

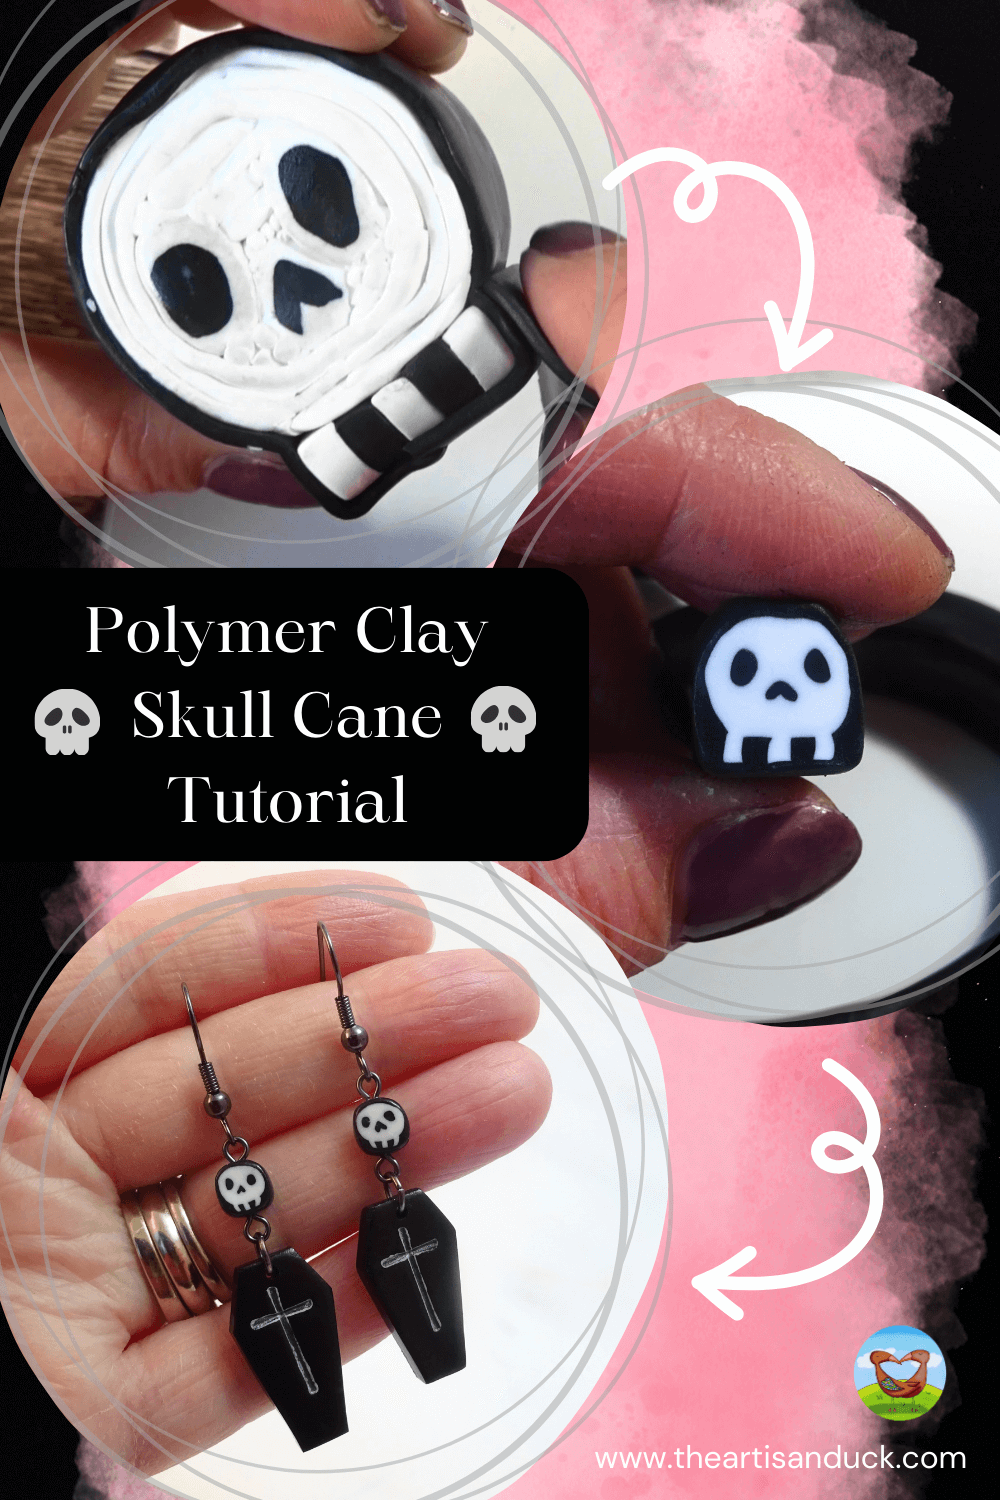
As ever, I am a little late to the party and Halloween crafting is in full swing but I am sneaking in with this tutorial on how to make a polymer clay skull cane because it’s just too cute (or creepy if you don’t think skulls can be cute!) not to share. In truth, this was filmed weeks ago but I have only just got around to putting it all together.
The clay colours couldn’t be more simple as I am just using black and white clay for it so minimal supplies are needed. I fully intended on making a small cane but I clearly didn’t judge it right as I ended up with a very long cane indeed.
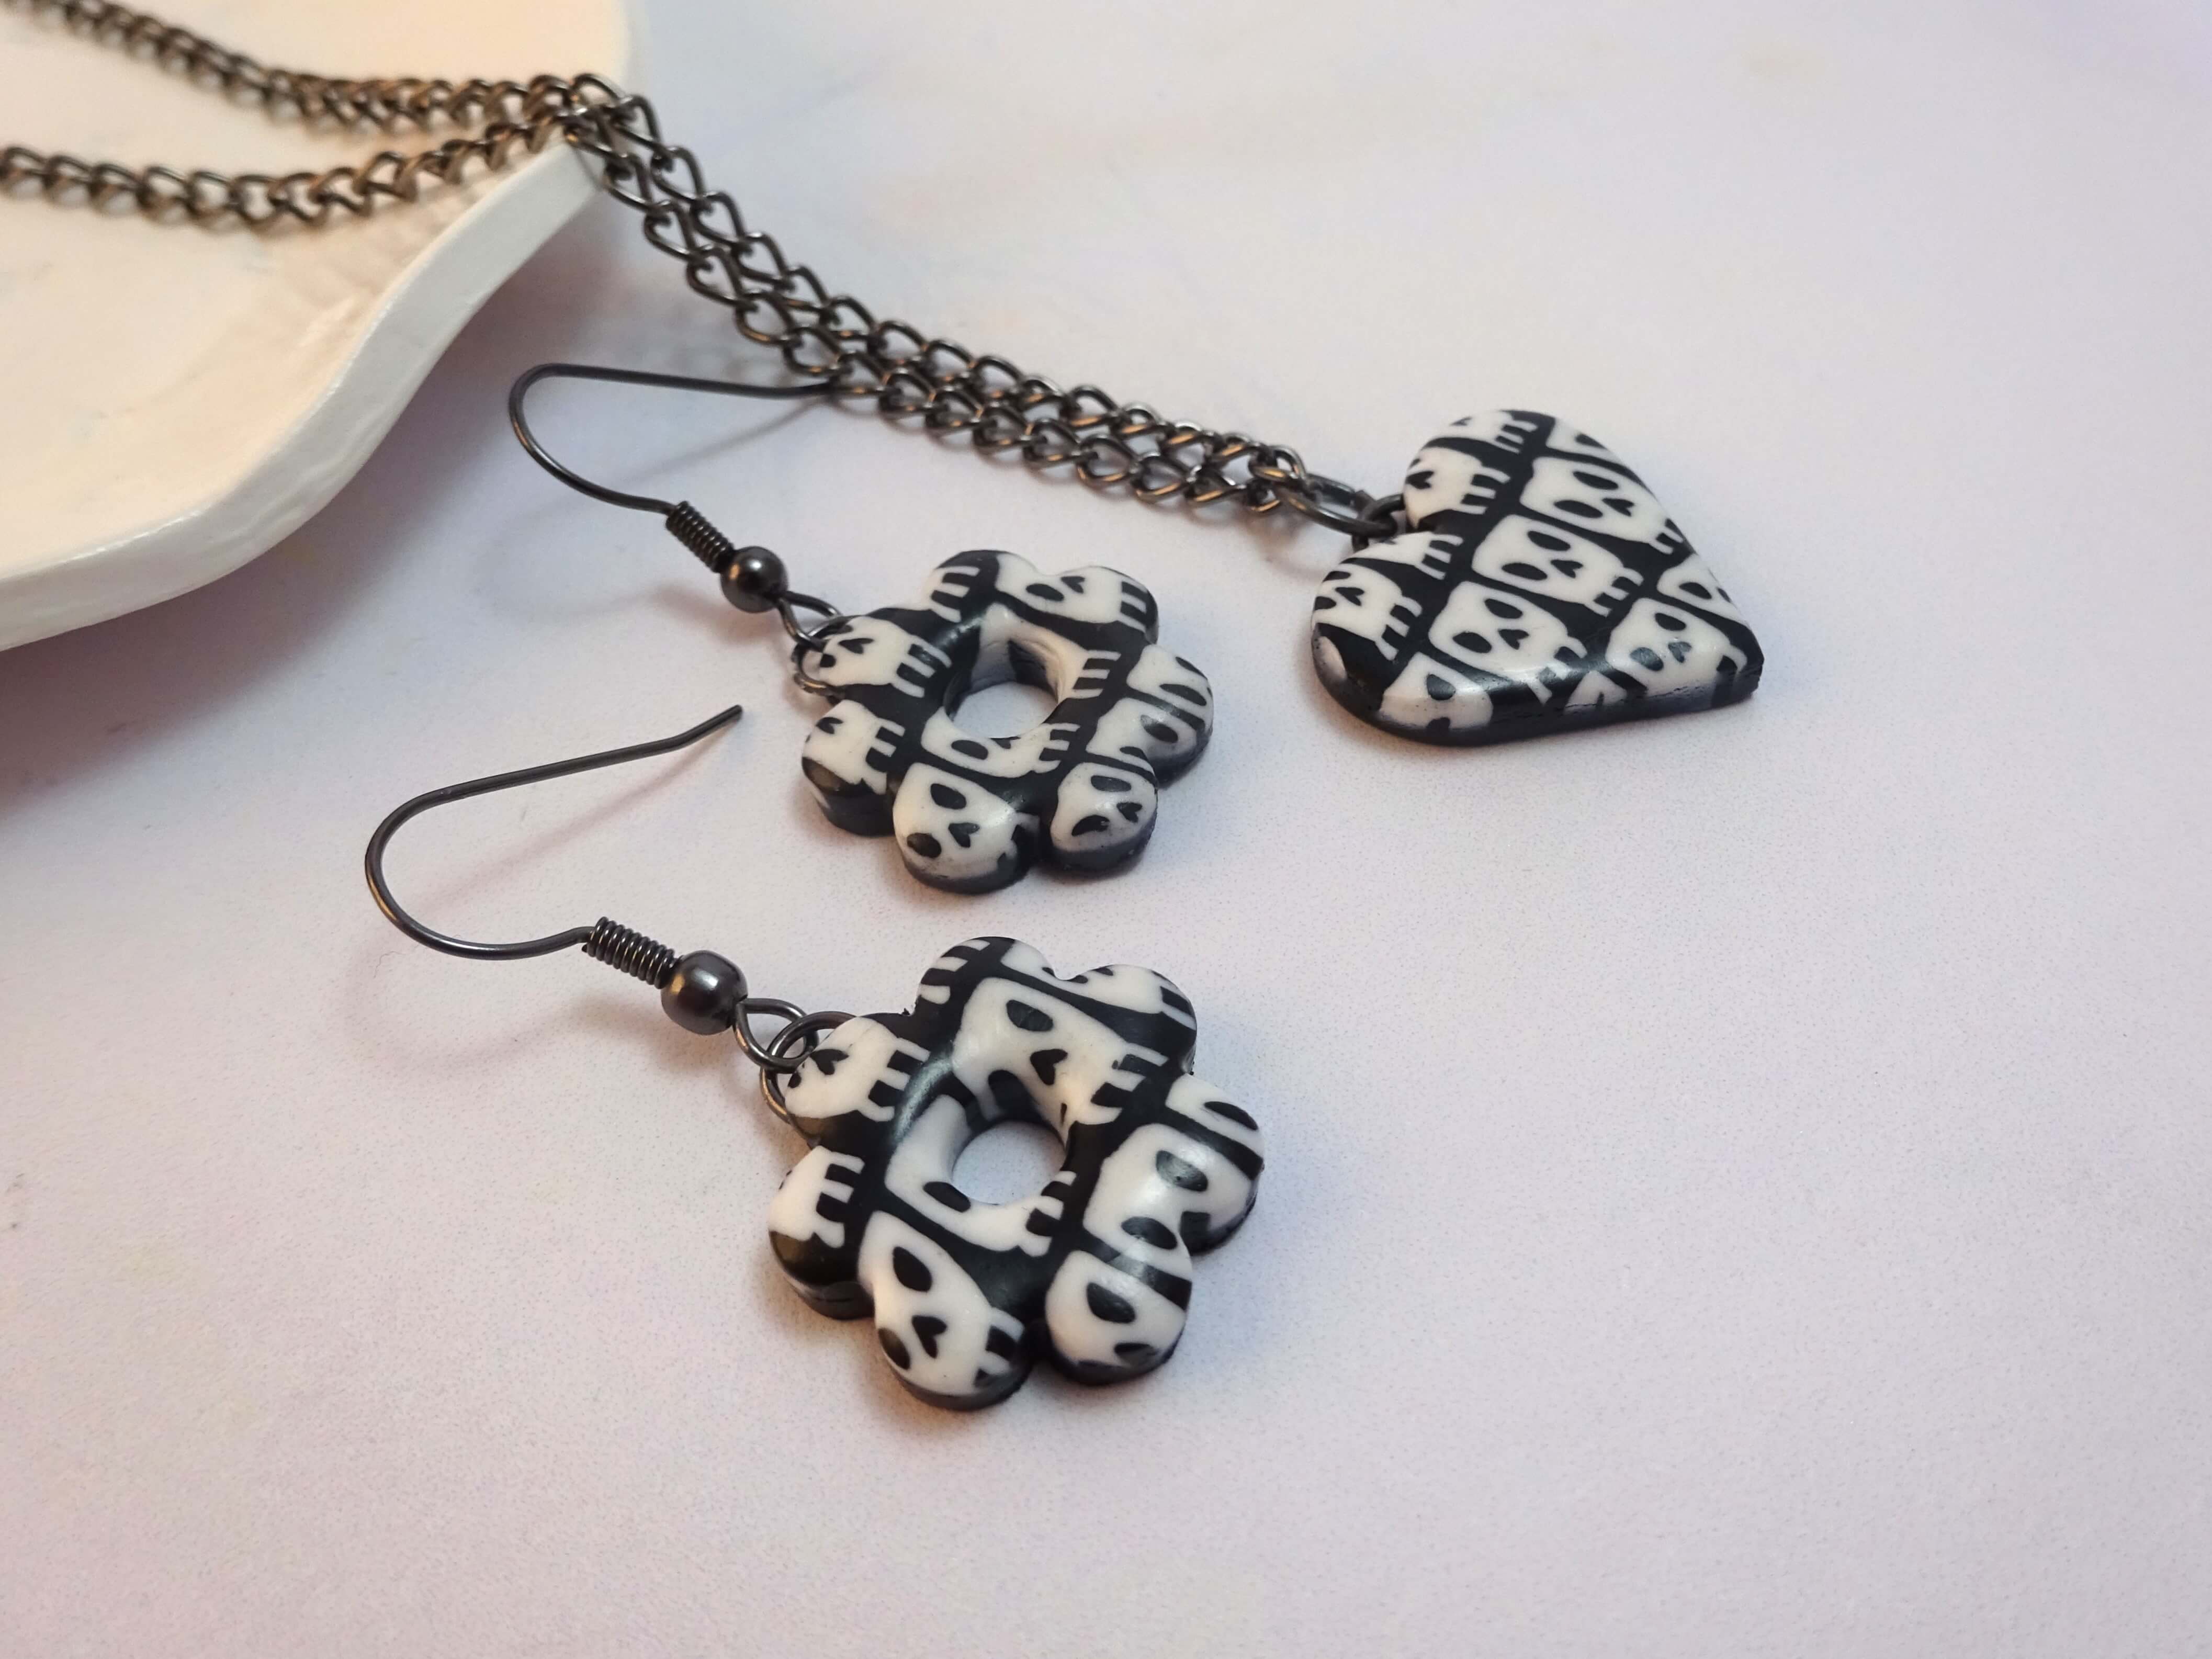
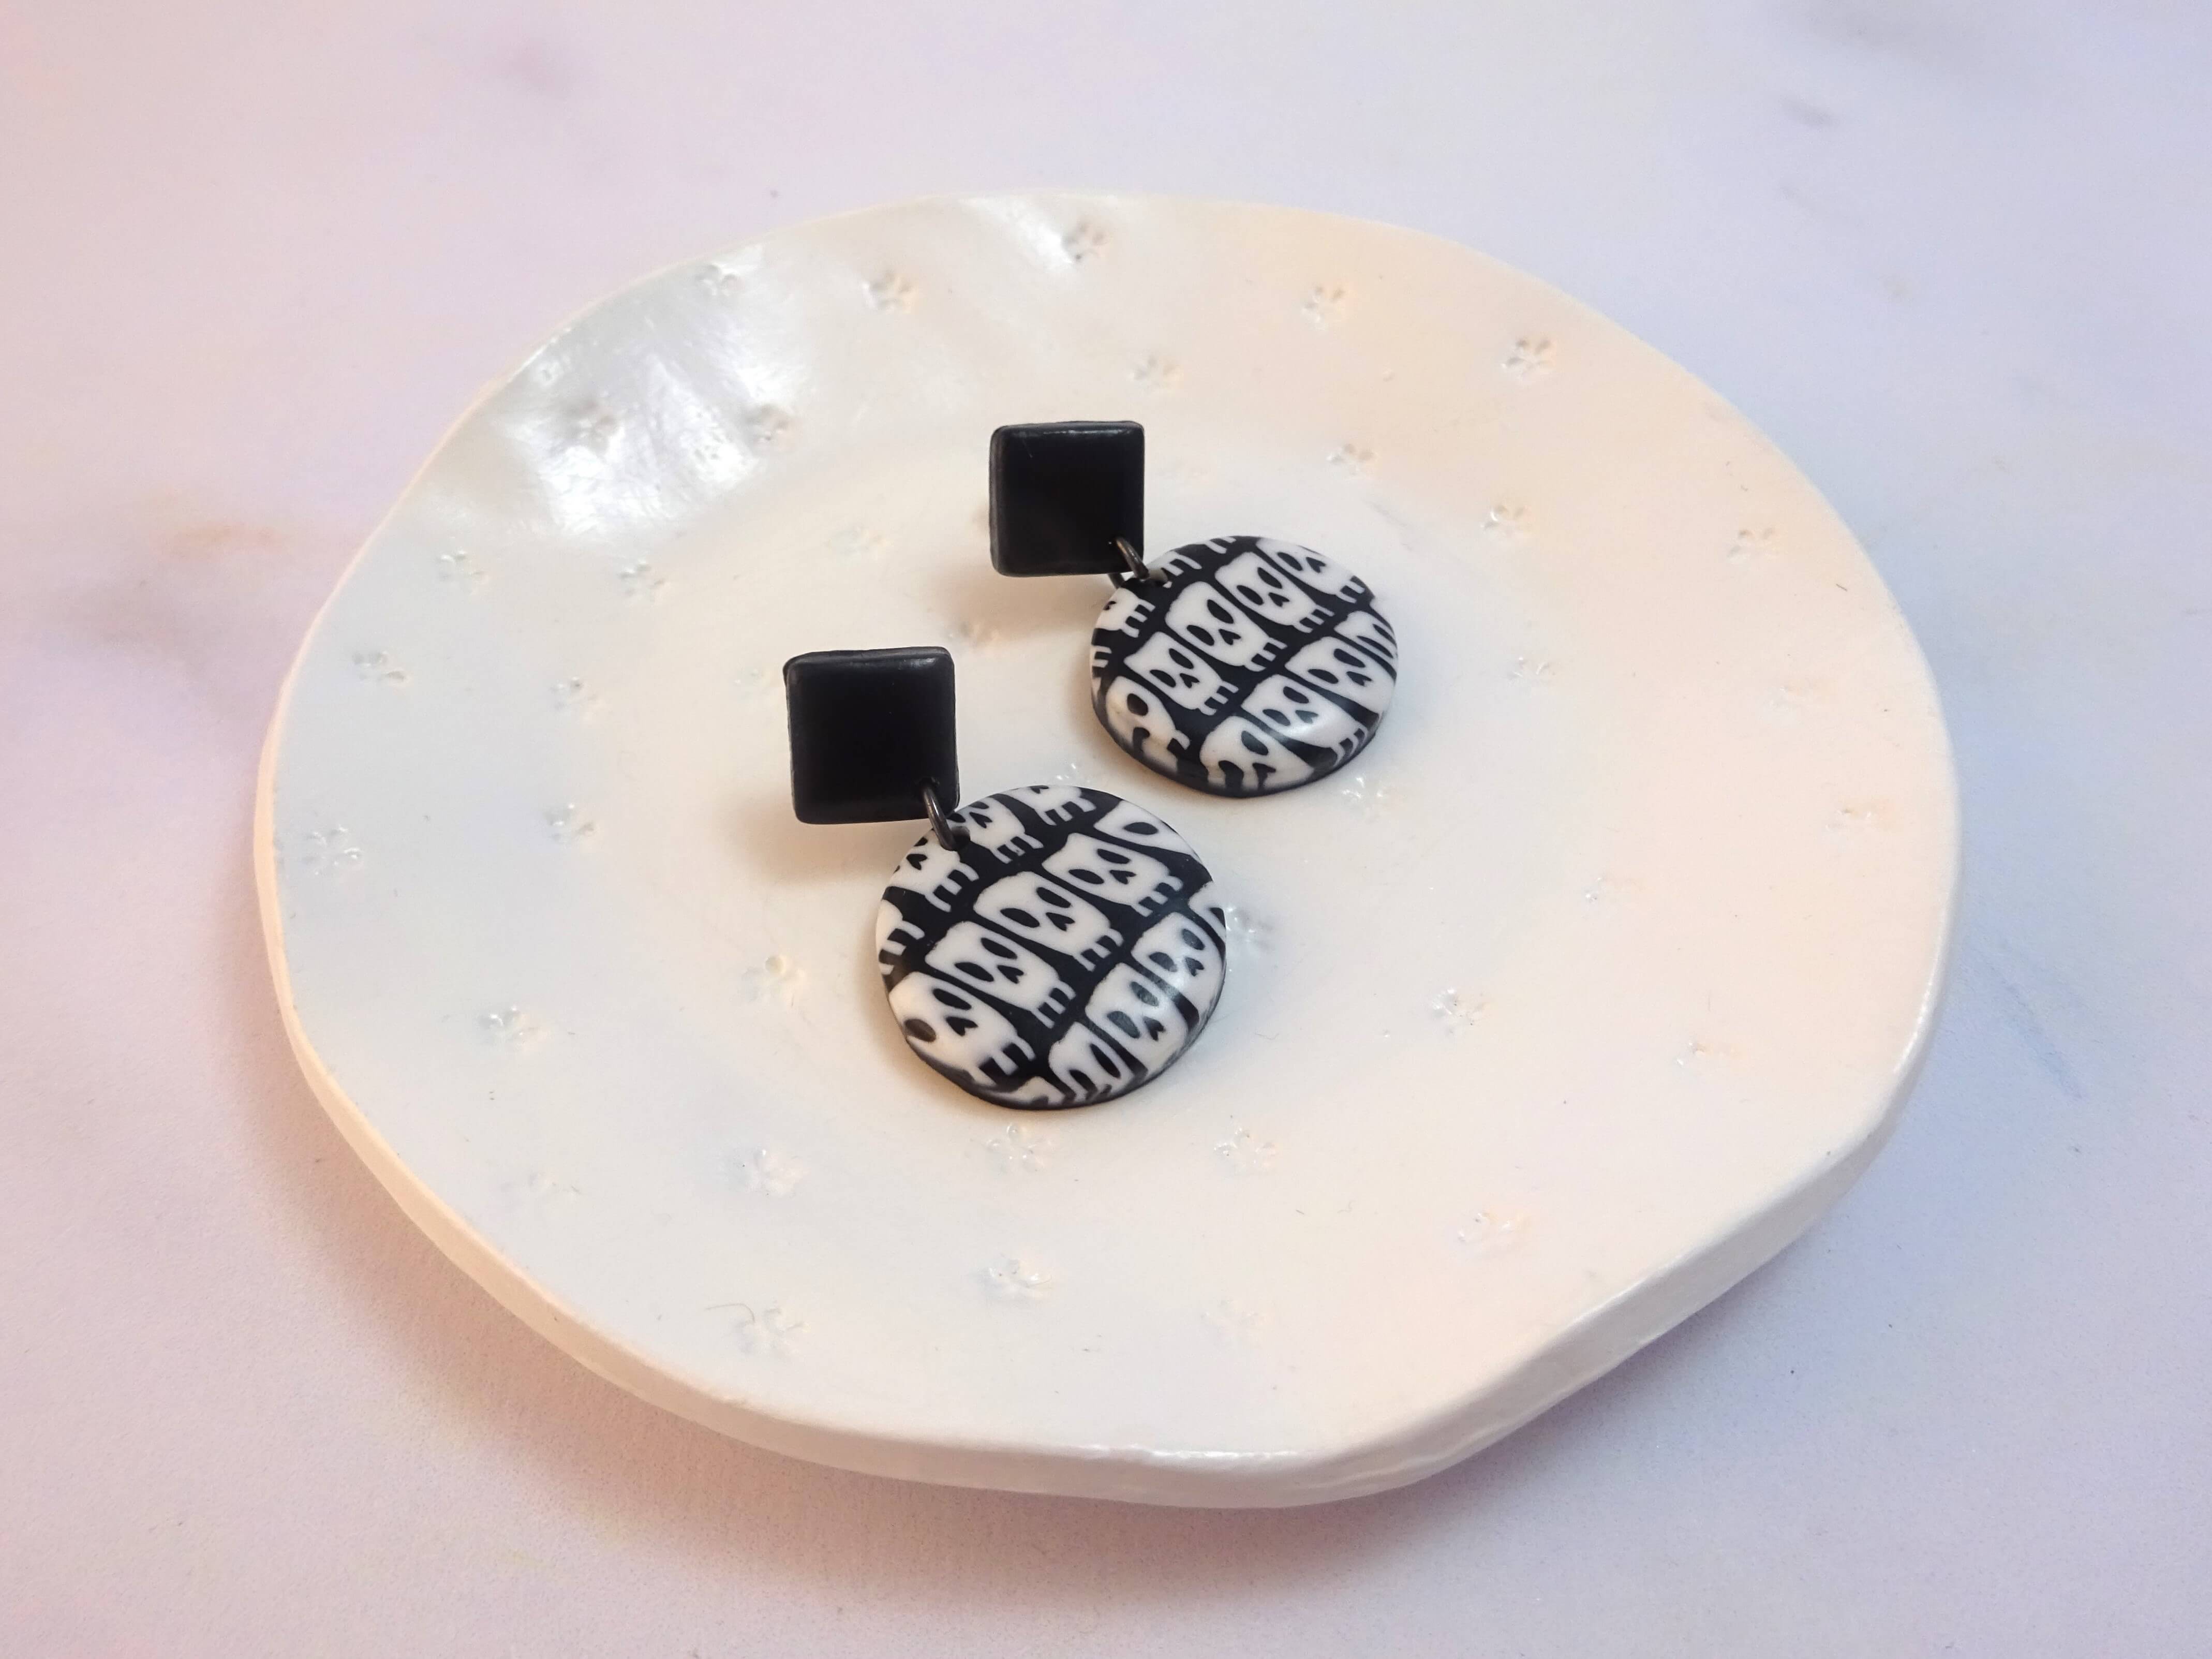
I then threw myself back into my Gothic era and made lots of fun skull and coffin jewellery with a few faceted beads for added sparkle. I will share some photographs of the finished jewellery at the end of this tutorial.
For this polymer clay skull tutorial, I have taken a few screen shots of this video tutorial to try to show, in a snapshot, the steps involved but, as ever, if you need further clarification the video should cover that. I have linked the video below.
Making a polymer clay skull cane is a great way to add some Halloween flare to your jewellery making – and it’s a lot of fun too! With the steps outlined in this blog post, you’ll soon have your own spooky skull cane to show off.
Tools and Supplies
For this tutorial you will need –
Black and white polymer clay
An acrylic roller or clay/pasta machine
A sharp cutting blade
A smooth surface to work on
A variety of cutter shapes to help make jewellery pieces from your finished cane
How To Make A Polymer Clay Skull Cane

Step 1 – Make a bull’s eye cane with black and white clay with the black clay inside the white. This will black is the hollow of the skull’s eye sockets. Cut it in half so that you have two eyes.
Roll more black clay, making sure it is double the length of one of the eye pieces, and shape it into a teardrop. Cut this shape in half and match the points of the teardrops together. This is the hollow of the nose.

Step 2 – Make a triangle of white clay and position it inside the nose shapes. This will support the nose when you reduce the cane. Then wrap another layer of white clay all around the nose, making sure to keep a point at the top of the nose shape.

Step 3 – Position the nose between the two eyes and press together. Make sure the nose isn’t too low or it will look like a moustache!
Pack around the cane with white clay, building up with thin snakes of clay in the tight spaces and working up to bigger pieces in order to get a round shape.

Step 4 – Continue with your skull cane by layering white and black clay to form teeth. I made three white teeth with the black in between being gaps in the gums. Make sure to position the middle tooth in line with the nose.
Pack around the can with black clay into either a circle or square – I opted for a square as it used less clay that a circle.

Step 5 – Once you have finished packing around your skull cane with black clay, reduce the cane down to a useable size. Cut the messy end off to reveal the result of all your hard work.
Inspiration On How To Use Your Finished Skull Cane

I made beads from chunks of the cane so there is one skull on each side and opted to hang them with some polymer clay coffins that I also whipped up at the same time.
I’ll just post a few more photos of the finished jewellery in case you are looking for a little inspiration for using your cane.

Now that you know how to make a polymer clay skull cane, try your hand at this fun and unique project. Share your own creations with us in the comments and tag us on social media – we’d love to see your results!
Hannah


Those are so 😎 .
Thank you 💀💀💀