


In this step-by-step tutorial, I’ll show you how to weave this pretty seed bead necklace with zombie pendant. The zombie is of course optional but the basic pattern of the necklace is versatile and remarkably easy to make.
If video is more your learning style then check out the YouTube video linked at the bottom of this post.
Gather Your Materials
To start crafting your zombie pendant seed bead necklace, the first step is to gather all the necessary materials.
You will need :
- Size 12 seed beads in Carnation (I am sure size 11 would work too)
- Size 11 Toho seed beads in Rose Gold
- 4mm pearls in Melon
- Zombie bead in Mango
The above links are NOT affiliate links. Spoilt Rotten Beads kindly sent me these beads for an unboxing on TikTok. I am sharing the love by linking the beads.
You will also need beading needles, beading thread, flexible beading wire, crimp beads, jump beads and a clasp.
Seed Bead Necklace Tutorial
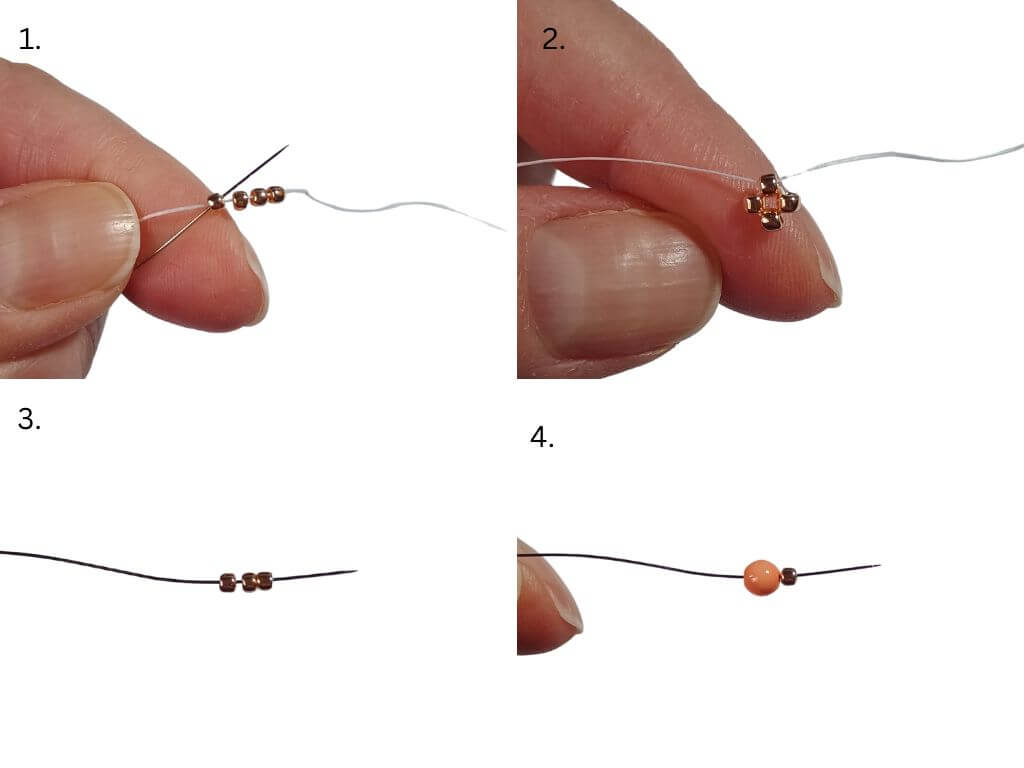
- On a long length of thread, pick up 4 Rose Gold seed beads. Leave a long tail thread, take the needle through the last bead on the thread.
- Pull the thread tight so pull the beads into a circle.
- Pick up three more Rose Gold seed beads.
- Pick up one 4mm pearl and another Rose Gold seed bead.
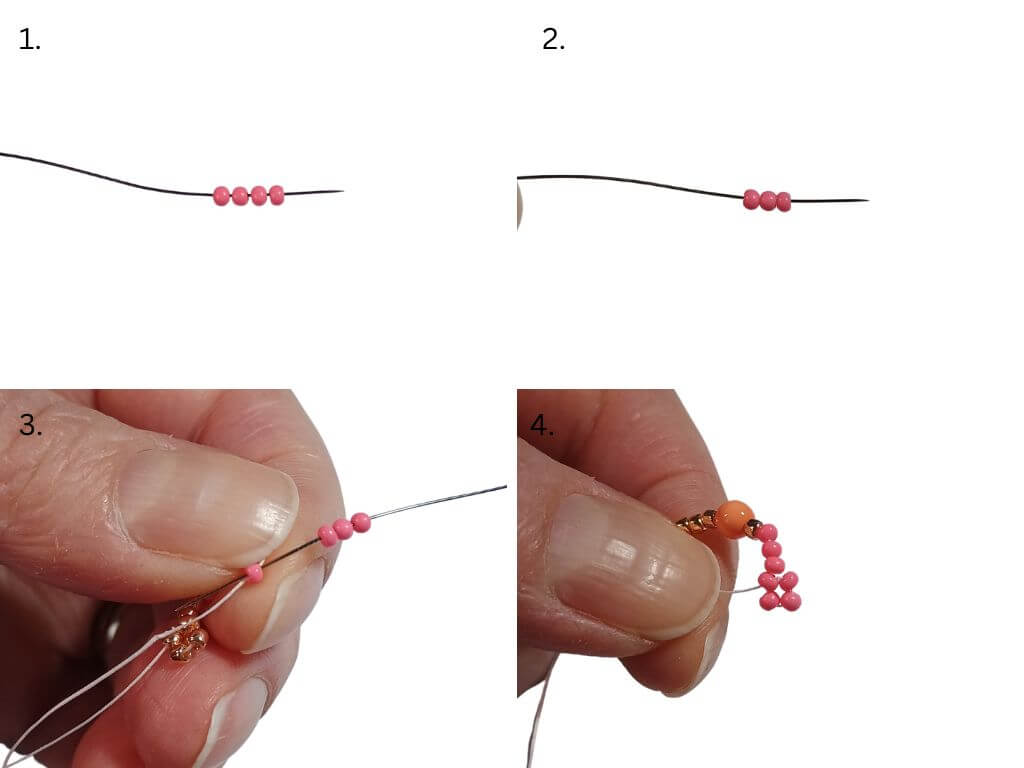
- Pick up 4 pink seed beads and take them down the thread.
- Pick up 3 more pink seed beads.
- Take the needle back through last pink seed bead added in picture 1.
- When you pull the thread tight the pink beads should form a loop.

- Pick up 3 pink seed beads. Take the needle into the last Rose Gold seed bead. This is before the 4mm orange pearl.
- Take the need into the 4mm orange pearl and Rose Gold seed bead on the end.
- Pick up 3 Rose Gold seed beads.
- Pick up 3 more Rose Gold beads. Take the needle back through the last gold seed bead picked up in picture 3.
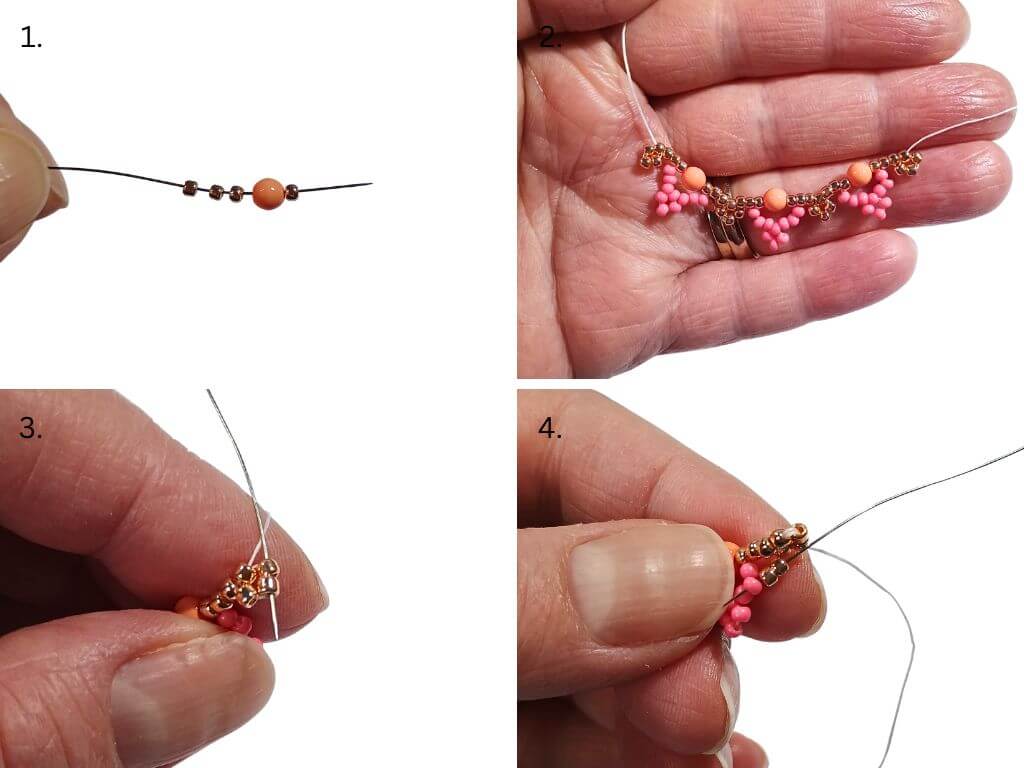
- Pick up 3 more Rose Gold seed beads, 1 4mm Orange pearl and another Rose Gold seed bead.
- Continue the pattern until you have reached your desired length.
- To finish the beaded section, complete it with a Rose Gold beaded loop. Then, take the needle down through the next two beads. You should be exiting out the bottom on the gold beaded loop.
- Pick up 2 Rose Gold beads. Take the needle into the second pink bead in the pink and orange section.
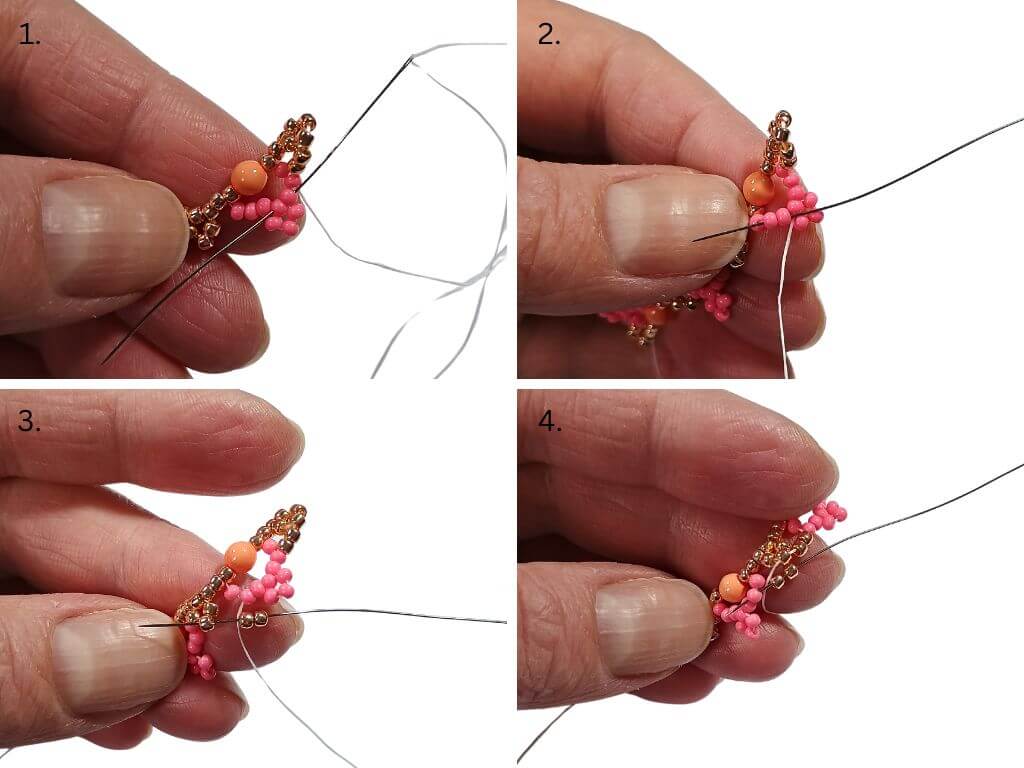
- Take the needle through the pink beads.
- Have the needle exit from the second to last pink bead on the other side.
- Pick up 2 more Rose Gold seed beads and take the needle into the next lower gold bead along.
- Pick up another 2 Rose Gold seed beads. Take the needle into the second pink bead in the next section along.

My finished necklace wasn’t quite long enough so I used flexible beading wire to finish it off. I recorded this bit for the YouTube video linked below. If you wish, add a cute zombie bead to the middle.
Different Colour Combinations
Consider experimenting with different colour combinations to create a truly unique and eye-catching piece. Mix and match shades of green, gray, black, and red to create a classic zombie look. Alternatively, choose a more playful approach with bright neon colors. Don’t be afraid to get creative. Try out unexpected combinations. You never know what stunning results you might achieve. Experiment with different hues and tones. Keep adjusting until you find the perfect balance. This reflects your personal style and makes your zombie pendant seed bead necklace truly one-of-a-kind.
This necklace would look great in shades of blue and silver with 4mm faceted beads. A snowflake charm can enhance the Christmas theme. Alternatively, use pinks and whites with a flower charm for a summery look.
DIY Seed Bead Necklace with Zombie Pendant Tutorial
The zombie bead adds a funny element to this necklace. In all seriousness, this necklace would look great without any charms or additions. If the necklace is kept at a choker length, it works well as a layering piece. The colour choices for the beads decide how much of a statement the piece makes.

Thanks for reading,
Hannah x

