


If you love wire work, seed beads and fish then I have the project for you. I realize this is a very niche group! But, these wire wrapped fish are really cute so being a fish lover is perhaps not essential. This tutorial is a very beginner friendly introduction to making wire work jewellery with easy wire wrapping. The inclusion of colourful seed beads helps to add a pop of colour.
The video for this tutorial is linked just below but I will quickly cover some of the basics first.
Tools and Supplies
For these wire wrapped fish I have used a few different tools and supplies. These are :
- Copper wire in 0.8mm (20 gauge)
- Copper wire in 0.4mm (26 gauge)
- Size 11 seed beads
- Wire cutters
- Round nose and chain nose pliers
- Oval shaped mandrel
- A chasing hammer
- Steel block

Wire Work Basics
I thought I would briefly cover some basic information about working with wire. I love the look of copper wire, so I use it for many of my projects. However, this wire can be beneficial if you are a beginner. It tends to be cheaper to buy so a great option if you are learning to work with wire. It is also a lot softer to bend so far easier is you have dexterity issues with your hands.
Gold plated and silver plated wire is great if you are wanting the look of a precious metal whilst keeping it affordable. After that, sterling silver and gold filled wire is perfect for high end wire projects.
It may be tempting to skip buying a steel block and chasing hammer but hammering the wire is an essential part of wire work. Bent and coiled wire is soft enough to bend back out of shape. Hammering the wire strengthens it and helps it to hold it’s shape.
You can also vary the look of the hammered wire by using either the flat or rounded end of the hammer head. The flat face of the hammer will give a smooth flattened surface to the wire. The rounded face with give a textured finish that catches the light.
Wire Work and Seed Bead Fish Tutorial
Seed Beads and Colour Variations
When adding the seed beads to your wire work fish you will need to check how many beads you need to fill the space. To do this simply slide the beads down the wire and see if it comfortably fills the gap. This is because there is often a large variation in seed bead brands and finishes despite them all being labeled as the same size. Even within a single tube of bead you may well notice that the beads are not all made a consistent size. This is not a problem if you are simply stringing a necklace for example, but for wire work projects like this you may wish to ensure that the beads are a consistent size across all the fish.
In term of colour choice, there is simply so much scope. You can play with bright and shiny or pale and matte. Combining colourful beads with different colours of wire will also produce a different look each time. Bright yellows, oranges and red combined with gold plated wire will give a hot summery finish. Cool blues and white combined with silver plated wire will give a more muted sophisticated look.
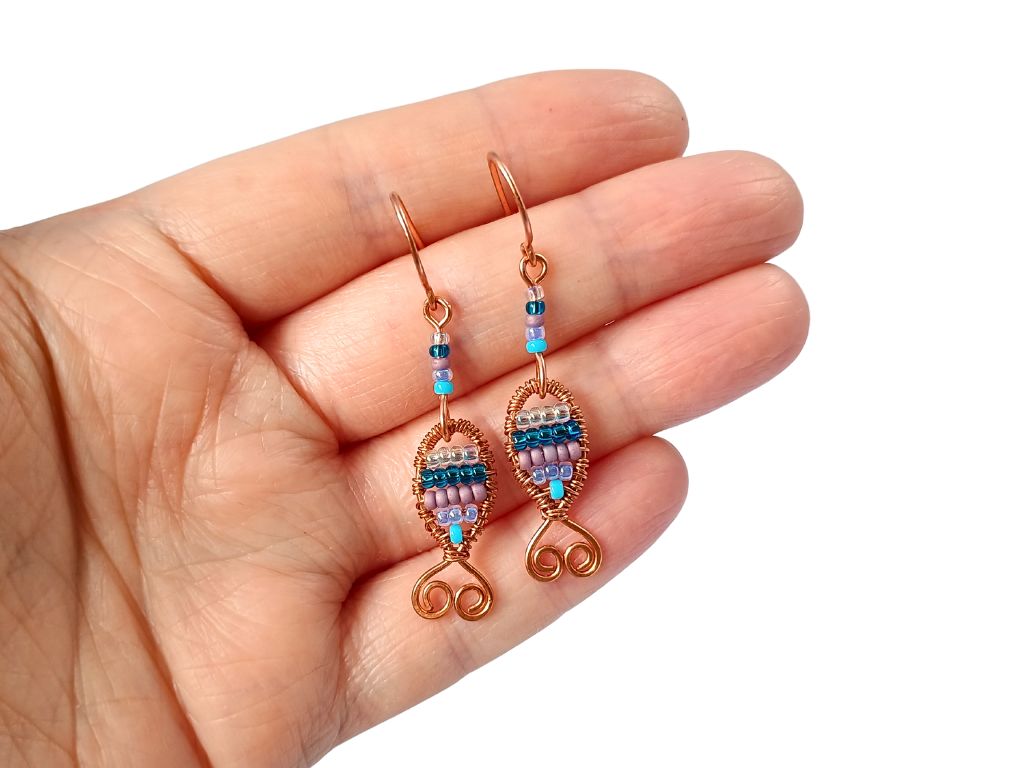
Whilst I have used my fish to make earrings, I think that they would look amazing as charms on a necklace. They could also be linked nose to tail to make a fishy bracelet.
I hope that I have inspired you to open that wire box and dig out some seed beads to make your own wire fish earrings.
Thanks for reading,
Hannah x


Leave a comment