


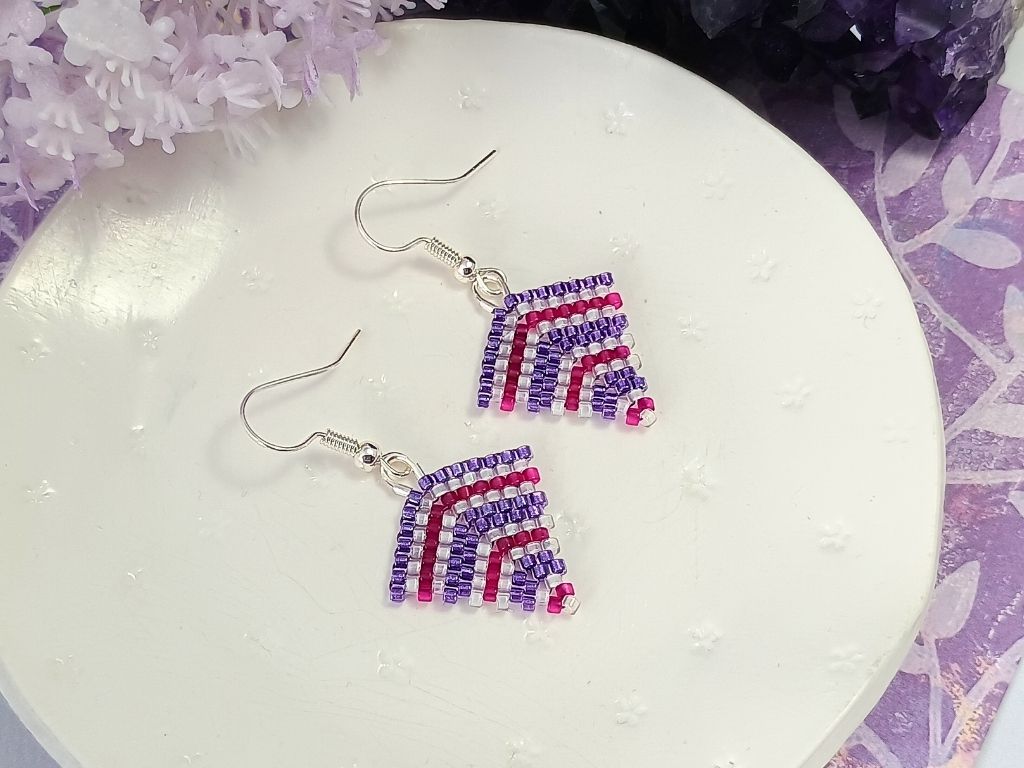
This week, as I was sat thinking about what tutorial I would like to make, I received a YouTube notification to say that I had a comment. With the most perfect timing it was a request to show how to make kite earrings, so, here we are, this is my beaded kite earring tutorial.
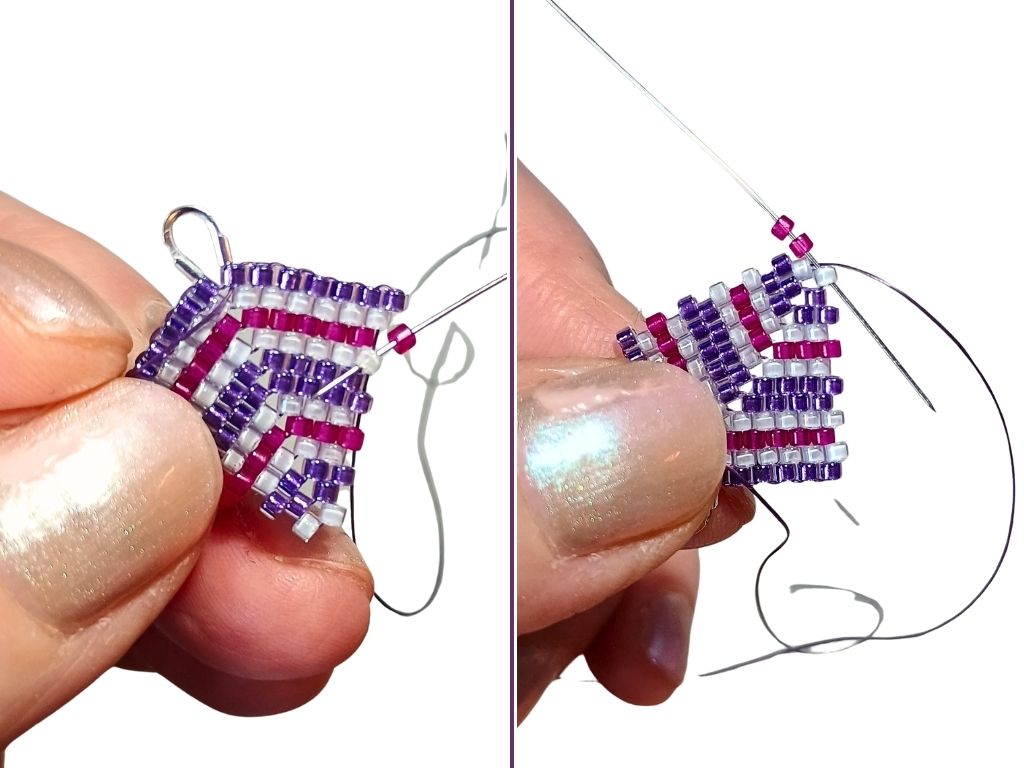
This technique, in my option, looks reasonably intimidating at the start. The starting point seems illogical and, until about twelve or so beads are added, it is quite tricky to see how the beading is going to flow.
I have filmed this video with two alternative ways to start the beaded kite. The first option shows simply how to get started with two beads. This gives the option to add a wire guardian at either end of the beading or to add jump rings or add a beaded stud top (this is pictured further down this post)
The second way to start the beading is shown at the end of the full tutorial. This way shows how to add a wire guardian at the start of beading so that there are no threads visible between the top two beads on the wider end of the kite earring.
I will add a pdf here for the pattern that I drew up. It is a very predictable pattern once you get into it as I thought having a more complicated pattern to follow alongside learning how to add the beads would get complicated. It may be useful to see what order I am adding the beads in relation to a pattern so, if you have a different pattern that you would like to decode, then you can apply the same order to it!
There is no word chart to accompany it I’m afraid as I haven’t had time to write one up.
Beads and Supplies
This project and pattern uses very few beads and supplies. I have used :
- Size 11 Delica in Sparkling Purple Lined (DB906)
- Size 11 Delica in Transparent Matte Fuchsia (DB775)
- Size 11 Delica in Lined Aqua Mist AB (DB078)
- Miyuki Purple beading thread
- A beading needle
- Silver plated wire guardians
- Silver plated earring wires
How To Bead A Kite
I will obviously let the video do most of the teaching on this one but I just wanted to add a note about how my brain processes how the pattern builds.
The beading starts from the middle two beads on the top, widest row. As more beads are added, the top row grows wider and the beading gets longer. We don’t start by beading both sides and awkwardly try to join them together but by slowing building each side, alternating between them as we go.
There are two main stitches in a kite bead ; the long smooth rows of peyote and the small angular sections of herringbone stitch in running down the centre of the beading.
I think of beading a kite in a ‘U’ shape in that we start on one side at the top, we bead a small section of peyote, add our two beads of herringbone and then more peyote down the other side.
I hope that make sense. I tried to explain it in my video but I am not sure if I was clear enough!
You can see more about herringbone stitch in this herringbone stitch bracelet tutorial.
How To Finish Your Beaded Kite
This may sound obvious but if you intend to use your finished kite as jewellery then it may be useful to decide how you want to use it before you start. In the video I show how to start you beading with two beads and then later on cover how to start it by adding a wire guardian at the beginning of beading.
If you wish to hang you kites in the opposite way to me then you wouldn’t want to add the wire guardian at the start as you will add it on the thinner end instead.
You could also use jump rings hooked through the the top or bottom of the herringbone sections. This would be especially useful if you were linking several beaded kites together – you could make the kites three times, with each kite slightly smaller than the first.
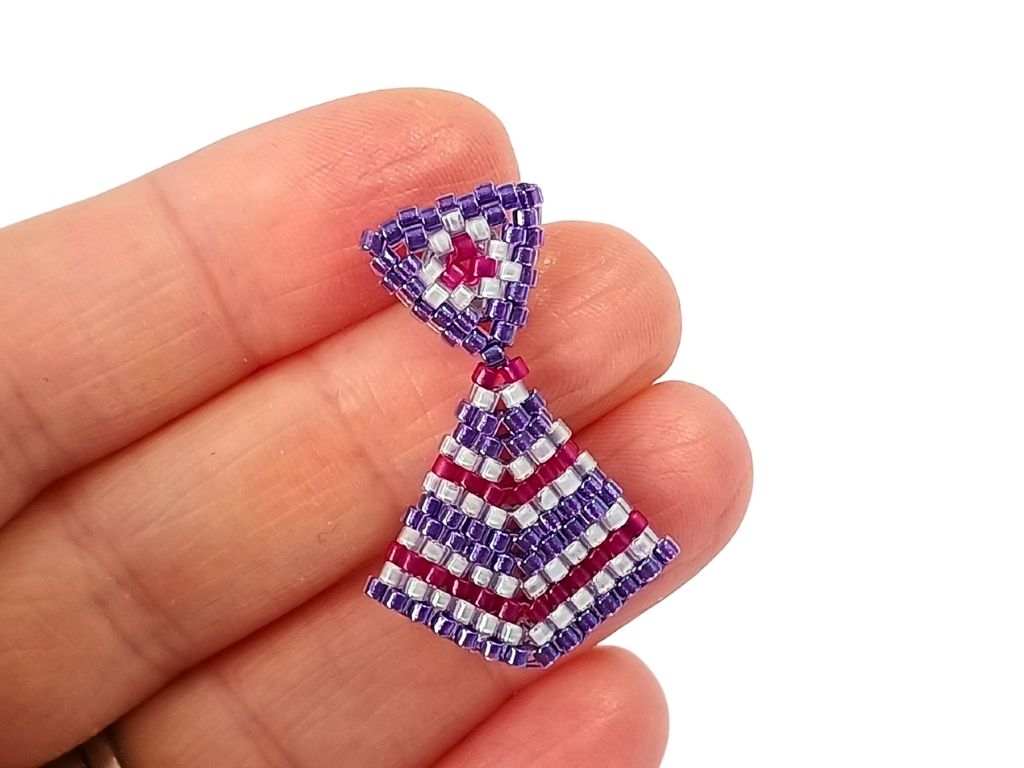
Your other option is to add a beaded stud top to the kite. In the example below I made a peyote triangle stud earring in using the same colour beads as my peyote triangle and added this to a double thickness beaded kite. The result is a more robust and fancy earring.
If any one wants to see how I do this then just leave a comment to let me know.
Beaded Kite Earring Tutorial
I thoroughly enjoyed working on these this week as it kites are a fun twist on all the other techniques that I have shown recently so I hope you enjoy it as much I have done.
Thanks for reading and watching. Please don’t forget to like, comment, follow and all of that good stuff if you would like to see more.
Hannah x


Leave a comment