
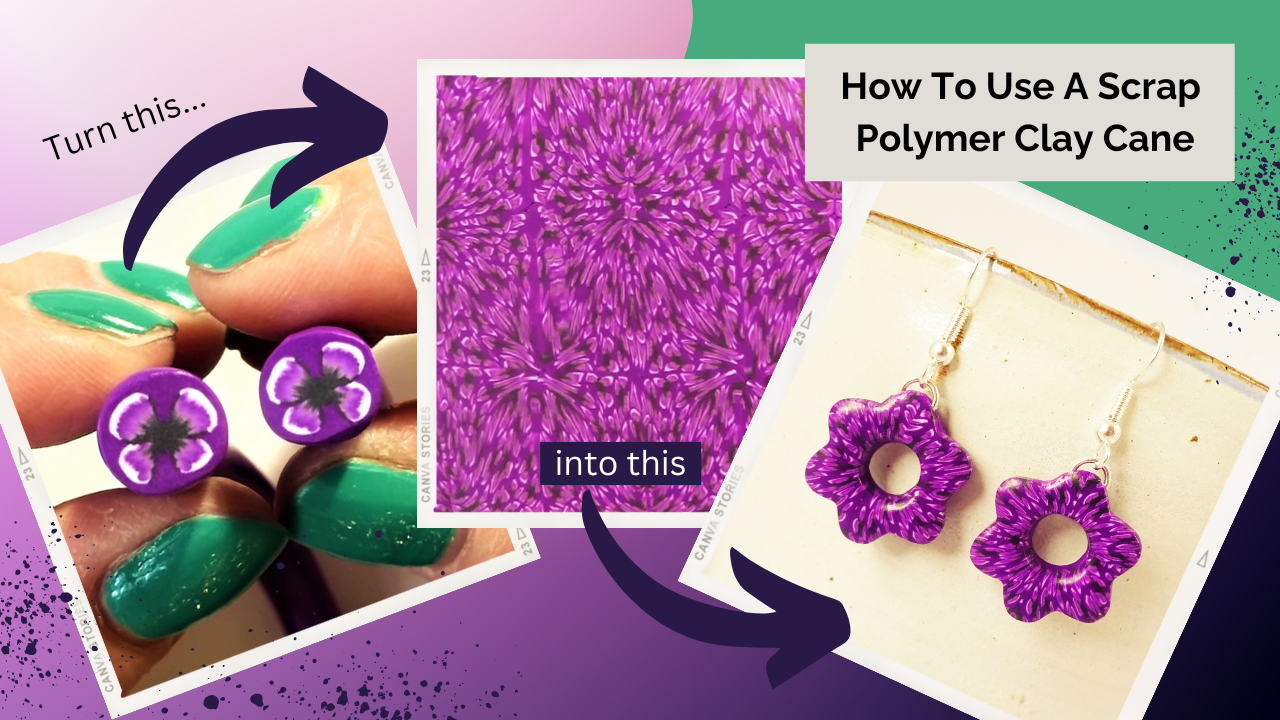

If you have ever made polymer clay canes then you know that they don’t always go to plan. However sure you are of the end result you never quite know if it has worked until you cut the messy end off for the grand reveal. The disappointment and frustration when you are presented with a cane that looks nothing as you had imagined, after all that work, is enough to put you off cane work completely, especially if you are a beginner and you’ve had multiple failures.
That was me last week. I made a cane that was supposed to be a quick and easy butterfly cane; I even filmed it in case I could use it as a tutorial. The basics of the technique are good and the butterfly wings look good but the finished cane looked more like a flower missing petals rather than the butterfly I imagined. I managed to capture my disappointment on camera.
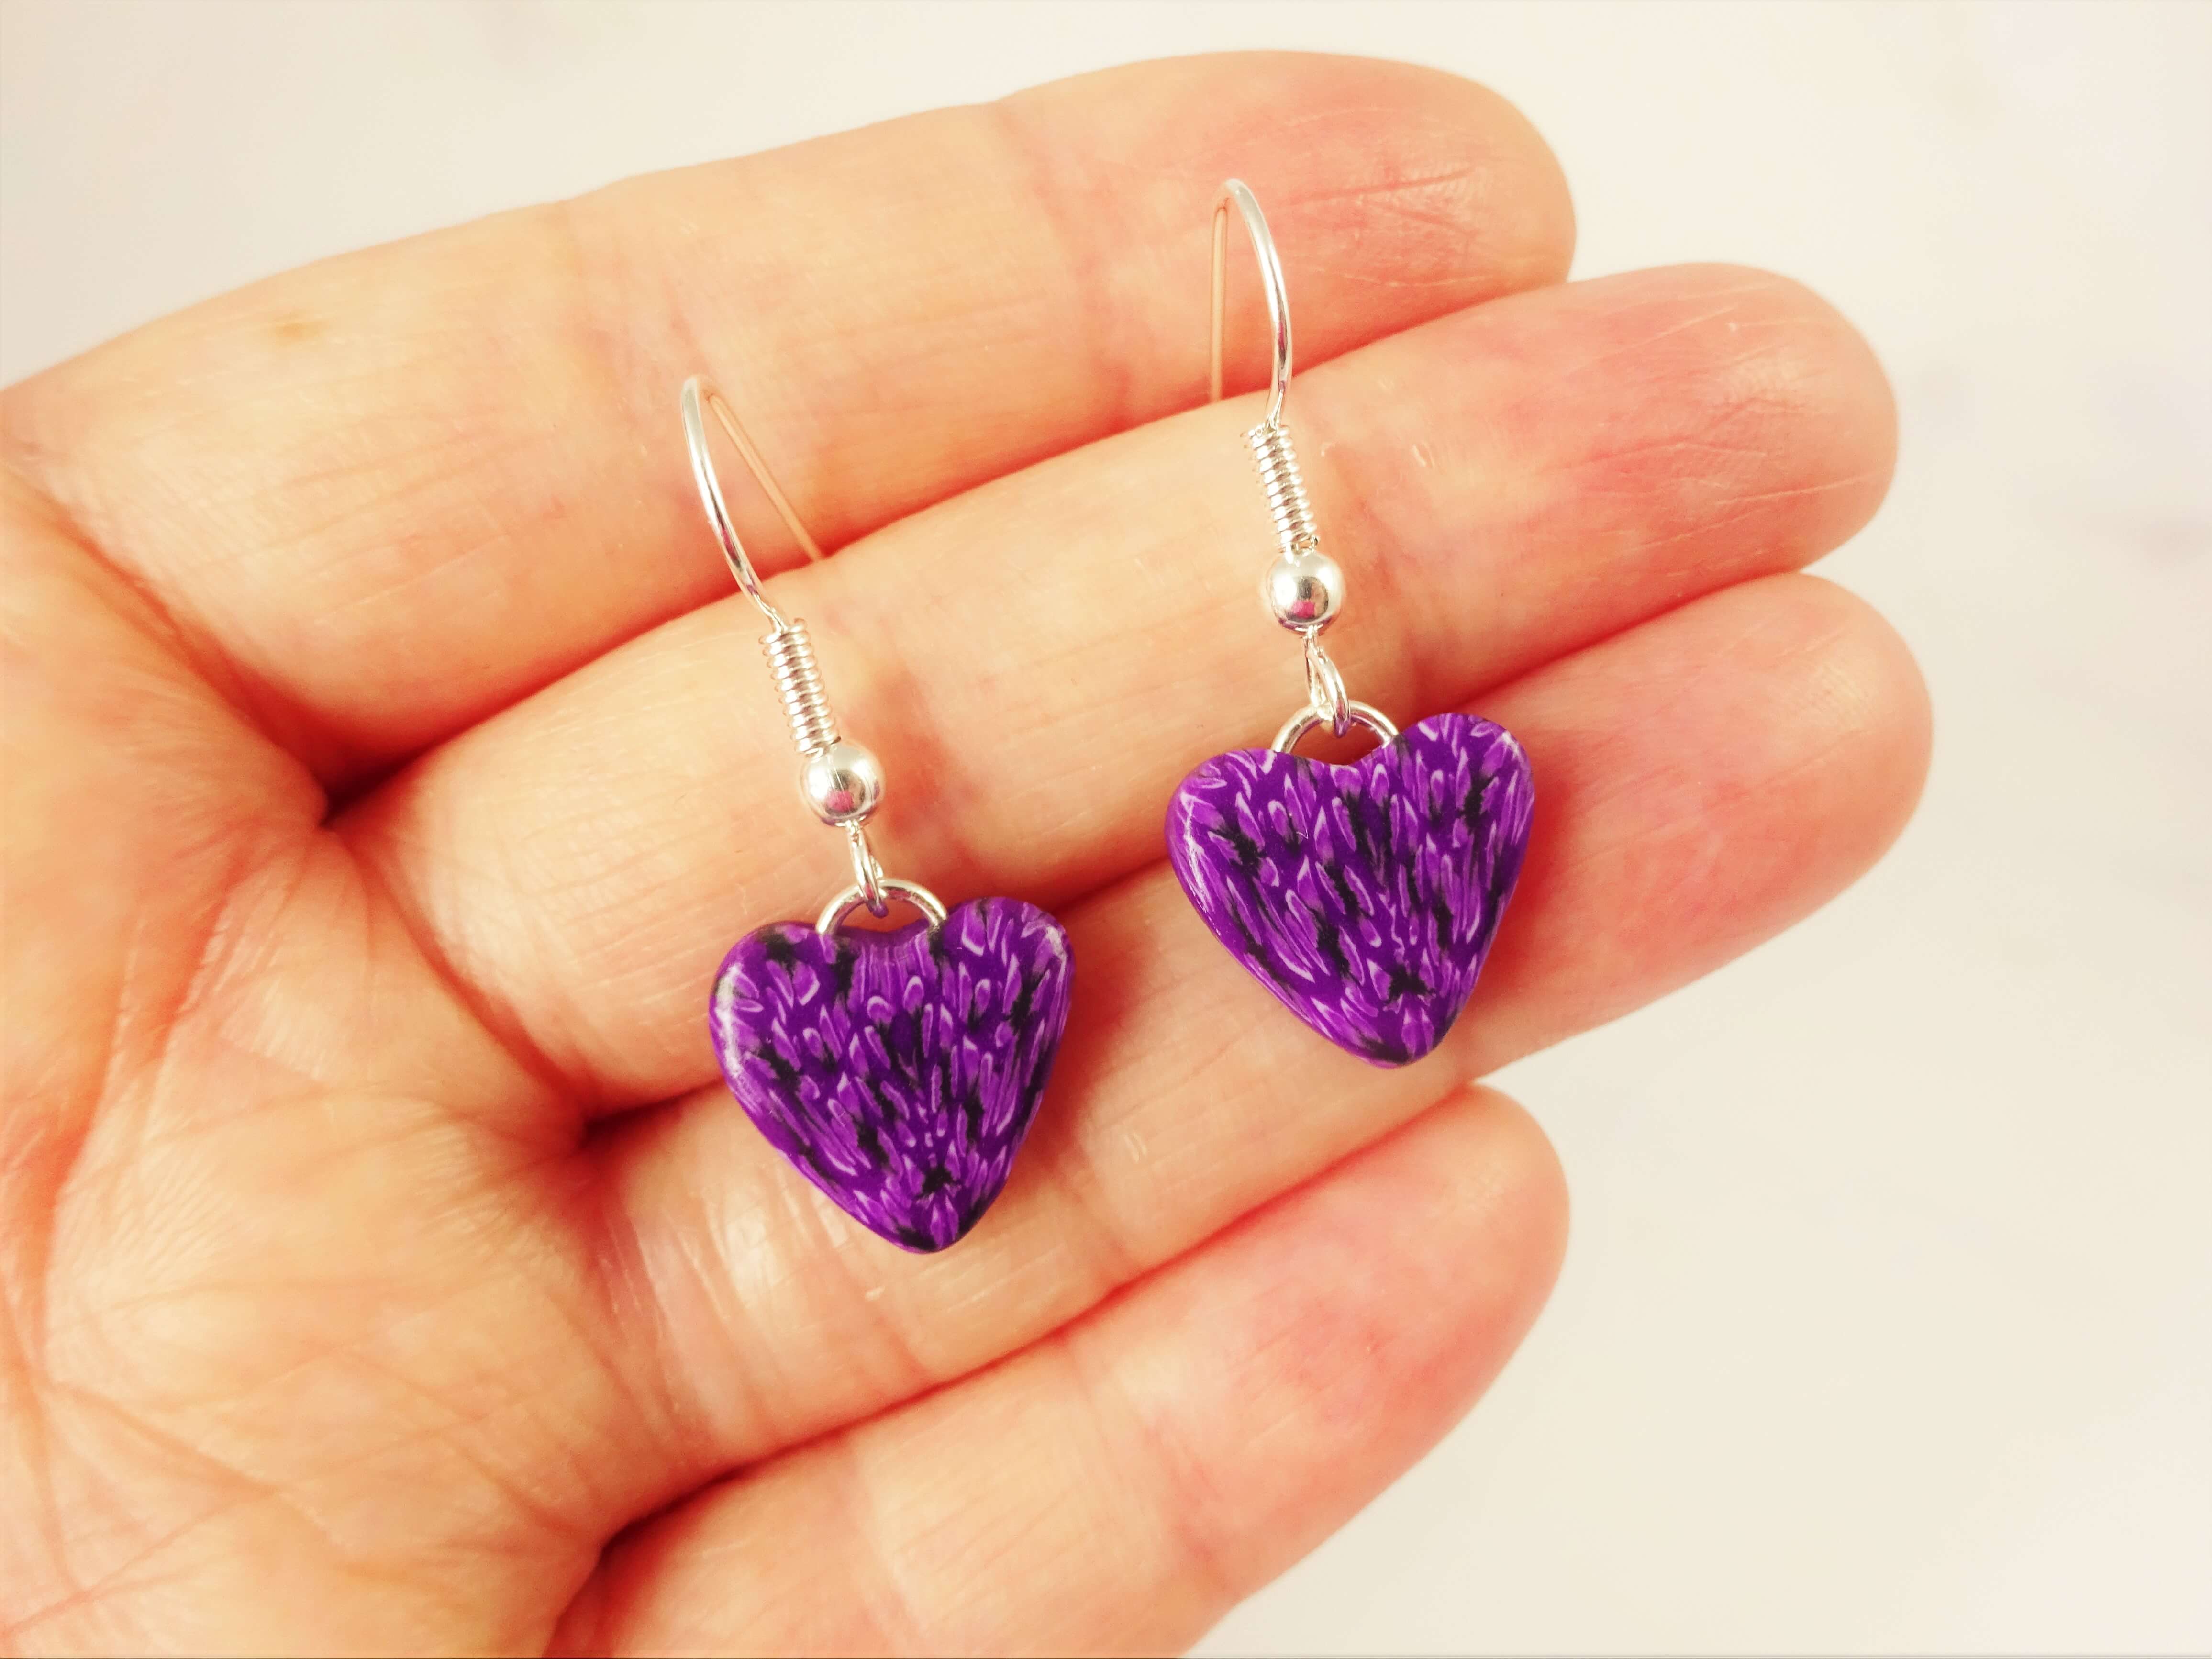
It sat on my desk for a few days whilst I spent time with my kids and pondered my next move. Several days later I sat down at my desk with a new plan. I took that cane that I didn’t like and turned it into something better than I could have imagined. I absolutely LOVE the finished jewelry that I made with it and the pattern in far more detailed and intricate than I could have made if I had tried.
Whilst, obviously, my scrap cane is going to be completely different to your scrap cane I believe that, if you follow the steps outlined here and in the YouTube video, you too can turn your failed canes into new beautiful canes and restore your faith in cane work and your ability to make them.
Before we get stuck into the tutorial, if you are looking for canes to try then do check out my various polymer clay cane tutorials . I have easy flower canes using cookie cutters, Extruder canes, Skinner blend flower canes and a colourful hearts square cane and many more besides.
So, dig out those old canes and let’s dive in…
How To Use A Failed Polymer Clay Cane To Make Jewelry

Step 1 – Reduce your scrap cane so that it is the same thickness all the way down. Next, press the cane to make it into a square shape – I use an acrylic block to help make straight sides.
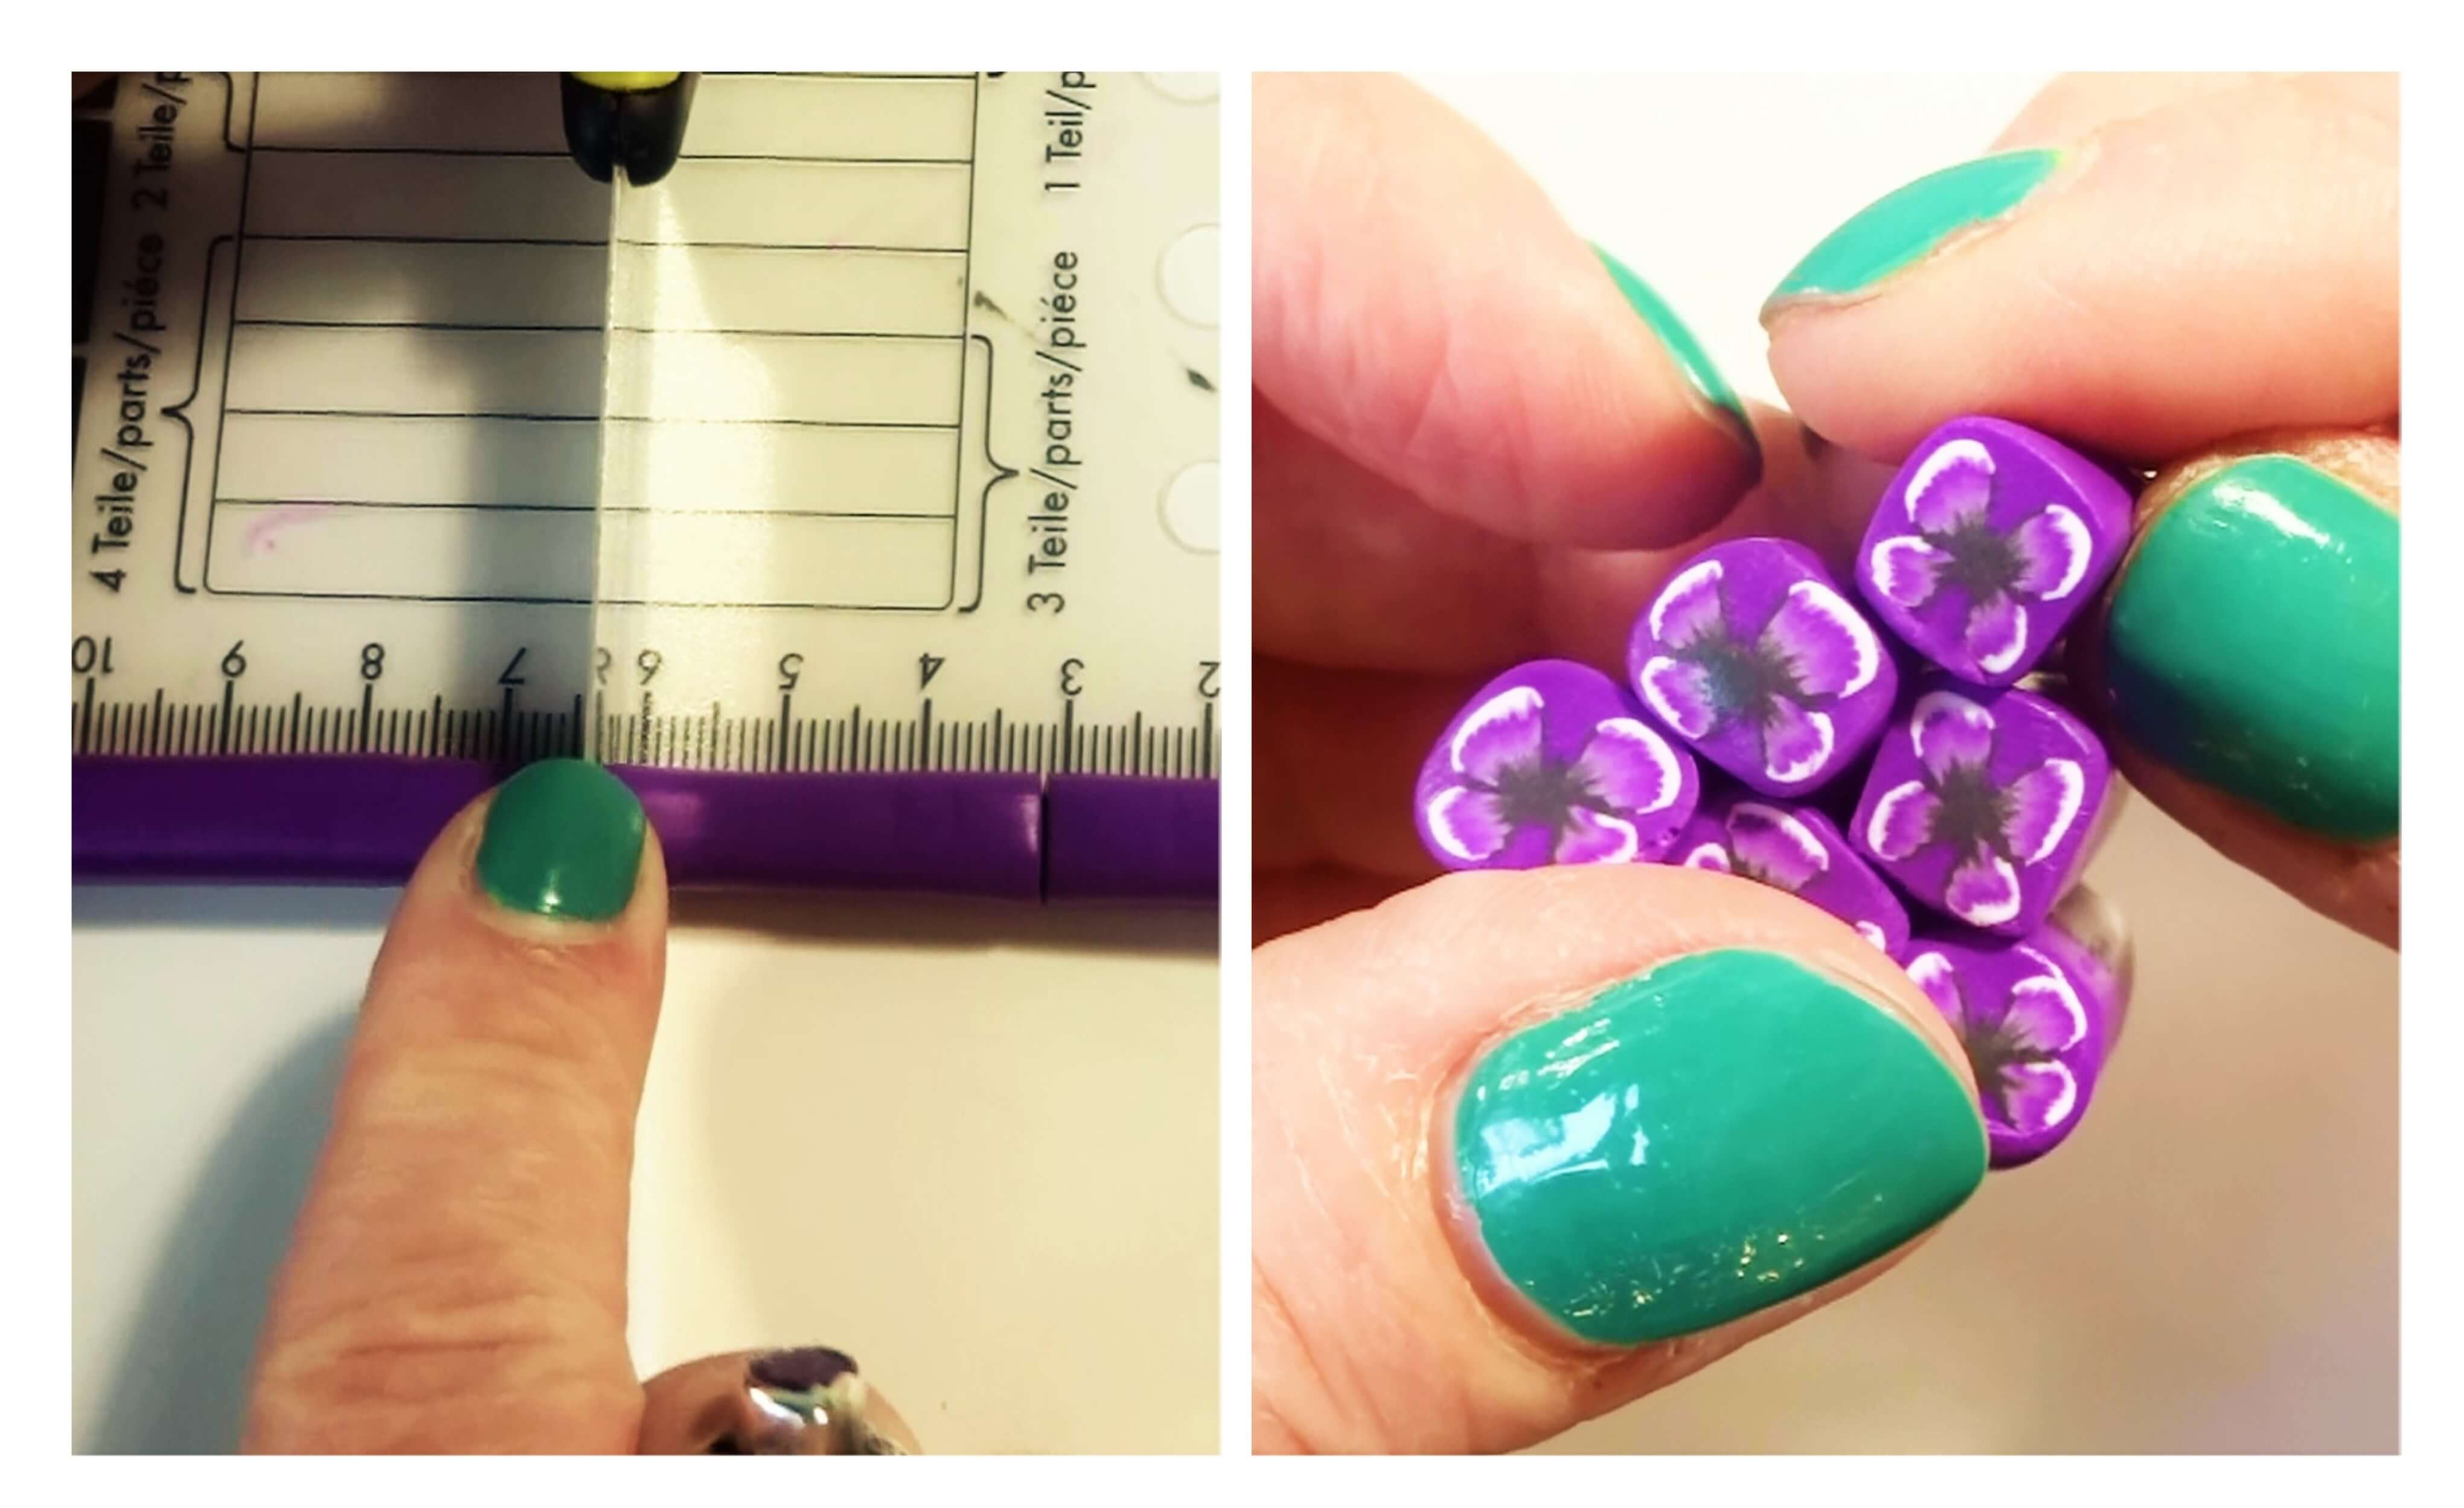
Step 2 – Cut your cane into six equal length pieces and stack them to form a triangle with 3 pieces on the bottom, two on top of that and the last one on the top.
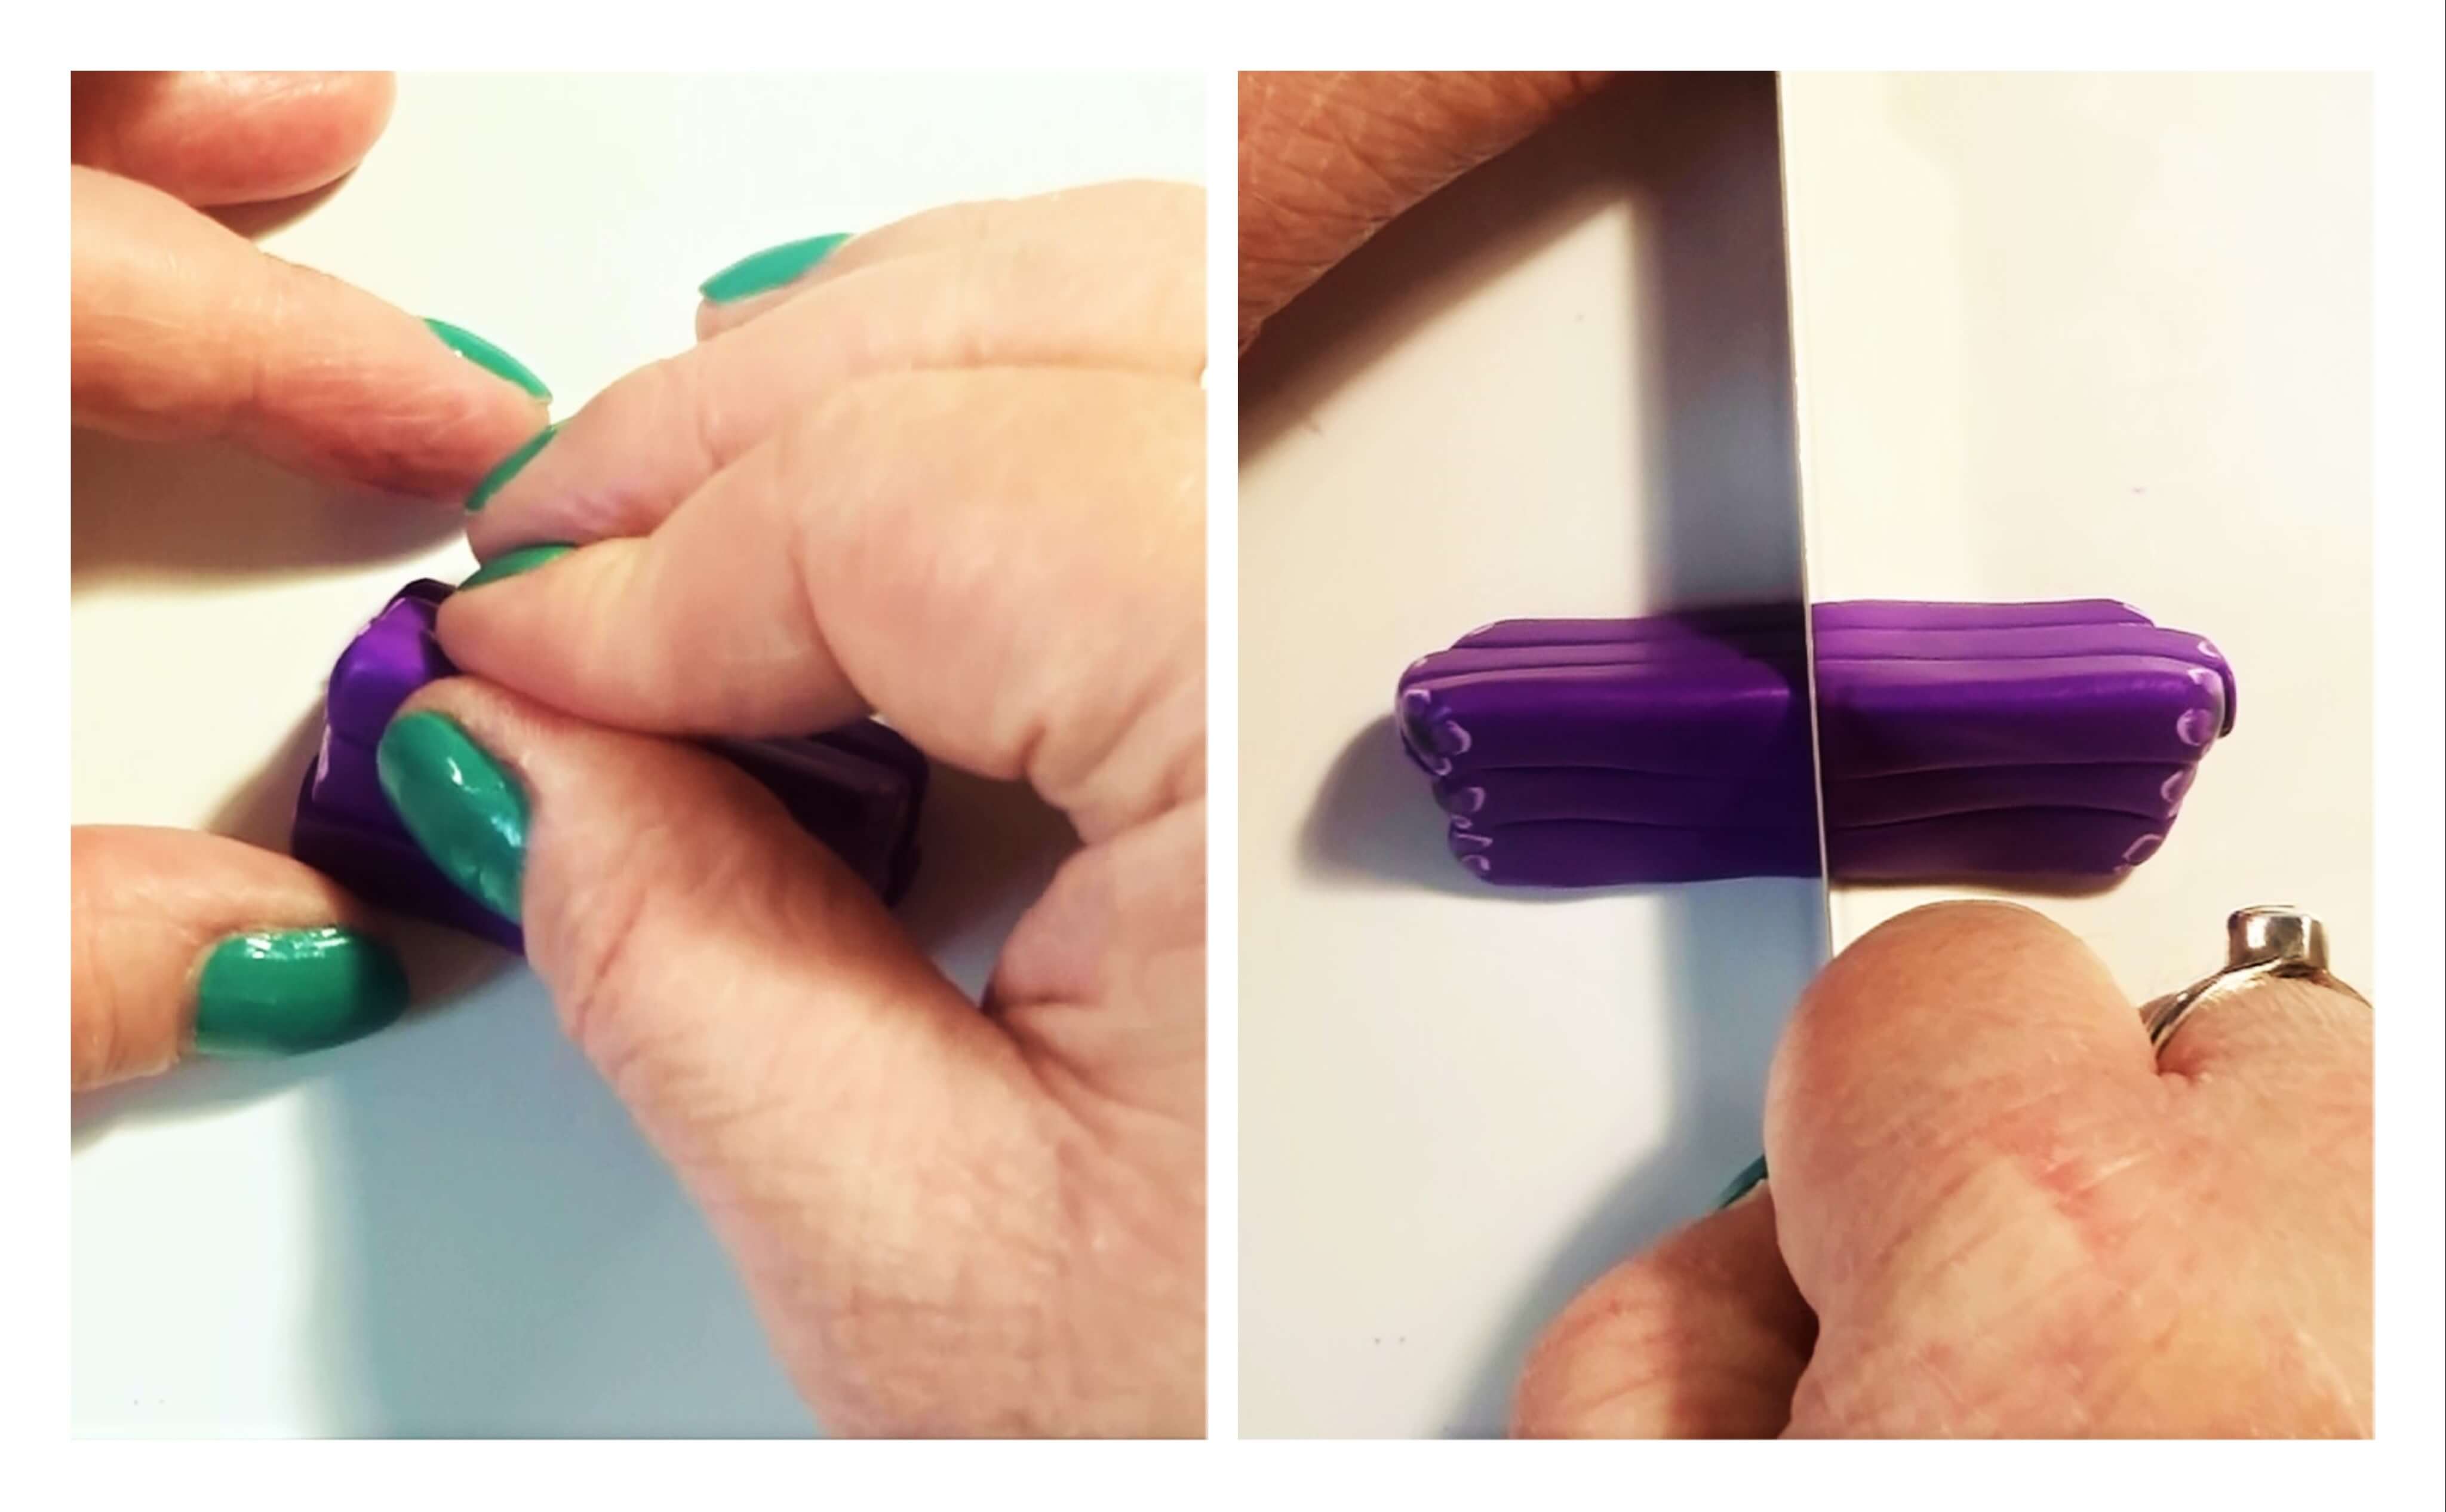
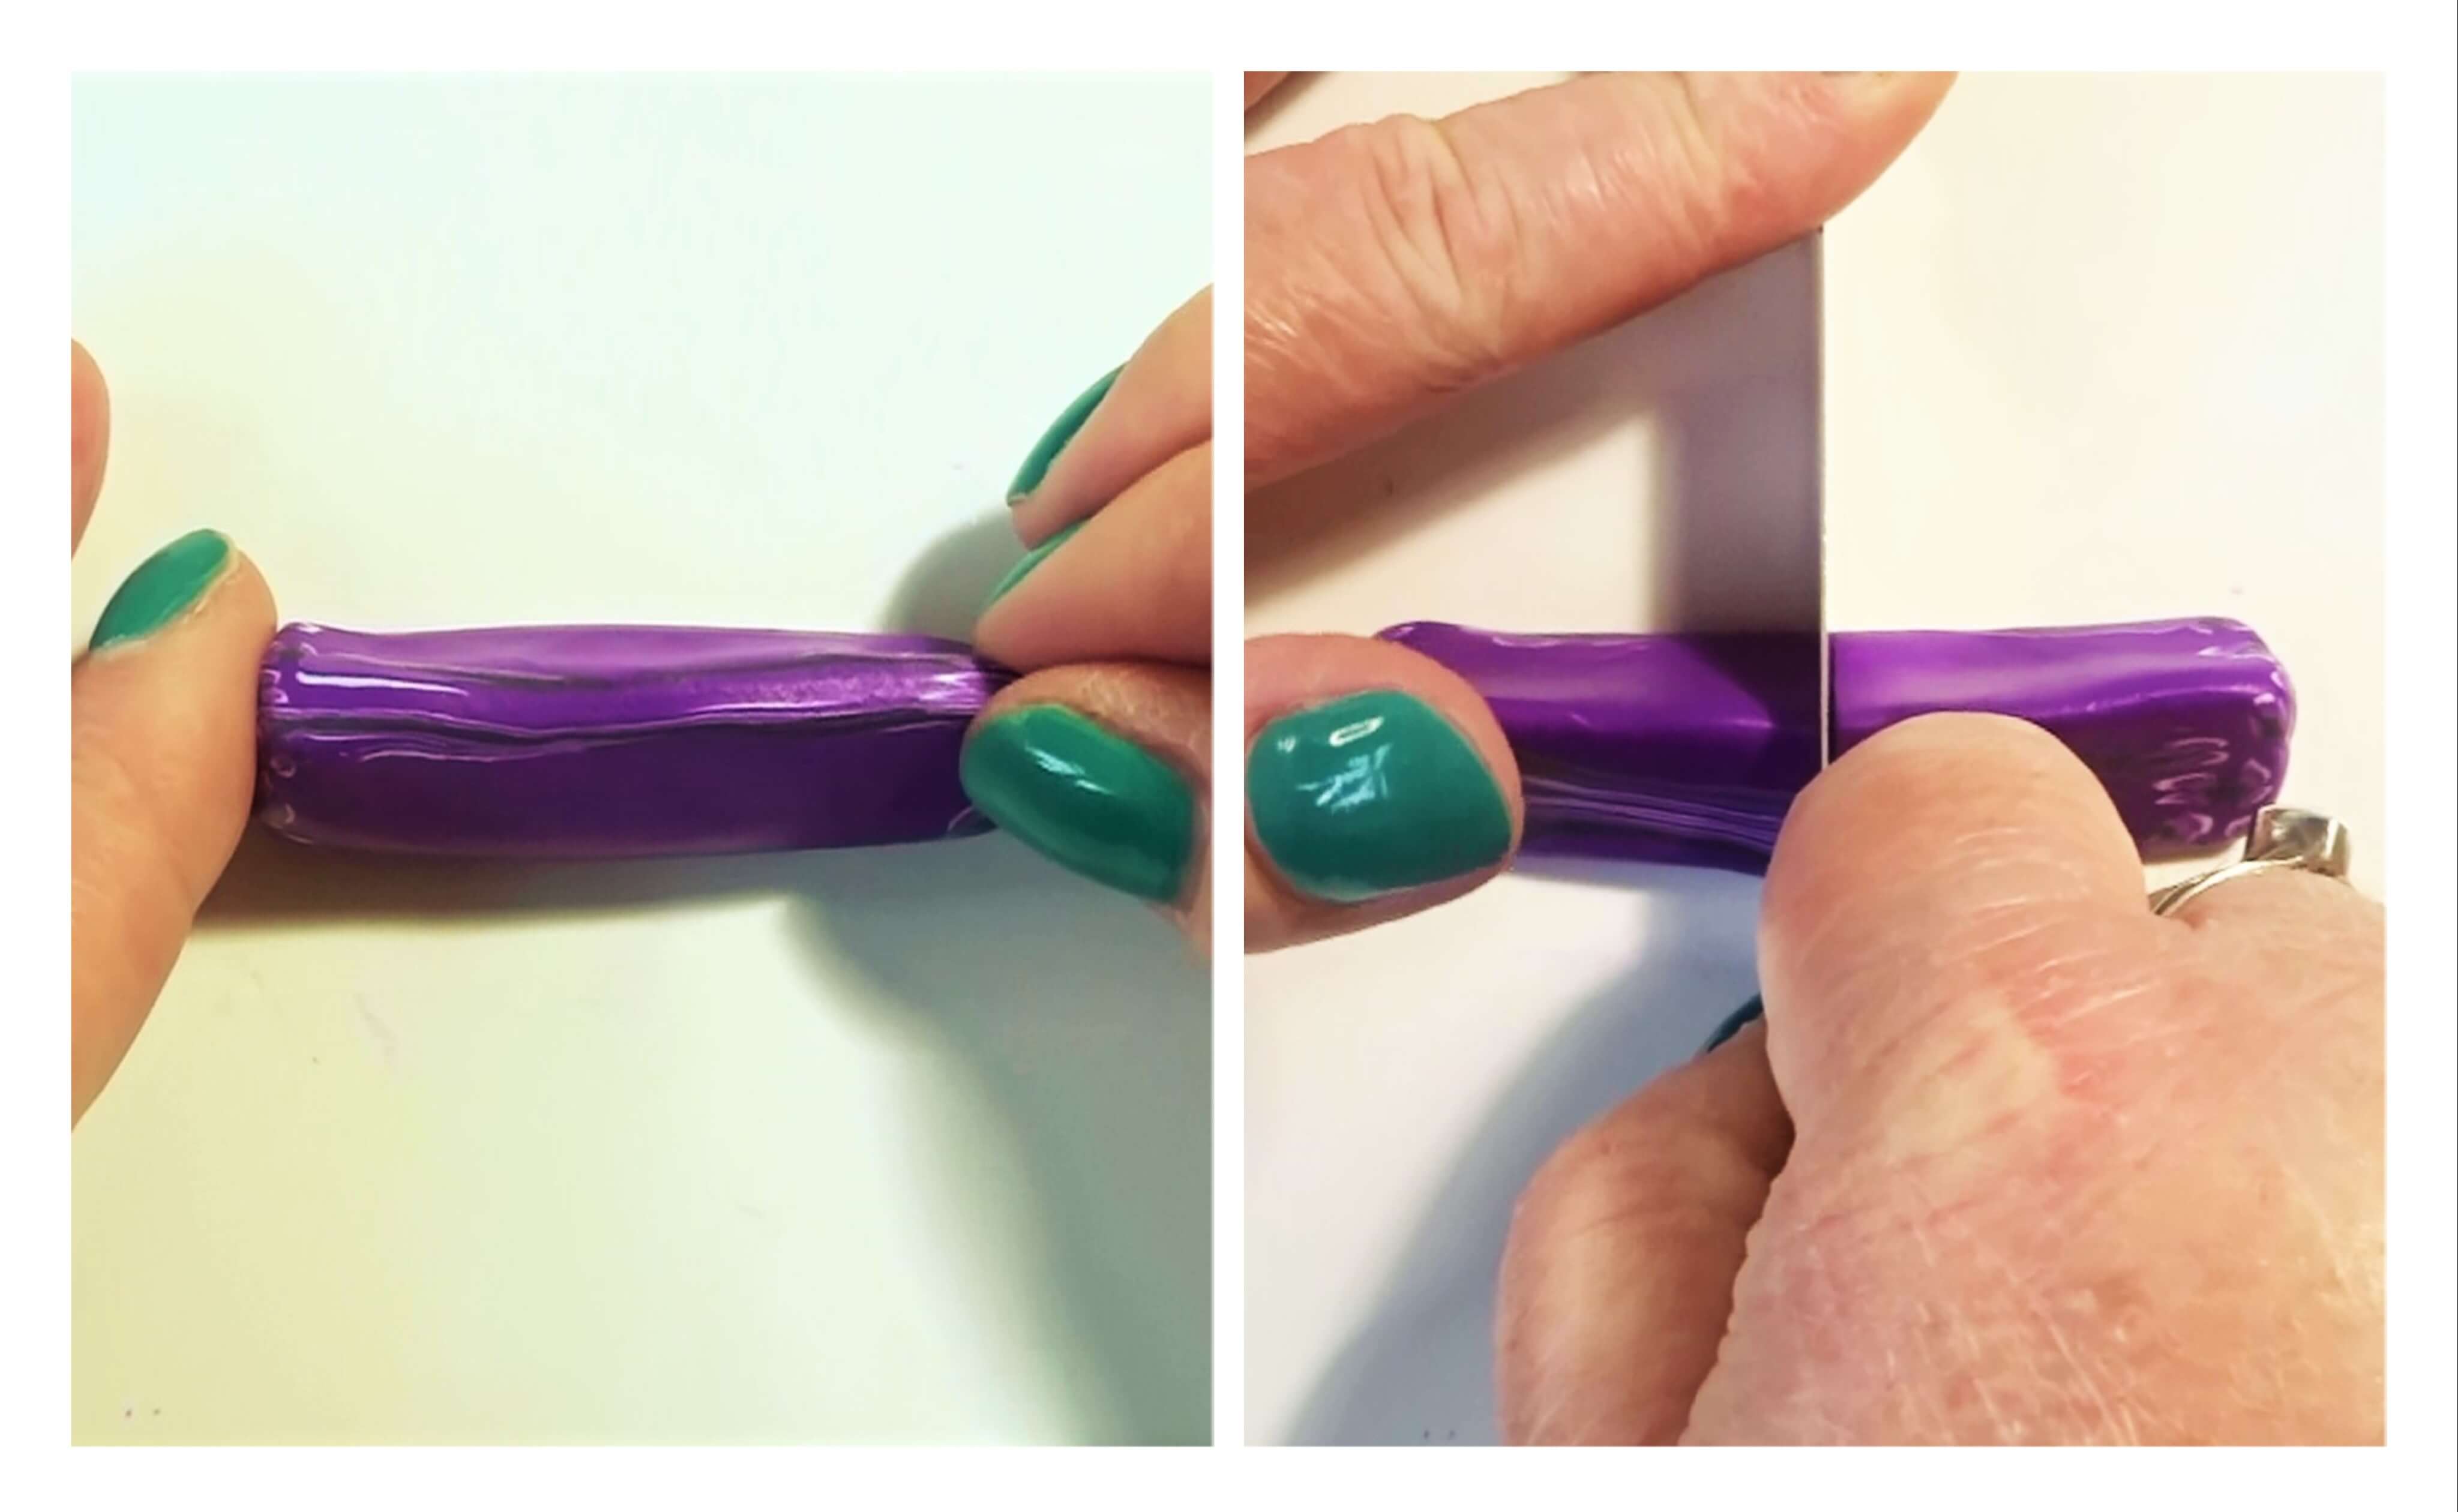
Step 3 – Compress the clay to remove any trapped air and form a sharper triangle shape. To do this press the clay against a flat surface and pinch the top. Turn the clay over and repeat on all three sides. Once the clay is in a good triangle shape cut it in half.
Step 4 – Open up where you have cut the clay and line it up so that the two halves are sitting in a mirror image – this will form it into a diamond shape. Next, press your clay against your surface to make a square cane – if the clay is leaning towards you push the clay top away from you to straighten it up. Similarly, if the clay is leaning away from you pull the top of the clay towards you.

Step 5 – Turn the cane up towards you and cut diagonally down it’s length (cut a little clay off the bottom of the cane if it is uneven so that the clay sits flat on your surface before doing this step). Cut both pieces of the clay in half again so that you now have four triangle shapes.

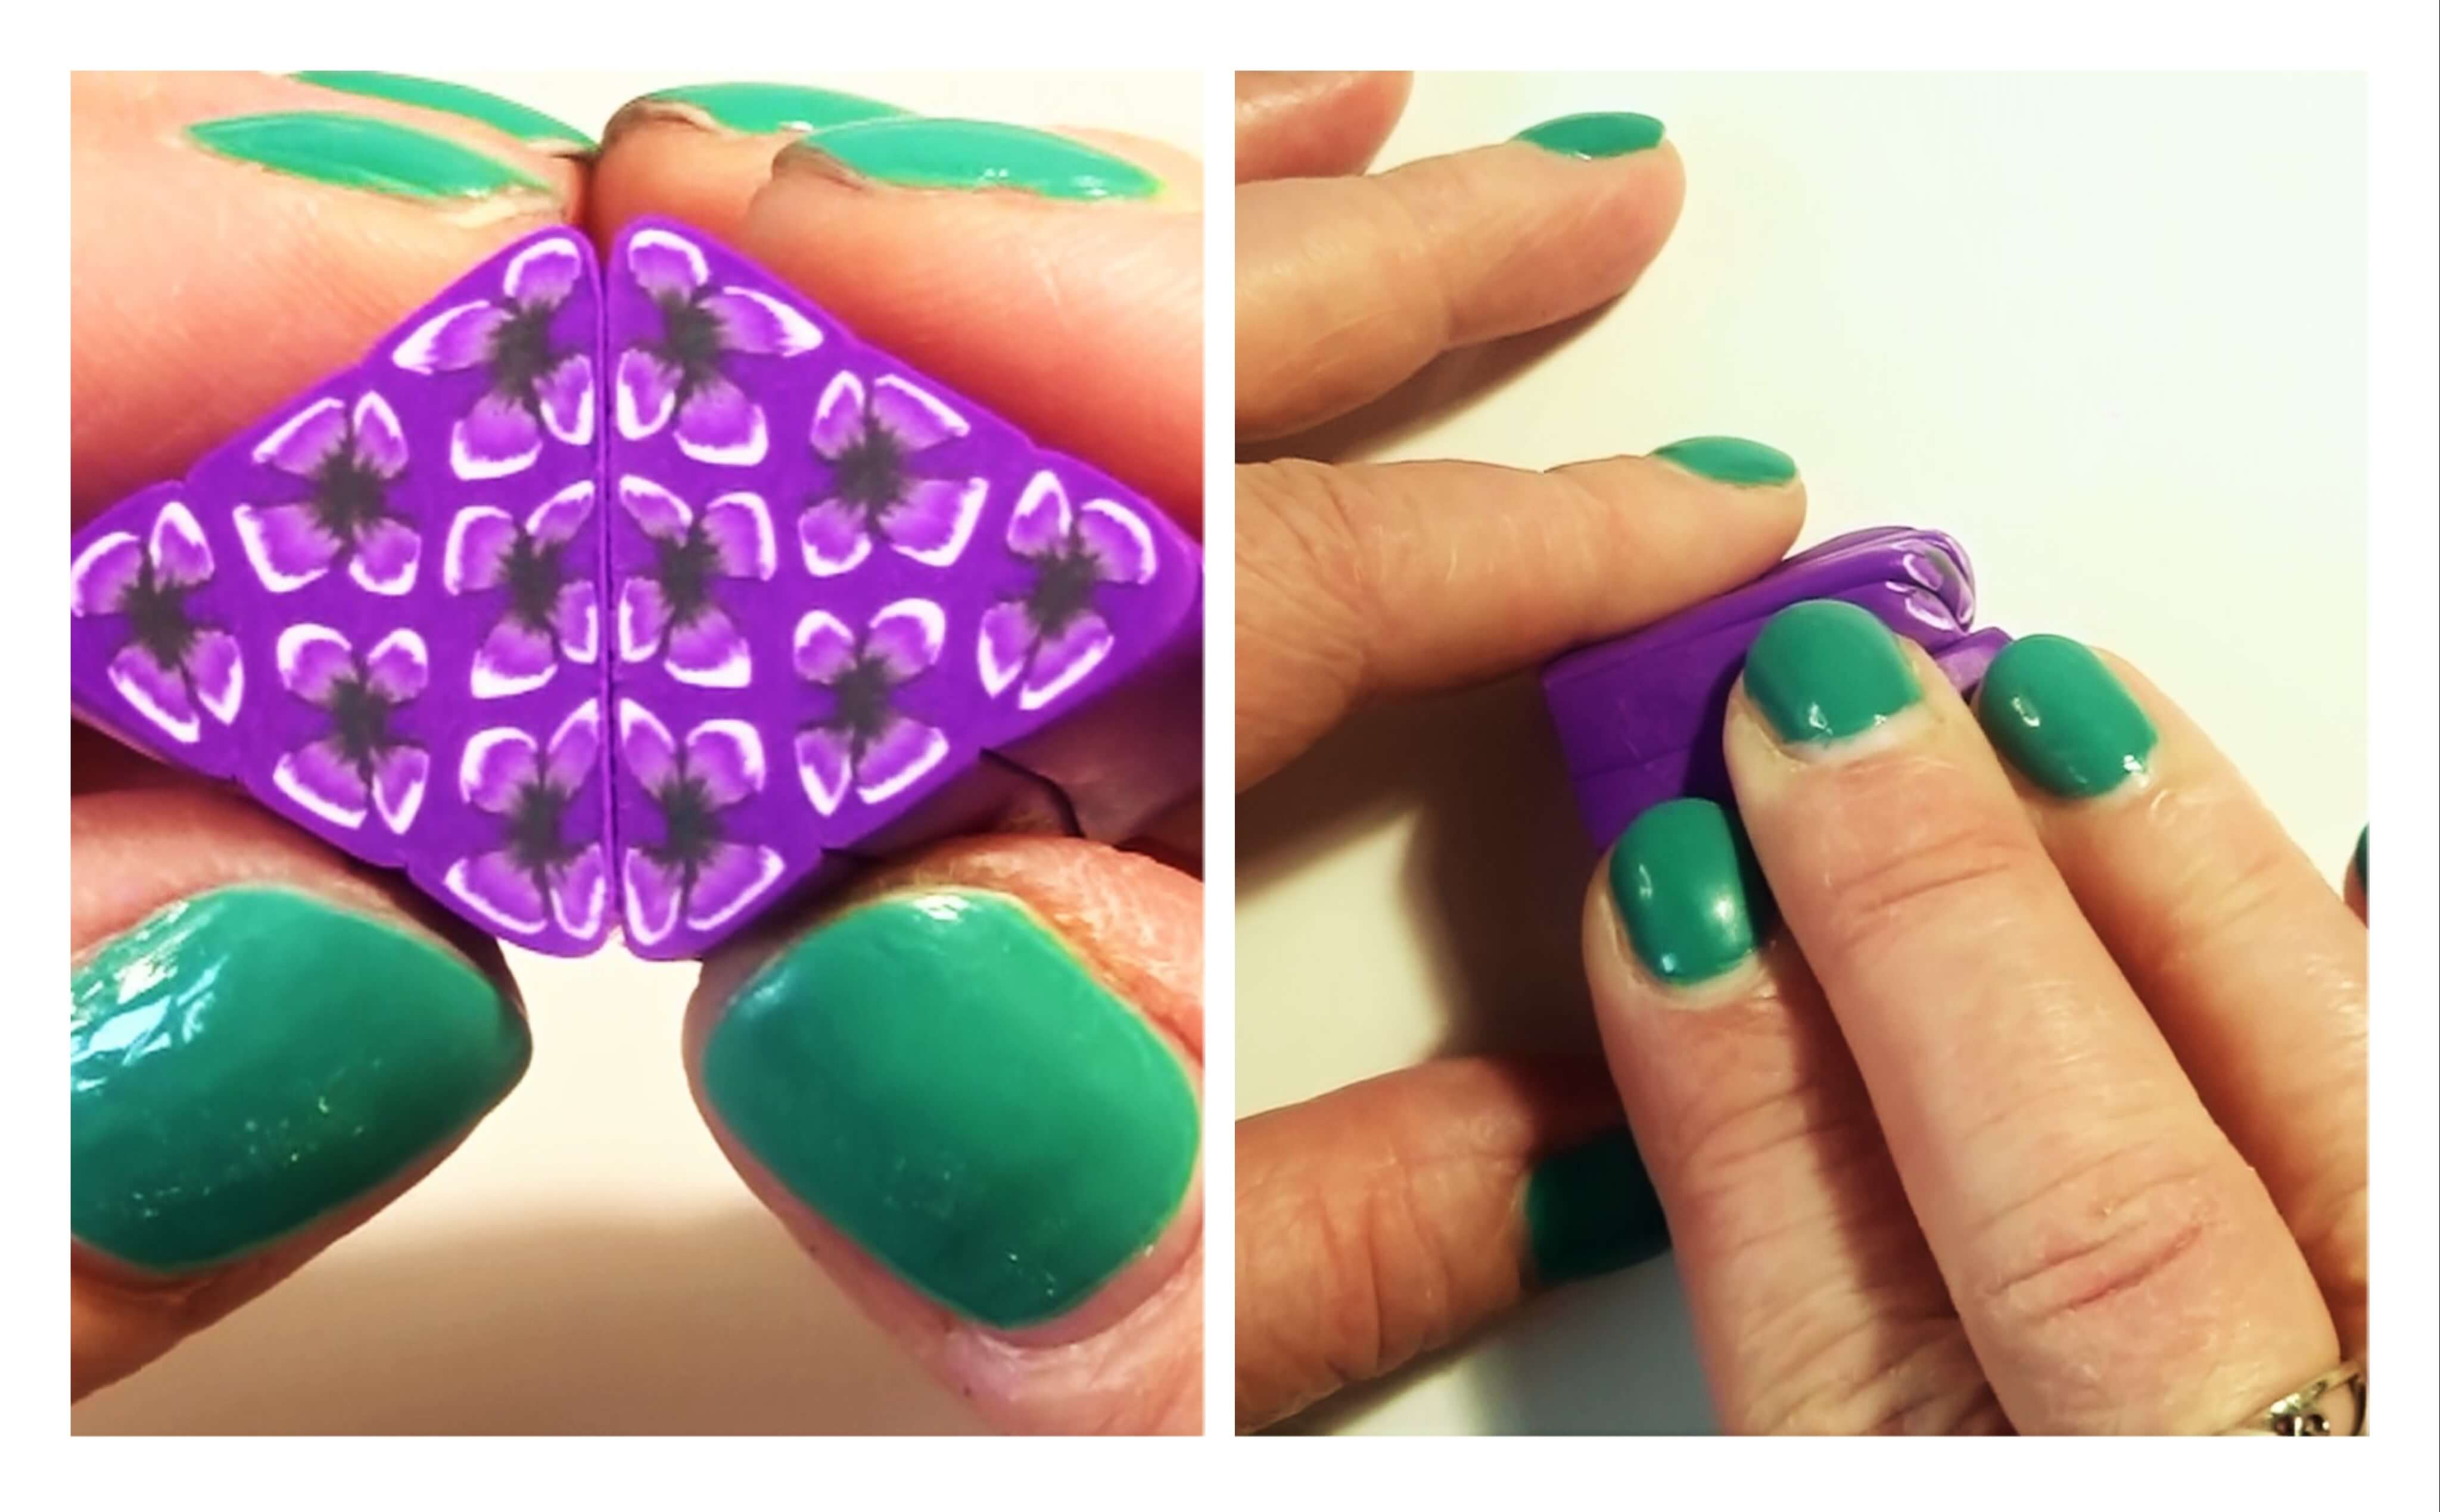
Step 6 – Pick up two pieces of clay and turn one piece and line it up with the other so that one outer edge of cane is turned in towards the pattern on the other. Then pick up a third piece and line it up in the same way.

Step 7 – Add the fourth piece so that the pattern faces inwards like the piece opposite. Squeeze the clay to form it into a square shape and reduce the length slightly.
Step 8 – Pinch the clay as you did before to form a triangle. Cut the triangle in half.

Step 9 – Open up where you have cut the clay and match up the two halves so that if forms a mirror image. As before, shape this into a square.

Step 10 – Roll out a sheet of clay to match your cane and cut slices of your cane. Lay these slices on the sheet of clay making sure to turn the pieces so that they form a pattern on the sheet of clay (imagine that one corner of your cane if the centre point and make sure that each piece points towards this centre point). Use an acrylic roller to smooth out those cane pieces.

Step 11 – Your sheet of clay should now have a mesmerising, symmetrical pattern on it. Cut this clay in which ever way you please!
Here are a few more pictures of just a few of the pieces I made. When I say I adore this technique I’m really not exaggerating.


I hope this has got you rummaging through your clay looking for all those old canes. I know that I have a few canes, good ones even, that I may use in this way because the finished pieces just look so good.
Let me know if this has been helpful – I would love to know what you are making with all those failed canes.
Hannah x


Leave a comment