


If you are familiar with my patterns and bead weaving tutorials, you will know that I am very fond of brick stitch. I have been trying to think of new posts and videos for this Christmas and fancied doing things a little bit different to normal and realised that the shape created by two drop brick stitch would lend itself very nicely to a beaded Christmas tree.
I do already have a brick stitch Christmas tree tutorial but because the style of beading this is different to two drop brick stitch they create very different tree shapes.
For many I am assuming this could be the first time you have heard of two drop brick stitch so I will give a brief run through of what it is and how it is different to regular brick stitch in a minute.
For this post, I have photographed the steps needed to complete your two drop brick stitch Christmas tree but there is also a YouTube video further down this post so if the photos are not clear or you prefer video tutorials then keep on scrolling….
I have made a pdf pattern to accompany this post –
The most important thing to note about the pattern is that you really need to think about the order in which the beads are being picked up (that will make more sense as you work through the tutorial) as we are working with more beads in one stitch than in regular brick stitch.
The pattern doesn’t show the silver star/loop on the top of the tree.
What Is Two Drop Brick Stitch and How Is It Different To Regular Brick Stitch?
Two drop brick stitch is where the regular method of brick stitch applies but instead of picking up one bead at a time, you pick up two beads per stitch.
As you may be aware, in regular brick stitch if you are starting a new row of beading and the row length is increasing on the previous row, that you will pick up two beads to start the row. This means that in two drop brick stitch, to start a new increased row, you will pick up 4 beads to begin with.
A big per of two drop brick stitch is that, because we are picking double the number of beads up in any stitch, the beading grows much faster than regular brick stitch patterns.
Two drop brick stitch is regularly used in bead weaving fringe earrings.
Tools and Supplies
For this project I have used size 11 Delica beads in Matte Transparent Forest Green, Galvanised Silver, Opaque Light Siam (red) and Metallic Bronze.
I have used Wildfire beading thread and a size 12 beading needle.
If you wish to turn your Christmas tree into a pair of earrings then you will also need some earring wires.
How To Bead A Two Drop Brick Stitch Christmas Tree

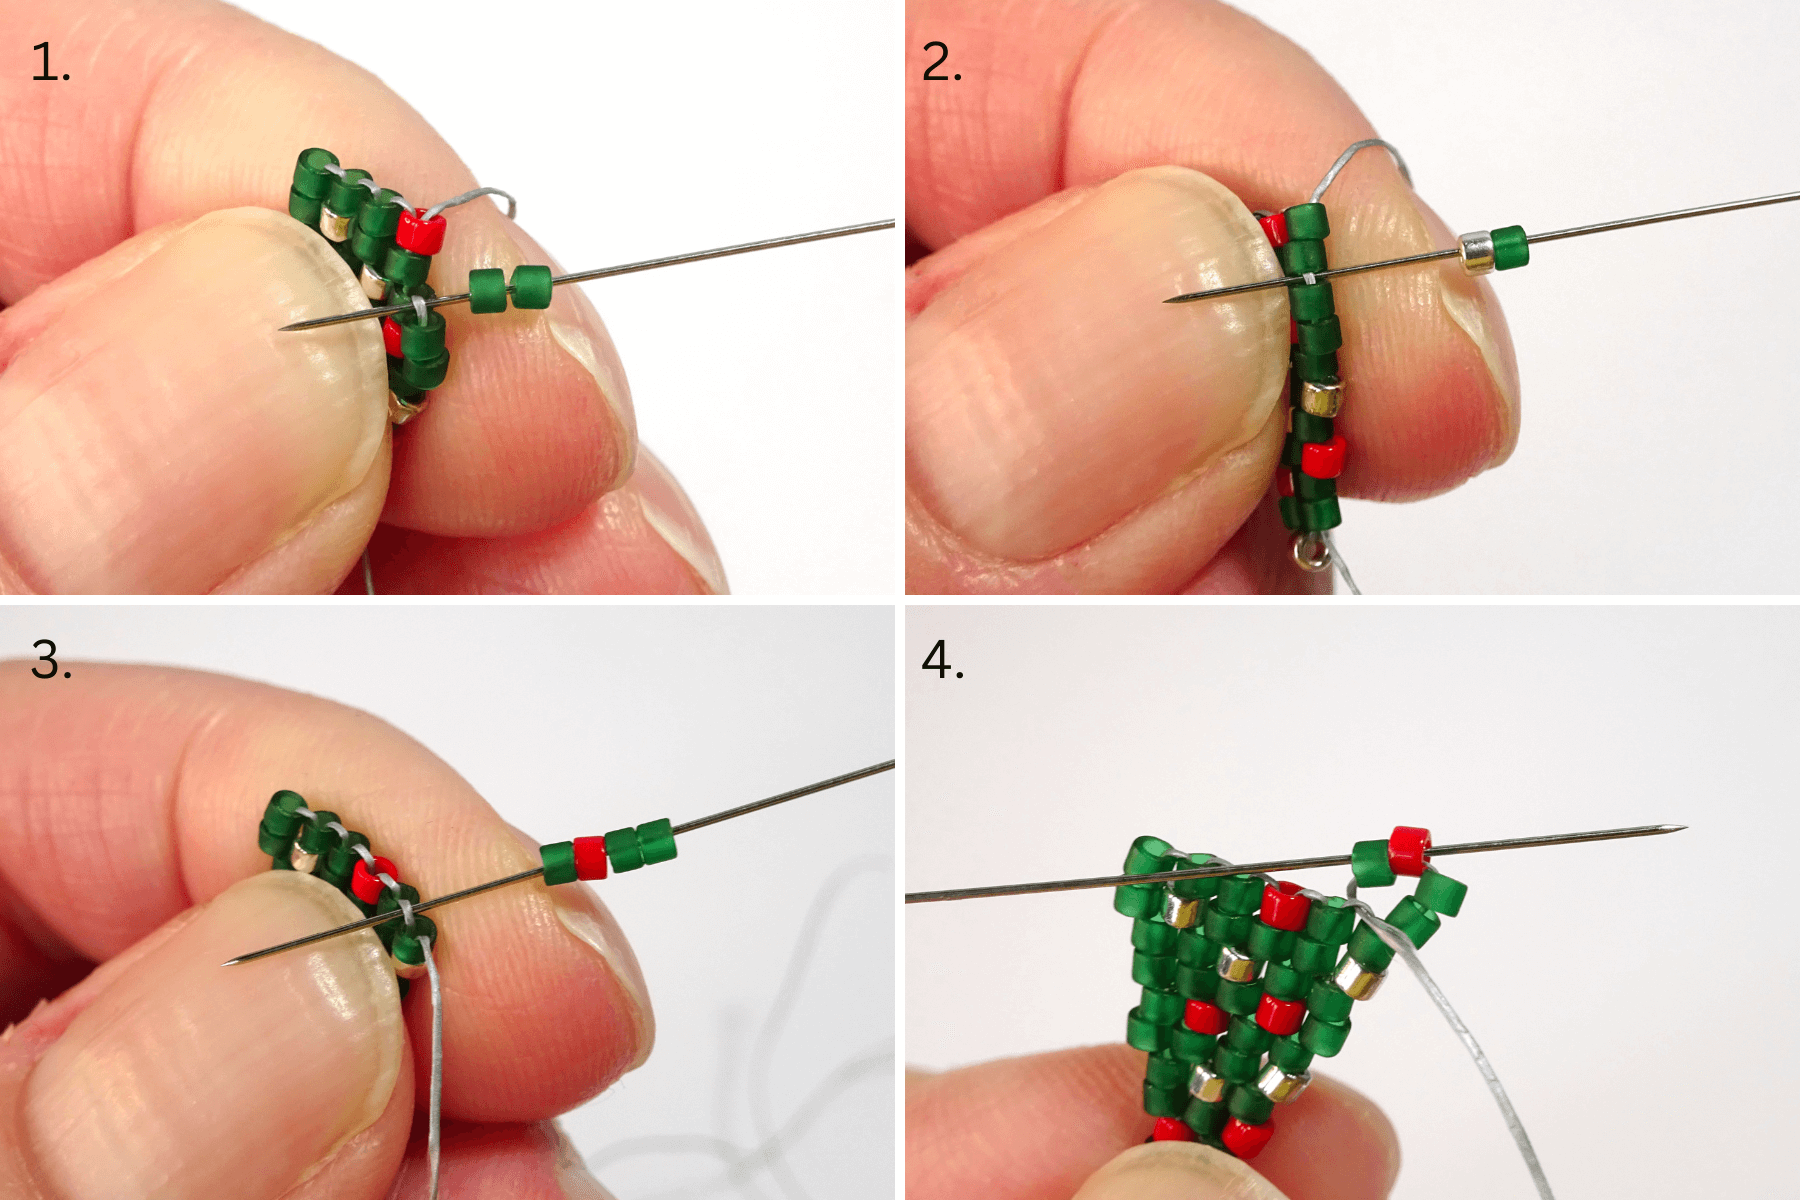
Step 1 –
- Add a needle to a length of thread (26″ is plenty) and pick up two green beads, one red and another green.
- Take the beads down the thread making sure to leave a tail thread (a good few inches long as this is used at the end) and take the needle back up into the first two green beads.
- Pull the threads to make the beads sit alongside each other.
- Take the needle back up into the red and green beads.

Step 2 –
- Pick up 1 silver bead and take the needle back down into the two green beads.
- Pick up one red bead, one green bead, one silver bead and another green bead.
- Take the needle under one of the bridging threads that sits across the beads on the previous row.
- Take the needle back through the green and silver bead to secure in place. I don’t show this step in every photo but for each stitch you need to complete it by going back up two beads.

Step 3 –
- Pick up 2 green beads on your needle and find the thread sitting between the bead rows. Take your needle under this thread and pull the needle and thread through.
- Take the needle up through the two green beads.
- Pick up two green beads, one red bead and another green bead. Take the needle under the thread sitting between the beads on the previous row.
- Take the needle back up the green and red beads.

Step 4 –
- Pick up two green bead and use the bridging thread to attach the beads. Finish the stitch by going back up through both green beads.
- Pick up a silver and a green bead and add this on to the end of the row as you did for the previous row.
- Pick up three green beads and one red. Add this to start a new row making sure to finish the stitch by going back up the single green and red bead.
- Pick up a silver and green bead and add these on in the same manner.

Step 5 –
- Finish the row of beading by adding four more green beads, adding them two at a time.
- Start the next row by picking up three green beads and a silver. Finish the stitch by going up through two green beads.
- Add a further two green beads.
- Pick up one red bead and one green bead and add in the usual way.
Step 6 –
- Continue on with the row by adding two green beads.
- Pick up one green and one silver beads and add them onto the row.
- Start a new row by picking up two green beads, one red and another green bead.
- Finish the stitch by going back up into the green and red beads.

Step 7 –
- Add a further two green beads onto the row.
- Pick up two more green bead and add them onto the row.
- Pick up one silver bead and one green bead and add them on.
- Pick up one green bead and one red bead and add them to the beading.

Step 8 –
- Pick up two more green beads and add them onto the end of the row. This completes the green part of the tree.
- To add the tree truck, take the needle back up into the green and red beads that sit alongside the two green beads just added.
- Jump the needle across and back down into the green and silver beads and the bottom of the tree.
- Pick up two bronze beads and add them to the bridging thread sitting along from the silver bead.
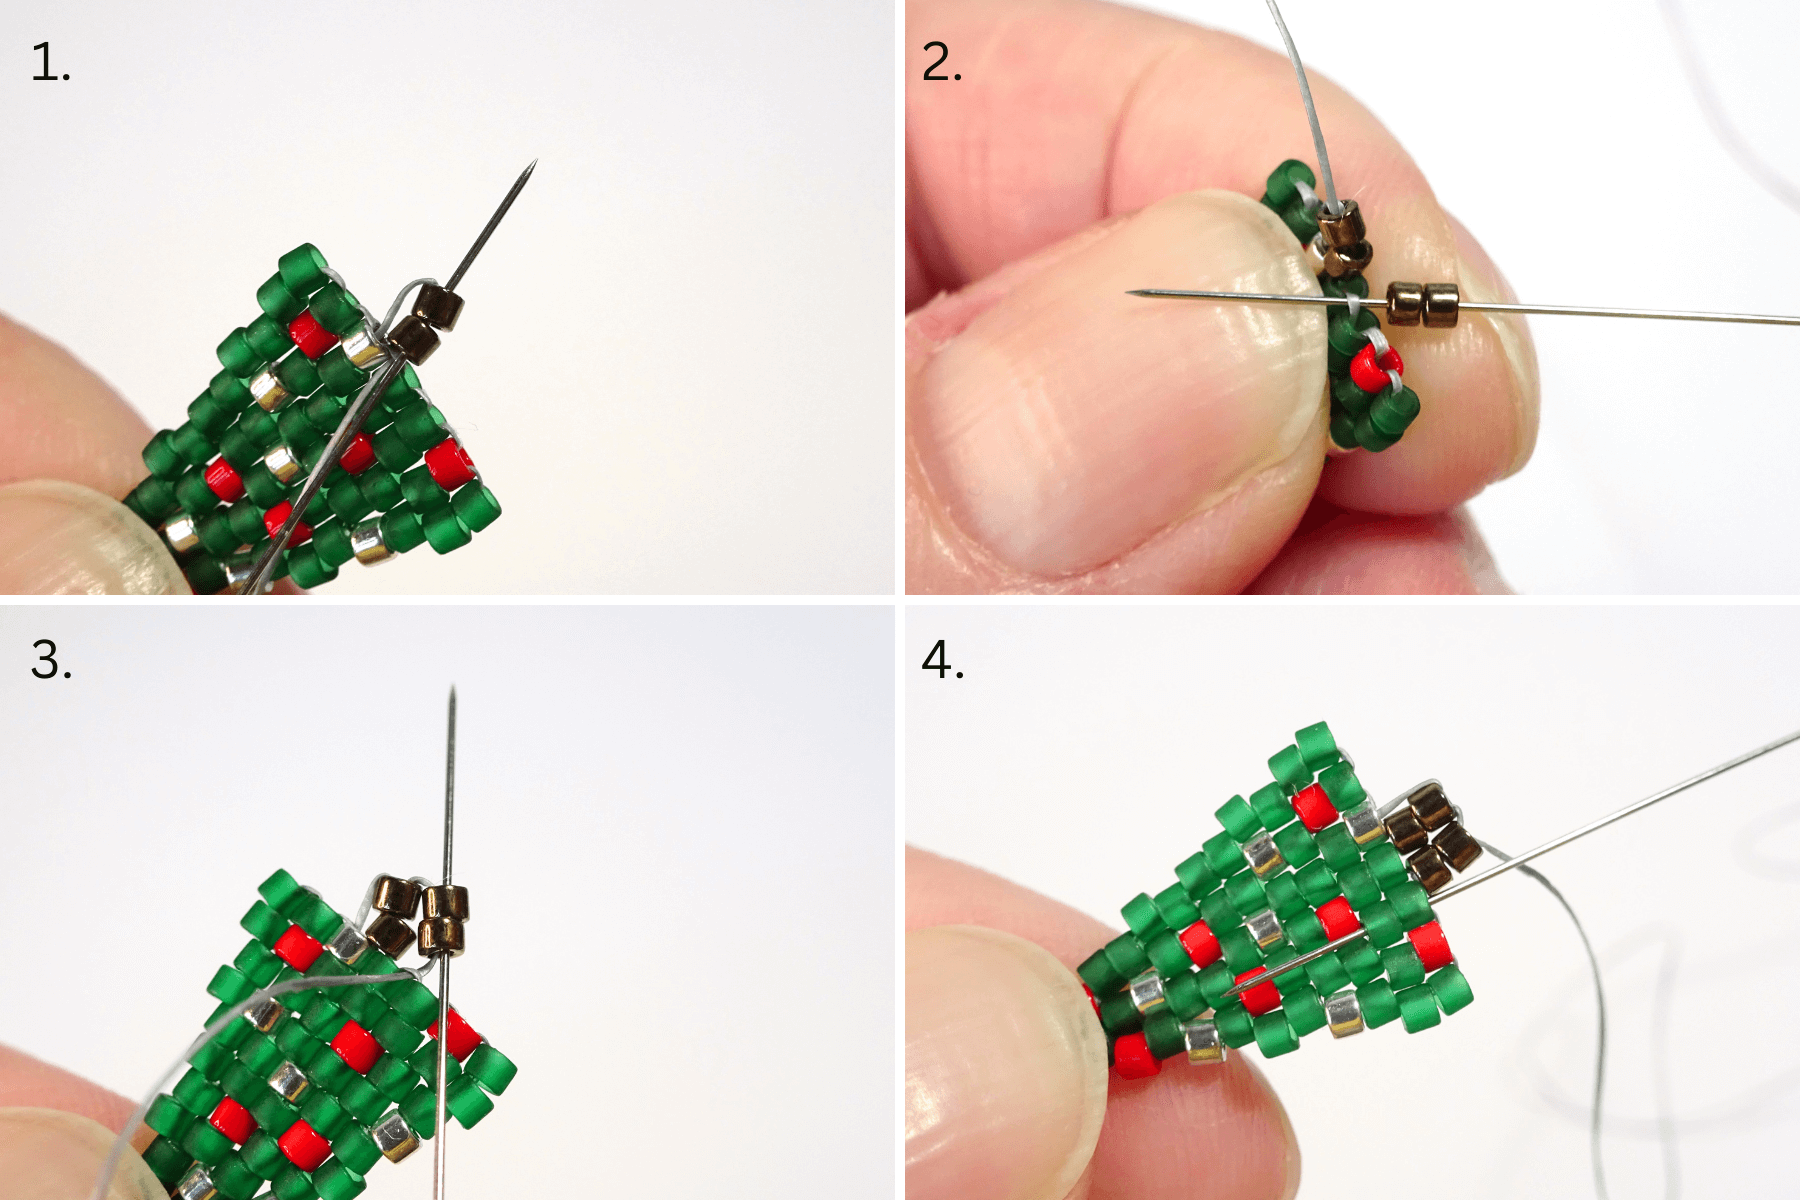
Step 9 –
- Take the needle back up into the two bronze beads. The thread will be visible along the edge of the bronze beads.
- Pick up two more bronze beads and add them to the next bridging thread along.
- Take the needle up through the bronze beads.
- Take the needle down into the two green beads at the bottom row of the tree. You will be able to see the thread sitting on the outer edge of the beading.

Step 10 –
- Add a needle to the tail thread and take it through the silver bead.
- Pick up three more silver beads and take the needle back through the silver bead at the top of the tree but from the opposite direction.
- Pull the thread tight so that the beads form a loop. Reinforce by taking the needle through all the silver beads in the loop again.
- Tie knots on the thread and cut off any excess. If you need help with this step then check out the video at the bottom of this tutorial as I cover it in more detail there. Your tree is finished!
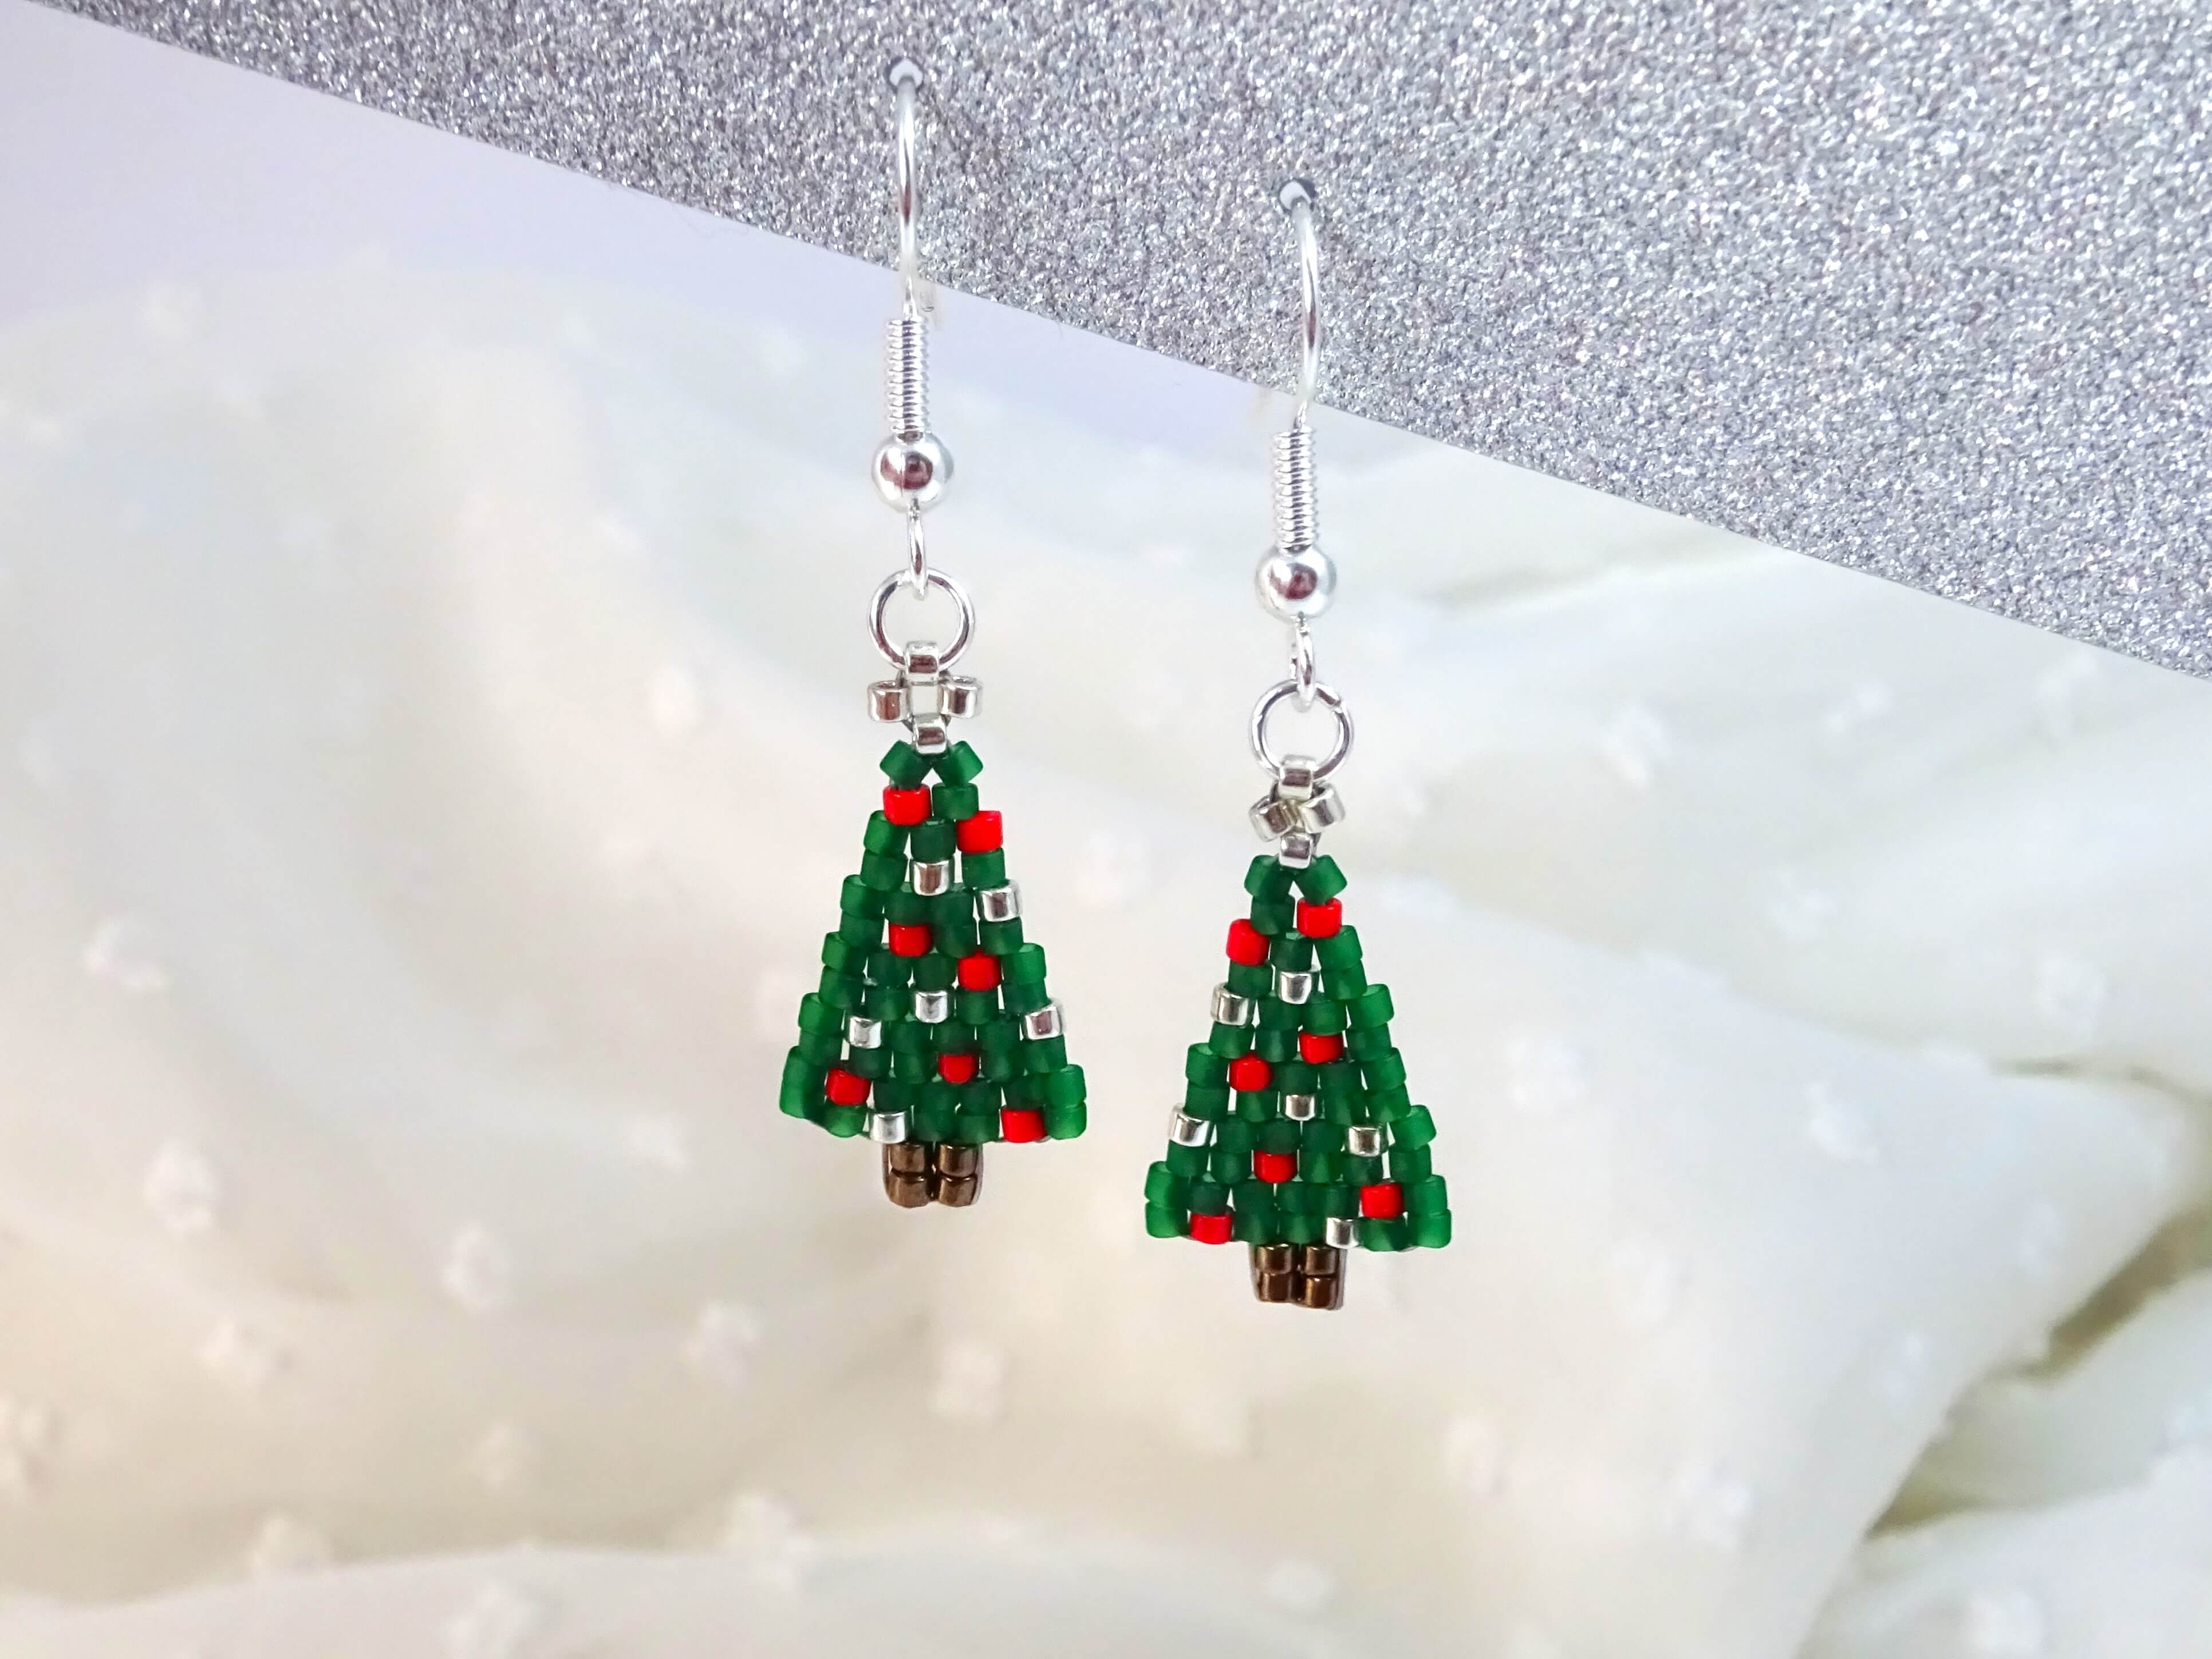
I have made two two drop brick stitch trees here and added them to a pair of earring wires.
Two Drop Brick Stitch Christmas Tree Video Tutorial
I hope you have enjoyed this twist on a brick stitch.
Thanks for reading.
Hannah x

