
Please note, this post contains affiliate links. All such links are clearly marked as such.
Are you tired of wearing the same old boring earrings? Do you long for accessories that reflect your unique personality and love for all things whimsical? Well, look no further because I have the perfect recipe for you. In this tutorial, we’ll take you on a journey into the enchanting world of polymer clay strawberries – the ultimate ingredient for creating cute and quirky earrings that will make heads turn. Whether you’re a seasoned polymer clay artist or a beginner looking to unleash your creativity, this step-by-step tutorial will provide you with everything you need to know. So, gear up and get ready to dive into the world of berrylicious accessories that will add a touch of whimsy to your style.
Gathering Your Materials
Before you can start creating your adorable polymer clay strawberry earrings, it’s important to gather all the necessary materials. Here’s what you’ll need:
First and foremost, you’ll need polymer clay in shades of red and green. I used Fimo Professional in Carmine and Leaf Green. Look for high-quality clay that is soft and easy to mold. You can find polymer clay in craft stores or online.
To shape and sculpt the clay, you’ll need some essential tools. A clay roller or rolling pin will help you condition the clay, while clay cutting shapes will be measuring out your clay to make consistent sized strawberries and for cutting your green leafy strawberry tops. Don’t forget to have a smooth work surface and a cutting mat to protect your table.
To add intricate details to your earrings, you’ll need a few additional tools. A small ball tool or dotting tool can be used to create the strawberry’s seeds, while a toothpick or needle tool can help you make indentations for the leaves. I also used a fine point Posca pen in yellow to add the seeds.
Don’t forget about the earring hardware! You’ll need earring hooks or studs, jump rings, and pliers to attach the clay strawberries to the earrings. Make sure to choose hardware that matches your personal style and preference.
Now that you have all your materials ready, it’s time to dive into the fun and creative process of preparing the clay. So, roll up your sleeves and let’s get started on making the cutest strawberry earrings around!
Preparing the Clay
First, it’s essential to condition the polymer clay before you can shape it into delightful strawberries. Conditioning helps soften the clay, making it easier to work with and ensuring a smooth and even texture. To condition the clay, begin by kneading it with your hands. Apply gentle pressure and roll the clay between your palms in a motion similar to kneading dough. This process warms up the clay and distributes any excessive moisture or air bubbles throughout the material.
As you knead the clay, you may find it feels a bit stiff at first. Don’t worry; this is perfectly normal. Keep working on it, and soon you’ll feel the clay becoming more pliable and malleable in your hands. Conditioning the clay can take a few minutes, especially if it’s fresh from the package, so be patient and take your time to achieve the desired consistency.
During the conditioning process, you might notice small bits of debris or fibers in the clay. To remove these imperfections, gently pick them out. Ensuring your clay is free from any foreign particles will result in a smoother finished product.
With your clay conditioned you’re now ready to move on to the next exciting step: shaping the strawberries.
Shaping the Strawberries

1) Measure out the amount of clay you want for your strawberry. I rolled my clay out on a number 2 on my clay machine and cut one circle measuring 3/4″ and another measuring 1/2″.
2) Roll your clay into a ball and then roll it slightly on one side so that the shape elongates.
3) Next, turn your clay so that the wider part is against your work surface and press gently to flatten it.
4) Refine the shape of your strawberry before moving on to add texture and leaves.
Adding the Seeds and Leaves
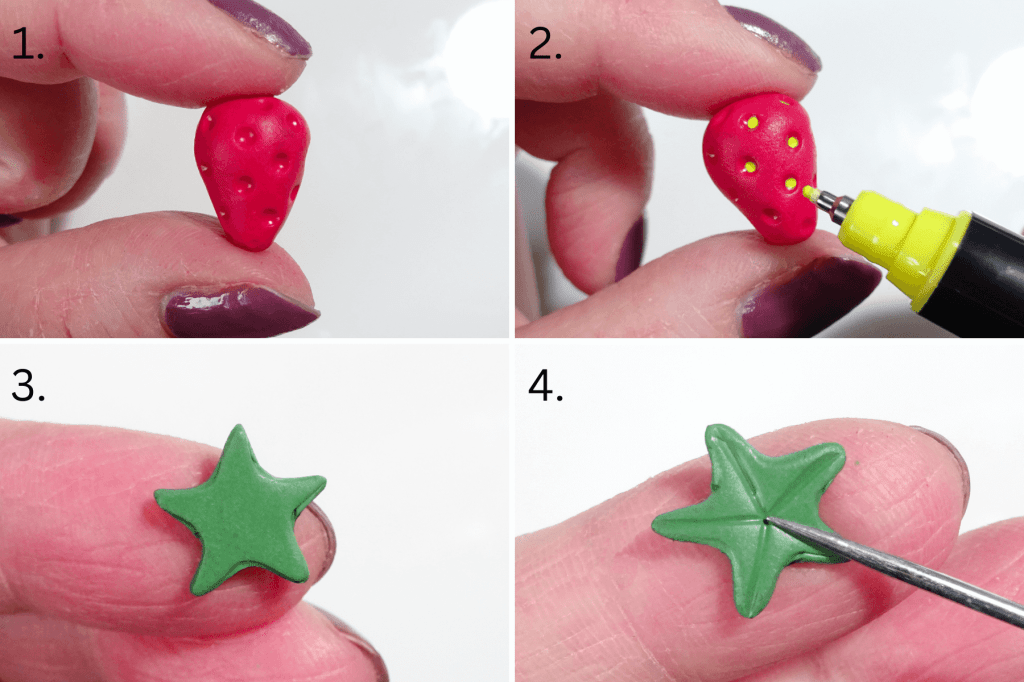
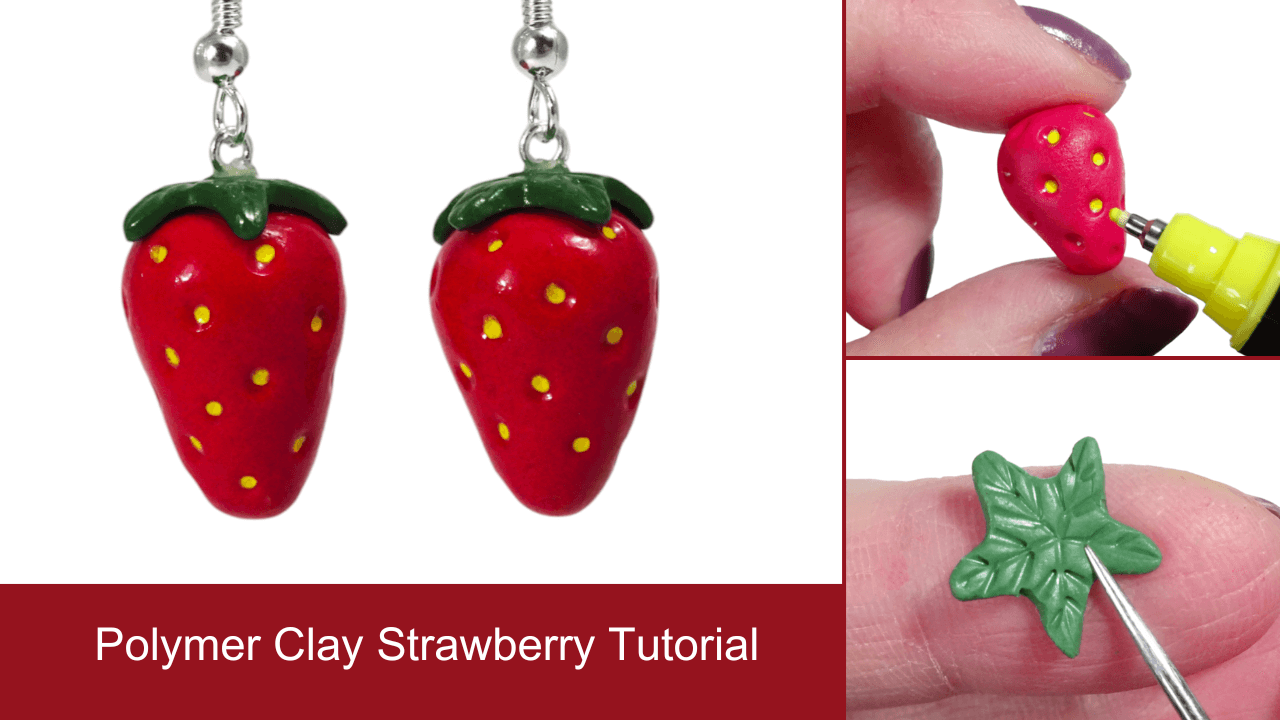
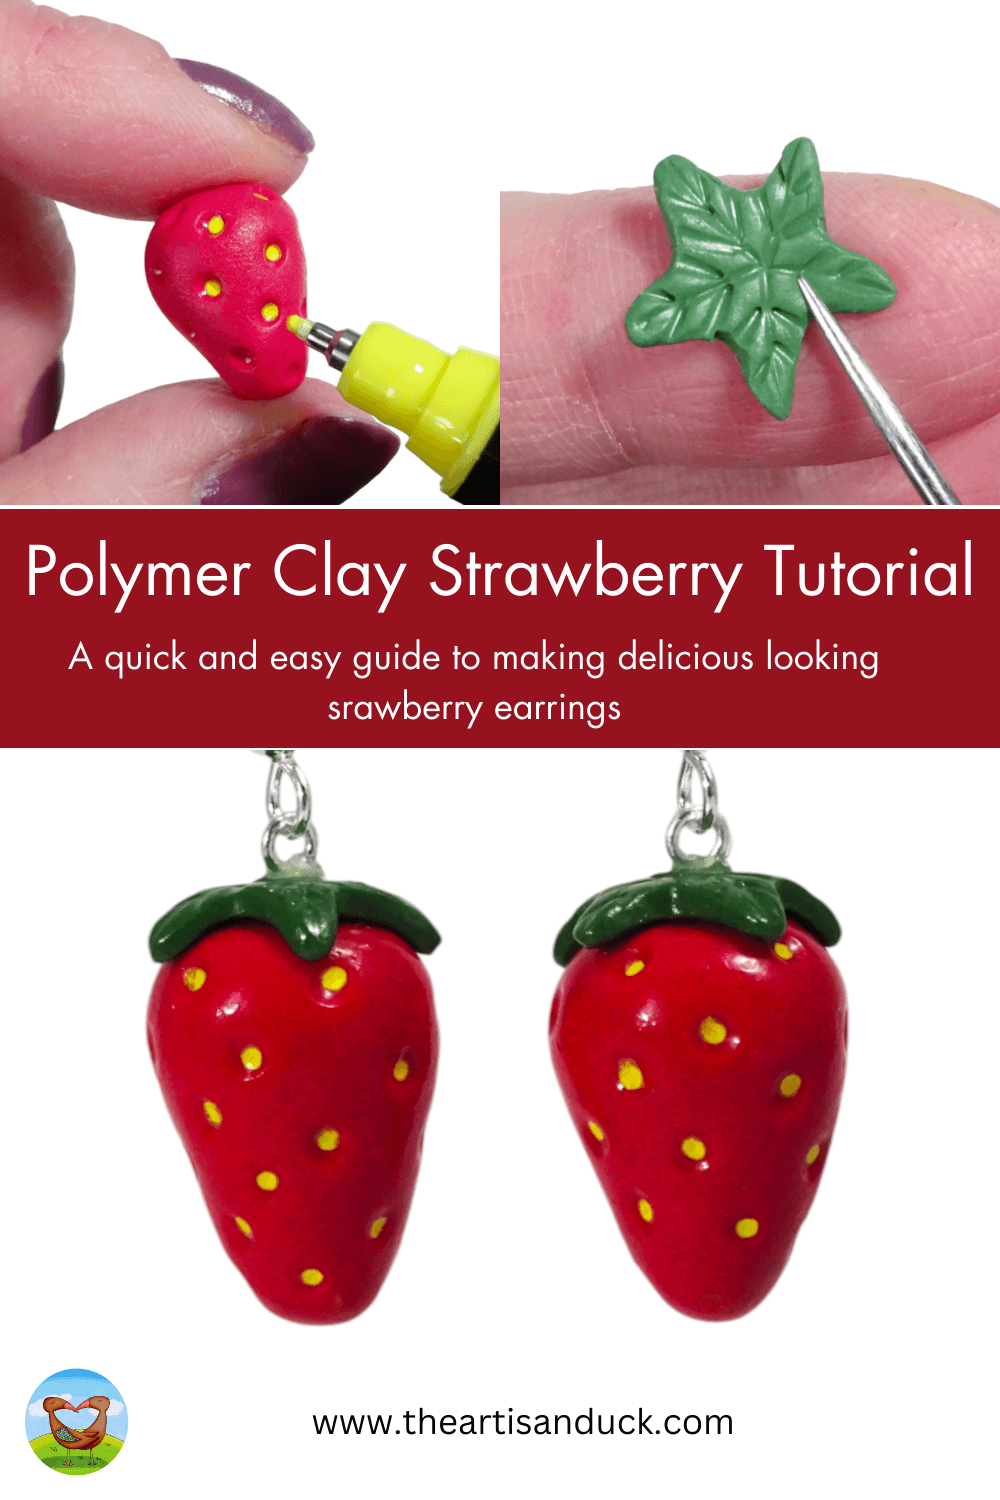
1) Take a small ball tool and carefully make small indentations all over the surface of the clay, mimicking the texture of a real strawberry. Press the tool gently but firmly, ensuring you don’t push too hard and deform the shape.
2) Use a fine tipped paint pen or acrylic paint on a ball tool or yellow clay to add dots of colour to imitate seeds into the indentations made by the ball tool.
3) Roll your green clay out so that it is thin (I rolled mine out on a number 5) and cut a small star. My star measures 1/2″ across from one point to another.
4) Using a needle tool, add indentation lines from the centre of the star to the tip of each point.

1) Continue adding details to the star to imitate leaf patterns.
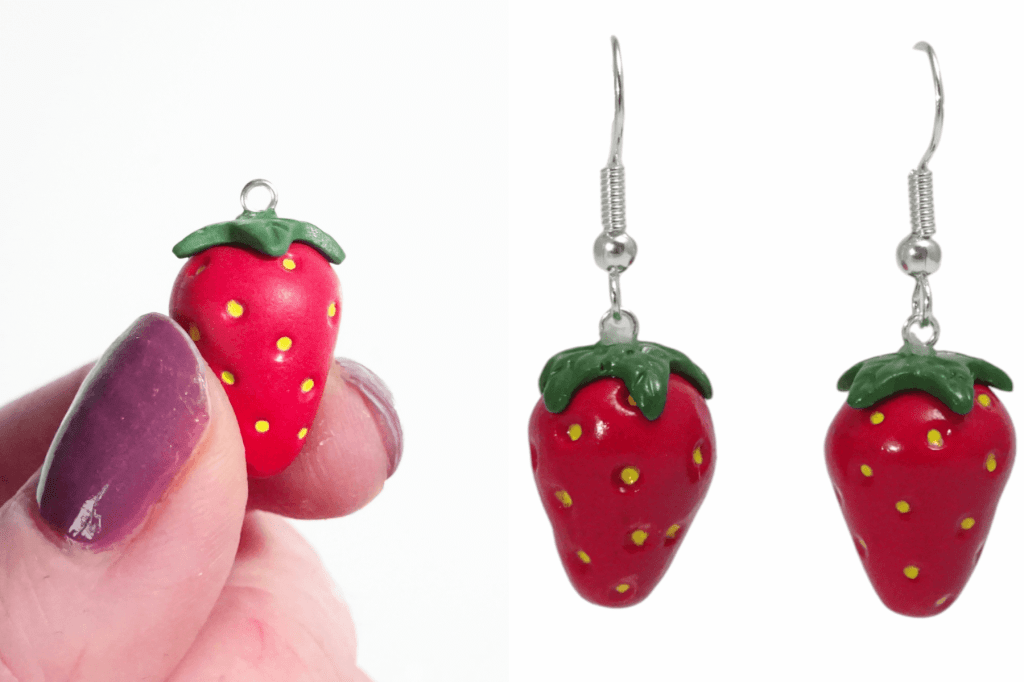
2) Carefully press the green star onto the top of your strawberry.
3) Add an eye pin to bake the strawberry. I cut the top of a regular sized eye pin to make a larger loop at the top so that I could hang it from a skewer.
4) Place your clay in the oven at the temperature specified on your packet of clay and for the required time.
Baking polymer clay is an essential step in the creation process. The heat will cause a chemical reaction that hardens the clay and makes it durable, so your earrings will last for years to come. Preheat your oven according to the manufacturer’s instructions for the specific brand of clay you are using. It’s important to follow these guidelines as different brands may require different temperatures for proper curing.
Finishing your Strawberry
Once the baking time is up, carefully remove the strawberries from the oven and let them cool completely before handling. The clay will be hot, and attempting to handle it while it’s still warm can result in distortion or damage to your beautifully sculpted strawberries.
After the strawberries have cooled, you can proceed with finishing touches to enhance their visual appeal. Begin by removing the eye pins you added for baking and add some glue to them before pushing them back into the strawberries.
Consider adding a glossy or matte finish to your earrings. A glossy finish will give them a shiny and vibrant look, while a matte finish will create a more subtle and sophisticated appearance. You can achieve these finishes by applying a suitable sealant or varnish, such as a polymer clay glaze, with a soft brush or sponge.
Ensure that the sealant or varnish is applied evenly and covers the entire surface of the strawberries. This will not only protect the clay from wear and tear but also give it a professional-looking finish. Allow the sealant to dry completely according to the instructions on the product packaging before handling or wearing your earrings.
Links below for products used are Affiliate links for Amazon (UK and United States). This just means that if you use my link to buy a product I earn a very small commission, at no extra expense to you (you pay the same regardless how you find the item). Every little extra helps me to offer free tutorials.
Affiliate Links –
UK
Polymer clay – Carmine Fimo and Leaf Green Fimo
USA
Polymer clay – Carmine Fimo and Leaf Green Fimo
How To Make Polymer Clay Strawberry Earrings
In conclusion, crafting polymer clay strawberry earrings offers a delightful avenue for expressing your individual style. This step-by-step recipe equips you with the knowledge to create your very own unique and adorable accessories. So, without delay, seize the opportunity to let your imagination run wild and embrace the whimsy that these berrylicious earrings bring to your personal fashion. As Oscar Wilde once said, “Be yourself; everyone else is already taken.” So, unleash your creativity and unlock a world of cuteness that is waiting to adorn your ears. Happy crafting!


Leave a comment