

When I started this blog many years ago I never once thought I would be sharing something so random as a beaded embroidery carrot. As my crafting has progressed over the years I have tried to test myself by trying new techniques. One of these techniques is bead embroidery.
In the summer last year I was feeling particularly uninspired creatively wise. I was also spending a lot of time in my garden as I was at the peak of growing season.
A little context is probably needed here – I have three main hobbies ; crafting, reading and gardening. I am somewhat of a novice gardener, but I live in the hope that one day I will have a garden over flowing with produce growing. My carrots were struggling to grow last year and I was missing having a craft project. I decided that the best way to get myself out of my creative slump was to pull out my bead embroidery things and come up with a pattern. Seeing as my carrots were on my mind, I chose them as my subject.
This is not a tutorial by any means as this is only my second attempt at bead embroidery. I will just show some photos of my finished piece and share my social media video with you.
Tools and Supplies
For this project I used a variety of the tools and supplies from both my bead weaving and polymer clay stash.
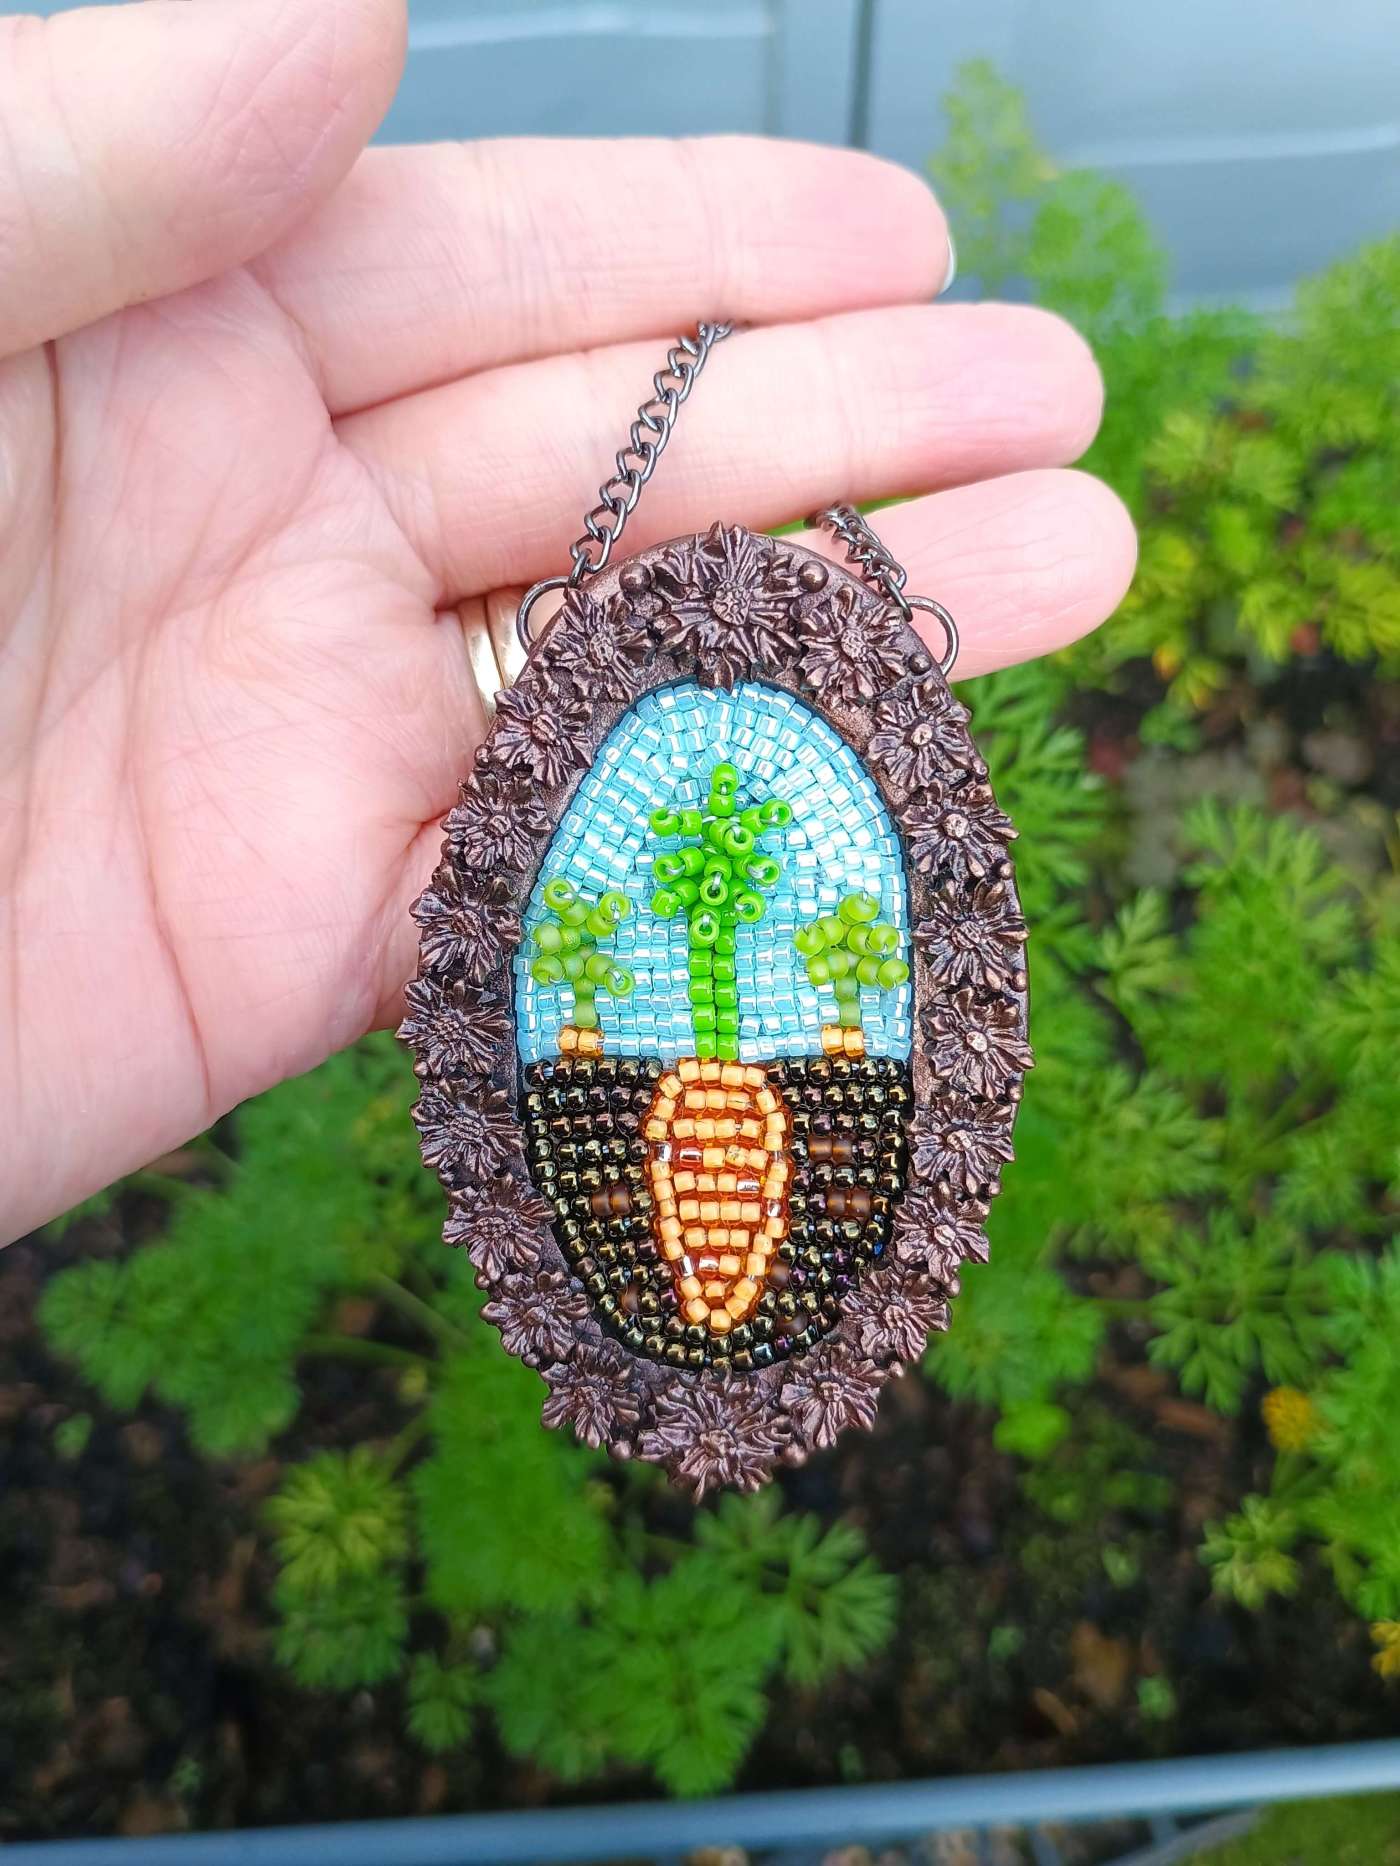
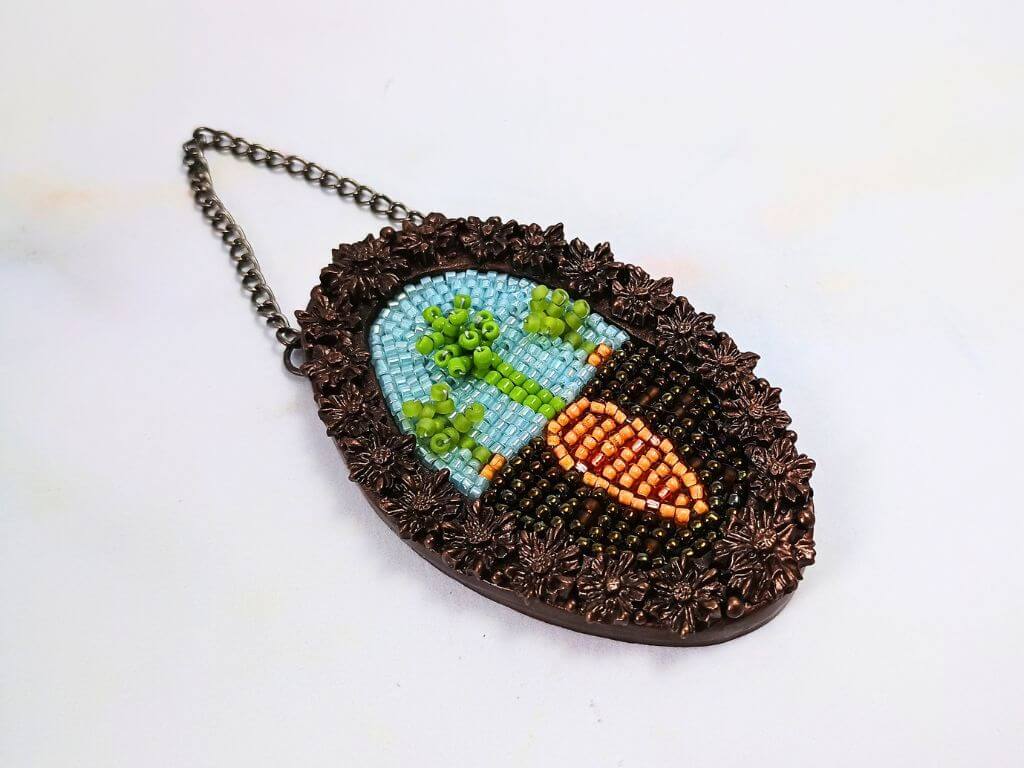
For the bead work, I used Lacy’s Stiff Stuff as my base. I drew my image on paper and transferred this onto my Lacy’s Stiff Stuff. You will see from the little video that my image was colored in. I used my alcohol ink markers to add the colour simply so I had a clear guide as to where I wanted by bead colors to go.
I also used size 11 seed beads from my pretty expansive stash. It seems I love buying seed beads. I used my bead weaving needles and favorite Wildfire thread.
For the frame I used black polymer clay, a bronze mica powder and flower mold. I rolled small balls of black clay to add to the spaces between the flowers.
Choosing The Beads
I though I would quickly share a little about my bead choice. I was obviously limited on colour palette as I was making a carrot, in the ground with a sky at the top. I did however try to add further texture to the piece by mixing up my bead finishes.
The mud has shiny brown beads with matte brown beads placed at random points. It’s doesn’t show this in the photos clearly. I was worried that the mud section would look a little heavy so using a mix of brown beads helped to visually break it up a bit.
I used two different shades of orange for the carrot again, mixing up the bead finish. For the large carrot at the front I used a bright solid green seed bead. To make the carrots at the back less defined, I beaded them with a single row of beads and used a muted matte green seed bead.

How I Approached The Beading
I started by beading the carrot. I added made an edge of orange beads to outline the shape and then added the beads in straight lines to fill the shape.
Again, I added the beaded border first, before adding the sky or soil. Beading in this order (boarder then filling in) made it very difficult as I had to make every bead fit that shape and into the space available. I should have added the boarder after the beading each section.
Most of the beading was kept in simple rows but the carrot tops provided their own challenge. I wanted the beaded carrot tops to actually look ‘fluffy’. This was because I wasn’t sure I could make it look anything like a carrot if I beaded them flat. I could try to describe here how I did it but honestly I don’t think it would make much sense. I hope the picture below clarifies what I mean by fluffy tops!

Making The Polymer Clay Frame
Out of the whole project this was the easiest part. I started by putting the back side of my bead work (I had cut the excess Lacy’s Stiff Suff off at this point) and used a blunt tool to make an outline. I then cut this less than perfect oval out of the clay with a craft knife.
I rolled out another sheet of black clay and placed the one with the oval cut out on top. I then cut a larger oval to make the frame. I used a silicone flower mold to shape the flowers. I added a little liquid clay onto the frame as I didn’t want to have to push the flowers down and risk distorting them.
I added tiny balls of clay to fill in the gaps and then dusted over it with a bronze mica powder. Once it was out of the oven I varnished it and then glued the carrot beading into the frame.
Bead Embroidery Carrot and Frame Video
What is the most bizarre thing you have crafted? I’m sure over time I will make many more items that seem odd to others but that fulfill that creative itch. Art is subjective after all and to me, this beaded carrot embroidery is a little masterpiece.
Hannah x

