

Please note that this post contains affiliate links. Such links are clearly marked.

I am still keeping things summery with this week’s polymer clay tutorial but thought I would show a technique that I haven’t shared before; Mokume-Gane.
What is Mokume-Gane
Mokume-Gane is a Japanese decorative metalworking procedure, thought to have been created 300 years ago, initially used to decorate samurai swords.
In Mokume-Gane sheets of contrasting coloured metals are fused together and then worked in various ways to produce a mixed metal finish. The result is a metal laminate to be used on decorative objects.
Mokume-Gane translates to ‘wood eye’ or ‘wood grain’ as worked metal takes on the finish of a wood grain.
I found that The Met has some really interesting information on Mokume-Gane and, if you are interested, towards the bottom of the page have short videos showing how the technique is used in metal Mokume-Gane.
For this tutorial though, I will obviously be using polymer clay to produce my Mokume-Gane jewellery pieces. The detail in the clay is achieved by pushing tools into a stack of different colour clay layers which results in the layers of clay being dragged down into the clay stack. These impressions create interesting movement and patterns in the clay.
This technique is one where you really have to trust the process because, until the clay is sliced, there is no way to see what is happening further down in the clay stack.
What you will need –
Translucent polymer clay
White polymer clay
Two different blues of alcohol inks (I used Stream and Sailboat Blue both by Adirondack)
I also used Perfect Pearls in the colour interference blue
A wavy cutting blade
A flexible blade
Ball tools with different size ball ends
Acrylic roller
Although this tutorial is primarily on the Mokume-Gane technique, towards the end of the video tutorial I use a tool called the Pac-Pen with a really cute fish cutting shape (I must add that I bought all these products myself). I will link below for the Pac-Pen and cutting shape if you are interested. You will need to buy the Pac-Pen and then you can buy a huge range of interchangeable cutting nozzles to screw in. These cutting shapes are tiny making them perfect to use for jewellery making. I’ll also add a code for 5% off your purchase 🙂
Affiliate links – this just means that I receive a small commission on purchases made at no extra cost to you –
Don’t forget to use the discount code for your 5% off!
Discount code – THEARTISANDUCK

How To Make an Easy Polymer Clay Mokume-Gane Ocean Background

Step 1 – Condition some translucent clay and separate it into 3 pieces ( you can use cutting shapes to ensure you have a even amount them). Condition some white clay and portion off into the same quantity as in one of the three translucent pieces.
Use your alcohol inks to tint the translucent clay, one colour per piece and if you wish, add Perfect Pearls to the third translucent piece. To add the alcohol inks, just add a tiny dot onto the clay, leave it to dry a little and then mix in.
You should now have 4 pieces of clay with a distinct colour difference. Roll them by hand or on your clay machine (number 3) whilst trying to make them roughly the same shape.
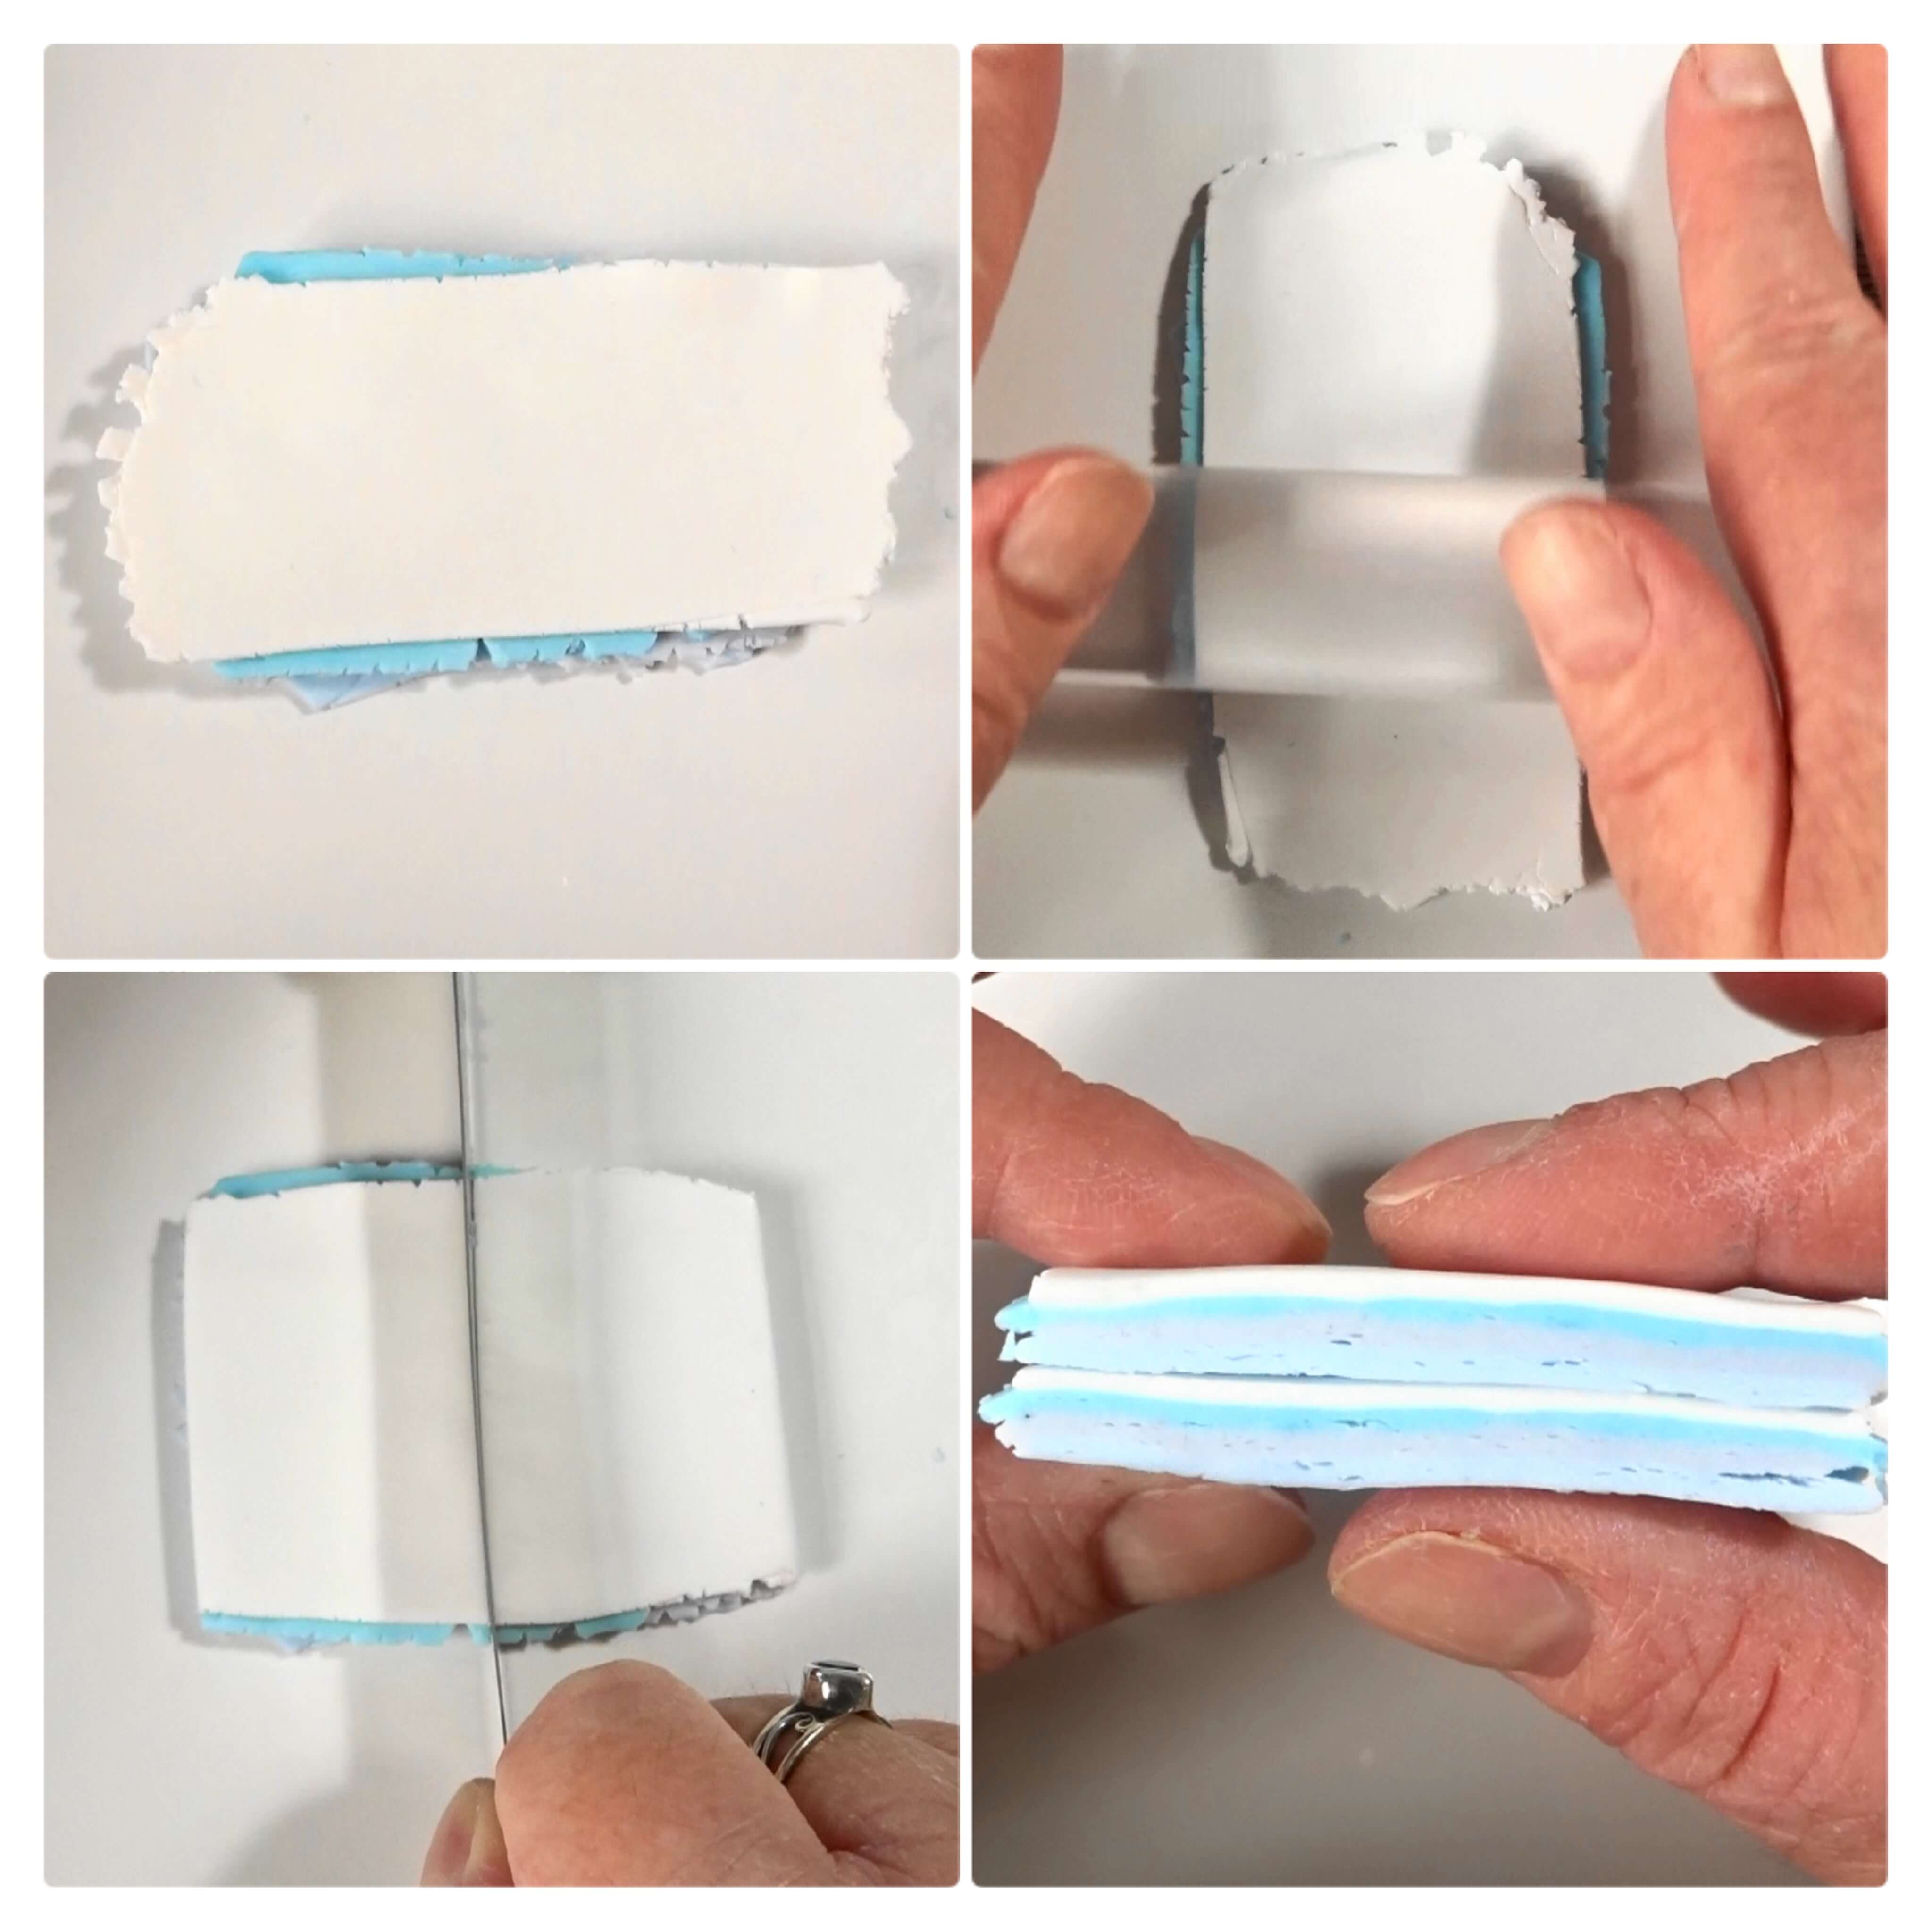
Step 2 – Layer your clay up. I put a translucent with alcohol ink on the bottom, followed by the translucent with the perfect pearls, then the last translucent with alcohol inks and lastly, the white clay.
Roll over this clay stack and cut in half. Lay on section on top of the other so that the colours repeat in the same order.

Step 3 – Roll over the clay stack again to roll it thinner and to ensure those clay layers are well stuck together.

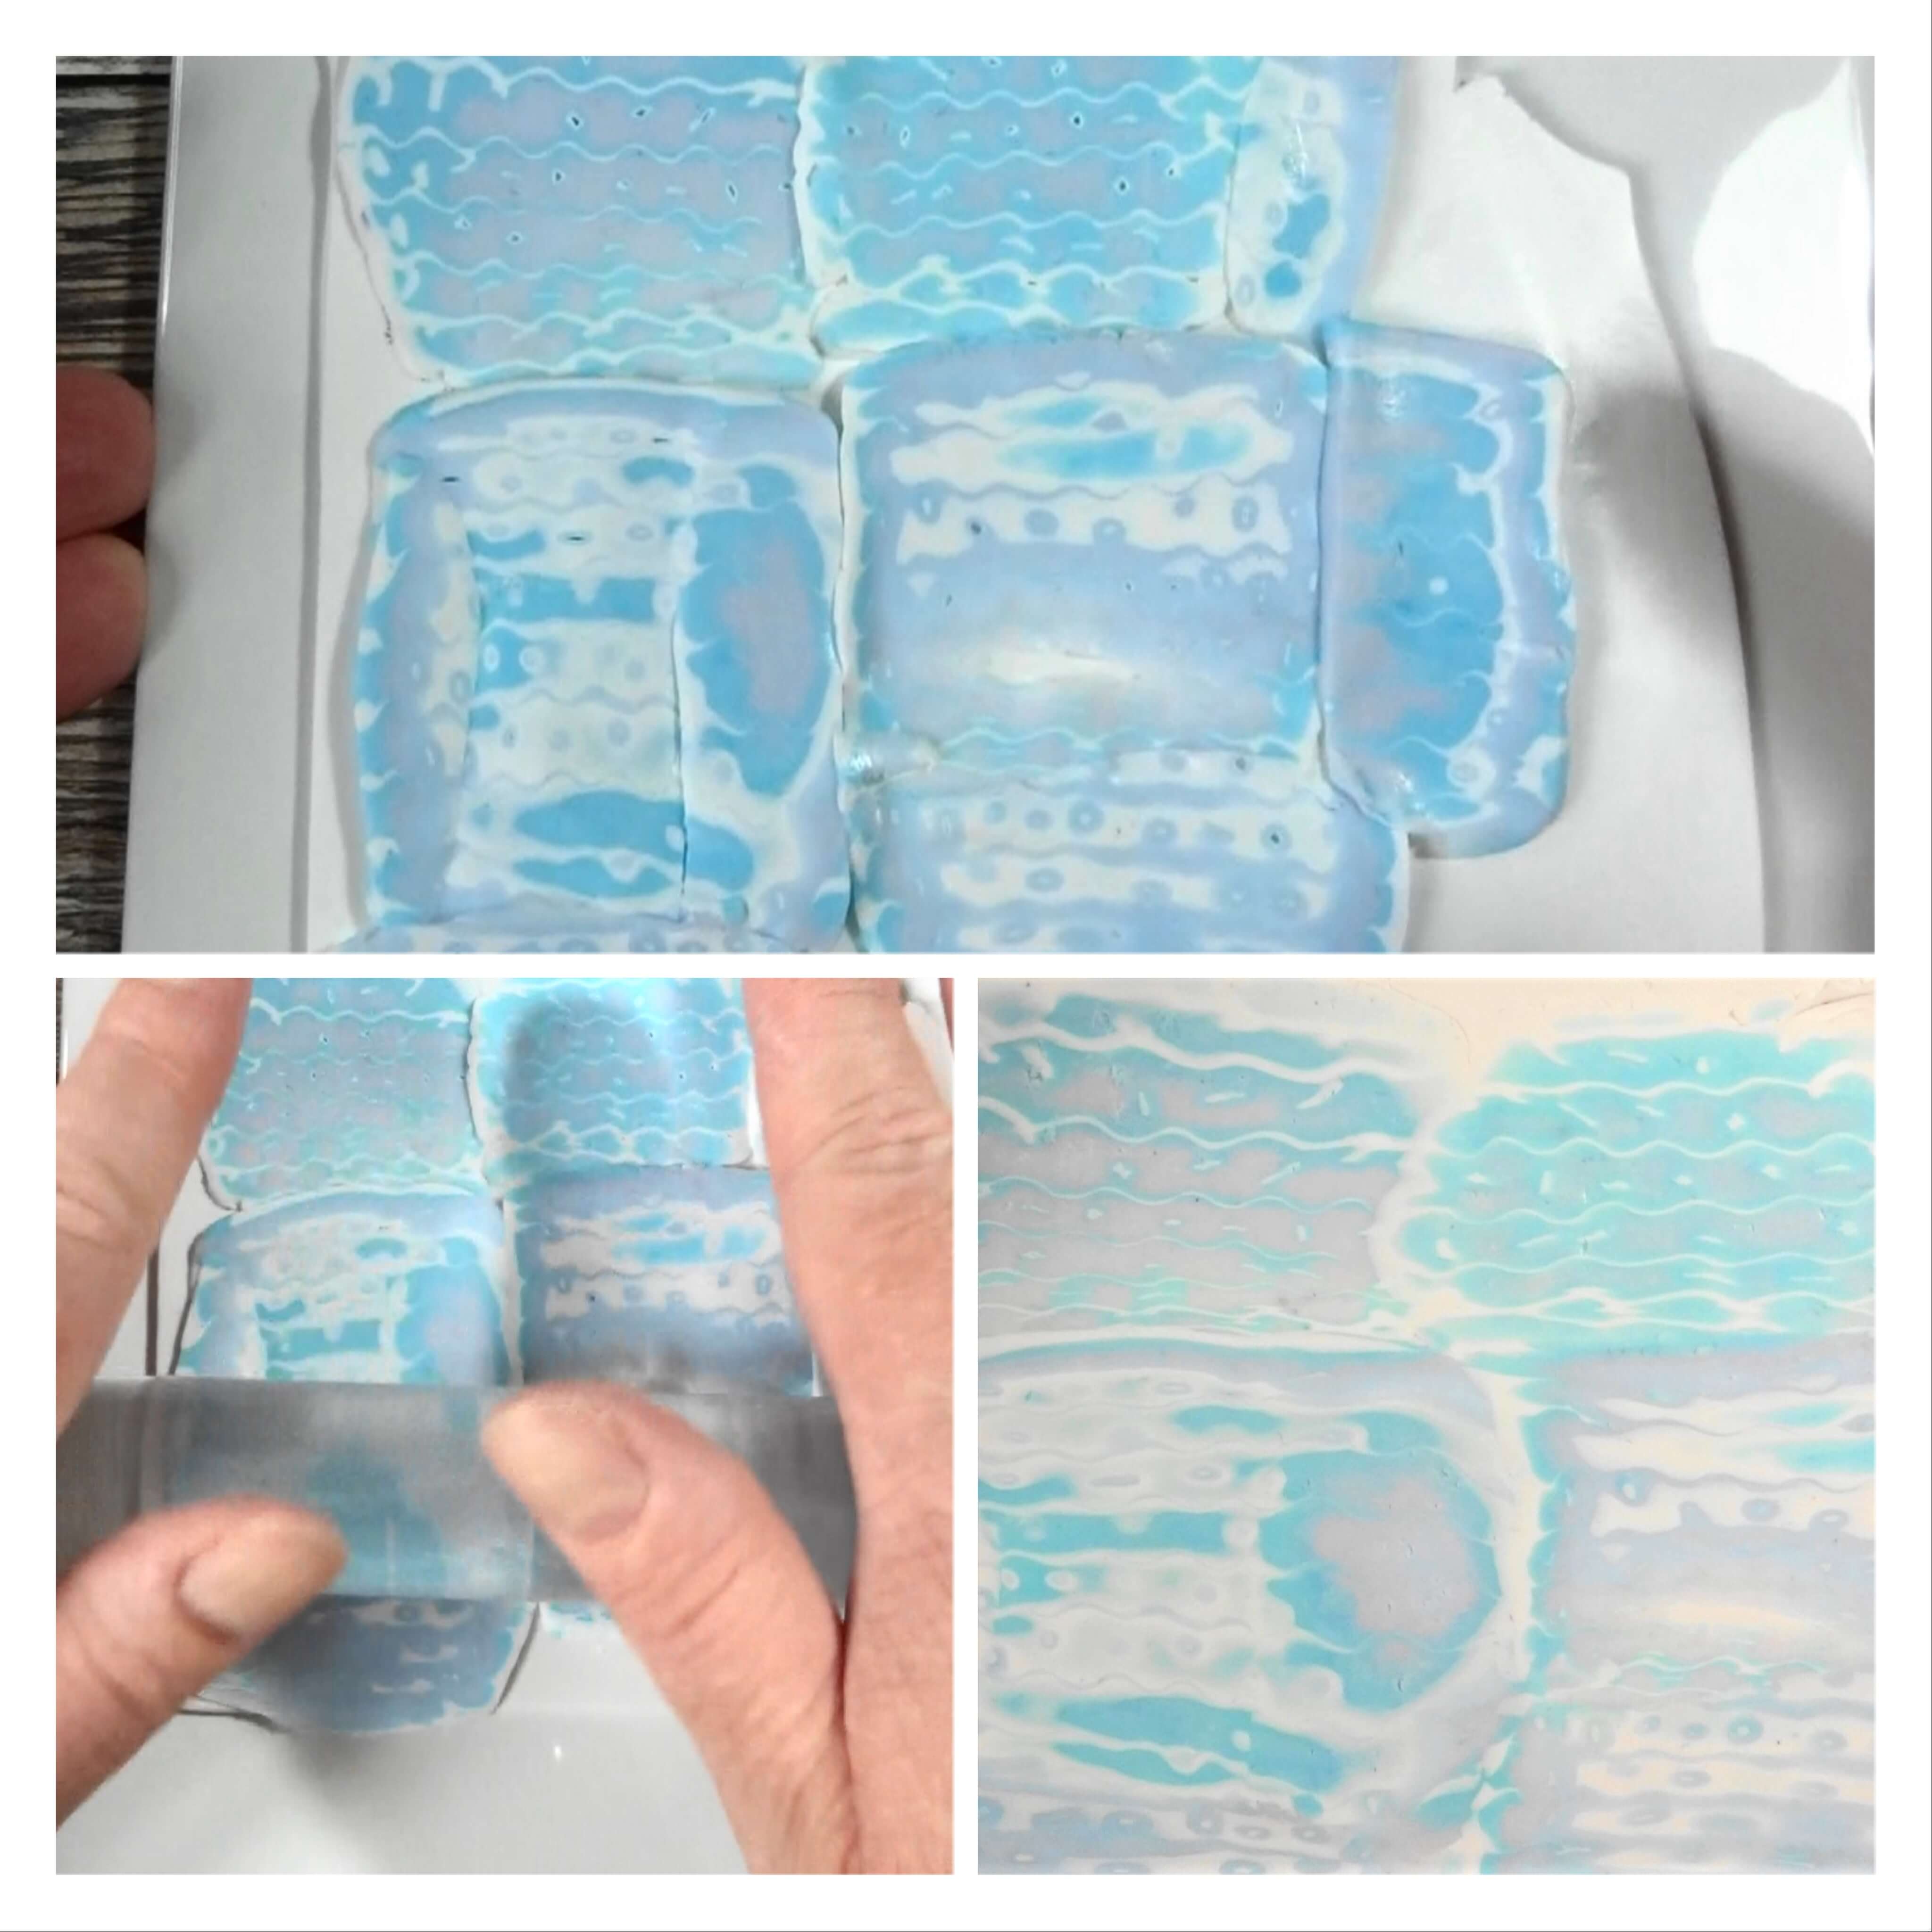
Step 4 – Push your wavy cutting blade all the way down the length of the clay. It is fine to cut through the stack completely as you can squeeze the clay back together. I used the dull side of my blade as I really wanted to drag those layers down but if you do this please, please be very careful.
Pick your clay up and squeeze it back together. Use two different size of ball tools to add futher detail into the stack of clay.
You have now created a wave and bubble effect.

Step 5 – Gently squeeze the clay so that the stack gets thinner and some of those holes fill up and then roll the clay with your acrylic roller (do not put it through your clay machine or the effect will be squashed too flat for the next step).
Make sure your clay is well stuck down to your surface and use your flexible blade to cut thin slices. This is the exciting bit as it is the first glimpse of the patterns you created.
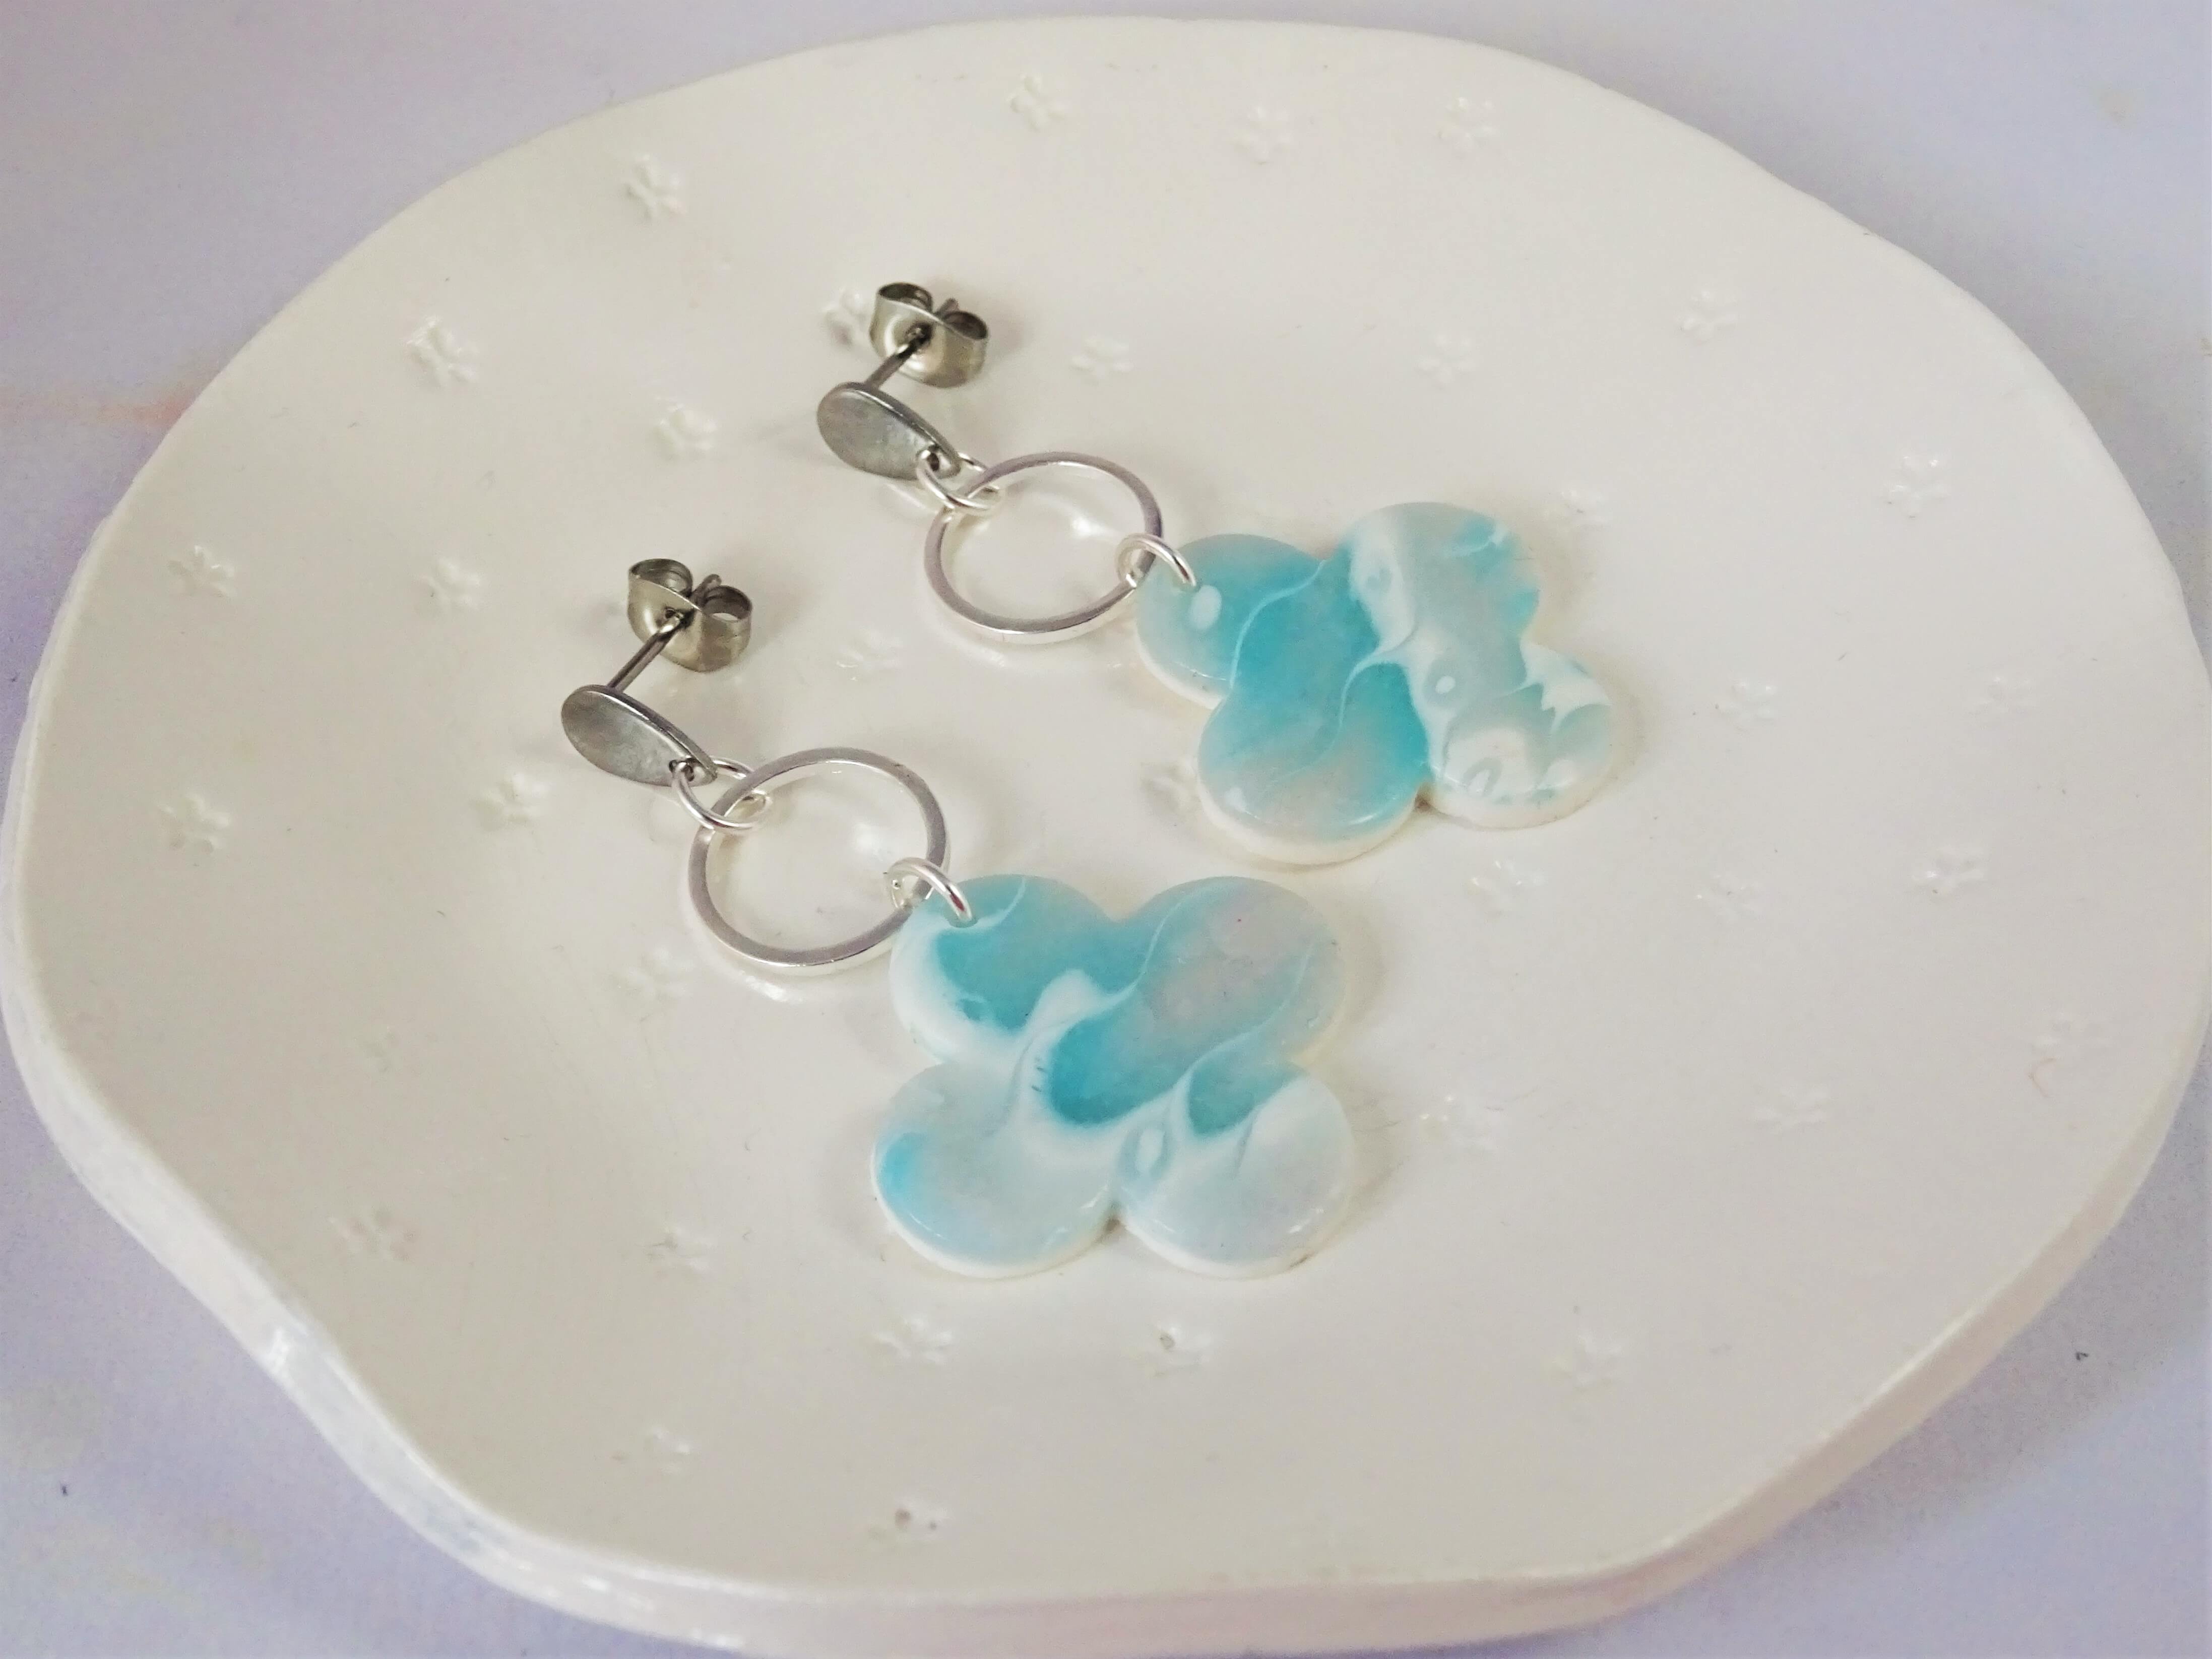
Step 6 – Condition more white clay and roll it through on a number two or three. Lay your pieces of Mokume-Gane onto the white clay and roll over with your acrylic roller until the clay is an even height.
If you want to reduce the thickness of the clay even further you can roll the clay veneer through your clay machine but this will stretch out the design to be careful which way you put it in the machine. I rolled mine through length ways so that it stretched the wave detail further along.
Step 7 – Use your decorated clay in all your various projects. I have made all mine in to jewellery. You can see from the earrings above that by using white along with the translucent shades of blue, there is a real sense of watery movement in the pieces. It reminds me of when the wave crashes on the beach.

These earrings really show off the bubble effect created with the ball tools.
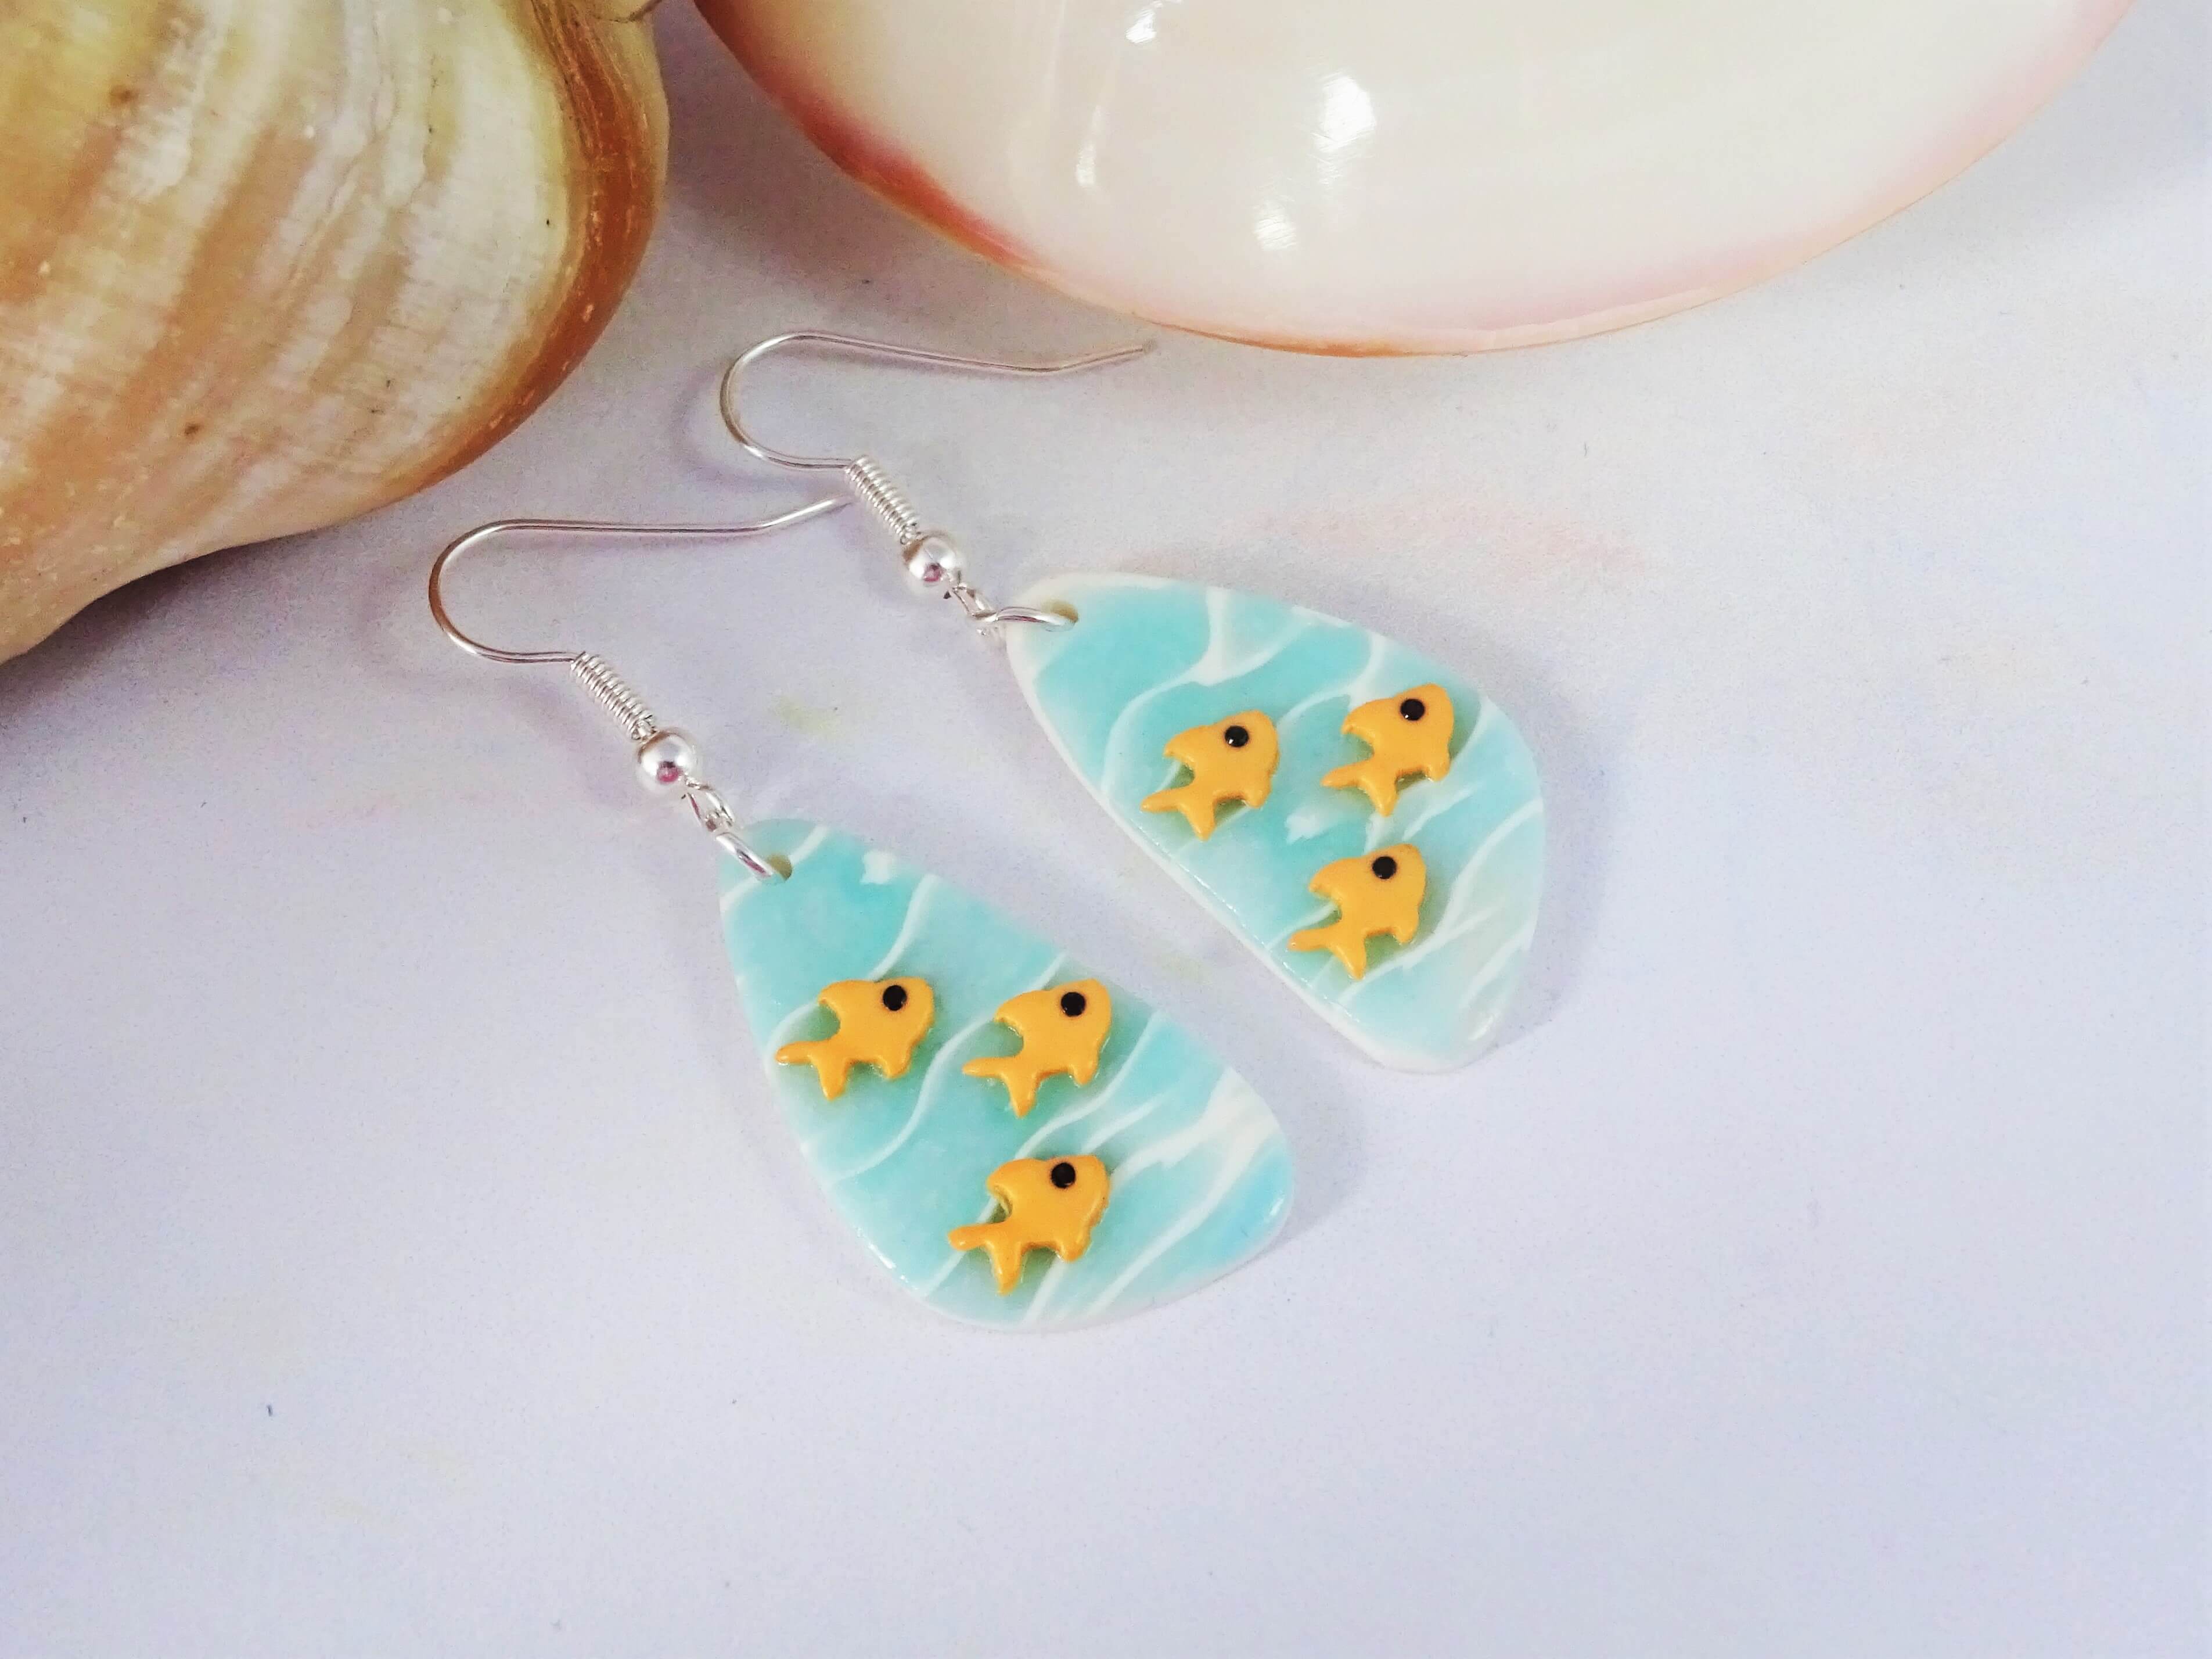
These earrings highlight the wave motion.
I have shown briefly in the YouTube video how I made those little fish so do check it out if you are interested.
Whilst this is the first Mokume-Gane tutorial I have shared, there are plenty more polymer clay tutorials to get your teeth into from easy flower canes, to pretty extruder flower slabs and vintage looking books.
I would love for you to follow along with me by subscribing.
Thanks for reading, see you again soon,
Hannah x


Leave a comment