


Step into the world of coastal serenity with the mesmerizing Peyote Star bead pattern, where each delicate stitch transforms your Delica beads into miniature works of art. In this post, we will briefly discuss how to make a Peyote star, explore the captivating elements of the coastal pattern, and guide you on the beads and tools needed to bring this design to life. Join us as we uncover what is included in this bead weaving pattern and where you can purchase it.
Table of Contents
- A Brief Overview Of How To Make A Peyote Star
- Exploring the Elements of the Coastal Peyote Pattern
- Beads and Tools Needed for the Peyote Star Pattern
- What Is Included In the Peyote Bead Weaving Pattern
- Where To Buy The Peyote Star Pattern
- Short Video Of The Peyote Star
A Brief Overview Of How To Make A Peyote Star
To truly appreciate the beauty of the Peyote Star bead pattern, it is essential to understand the technique behind the Peyote stitch. This versatile beading technique involves weaving beads together in a zigzag pattern, creating a piece of bead work perfect for intricate designs like the coastal theme of the Peyote Star. Understanding how to execute the Peyote stitch is crucial in bringing the stunning details of this pattern to life.
If you are new to Peyote stitch I have some easy Peyote tutorials that are perfect to get you started. You could start with a Peyote triangle tutorial which works the peyote stitch around to form a triangle piece of beading (this is a similar technique to the warped squares needed for this Peyote star project) or something cute like a Peyote rabbit, Halloween Peyote Pumpkin or Peyote Snowflake tutorial.
In order to make a Peyote star you need to bead 5 warped squared following the pattern and once all 5 warped squares are beaded, they are then sewn together to form the star.
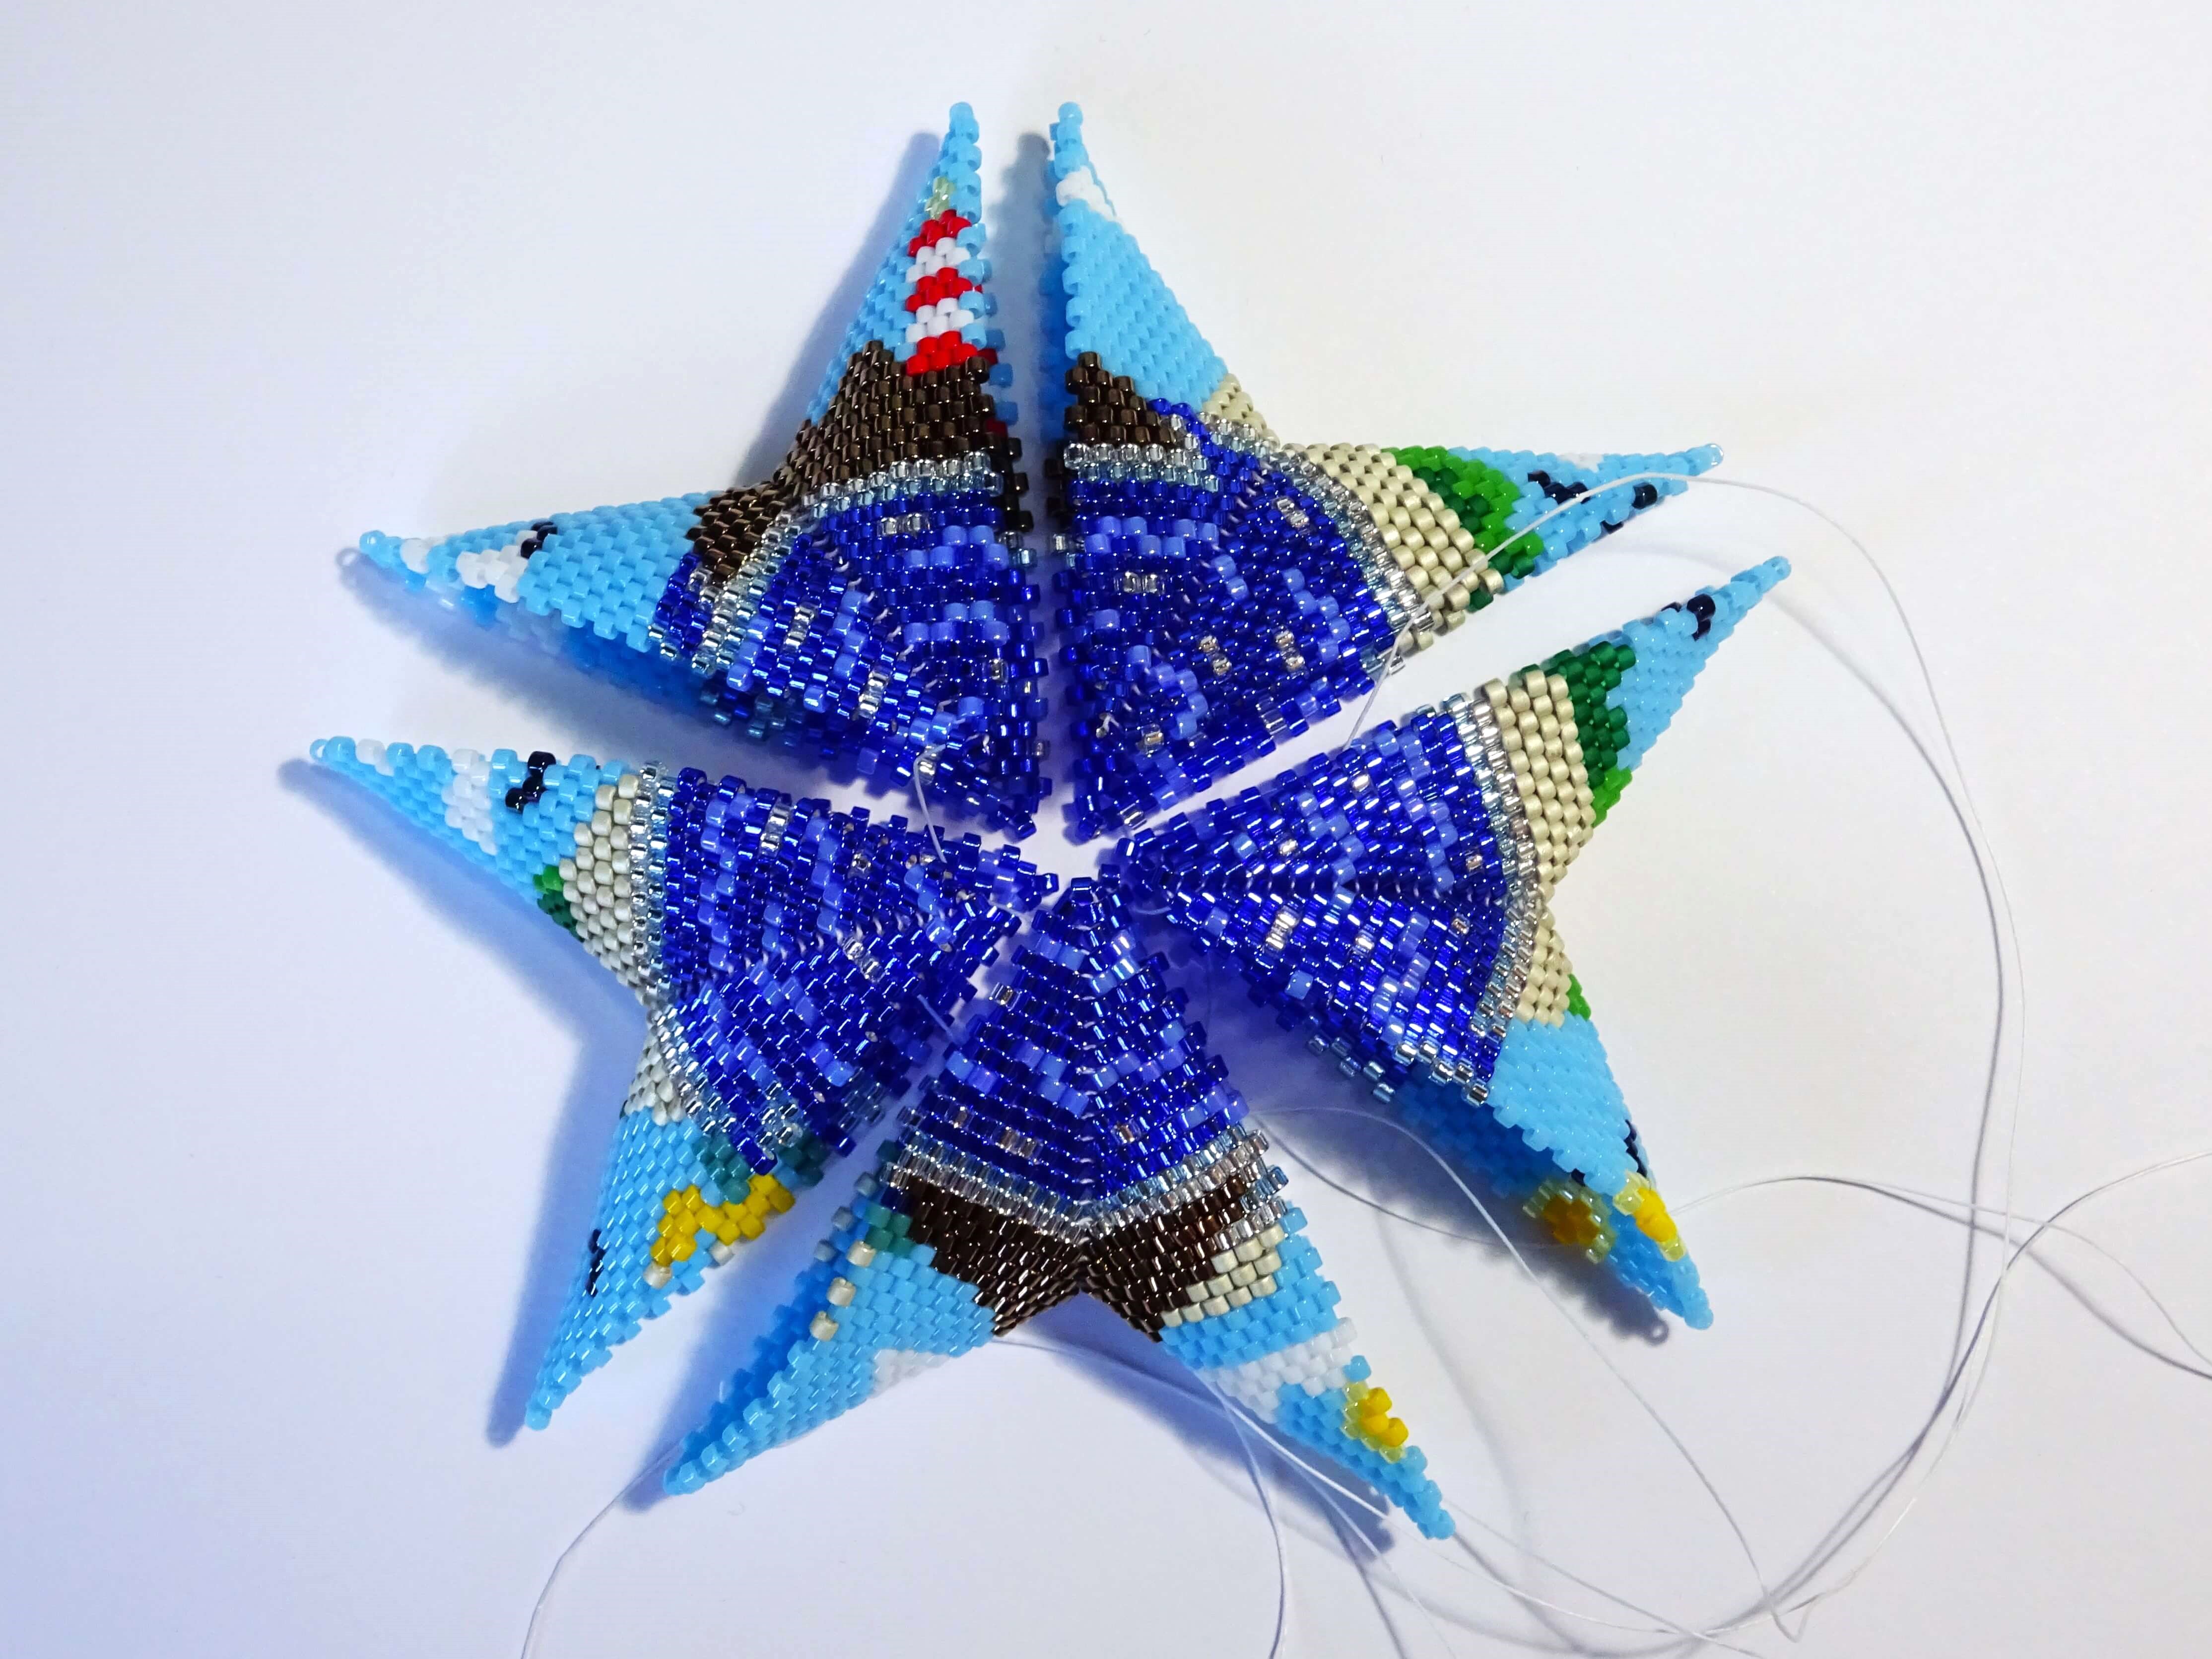
Above is a quick picture I snapped for my social media of all 5 finished warped squares. I left the threads on so I could use these to sew all the pieces together. This avoided the need to tie more knots than needed in the beading ( I will do anything to minimise how many knots I have to tie!)
Once 4 of beaded warped squares are connected it looks like the gap for the fifth is too big but believe me, they all fit together perfectly. The pattern is also written so that when you are connecting the warped squares no extra beads need to be added; it will all fit together seamlessly.
Exploring the Elements of the Coastal Peyote Pattern
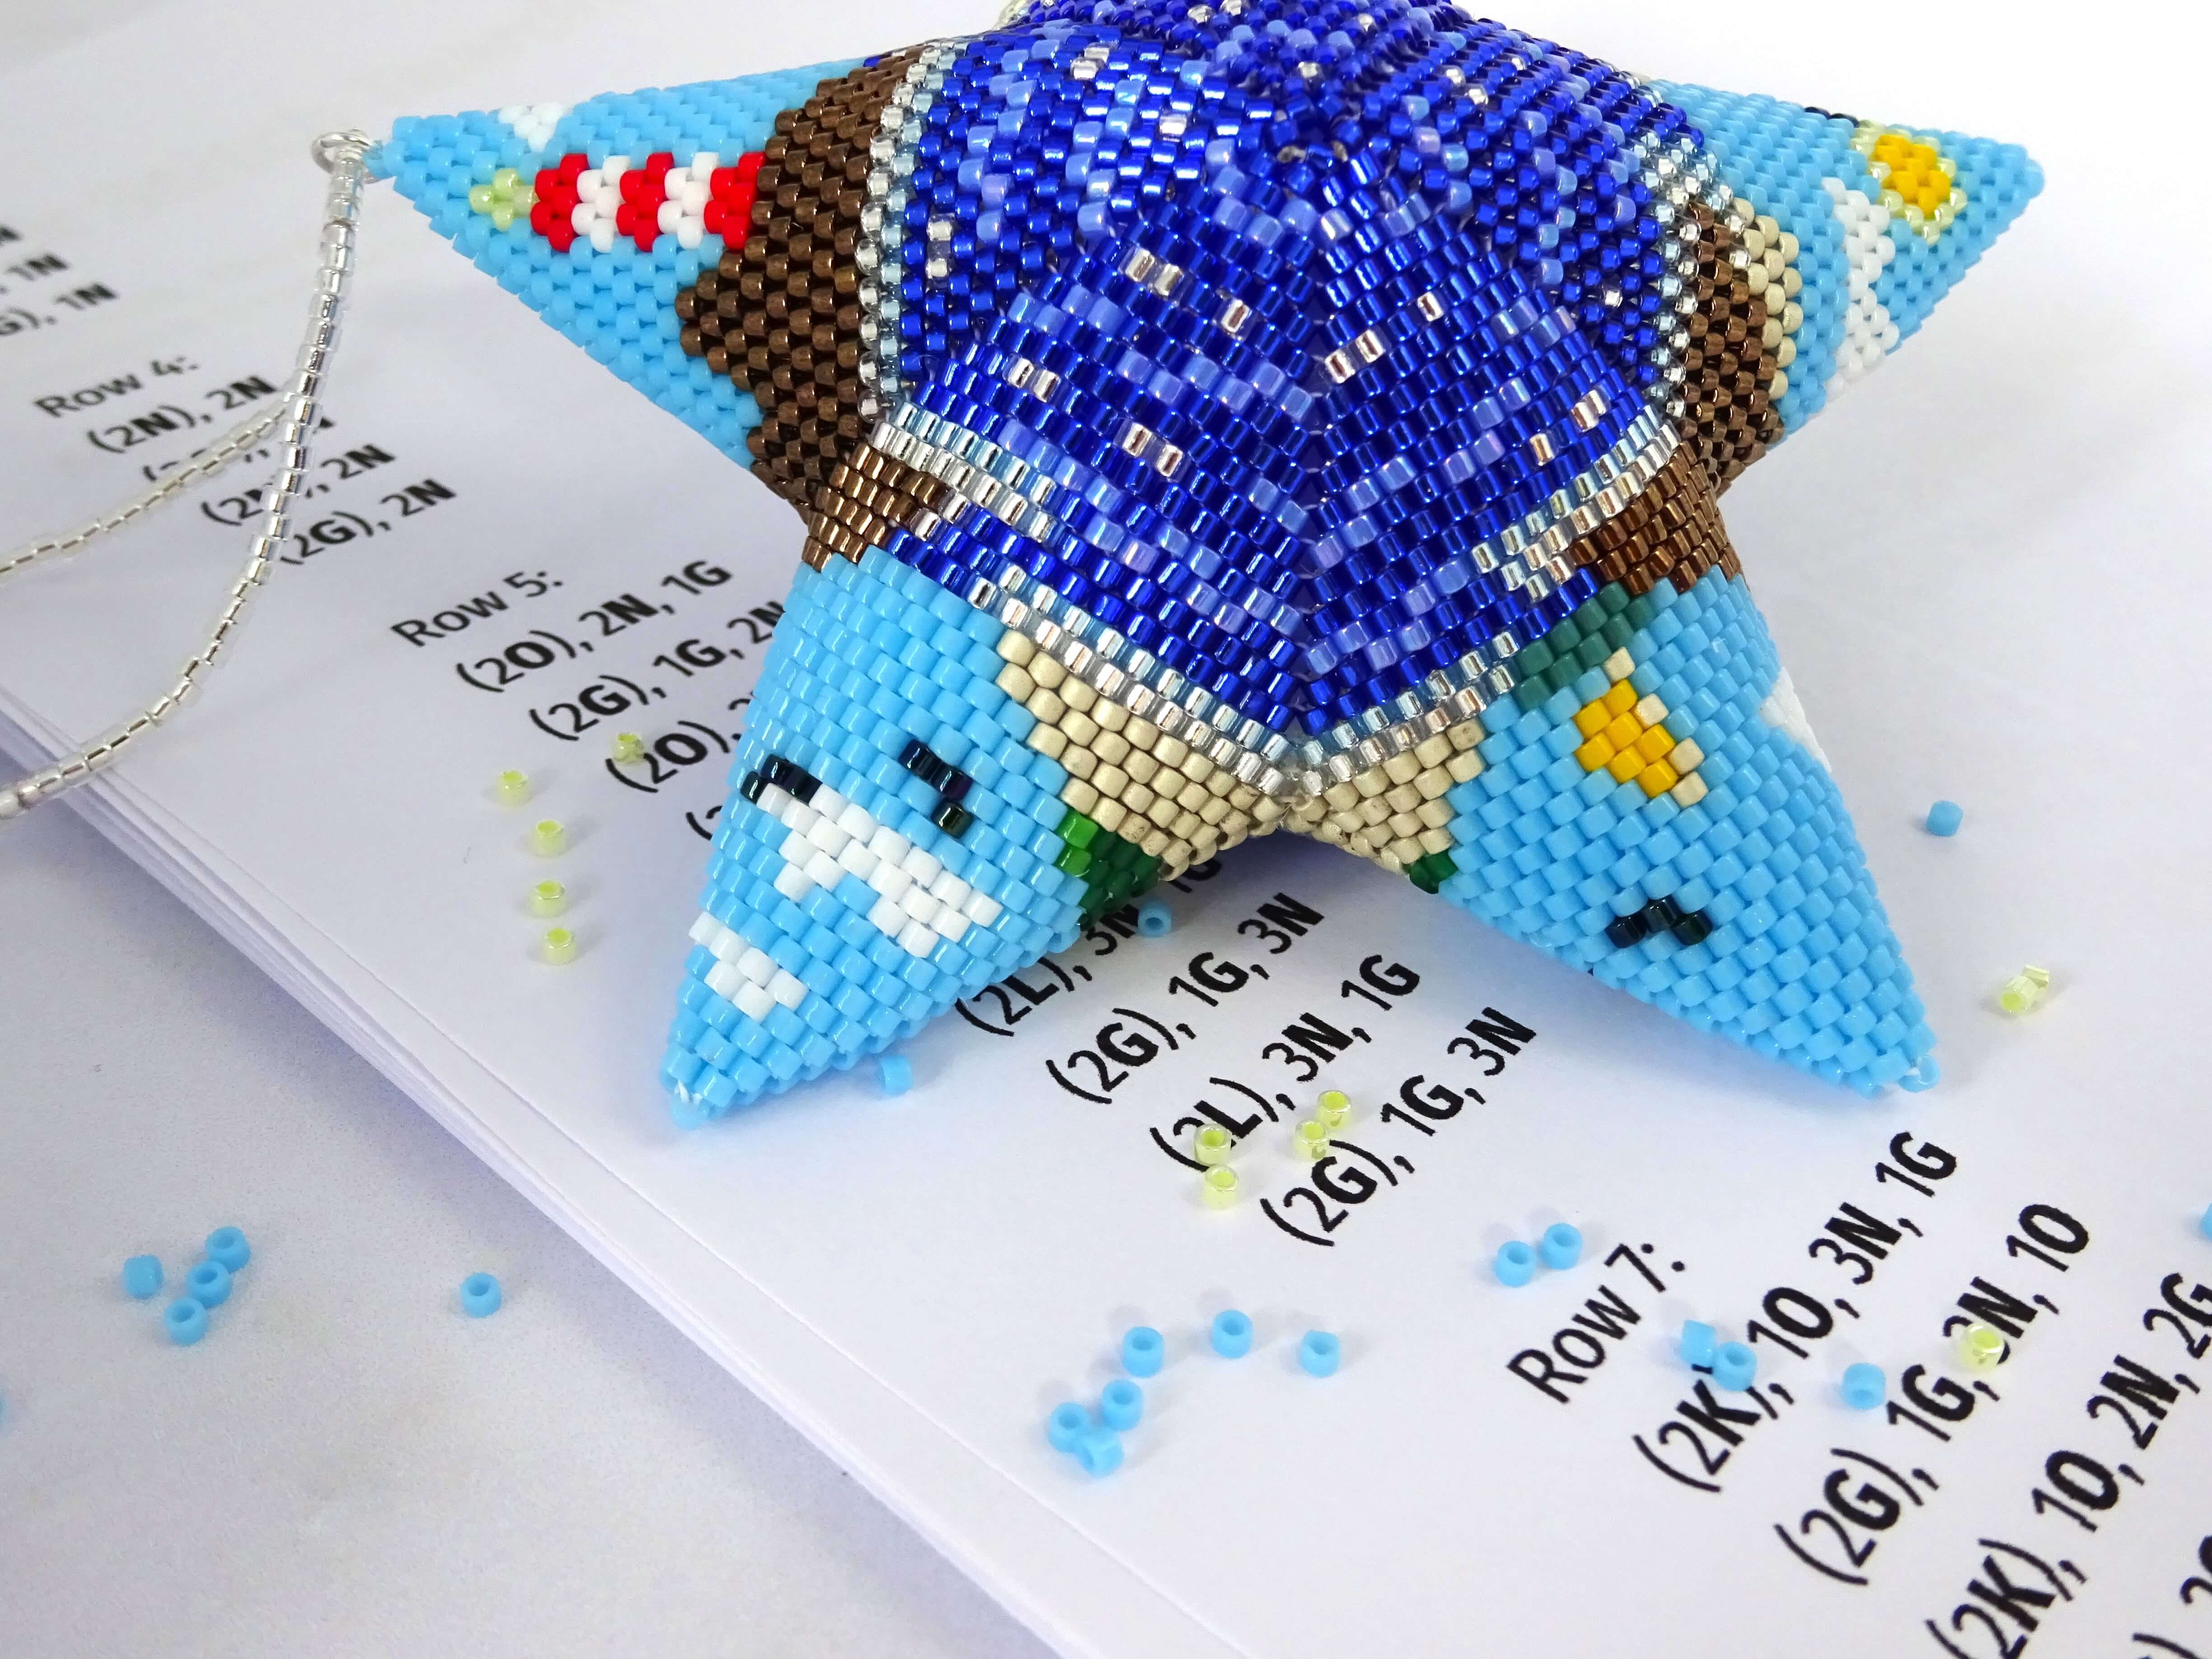
The coastal theme of this bead pattern is inspired by the natural beauty of the ocean and shoreline. At the top of the pattern is a distinctive light house on a rocky cliff. The cliffs are echoed around the whole star with greenery to add more depth and dimension to the beading. The pattern features shades of blue and silver to mimic the colours of the sea and to add movement to the water. Intricate details such as birds, clouds, a sun and even a boat are added to evoke bright sunny days. These elements come together to create a stunning and dynamic pattern that captures the essence of the coast.

This attention to detail makes this bead weaving pattern a truly special and unique project for beaders of competent skill levels.
Beads and Tools Needed for the Peyote Star Pattern
To bring this pattern to life, you will need a variety of Delica beads and tools.
The size 11 Delica Beads you will need for this stunning coastal design are:
- Opaque Light Sapphire (DB167)
- Opaque White (BD200)
- Pale Yellow Pearl (DB232)
- Matte Galvanised Silver (DB335)
- Opaque Pea Green (DB724)
- Matte Emerald Green (DB767)
- Opaque Light Blue (DB727)
- Opaque Light Siam Red (DB727)
- Opaque Canary Yellow (DB1132)
- Duracoat Opaque Eucalyptus (DB2131)
- Dark Sapphire (DB047)
- Silver Lined Light Blue (DB044)
- Blue Iris (DB002)
- Metallic Bronze (DB022)
- Silver Lined Crystal (DB0041)
These beads are a suggestion and if you have other colours, like blue, red, green or yellow that you feel would work well then you can substitute with those if you would like. I would suggest keeping a mix of opaque, metallic and silver lined finishes though as the contrast between them adds a lovely finish to the piece.
Additionally, you will need beading thread and needles and a beading mat or tray will help keep your work organized and prevent beads from rolling away as you create the Peyote Star design. To finish your star, you will need some toy stuffing to fill it out and give a 3d finish.
With these beads and tools in hand, you will be ready to embark on this exciting bead weaving project that aims to capture the beauty of the coast.
What Is Included In the Peyote Bead Weaving Pattern
Included in this pattern is –
- Images of the front and back of the design.
- Images of 5 warped squares.
- A bead list with symbols and bead count.
- A word chart for each warped square.
Where To Buy The Peyote Star Pattern
If you are interested in purchasing this Coastal Peyote Star Pattern, it is available in my Etsy shop. Once you have completed the order you will be able to download it and start beading. This beading project is perfect for beads who love the ocean or those looking for an creative Summer project.
Prior knowledge on how to make a Peyote star is necessary though as this is a pattern only.

Short Video Of The Peyote Star
Curious to see the Peyote Star pattern in action? Watch the short video below for a glimpse of me making this stunning coastal bead pattern.
Happy beading!
Hannah x

