
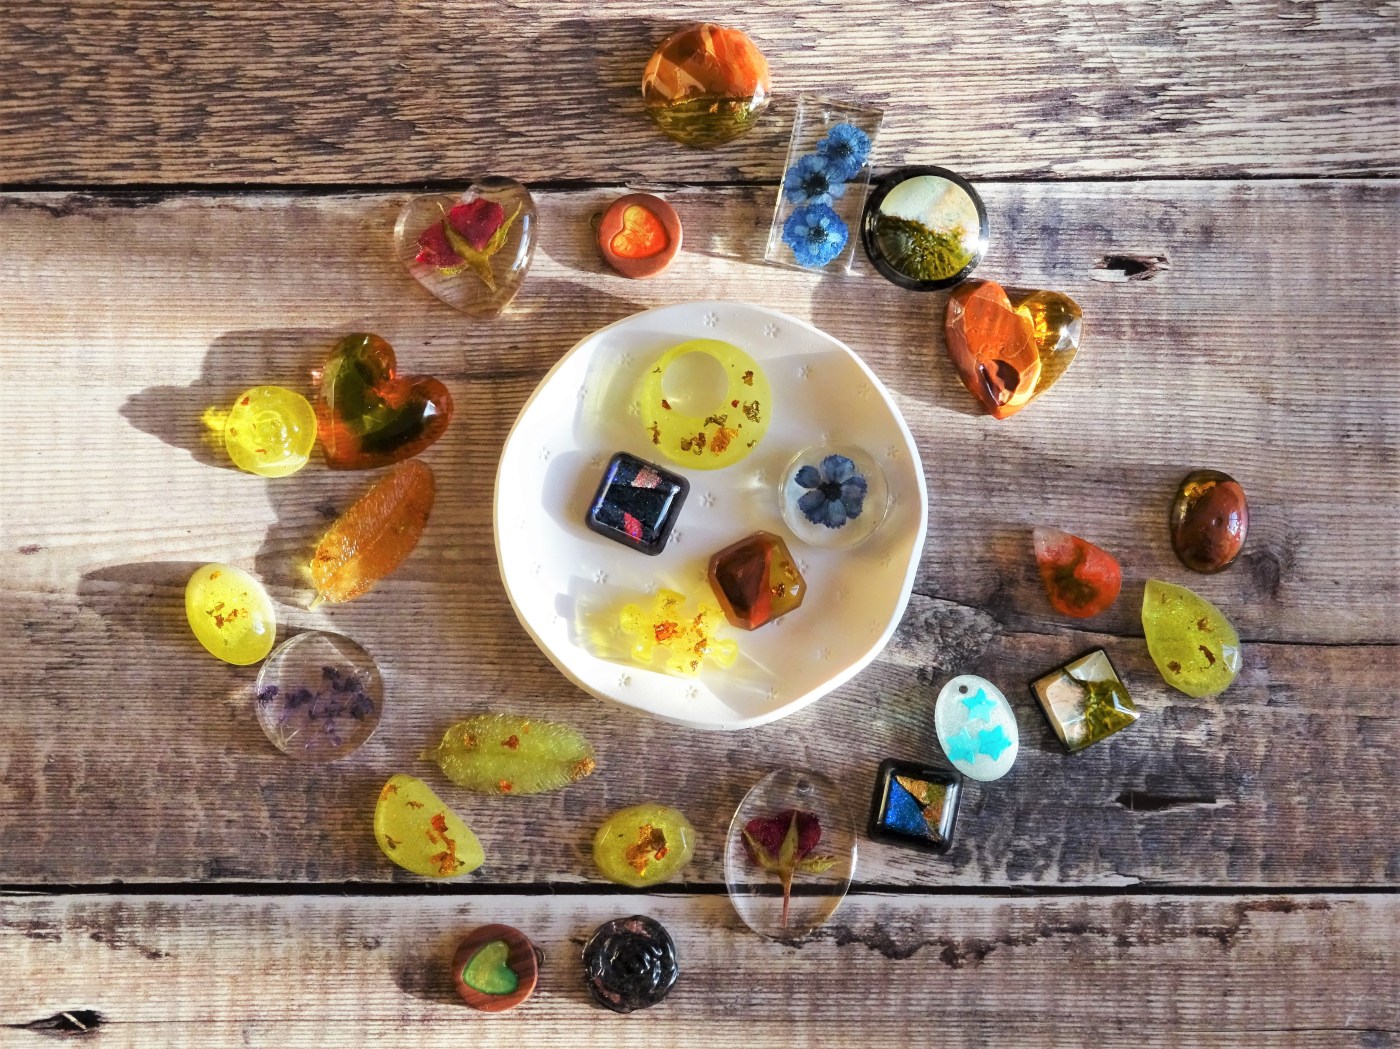

I fancied making resin jewellery components years ago but for some reason decided that it was too hard although I am not sure why. I felt the old curiosity creeping back up just after Christmas so bought some Gedeo Crystal Resin. After it arrived I waited for a few good kid free hours, pulled out what I wanted to use in the way of embellishments and spent a few happy hours playing.
This will be a super photo heavy post so I will just explain after each set of pictures what is going on.

My jumping off spot was dried pressed flowers. Simple enough but I did notice that the colour in the blue and purple flowers ran a little in the resin.
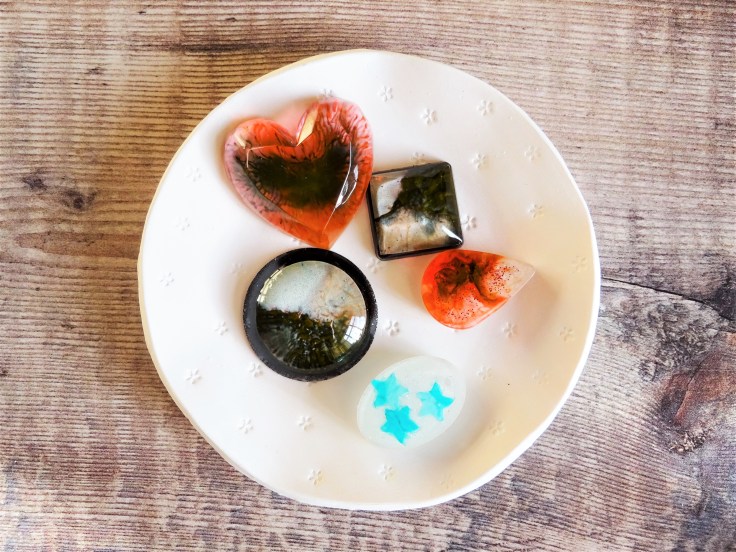

I then wanted to see how alcohol inks would react in the resin. The first thing to note is that the colour of the inks (I used the Ranger alcohol inks) altered in the resin. They made pretty fun patterns in the resin though. The heart and the teardrop pieces is where I filled my mould with resin and then added small amounts of ink. The other 3 pieces are where I put the alcohol ink on yupo paper and then cut out shapes to put in the resin moulds. The inks still changed colour and made a few swirly patterns in the resin.


Now these are kind of why I bought the resin in the first place and is something that I plan on revisiting and trying again with. Have you seen those gorgeous resin and wood necklaces before? The wood is smooth and matt and the resin is glossy. I wanted to try to create something along those lines but with polymer clay. I baked the clay in the shapes I wanted and then filled with resin and gilding flakes. The resin was tinted with a green alcohol ink before pouring as I felt that the more yellow shade would suit the clay colours I used. The resin covered the clay too with the added bonus that it made the metallic bronze clay look all shimmery. They are far, far from perfect but they look kind of cool.
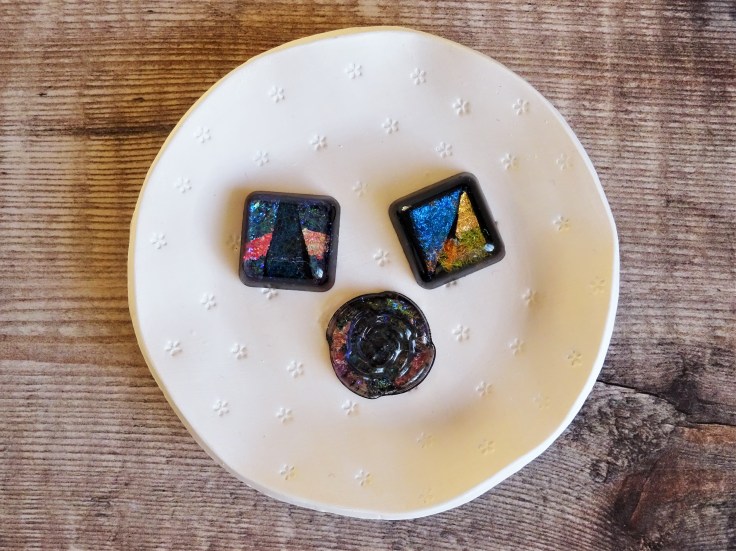

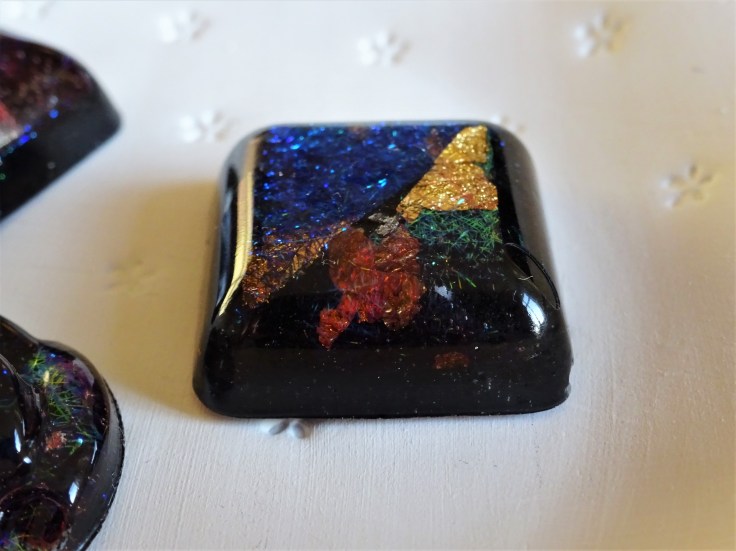
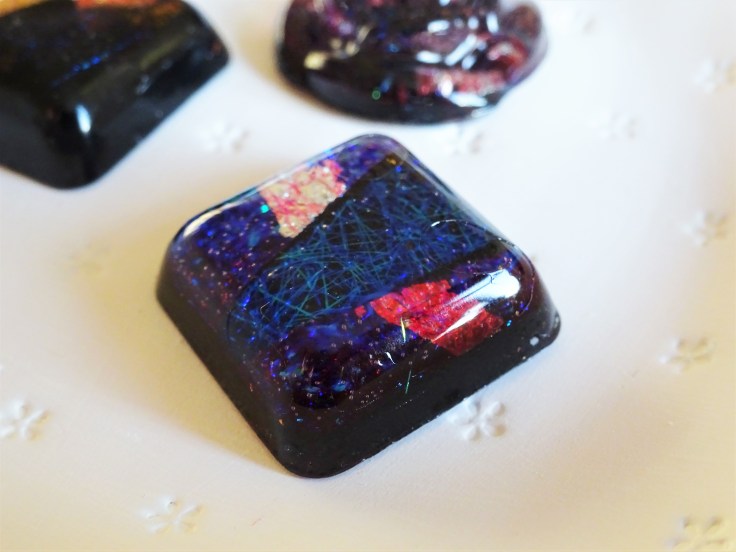
I was finding my feet now so attempted a faux dichroic glass affect. Soooo much fun. I have used Angelina fibres on one layer and then topped with resin tinted with black paint and black glitter. They look quite good in the photos but even better in real life.

I used the remaining green tinted resin to make these which simply have the green/yellow resin with gilding flakes on one layer and then topped with white tinted resin and crystal glitter. The only issue with some of these is that the resin set (probably because of the mould. I have 2 different types and this only happened in one of them) with a raised edge all the way around. Does anyone know if I can sand them down to make them less pronounced or do I need to top up with more resin?

I’m still trying to work out what to do with them but I have ideas.
The sun came out for these photos and I had fun playing with other experiments in the works. Did anyone spot anything else new?
The takeaway for the next time the resin bottles makes it out of the cupboard is that I need to learn patience and not keep sticking my fingers in to see if its ready!
Hannah x


It looks like you had loads of fun trying something new and they all look fab. The idea of putting dried flowers in is cute. Your ones with polymer clay in look a bit like Amber in the photos. I’ve never experimented with resin before so I don’t know if you can send it down though i imagine it might leave a les glossy surface. You made me laugh with your impatient prodding… But maybe your fingerprint on items gives them a unique selling point!
Ha ha, yes having my finger print in them would certainly make them unique. I worried that sanding them down could make them dull on the back – I may just mix a little more resin and top them up.
It was so much fun. I’m looking forward to trying again 😃
Topping up could work… As long as you don’t end up with another edge… But it’ll be worth a try. There’s a resin jewellery workshop happening near me soon, and seeing yours has made me tempted to sign up for it
Ooh do it, then you can report back to me! 😆
I’ve just sent an email enquiring about it! Thanks for the inspiration/motivation 😊
That’s great, so exciting. Let me know how it goes (if you get to go). It really is a lot of fun. I didn’t put any pressure on myself to make something spectacular so really just enjoyed the process. The pieces I ended up with were a real bonus 😃
That’s so cool.. And that’s what crafting should be about I guess. Why do we put so much pressure on ourselves?! 🤔
Silly isn’t it but yes it is easy sometimes to get stressed about the result rather than enjoy the process!
I do the same 😳
These look great. I am amazed by your creativity. 😄❤
Thank you so much 😃
Oh what a fabulous play time!!
The ‘dichroic glass’ squares – if you could get two little squares which (kind of) looked like twins – they’d make lovely earrings Hannah
I like them all. For various different reasons.
The new thing … the white clay dish? Is it air dry clay? Love the little daisy impressions you’ve stamped into the surface!
GREAT makes, and FABULOUS post Hannah. Love all the photos.
Sending squidges ~Cobs. xxx
Thank you Cobs 😃 I had so much fun. The faux dichroic glass is by far my favourite at the moment and love the idea of making earrings from them. Mia-matched earrings are really trendy at the minute so I can’t make them look similar I may get away with it 🤣
Well spotted on the white dish. I felt that my photo props needed something new so made some little dishes from Fimo. I totally messed up though thankfully it doesn’t show in photos. I may make more as a back up for craft fairs so I expect a blog post featuring them will be written soon! Hxx
Doesn’t look in anyway messed up Hannah. Well done with it. It’s fabulous! ~ C xxx
These are terrific! I was surprised about the flowers running… I wonder if they were dyed. I just started playing with my Pebeo Gedeo resins last week… I used the glazing resins to cover some hat pins I’d used with their Fantasy and Moon paints for an agate kind of look. (Blog post in the future.) Now that I’ve seen your post, I’m excited to try that faux dicrhoic look!! I got to play with dichroic glass once and wish I had easy access to try it again. But these look just as cool! I’d be interested to know if you had any trouble keeping the Anglina fibers in their place. Also… did you let the clear layer dry before adding the black? Thanks for the fab inspiration!!
Thank you. I was surprised about the colour in the flowers running but like you, I suspect they had been dyed. Ooh, I have some of the glazing resin to use over polymer clay and pebeo Fantasy paints but I’m yet to use it. I look forward to seeing what you made with it.
The faux dichroic glass ones are my favourite. I cut pieces from a sheet of Angelina fibres from a sheet that I had ironed together (I keep reading that back and I have no idea if that makes any sense!) and then put them in the resin moulds. They moved around a little but not too bad although I did notice in one in particular that it looked as thought the pieces of fibres were in different levels of the resin. Gave it a cool look of depth thought. Yes, I waited 24 hours for the clear layer to dry and then topped up with the black layer.
Glad you feel inspired with it 🙂
oh wow, these are amazing! i think I inherited a resin kit from my mum, I have to dig it out at some point
Thank you 😀 Dig it out and have a go – it was so much fun.
This is great and has definitely inspired me to try new things with resin! Thanks
Hi Lisa, glad it was of some interest 😀