
Please note – there are Affiliate links for products used in this tutorial at the bottom of this blog post.
I’m the type of crafter who is always looking for the next technique to try. I would estimate that approximately 99% percent of the time that I am not sat at my clay desk making I am dreaming up new projects.
I had a child free day this weekend and just sat at my desk to attempt one of the projects I had recently thought of. I knew straight away the look I was going for – faceted stones with a gem stone type finish all wrapped up in a pretty flower brooch – and I had the perfect tool for the job… The cheapest little silicone mould I had bought on amazon on impulse years ago but never actually got around to using. It means that making these faceted stones is super simple and very quick.
Right, I’m sure you are here for the actual tutorial and not me rambling on so I’ll get to it.
If YouTube tutorials are more your thing then scroll down to the bottom of the post for the video tutorial.
How To Make Polymer Clay Faceted Stones And Flower Brooch Tutorial
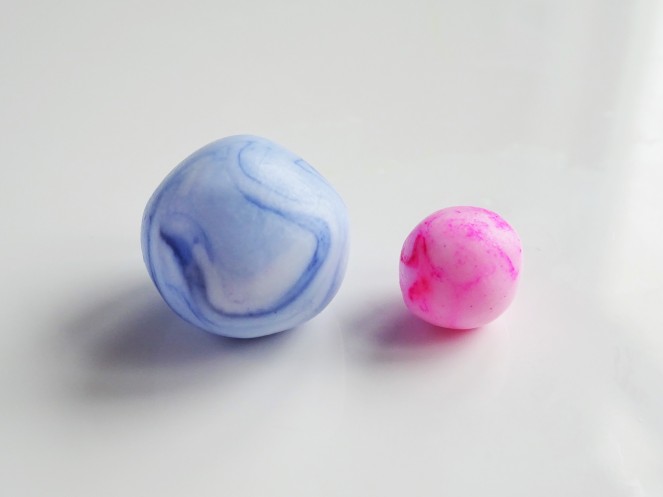
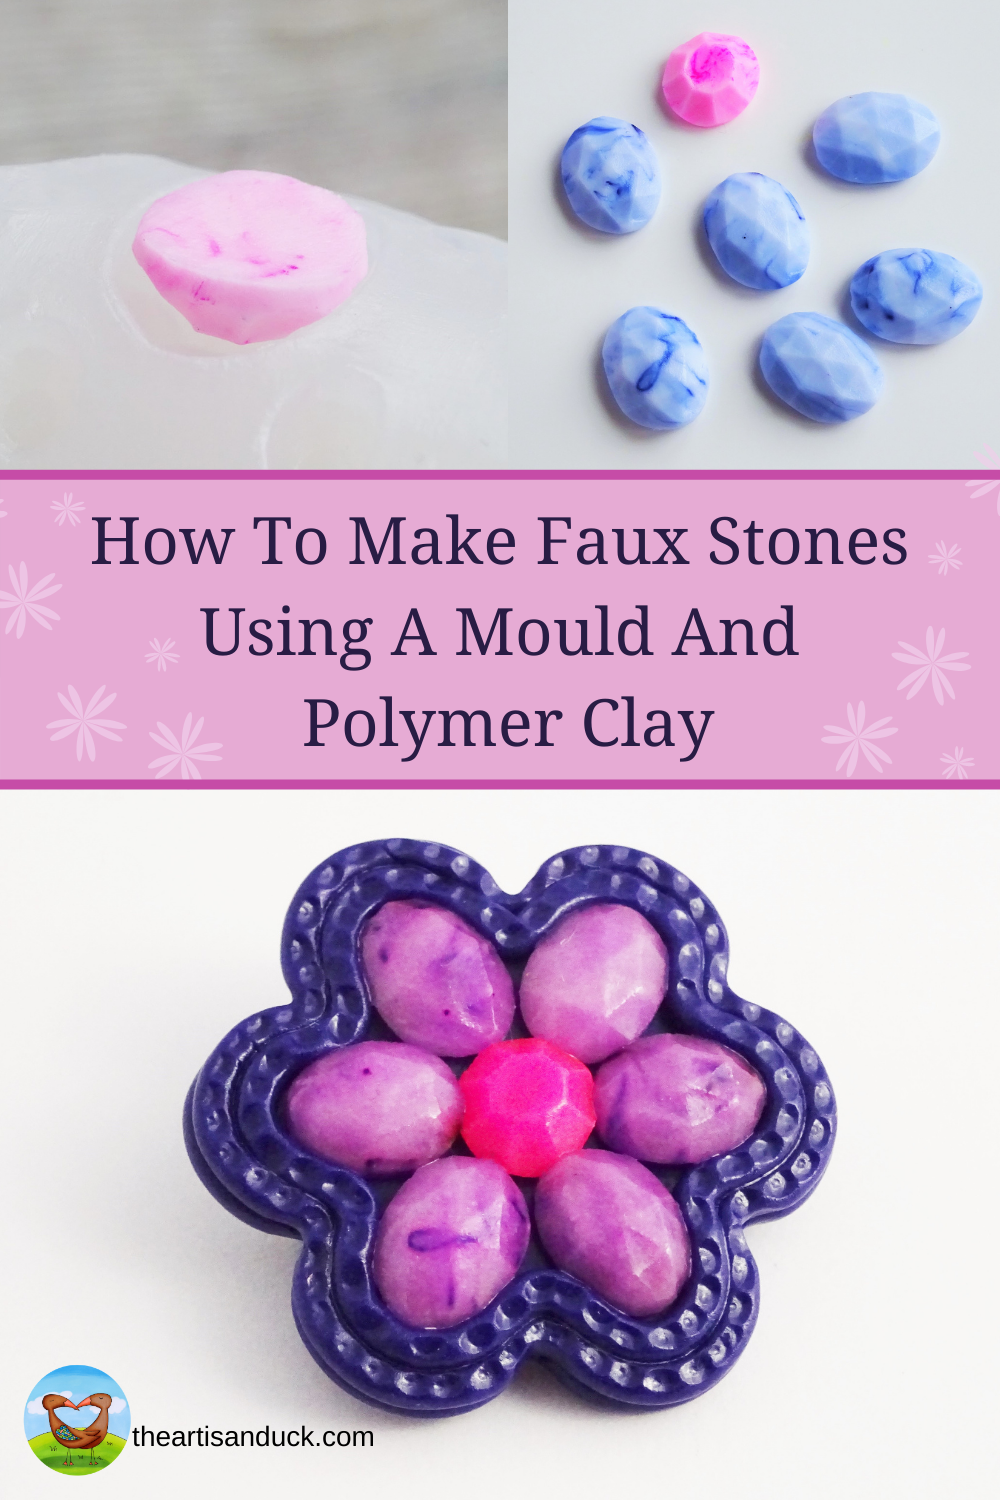
- Condition a little translucent clay to make it soft enough to work with. This needs to be very soft so add small amounts of liquid Fimo as you go until it still holds its shape but pushes easily into the mould. Pinch off a small amount for the flower centre (check that it’s plenty to fill the mould) and the rest will be for the petals. There are 6 petals needed so make sure there is enough for that before mixing in the colour.
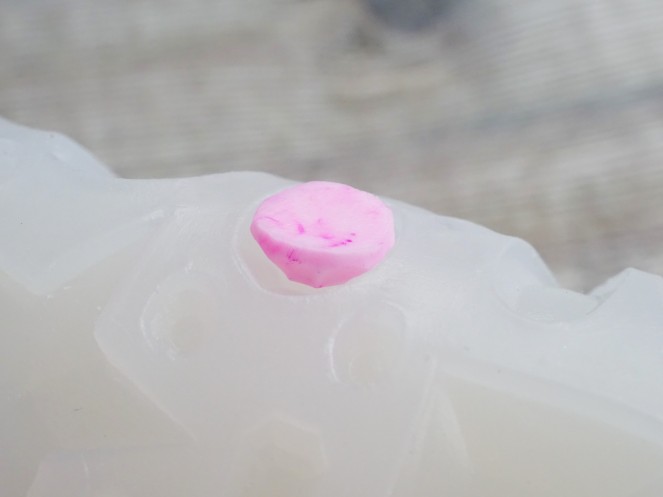
From here marble in very small amounts of alcohol ink (like a pin prick amount until the clay has a lovely soft colour). The alcohol ink colour intensifies in the oven so a little goes a long way. I wanted the look of imitation stone so didn’t worry about blending too much. I used Passion Purple ink for the petals and Senorita Magenta for the flower centre.

2. Push your super soft clay into the middle size circle on the mould.
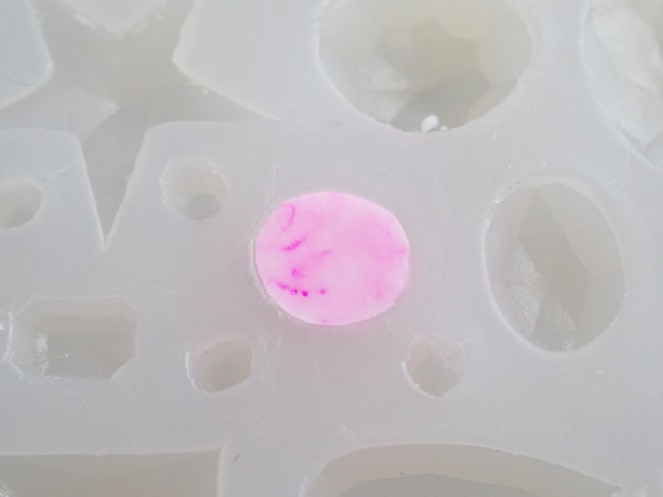
3. Take your flexible blade and carefully cut the excess clay from the top.
4. Bend the mould so that it forces the clay to lift out at the sides. Carefully take the clay out of the mould and put to one side.

5. Repeat this process again for the petals using the oval shape on the mould. I deliberately pushed in some of the more marbled sides of the clay to get the swirly finish where I hadn’t mixed the ink in.

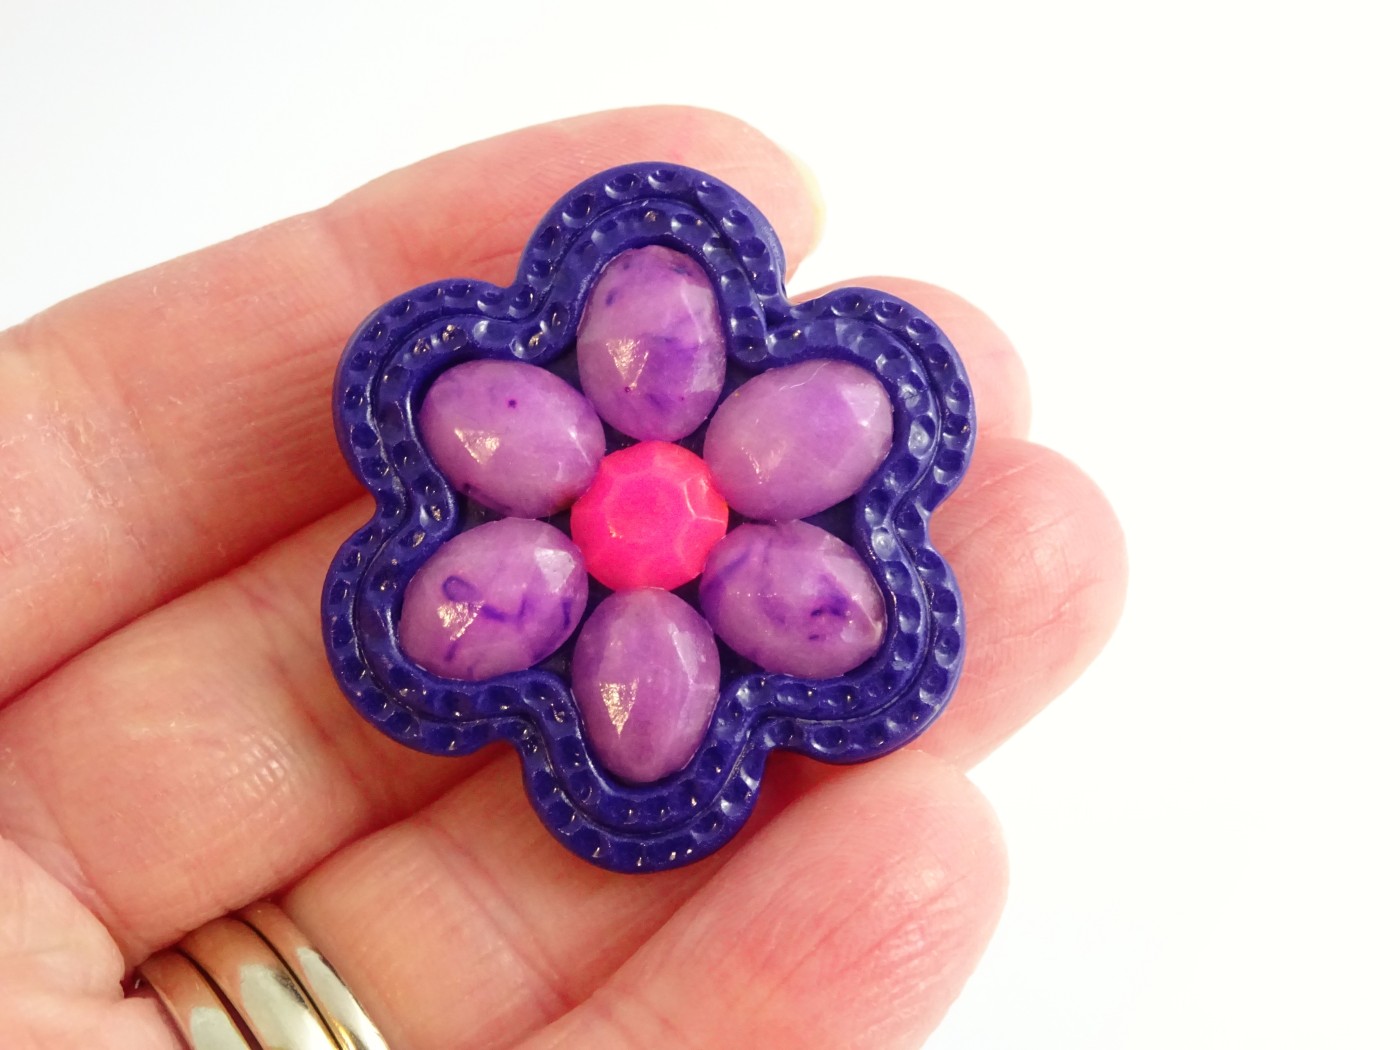
6. Soften some Fimo purple and navy blue clay. Mix 3 parts purple to 1 part blue (use a shape cutter to measure this out ie, 3 circles of purple to 1 circle of blue). If you measure the clay in the mix it is easier to replicate the colour if you don’t mix enough. Roll this on on a number 3 and lay your faceted stones on to form a flower shape.
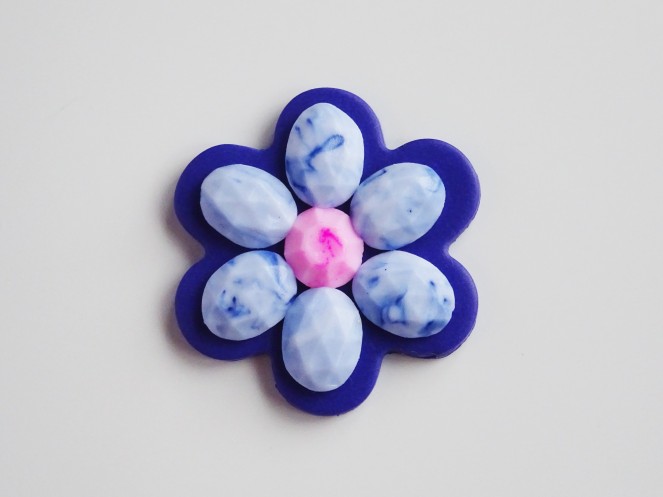
7. With either a shape cutter or free hand cut around the flower shape. There needs to be and border around the faceted stones to add extra details. I using the shape cutters linked to below it is the middle size flower cutter.

8. Using you clay extruder make long snakes of clay with the disc with 8 holes.

9. Wrap one snake of clay around the faceted stones so that it sits on the base sheet of clay. Bend the clay to dip in around the flower shape and cut the end so the two ends meet neatly.
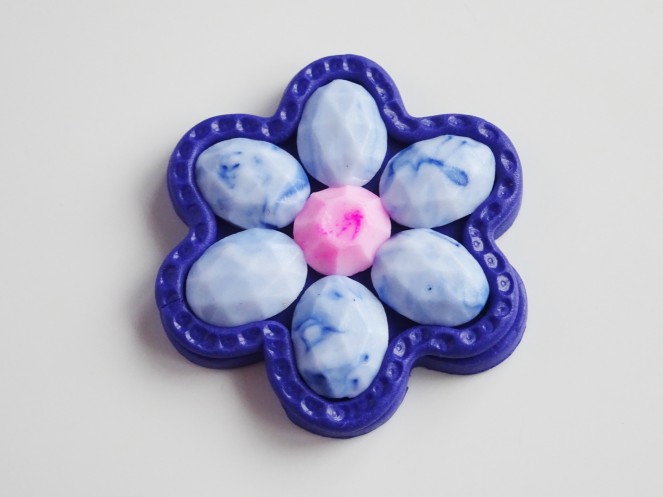
10. Take a medium size dotting tool to press a little dotted detail into the clay edge around the flower petals.
11. Take another snake of clay and wrap it twice around the flower shape so that the clay snake forms two levels around the flower. To do this begin by rolling the end of the clay snake to make it a little thinner and position in at the base of the clay. Wrap the clay around using your ball tool (not the actual ball itself but the piece that joins the ball to the handle) to press into the dips in the flower shape. Once you reach the start continue wrapping but on top of the previous layer to form a top layer. As you reach the end cut the clay and roll it to thin it out. Rest this on top of the clay to finish.
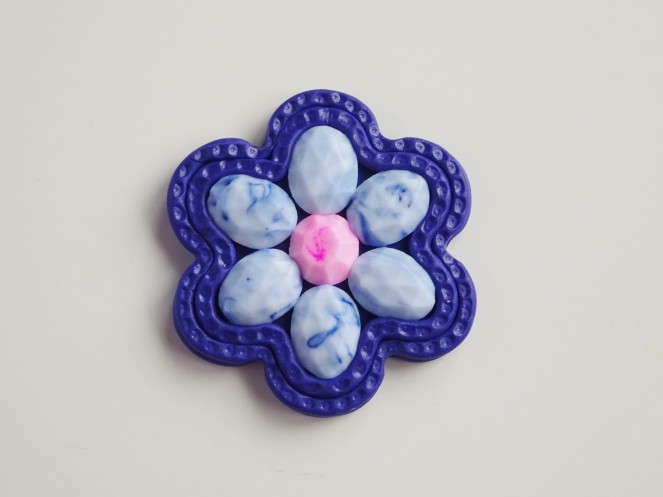
12. Take your ball dotting tool again and add more dotted detail around the edge of the flower. Pop this in your oven following the instructions on the packets of clay.
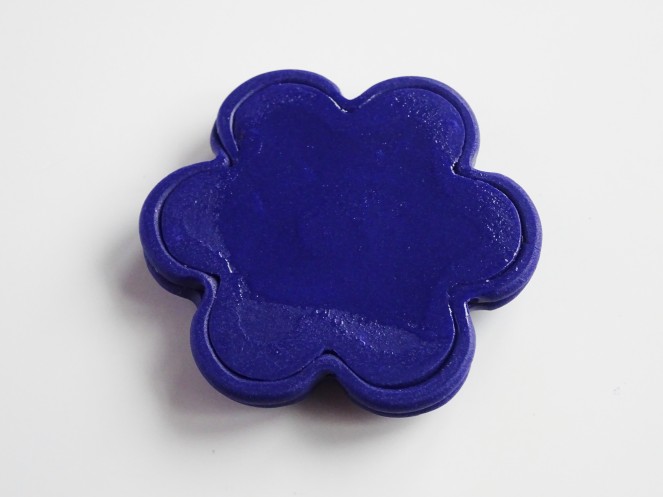
13. To add the brooch back, once the clay is hard and cooled down, turn it over and rub on a small amount of liquid Fimo.
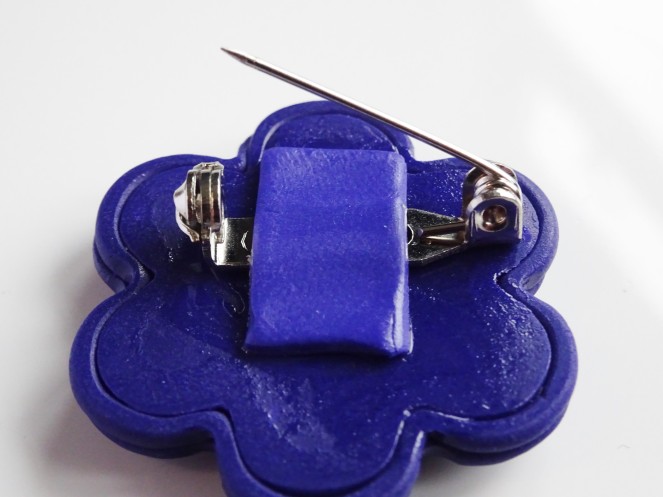
14. Using the same purple/blue mix as before roll it out on a number 4 on your clay machine and cut a small rectangle of clay. Position the brooch in place and lay on the rectangle of clay to hold it in place. Make sure the brooch can still work well and that the clay isn’t in the way. Pop it back in the oven following the instructions on the Liquid Fimo.

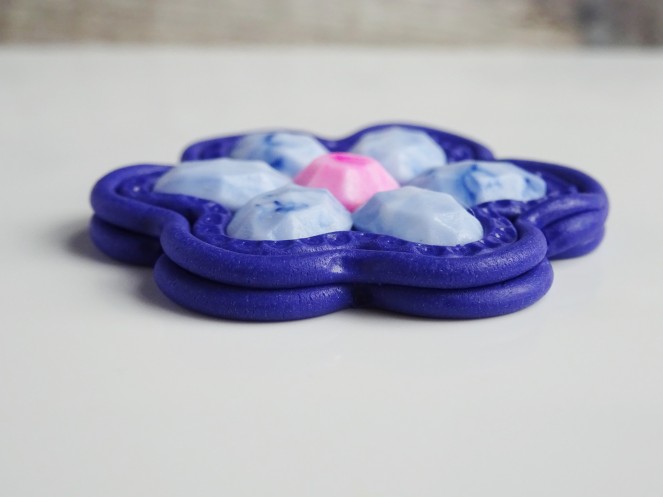
15. Let your brooch cool and then give it two coats of gloss varnish and leave to dry. The varnish will help those facets to shine and catch the light.
Two big points to end – scroll up to see just how those translucent clay stones changed from before and after heating in the oven. It’s like magic, perhaps unpredictable magic at times. Alcohol Inks and translucent clay are up there with my favourite things to work with. I have another polymer clay and alcohol ink flower necklace tutorial here , a translucent cane tutorial here and this watercolour technique tutorial uses translucent clay and chalk but you could replace the chalk with a little alcohol ink.
Second point is that I use the ball end tools (they are nail art dotting tools) all the time in my clay work. They are super useful for adding detail, helping smooth the clay and great for moving clay into place. The best thing is that they are the most inexpensive clay tool I own.
If all that has got you interested in seeing more then I have many exciting, free tutorials for you to scroll through here.
Here are the links for the products used in this tutorial. Please note these are affiliate links for Amazon UK and Amazon US. Affiliate links simply mean that I earn a small commission, at no expense to you, if you make a purchase through my link. This just makes it possible to offer free and unique tutorials.
Amazon UK
Fimo Effects Translucent, Fimo Professional in Purple and Navy
Silicone Mould – I used the smallest mould in this set of three.
Amazon US
Fimo Effects Translucent, Fimo Professional in Purple and Navy
Jaquard Pinata Alcohol Inks – I couldn’t find these in a reasonable size bottle but check out the colours of Ranger Tim Holtz alcohol ink. I have used these too and the colour choice is great.
Silicone Mould – Again, sadly, I couldn’t find this exact mould but there were similar options.
Fimo Gloss Varnish and Liquid Clay
It’s such a frustration when I can’t find the products to list.
This technique has so many uses. My brain is already rolling through the many options – I can guarantee this won’t be the last time I use it.
Just think how amazing it would be if you could make your own faceted stones to match any project……. Oh yeah, now you can!
As ever, if you use this technique in any of your projects and you share them on Facebook or Instagram then don’t forget to tag me. I would love to see what you come up with.
Until next time, happy crafting and see you soon.
Hannah x

