

This post contains affiliate links. All such links are clearly marked.
I have spent a little time recently getting back to basics with my crafting as a way to pull myself out of some creative tiredness (burnout sounds so dramatic!) and imposter syndrome. It was good to remind myself that I can be creative and it doesn’t have to be hard or involve long and complicated techniques. Polymer clay silk screens are great for quick and easy crafting so I soon found myself reaching for them.
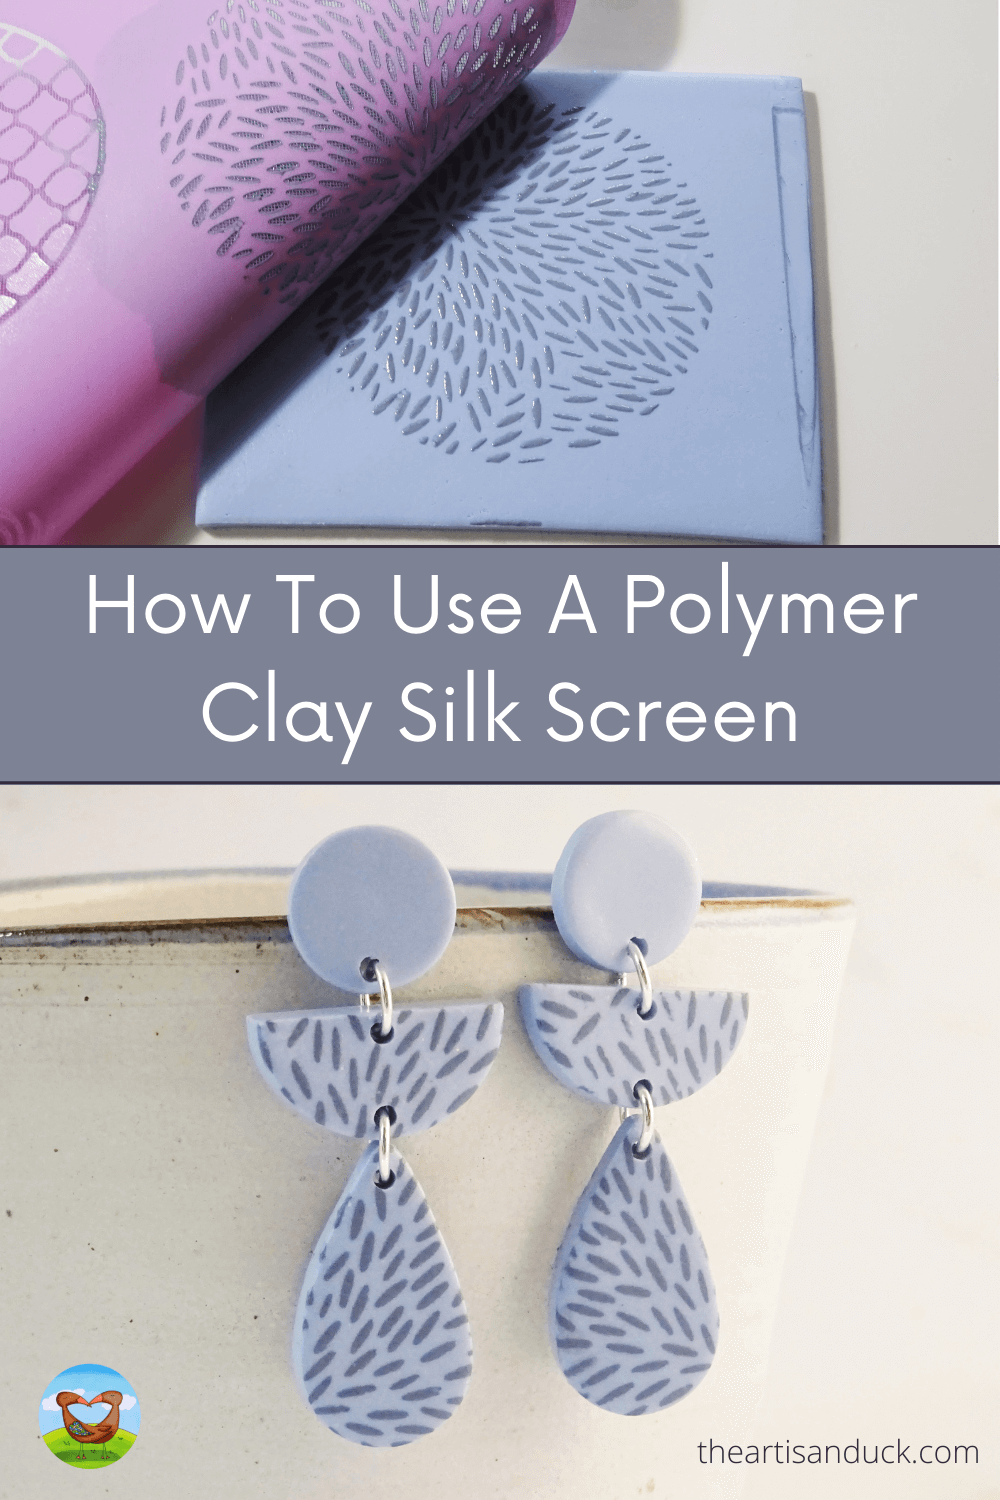
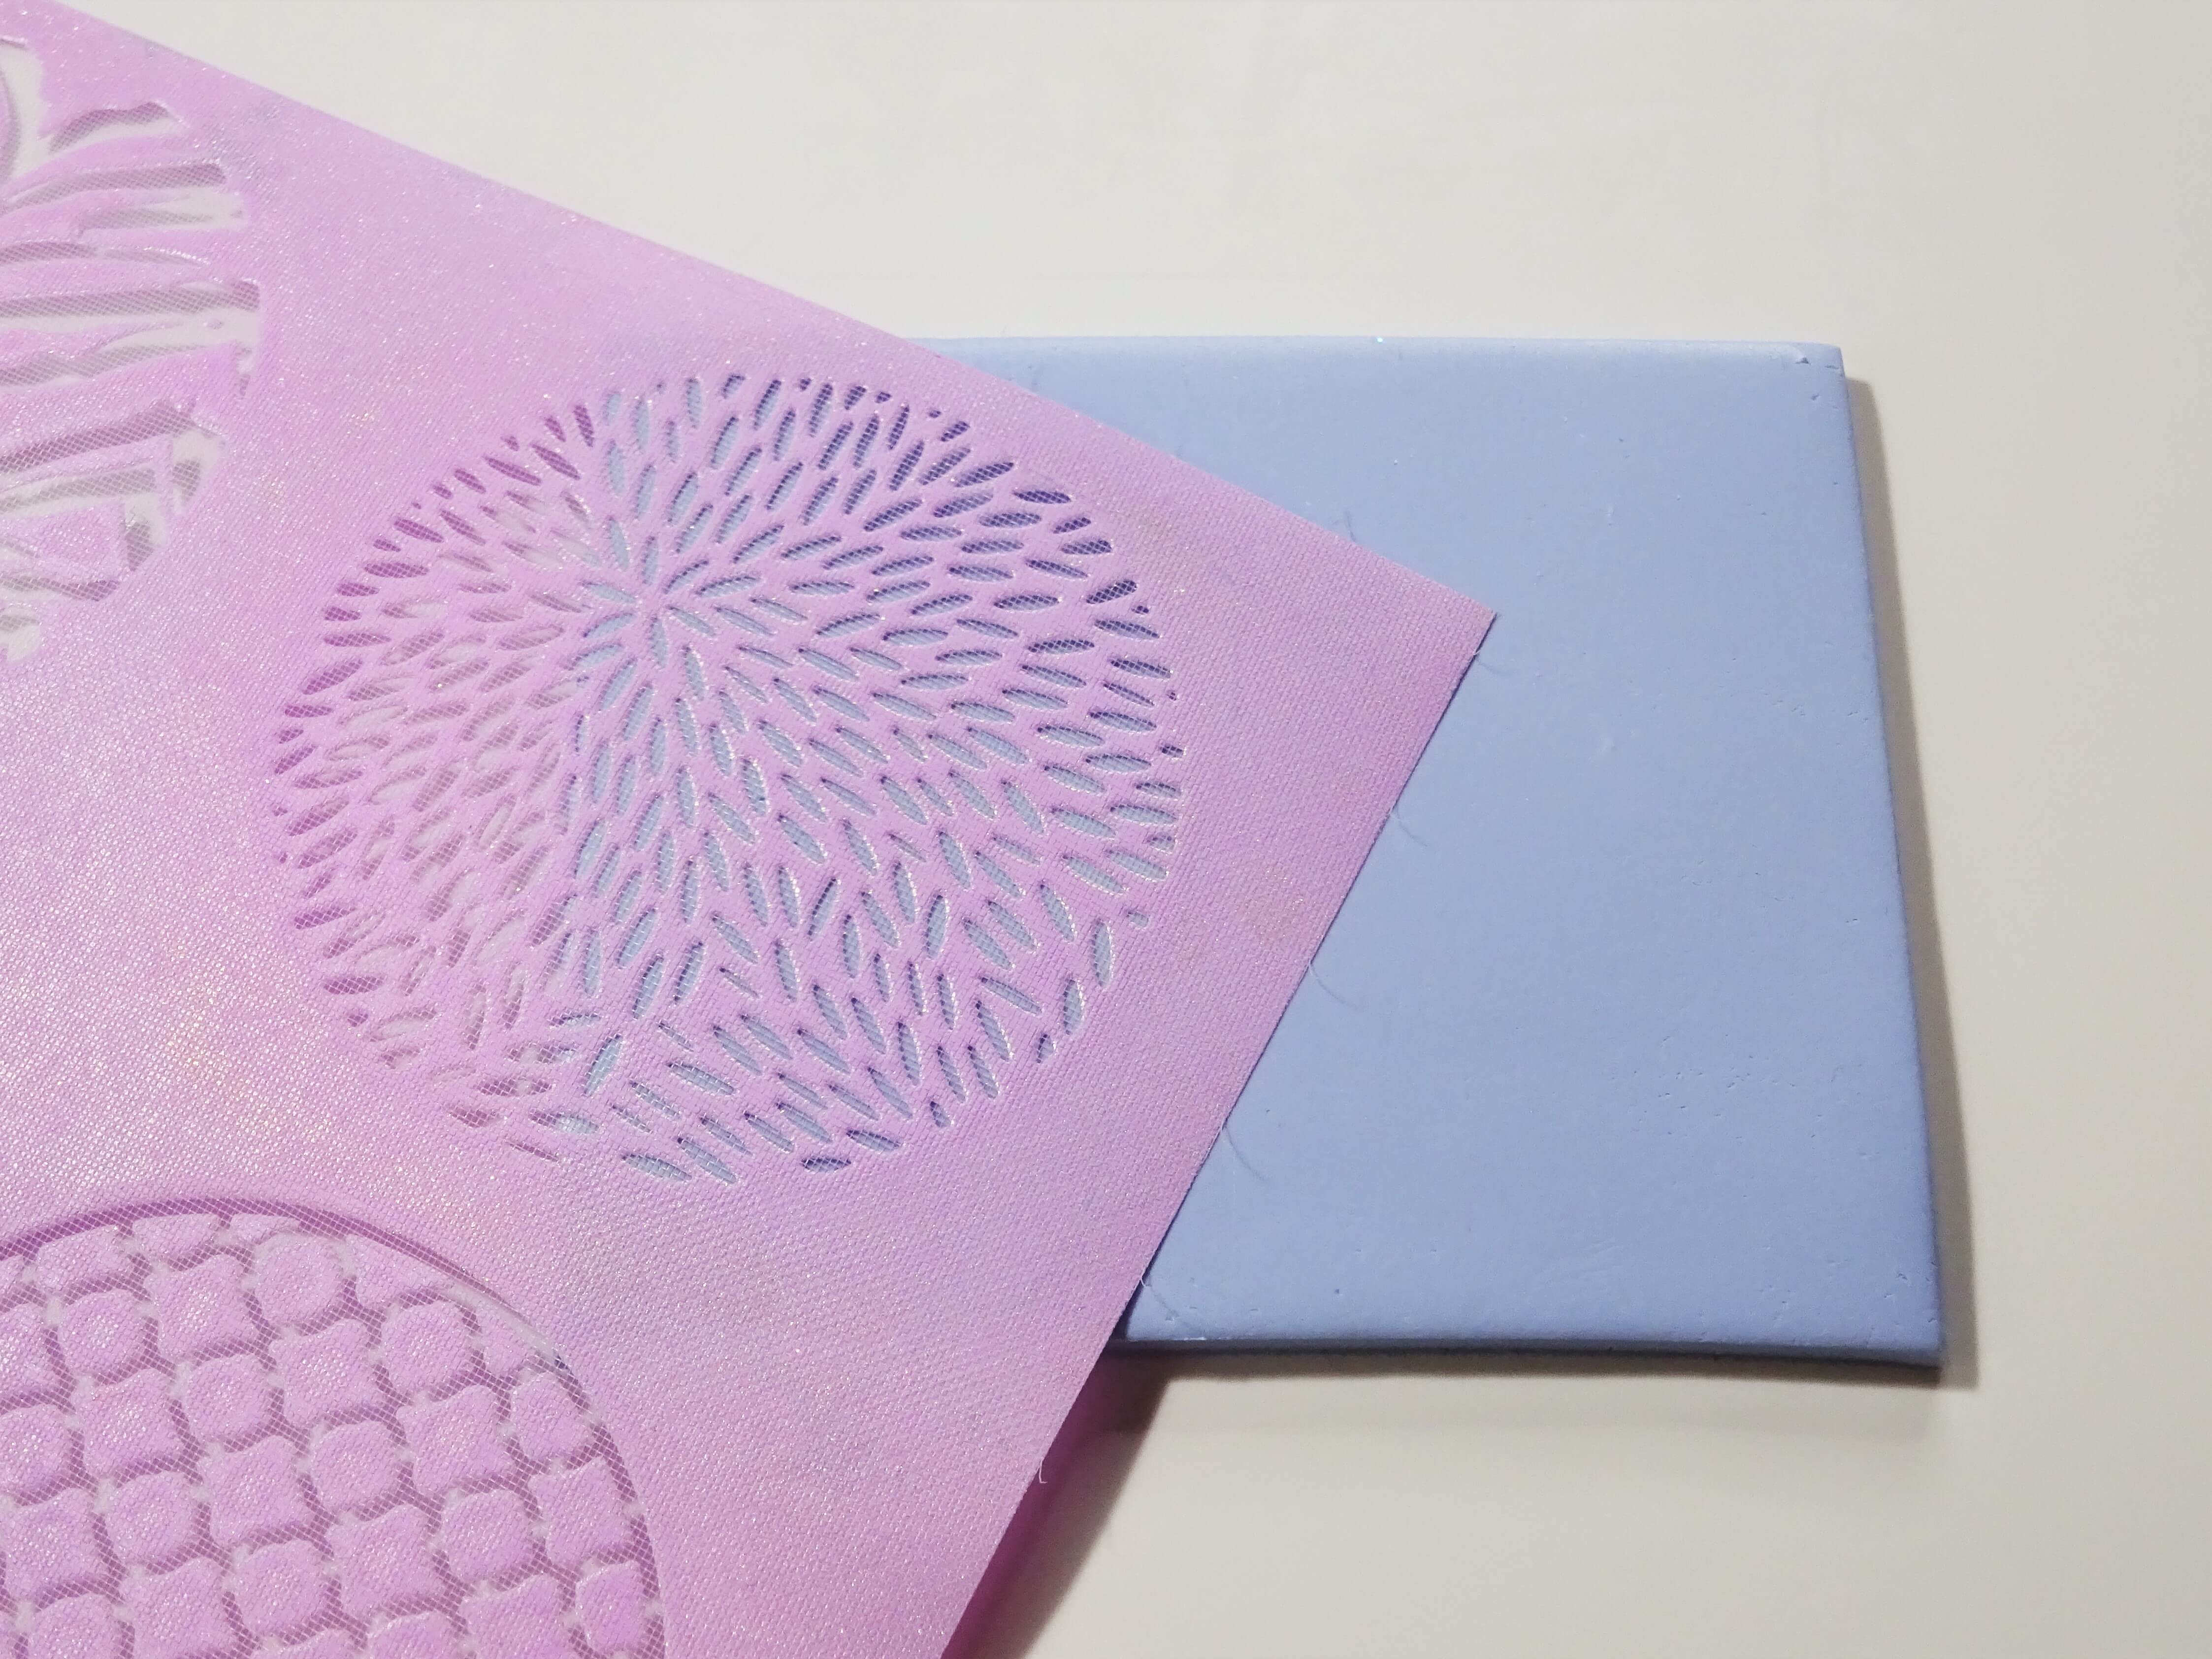
If the idea of a polymer clay silk screen is new to you then, in brief, it is a thin sheet (rather like a plastic stencil but much finer) with patterns cut out. They are used in conjunction with acrylic paint usually and are a really great way to add detailed patterns onto the surface of polymer clay. The stencils are reusable so it is also a cost effective way to produce jewellery and home décor items without waste of clay or products.
The Do’s and Don’ts of Polymer Clay Silk Screens
There are however a few things to be aware of when using silk screens so, before I show you how to use them, I’ll cover a few basics here first –
1) Test your paints on polymer clay before you start!
Silk screens are commonly used with acrylic paint but not all types of acrylic paint work on polymer clay. I have found inexpensive craft paint generally works very will, such as Deco Art Americana and Metallic, as well as Jacquard Lumiere metallic paint (Links to these products can be found at the end of the tutorial). Artist acrylic paint, like you get in squeezable metal tubes, don’t work at all on polymer clay and will remain either wet or sticky.
2) Have a bowl of warm water ready before you start
Polymer clay silk screens are very fine with lots of intricate detail. There is a mesh type cover across the whole silk screen and paint is pushed through this to produce the pattern. If acrylic paint dries on a silk screen the screen could well be rendered unusable, so in order to prevent this, have a bowl or tub (not one that will be used for food going forward) filled with warm water ready to hand for when you have finished with your silk screen. Just pop it in the water with the wet paint on it and it’ll be easy to clean when you are ready.
3) Pick your side…
As mentioned above, silk screens have a fine mesh texture on the front and the back is a smooth shiny plastic. The mesh side will leave the texture on your clay and may allow paint to seep underneath it ruining your finished piece so always put the silk screen onto your clay with the smooth side down on the clay. Use your hand or acrylic roller to ensure your silk screen in stuck down properly.
Now onto the good bit…
How To Use A Polymer Clay Silk Screen
Condition your clay well and roll it out to your desired thickness. Make sure your clay is flat with no air bubble in it and that it is big enough for your chosen pattern.

Position your silk screen, shiny side down, onto your polymer clay. Run your fingers or acrylic roller across the surface to ensure it is stuck down properly.
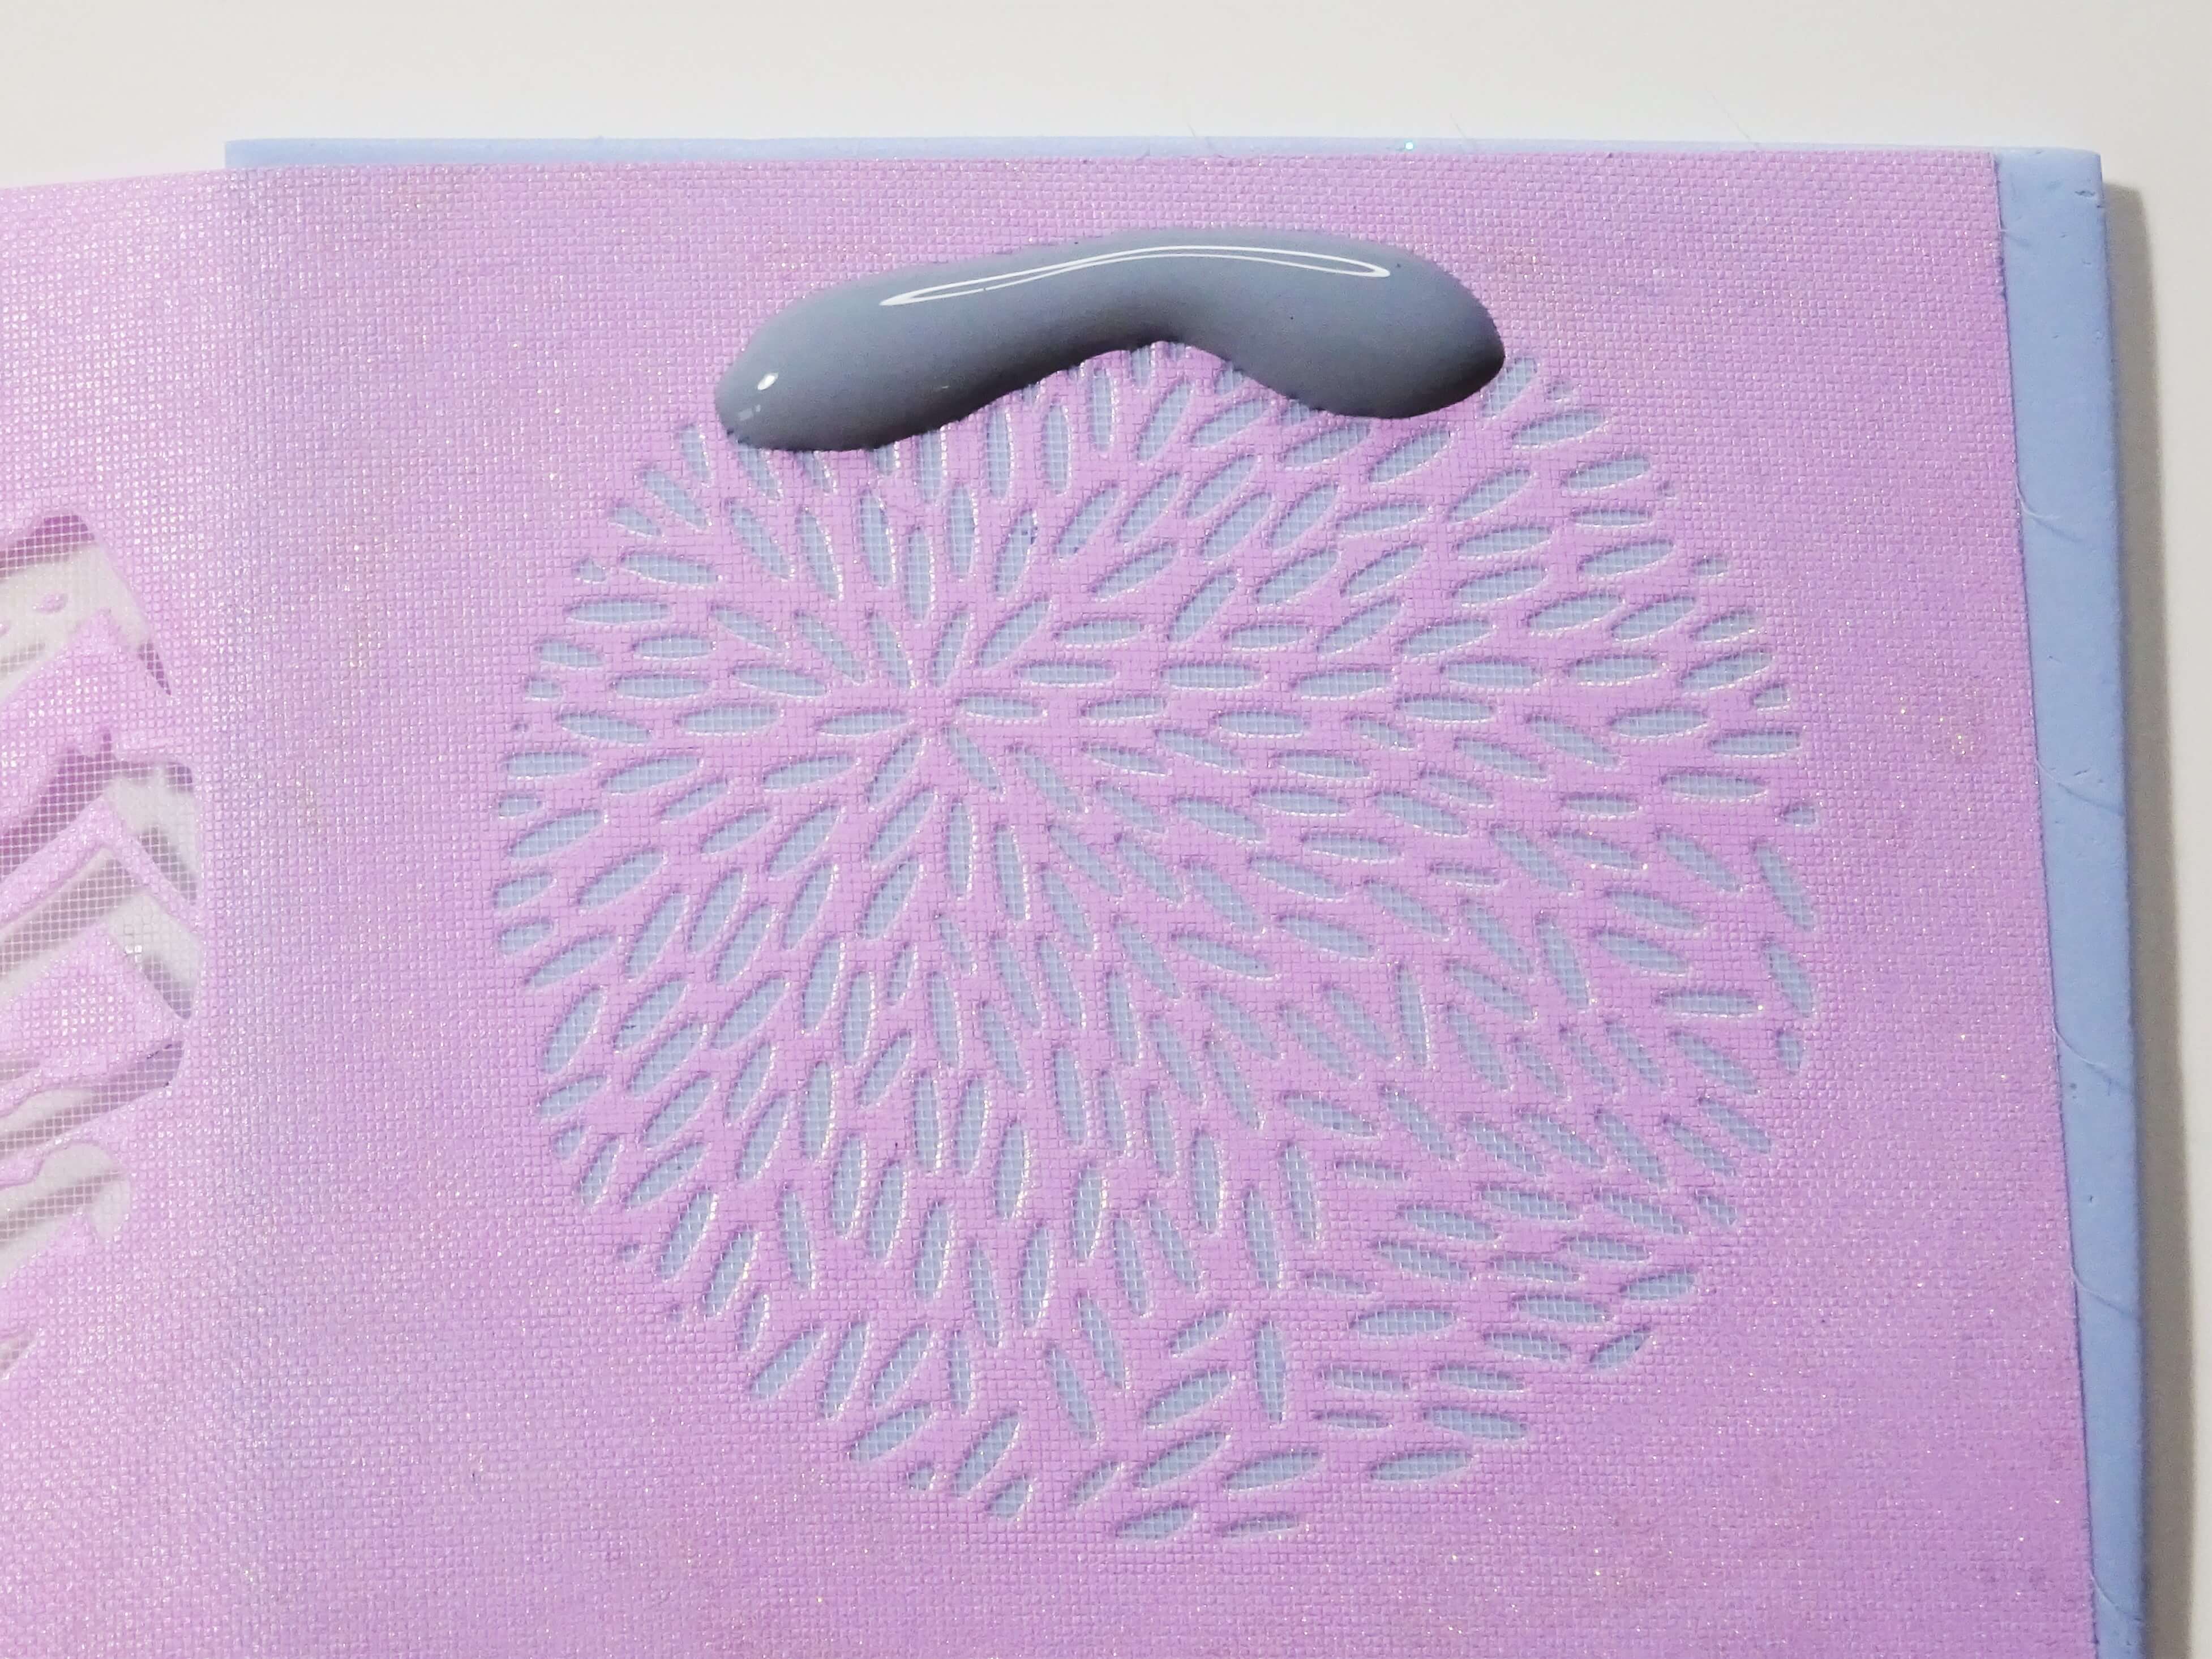
Squeeze a bead of your chosen paint along the top of the silk screen.

Take a scraper tool (mine came with my silk screen set) or something similar like an old gift card etc and use it to drag the paint down the silk screen. Once may be enough but if not all of your stencil is covered then pick up the scraper tool and position it at the top of where the blank spots are and drag it down again. There is usually sufficient paint to the scraper to do this.
Once the whole silk screen is covered, make sure there isn’t excess paint on the it by running the scraper tool over the whole surface again if needs be.
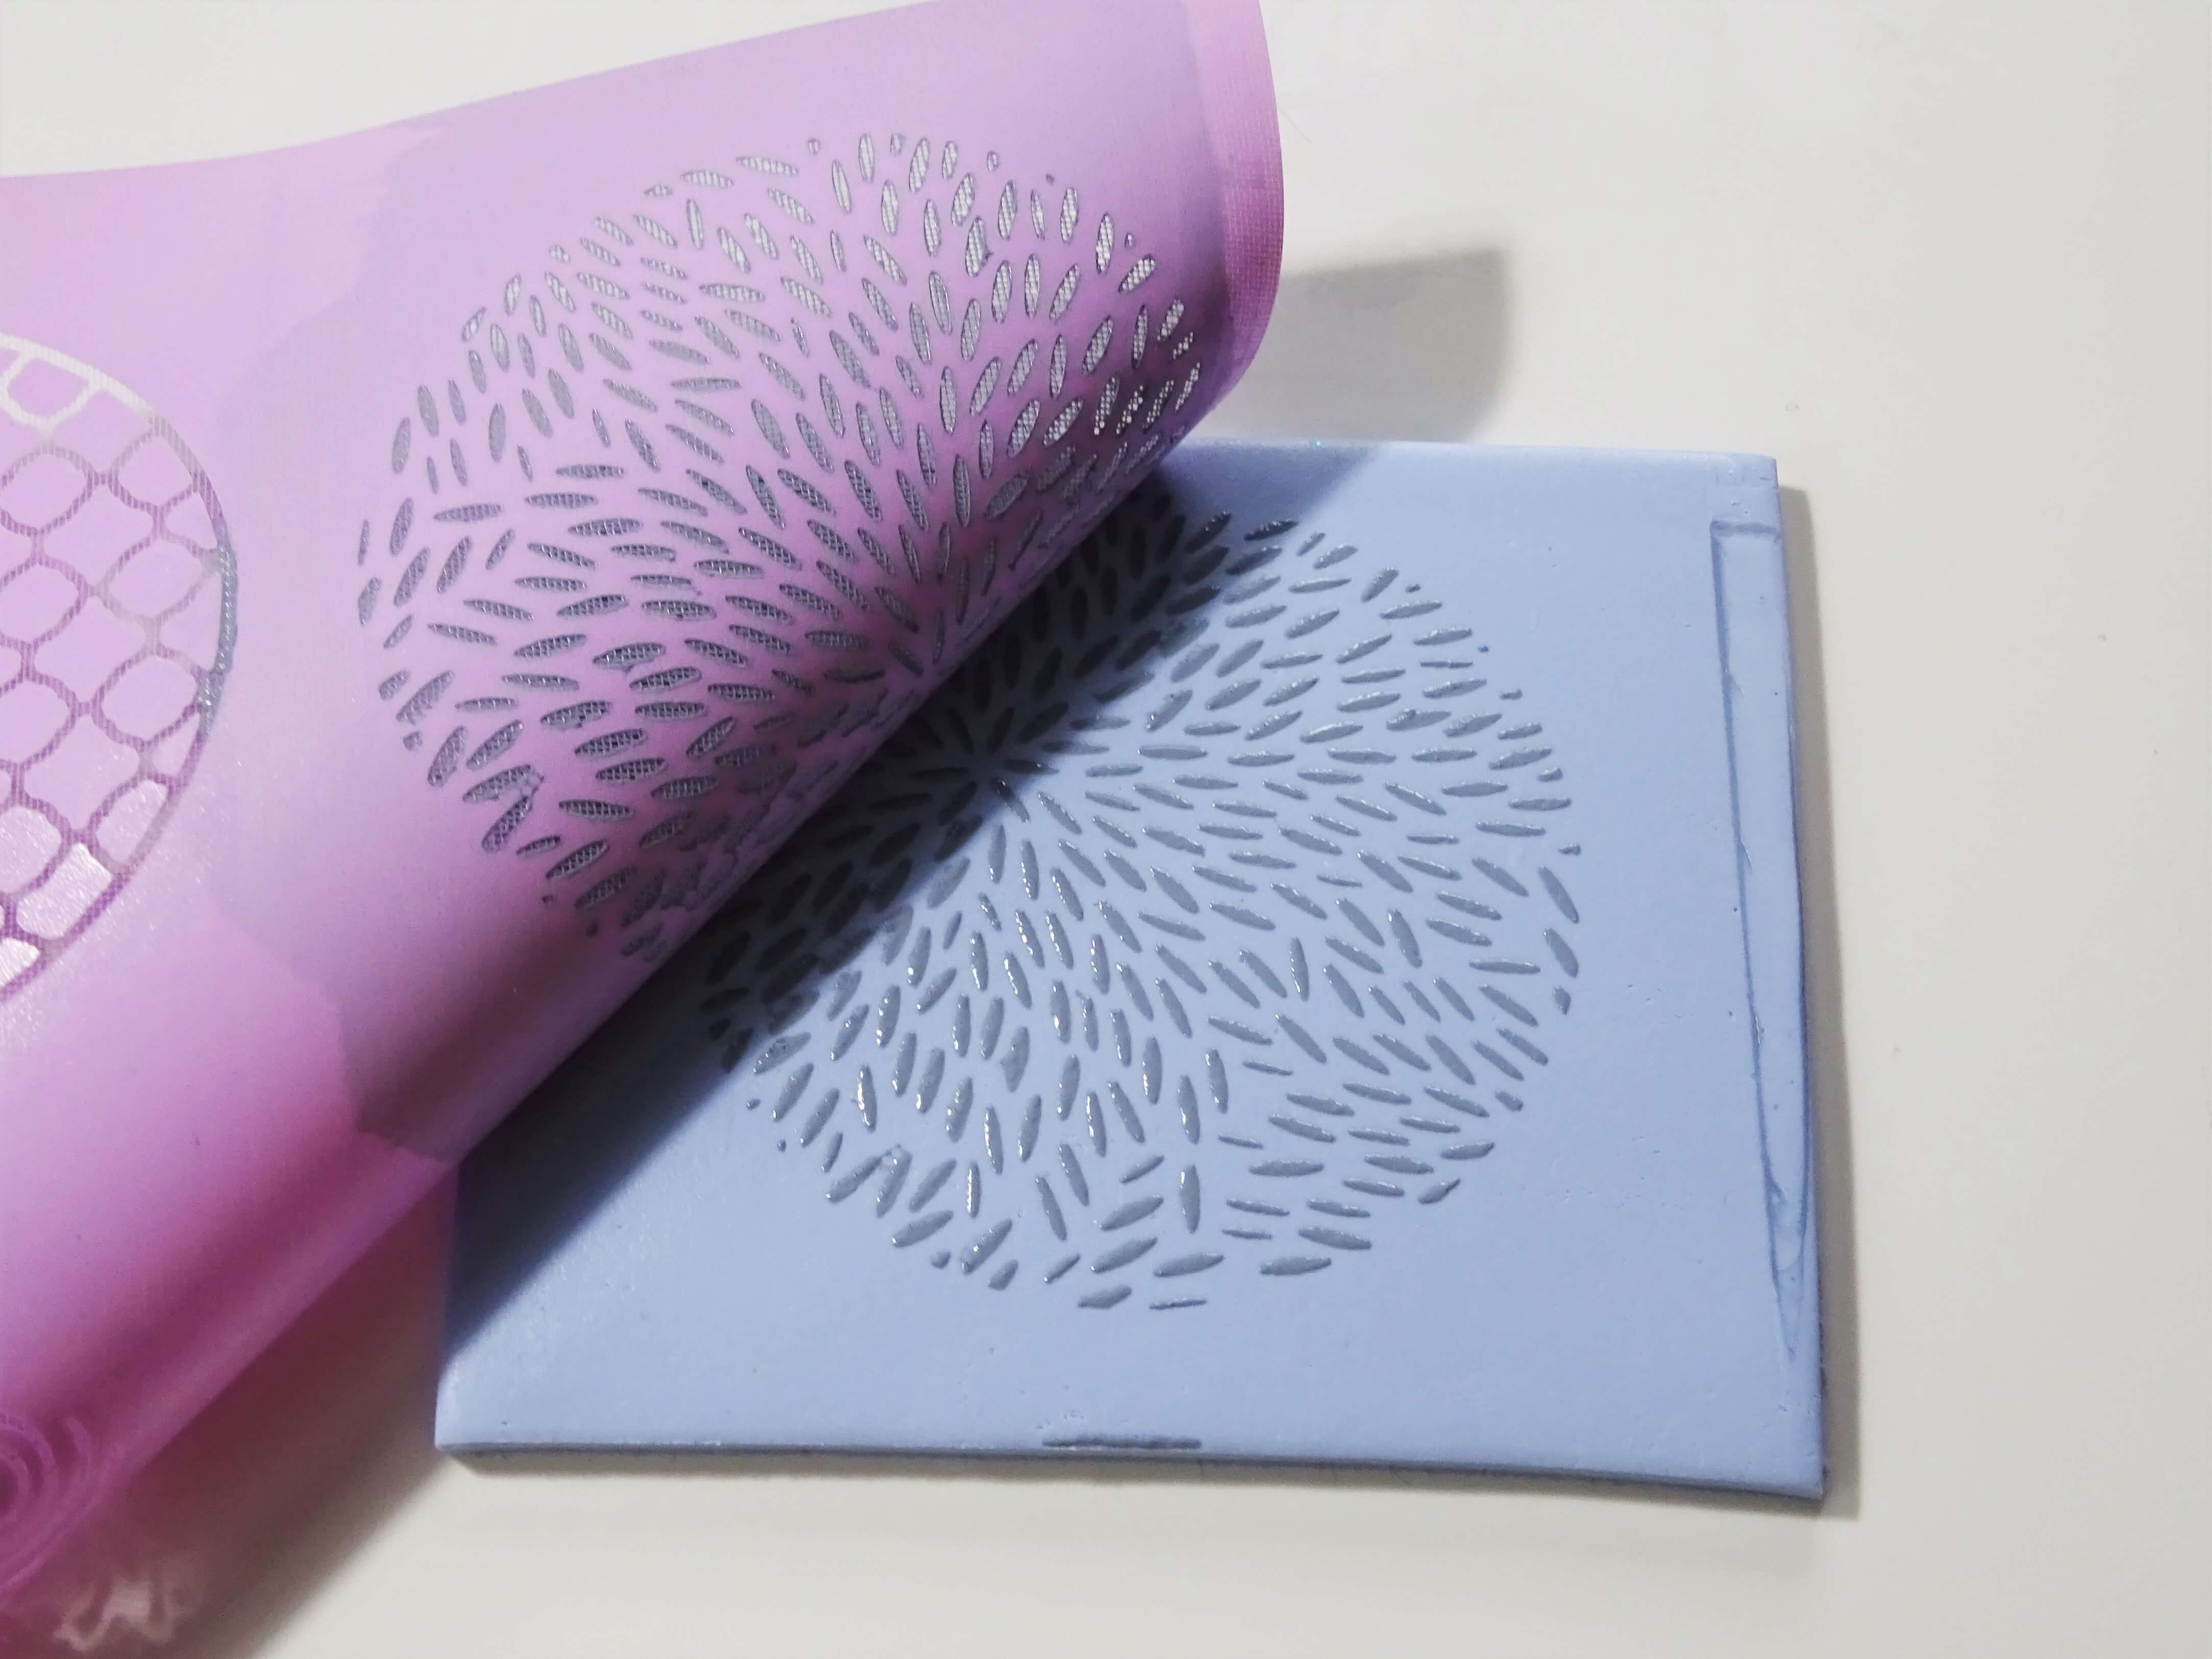
Peel your silk screen off your polymer clay to reveal the pattern. Put the silk screen and scraper tool into a bowl of water to prevent the paint drying on them.
Put your clay to one side to allow the paint to dry fully before cutting. Once the paint is dry you can cut your clay and make into various projects.
How To Use More Than One Colour Paint On A Polymer Clay Silk Screen
Just for fun, I thought I would show how to take things one step further by using more that one colour of paint on a silk screen. I have used two colours but add as many as you like.
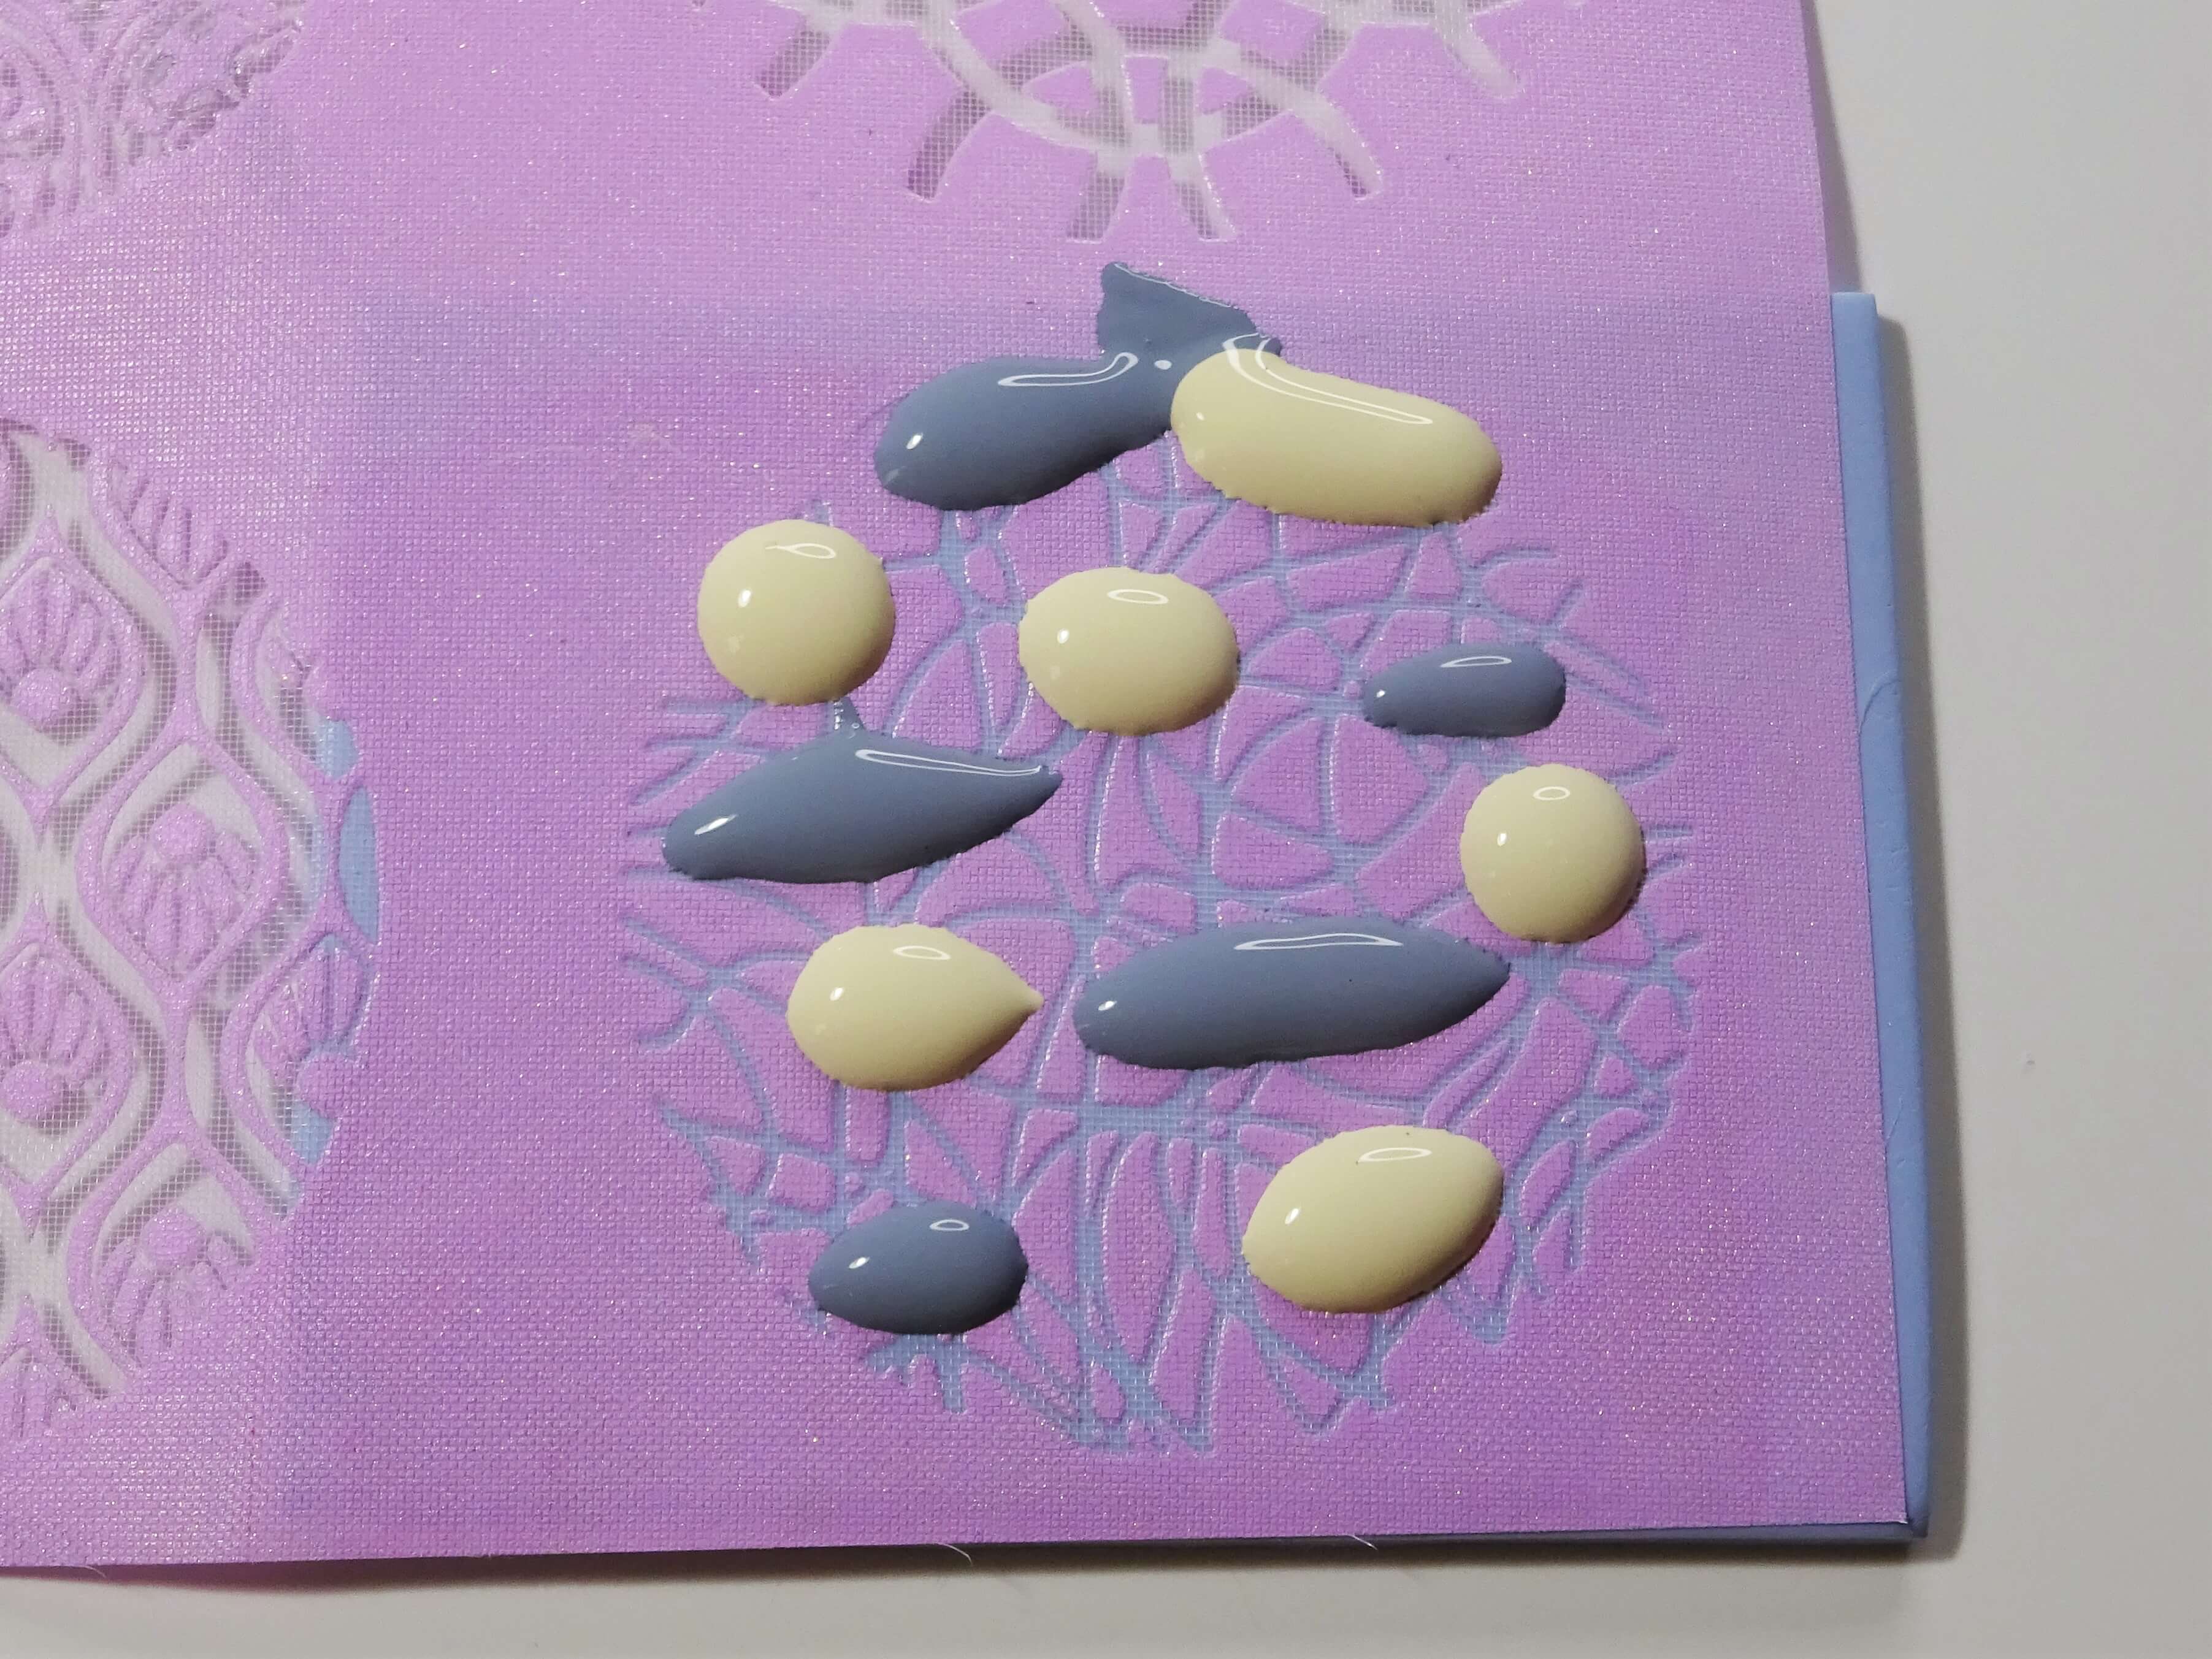
Start as before, with conditioned clay and your silk screen properly in place. Take your paints and add a bead of paint to the top of the stencil. I have done one half blue and the other a pale yellow. Then position dots of paint in a random fashion on the silk screen.
Just a quick tip, make sure that you like the colours your paints make when they mix as they may mix a little when you drag the paint over the clay.
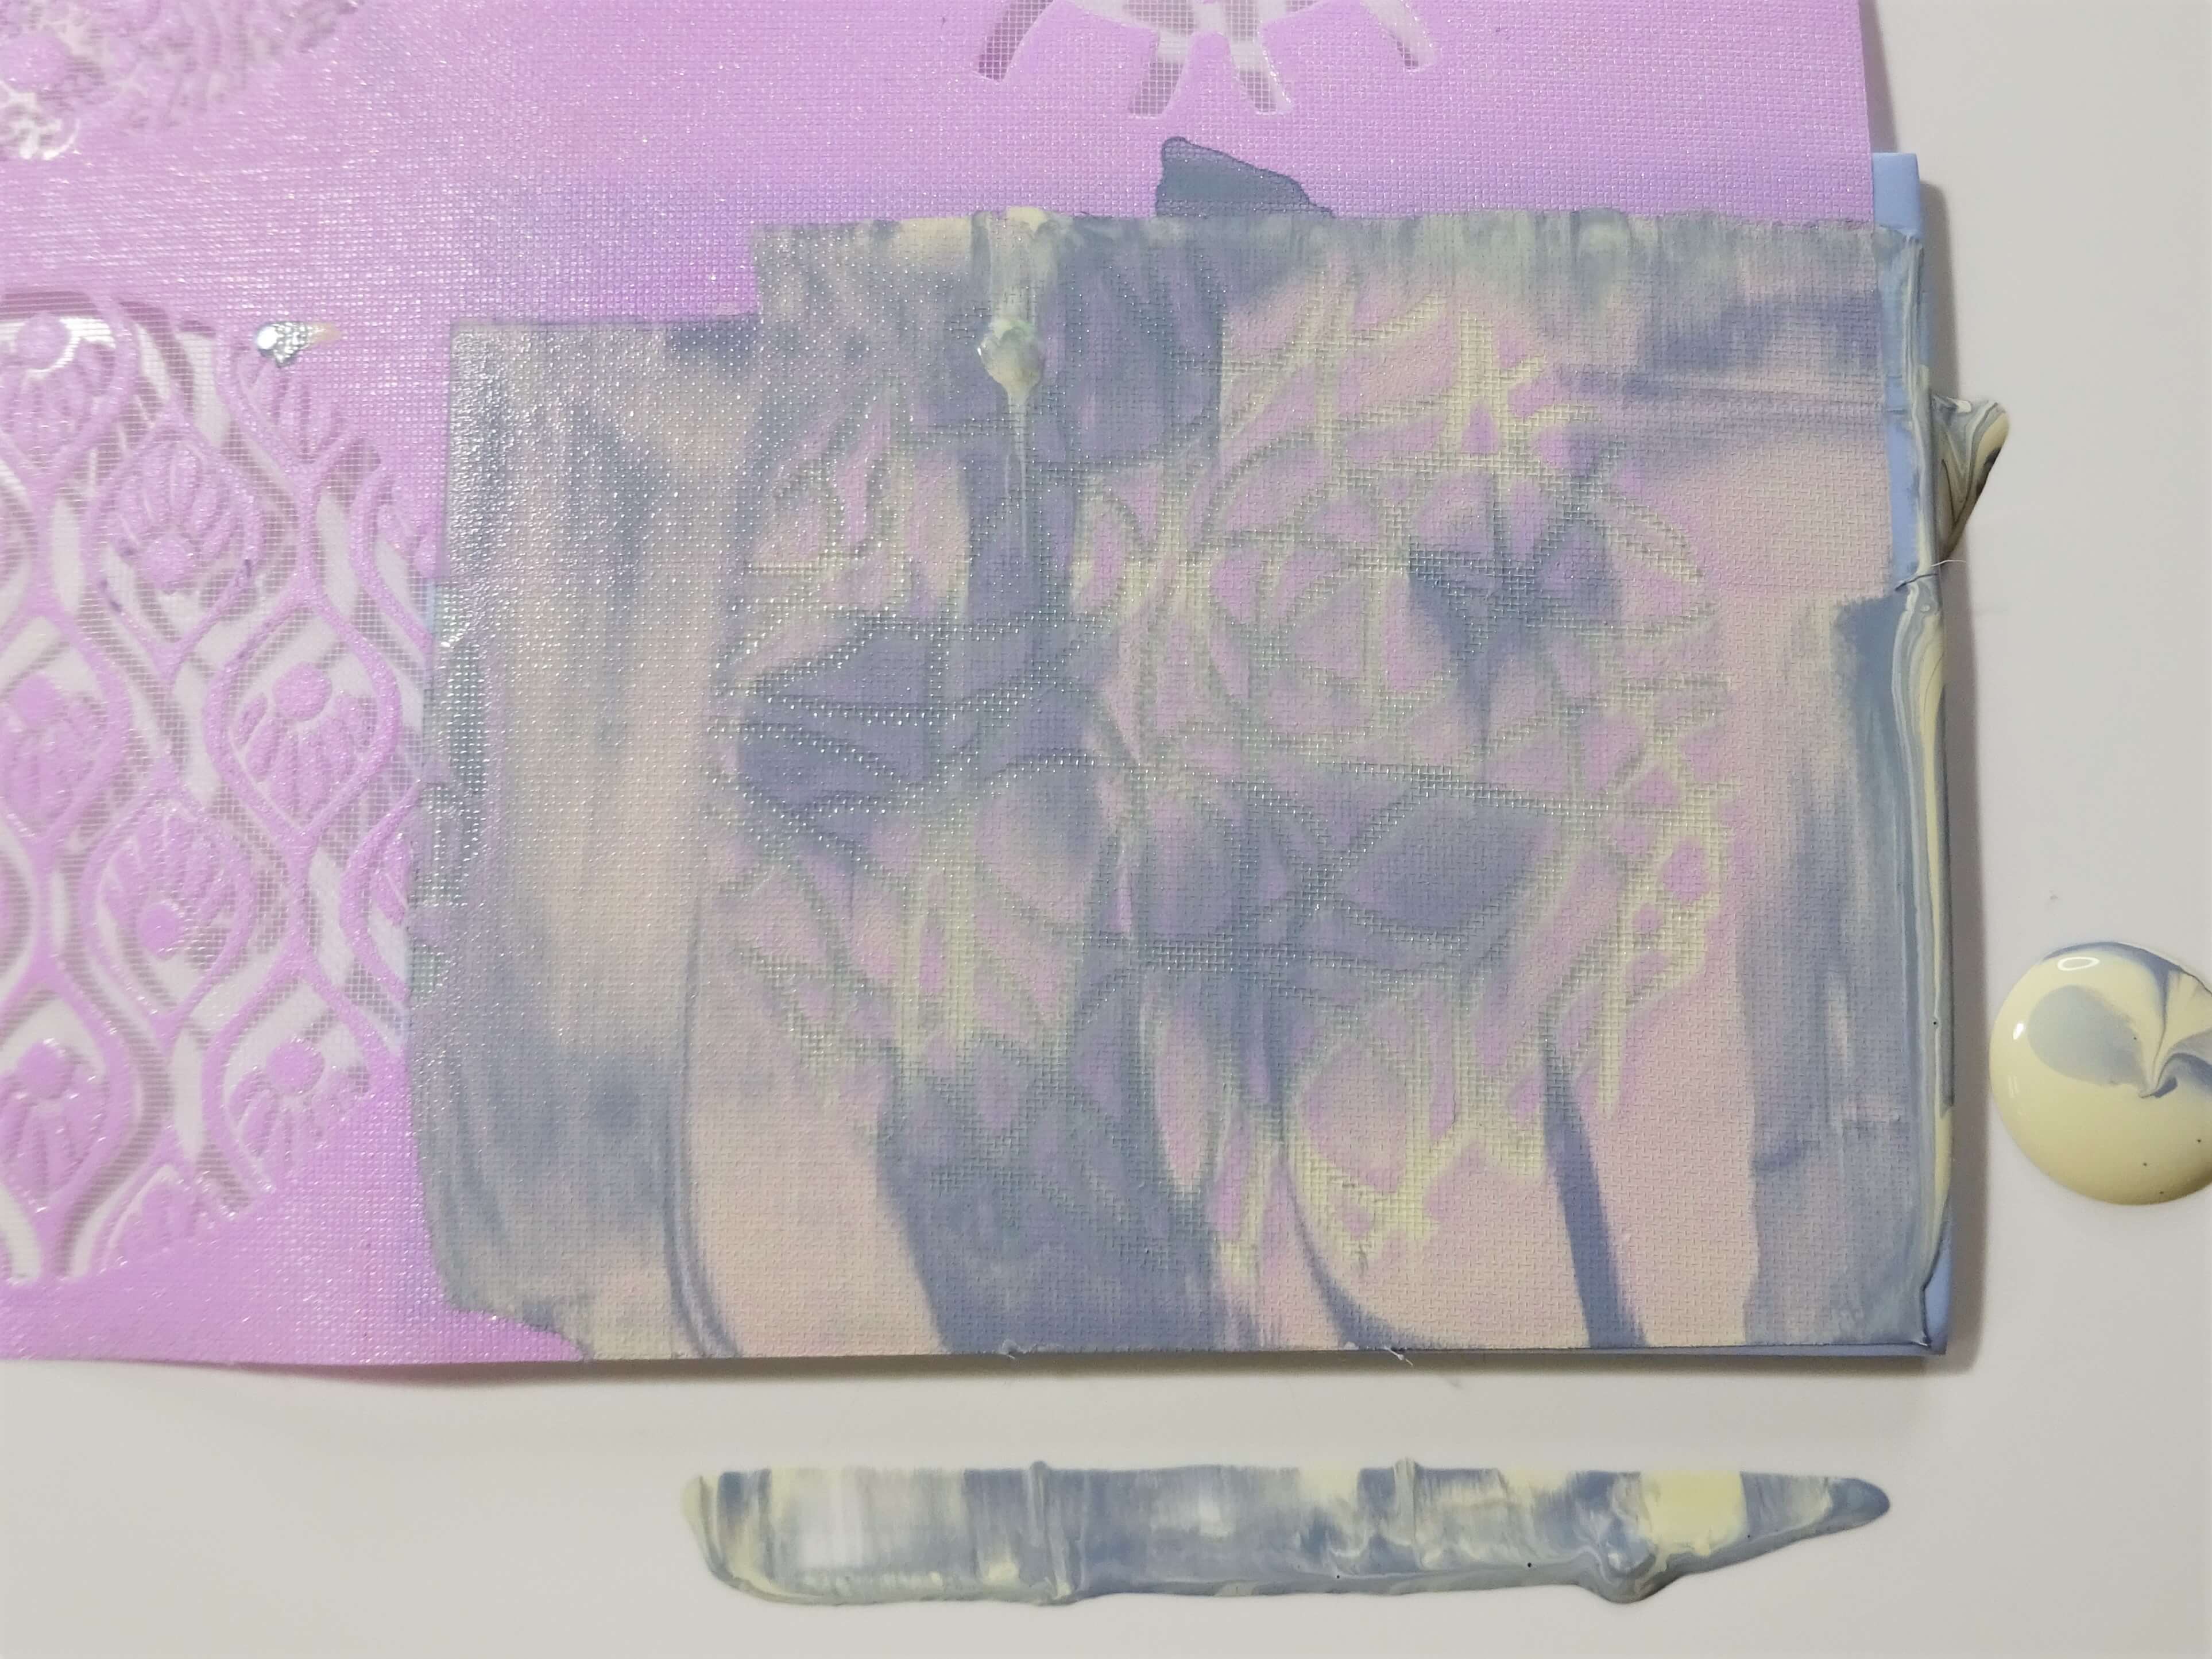
Drag the paint down as before. Use what ever paint in on the scraper to fill in any gaps.
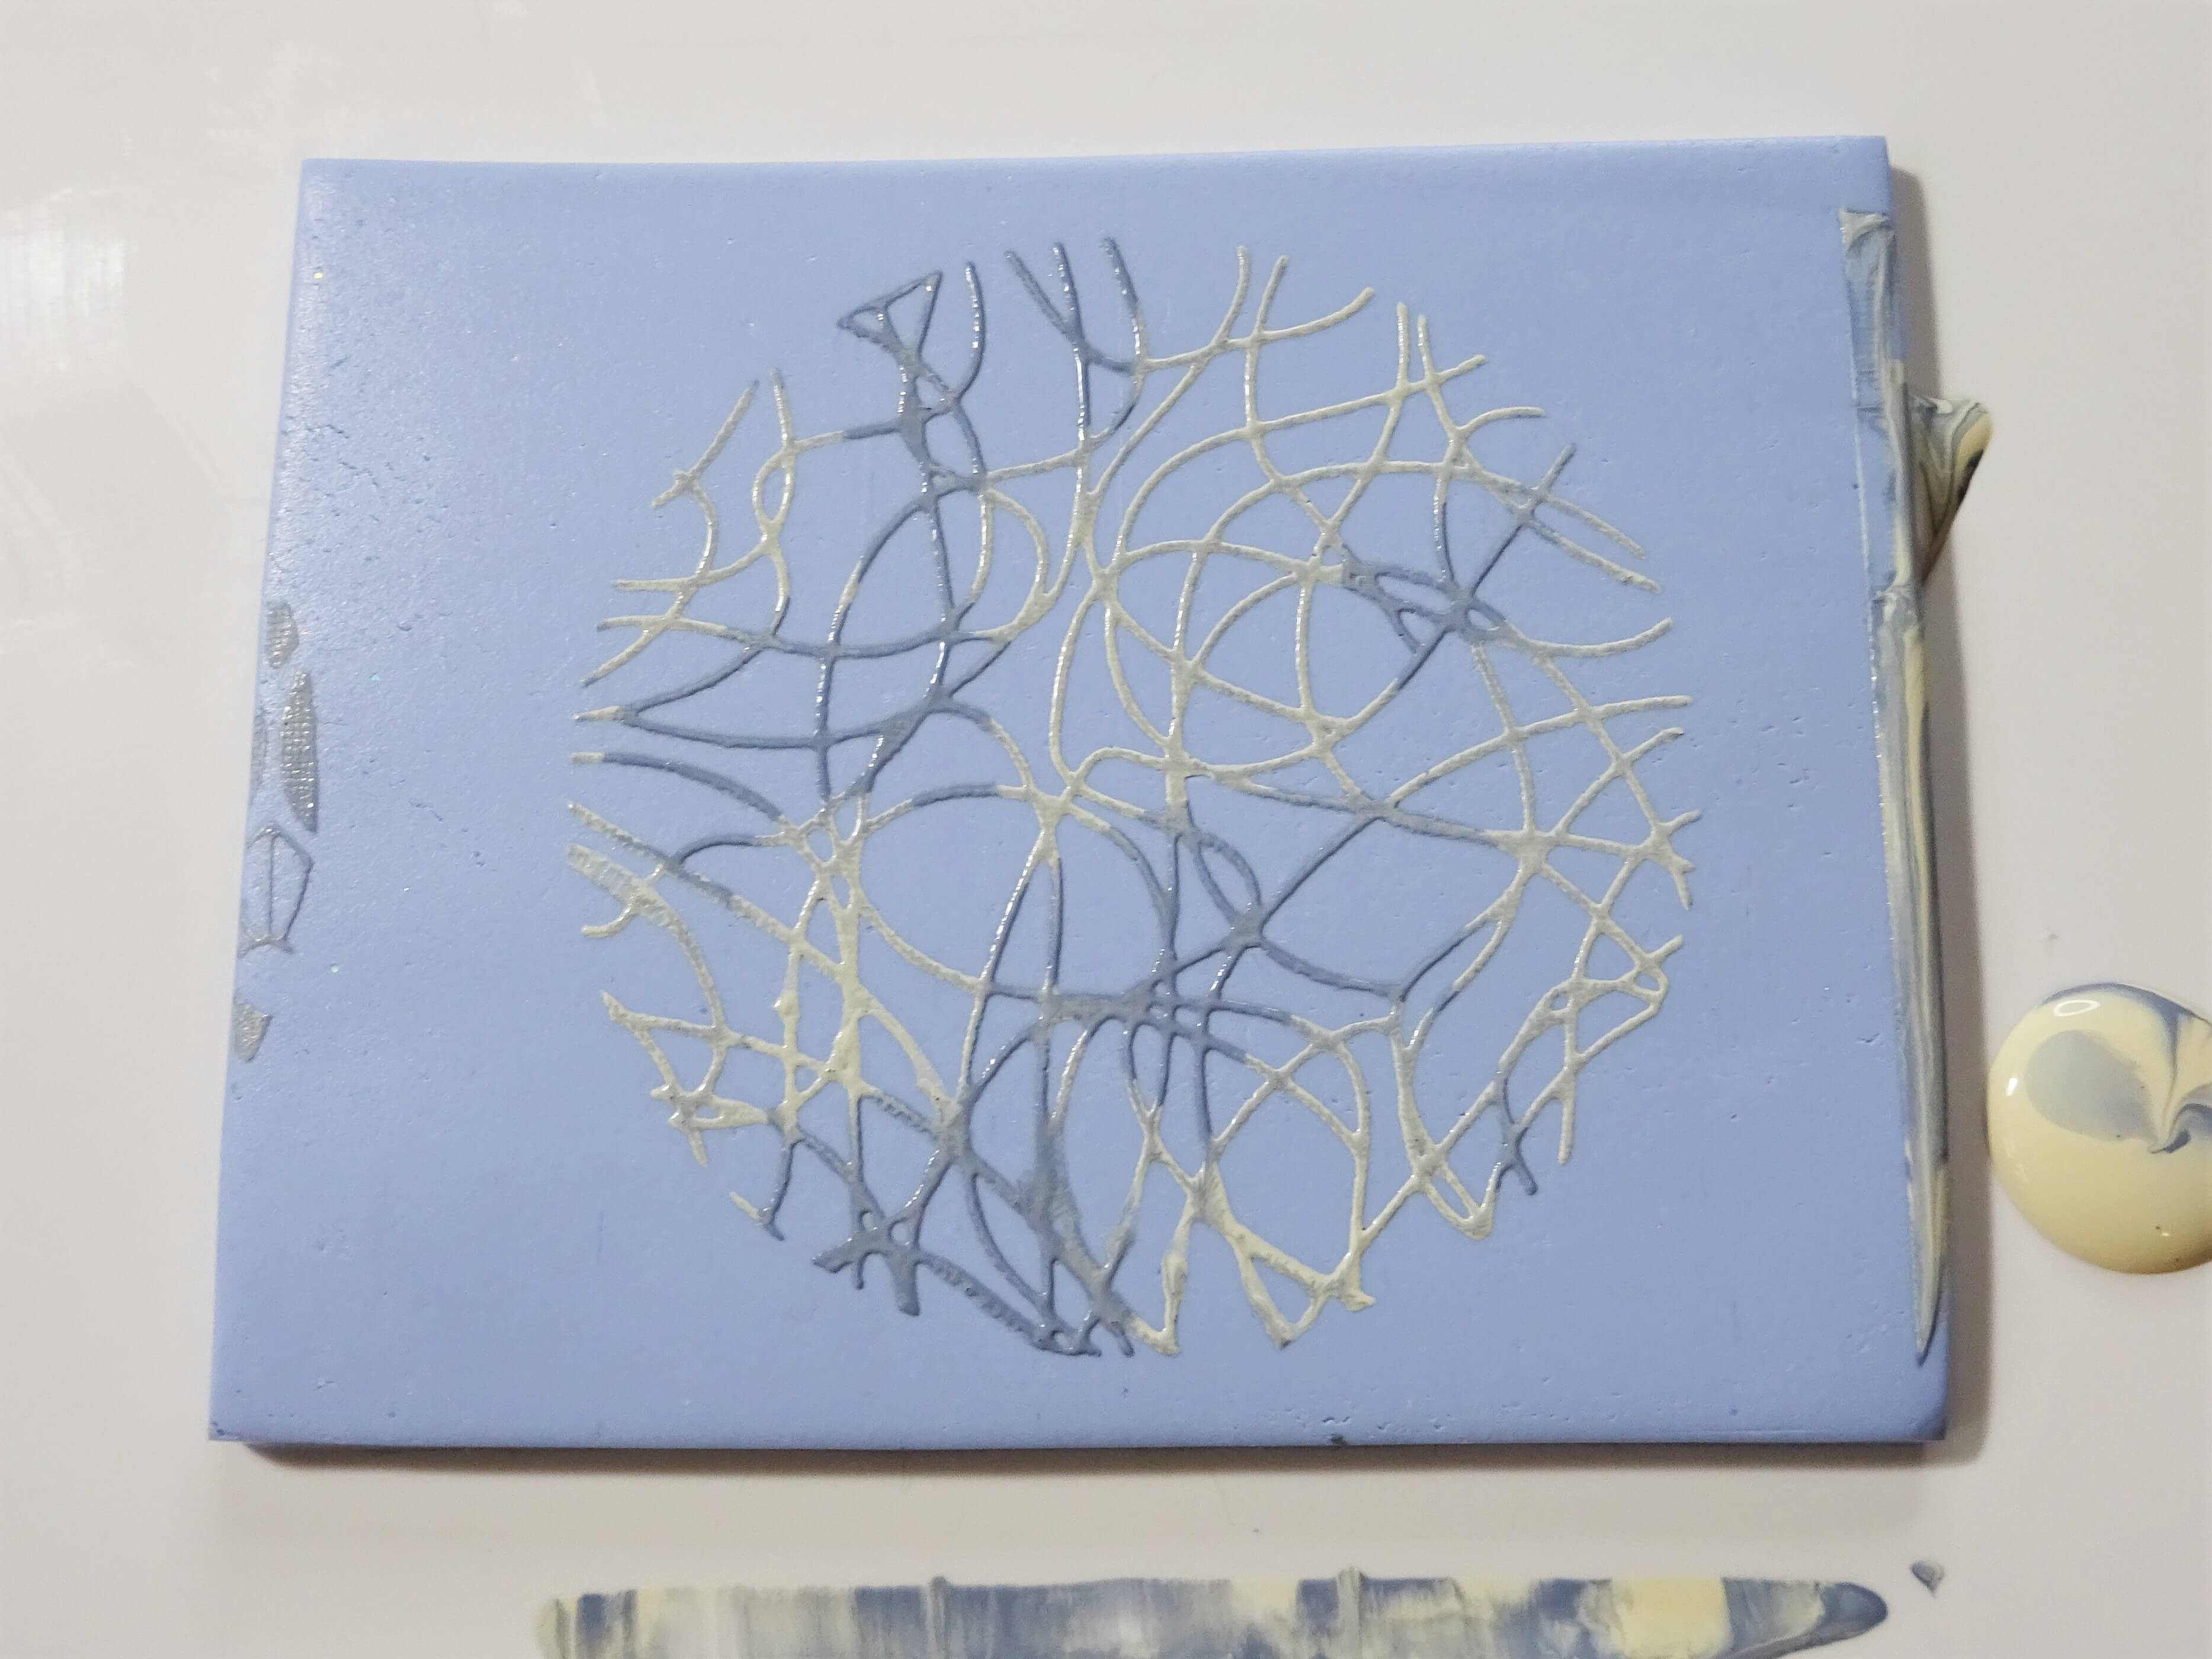
Lift the silk screen to show the result. Put this to one side to dry before using and put your stencil and scraper tool in water.
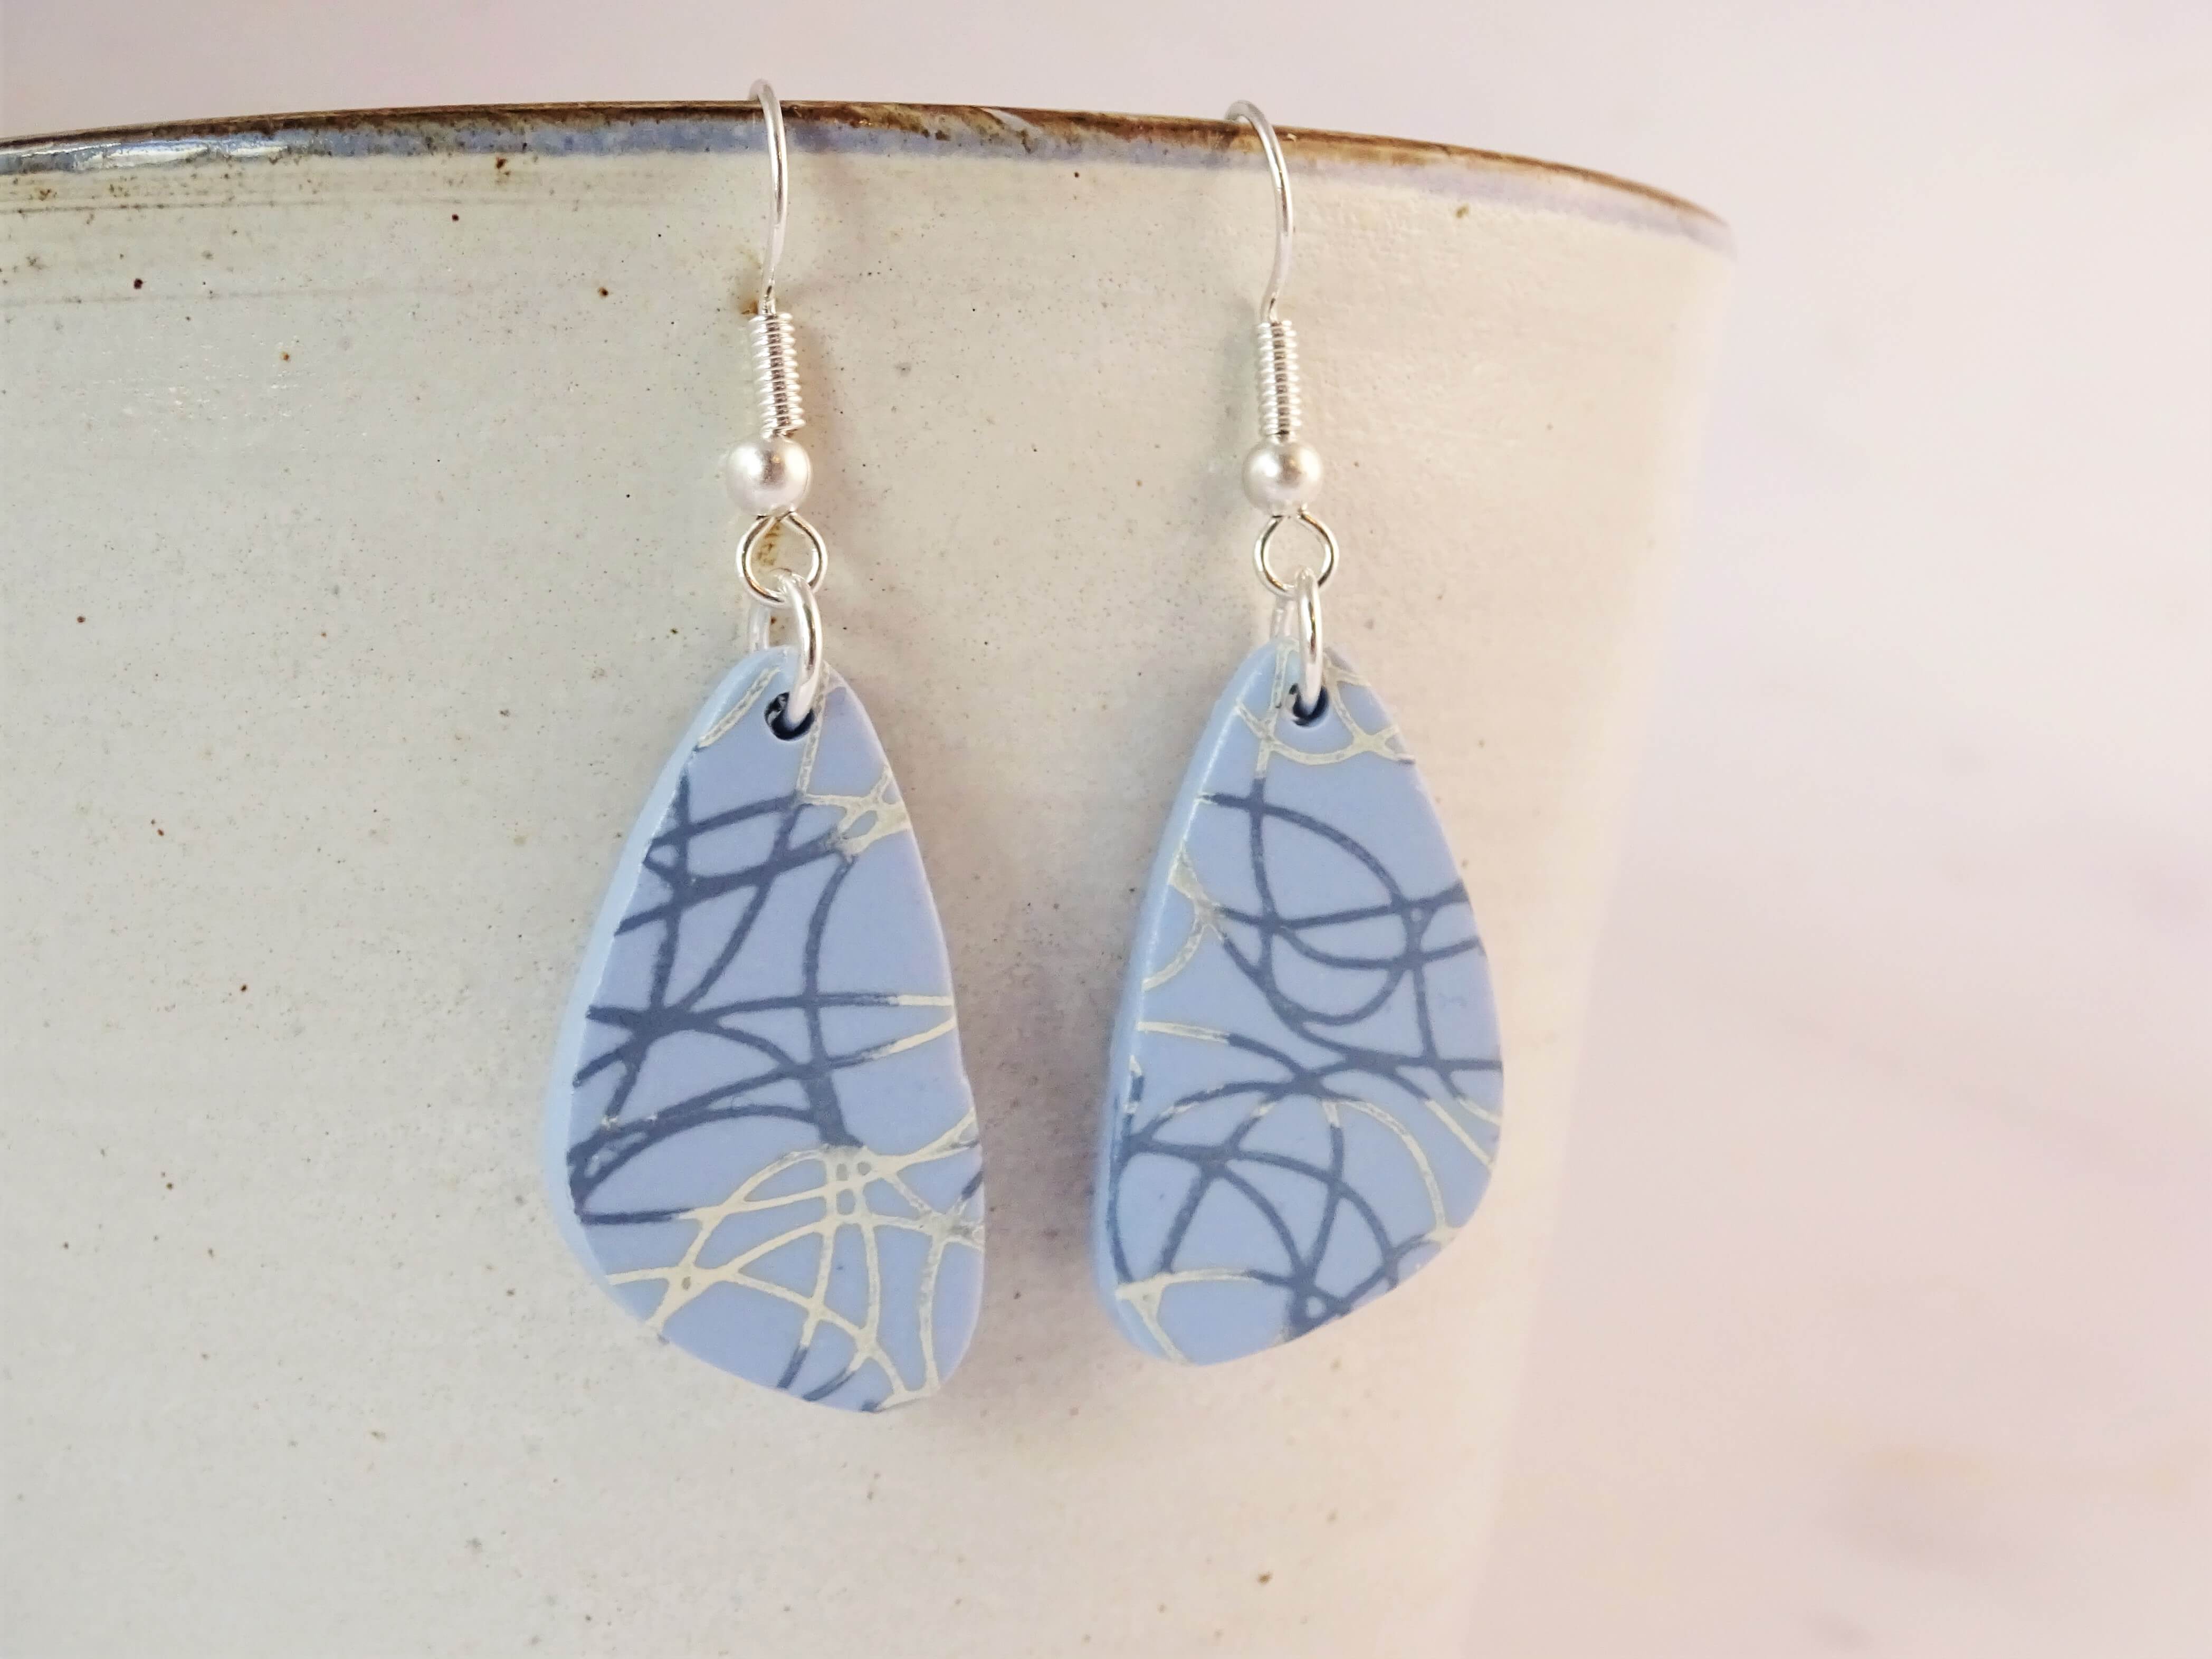
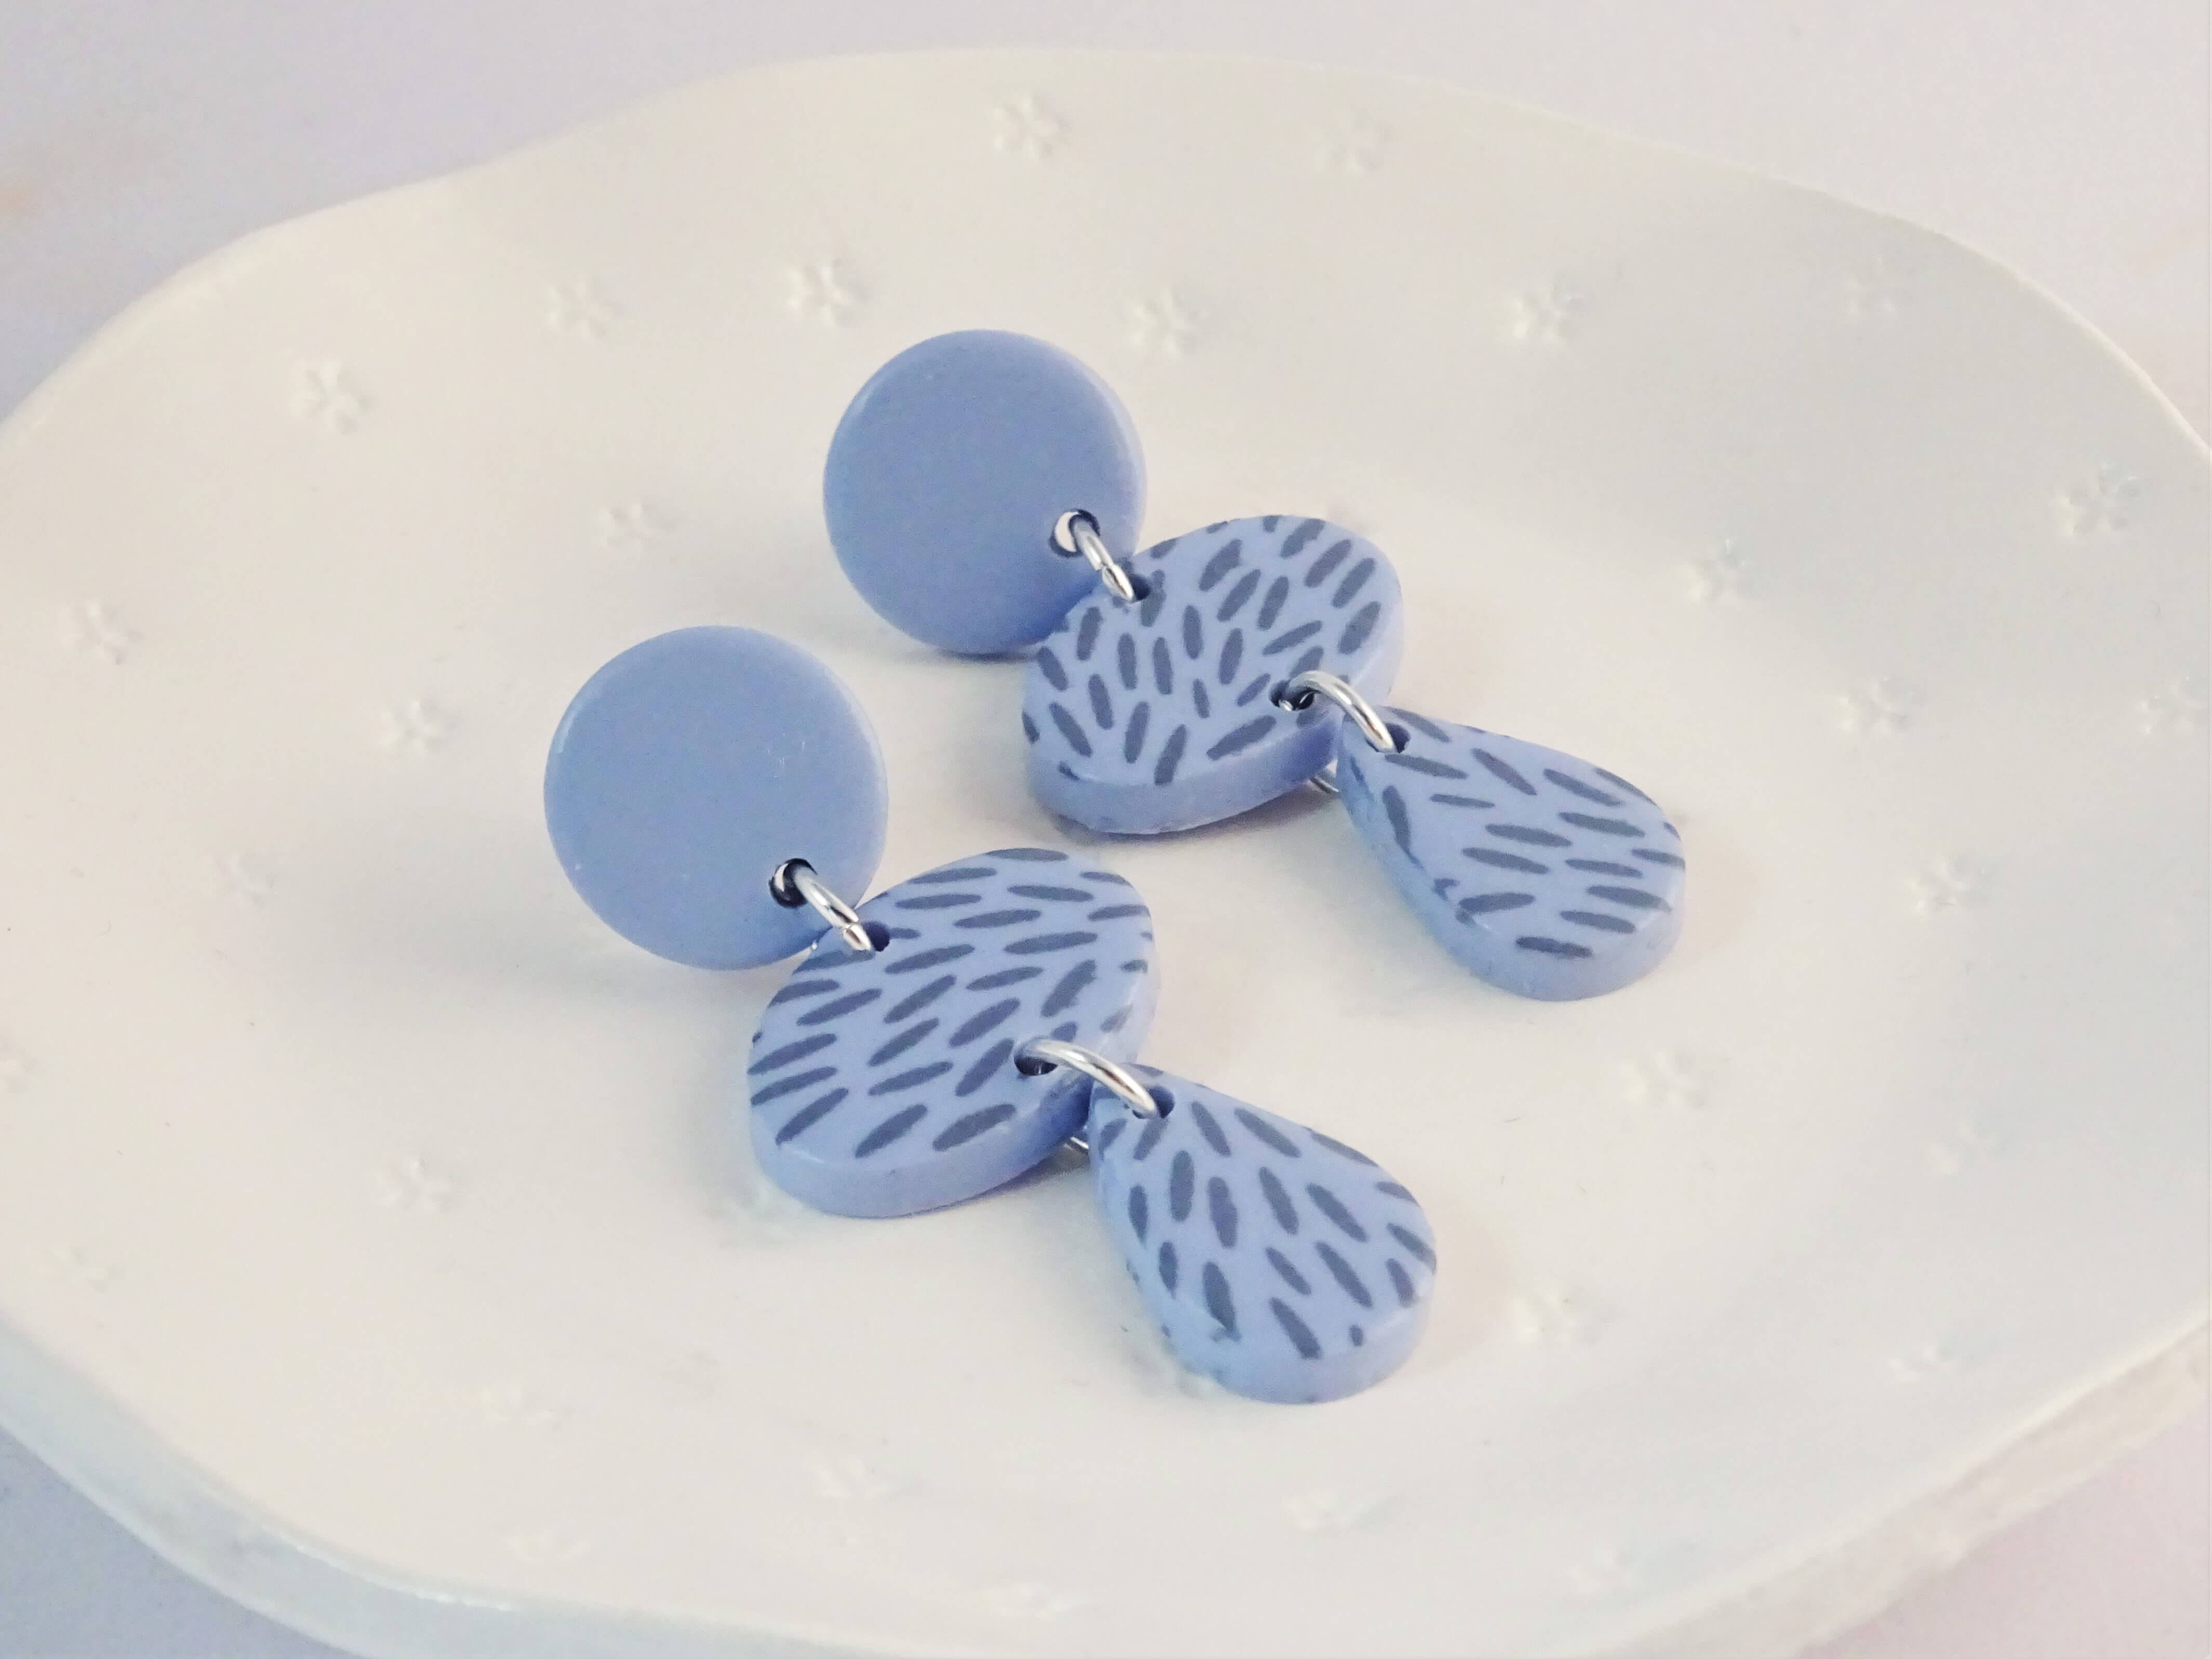
Cut out to use in your polymer clay projects. I have made more earrings and I love how those colours shift from yellow to blue.
It really is that easy! Perfect for when you only have a small pocket of time to be creative. You could even sit and make a batch of silk screen polymer clay and put them to one side for a day when you can just sit and use them.
I have added a video below if your would like to see the actual process in action. If you plan on using this technique to make polymer clay statement earring then here is a tutorial showing the best way to add earring posts to polymer clay earrings.
Links below for products used are Affiliate links for Amazon (UK and United States). This just means that if you use my link to buy a product I earn a very small commission, at no extra expense to you (you pay the same regardless how you find the item). Every little extra helps me to offer free tutorials.
Affiliate Links –
UK
Sculpey silk screen kits : Silk Screen set with paints (this the the kit where my stencil is from)
Additional silk scree sets – Floral and Nature
Craft paint suggestions :
USA
Additional silk scree sets – Floral and Nature
Craft paint suggestions :
If you have made it this far then don’t forget to check out my other polymer clay tutorials 🙂
Thanks for reading,
Hannah x

