
This post contains affiliate links.

A little while ago, on my YouTube channel, I was asked if I could do some Peyote stitch tutorials, as up to now I have predominantly made brick stitch tutorials, and also a tutorial for little beaded houses. It seemed a logical thought to put the two requests together into one tutorial.
I had originally made a traditional looking peyote house (ok, I got totally carried away and I have whole pattern worked out for a set of three houses which is super cute but it would make a very lengthy blog and YouTube tutorial!) but struck on the idea of trying the same pattern but with a heart inside instead of the windows and door. I put the two houses to vote on my Instagram stories and the houses with the heart won with about 75% of the votes.
These peyote houses are made with an odd count peyote, as I wanted the houses to look symmetrical, so I show how to turn you needle and thread around to ensure you are ready to start the next row (even count does not require this step).
The first step of any of these tutorials is to make a pattern for me to follow. I have numbered the rows on the pattern as I find it makes it easier to read.
Free pdf pattern –
For these peyote stitch houses I have used Delica in size 11 in Bronze (Affiliate link UK / USA), Opaque Cream ( Aff – UK / USA), Opaque Jujube (Aff – UK / USA) and silver lined with my favourite Wildfire beading thread (Aff – UK / USA).
Just a side about the above affiliate links; if you use my link to buy a product I earn a very small commission, at no extra cost to you (you pay the same regardless how you find the item). Every little extra helps me to offer free tutorials.
Linked below the photo tutorial is a YouTube video if that is more you thing.
Peyote Stitch Houses Tutorial
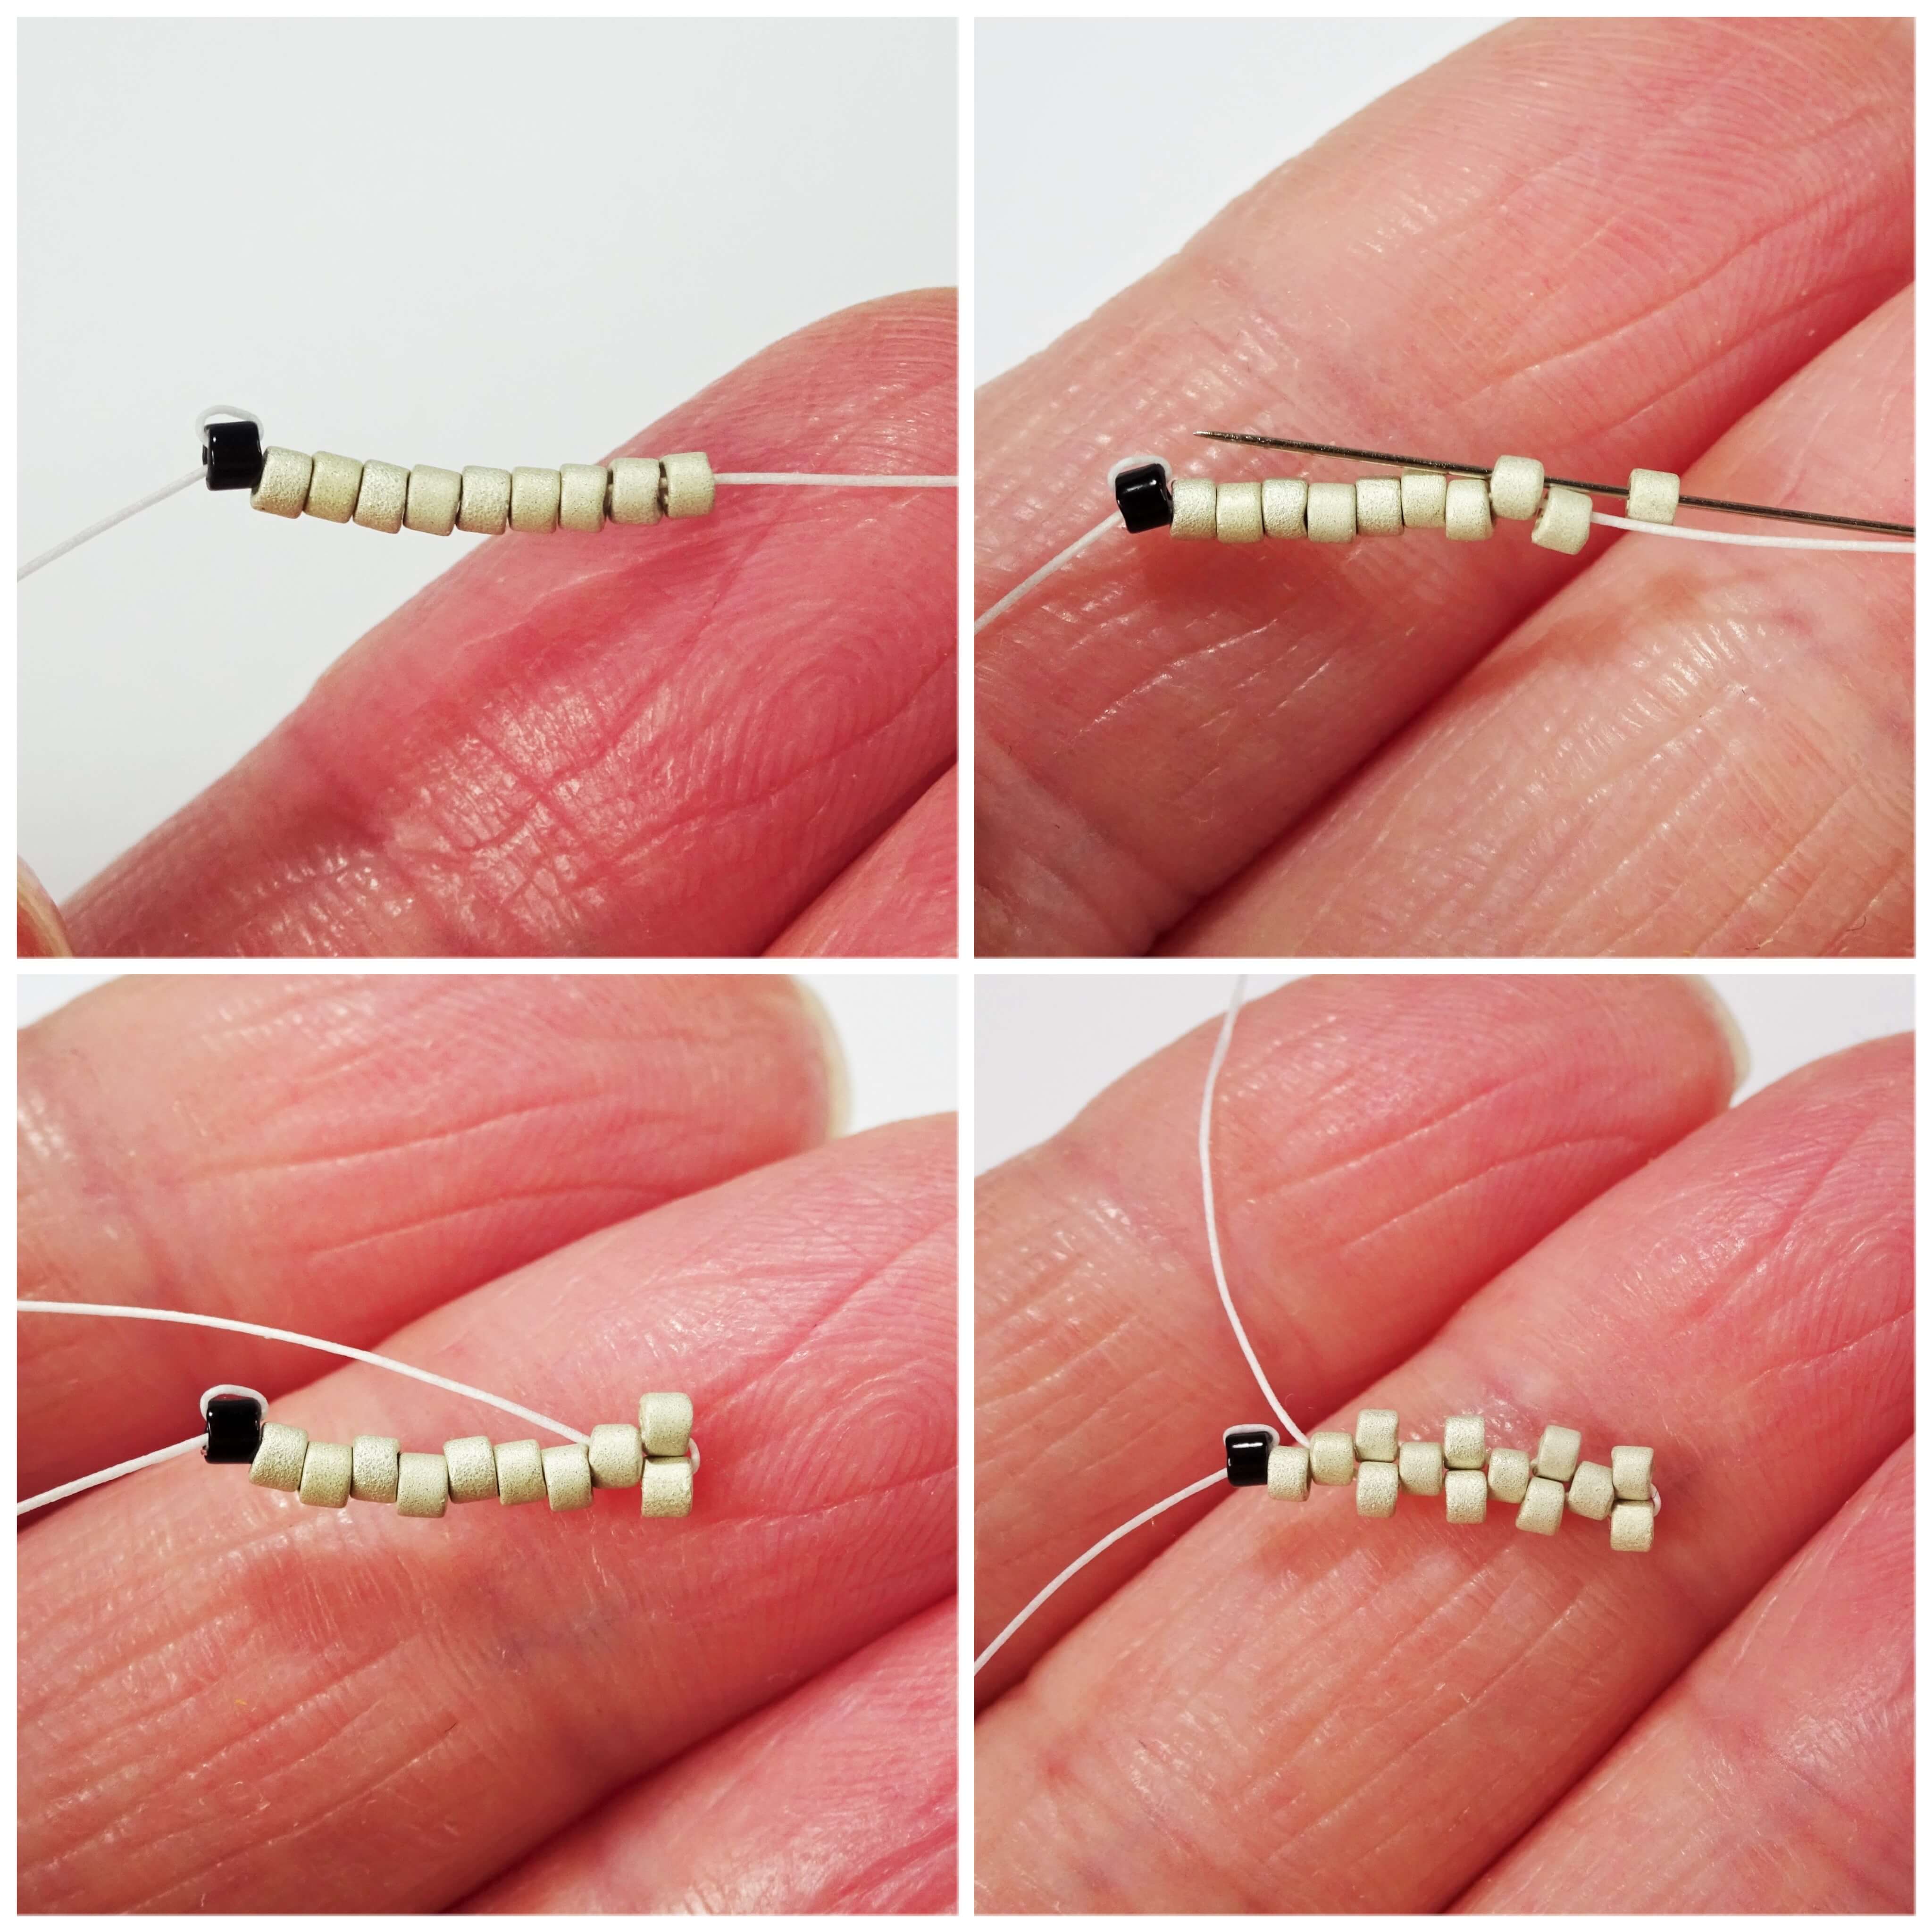
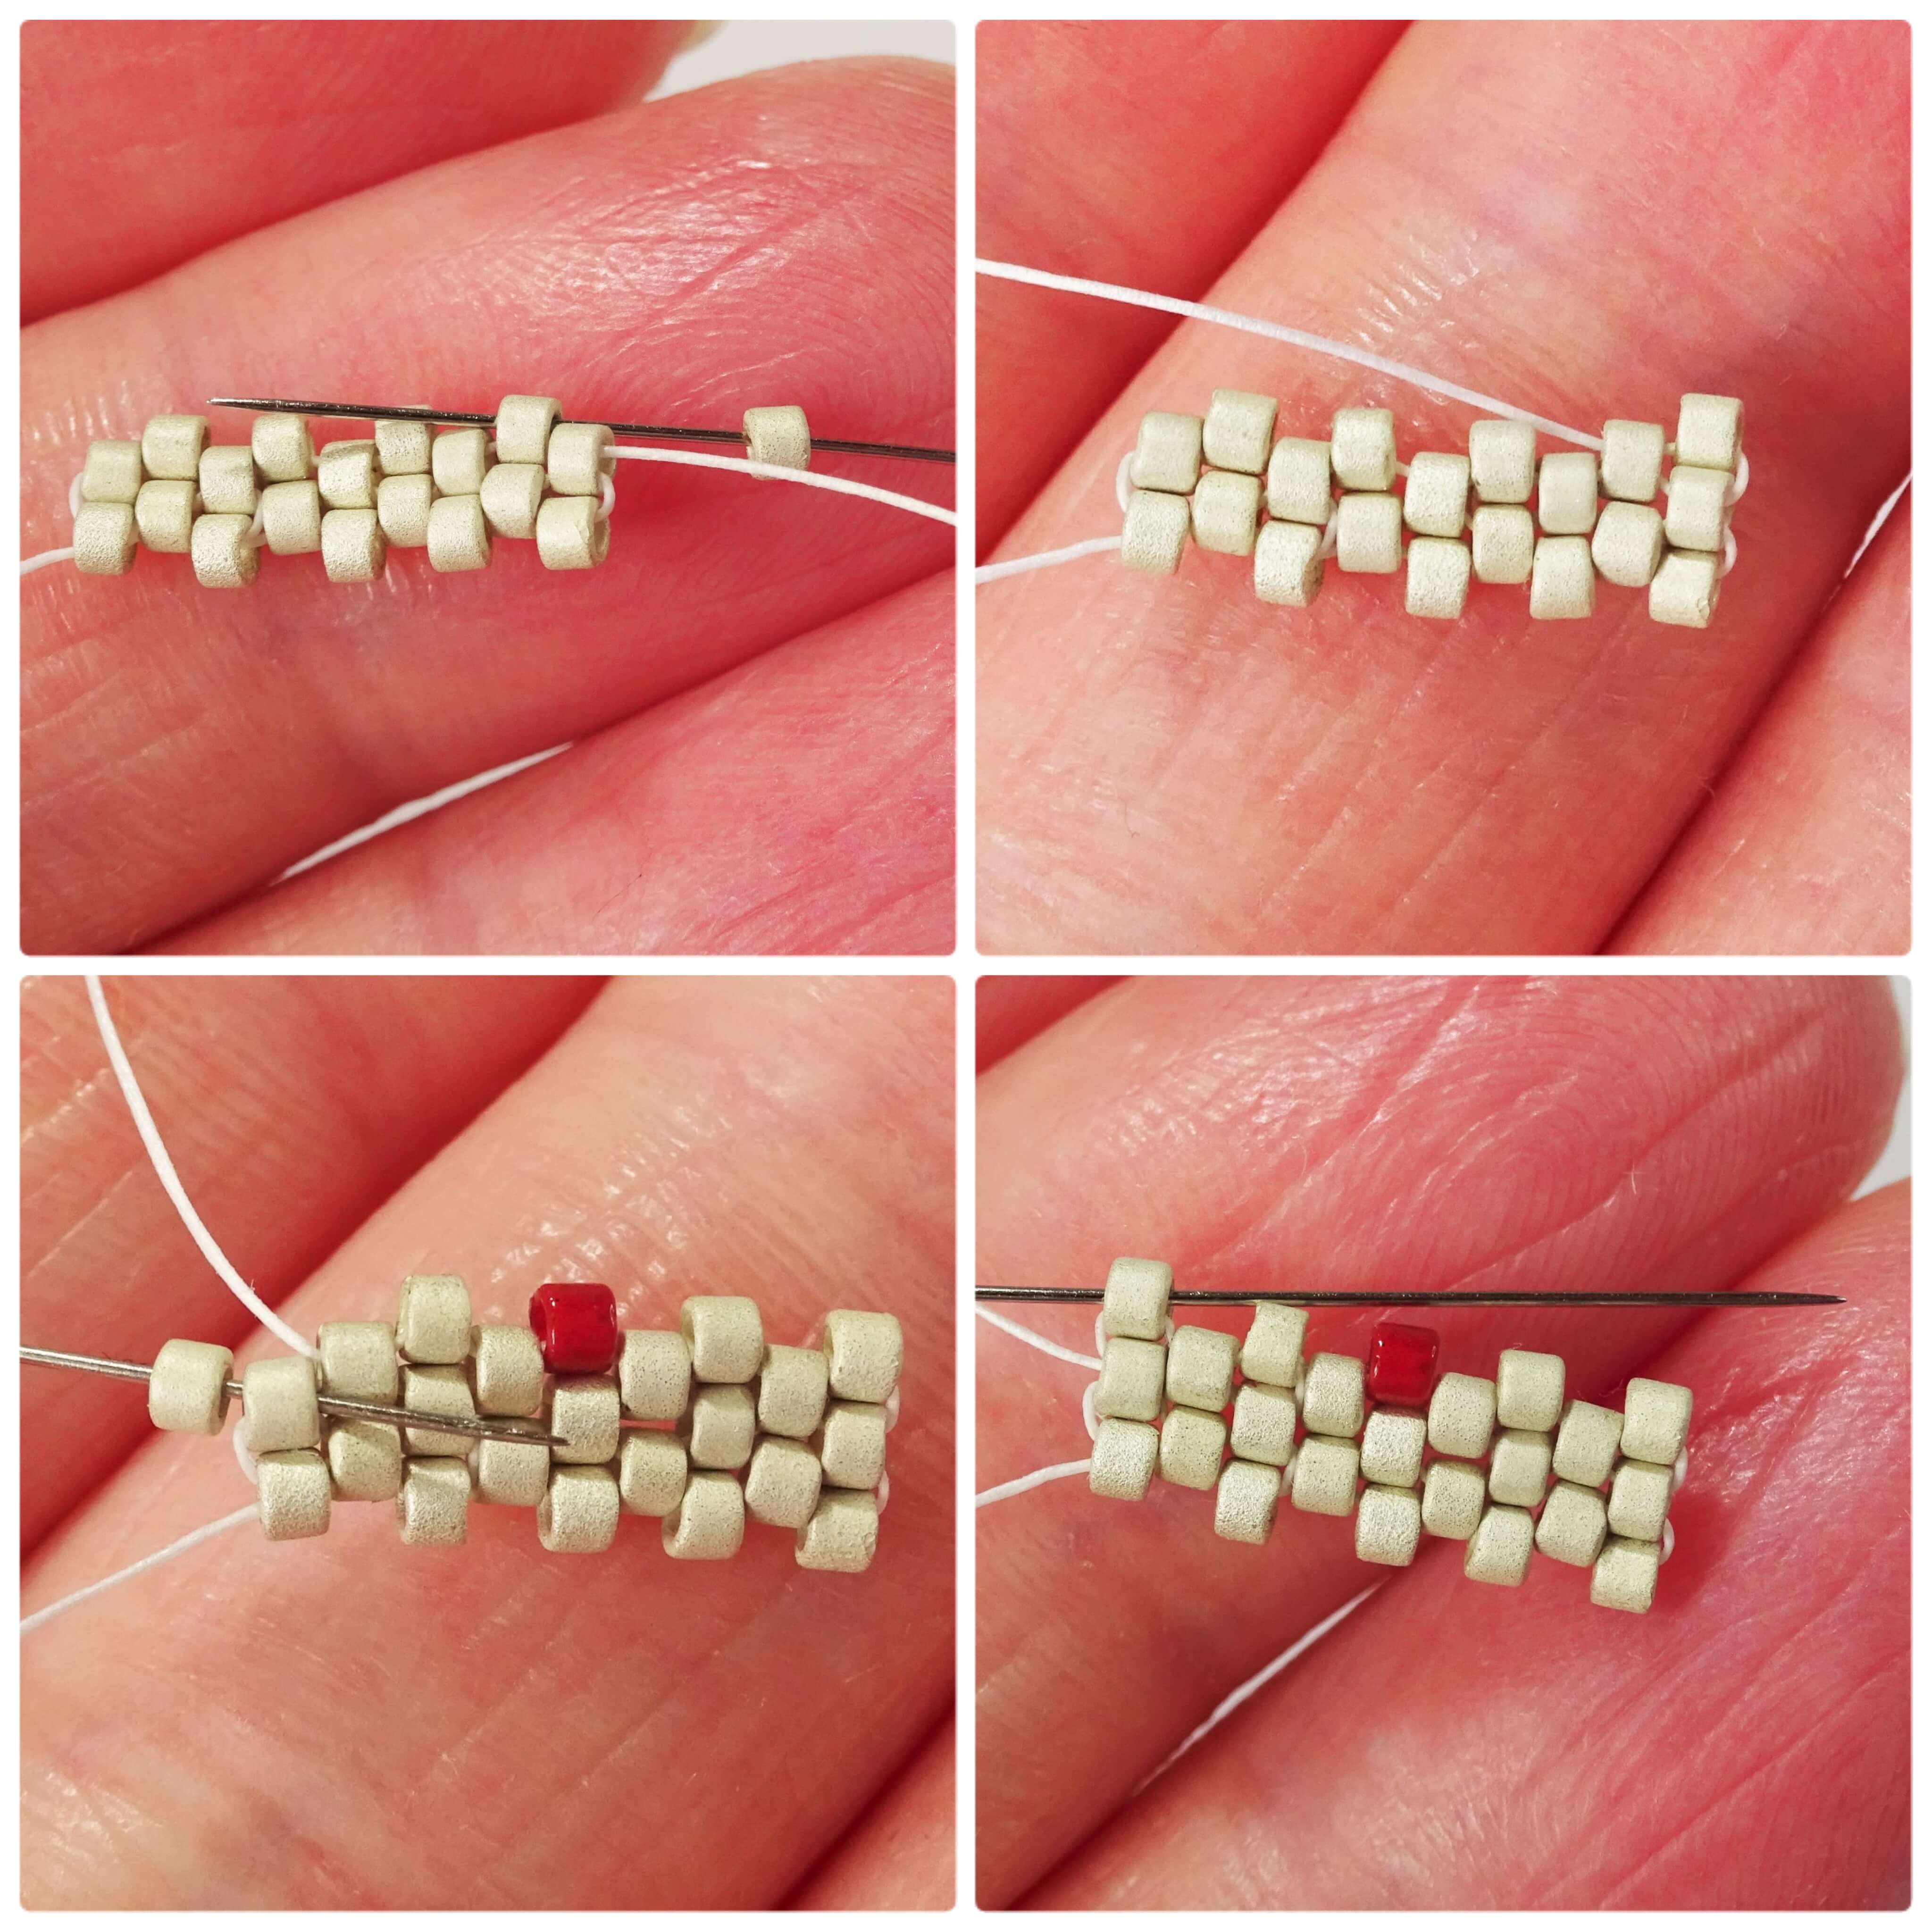
Cut a length of beading thread and add a needle to one end. Add a stopper bead by threading a bead on, in a different colour to your project beads, and looping the needle through it again so that the bead is secure on the end. Leave enough tail thread to weave in at the end.
When starting a new peyote project, you pick up the first two rows to begin with, so, in this case that is 9 cream beads (5 in row one and 4 in row two). Next, pick up another cream bead (this is the start of row 3) and take the needle into the second bead in from the end.
Pull the thread tight so the beads are sitting firmly with two beads sitting on top of each other and the second bead in staggered between them. Finish the row of beading by picking up 1 cream bead at a time and taking the needle through alternate cream beads on the row below.
There is now a clear distinction between rows one, two and three.
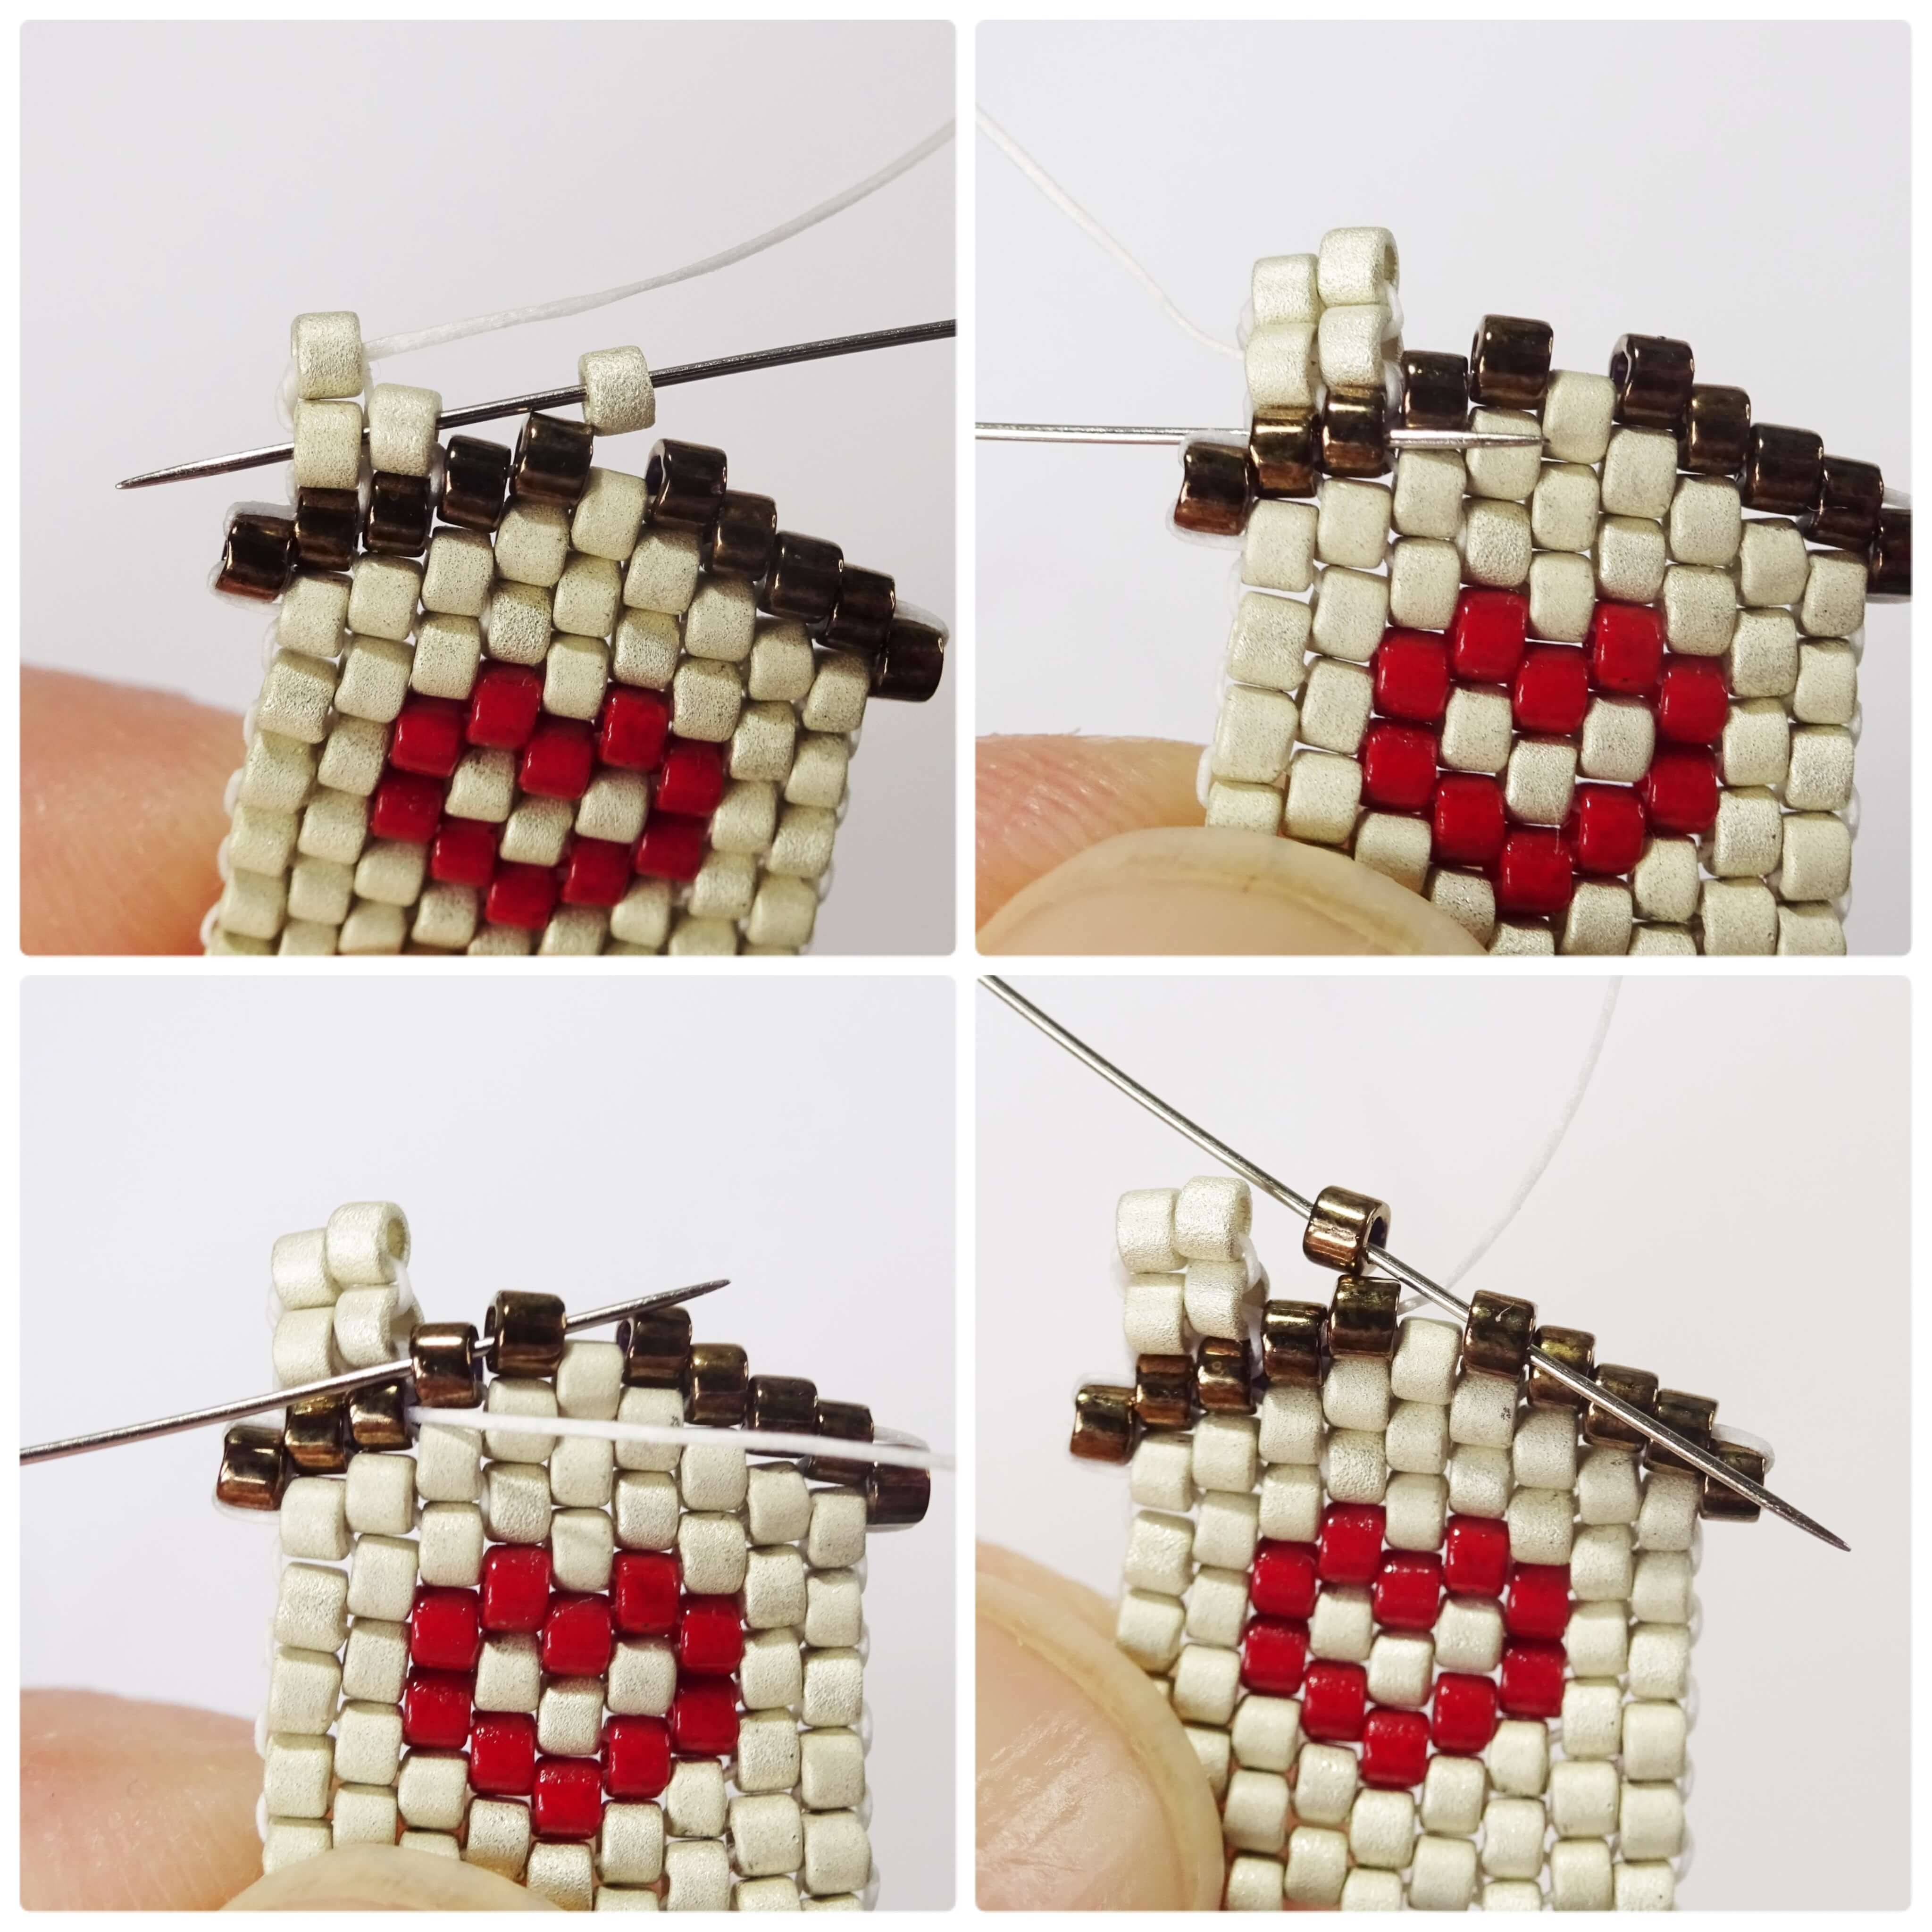
Because this is an odd count peyote, to finish off row three, pick up one more cream bead (row three has 5 beads in total) and take the needle into the bead below on row one. This is because there is no bead available on row two to bead into.
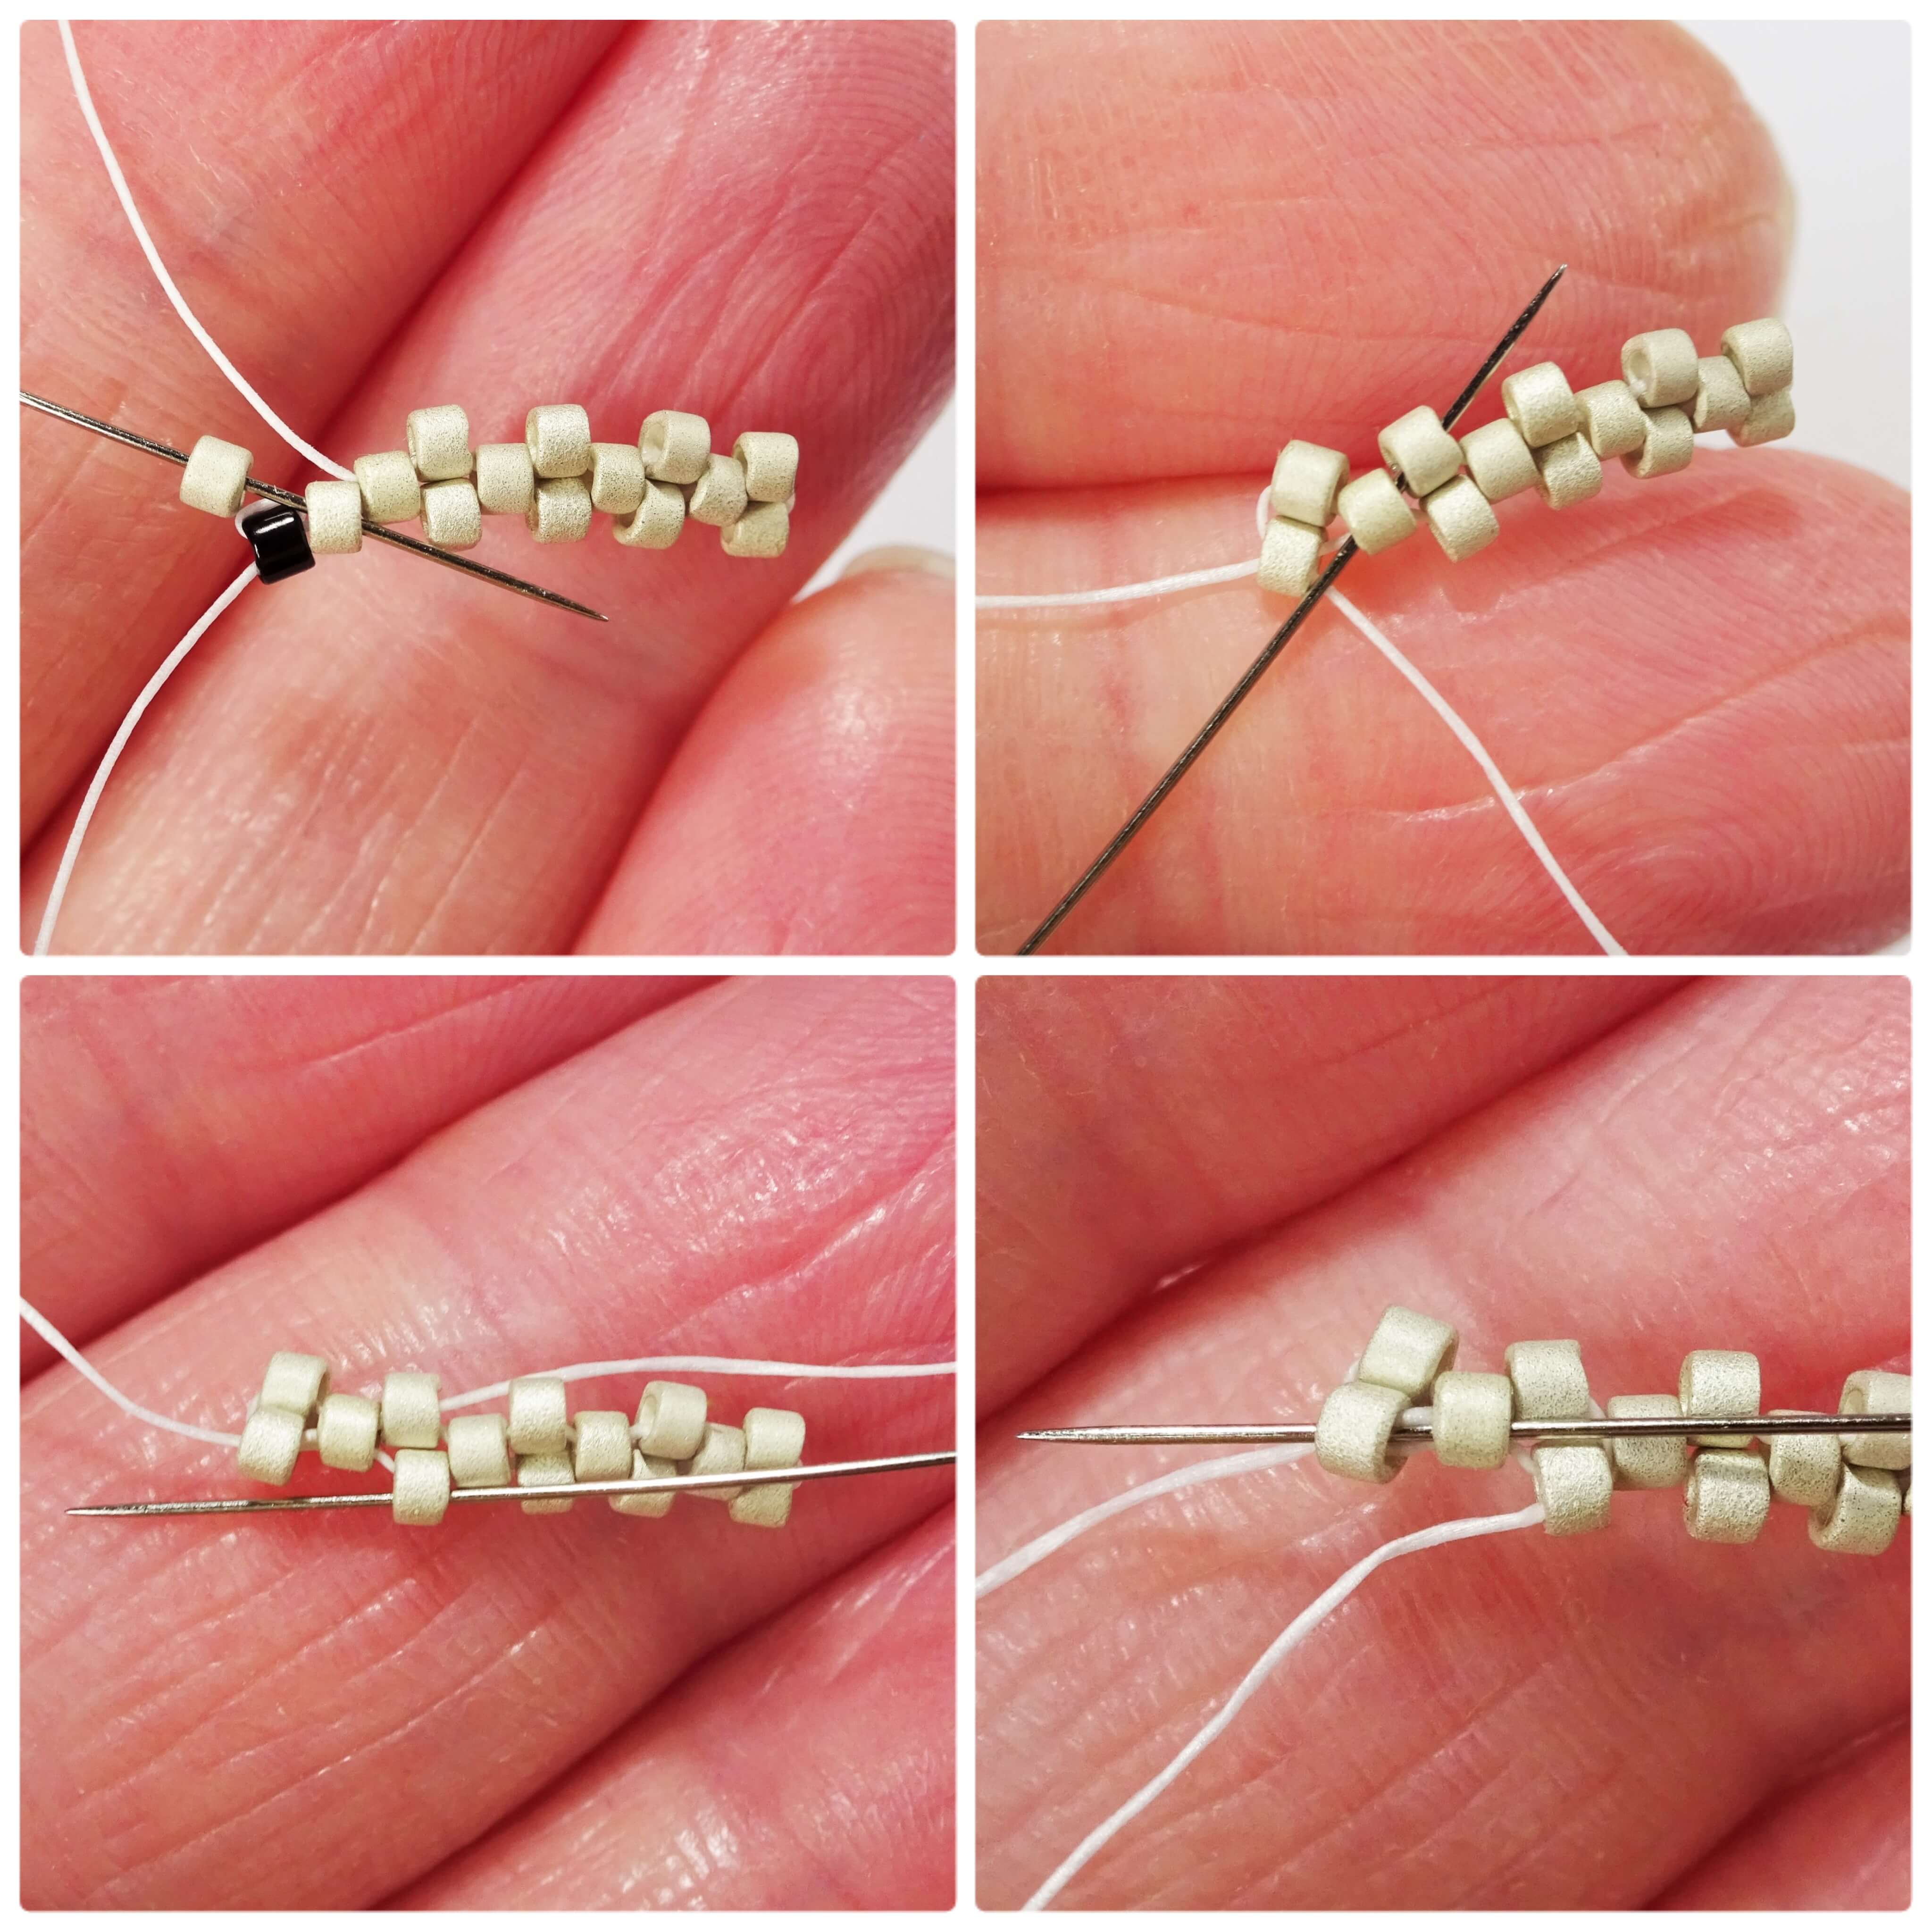
The needle and thread is now in the wrong position to begin the next row of beadwork so we need to change direction. To do this take the needle into the adjacent bead in row two and up into a bead on either row one or three.
Next, take the needle directly down into the bead below (or above depending on which row you were in) and through the bead in row two again and the bead where the tail thread is coming from. The needle and thread is now exiting outwards from the bead on row one.
Take the needle up so that it is exiting from the last bead in row three and moving towards the rest of the bead work. Begin row four by picking up 1 cream bead and taking the needle into the next cream bead sticking up in the bead work. This new bead will fill in the gap between the beads.
Continue with row four, one cream bead at a time, taking the thread into the cream beads that are raised from the previous beading layer. Row four has 4 cream bead.
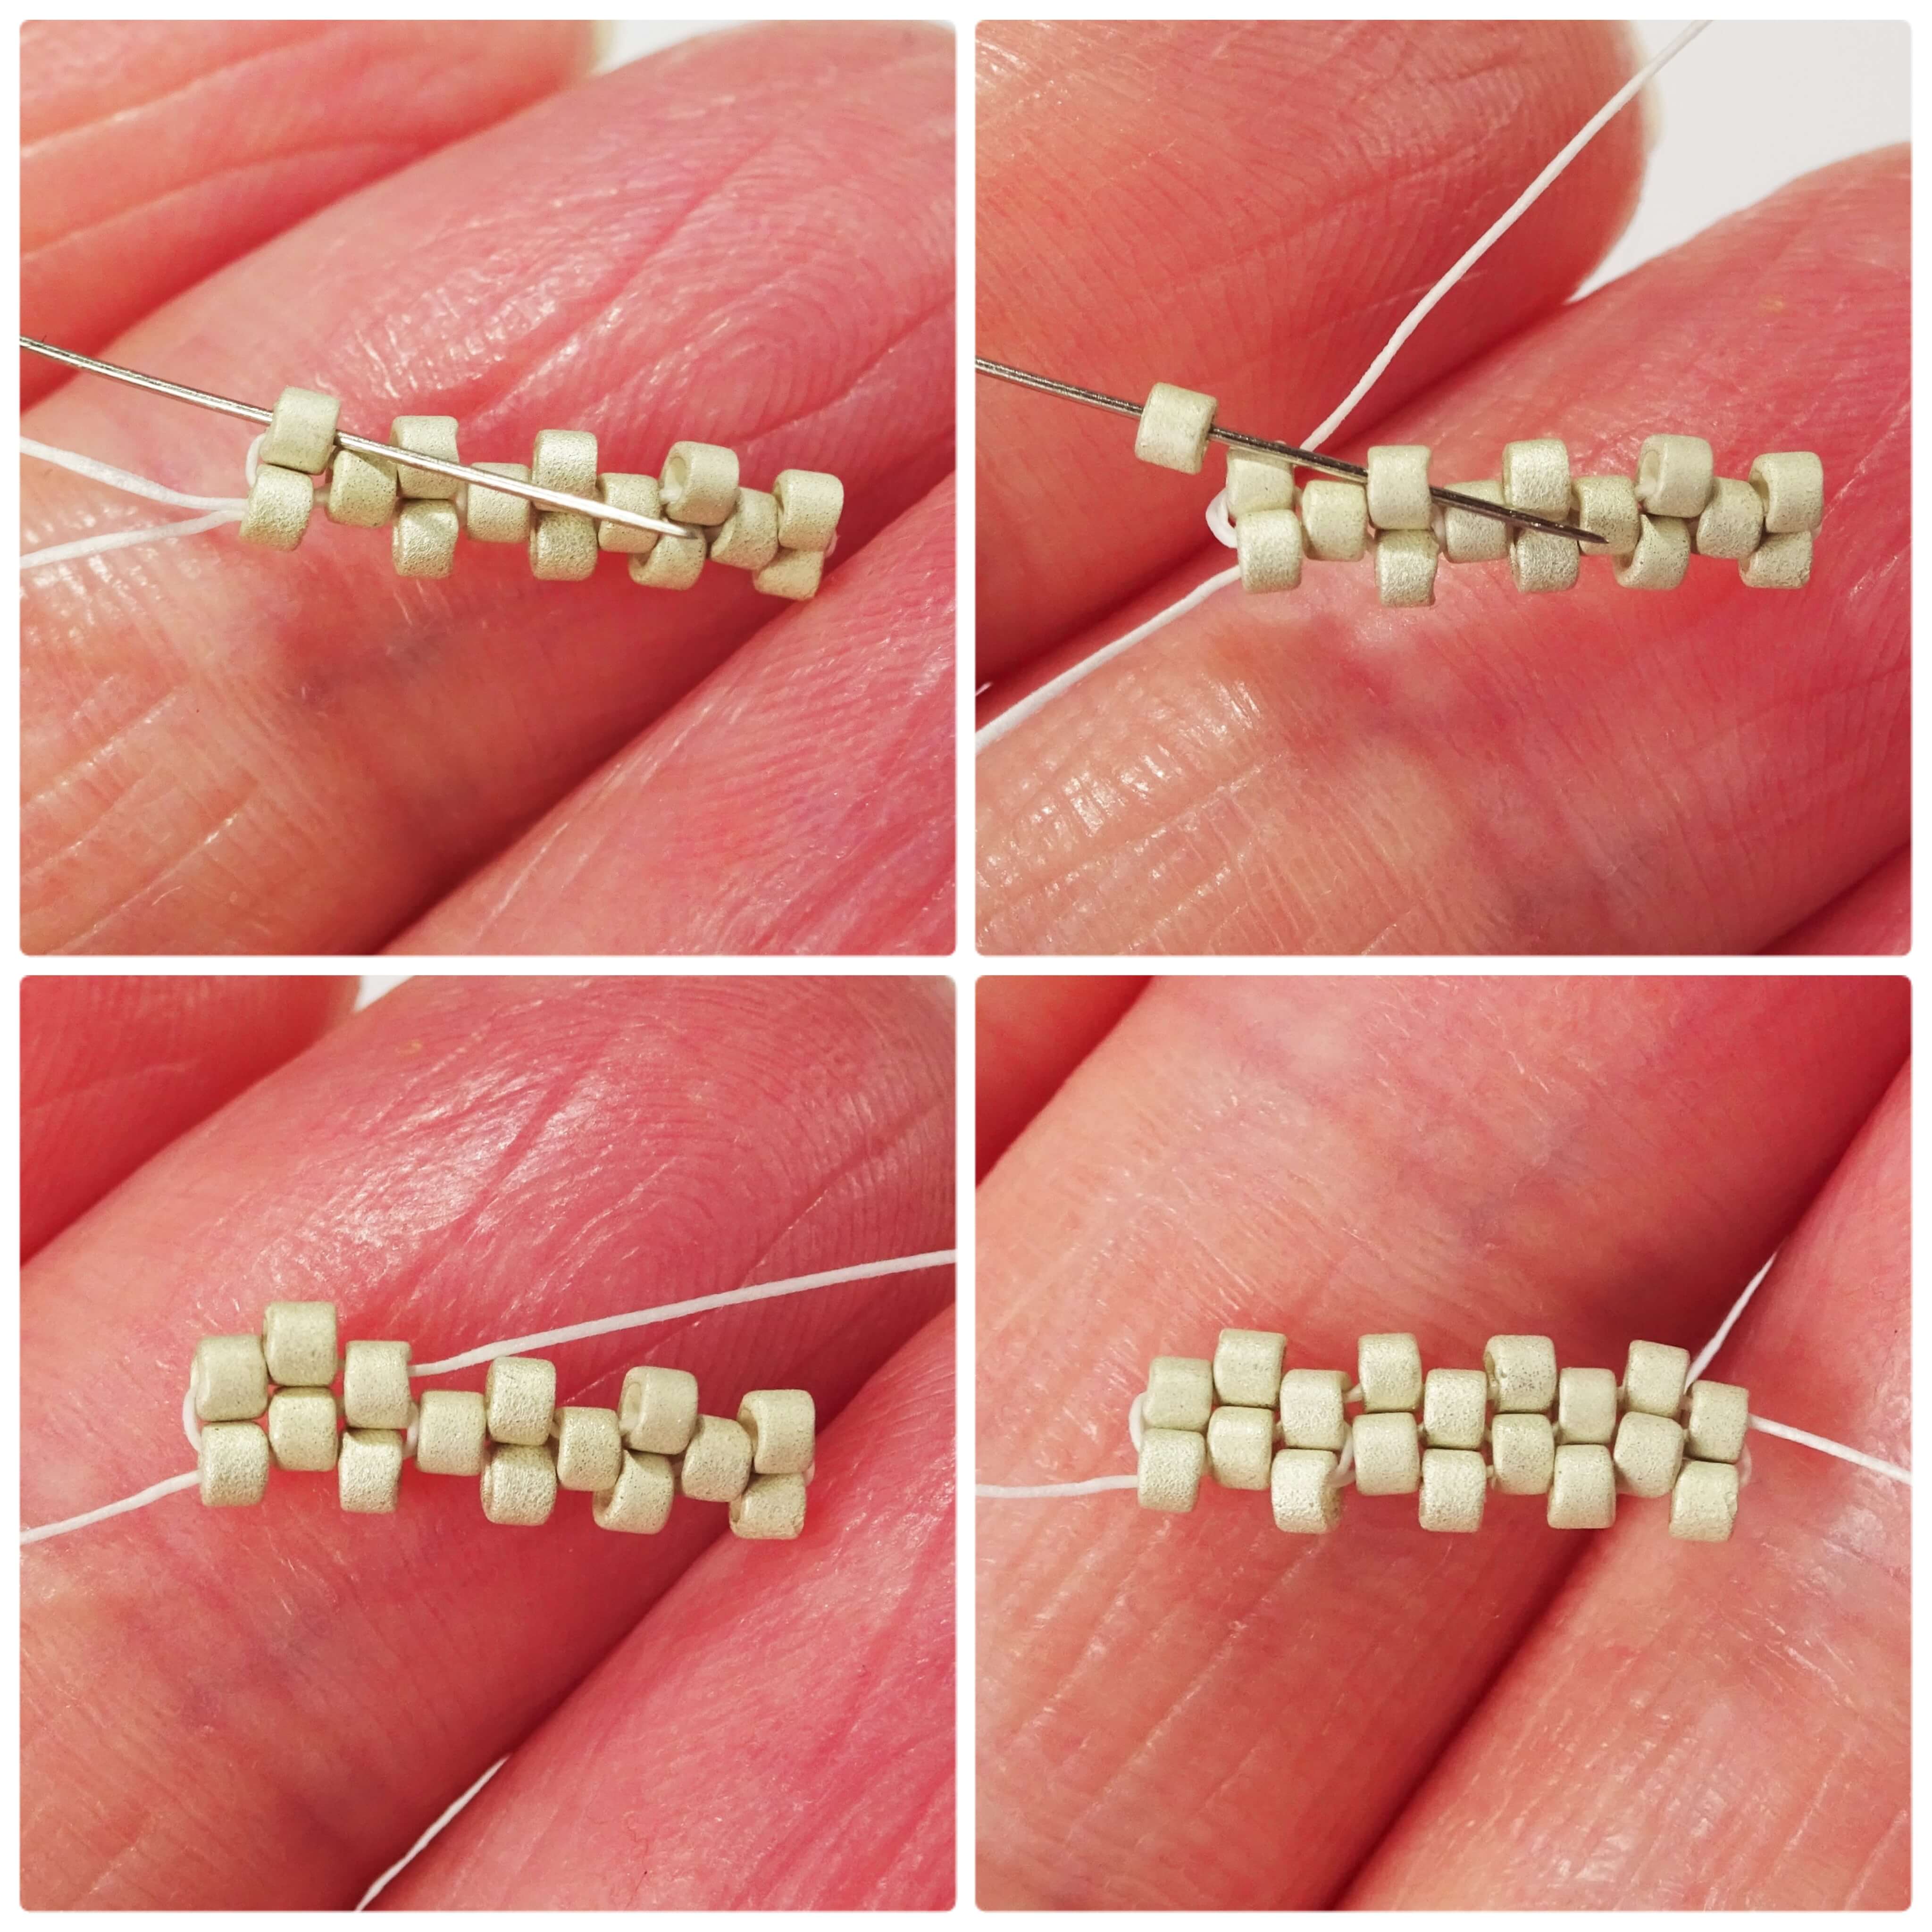
To start row five, simply pick up 1 cream bead and take the needle into the second bead in that is sticking up. Fill the rest of the row in as in previous steps; row five has 2 cream beads, 1 red and then 2 more cream beads to finish the row.
Add the last bead by taking the needle into the last bead on the lower beading level and then turn your needle and thread around, as shown in step 2, so you will be ready to start row 6.
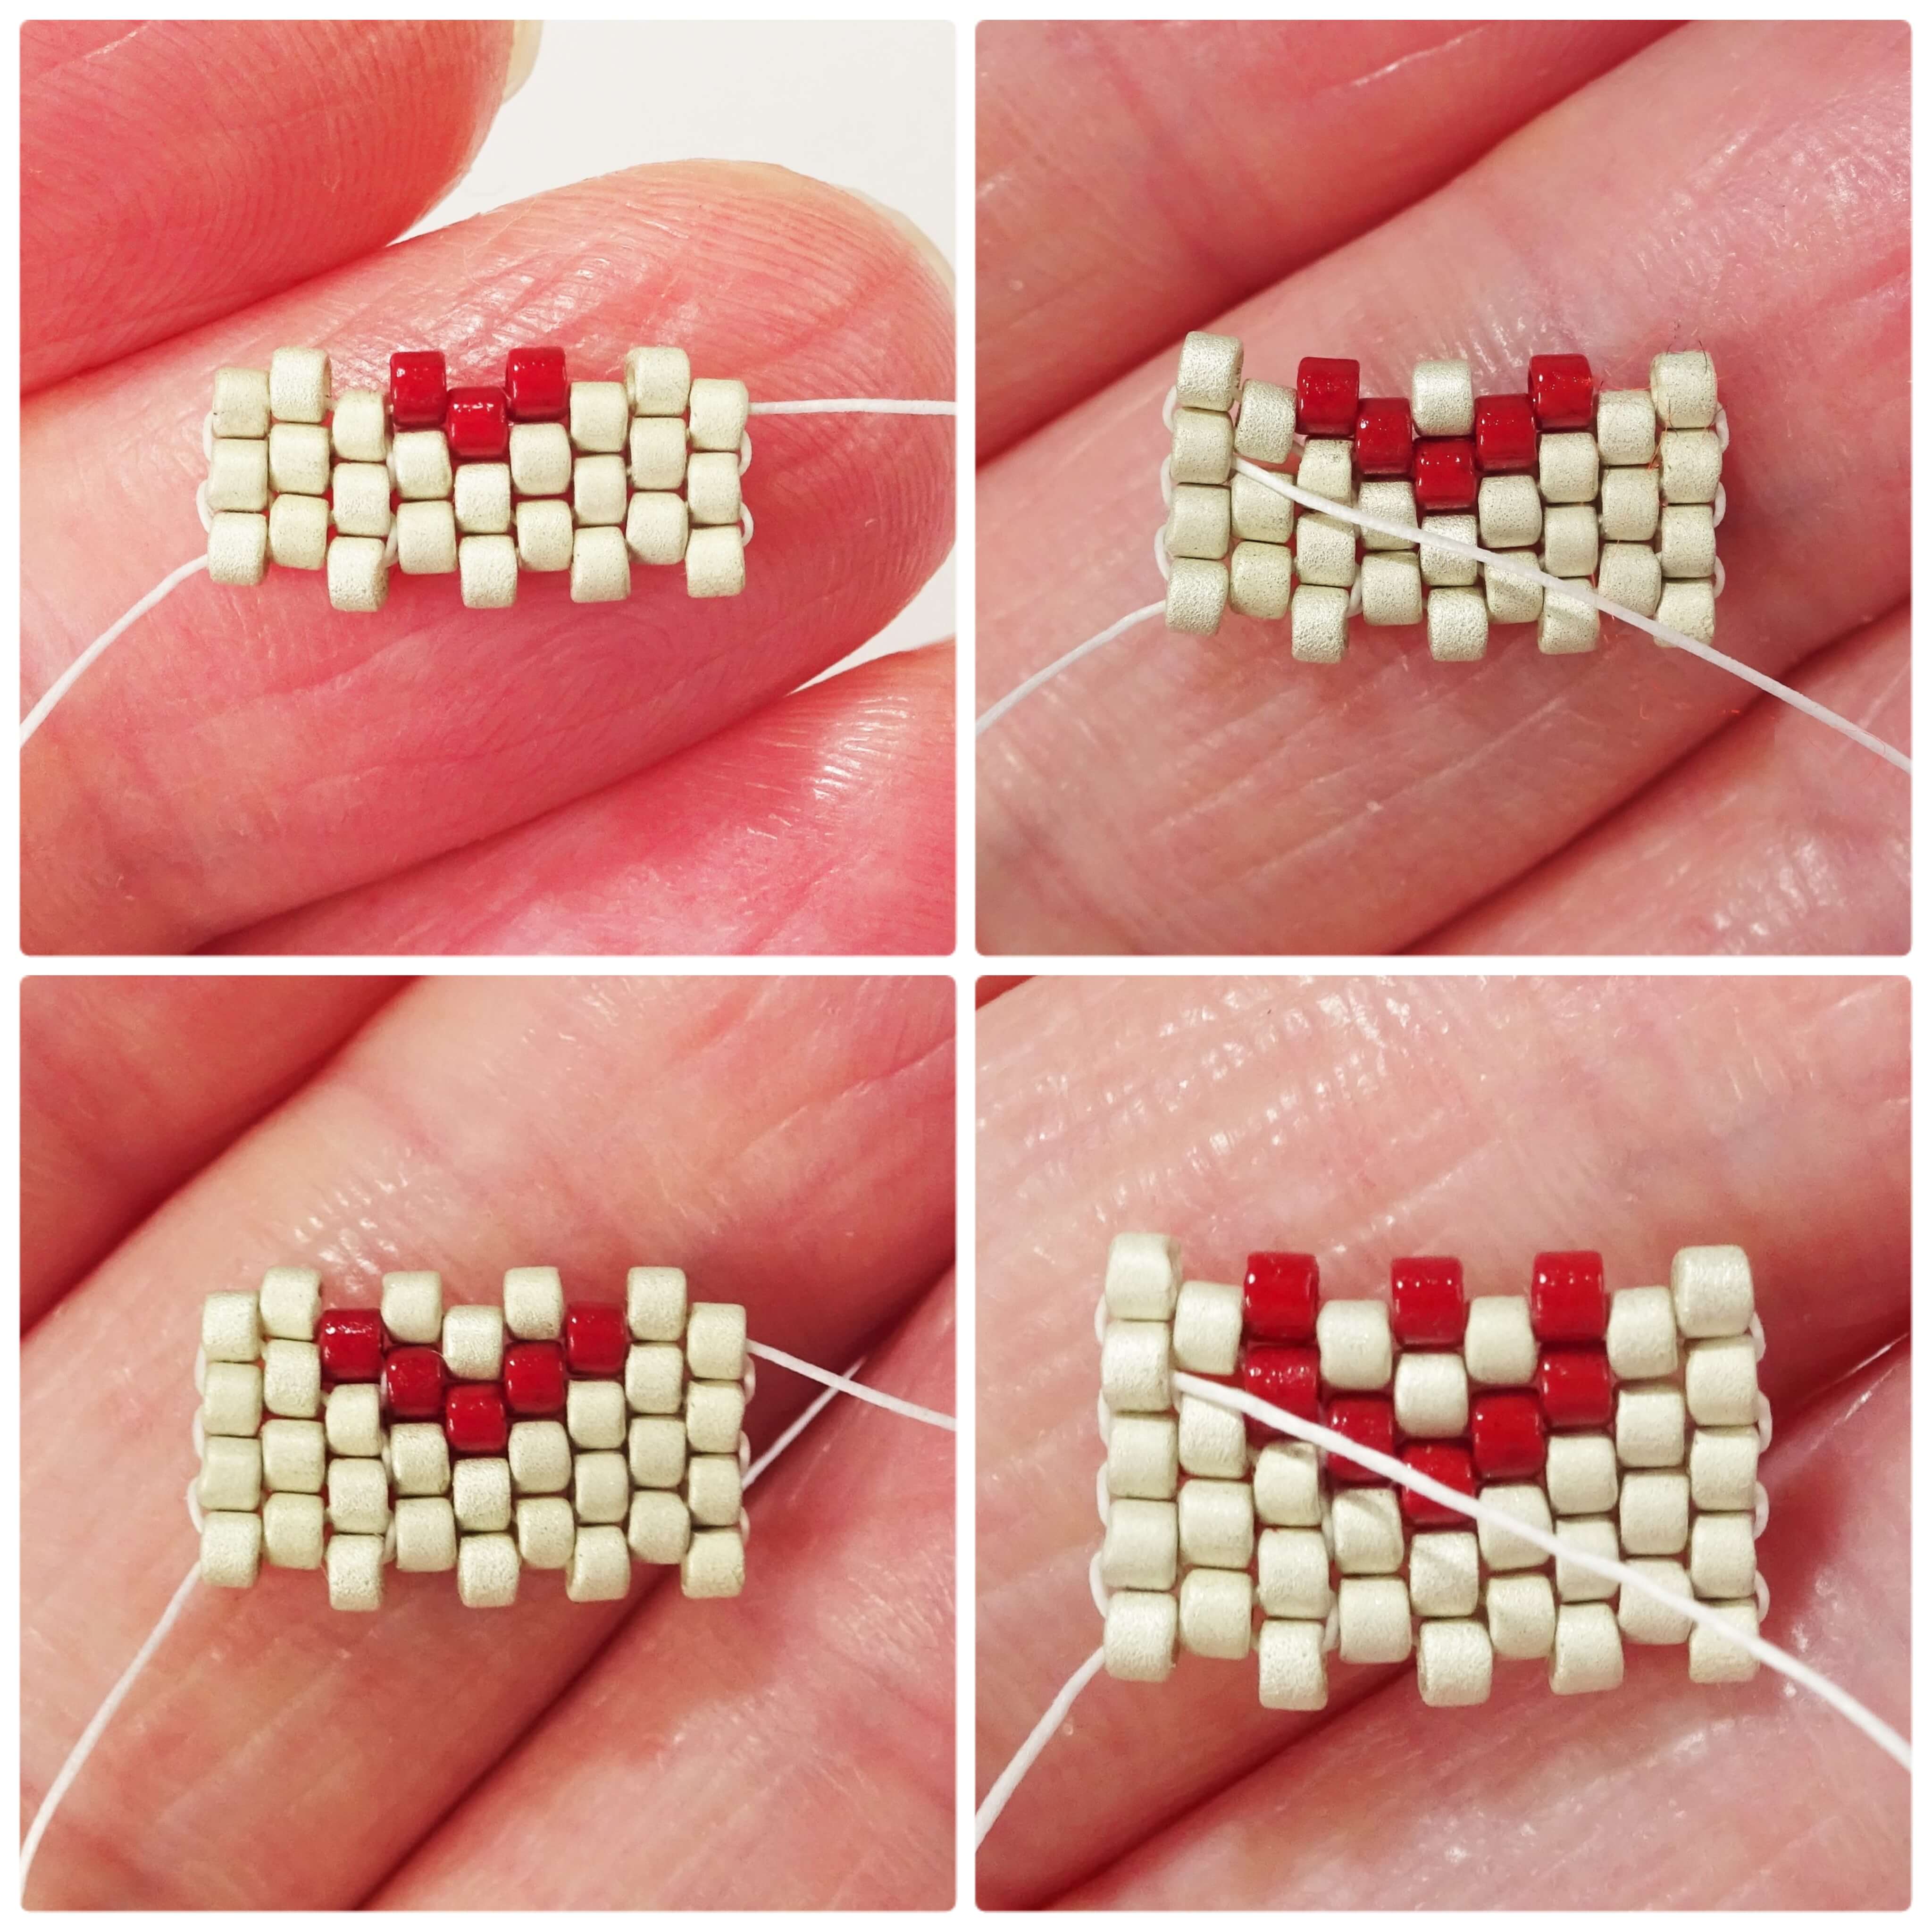
Add the beading rows as before, one bead at a time ;
Row six – 1 cream, 2 red and 1 cream.
Row seven – 1 cream, 1 red, 1 cream, 1 red and 1 cream. The needle and thread will need to be turned around as in step 2 at the end of this row.
Row eight – 4 cream.
Row nine – 1 cream, 3 red and 1 cream. The needle and thread will need to be turned around as in step 2 at the end of this row.
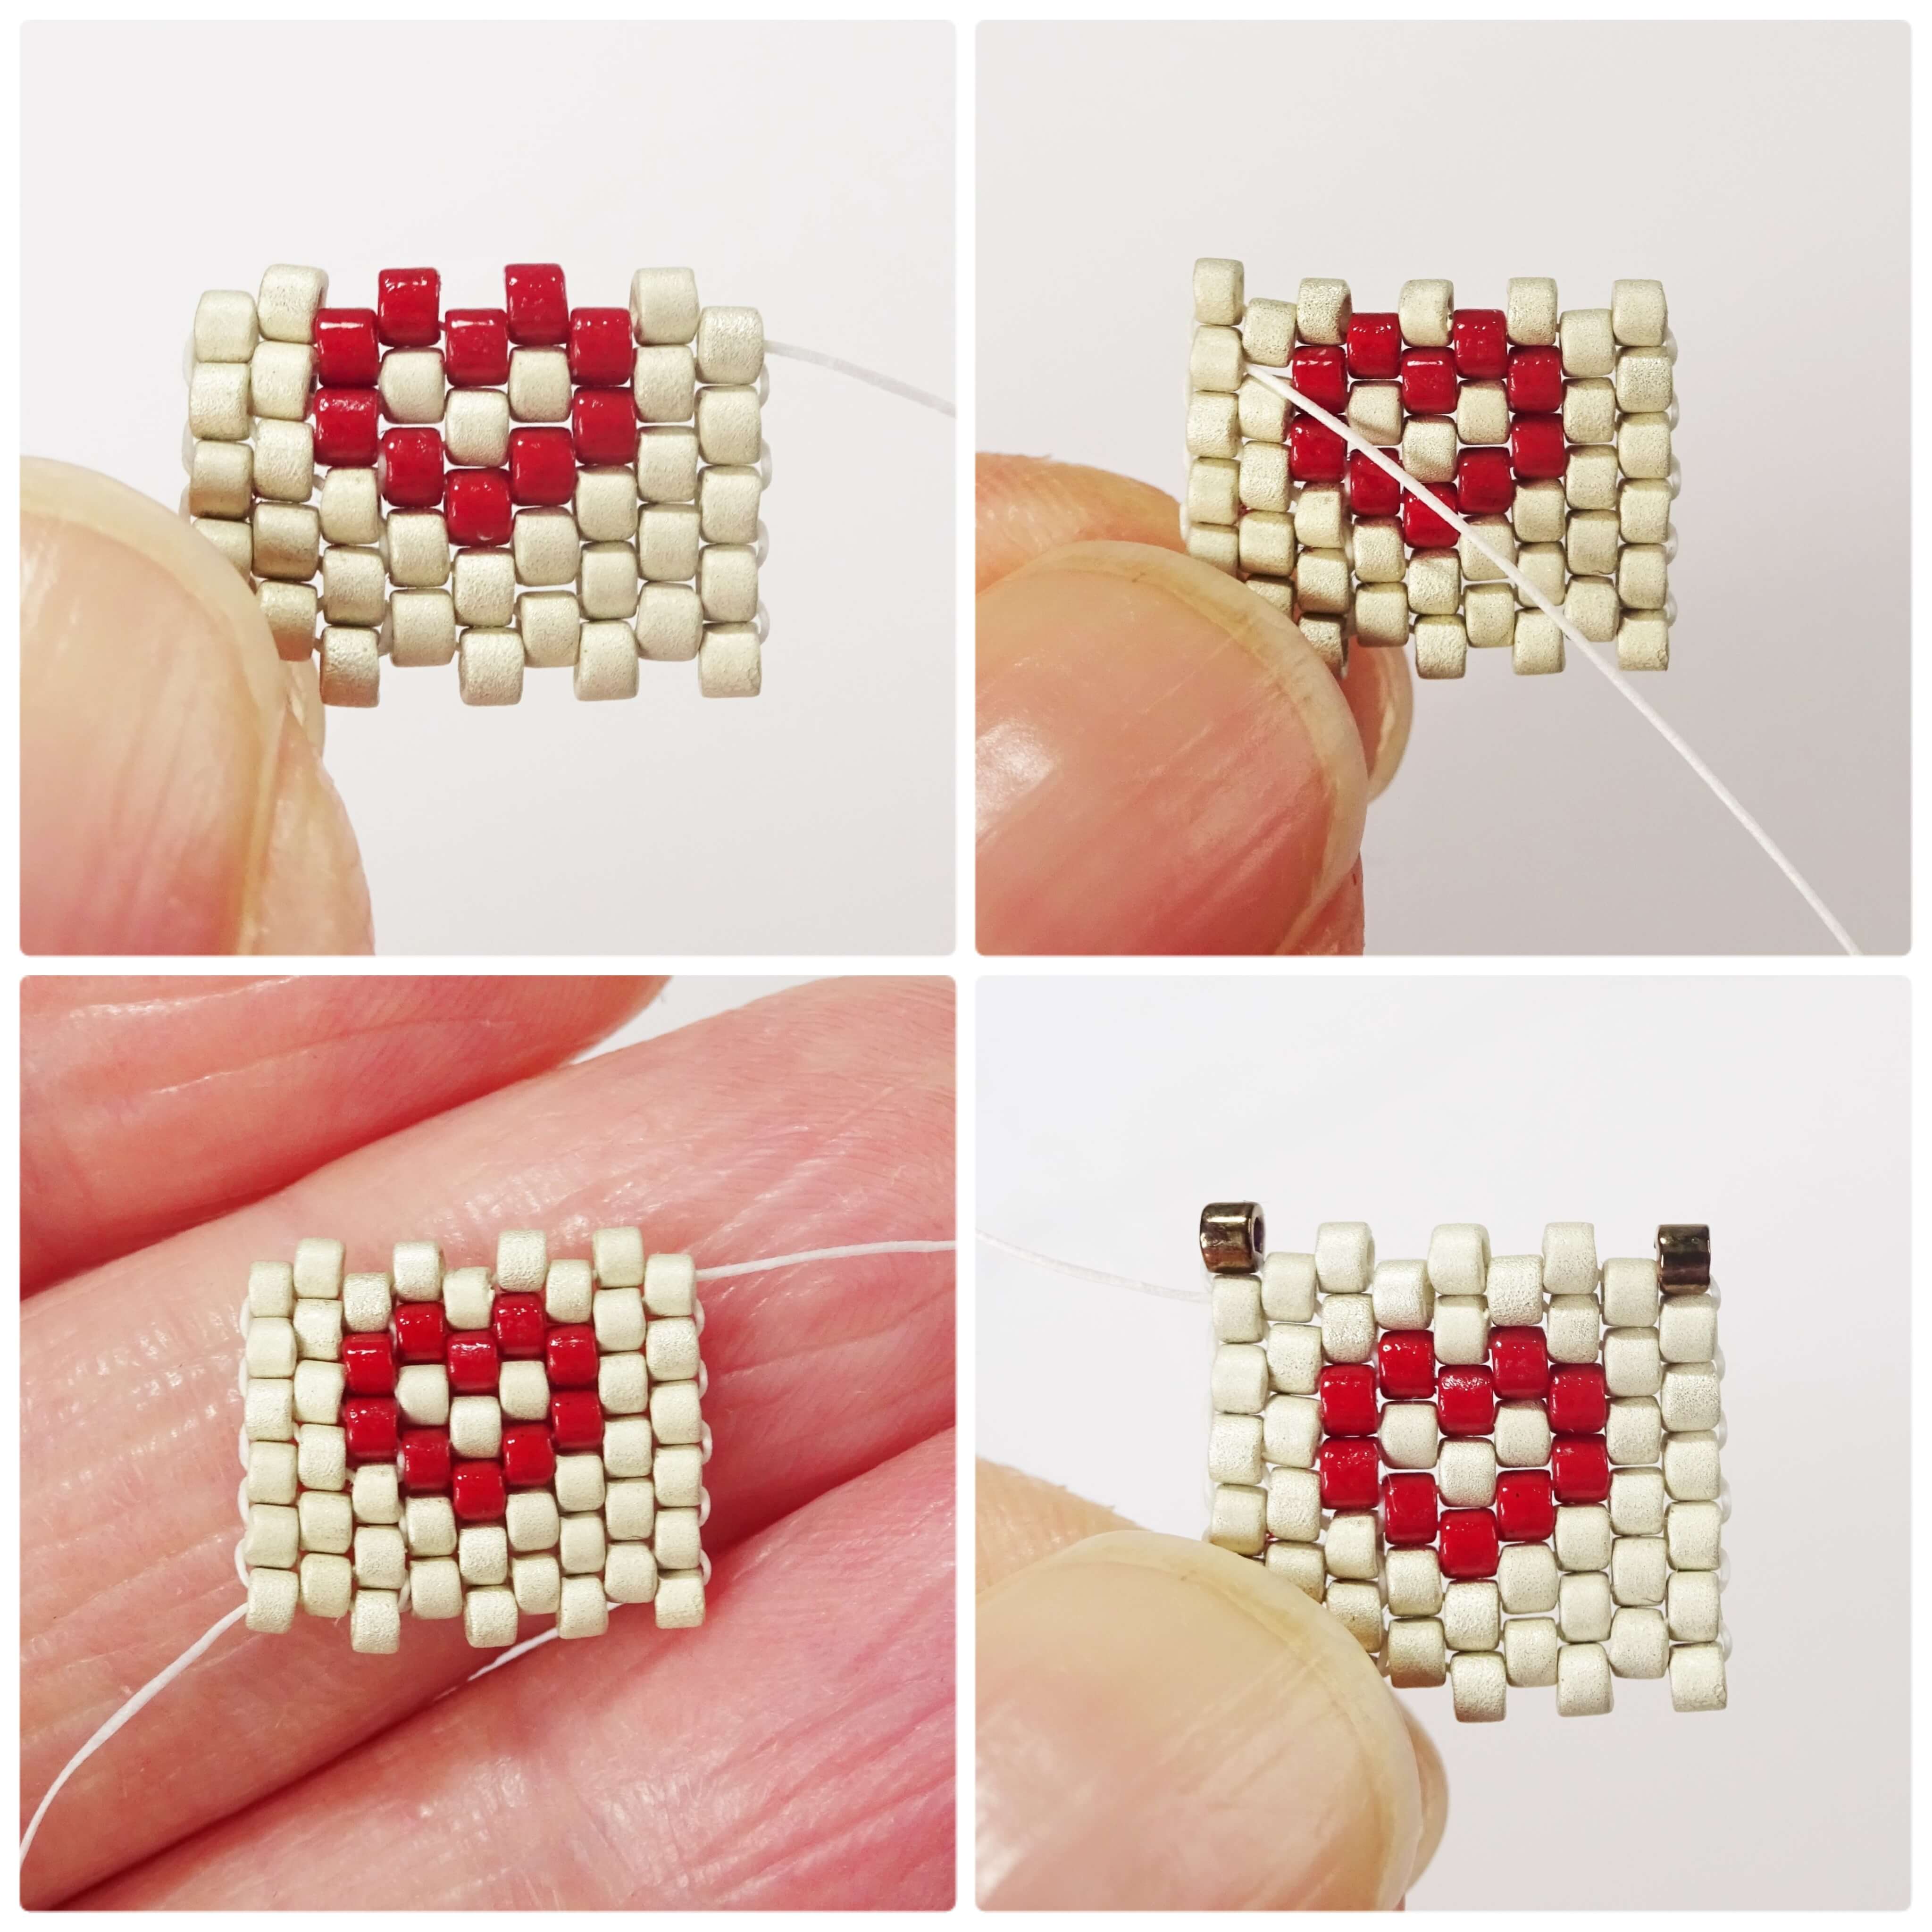
Row 10 – 1 cream, 2 red and 1 cream.
Row 11 – 5 cream. You will need to turn your needle and thread around as in step 2 at the end of this row.
Row 12 – 4 cream.
Row 13 – 1 bronze, 3 cream and 1 bronze. Do not turn the needle and thread around yet!
To add the overhang on the roof, turn the needle and thread around as in step 2 but stop when it is exiting out the lower bead (as in don’t step up to the top bead in row 13) and pick up 1 bronze bead. Take the needle under the threads running along the edge between the top two beads and pull the thread through.
Take the needle back up into the new bronze bead and pull the thread tight. This new bead will be siting firmly against the bead work. Continue by taking the needle into the bronze bead that finished row 13.
Add row 14 – 1 bronze, 2 cream and 1 bronze. Finish the row by taking the needle down into the bronze bead that finished row 13.

Take the needle down into the cream bead below where you are exiting from and continue by turning the needle and thread around as in step 2. Stop when you are exiting out the cream bead again.
Pick up 1 bronze bead and take the needle under the threads running along the outer edge between the top two beads. Pull the thread tight and then take the needle up into the newly added bronze bead again.

Continue by taking the needle up into the next 2 bronze beads already on the bead work.
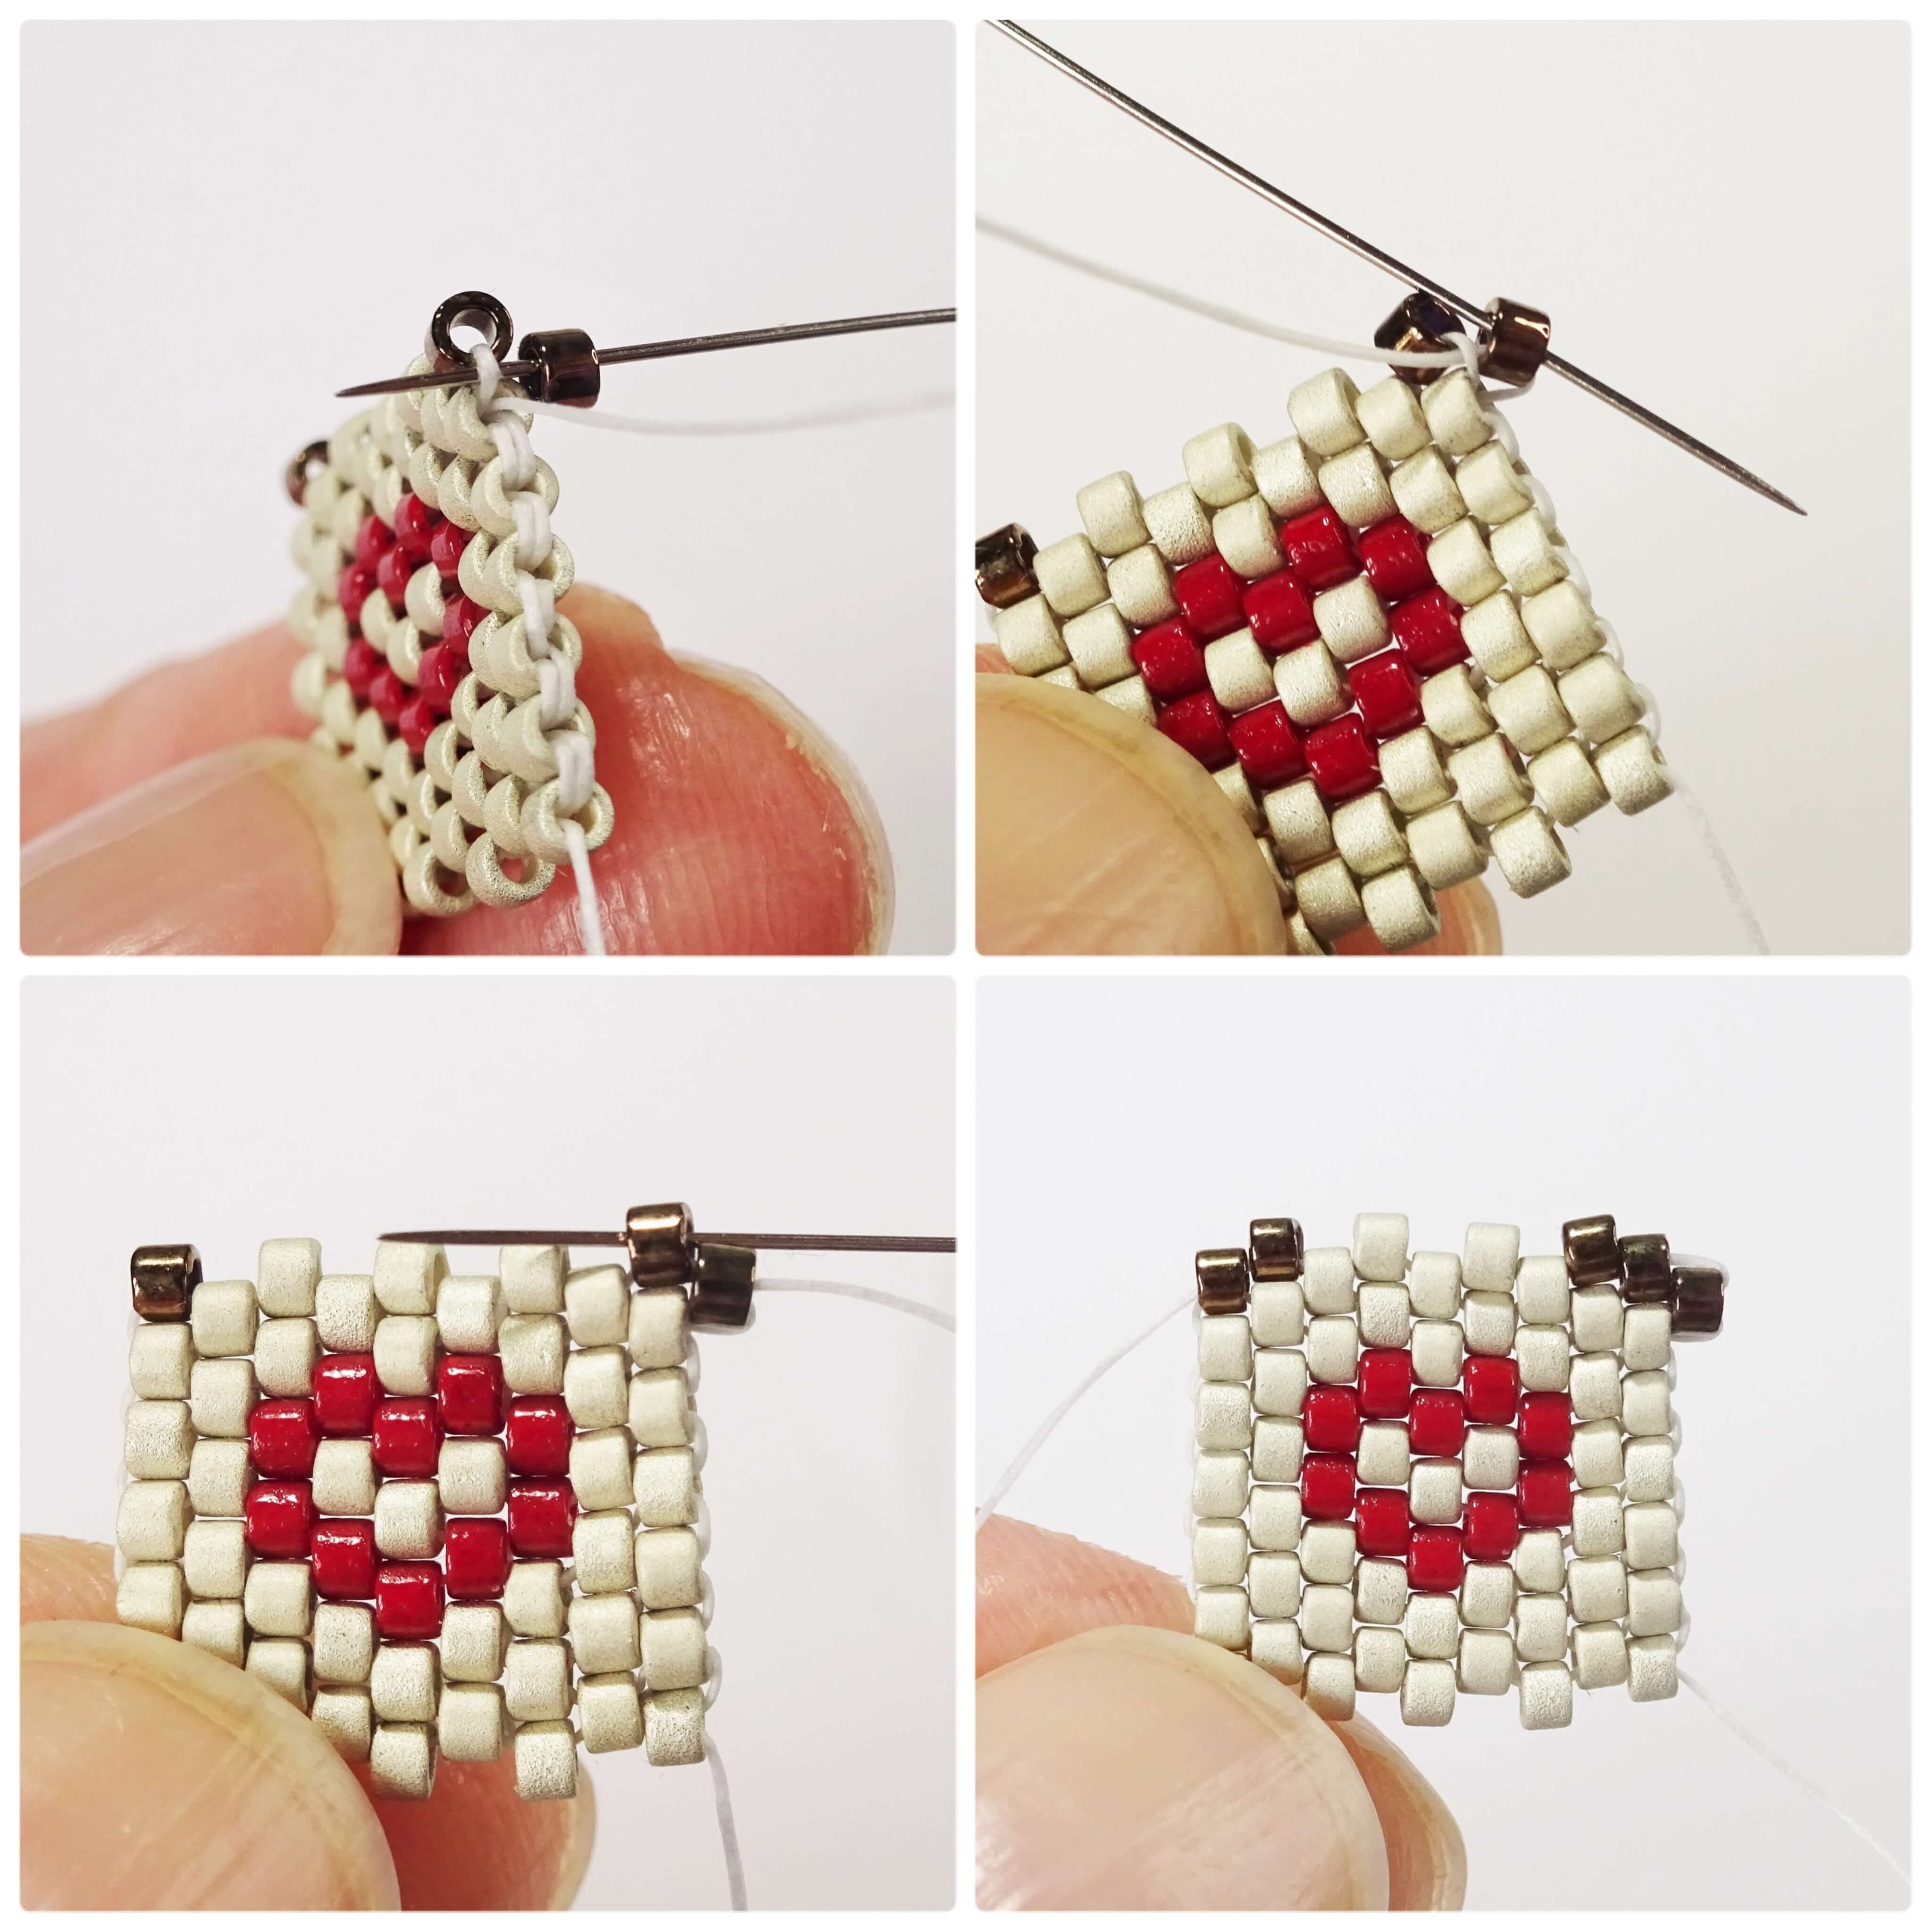
Add row 15 – 1 bronze, 1 cream and 1 bronze.
The needle will be exiting out of a bronze bead third in from the end. We need to turn the needle and thread around here but can easily cheat by tying a knot. Do this by taking the needle under a thread running between the beads, pull to form a loop, take the needle through the loop and pull tight.

The thread in secured in place now by the knot so, take the needle back up the 2 bronze beads on the inner part of the bead work.
Add row 16 – 2 bronze.
The needle will now be exiting out of the bronze bead in row 15. From here pick up 1 cream bead and take the needle into the next bronze bead along (third bronze bead in from the end) but with the needle pointing inwards towards the rest of the bead work.
Pull the thread tight so that the bead new cream bead sits on top of the bronze bead. Take the needle back up into the cream bead.

Pick up 1 cream bead and take needle into the bronze bead below it (second from the edge) but with the needle moving inwards towards the beadwork. Take the needle up into the newly added cream bead.
Pick up 1 more cream bead and take the needle down into the cream bead below it so that both new cream beads are sitting on top of each other. Take the needle up into the top cream bead again.
Pick up 1 more cream bead and take the needle down into both lower cream beads and then down into the bronze bead straight below.
Move the needle up through the bronze bead until you reach the top of the roof.
Pick up one more bronze bead to finish the roof.
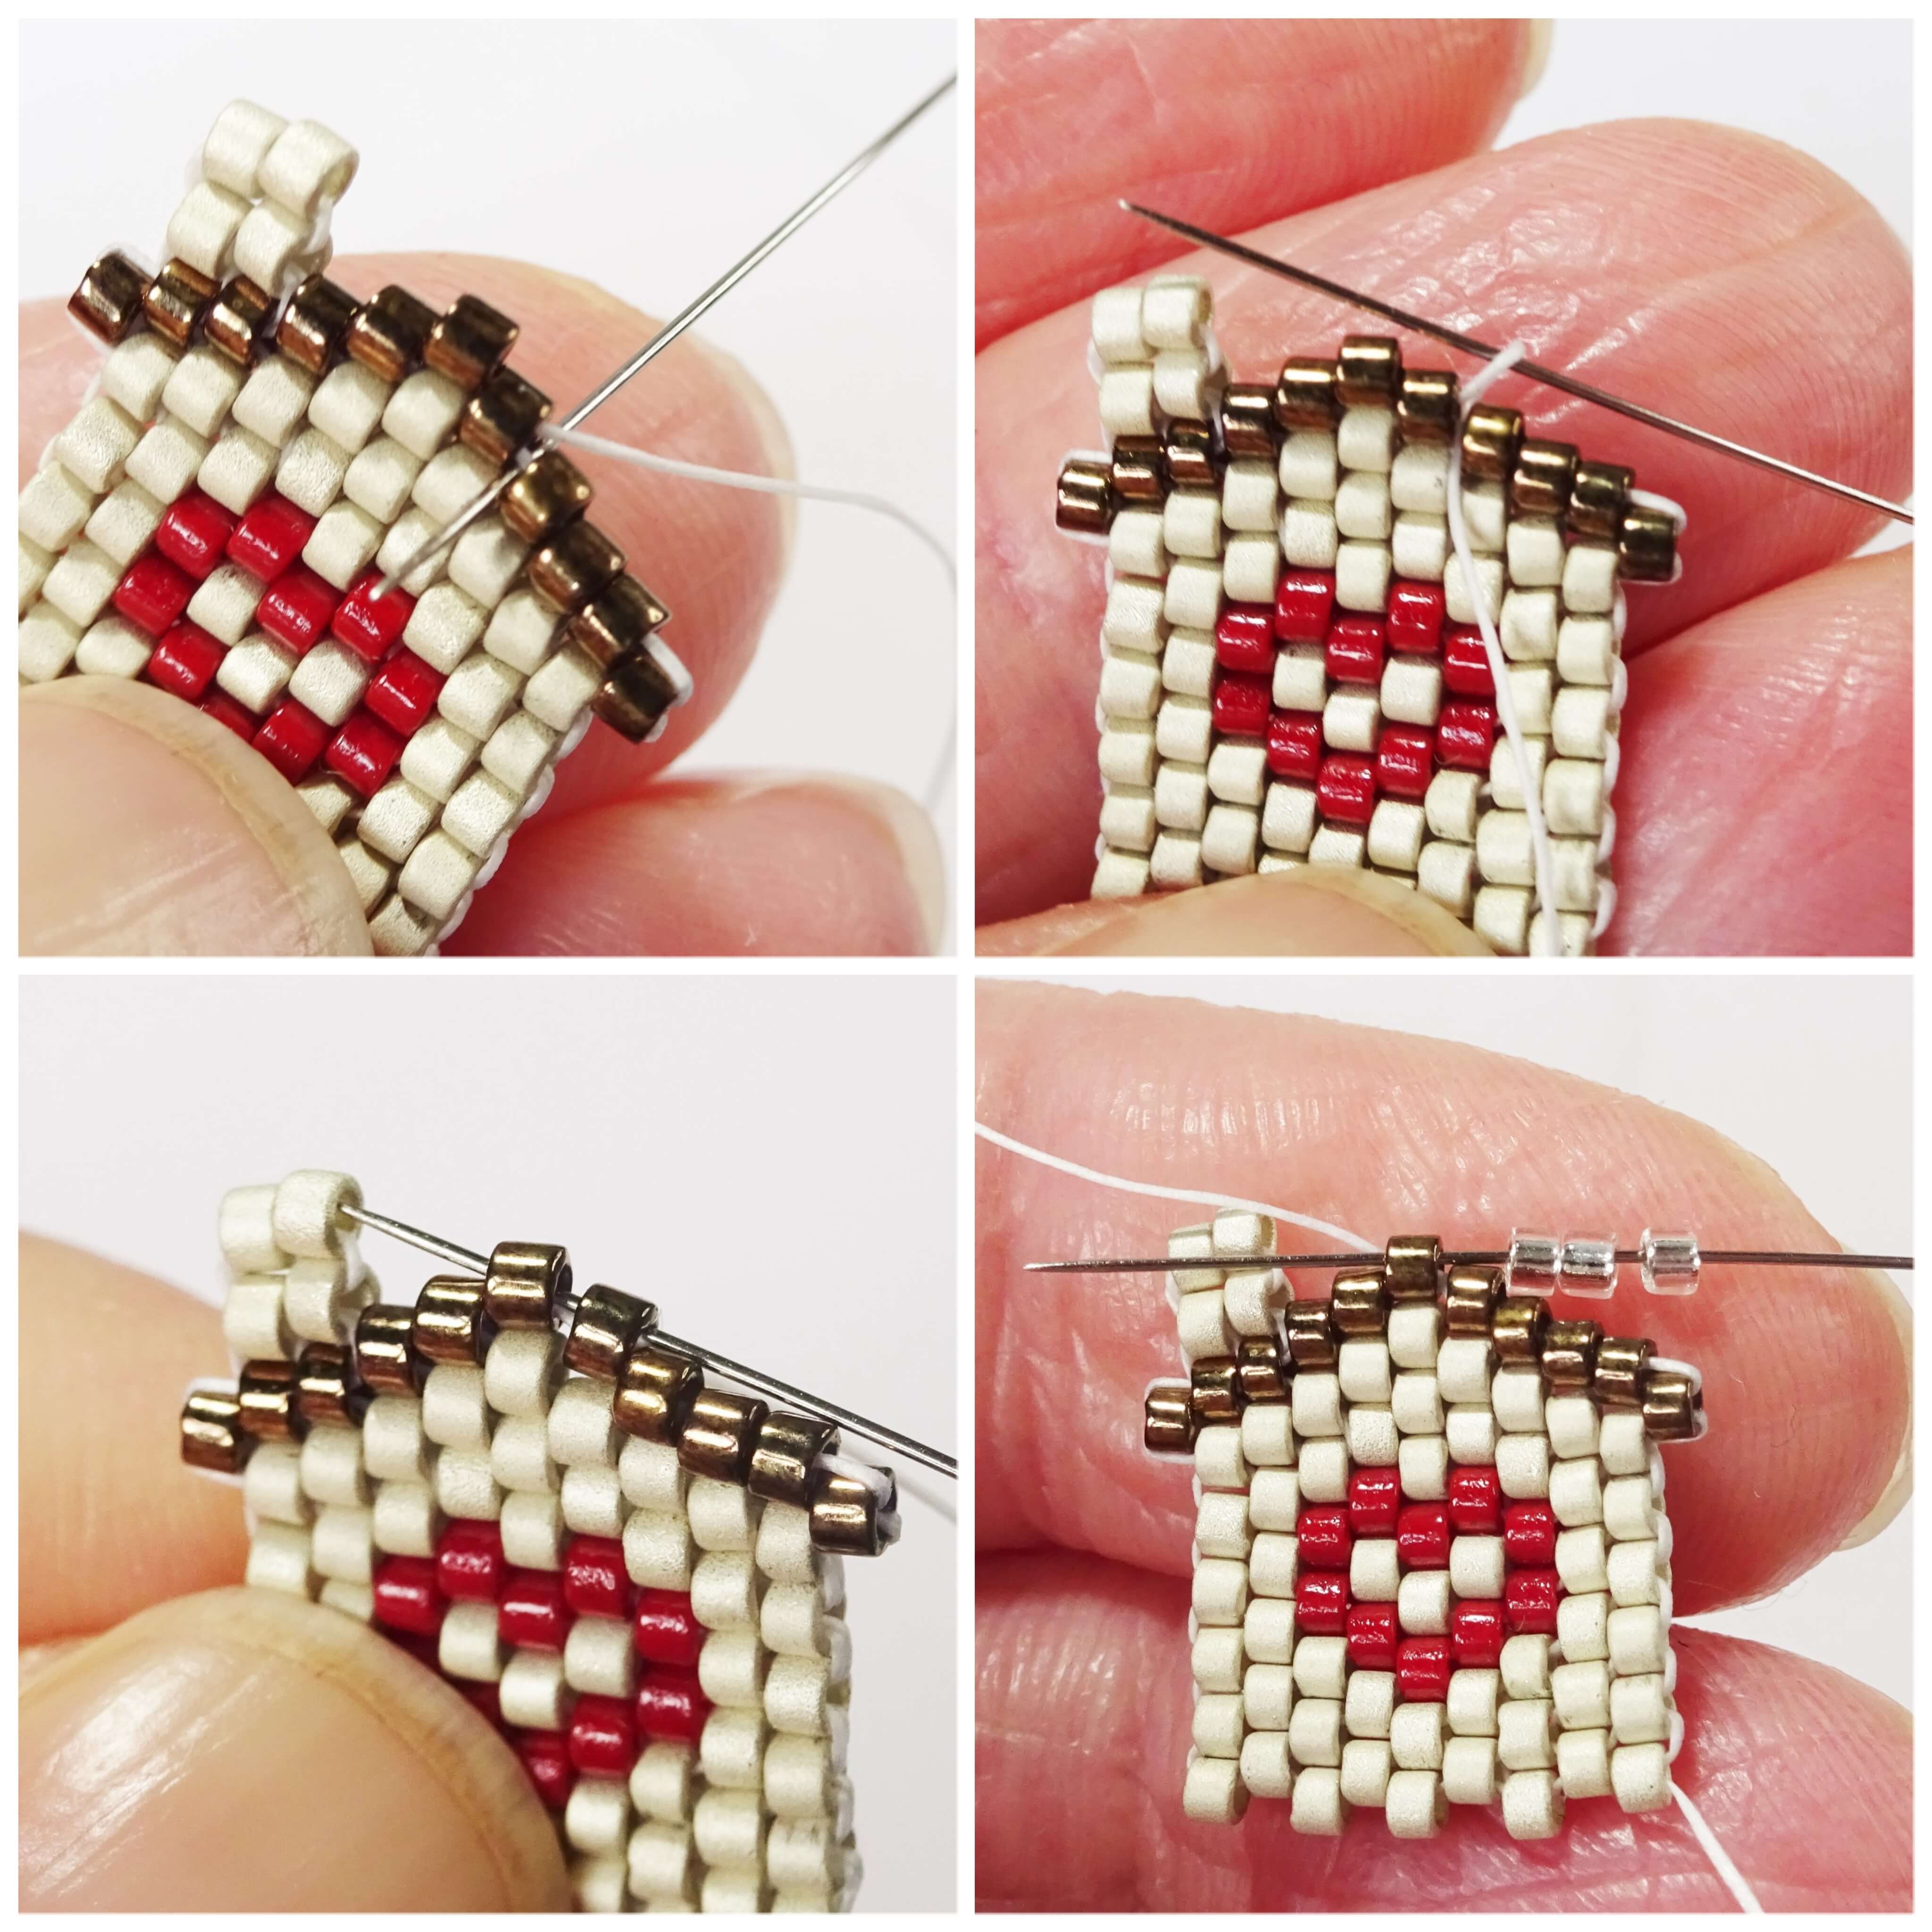
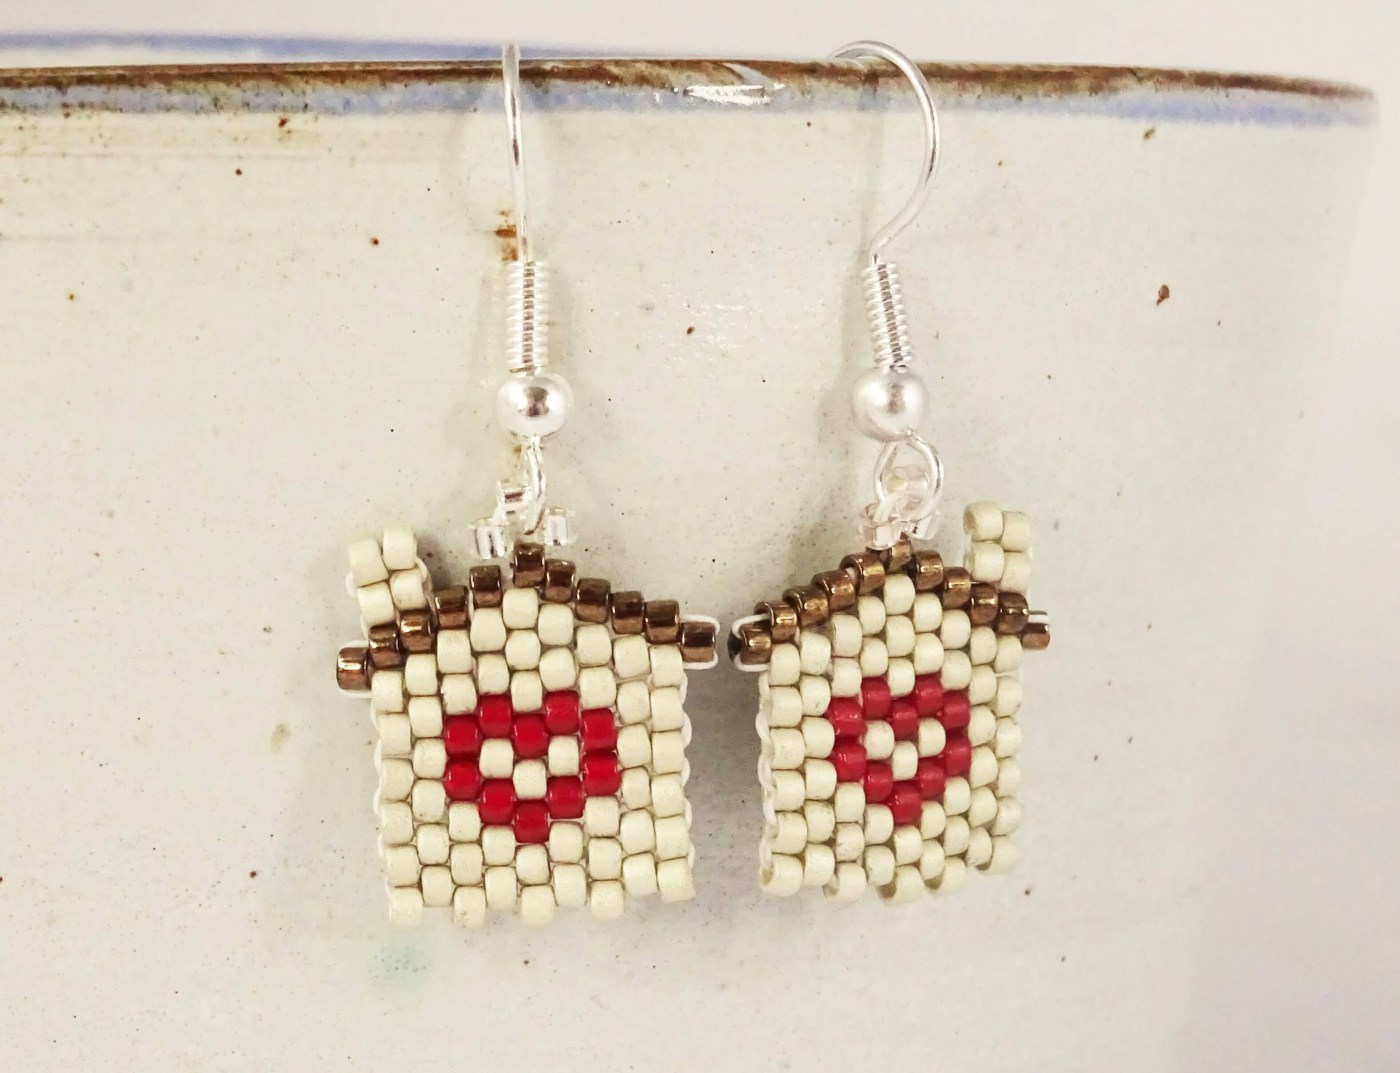
If you wish to add a beaded loop at the top as I did, tie a knot on the thread and then reverse your needle back up to the top of the house. Pick up 3 silver lined bead and take your needle through the same top bronze bead again but from the opposite side so that the silver lined beads are pulled into a loop.

Knot both the working thread and tail thread several times in the beadwork and cut off any excess. Add your earring wires and your new earrings are ready to wear.
I hope you have enjoyed this peyote stitch tutorial. Any suggestions as to what to make next and is it peyote or brickstitch?
Thanks for reading,
Hannah x


You are way beyond my pay grade. So smart and so cute.
Thank you 😃