

I thought I would do something a little different today. I started working on this pendant a few months ago and only recently got round to finishing it off. I took photos of the process and thought it would be fun to make a little tutorial out of it.
It is a great technique for using up left over clay from other projects which means that you will get different results each time you do it.

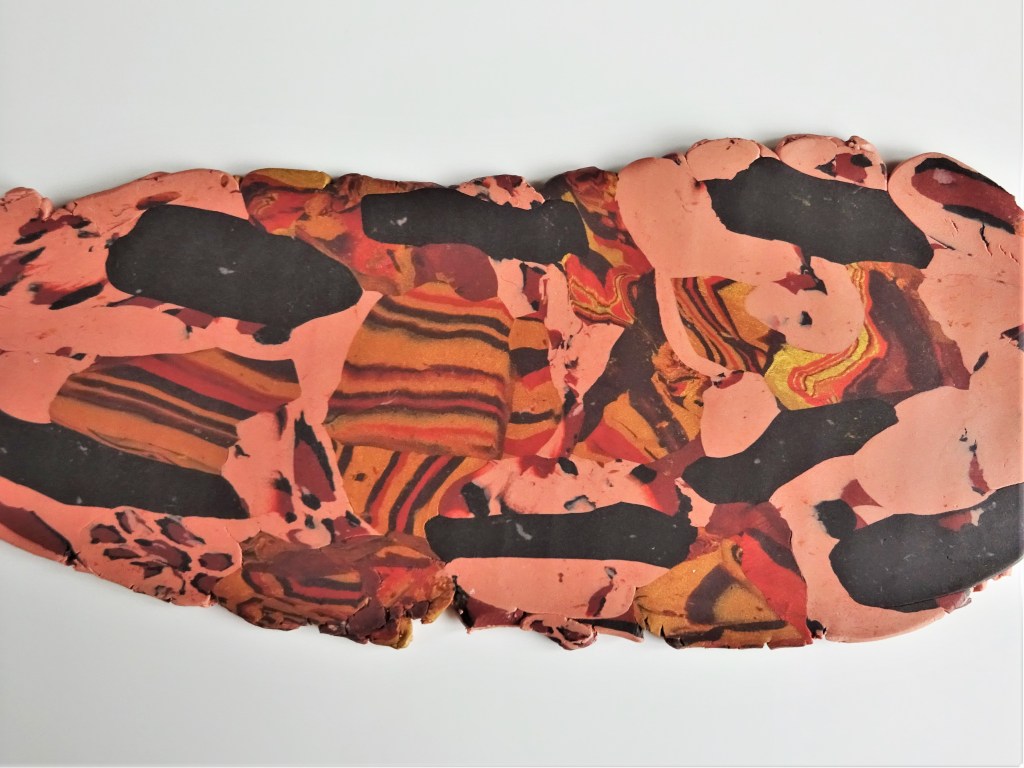
- Get your clay – I had clay left from my leopard print cane and some metallic clay from a project that was a total failure. I made sure that I had a combination of light and dark and colours that would mix nicely.

2. Break up some of the big lumps of clay and squash the clay together so that it makes a sheet of clay as opposed to a ball of clay. I made sure that there was an even spread of colours and metallic clay. Start to roll the clay to compress it.
3. Continue rolling until all the clay has squashed together to form one sheet of clay. If you have a pasta/clay machine you can pass the clay through it on the thickets setting.

4. Choose the side that has the most pattern/detail and fold the clay with the best side facing outwards.
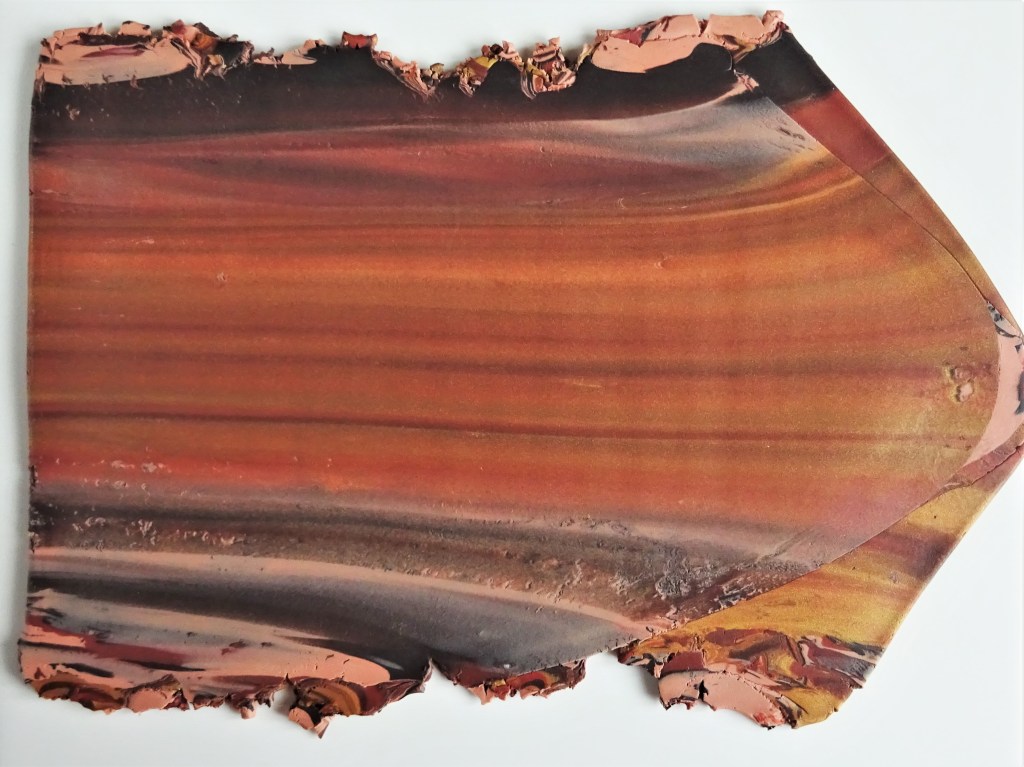
5. Keep folding and rolling the clay until the different colours form lines. You must fold and roll in the same direction every time or the lines won’t form. Every time you fold the clay choose which side is the best and fold clay with this side facing outwards. As soon as the desired pattern is reached roll the clay a little thinner.

6. From a similar mix of clay form step 1 make a base layer. Carry on mixing the clay until it forms a solid colour. Roll this as thin as you can whilst being able to comfortably handle it (number 4 on my pasta machine).
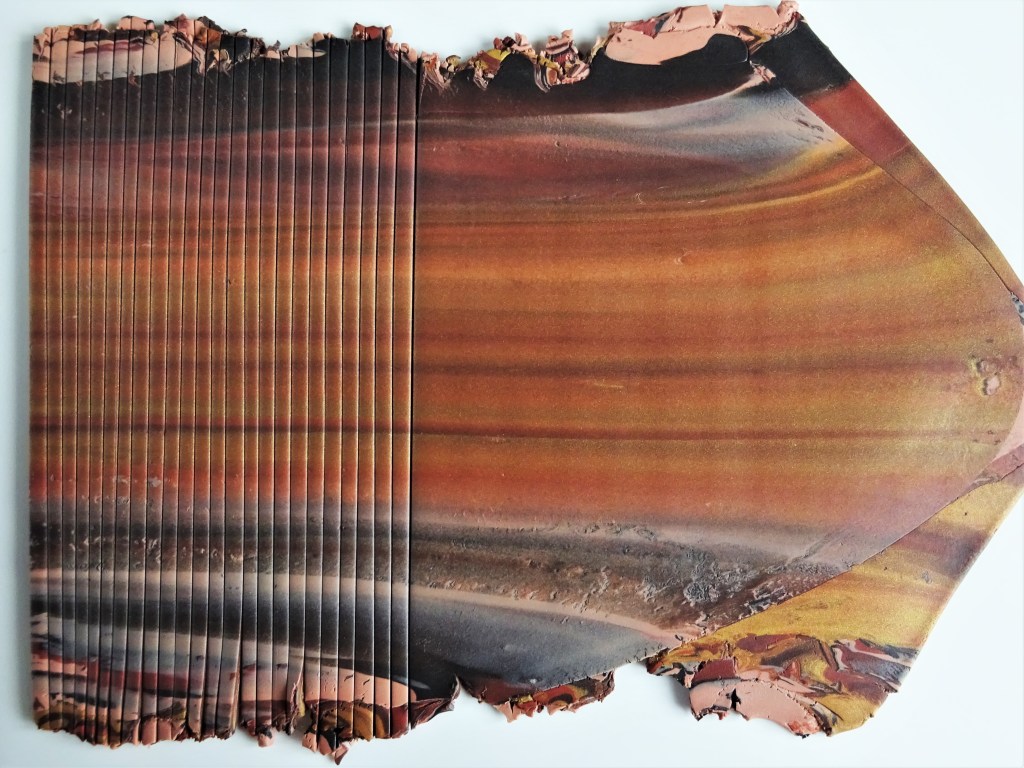
7. Cut the stripey clay into strips making sure to cut vertically to the horizontal line. Make each strip about 2mm wide.

8. Pick up each strip of clay in order and start laying it on the base layer. With each new strip I put down on the base layer I staggered the height – The first 5 strips where a little higher than the one before and then the next 4 a little lower. Use the placement of the clay strips going up as a guide for the ones going down. Carry on with this until the strips are finished. Try to make sure that the strips are laid down as straight as possible.

9. Gently roll the clay with an acrylic roller so that the clay starts to merge together and the cut lines fade. Do not put this through the pasta/clay machine as it will distort the pattern too much.

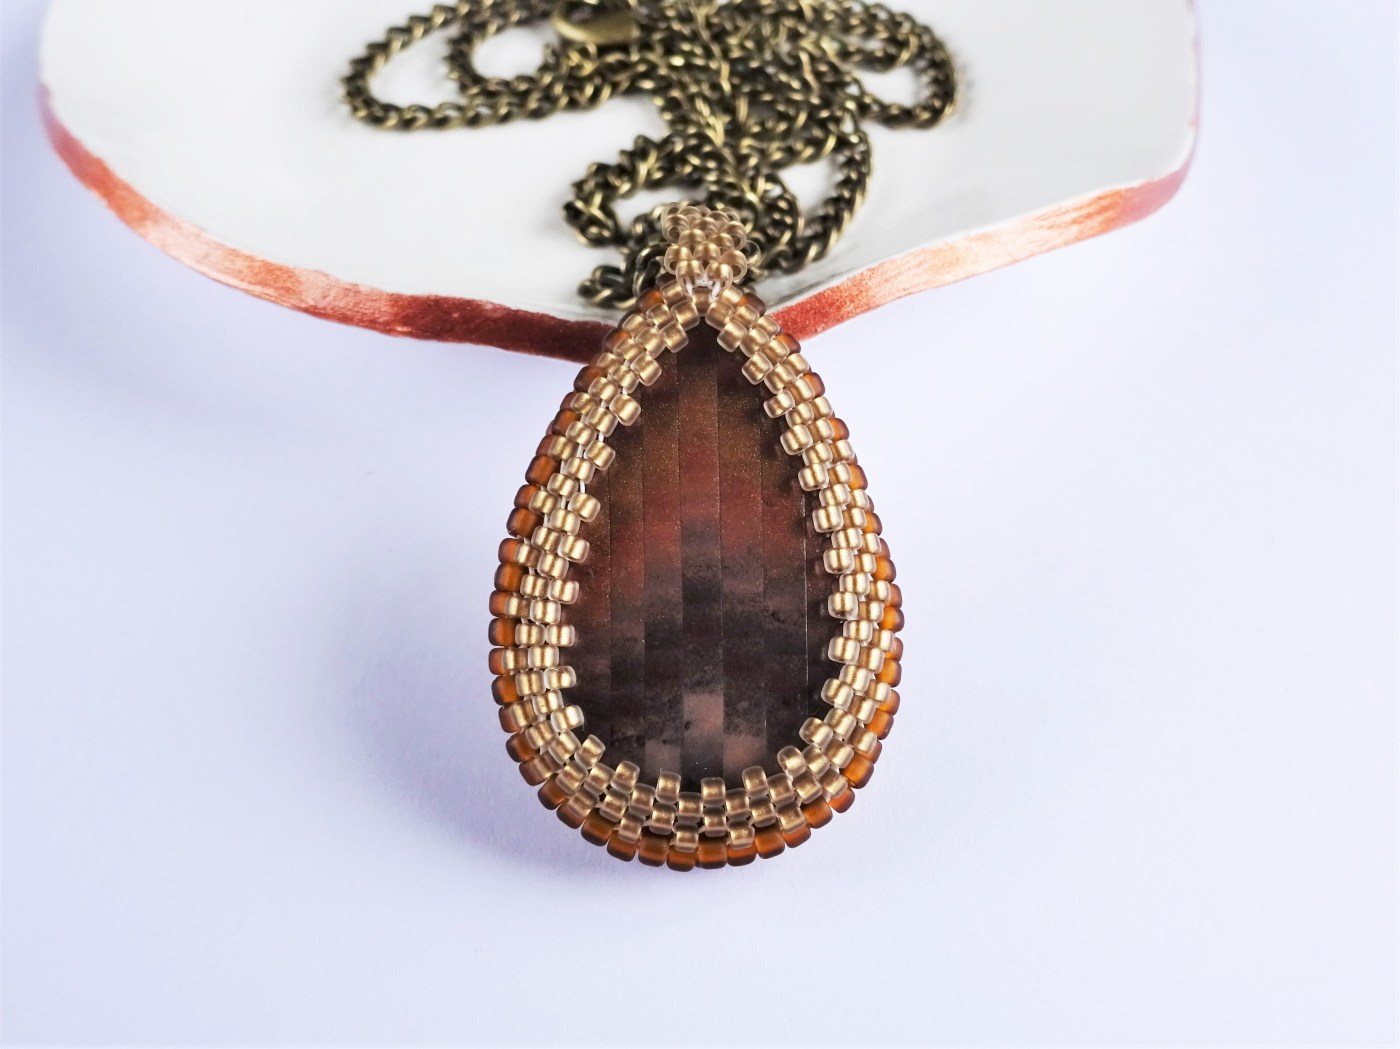
10. Choose the best parts of you new sheet of clay and cut shapes out. Harden in the oven according to the instructions on the packet of clay and varnish if desired.
I have finished this pendant with 2 coats of gloss varnish and made a beaded bezel for it. I planned on doing a tutorial to show the beadwork but I was half way through before I remembered to pick up the camera. Oops. Another day maybe 🙂 There are however some Beadweaving tutorials here 🙂

I hope it was fun to see some of the process as opposed to the finished simply being shown the finished result.
I have more free polymer clay tutorials ranging from cane work to other fun techniques.
Hannah x


Very nice.I love using ‘left overs’.
Thank you. I hate to call it ‘scrap clay’ as it sounds as though there is something second rate about the clay.
Wow fascinating
Thank you. Glad you enjoyed it 😃
This is beautiful!
Thank you 🙂