

*This post contains affiliate links*

There is no denying that, in the northern hemisphere, spring is on it’s way. I’ve used my time indoors this week by making these little Easter and Spring rabbits to add a little Easter cheer to my home. The rabbit is based on the rabbit from my woodland animal Christmas decorations but with a Spring makeover.
I’ve linked all the products and tools I have use at the bottom of this post.
How to make a polymer clay rabbit

1. I measure all my mini decorations with shape cutters so that, if I am making multiple of the same one, there is a consistency in size.
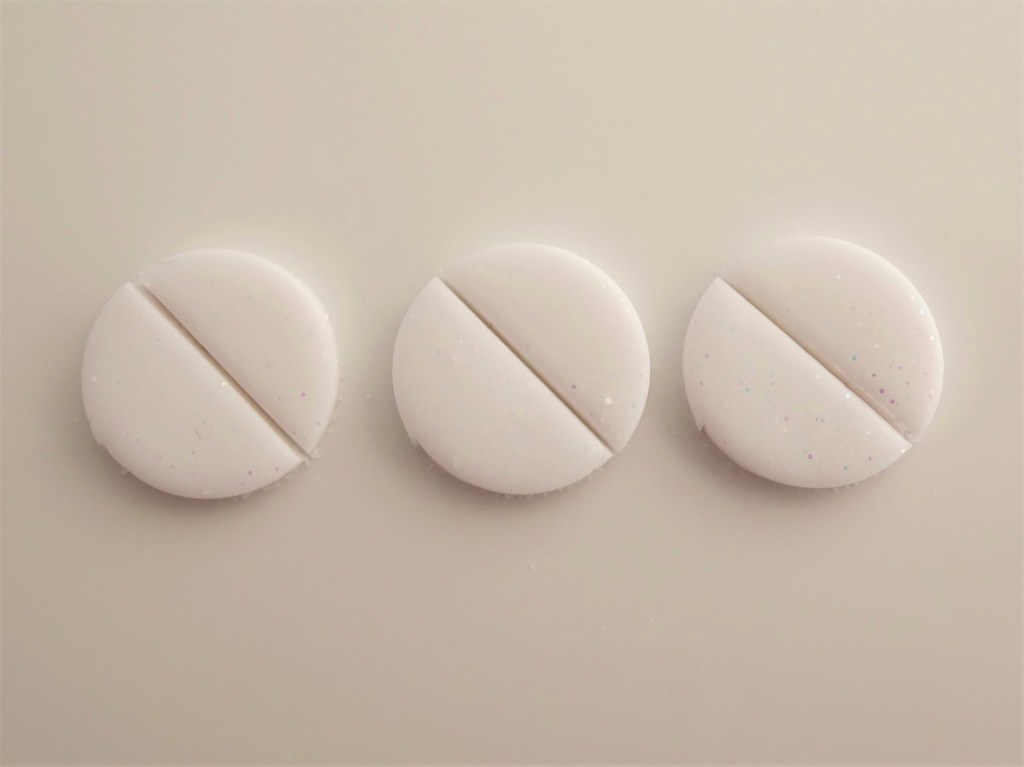
Condition some Fimo Effects in Glitter White to make if soft enough to work with. Roll through your pasta/clay machine on the thickest setting. I cut two circles with my largest cutter (measures 4cm round) and two with my smallest circle cutter (1.3cm round).
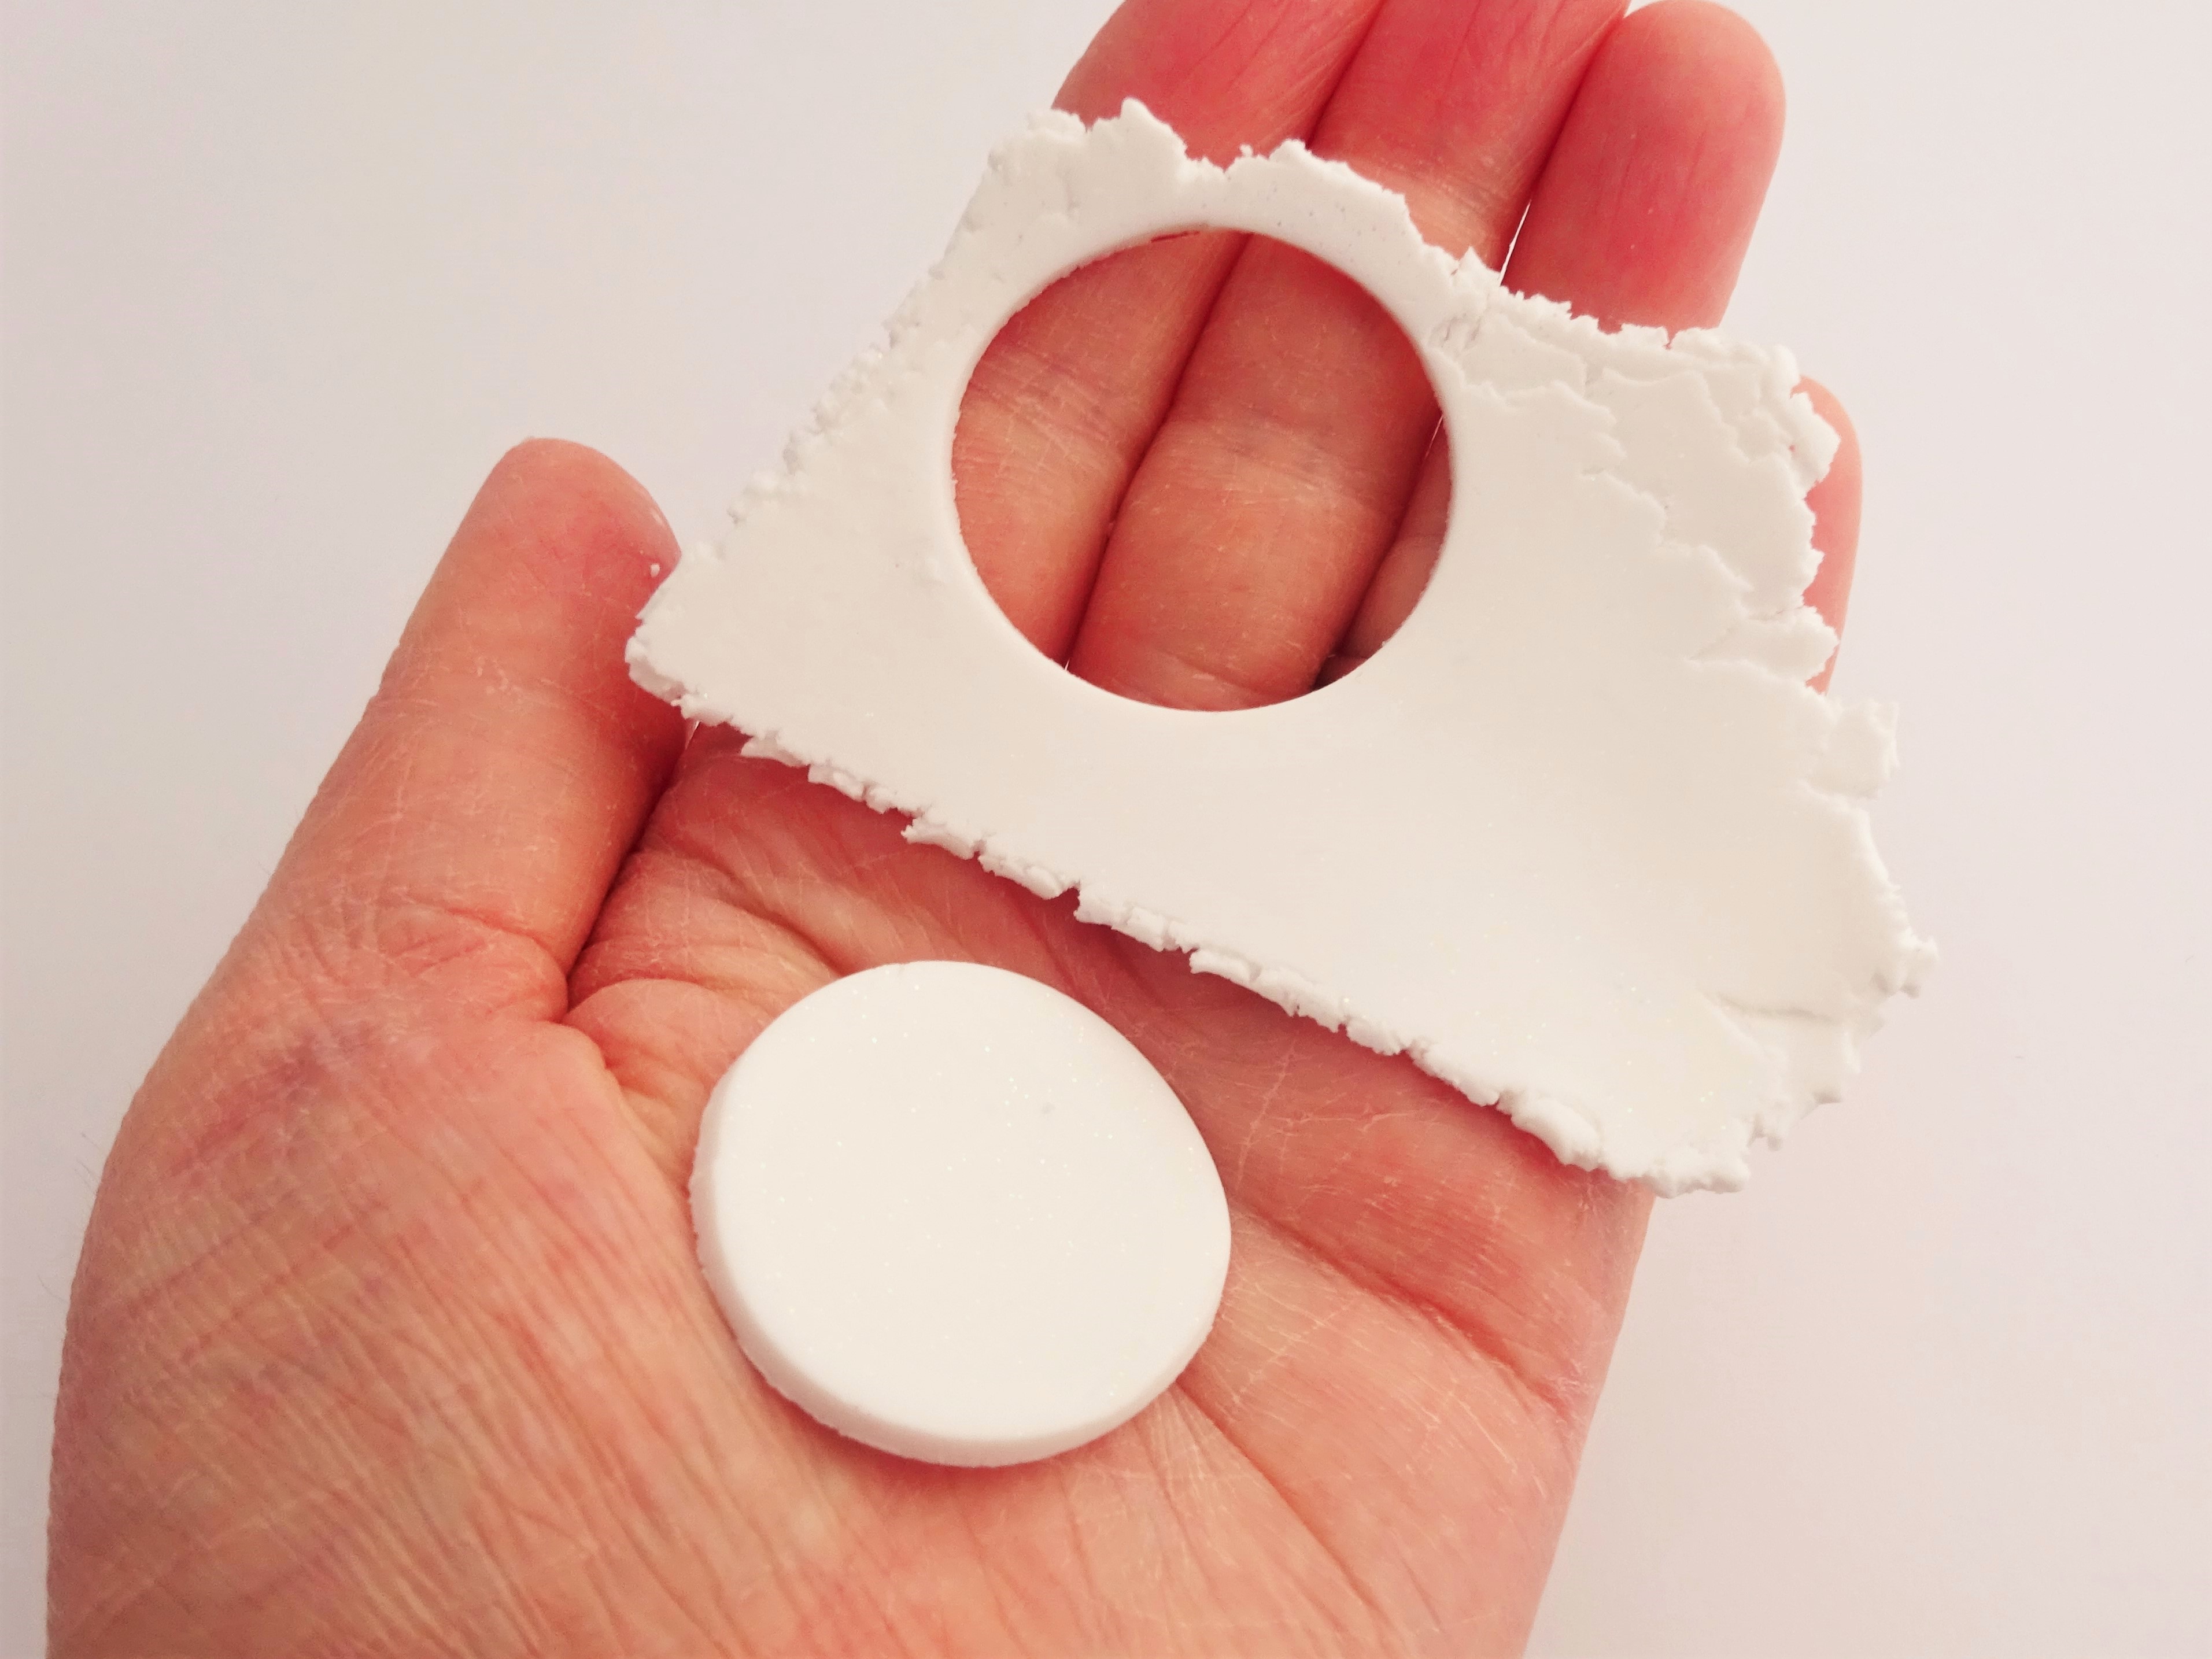
2. Combine these circles together and roll through your clay machine again on the thickest setting (number 1 on my machine) and cut a circle from this sheet of clay with the second largest cutter (3cm round).
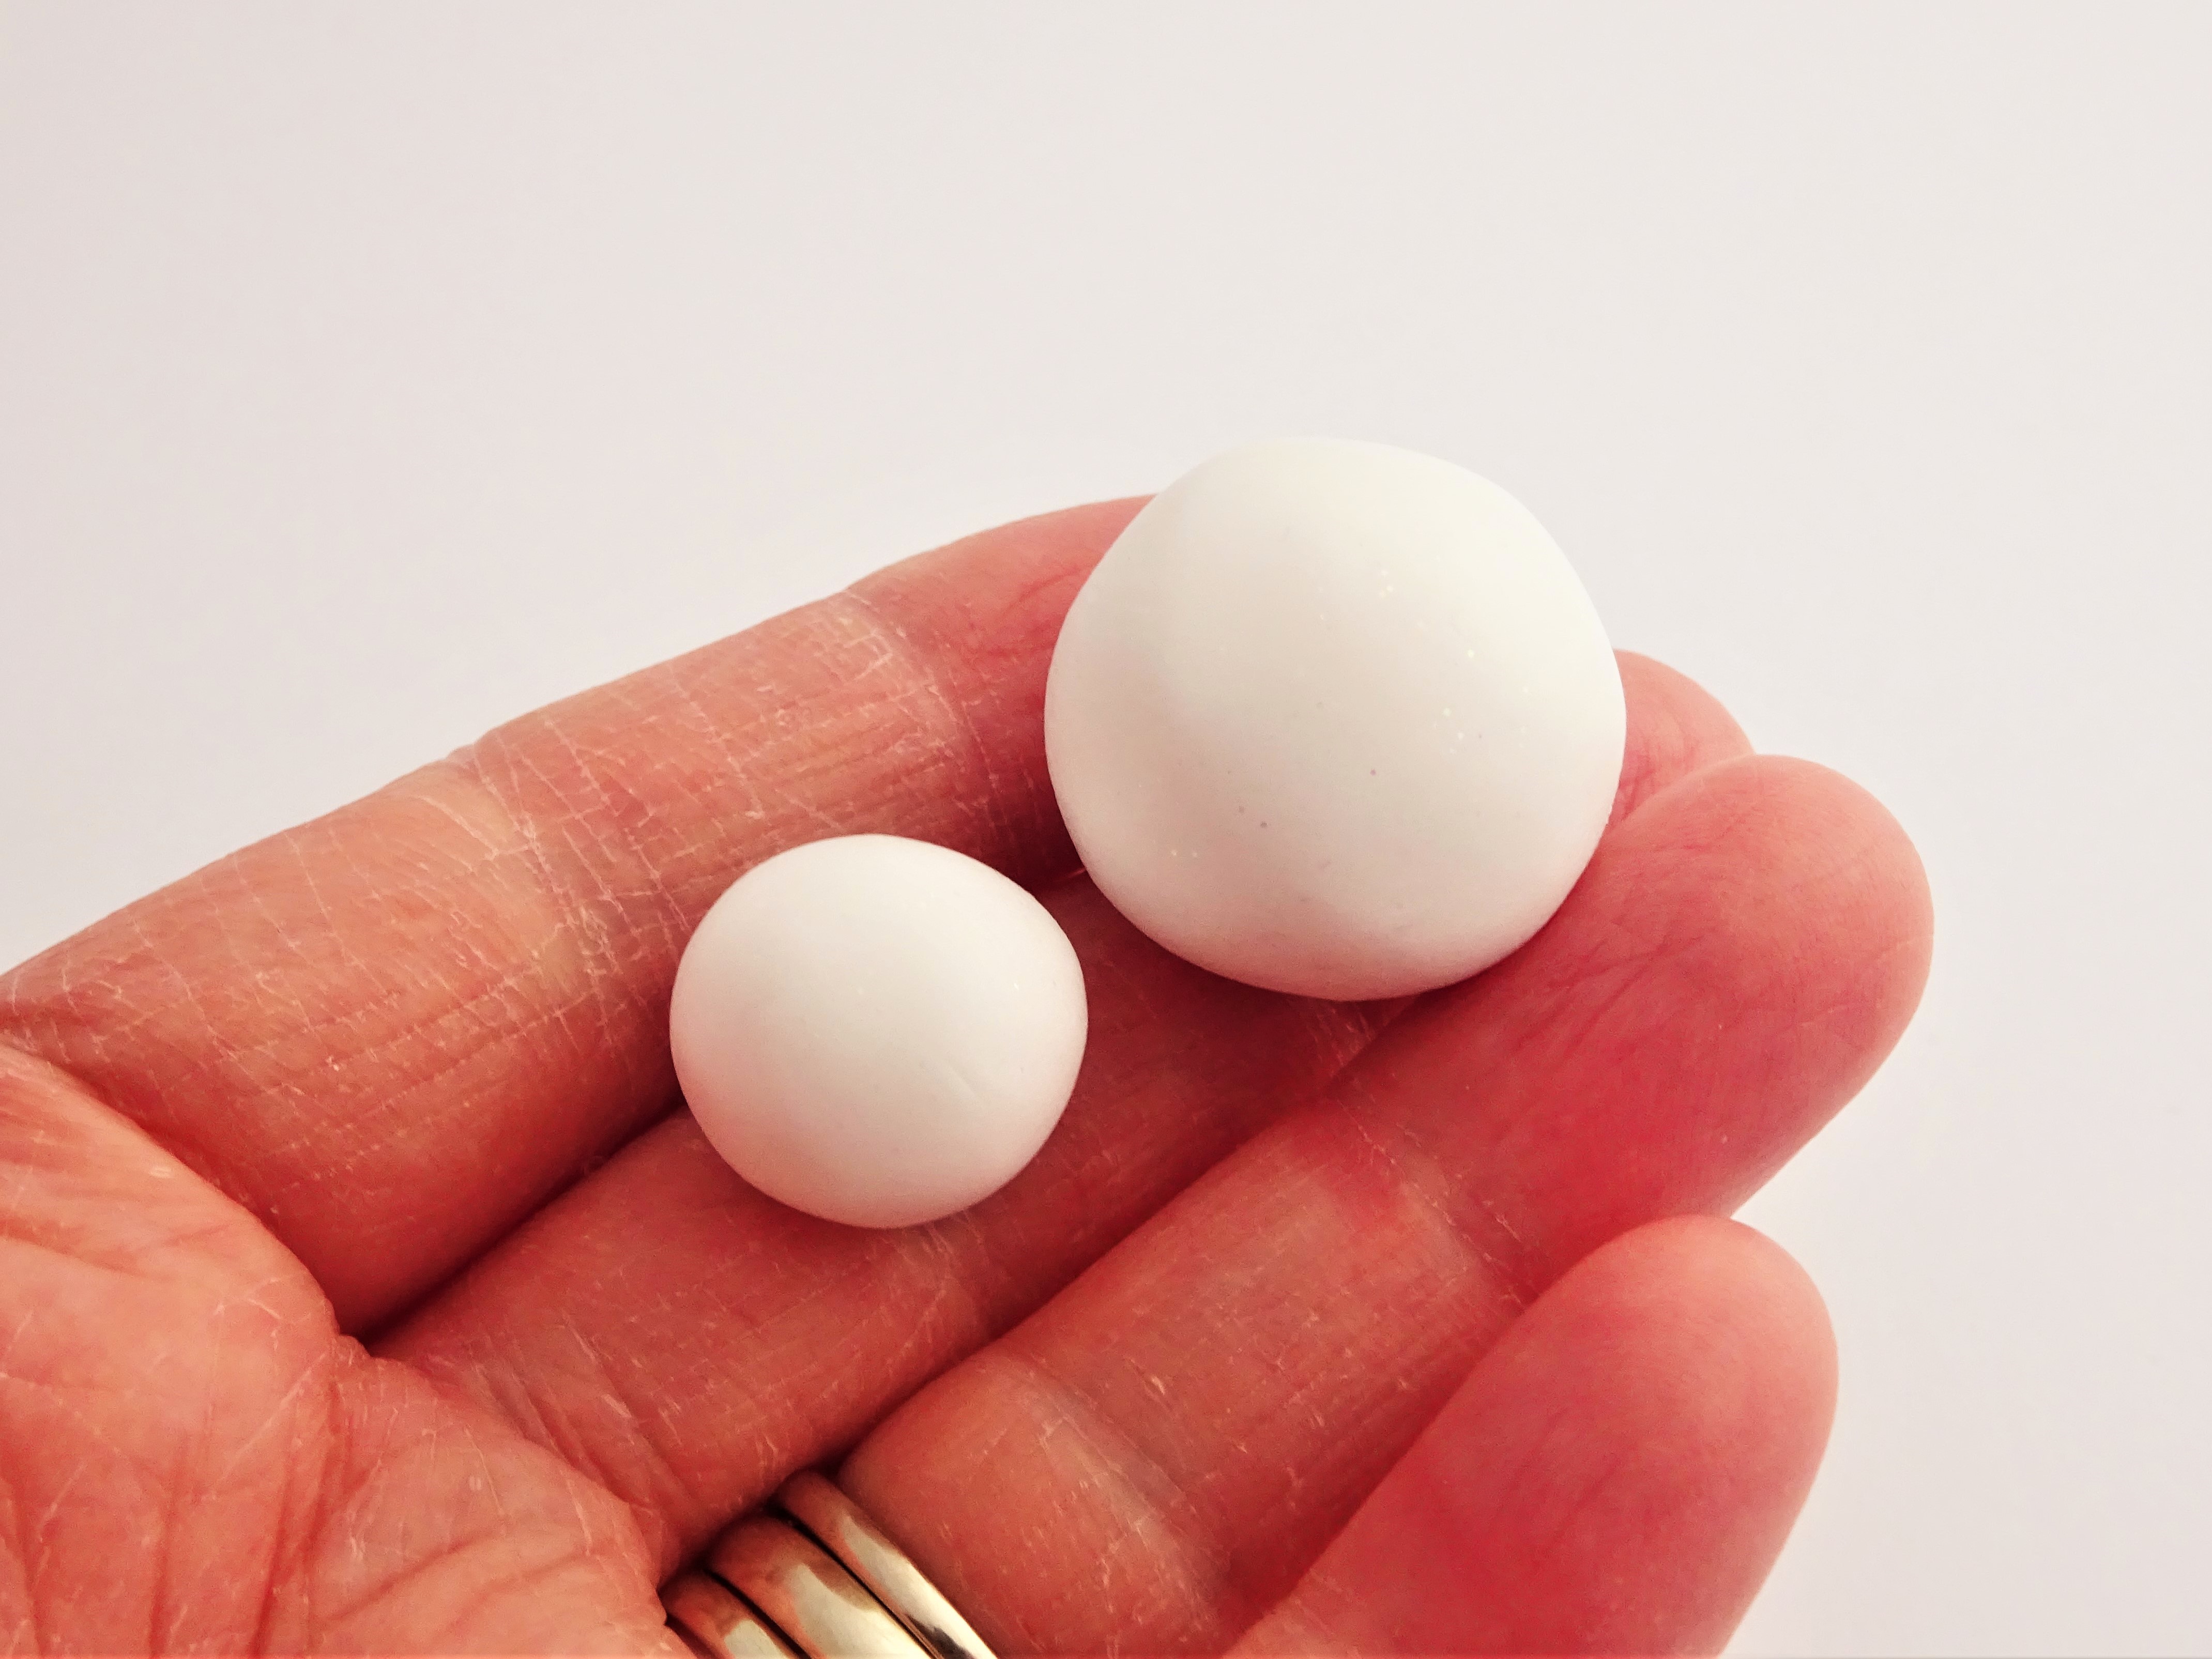
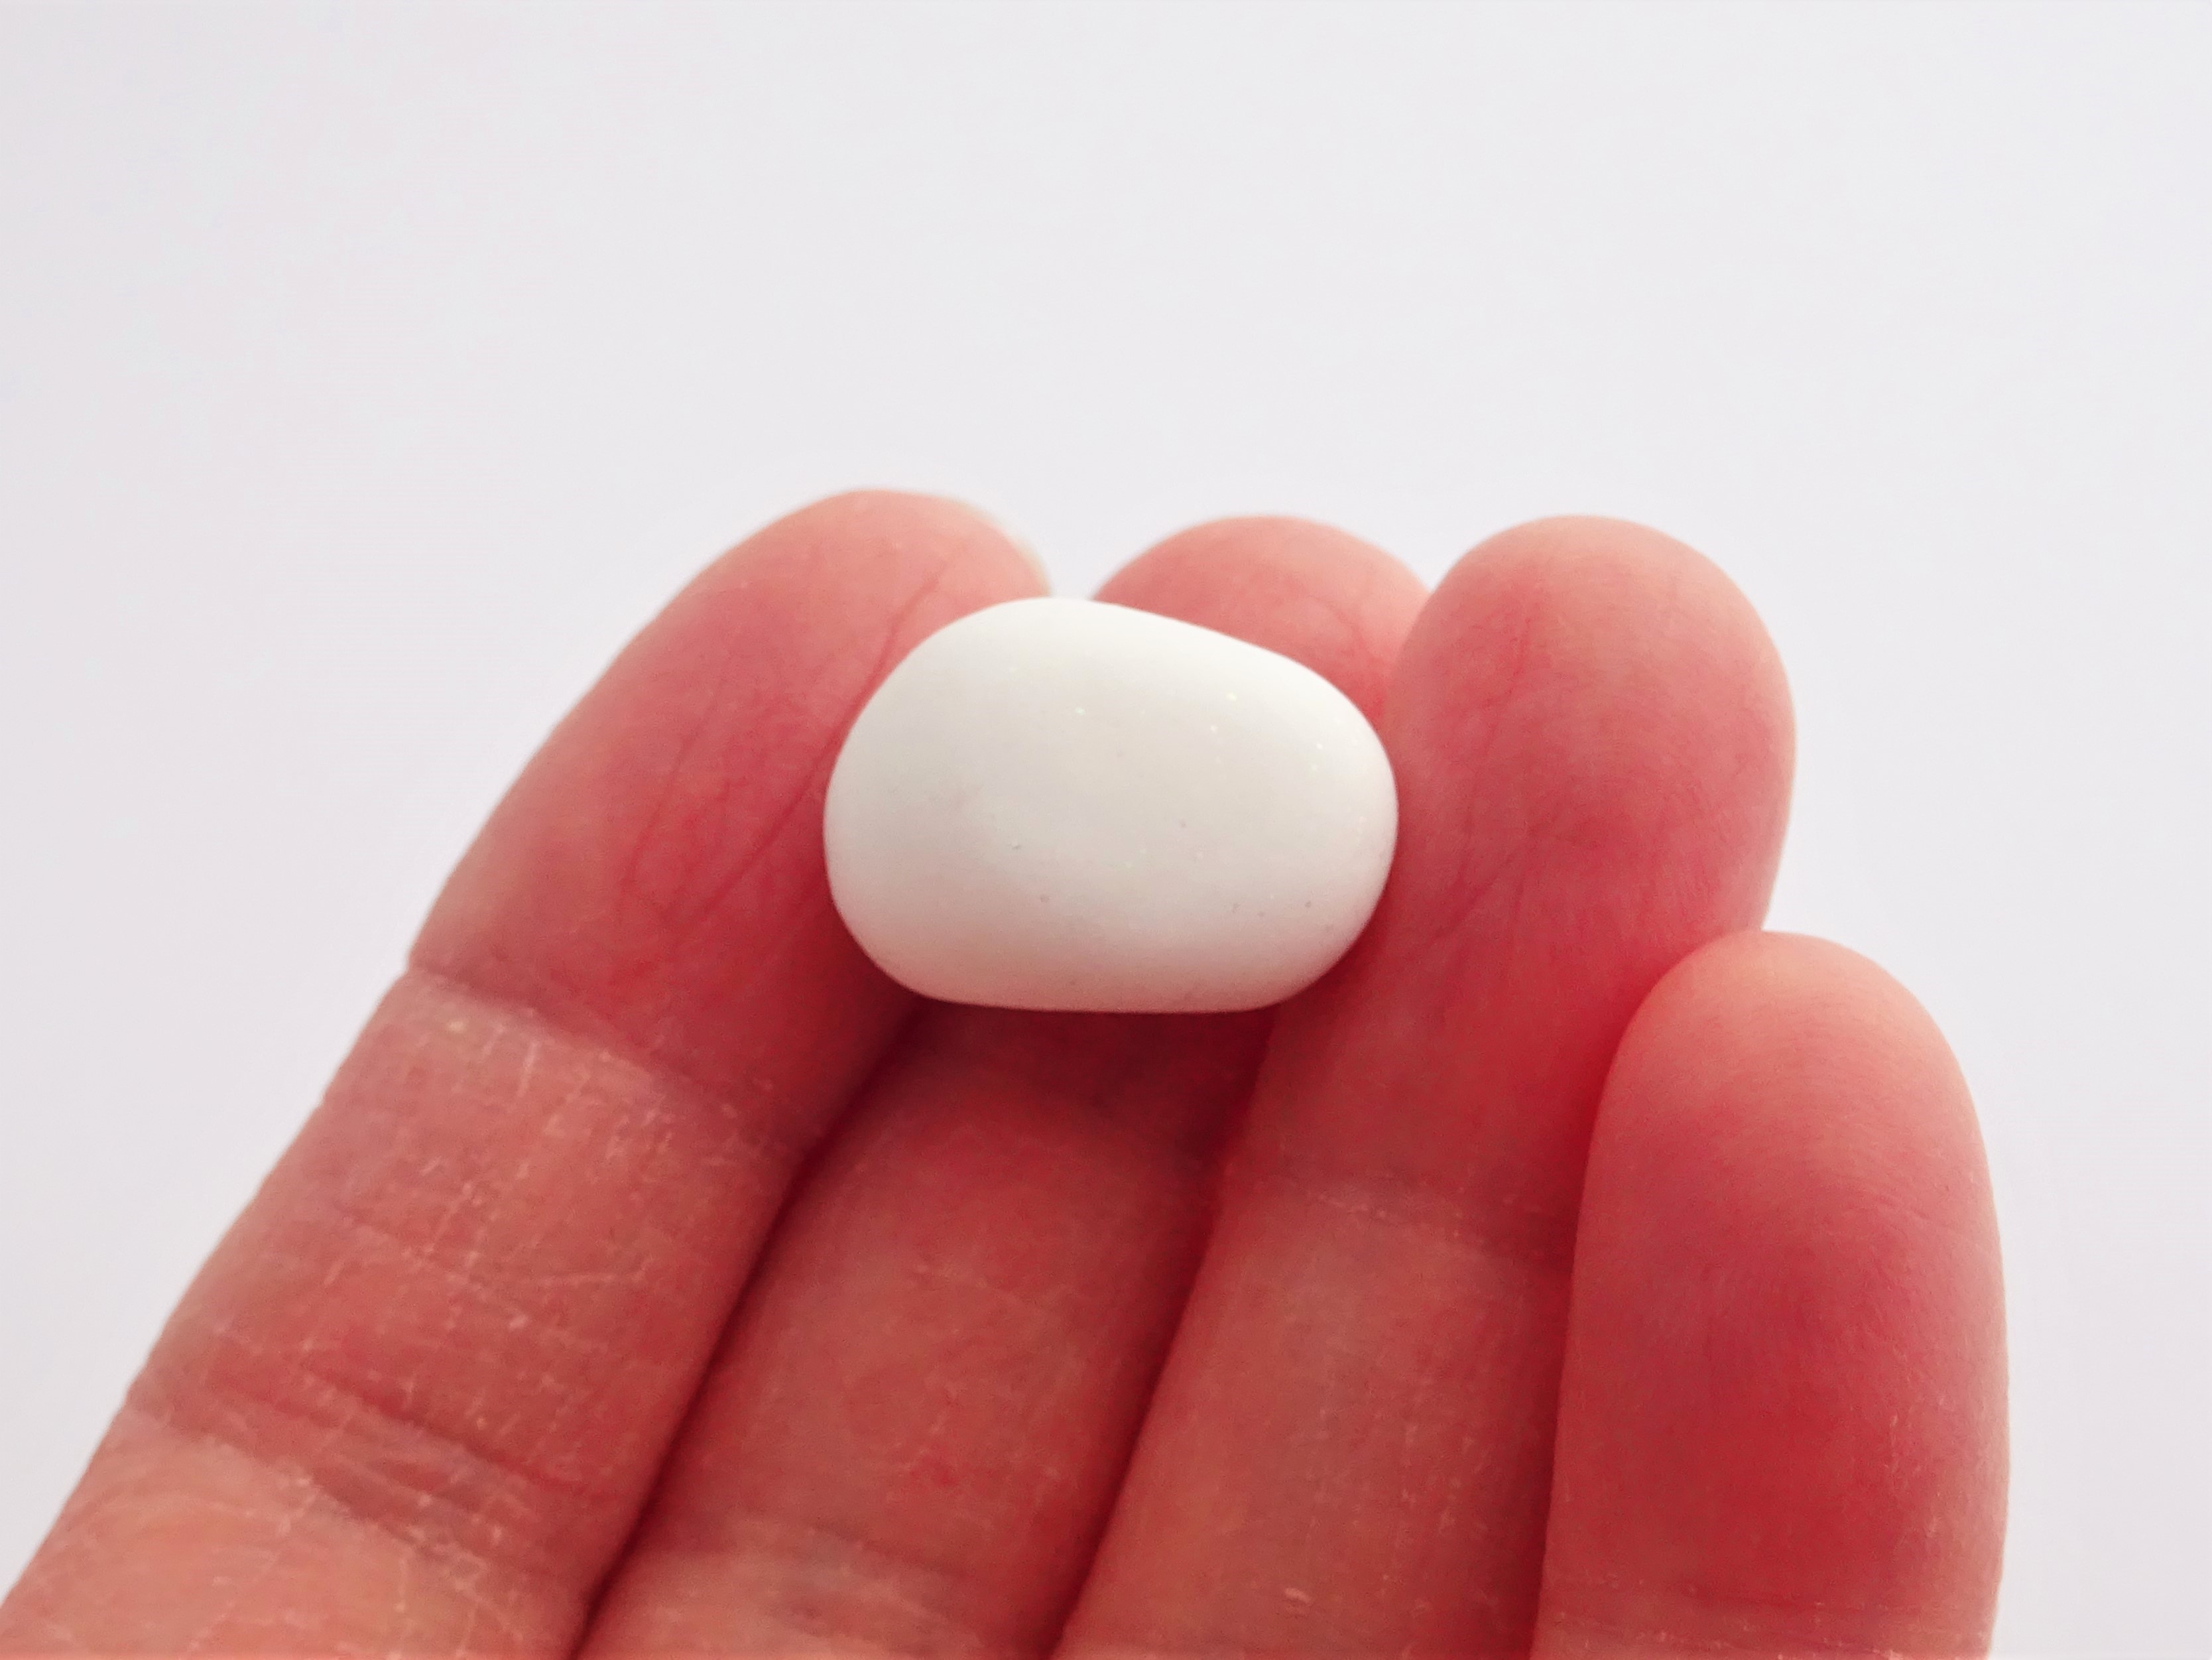
3. Roll this cirlce into a ball and then roll the remaining clay into a ball. The smaller ball is for the head and the bigger one is for the body. This doesn’t look like much clay at this point.
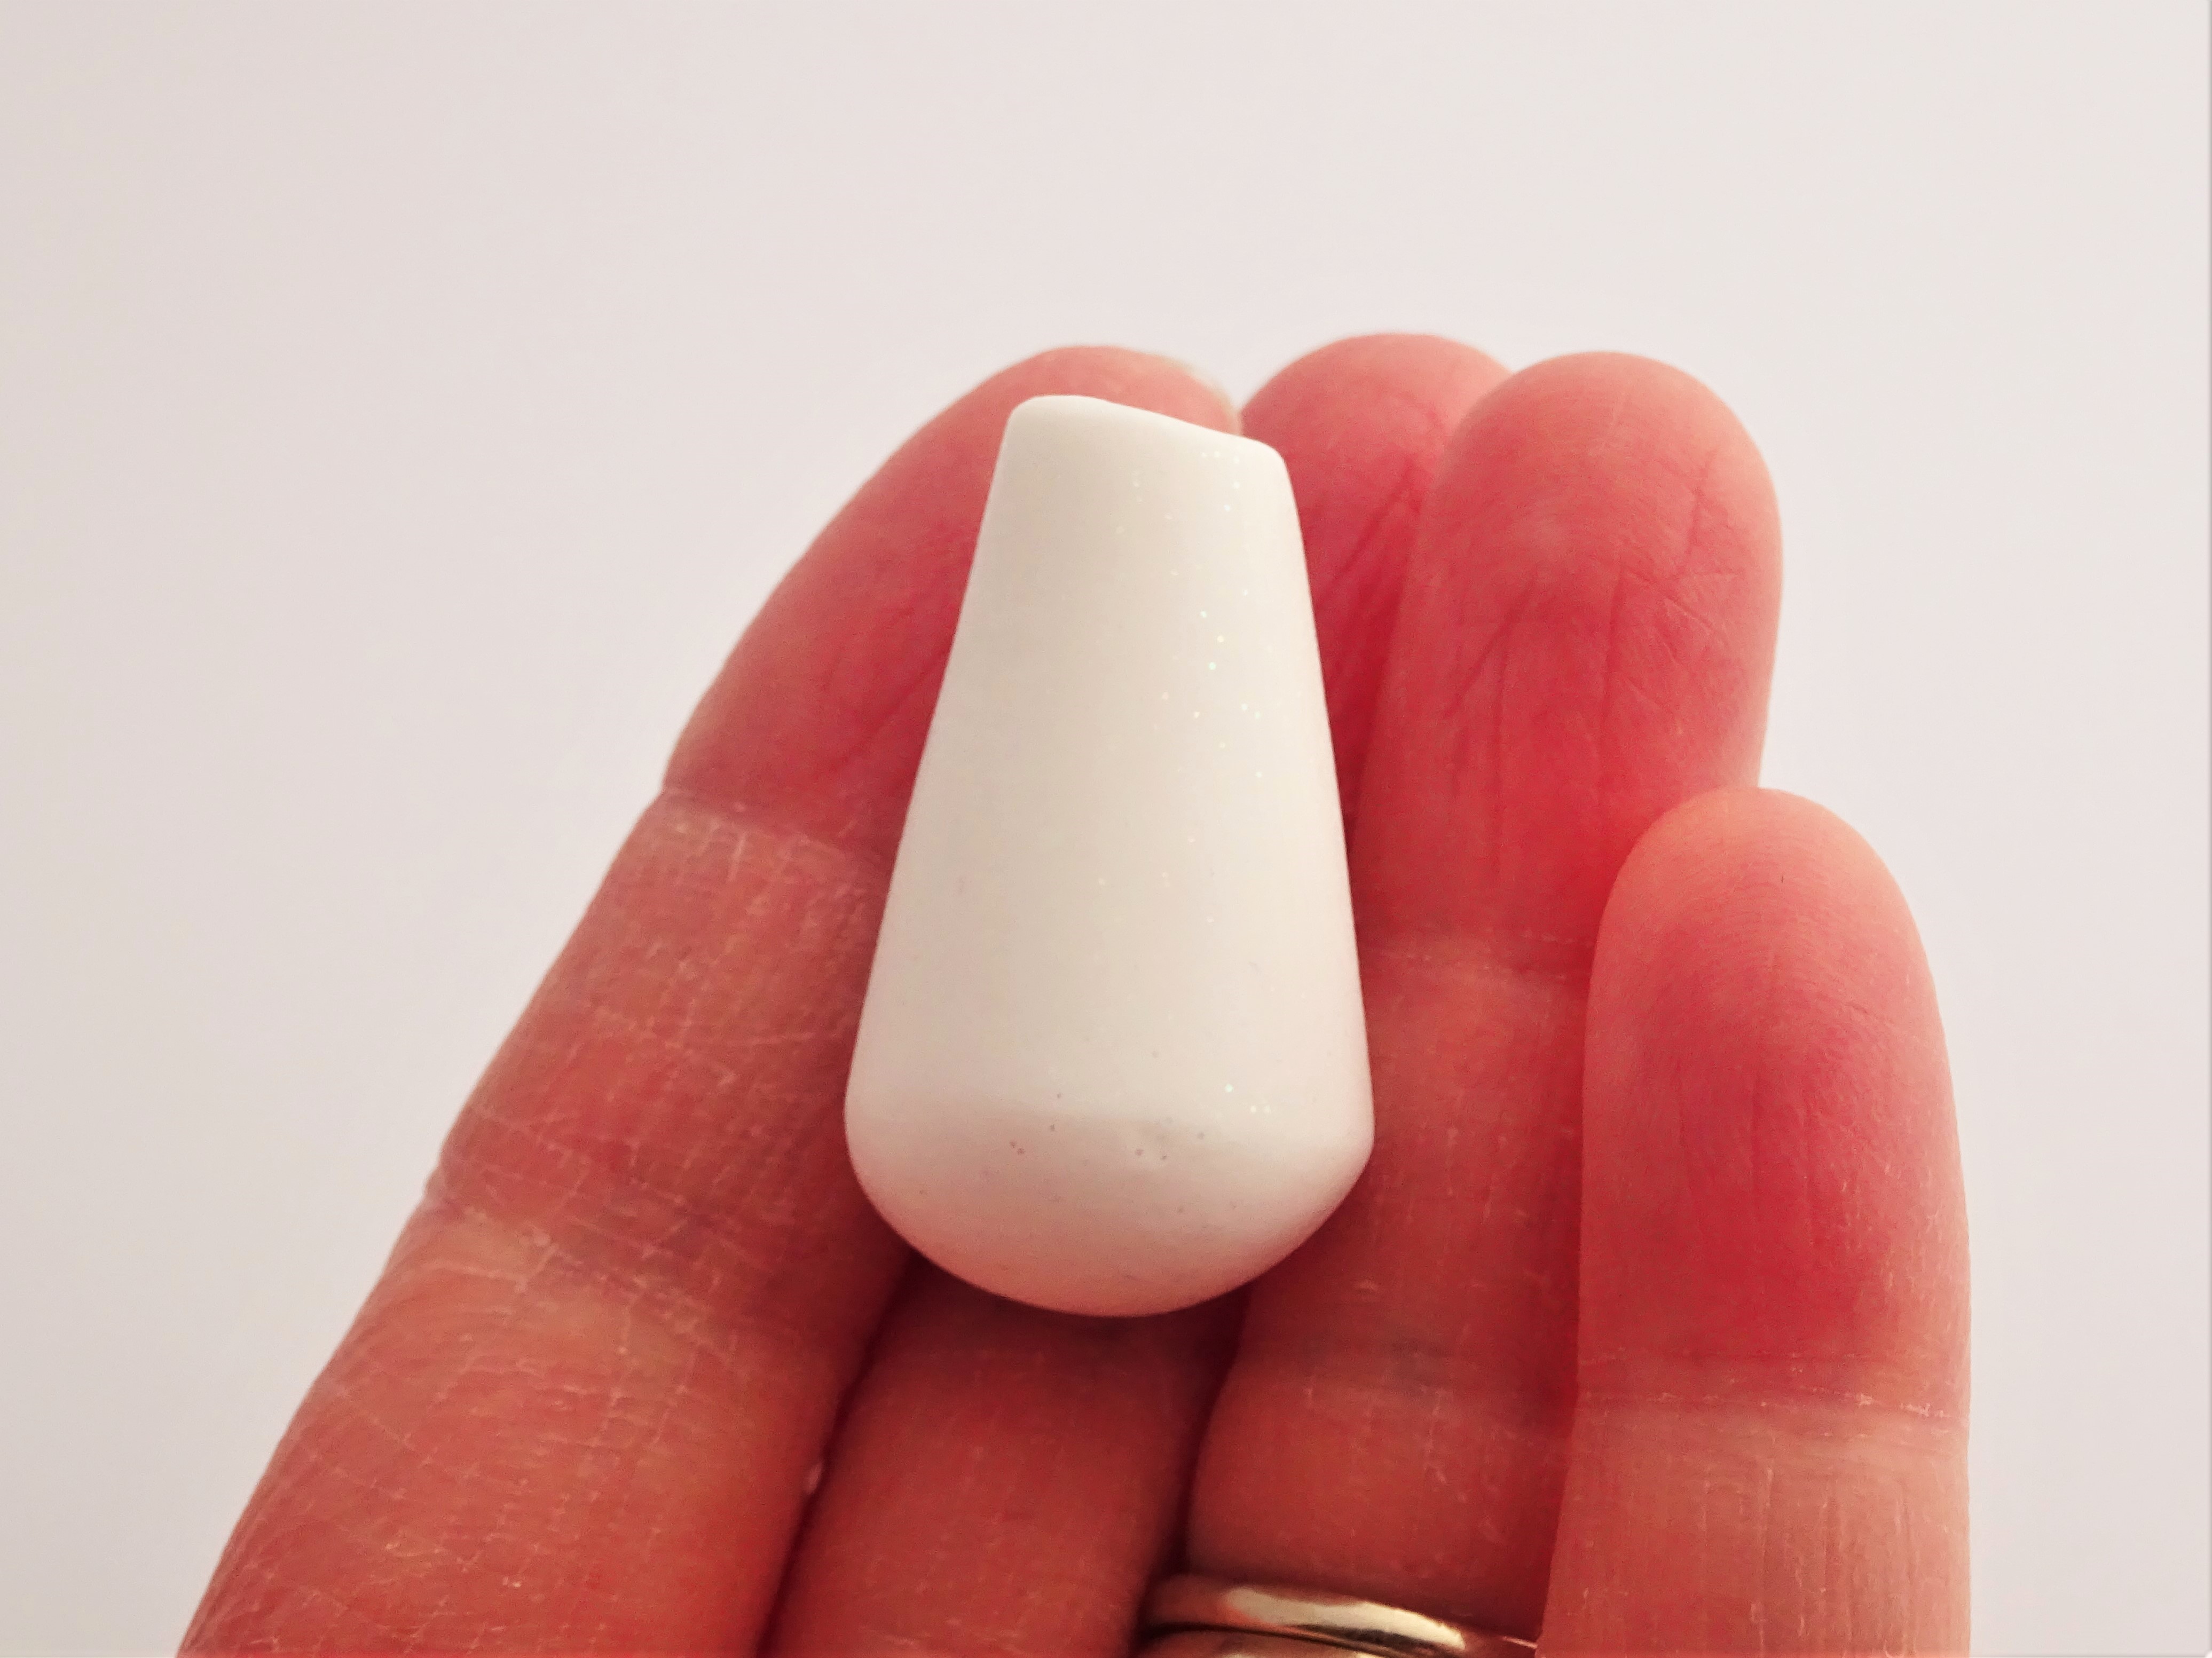
4. Working with the larger ball of clay, begin by pinching one half of the ball and then begin to roll against the surface. This will make the clay elongate.
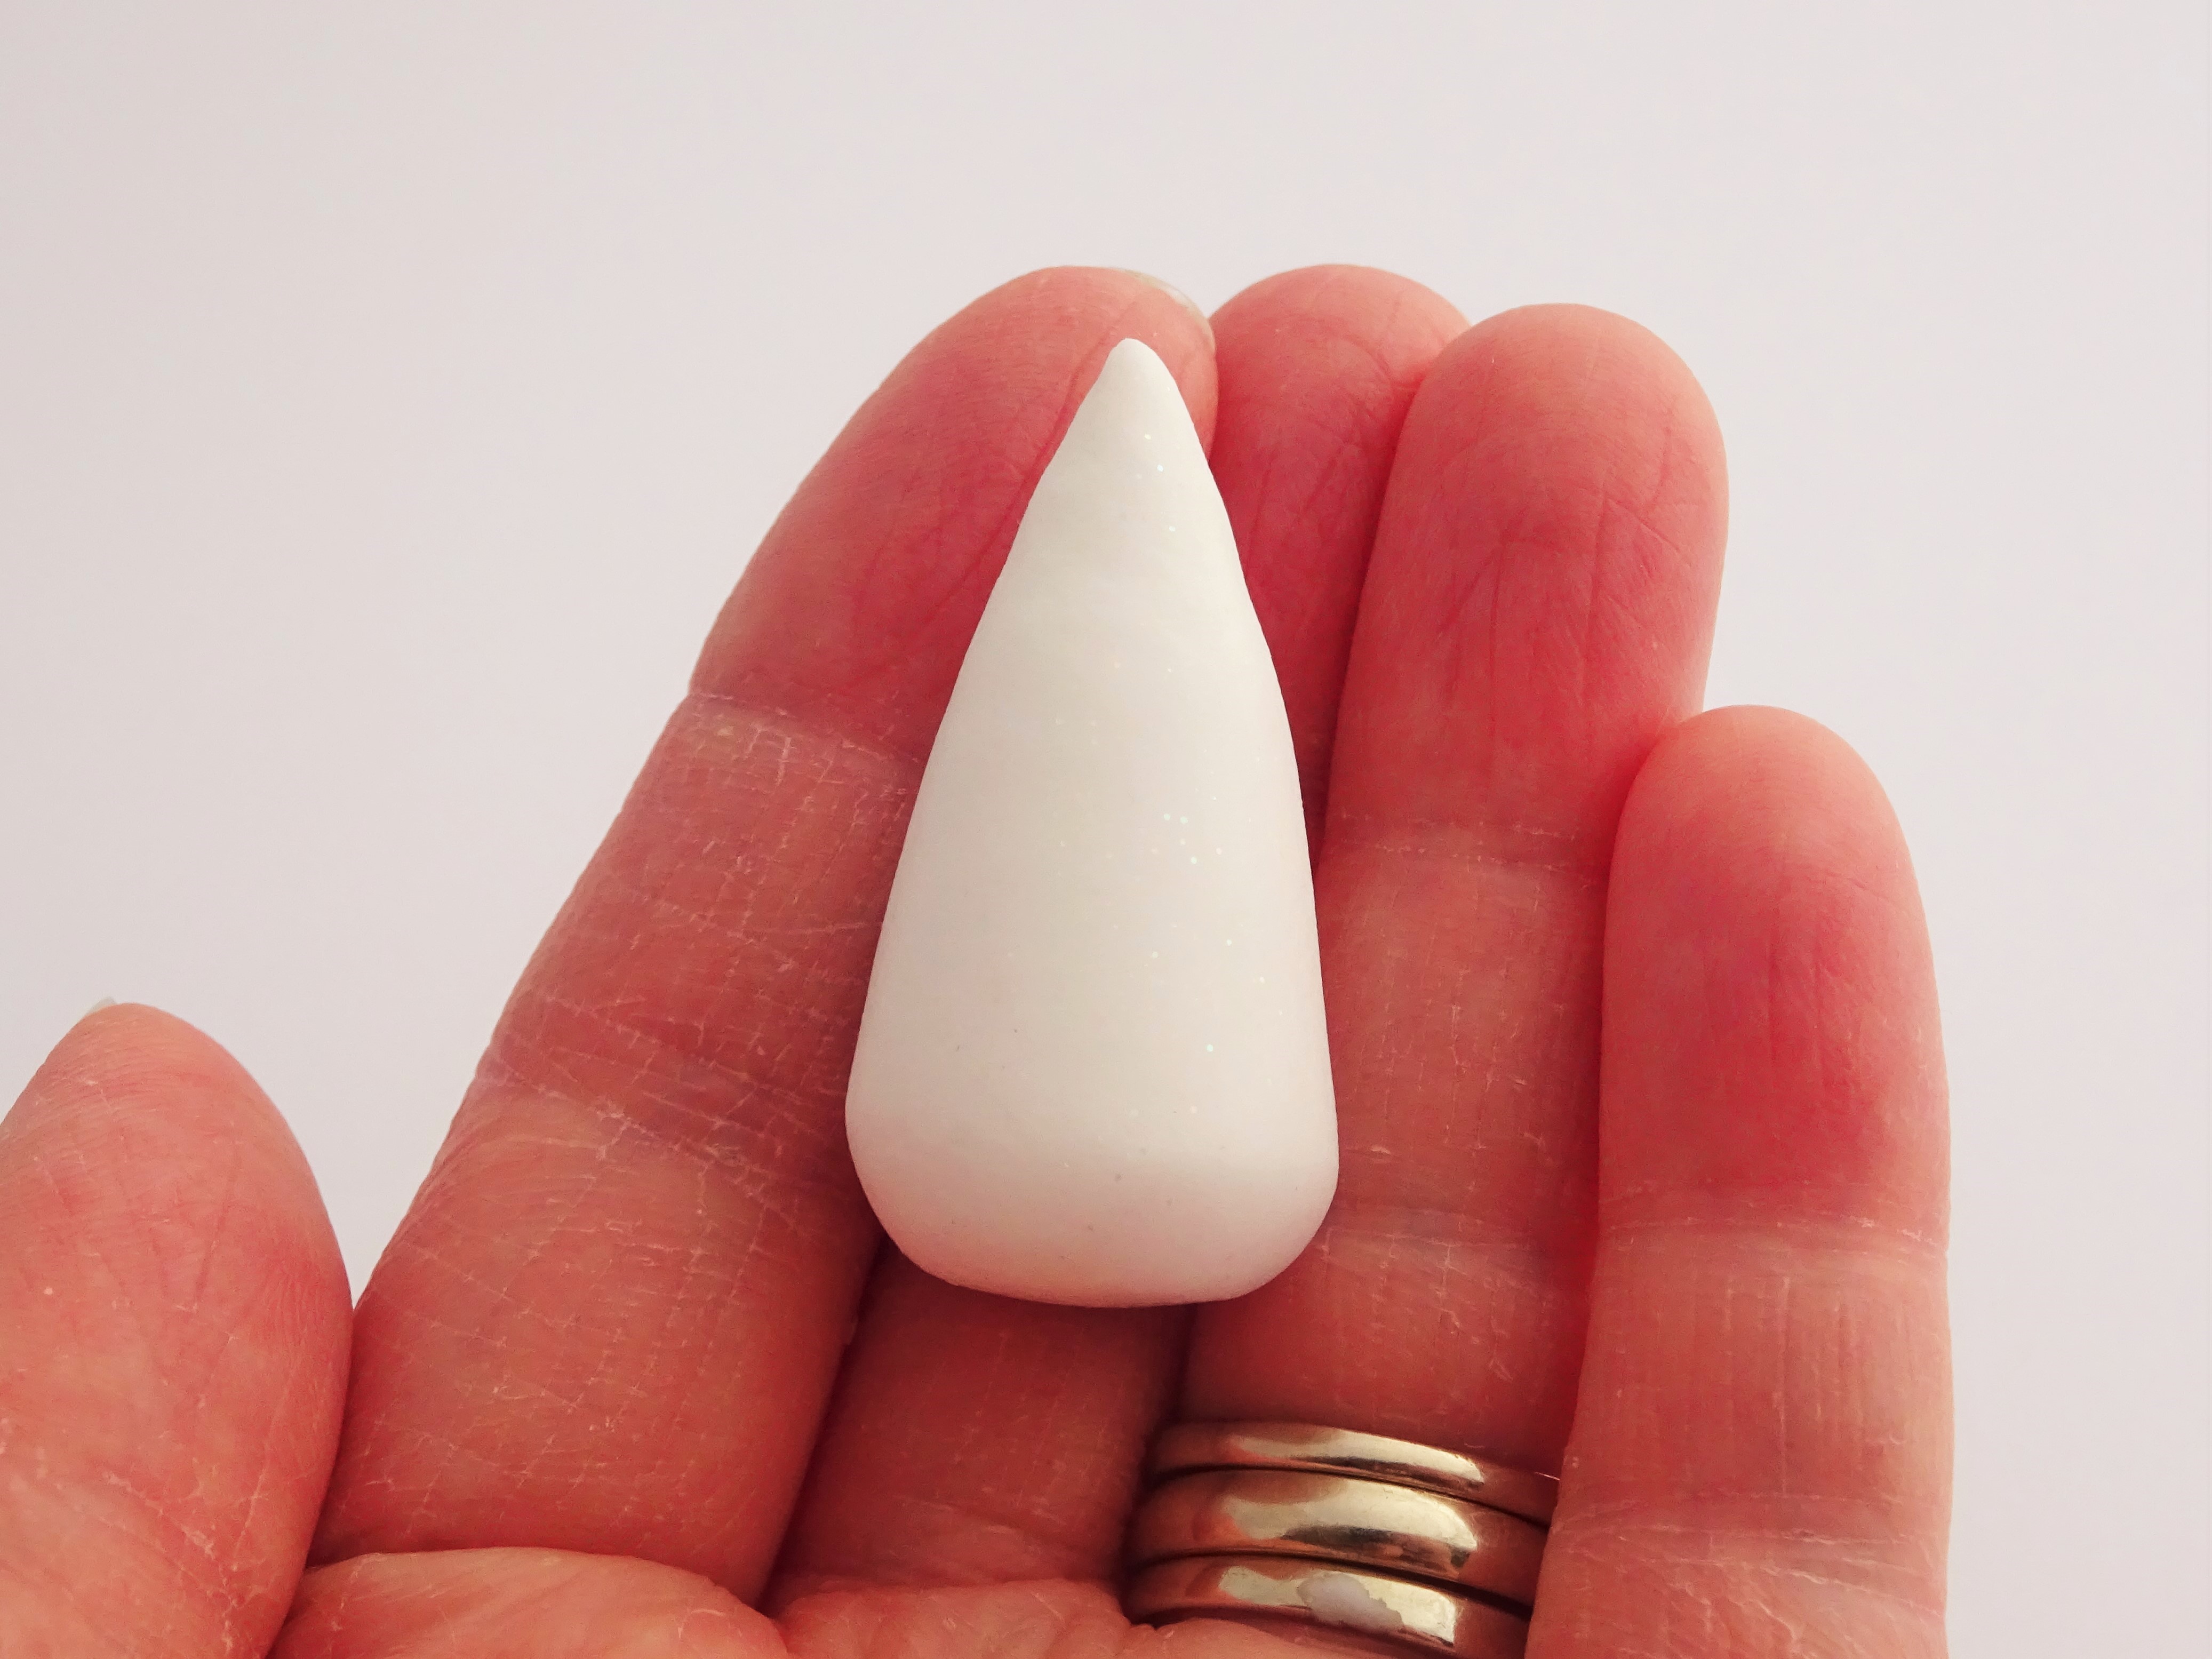
5. Continue pinching the top section to make a point and press the rounded side on the surface to flatten the base. It is important to make this base flat as this will help your rabbit to stand. Put this to one side for a minute.
6. Now, using the smaller ball of clay, gently press the clay in the surface to create a flat edge whilst squeezing the front half. This will start to make the clay form a distorted oval type shape.
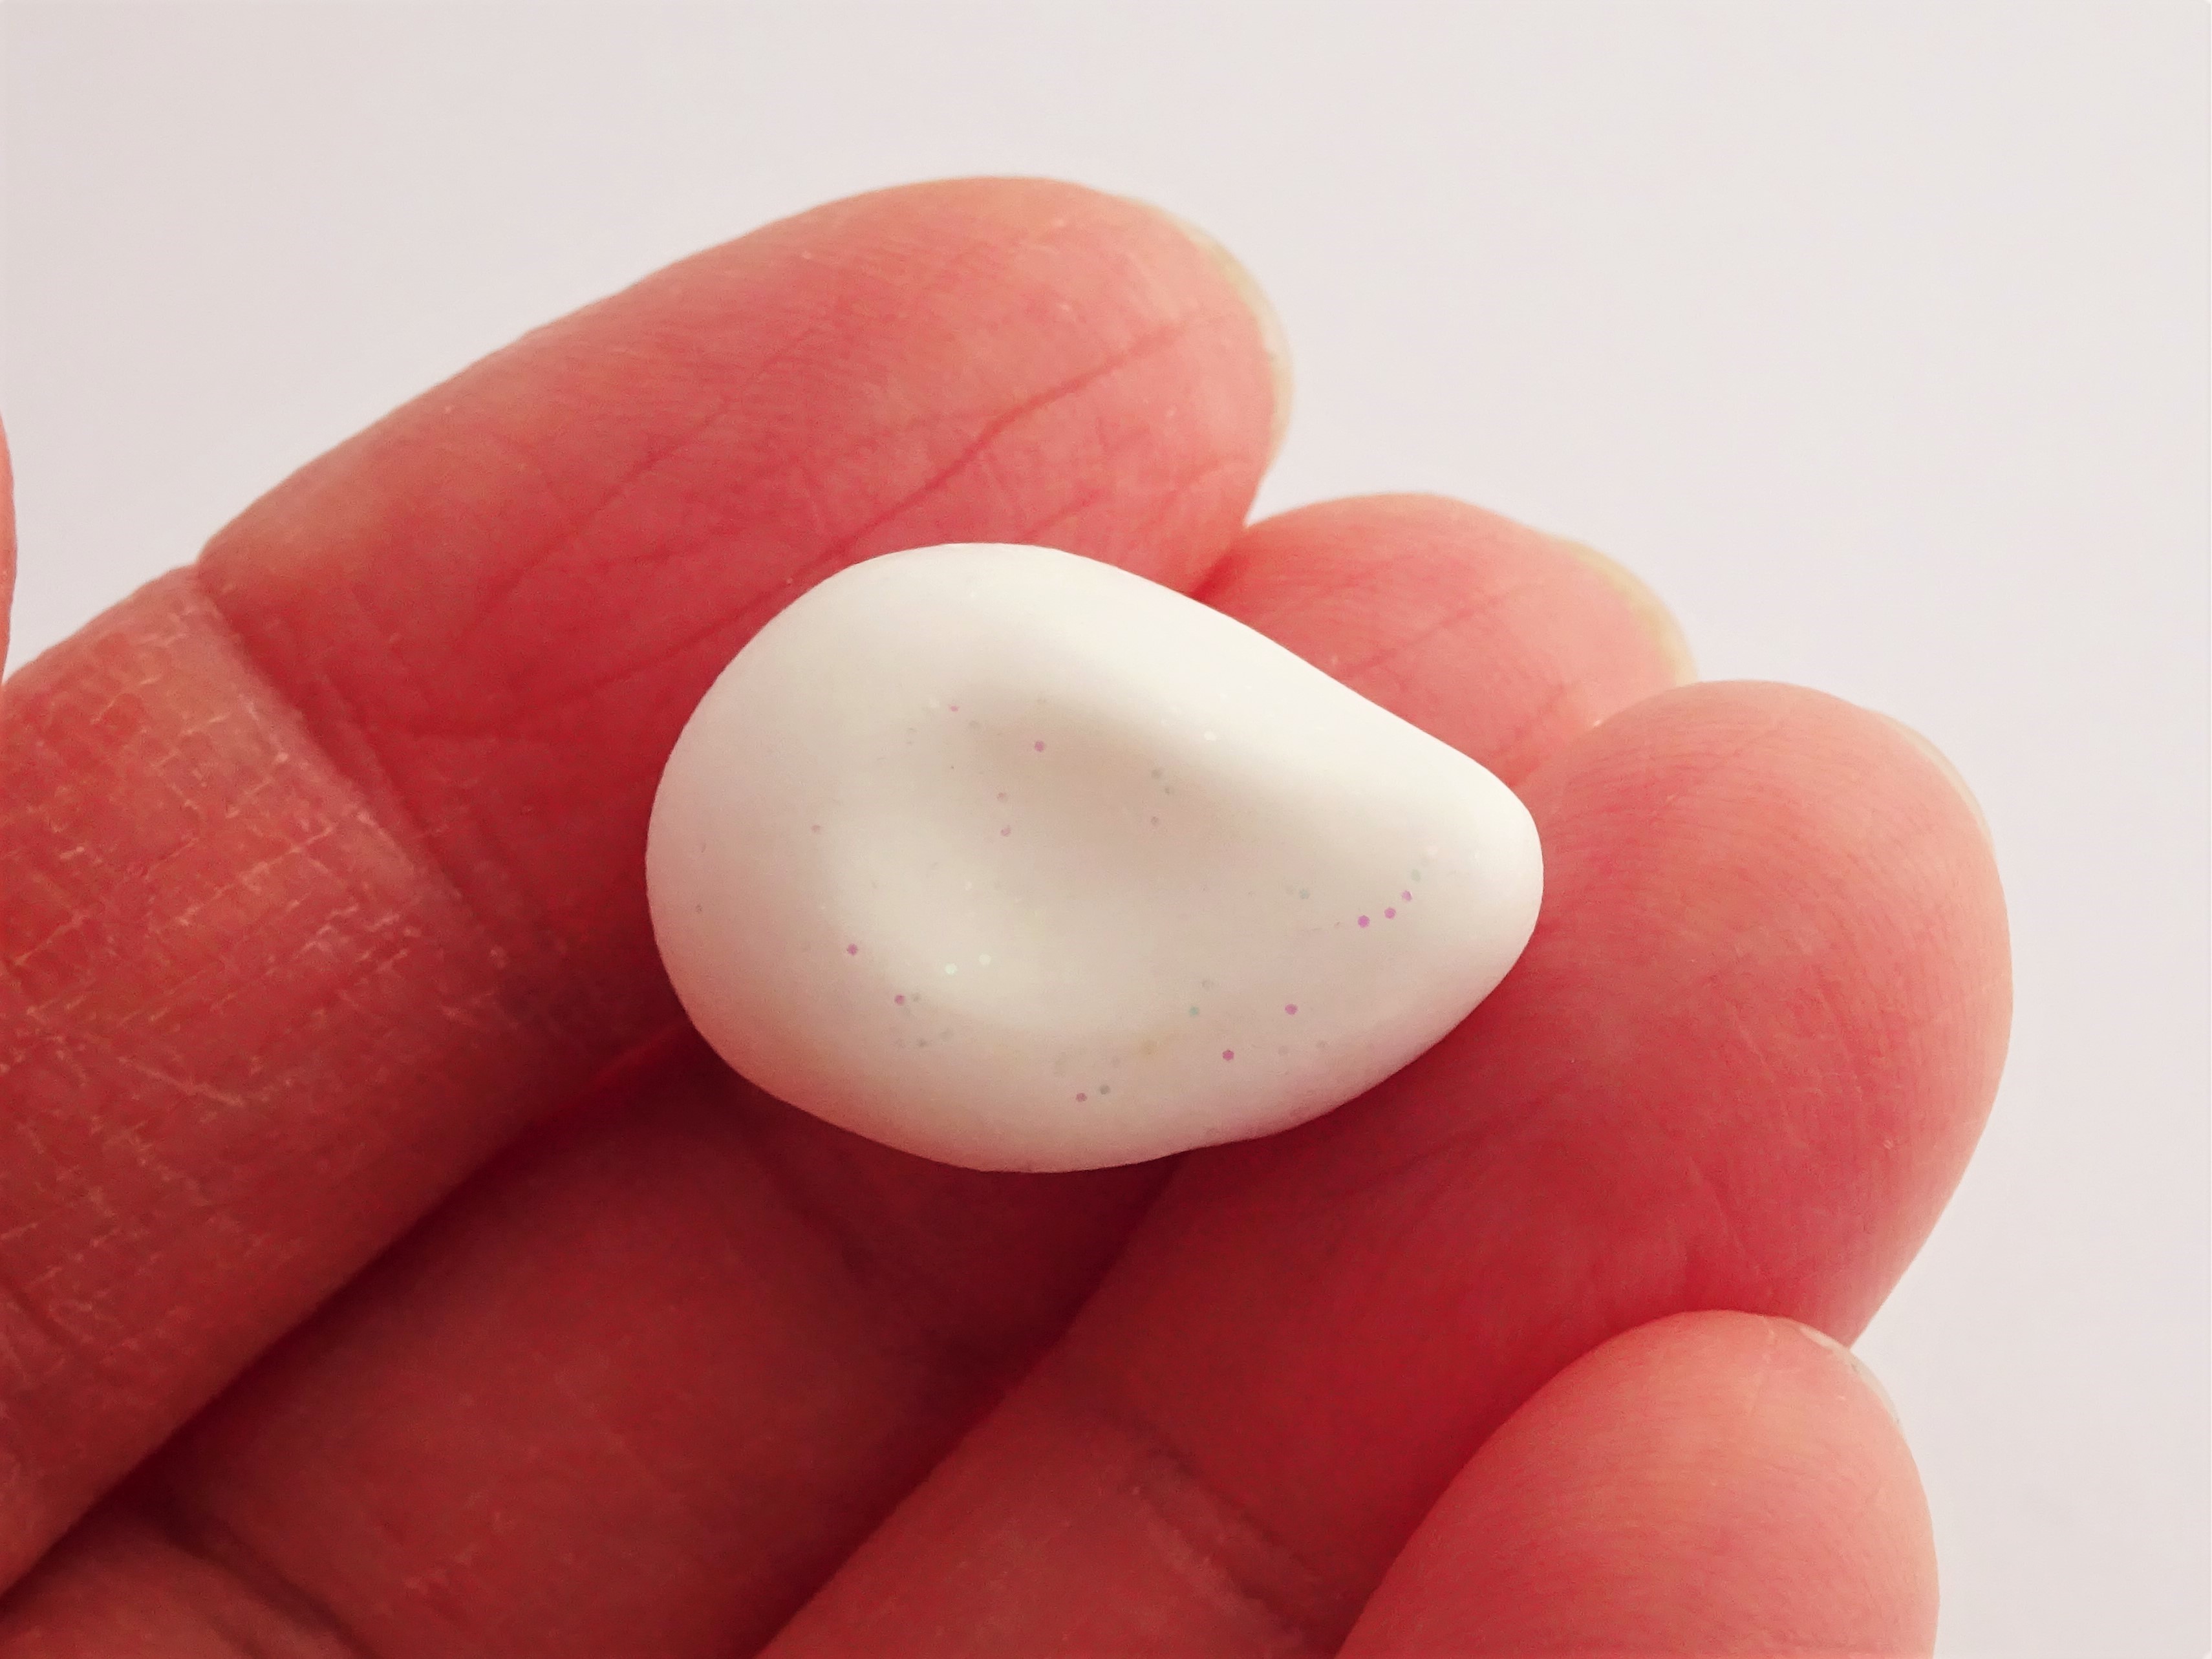
7. Lift off the surface and gently push up the front where the nose is going to be and gently flatten the bridge of the nose. Using a large ball tool make an indent on either side of the head and then smooth it over with you finger.
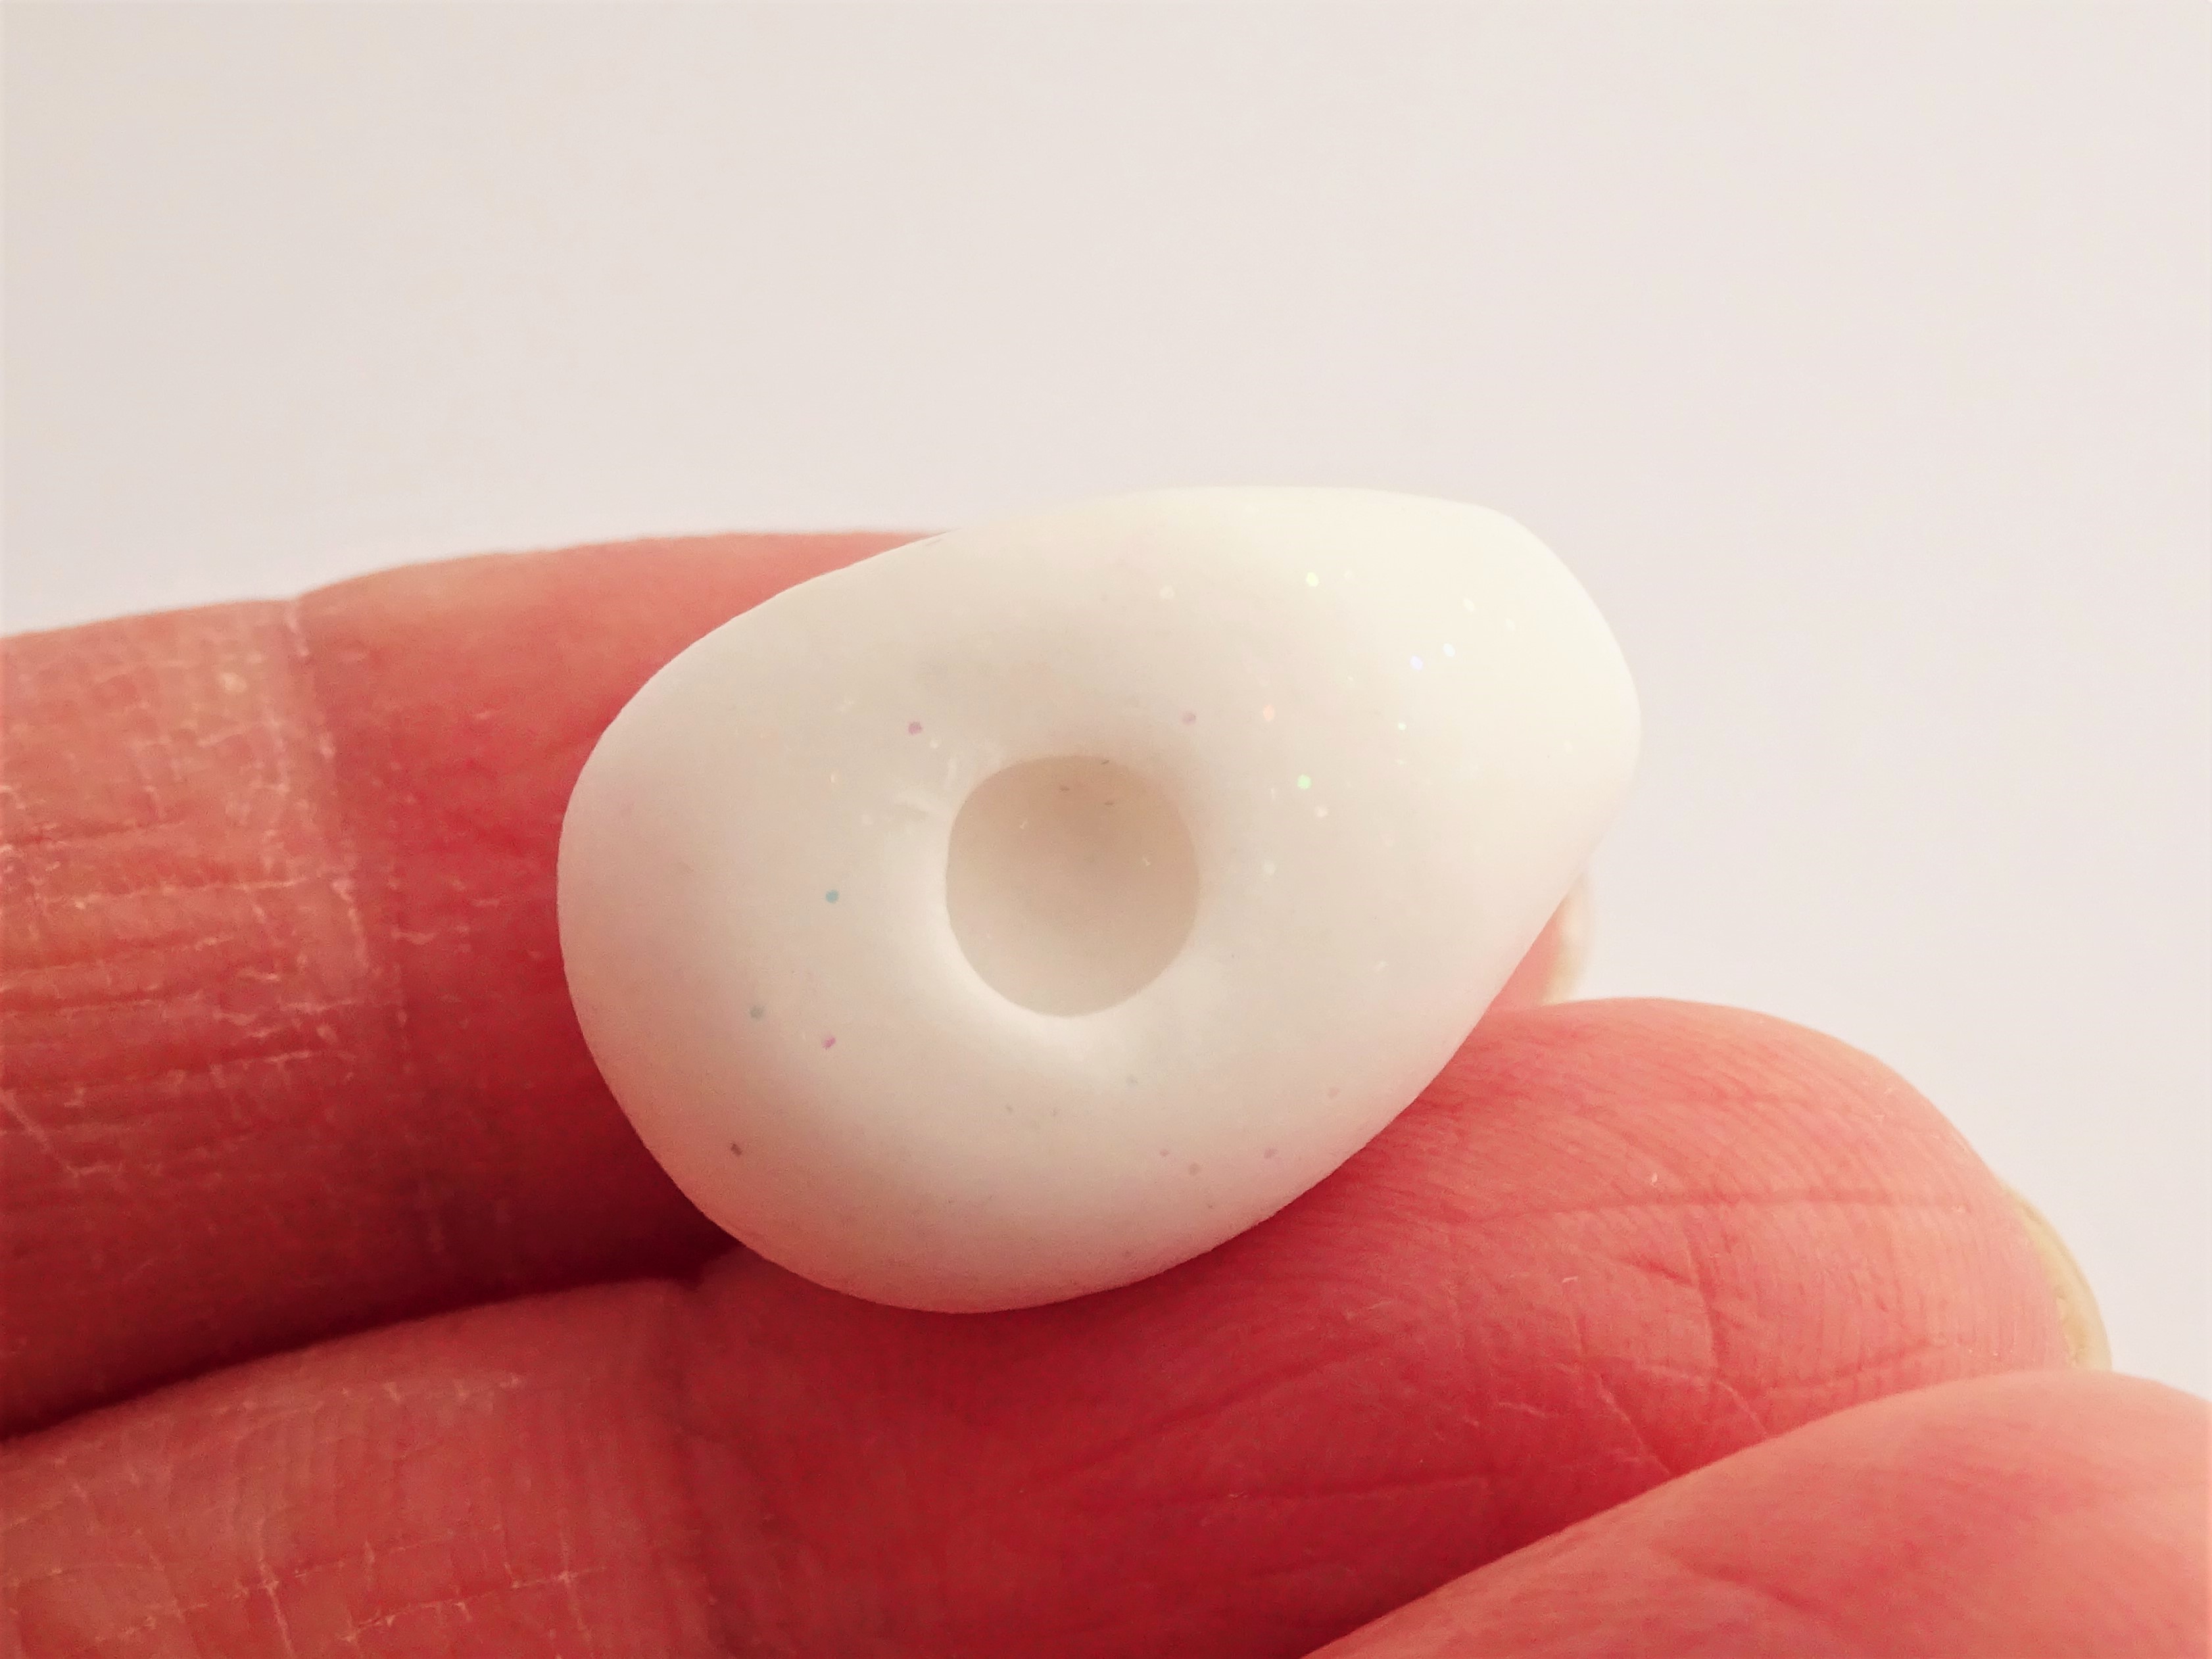
8. On the flat underside of the head use a smaller ball tool (or something with a rounded top) to make an indent,

9. Push the head onto the body. Once the head is in place put the rabbit on to a flat surface and continue to gently push down to ensure a good bond. In many of my mini sculptures I add some wire supports to securely join pieces but for ease in this tutorial I chose not too. It is not necessary as long as these two parts are firmly attached at this point.
Go back in to refine any details that have been softened or distorted.

10. Find a tool with a flat end (I have a fimo tool with a tip a little like a flat head screw driver) and press in an line where the nose would join the mouth and on either side, where the nose will be, going in a curved motion so if the two lines (on either side) were to join up under the chin and on the nose they would roughly form a circle.
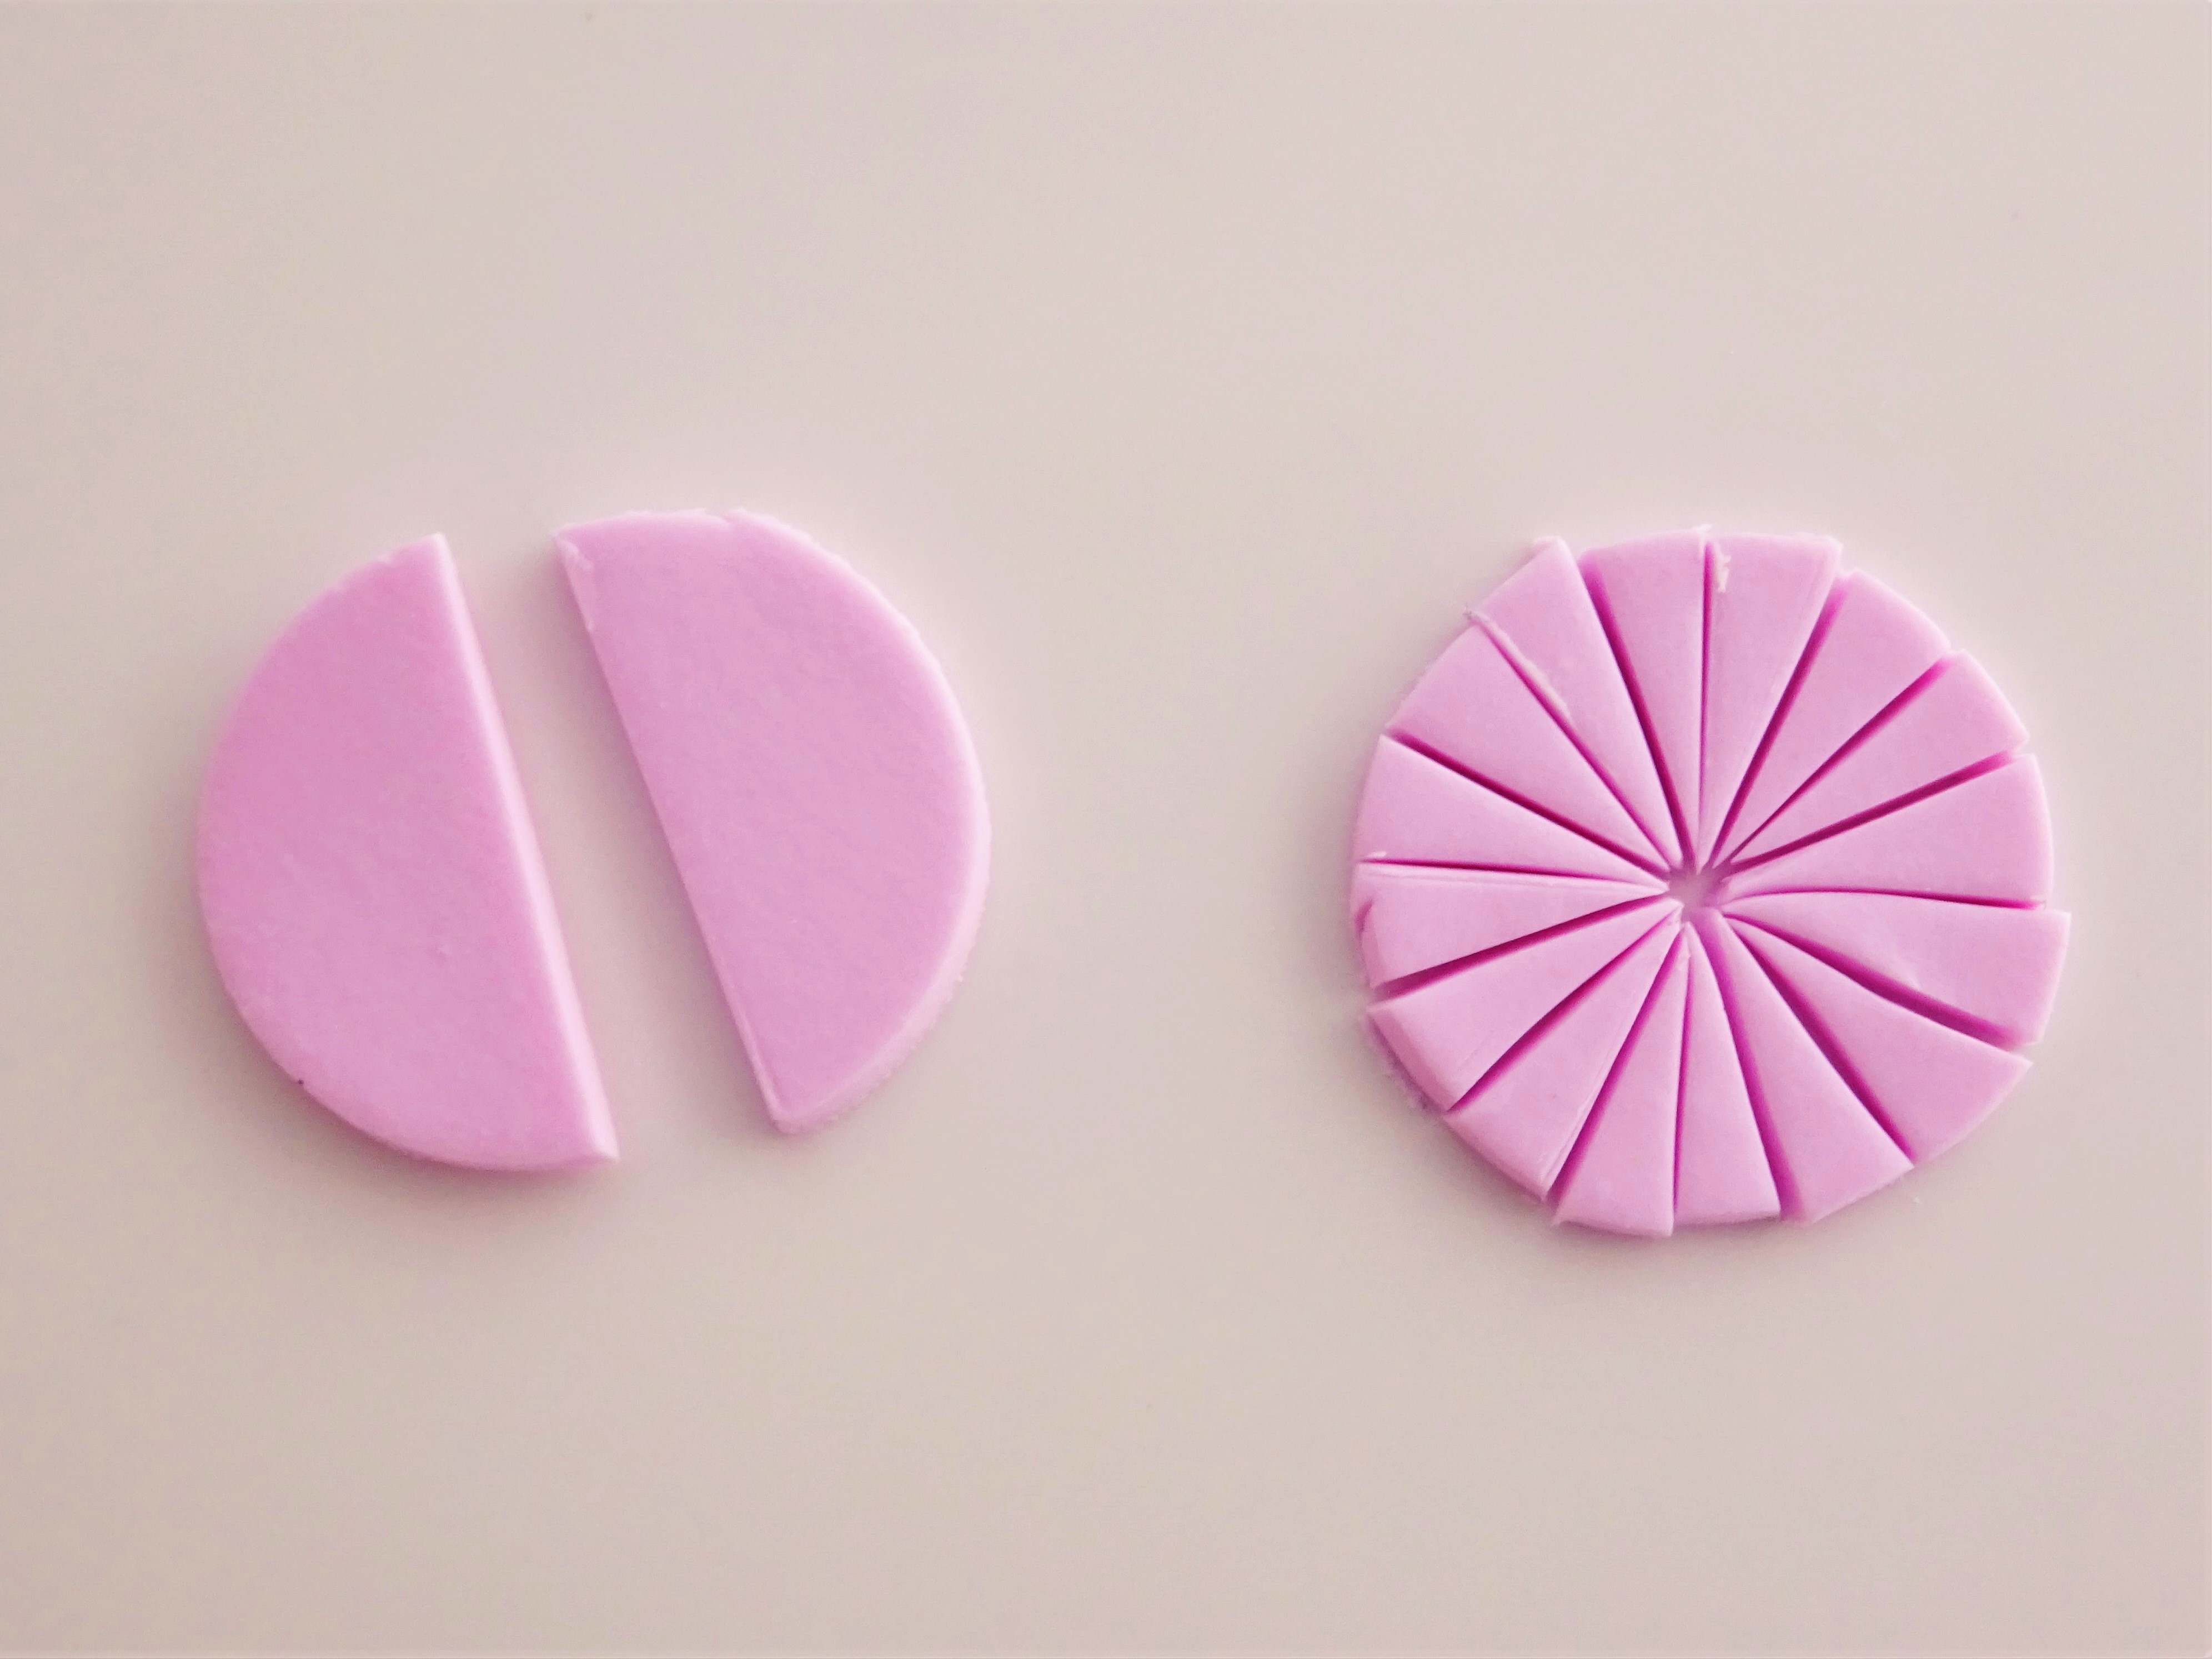
11. Soften a little Fimo Effect in Rose/Light Pink. Roll thorough your clay machine on a number 6 (if you are rolling by hand this is only a few mm thick). Cut two circles with the smallest circle cutter (1.3cm round)
Cut one of these in half and cut the other into 16 (start by halving, then quarter etc)

12. Take 1 of the 16 pieces of pink and roll it into a ball. Gently press on a flat surface. Then pick up and pinch one end and press the other to make a triangle. Position it on the rabbit with the point of the triangle sitting in the line joining the nose and mouth.
13. Roll more glitter white through your clay machine on a number 2 (so slightly thinner than you started with in step 1). Cut 3 circles with your smallest cutter. Cut them all in half.
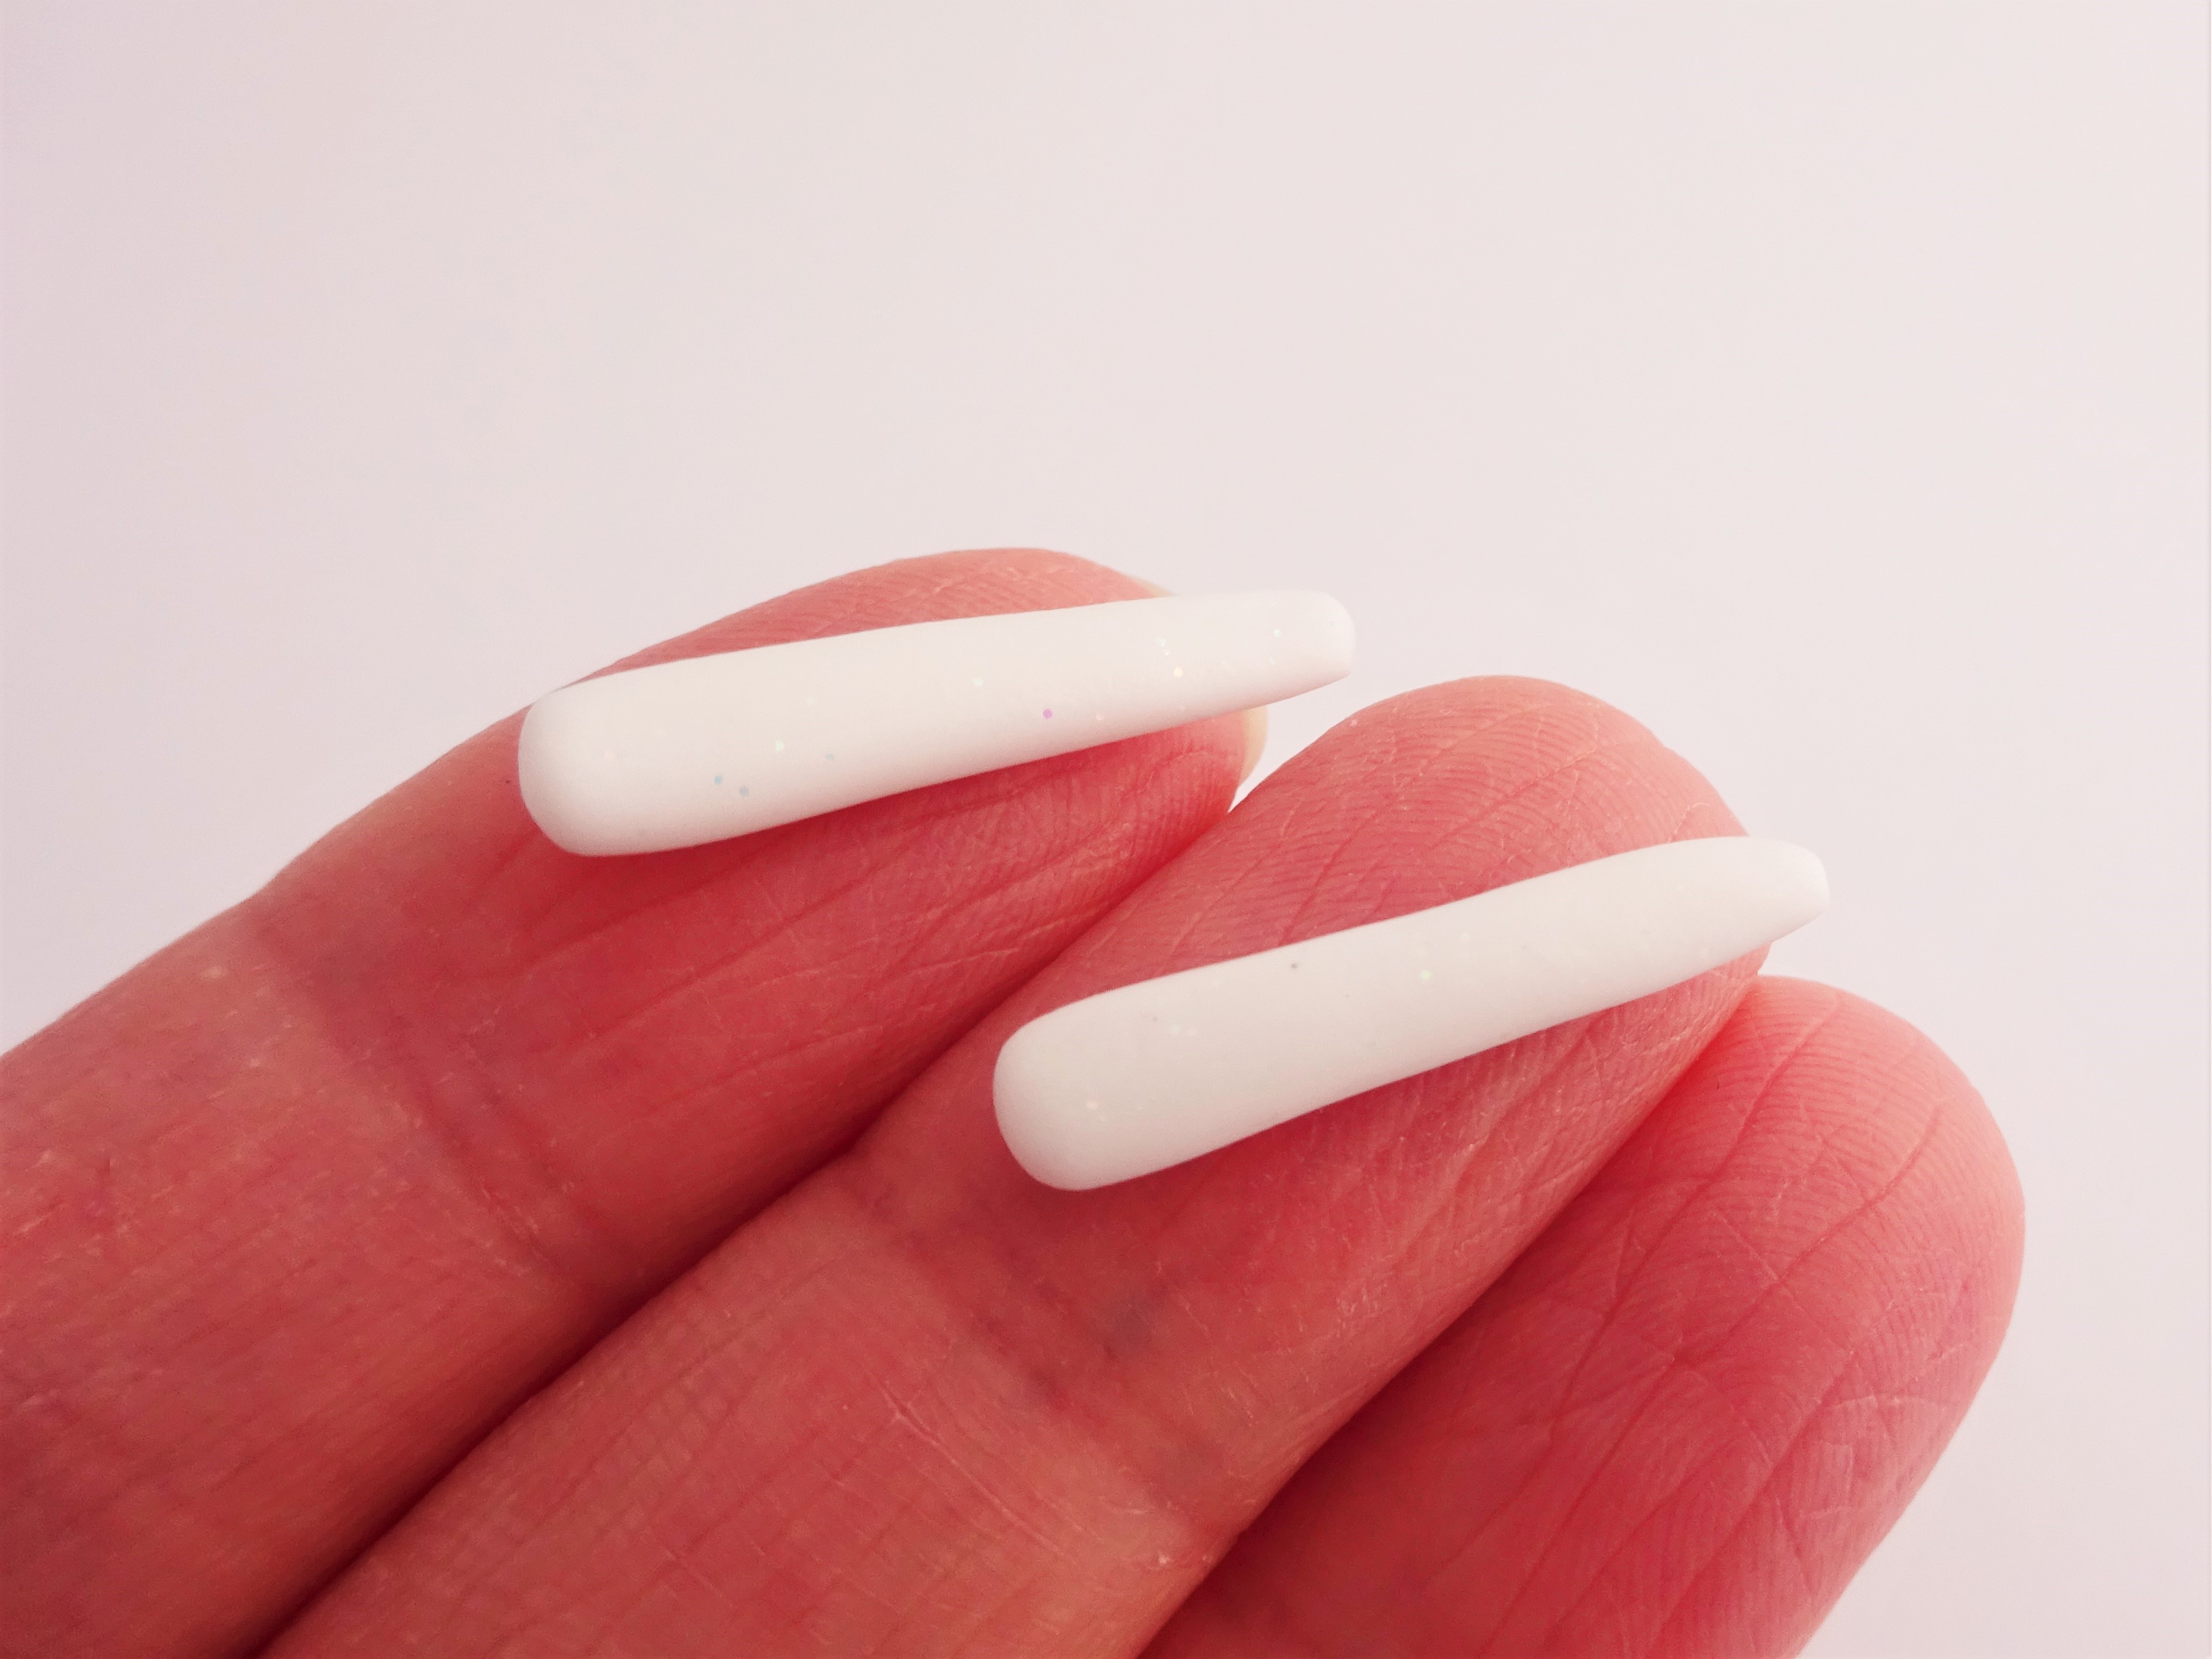
14. Roll 4 of these halves into balls. We are going to use 1 half per ear and one half per arm. Roll the balls against a flat surface so that they stretch out. Apply a little more pressure at one end to make it a little thinner. Press on the surface gently so that one side flattens.
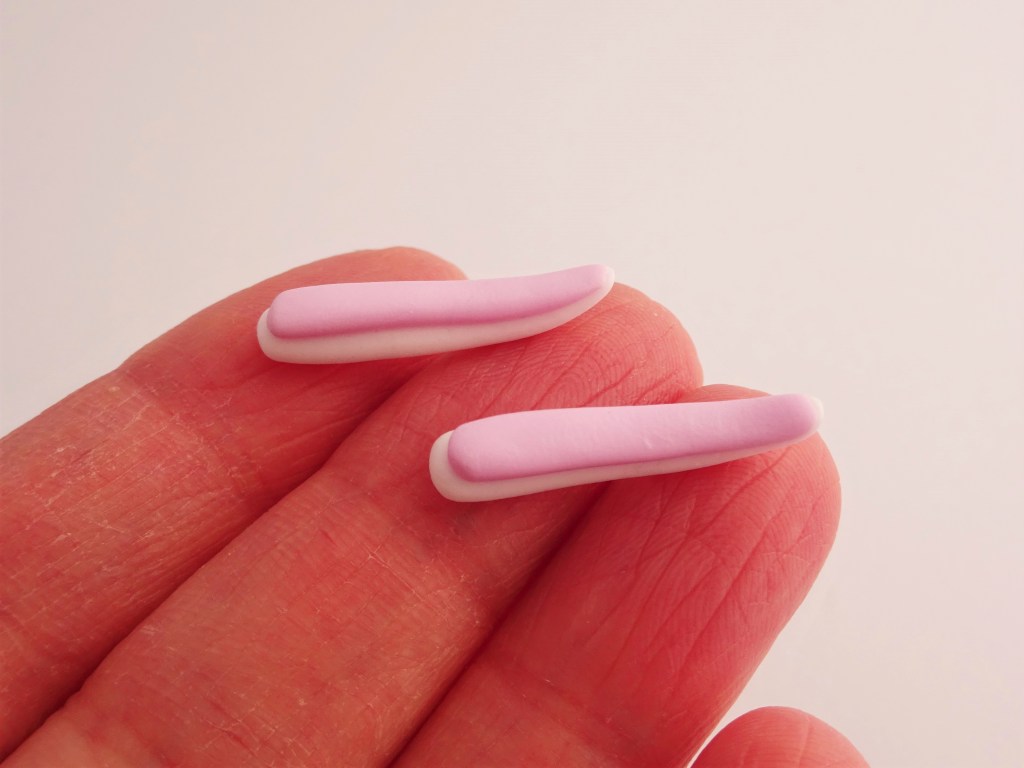
15. Repeat step 14 with the two halves of pink from step 11 and lay them on the flat side of two of the glitter white ears just made.

16. Place the ears and arm on your rabbit. Make sure you are happy with the placement before pressing them on firmly. Also, don’t press the full length of the arms down if you are planning on adding the Easter egg or Spring flowers.
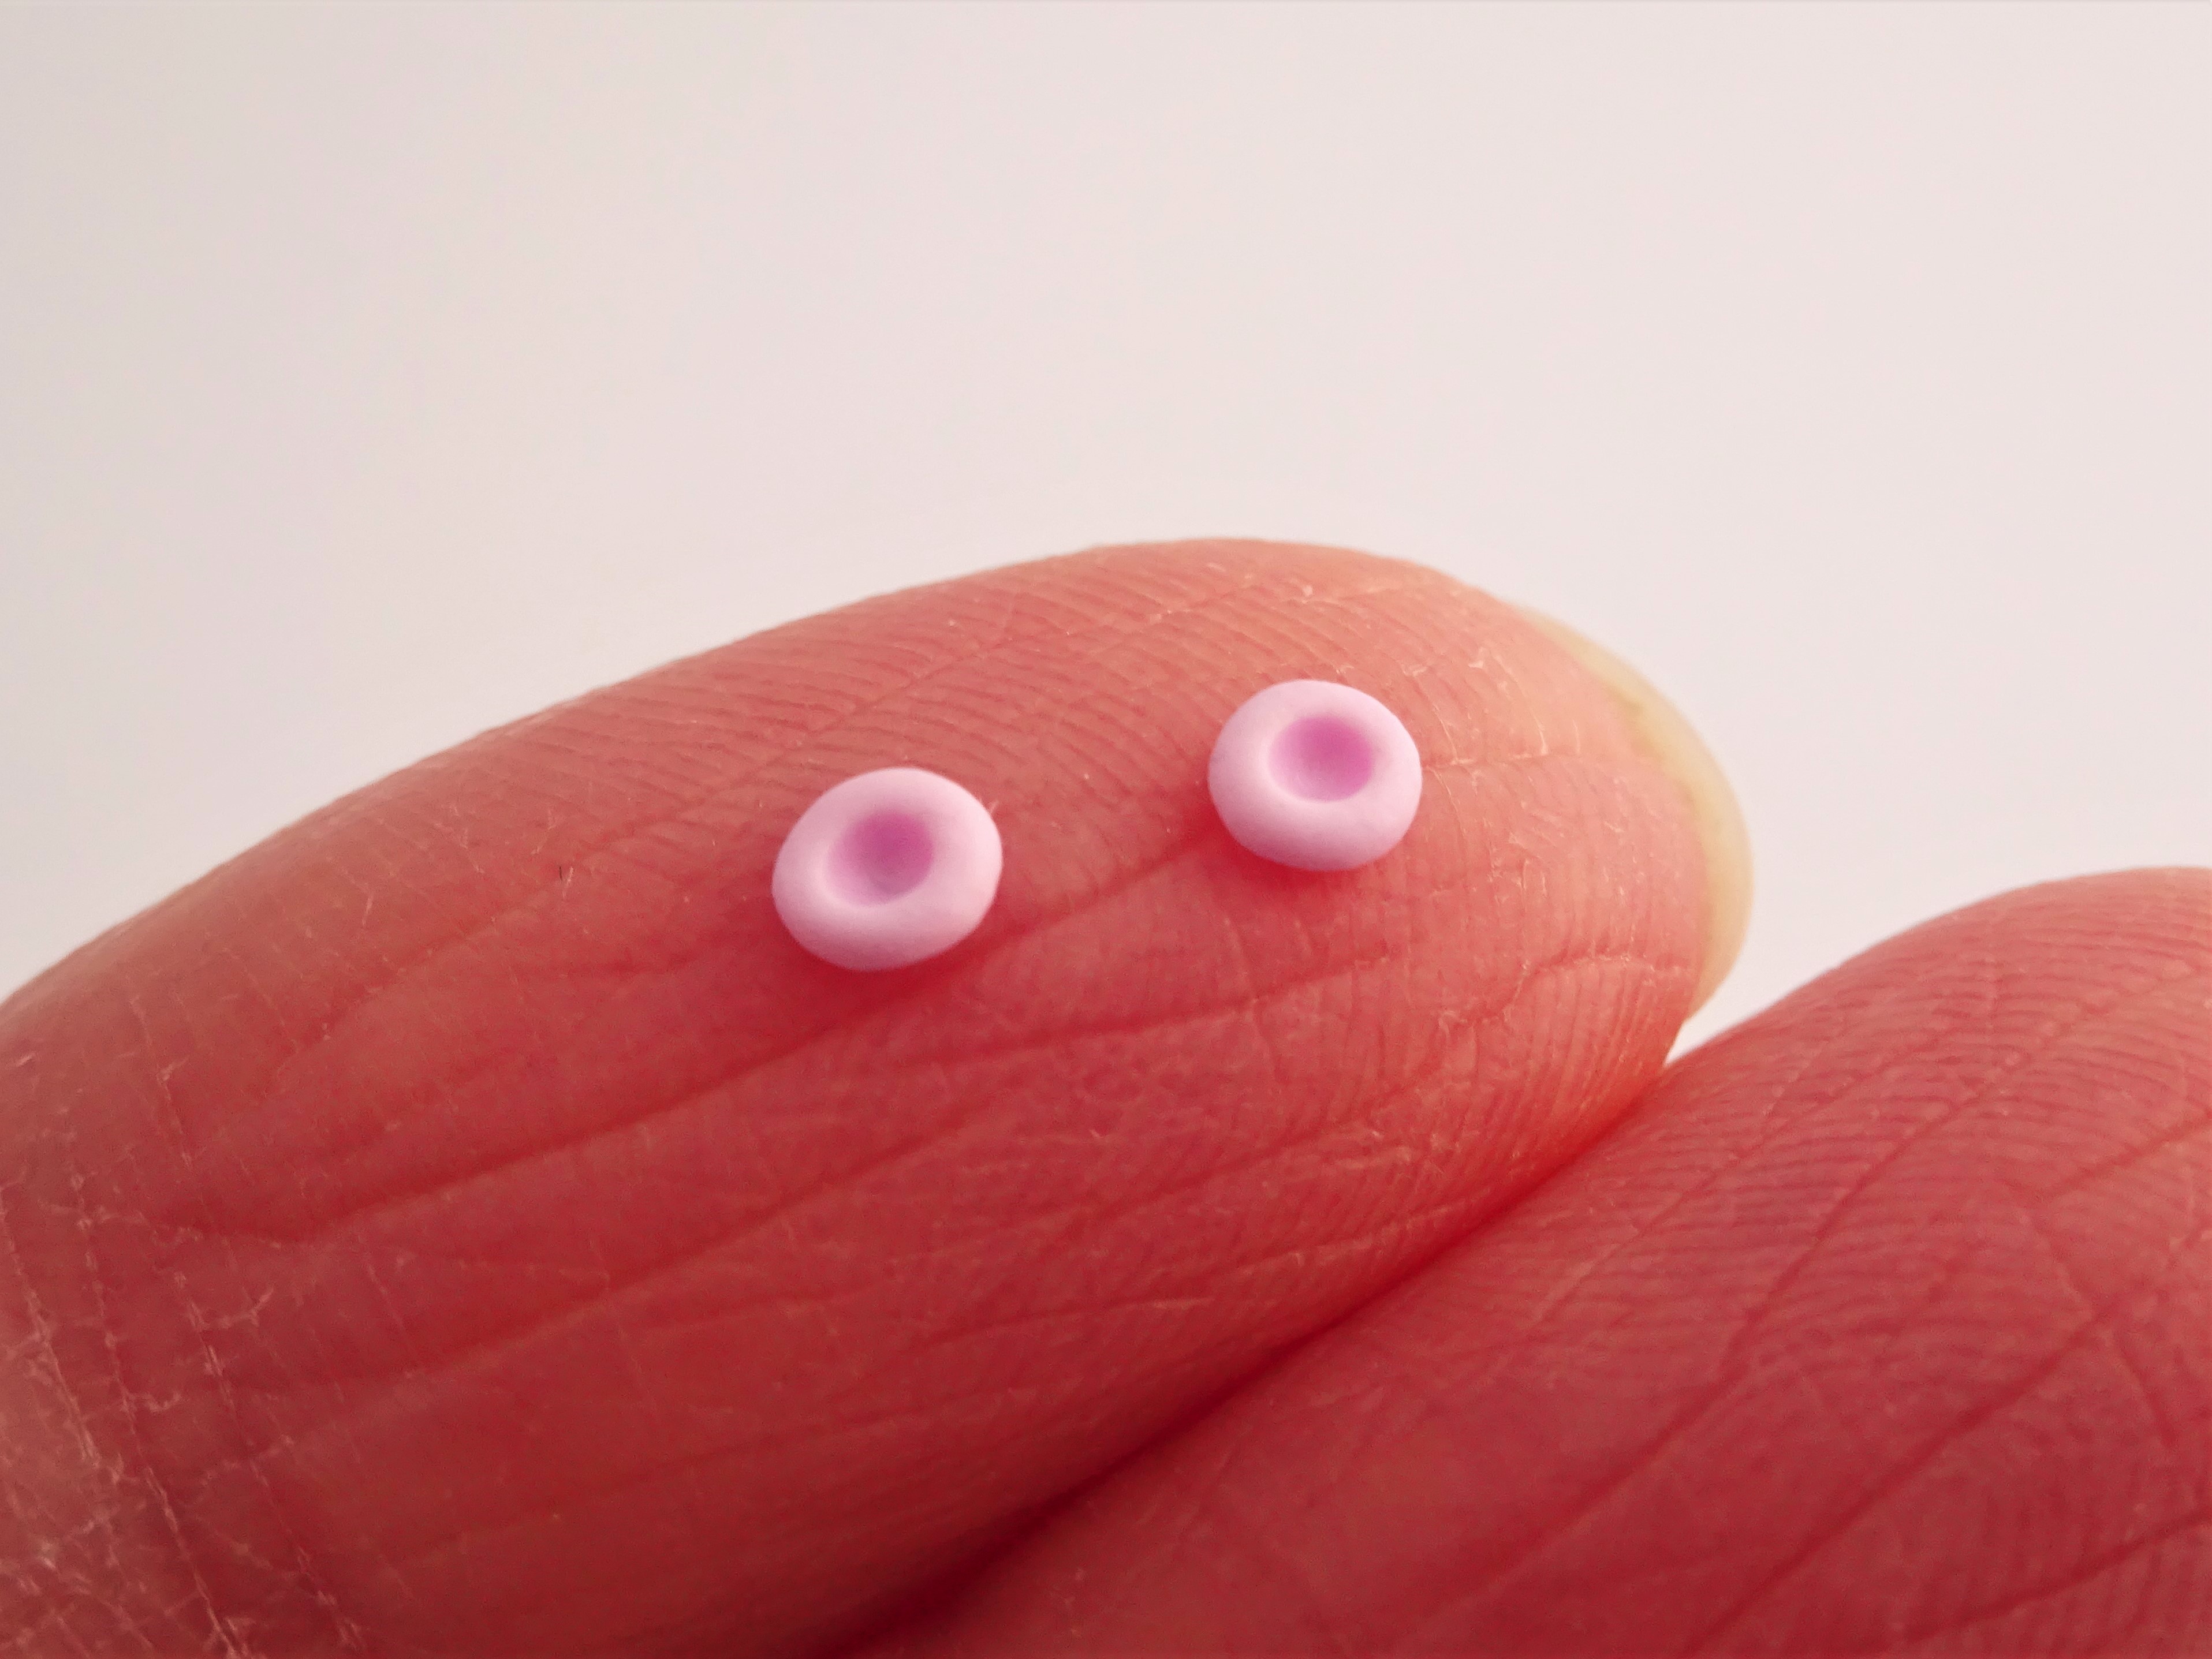
17. Take one of the 16 pieces of pink clay from step 11 and cut in half again. Roll each piece into a ball and press down. Use a small ball tool to press into the middle of each one.
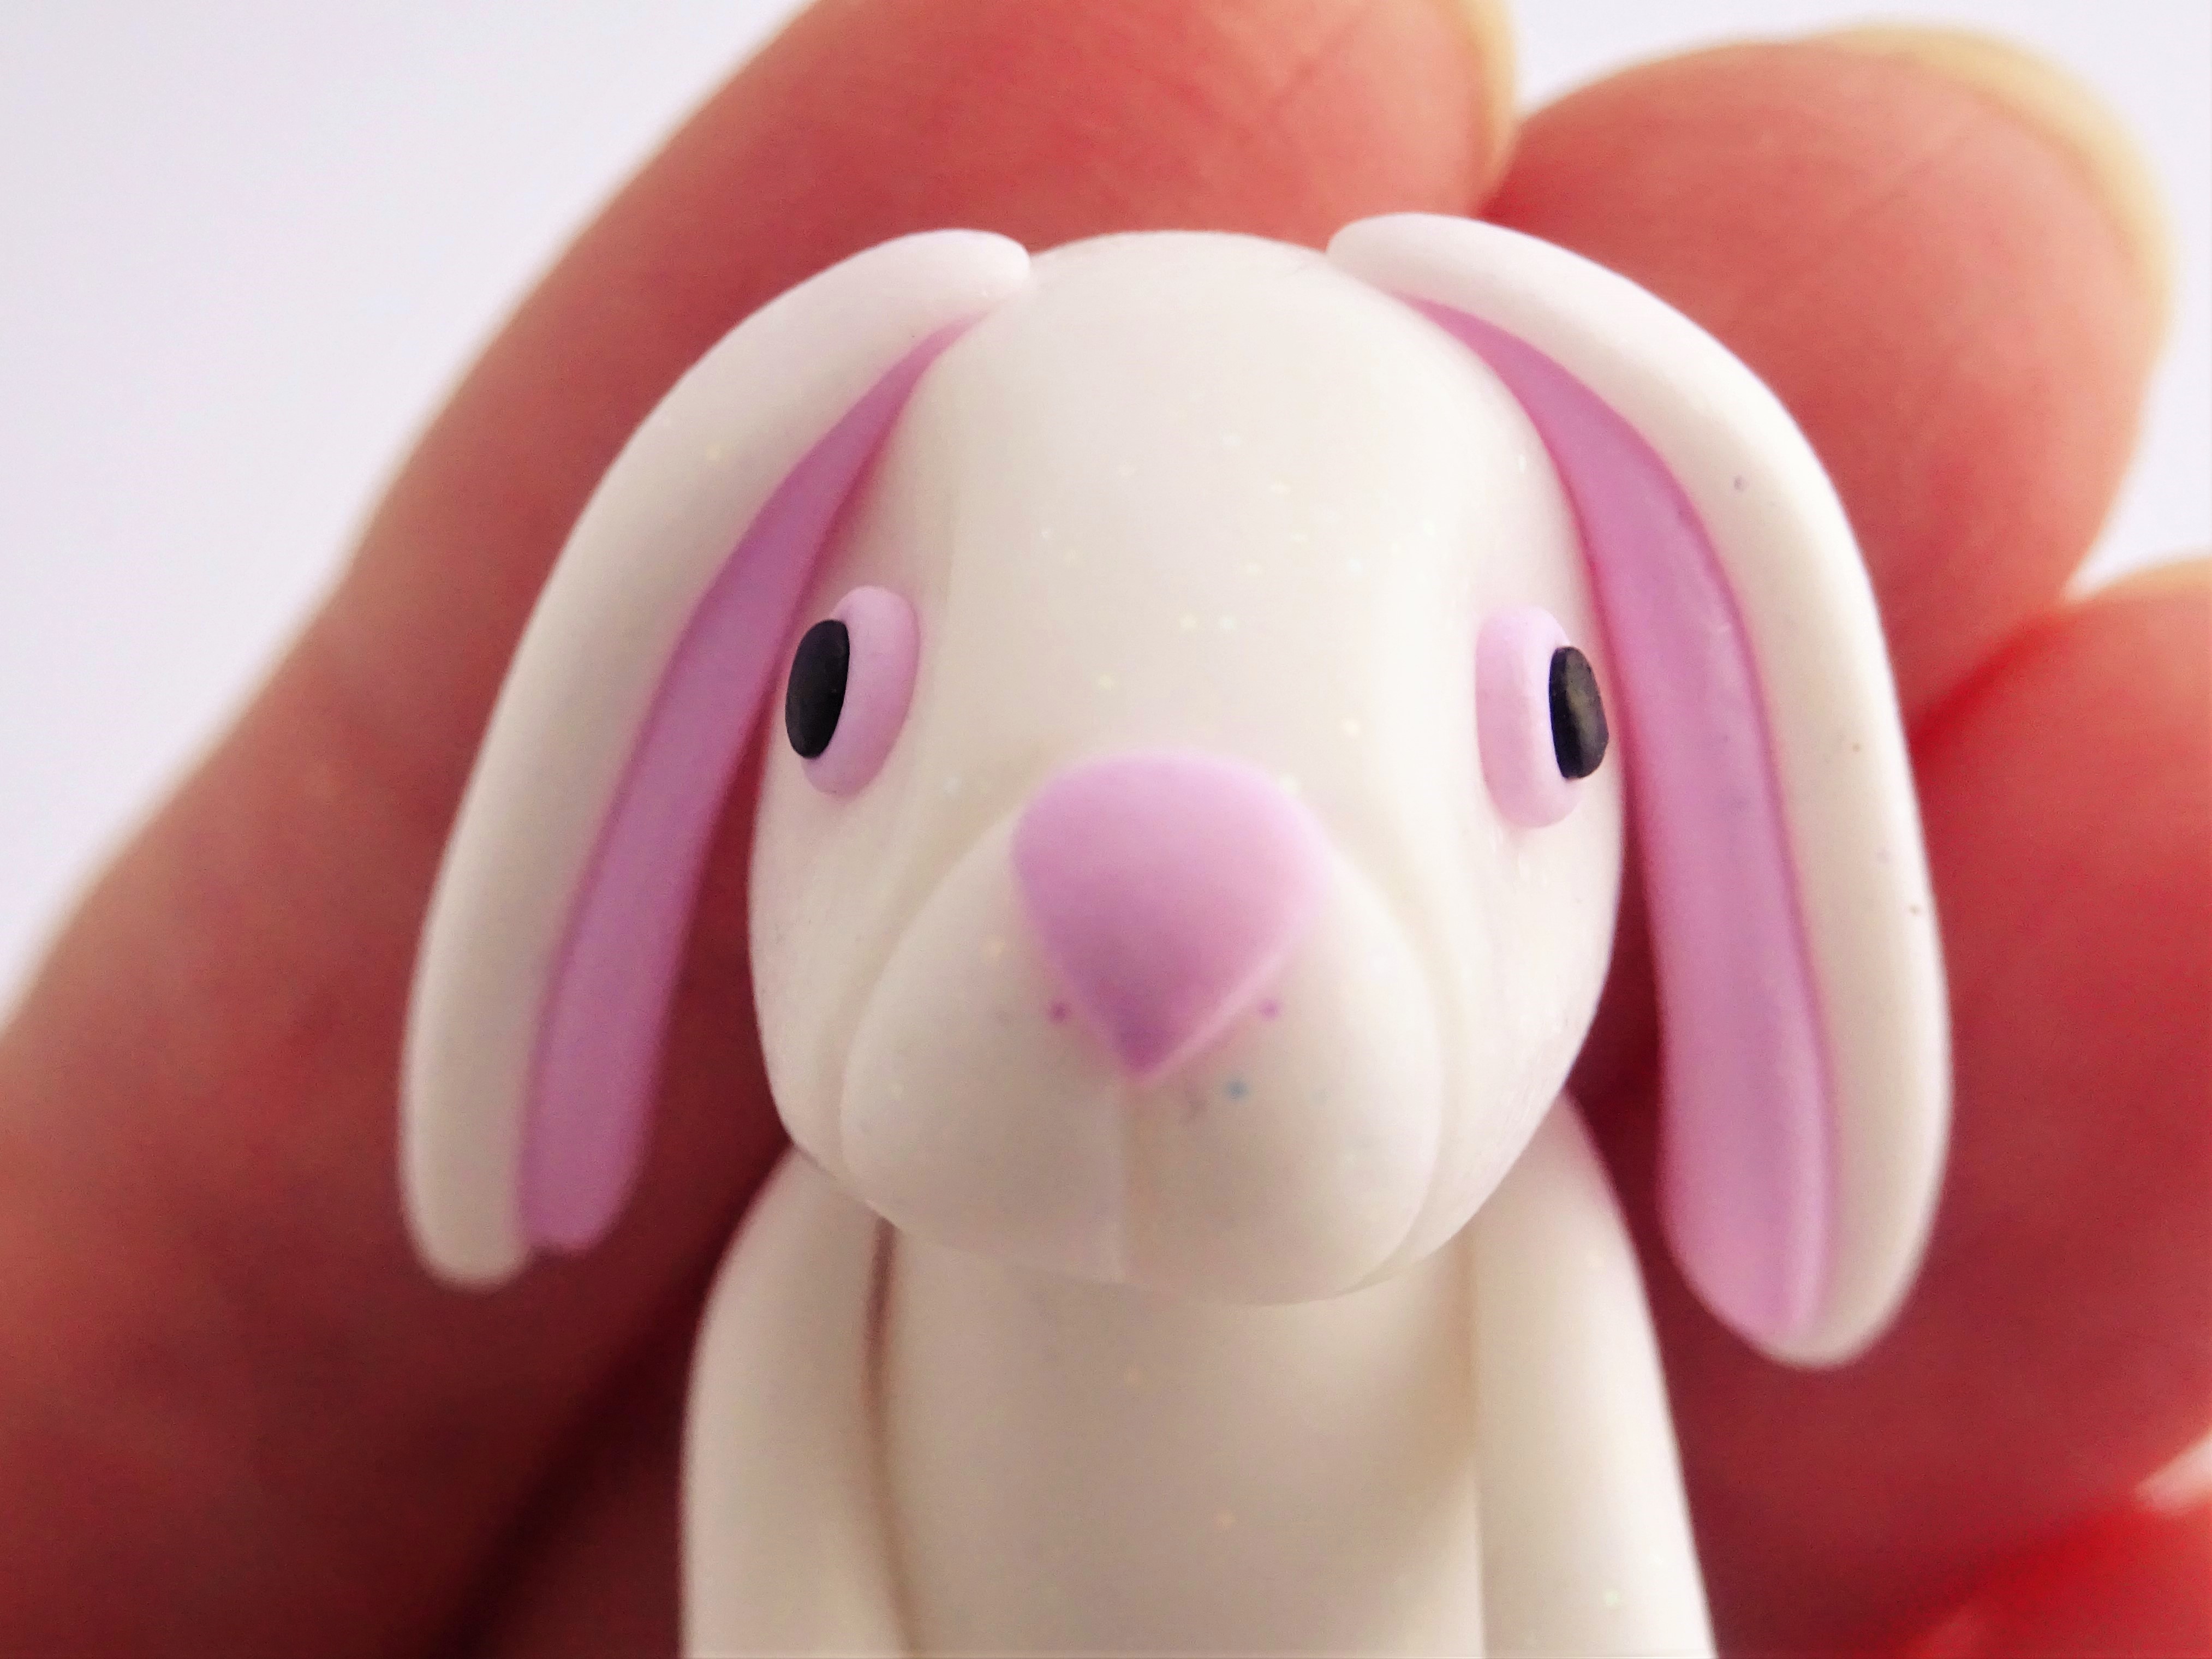
18. Condition a very small amount of black clay and roll even sized balls to form the rest of the eye. Put these in the pink pieces made in step 17. Position the eyes on either side of the head and press down when you are happy with their position.
Please, please clean your hand in between conditioning and rolling the black clay and returning to handling the lighter colour clay. Any residue of dark clay on you hands will stick to the light and it’s not easy to remove it.
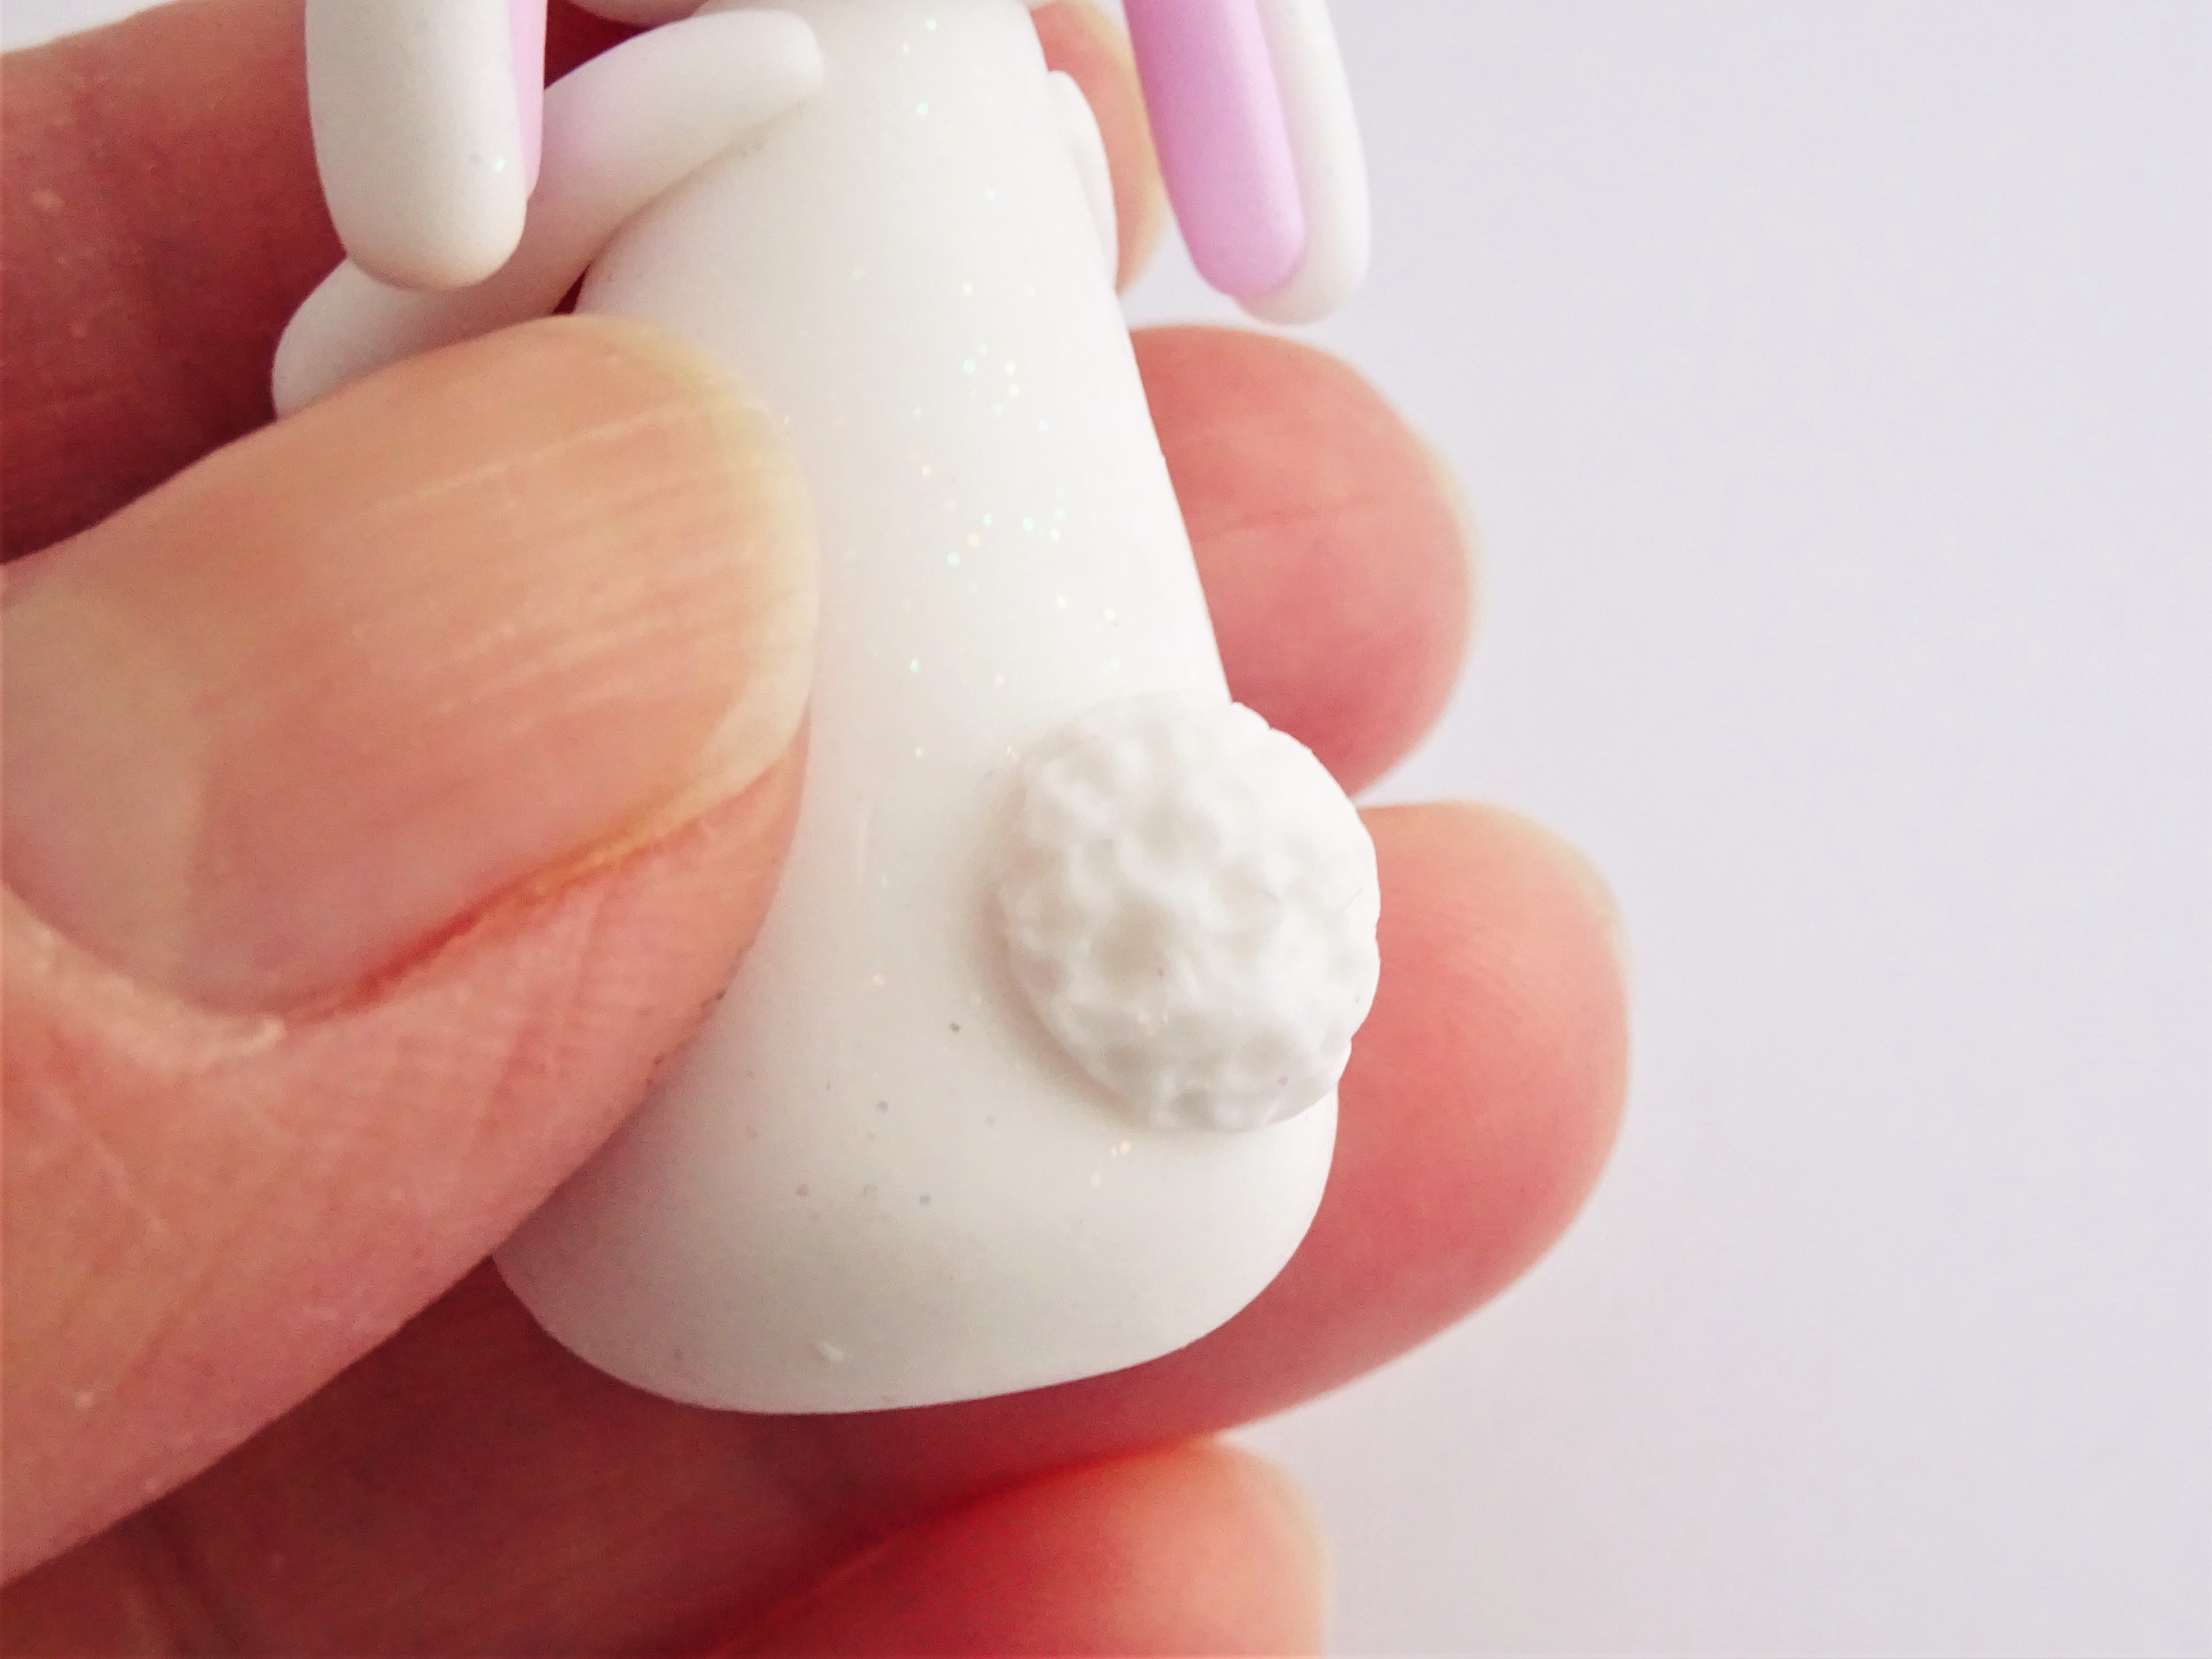
19. Using one half of clay from step 13, roll into a ball and then gently press against a flat surface. Texture the tail with a small dotting tool (or leave plain if preferred) and place it on the back of the rabbit.
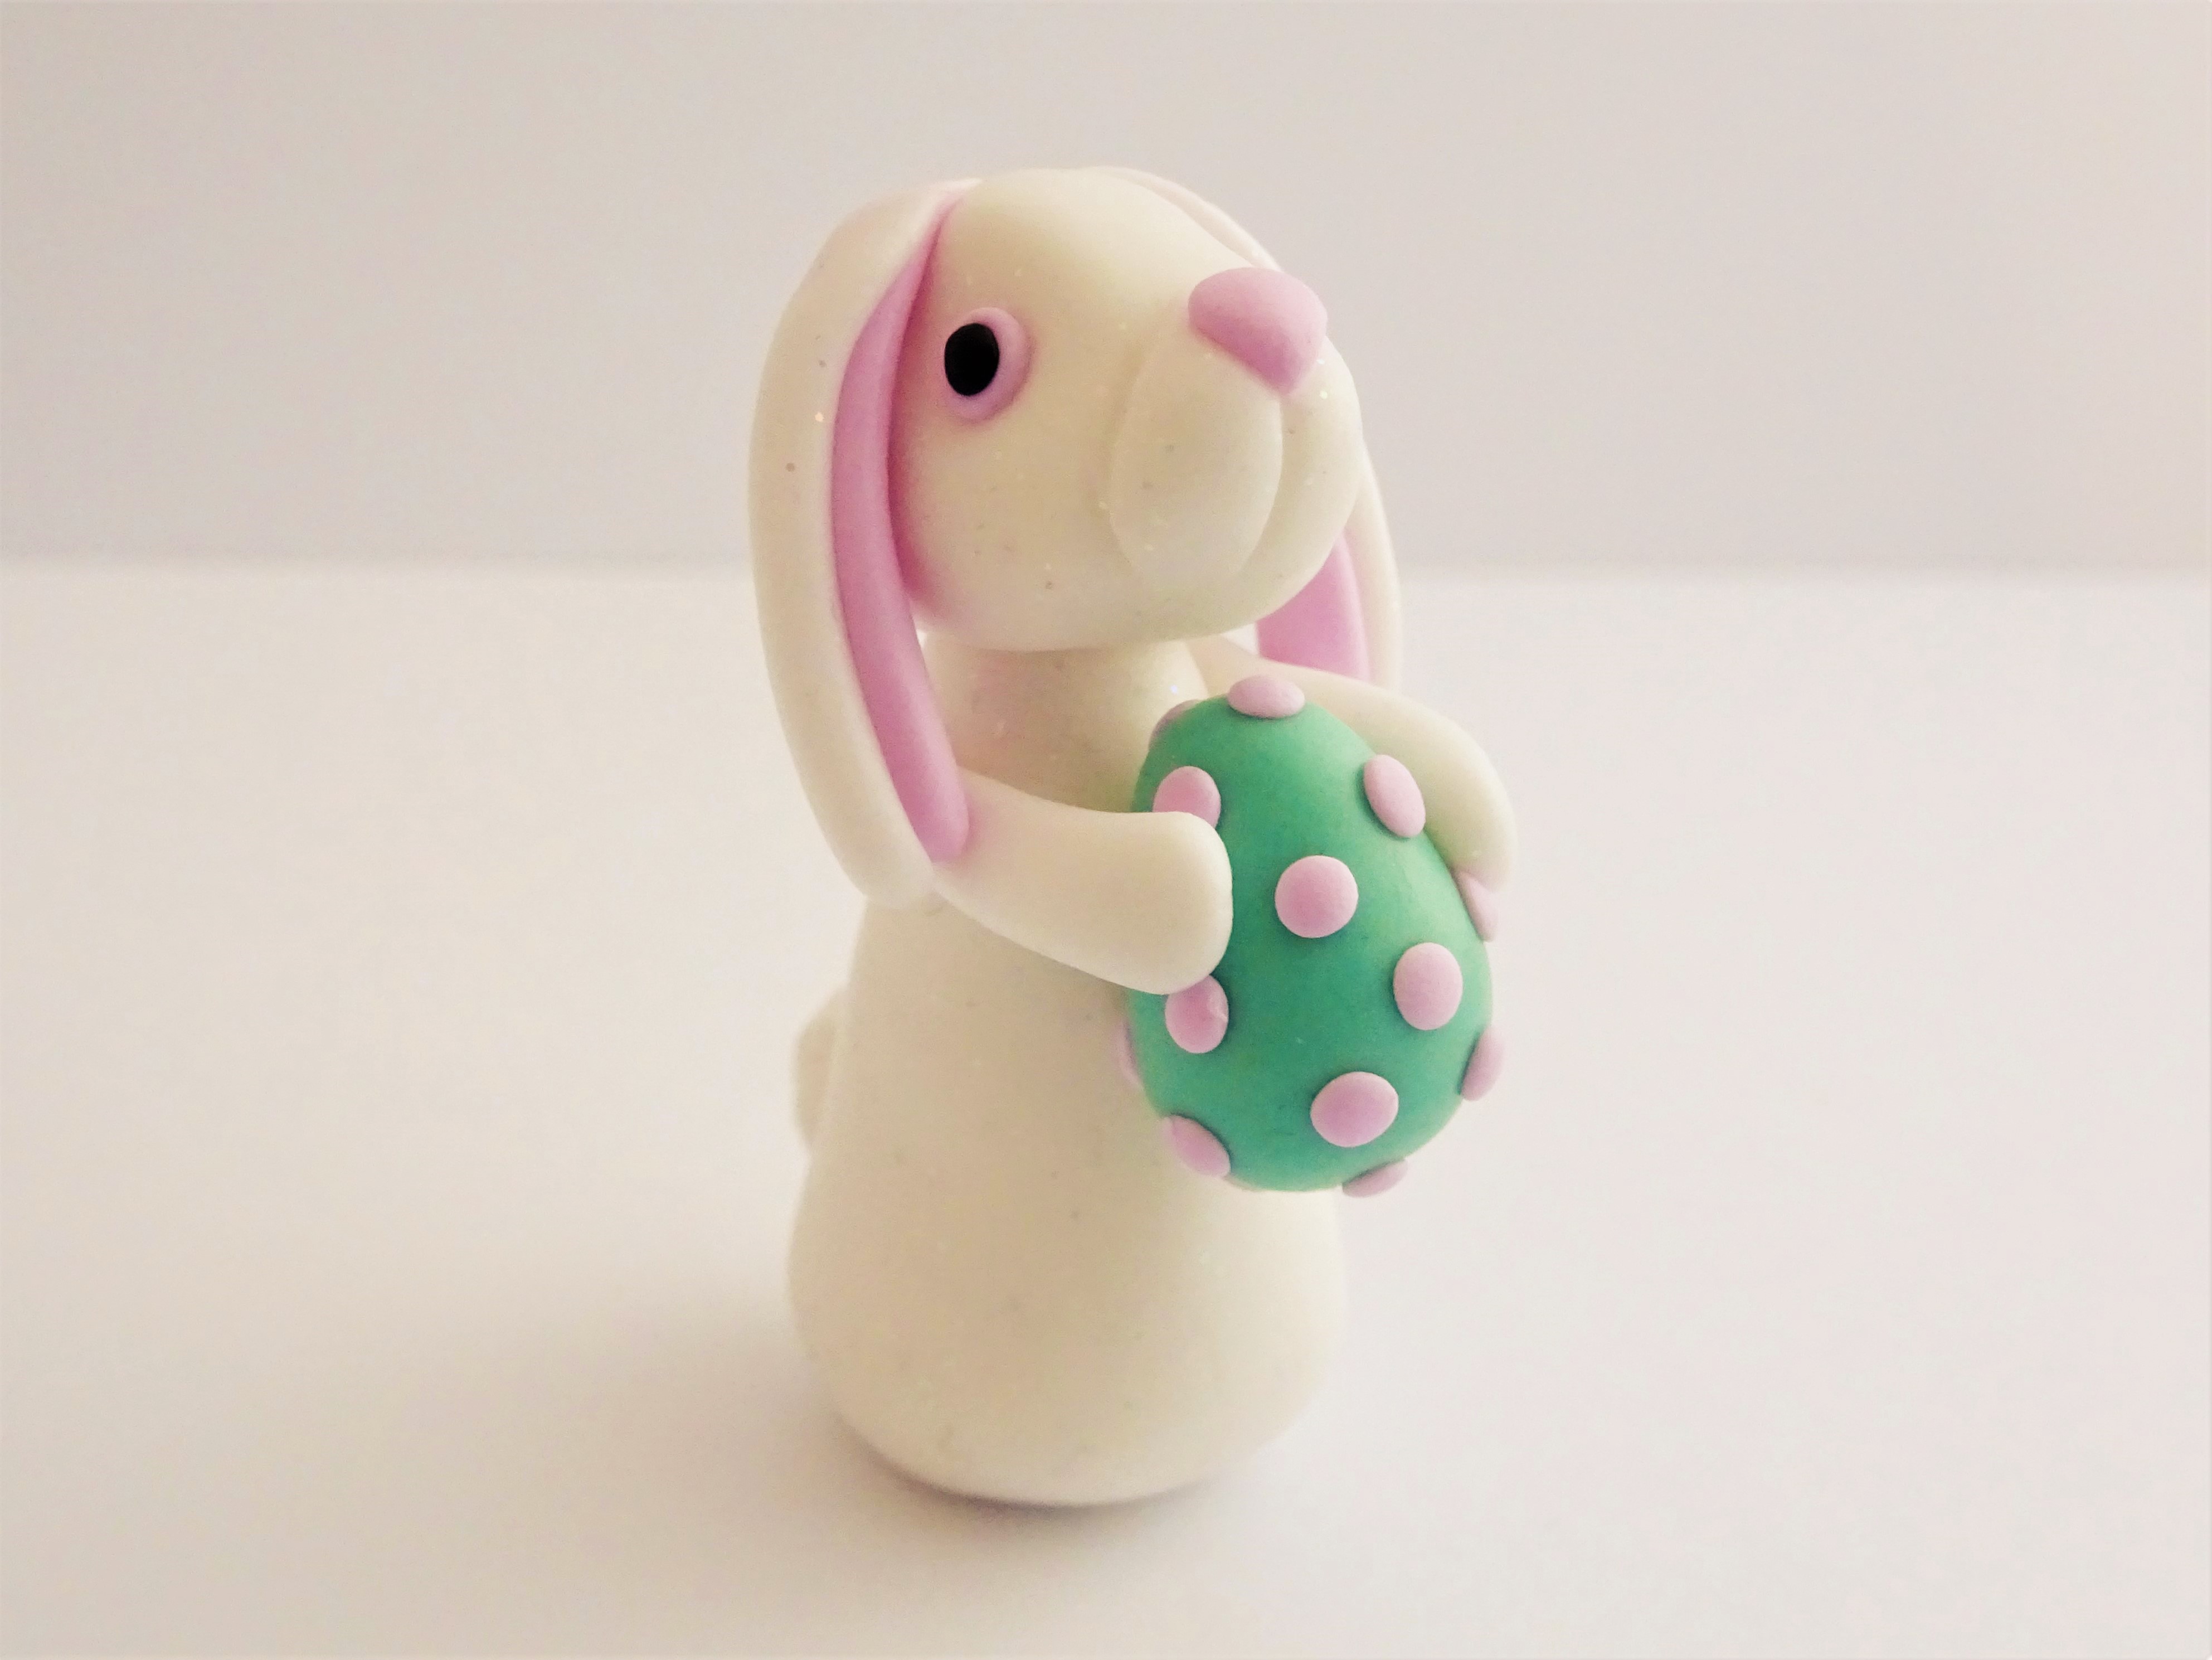
20. For the egg, condition a little Fimo Effect in Jade and cut a circle about 2cm round (my second smallest size) and roll into and egg shape. Add small dots of the Rose/ Light Pink to the egg and secure in the rabbits arms. Make sure all the arms, ears and egg are pressed down firmly at this point.
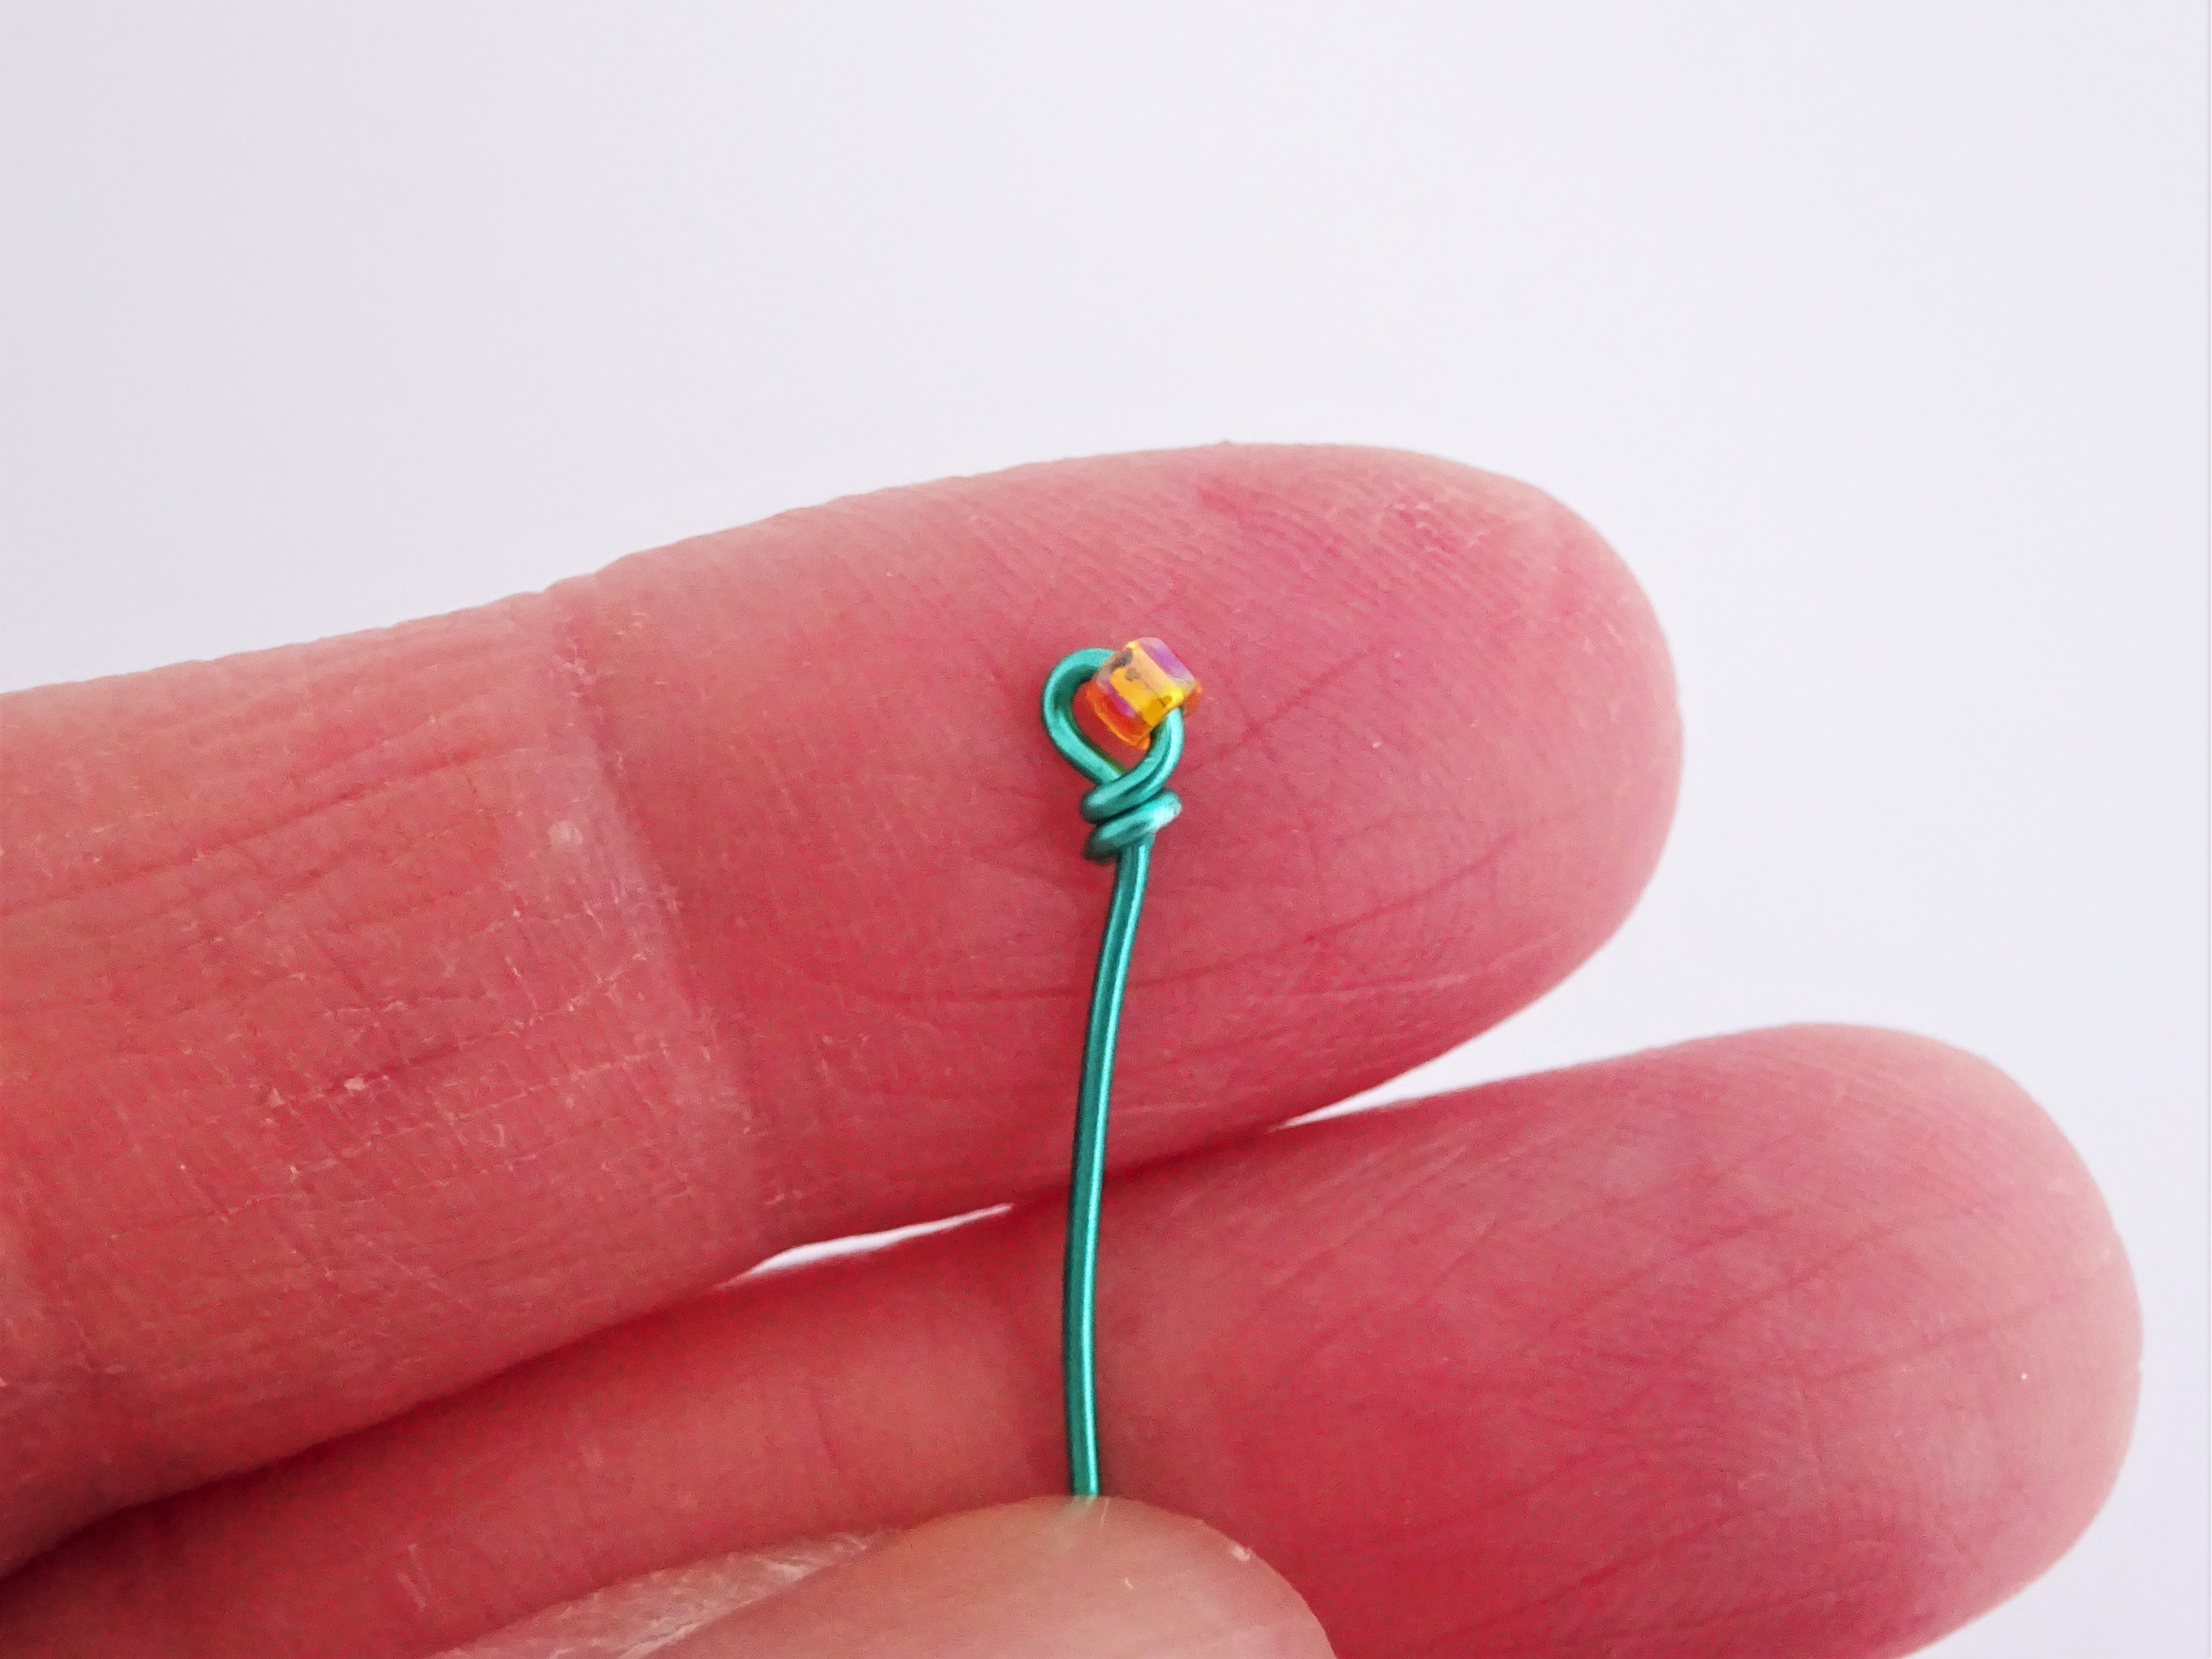
21. For the flowers take a length of green craft wire. Put a size 11 seed beads on one end (I used this orange/gold beads) and made a wrapped loop at the top.

22. Take some Rose/ Light pink clay and roll through your clay machine on a number 6 and cut a circle with you smallest cutter. Roll into a ball an then shape over a large-ish ball tool to shape. Push the green wire through the base of the pink cup and pinch around the base of the clay. Repeat the process with a little Jade clay. Ideally, you would put these flowers in the oven according to the instructions to harden before carrying on ( I say ideally as I didn’t and it was very difficult not to distort them in the next step).
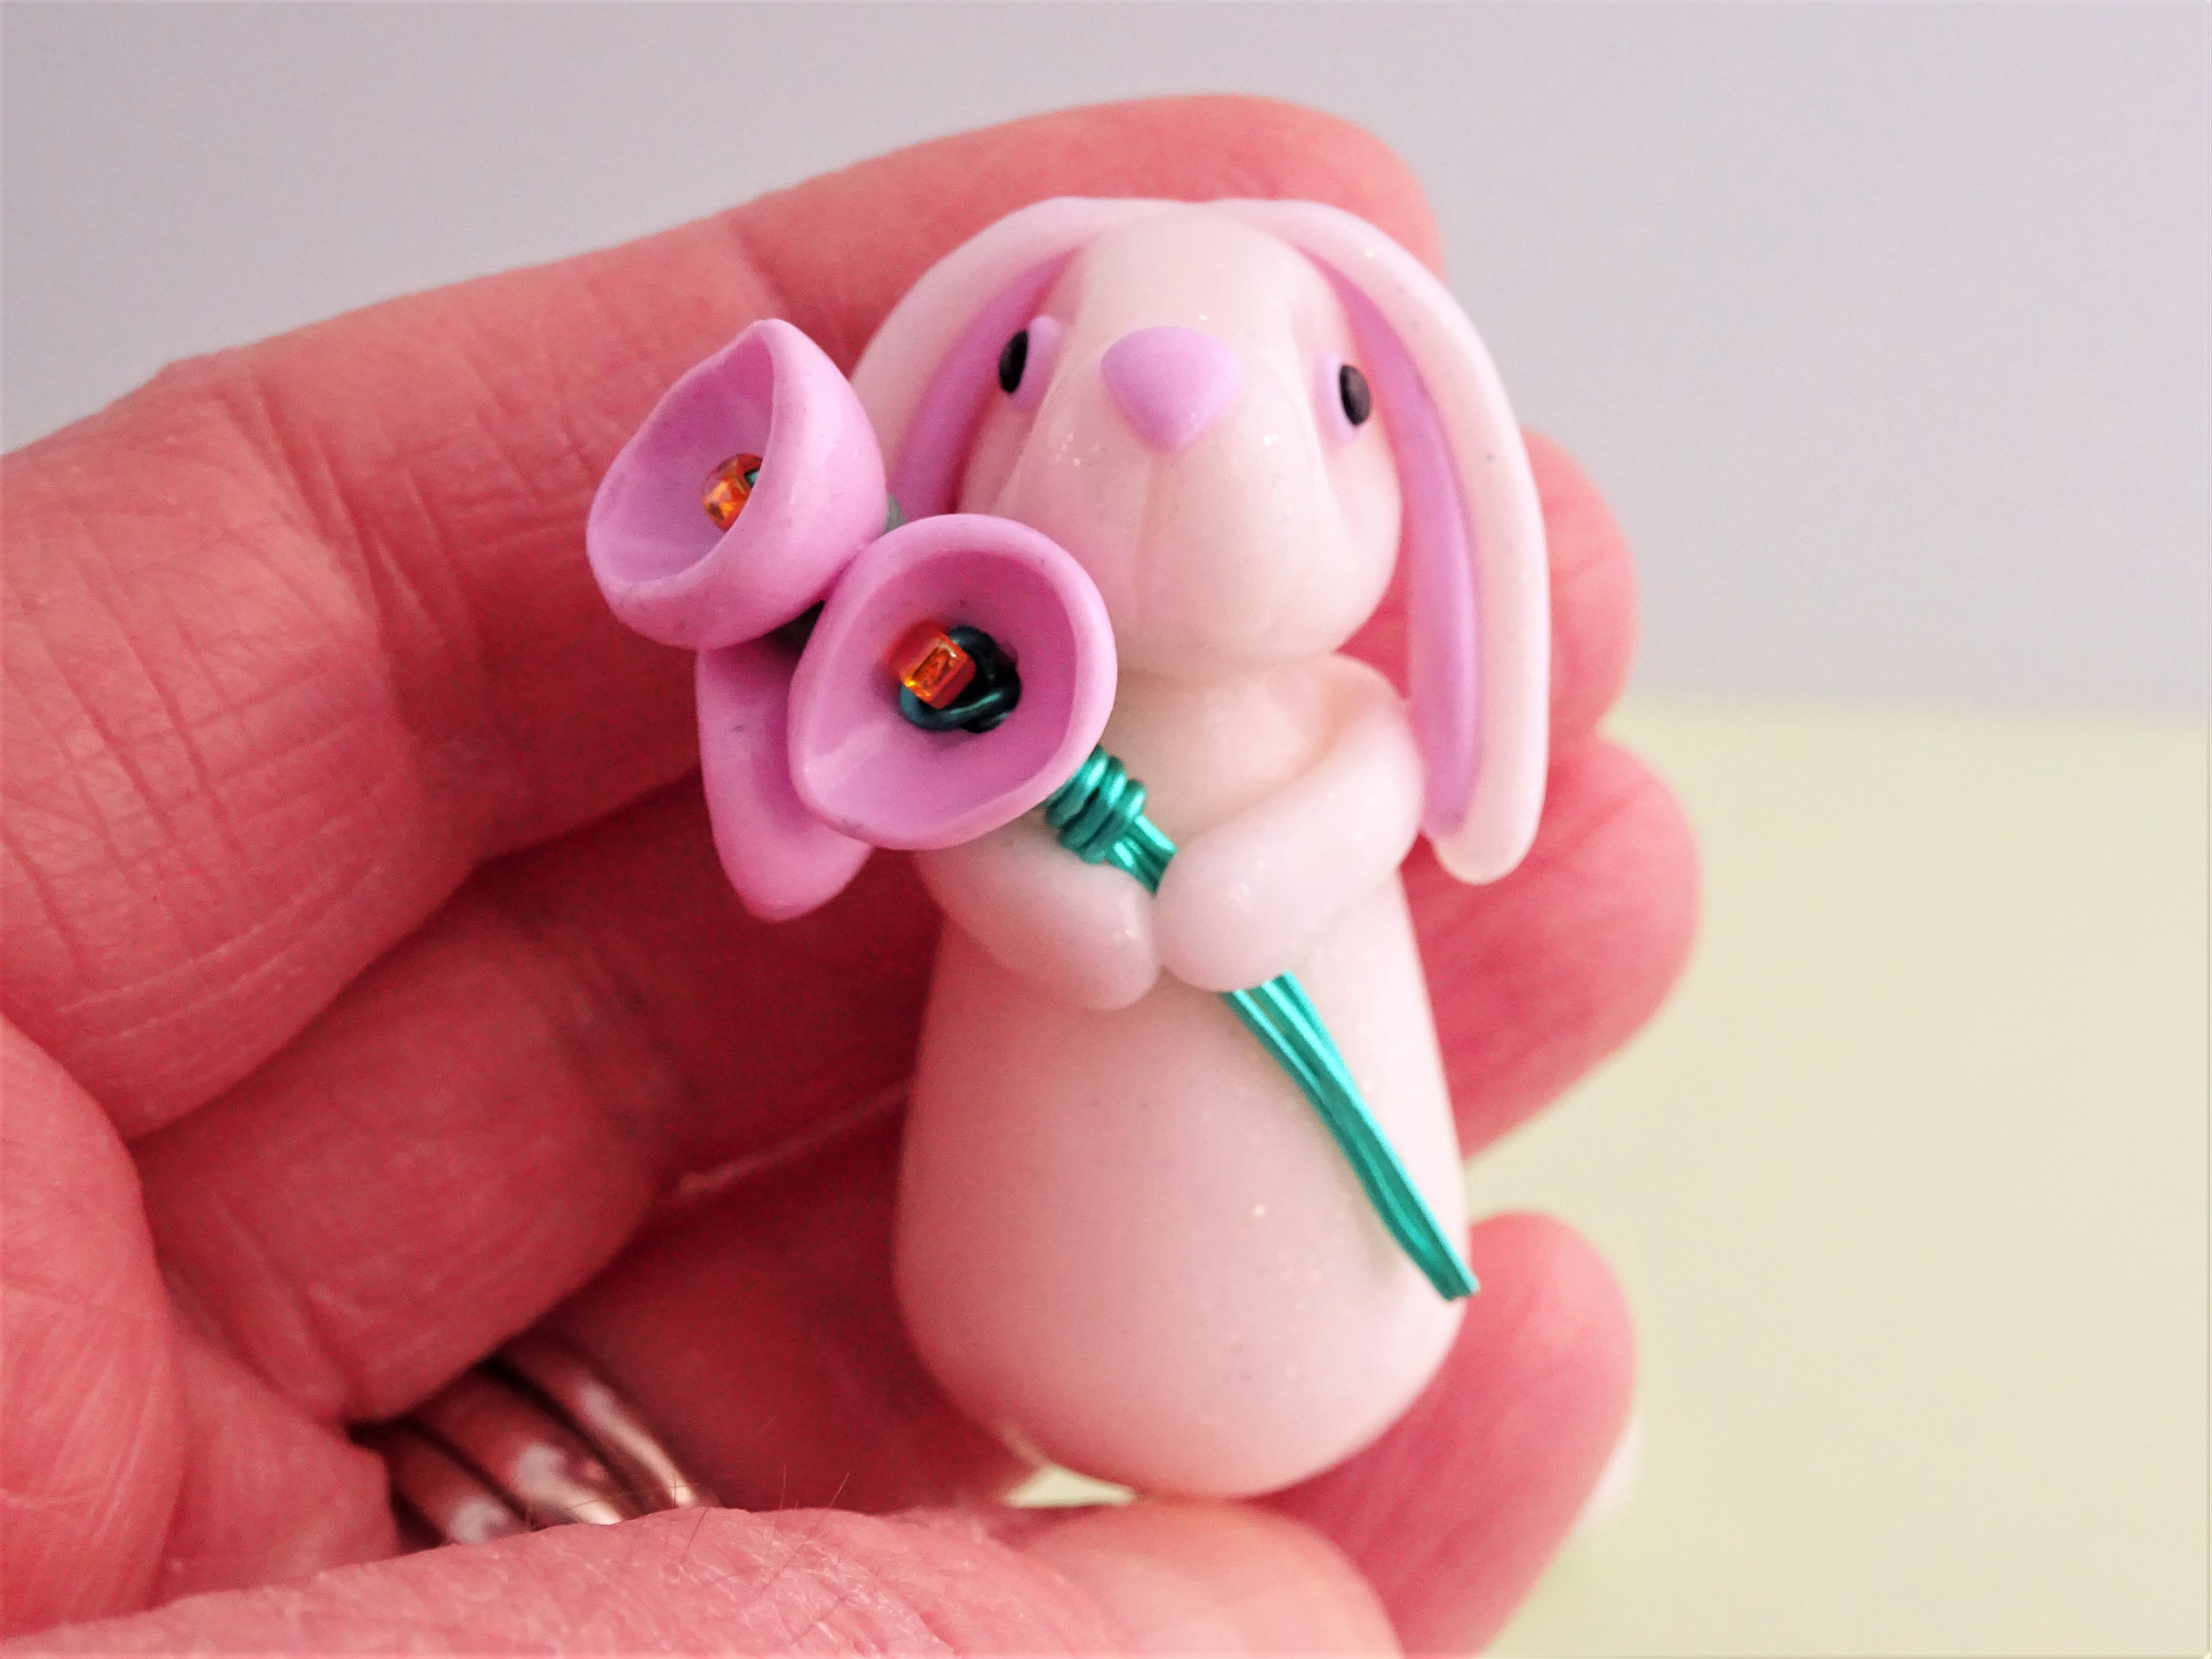
23. Gather the flowers together and wrap a small length of wire around the flower stems to help hold them securely together. Cut the stems so they are the same length. Position them in the rabbits arms.

24. Put in the oven and harden according to the instructions on your packet of clay. Give two coats of gloss varnish once they have cooled down.
I love the white glitter clay but these could be made in any colour you fancy. You could add snazzy patterns to your egg and make the flowers smaller to make a smaller bouquet. As ever, these tutorials are designed almost as a jump start to further ideas.
Listed below are the affiliate links for some of the products and tools I have used in this tutorial for Amazon UK and Amazon US – this simply means that I earn a very small commission, at no extra cost to you, if you use my link to purchase and item. It just means that I can continue to make these hopefully fun and free tutorials.
Amazon UK
Fimo in Glitter White, Rose/ Light Pink, Jade, black
Cutting shape set and Smaller shape set
Amazon US
Fimo in Glitter white, Rose/ Light Pink, Jade, black
Cutting shape set and Smaller shape set
I haven’t listed any ball tools as I have some very generic nail art dotting tools that I use but you could look around your home for anything with a rounded top that could be used.
If you make them please give me a shout either on here or Instagram or Facebook. I would love to see your work.
Don’t forget to check out my other polymer clay tutorials and use the little pop up subscription box to keep up to date with more free tutorials.
Hoppy Easter
Hannah x


The directions are well done but I am so totally sure mine would not look like yours.
Ha ha, thank you. I absolutely understand what you are saying – I have two sisters who are fantastic knitters. It’s like magic to me how they can get yarn and needles and make something wearable. Total and utter magic.
I do so love these Hannah!
Ah, thank you so much 🙂