

Please note – This post contains affiliate links (all links at the bottom of this post)
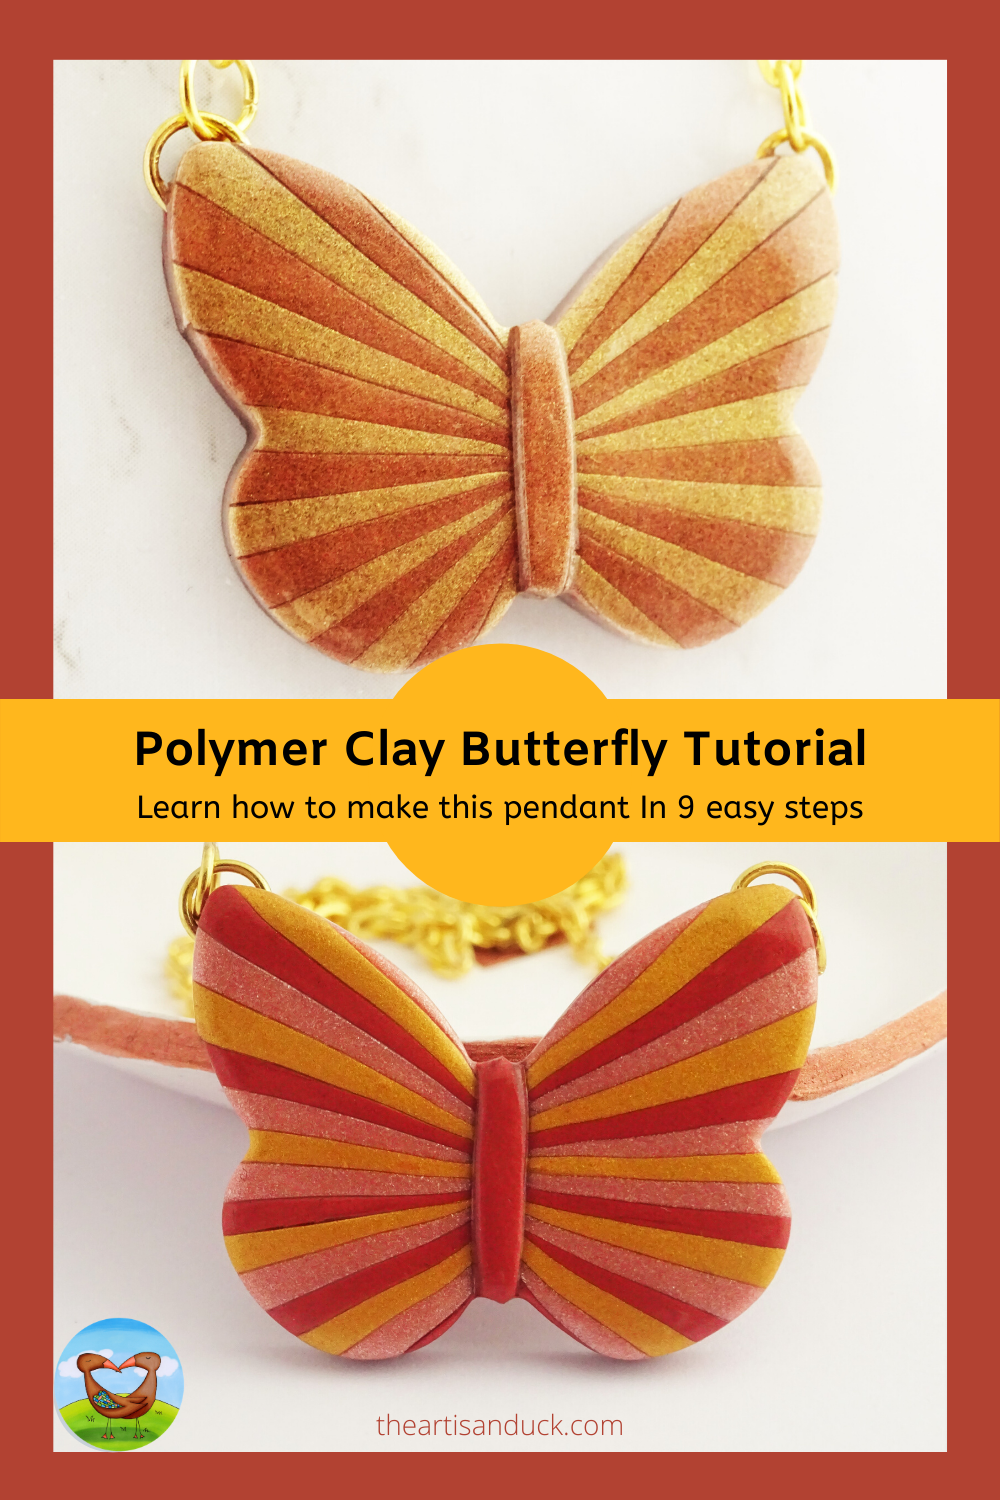
It’s time for another quick and easy polymer clay tutorial. Don’t be fooled though, as easy as it is, the results are very effective and make very pretty pendants. Using shimmering mica powder and metallic clay gives these pieces a lovely finish. I have also made one with translucent clay and I’m in love with the much needed bright colours. I’ll pop the pictures after the tutorial, so…….
How To Make A Butterfly Pendant With Mica Powder And Metallic Polymer Clay
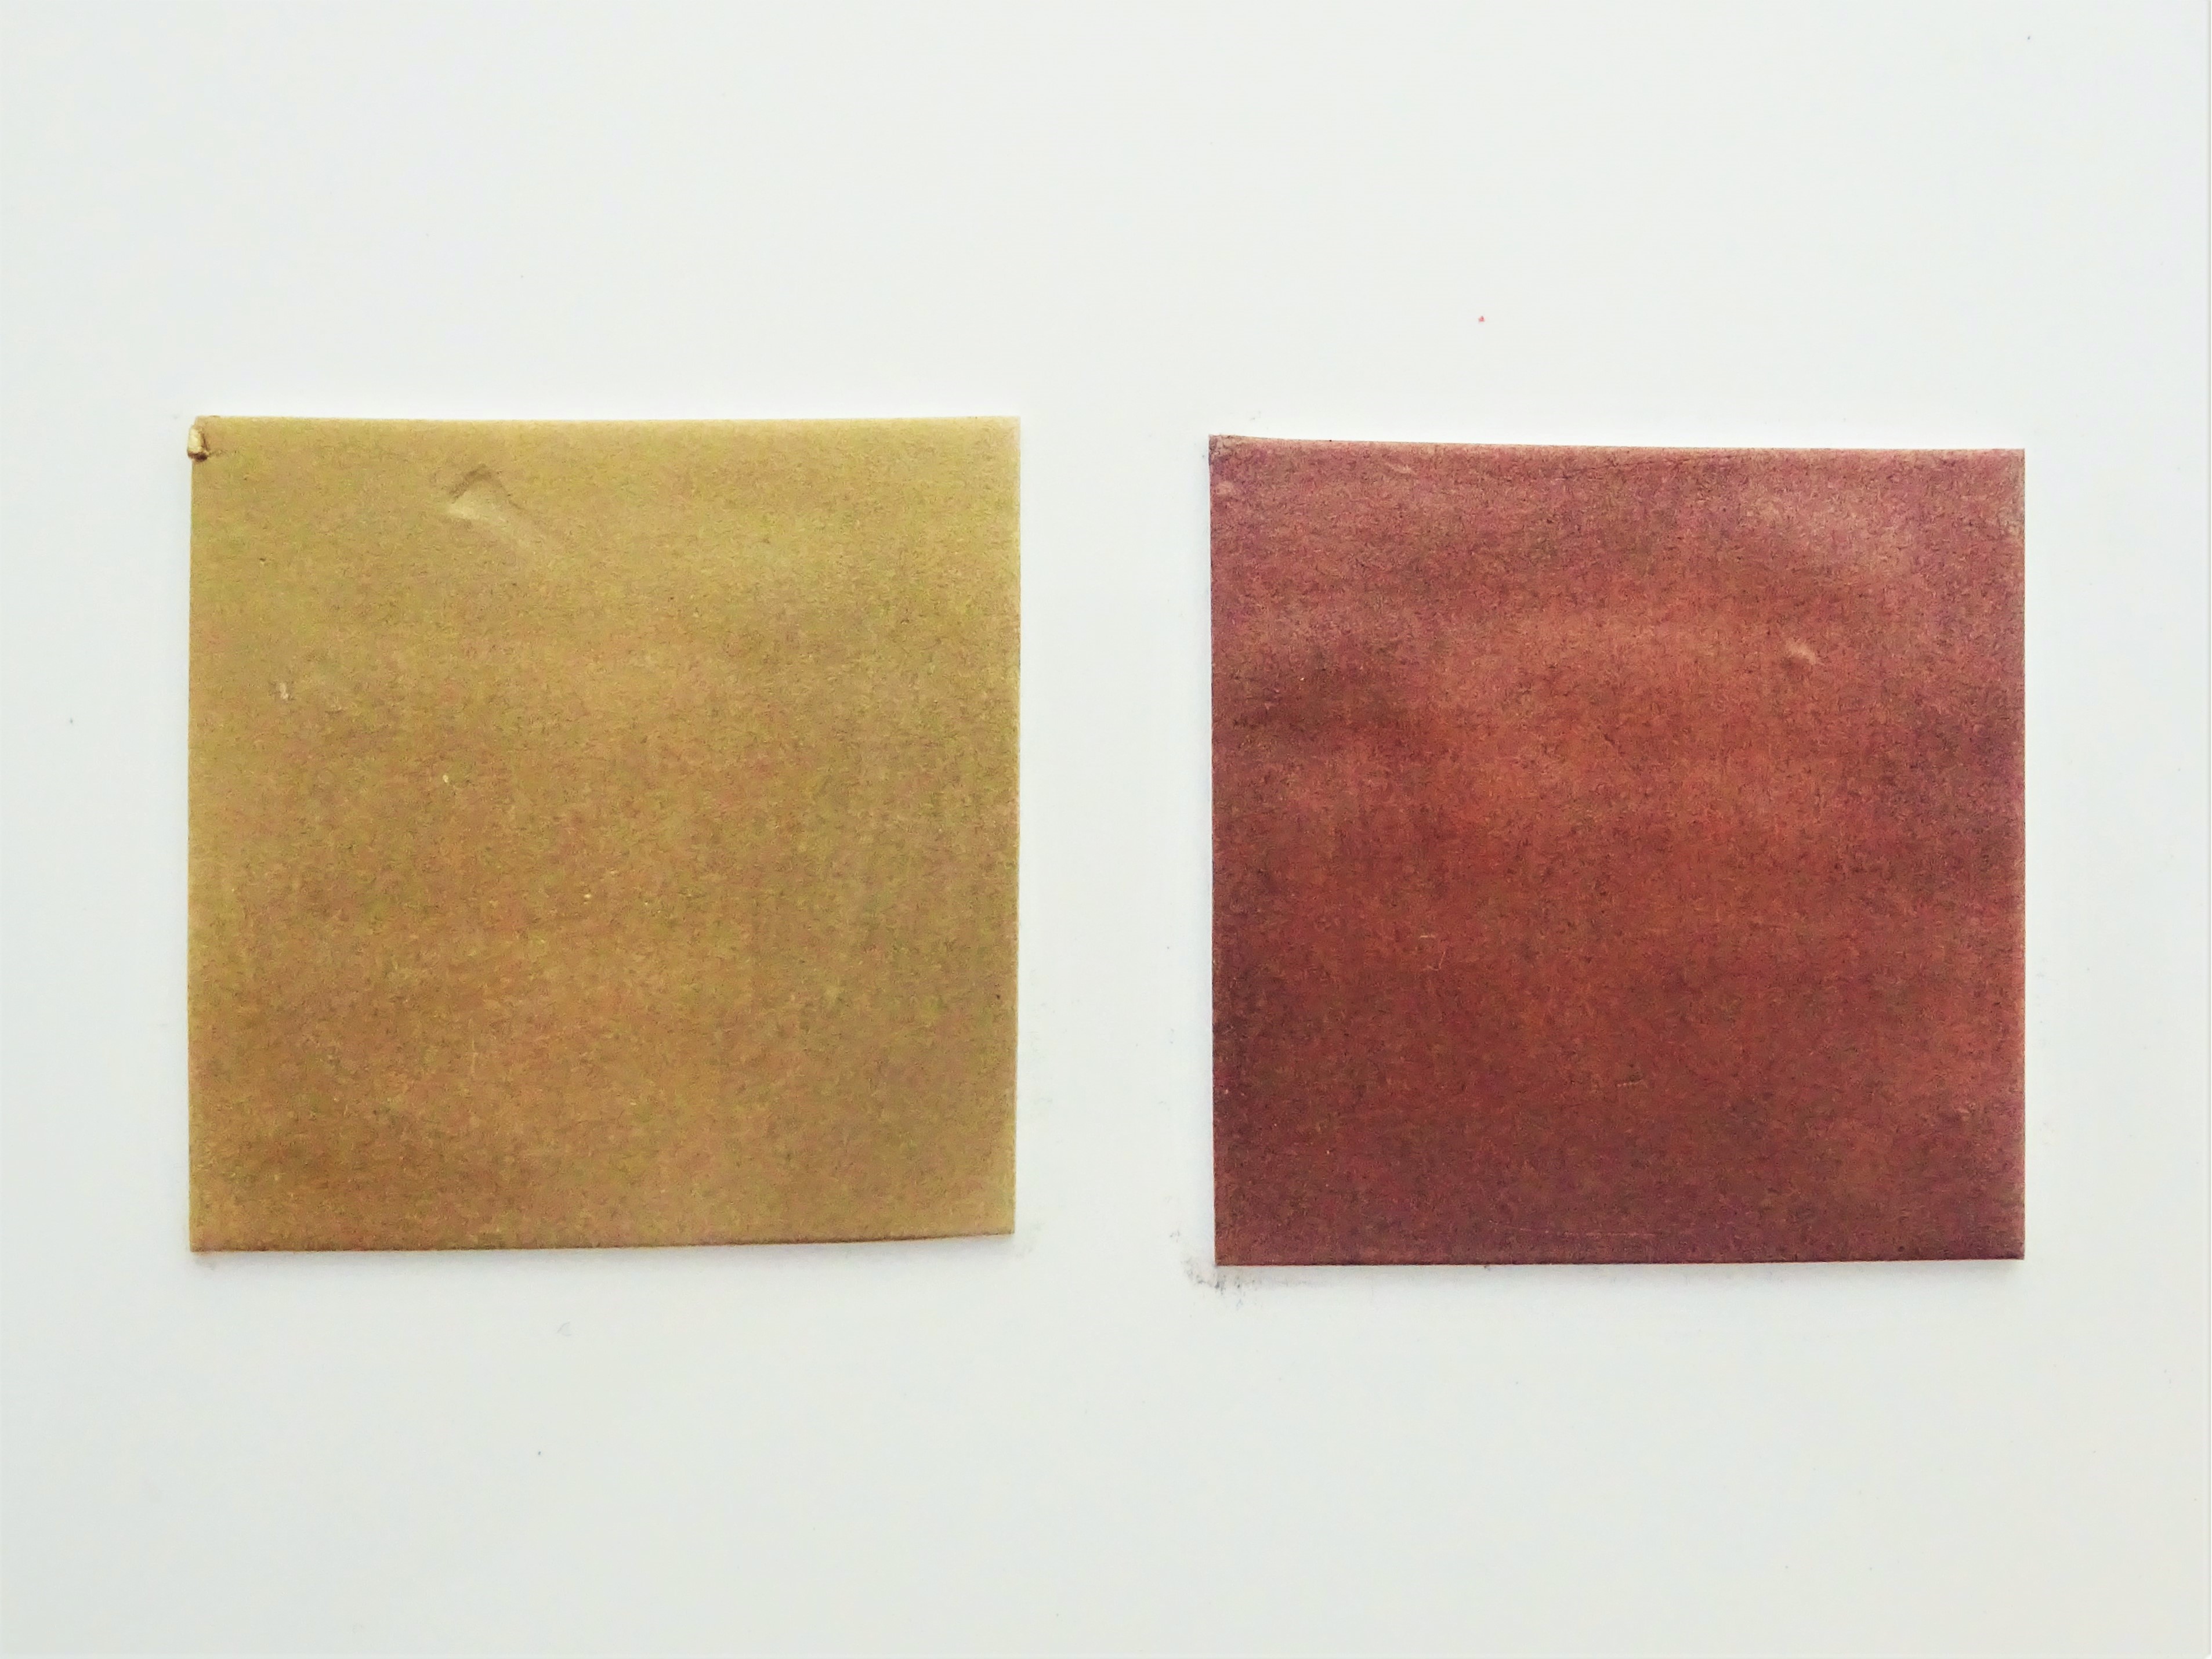
1. Condition and roll out white clay on a number 6 on your clay machine. Cut 2 squares of clay (I used a cutter 4cm x 4cm or 1.5″ x 1.5″). Liberally dust with Ranger Perfect Pearls one in Heirloom Gold and the other in Cappuccino.
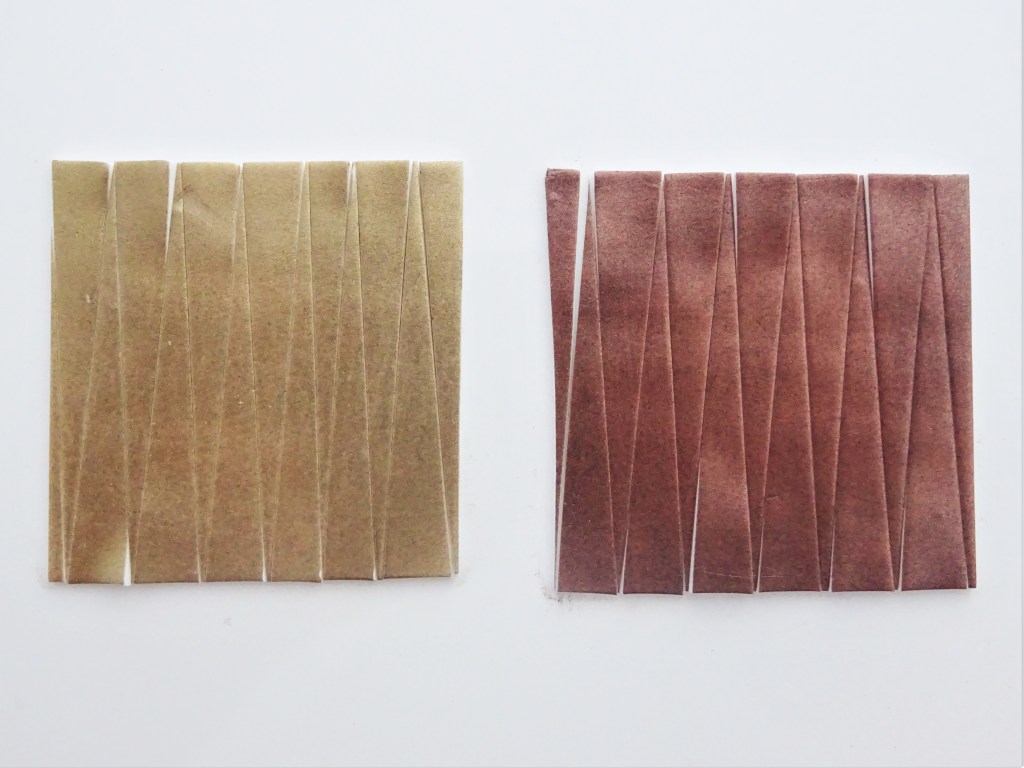
2. Cut long triangle shapes from each square and put to one side.
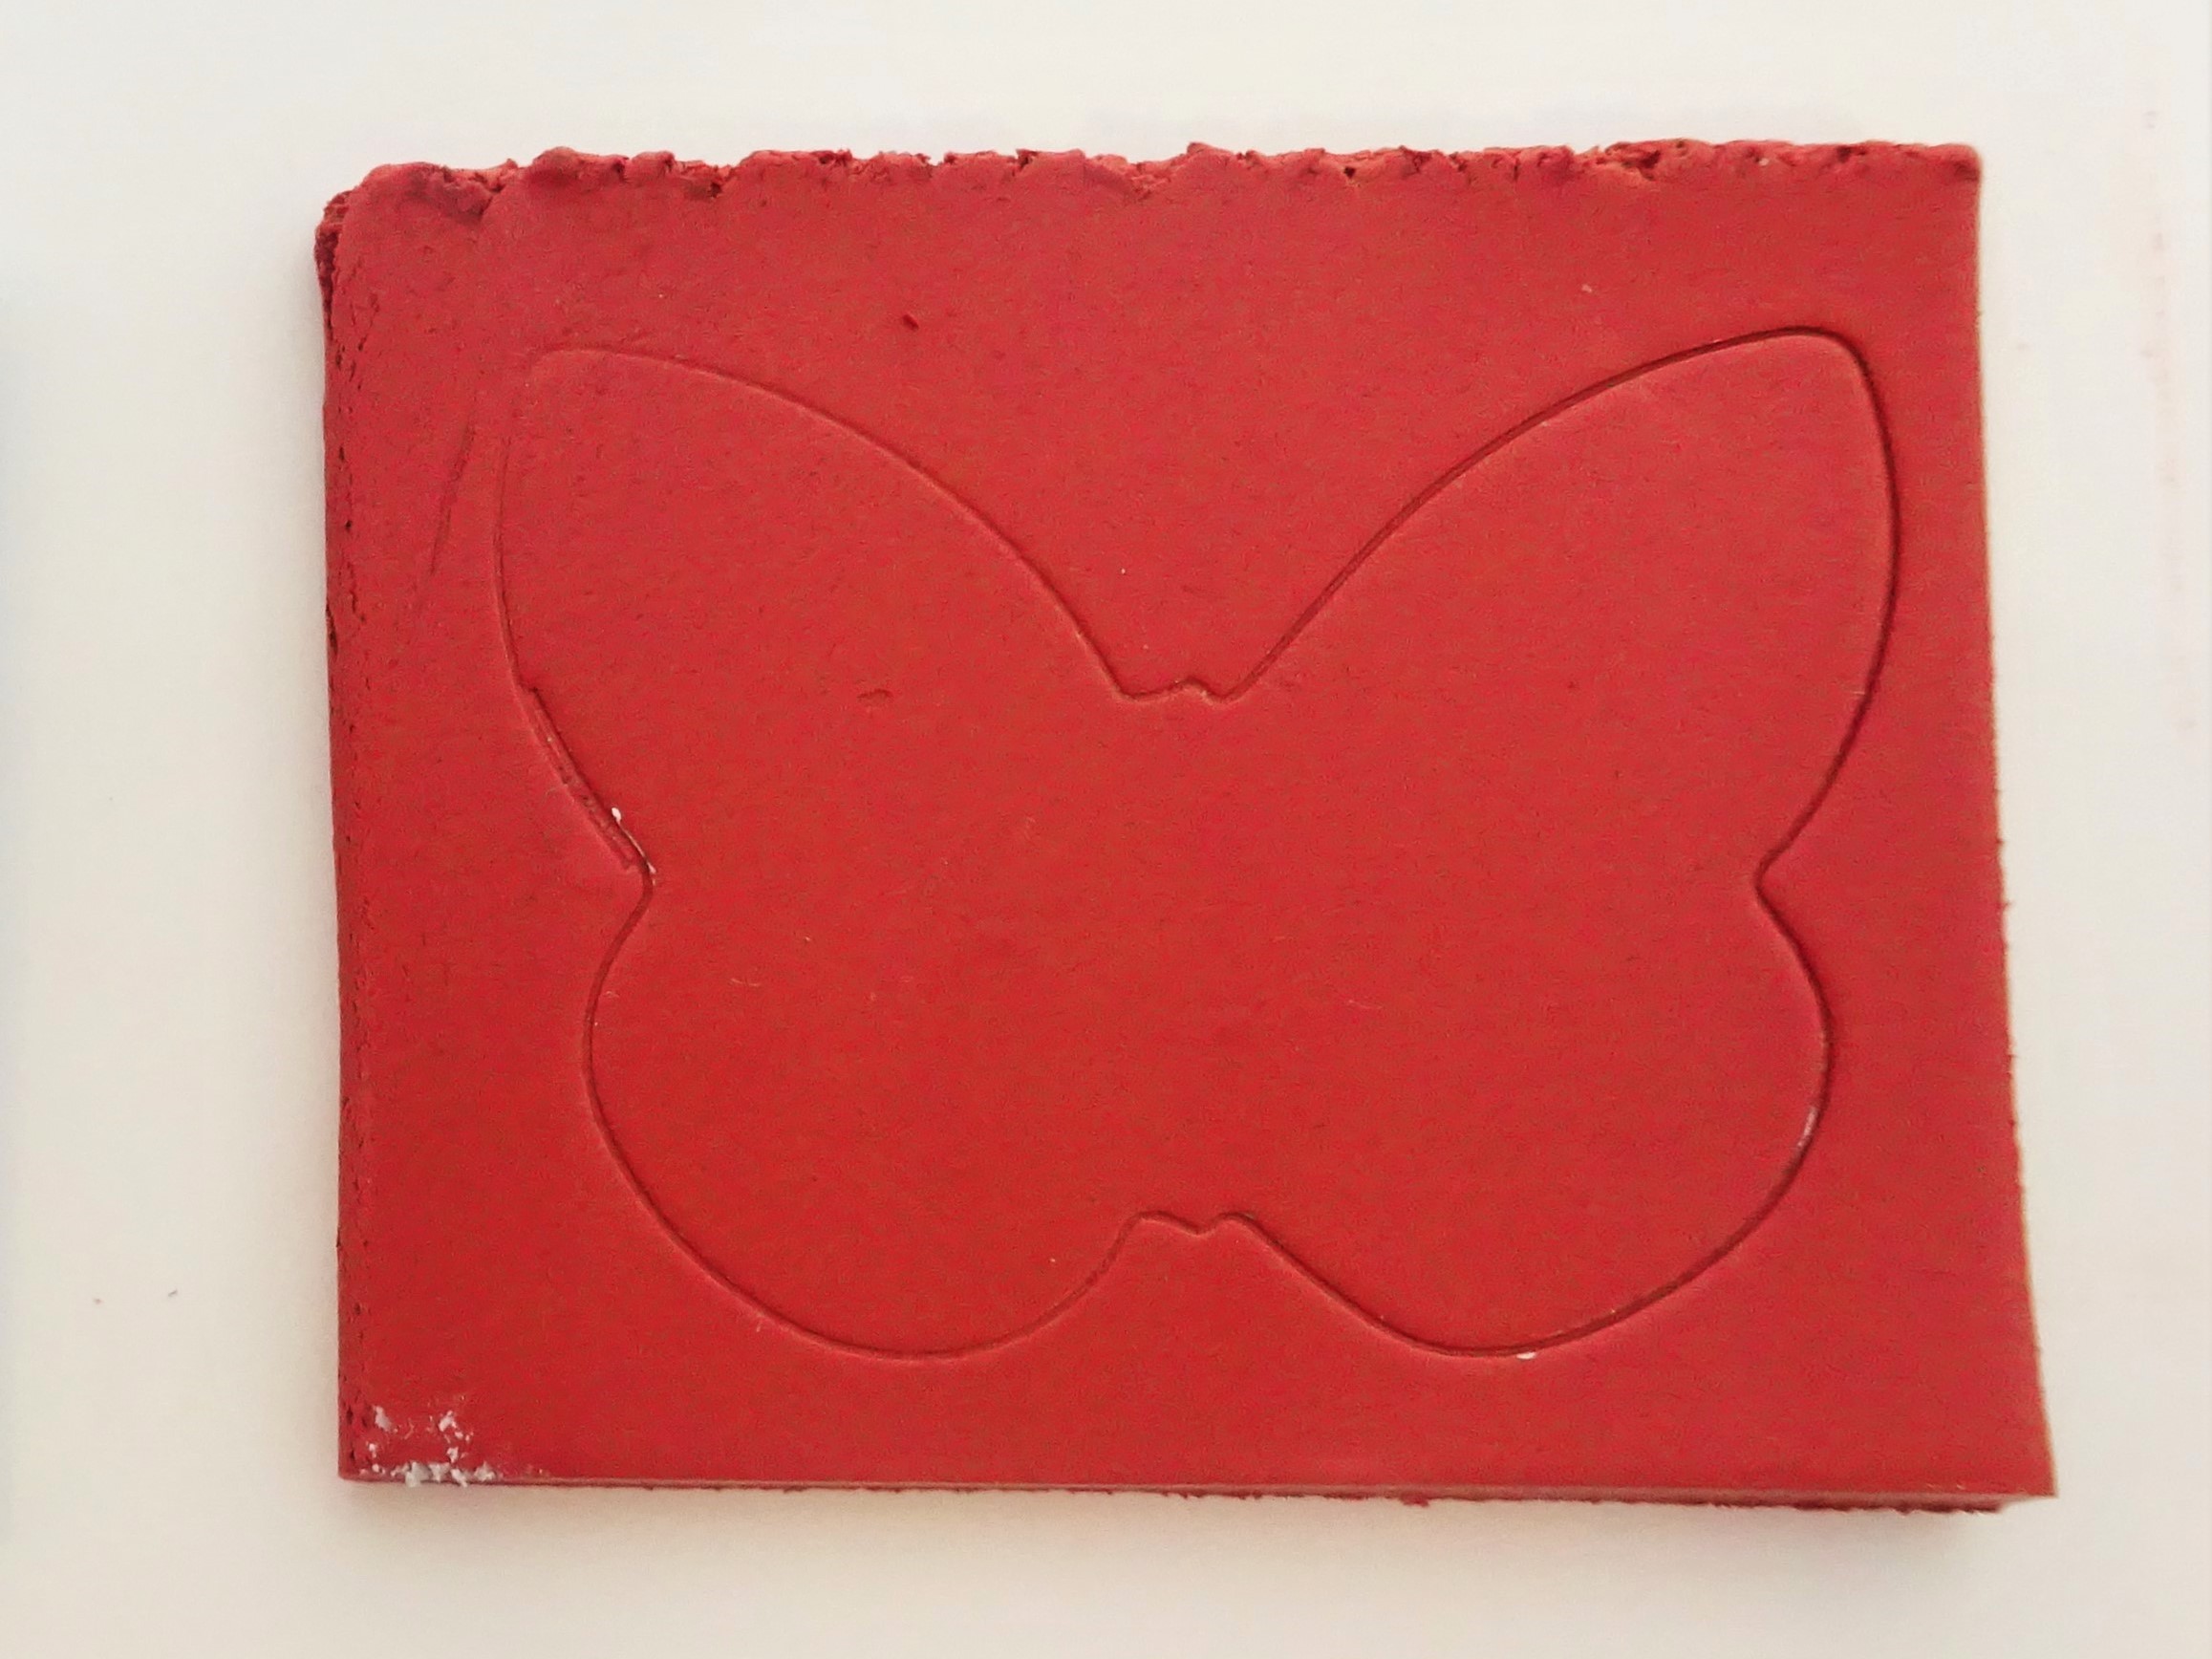
3. Conditions some Metallic Copper clay and roll through on the thickest setting on your pasta machine. Take your chosen butterfly cutter and lightly press it into the clay. The idea is not to cut the shape but to leave an outline so you know where to lay your metallic triangles.
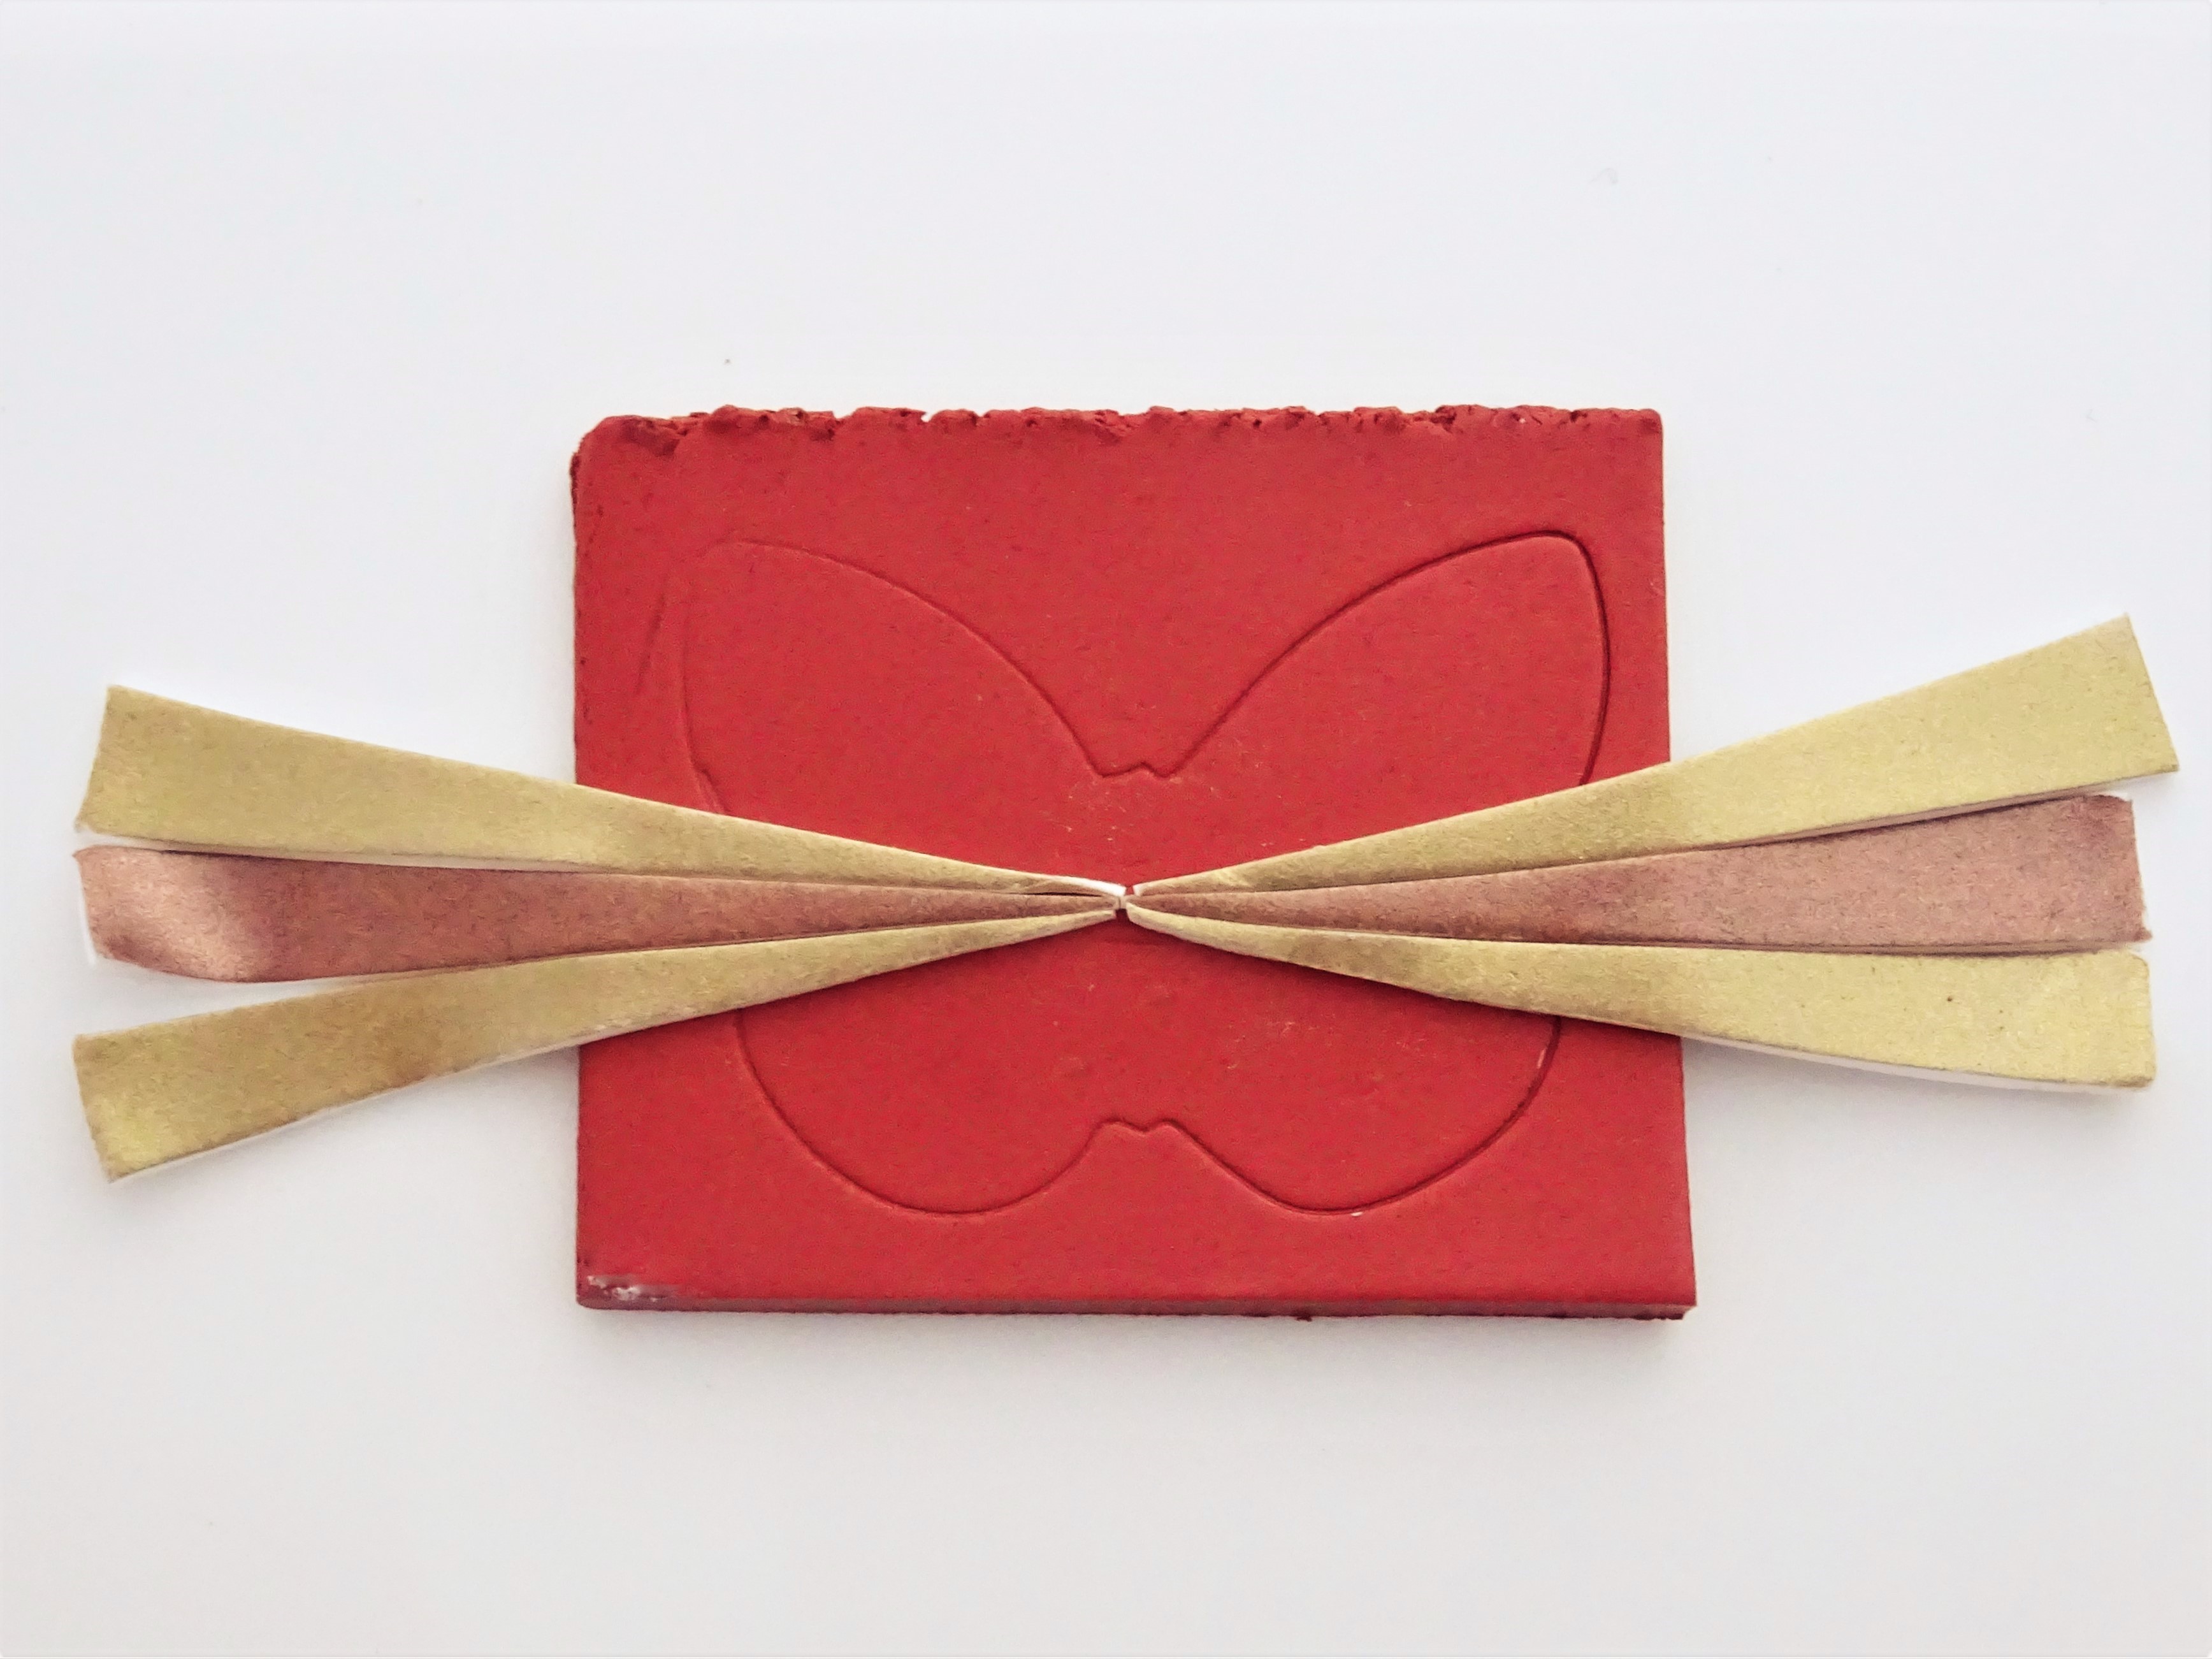
4. Start working from the middle of the outline. Pick up the first colour (in my case Cappuccino) and layer the triangle point in the centre of the butterfly body and match it with another Cappuccino strip on the other side. Pick up strips in gold and lay them next to the previous colour. Try to keep them as close and straight as possible.

5. Continue until all the butterfly in covered. I ran out of strips of clay so I cut the excess off the edges, cut to a point and used that. Don’t worry about the middle looking messy – we are going to cover it.
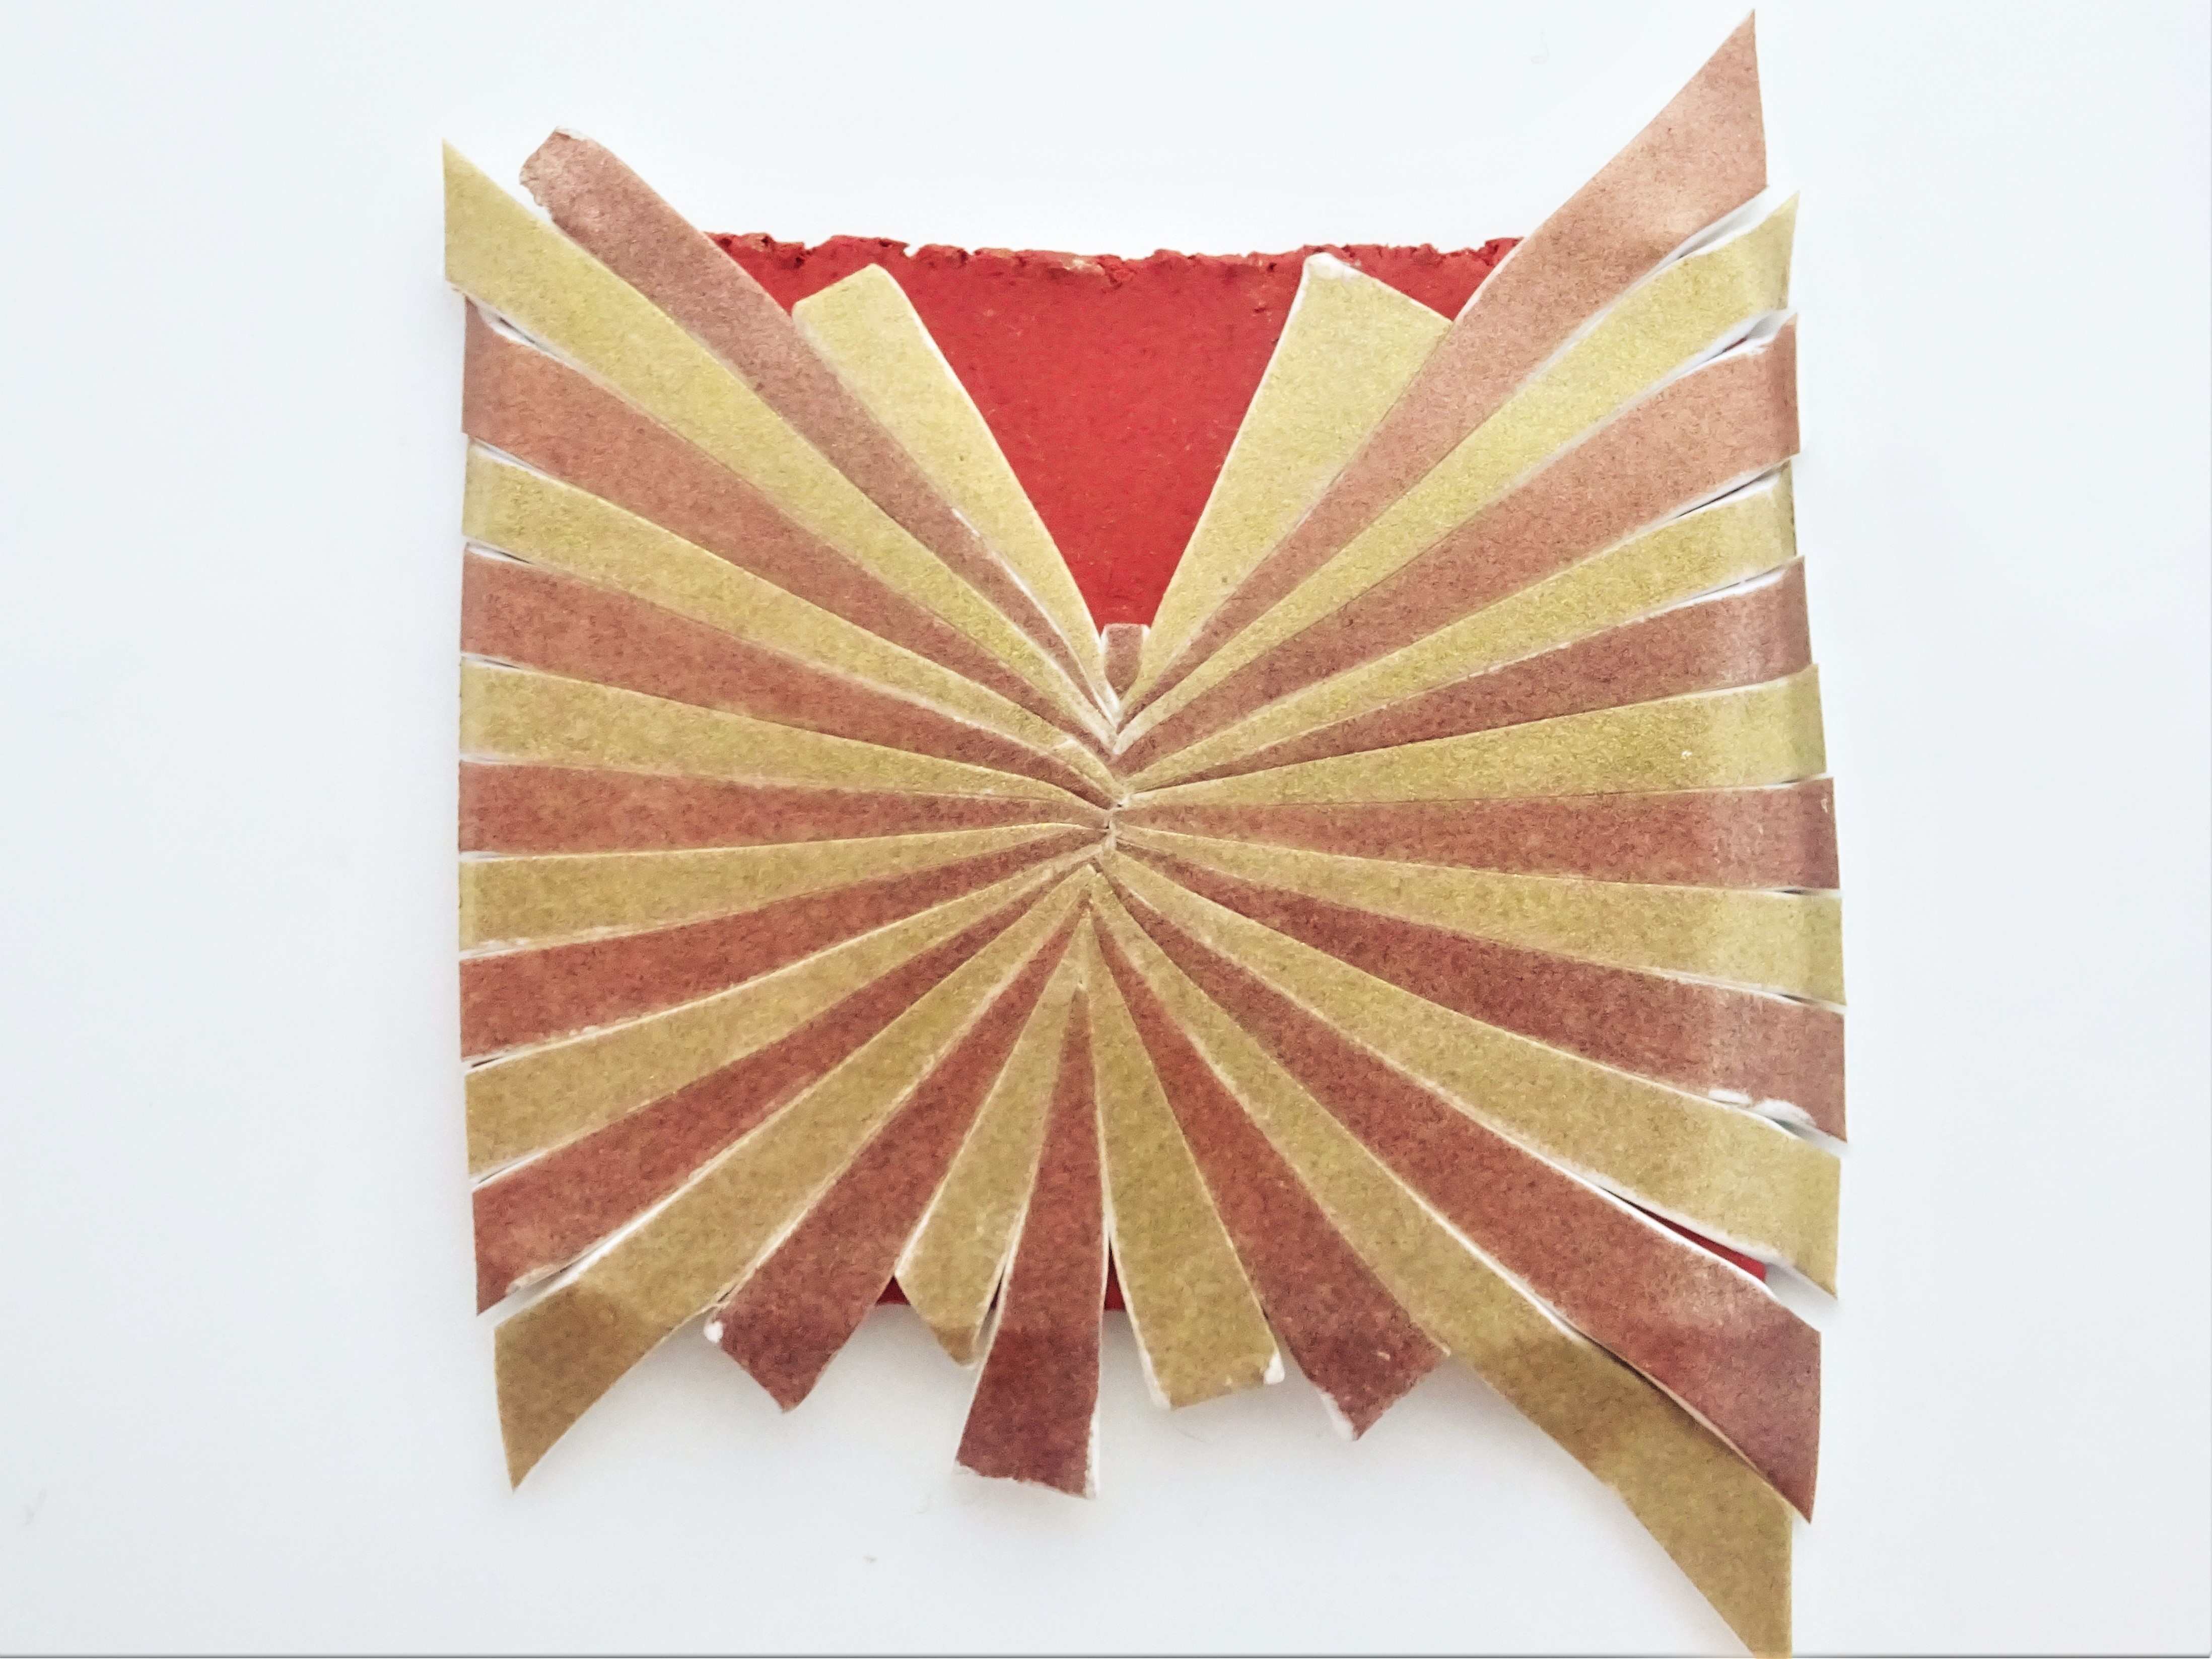
6. Take your acrylic roller and start to roll the clay, turning it as you go to get even pressure. Don’t press too hard – you just want to ensure those strips of clay are stuck down and to smooth out the joins between them.
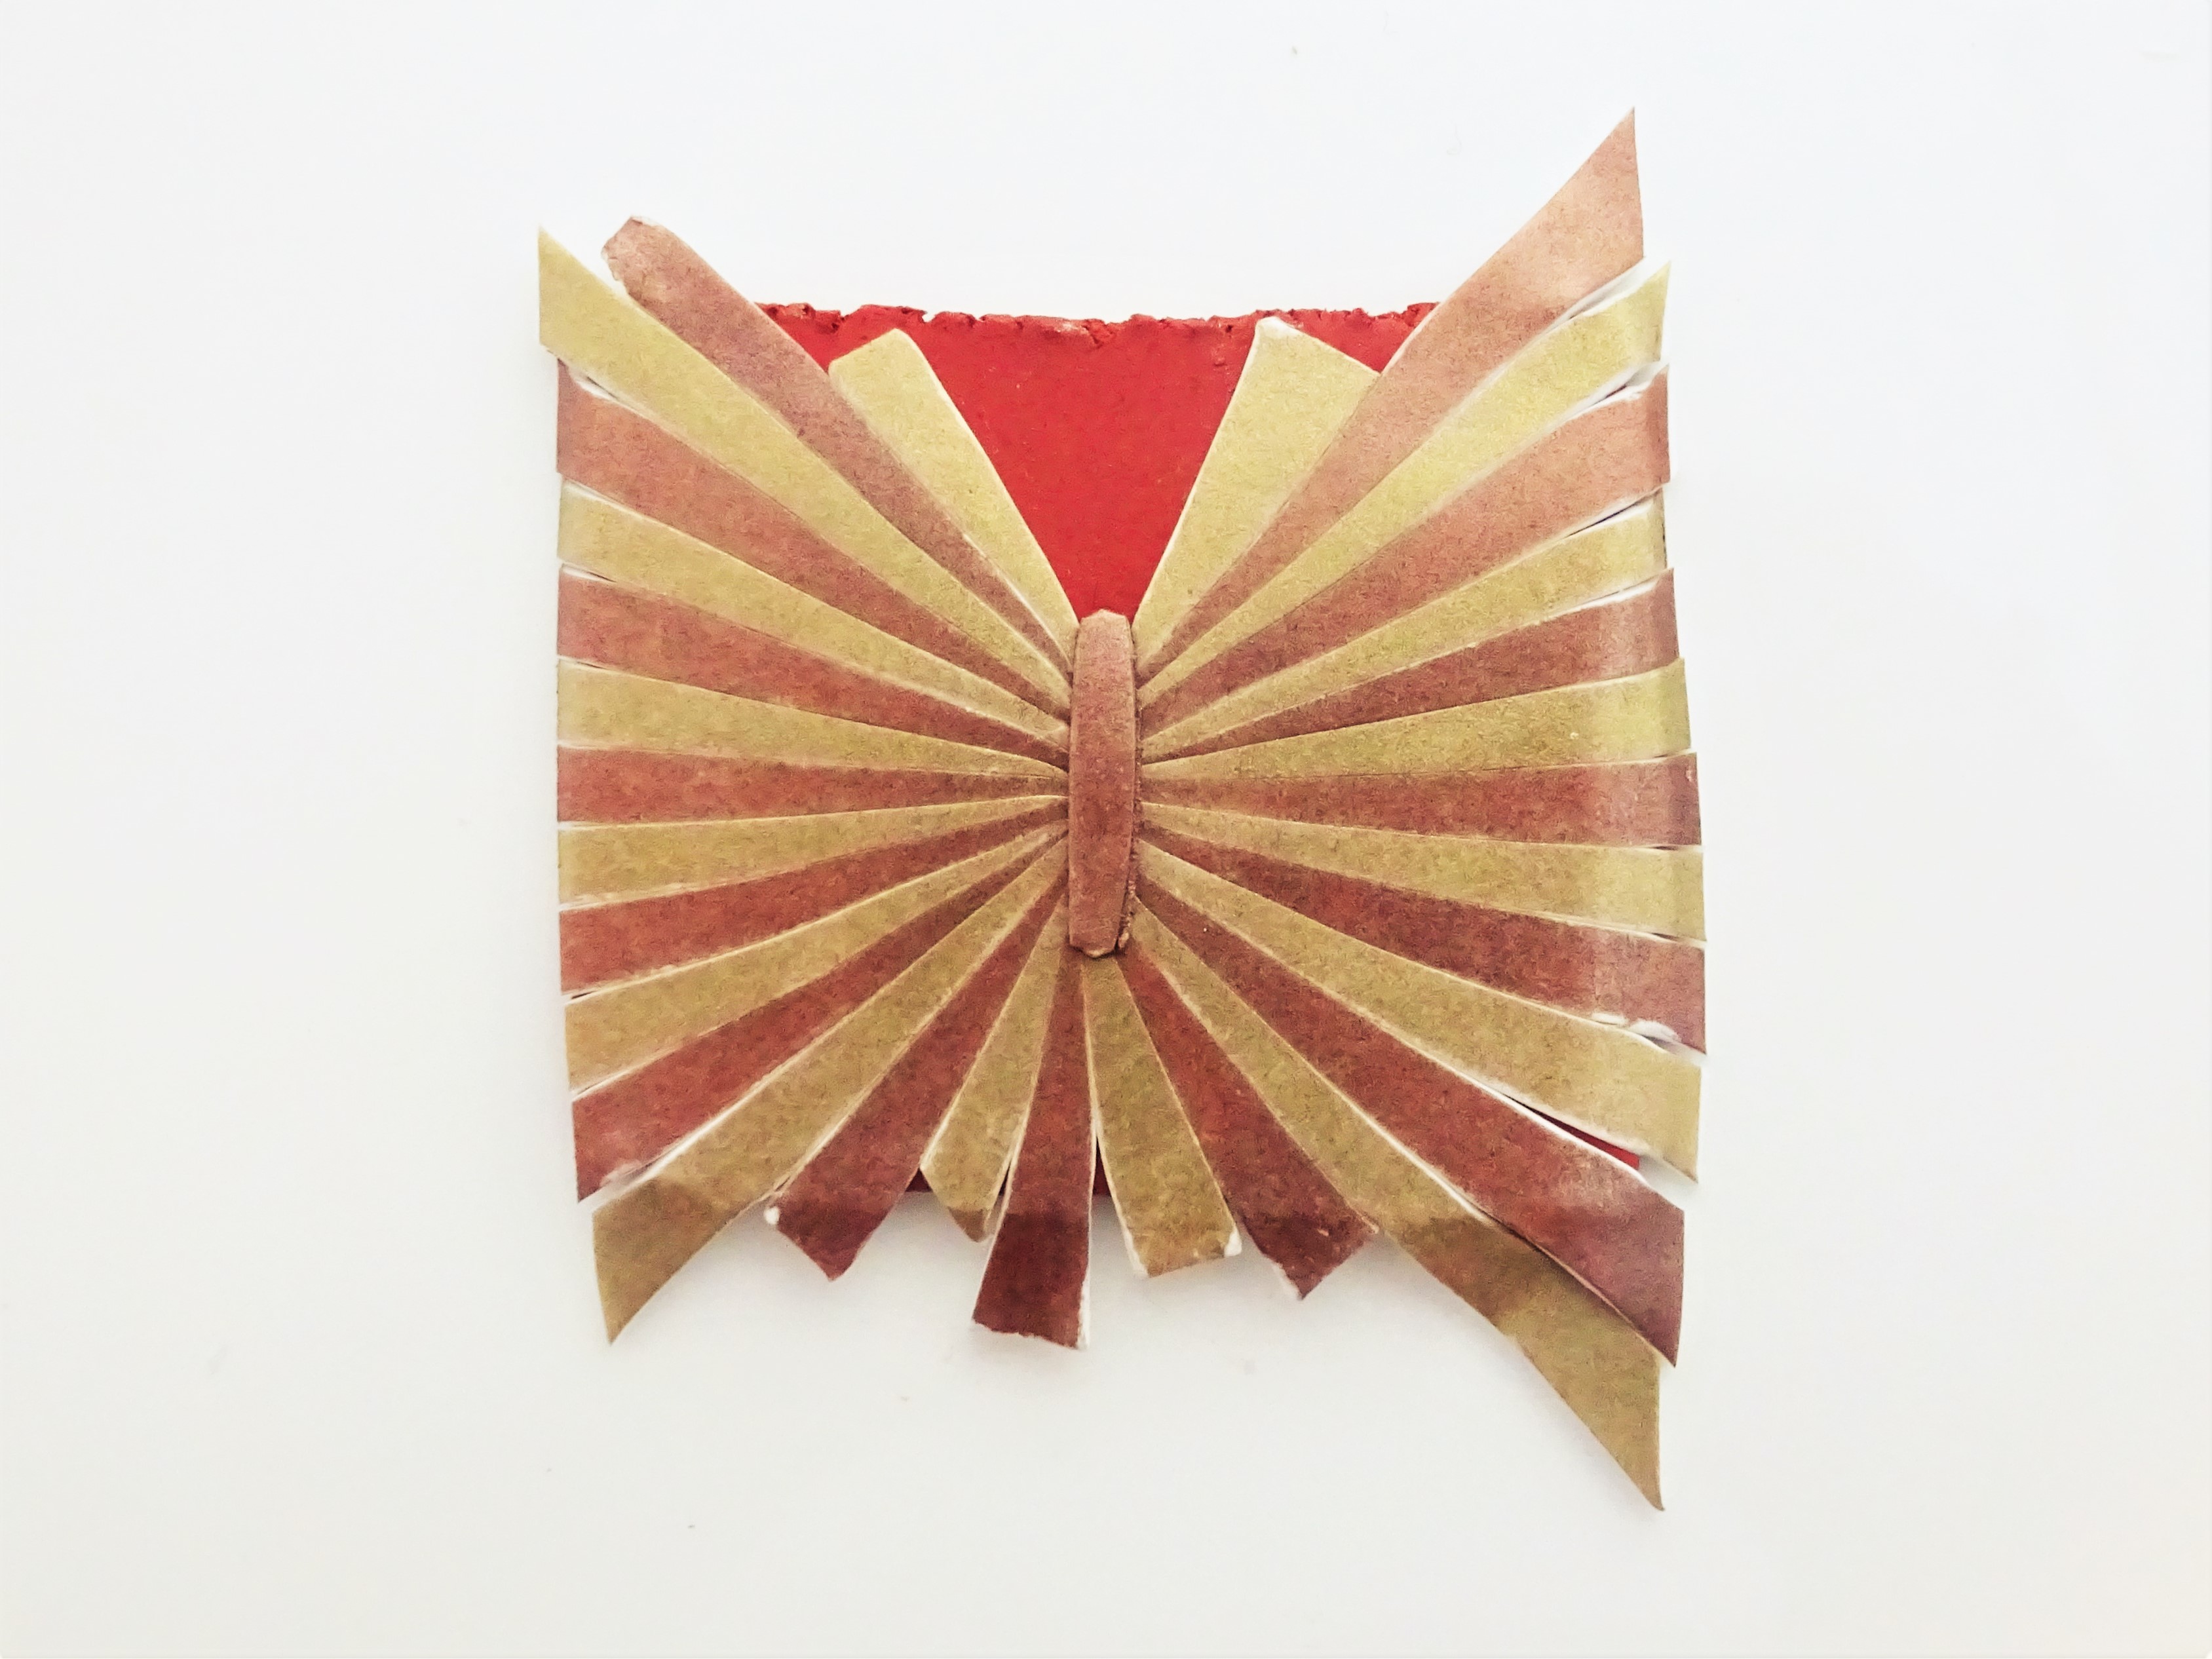
7. Take some more white clay and roll on a number 6. Cut the middle part of the butterfly and cut lines where the wings meet the body – this gives the thickness required for the body. Give a dusting with Cappuccino Perfect Pearls and stick to the body.
The YouTube video below goes into more detail on this.

8. Line up your cutter so that the body lies in the middle and cut your shape. Clean up the edges with your finger and then dust the edges with more Perfect Pearls in Cappuccino.
From here add jump rings (I used 5mm gold plated) so you can wear you pendant on a necklace. I have a tutorial that covers this step in detail.

9. Pop in you oven according to the instructions on your packet of clay. Once hardened and cooled give two coats of gloss varnish and attach a gold plated chain.
The results are like little rays of light.

Here I have used the same technique but coated the clay with Perfect pearls in Mandarin, Biscotti and Mint and layered on metallic silver clay.

This one has been made all from metallic clay. This is the butterfly demonstrated in the video below.

This one has been made from Fimo translucent clay with a base of translucent white. Look at those colours!!!
Affiliate links for products used from Amazon UK and Amazon US
Amazon UK
Fimo Professional white and Metallic Copper
Perfect Pearls in Heirloom Gold and Cappuccino
Amazon US
Fimo Profession White and Metallic Copper
Perfect Pearls in Heirloom Gold and Cappuccino
Which one of these is your favourite?
I’m still plotting how I can take this basic tutorial and take it further…..Watch this space, maybe.
If you enjoyed this tutorial then don’t forget to check out my other polymer clay tutorials before you go
Hannah x

