


I decided to switch the polymer clay jewellery making up a little this week and work on a flower cane. It has been a while since I worked with a cane and I had this idea of making a flower outline in really bright colours but then to keep everything else one colour. It’s been fun, I’ve needed sunglasses at times with the colours of clay I’m working with and I’ve pushed myself because green isn’t usually my colour of choice to work with.
How To Make A Tropical Flower Cane In Polymer Clay
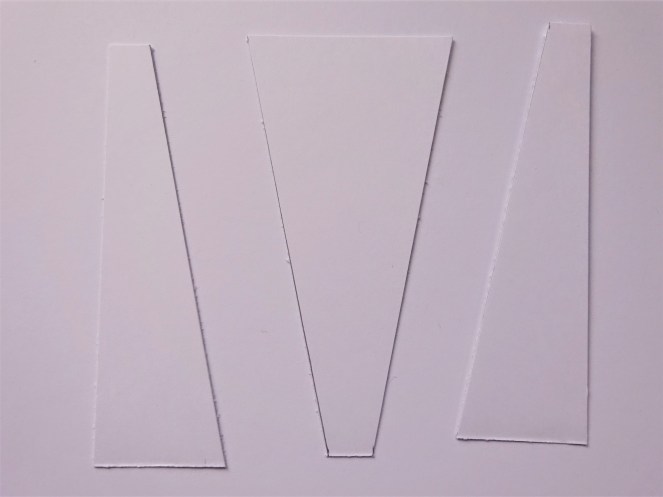
1. Not the most exciting photo to start! Cut yourself a template for a skinner blend. Cut a rectangle of card 7 x 10cm.
On one of the sides measuring 7cm measure two points, 3cm down from each corner. On the other side measure 1cm down from each corner. Join the corresponding points with two lines and cut along them.
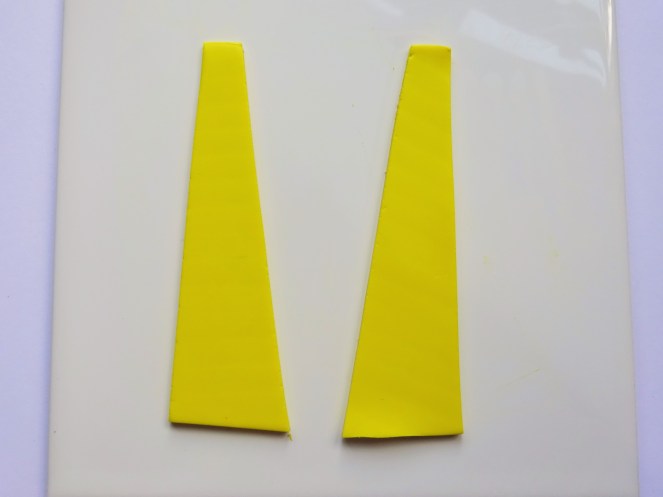
2. Make a mix from True Yellow Fimo Professional and Fimo White using twice as much yellow than white. You can skip this step if you wish for the colours to be brighter. Once thoroughly mixed roll through your clay machine on the thickest setting and put the two smaller template pieces on the clay. Cut around the template.

3. Make a mix from True Magenta Fimo Professional and Fimo White using twice as much magenta than white. Once mixed roll through on the thickest setting on the clay machine and place the biggest template piece on top. Cut around the template.

4. Put the pieces together so that it looks the original template and gently roll with an acrylic roller to push the pieces together.

5. Reduce the clay machine down to a number 2 (second thickest) position the clay as shown in the picture. Roll through the machine.

6. Fold the clay in half so that the two yellow corner meet, position the clay in the roller with the folded side downwards and roll through the clay machine again on a number 2 thickness.
7. Continue rolling and folding the clay in this way until the clay begins to blend.

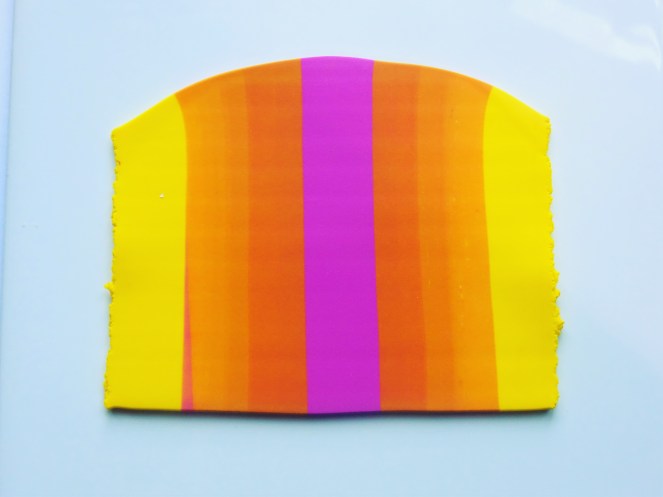
8. Reduce the clay machine down to a number 3 and continue folding and rolling until you are happy with the blend. Cut the edges off (put these to one side for the next step) leaving equal yellow at each end. My piece measured 3cm x 13.5cm.

9. Pressing the pieces together that you cut off from the previous step, reduce the clay machine to a number 4 and roll them through so that they form a new clay sheet. Cut a straight edge on 3 sides. Roll some of the yellow and white mix from step 2 through on a number 6 and cut it at a depth of 1.5cm and the same width as your skinner blend piece (In this case 3cm). Fold this over the straight edge at the bottom of the new clay sheet.

10. Roll this through the clay machine again on a number 4 with the yellow side facing downwards. Cut it at a depth of 2cm and pinch the end, without the yellow top to make more of a point at the top.
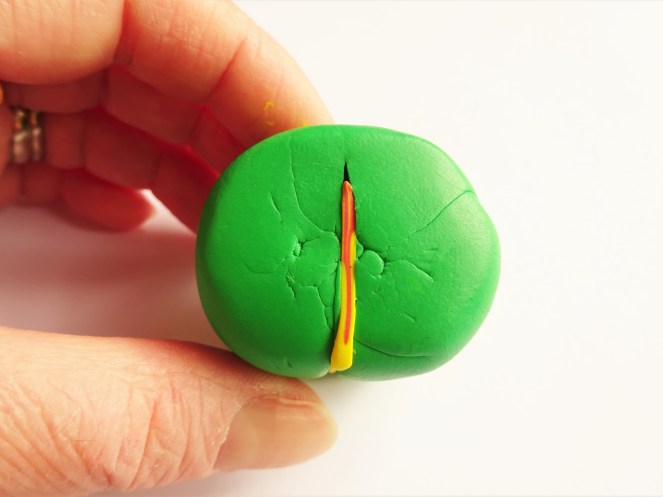
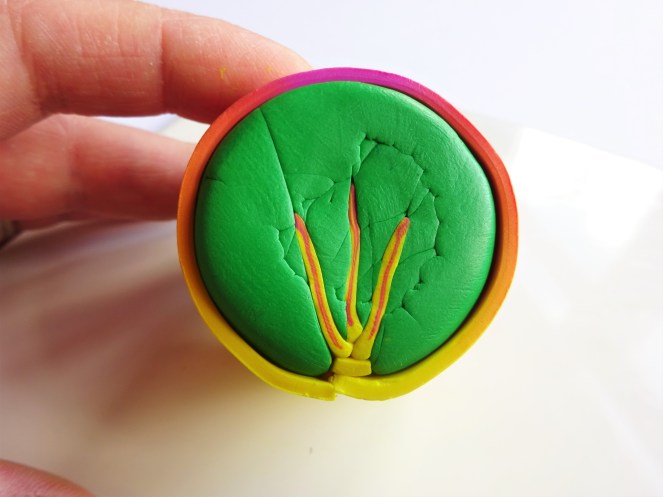
11. Make a mix of clay with Fimo Professional in Sap Green and True Blue in the ration 3:1. Do this by rolling the individual colours through your machine on the thickest setting and cut circles (or whichever shape you fancy) so that you have 3 green circles and one blue. Mix these together. You will need several of these mixes. Make a column of green clay big enough for your skinner blend to go round. Cut into the centre of the green clay put in the piece that you have just made, with the yellow end facing outwards.

12. Repeat steps 9 – 11 twice more but cut the pieces to a depth of 1.5cm. Insert them at diagonals to the centre point as shown. Fill the gap at the bottom with a little piece of yellow clay. Lay this down on the skinner blend so that the yellow is facing up and the green in the middle of the skinner blend.
13. Roll the skinner blend around the clay so it fits perfectly. Cut off a little yellow if needs be.

14. Roll some of the pink and white mix from step 3 through on a number 5 and wrap one around the clay cane.
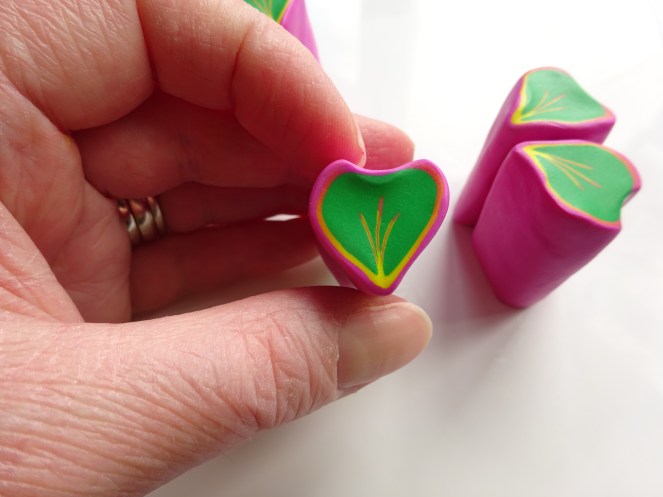
15. Reduce this to a length of 15cm (with the rough ends off) and cut into 5 pieces (3cm each). On each piece pinch the base, on each side first to make sure they line up, and then all the way along. On the top press something round into the top of the petal to make a heart type shape.
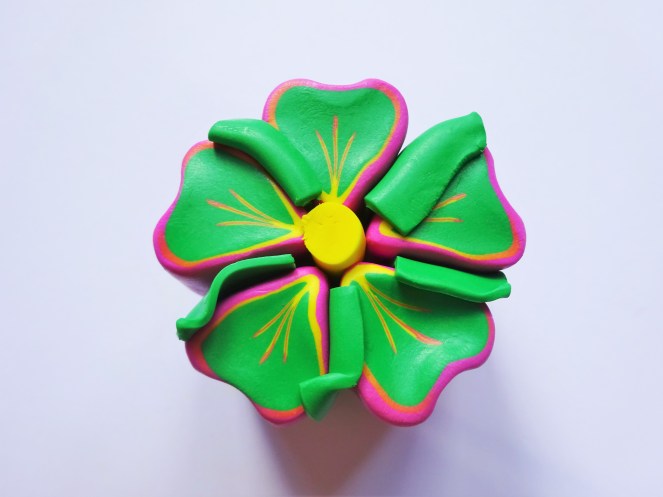
16. Make a snake of the yellow and white clay for the centre and position the flowers around it with a some of the green and white mix clay, rolled through on a number 6, in between each petal.
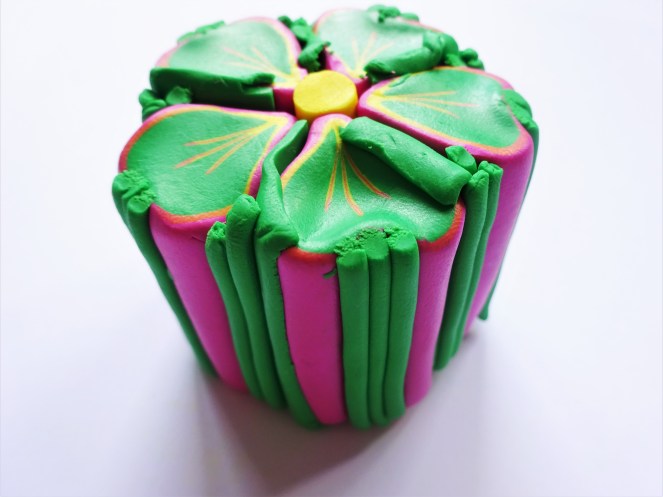
17. Pack more of the green and white mix clay around the clay. I like to make snakes of clay with my extruder for this and add it around the parts of the cane that are empty. The idea is to make it a more circular shape so it can be reduced without distorting.

18. Wrap the cane once with a piece of green/white clay rolled through on a number 5 and reduce the clay to the desired size.
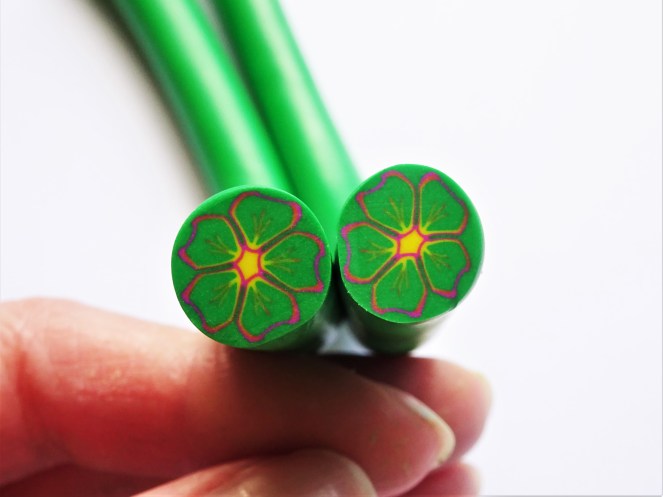
19. Cut the cane to reveal your finished cane. The petals should have this cool colour shift.

I have made pendants, earring and beads with the finished cane. I used a base of the green/white mix so there is a seamless blend between the cane slices and the base. I use a dotting tool to add little dots of acrylic paint (I use Lumiere by Jaquard in Sunset Gold).
If you would like to see how to make beads and pendants with your finished cane the I have a post about it here.


All ready for some warm weather and fancy tropical fruity drinks!
If you have enjoyed this don’t forget to check out my other polymer clay tutorials.
As ever don’t for get to tag @theartisanduck on social media if you try one of my tutorials.
See you next time.
Hannah x


Really pretty .Very time consuming but the results are grand.
Thank you. It is one of the more time consuming projects especially as it made a lot of cane so I still have a lot left to use! 😂