
Please note this post contains affiliate links for products used.

Last year I made a tutorial showing how to use a polymer clay cane to make beads and pendants and in that tutorial I was using some rose cane that I had left over. I was asked a few months ago if I would show how I made the rose cane so here is that tutorial. It has taken me a while to sort it out as I predominantly work by eye so for this to become an easy tutorial to follow I had to measure all the clay pieces with the hope that, if you follow it, you will get the same results.
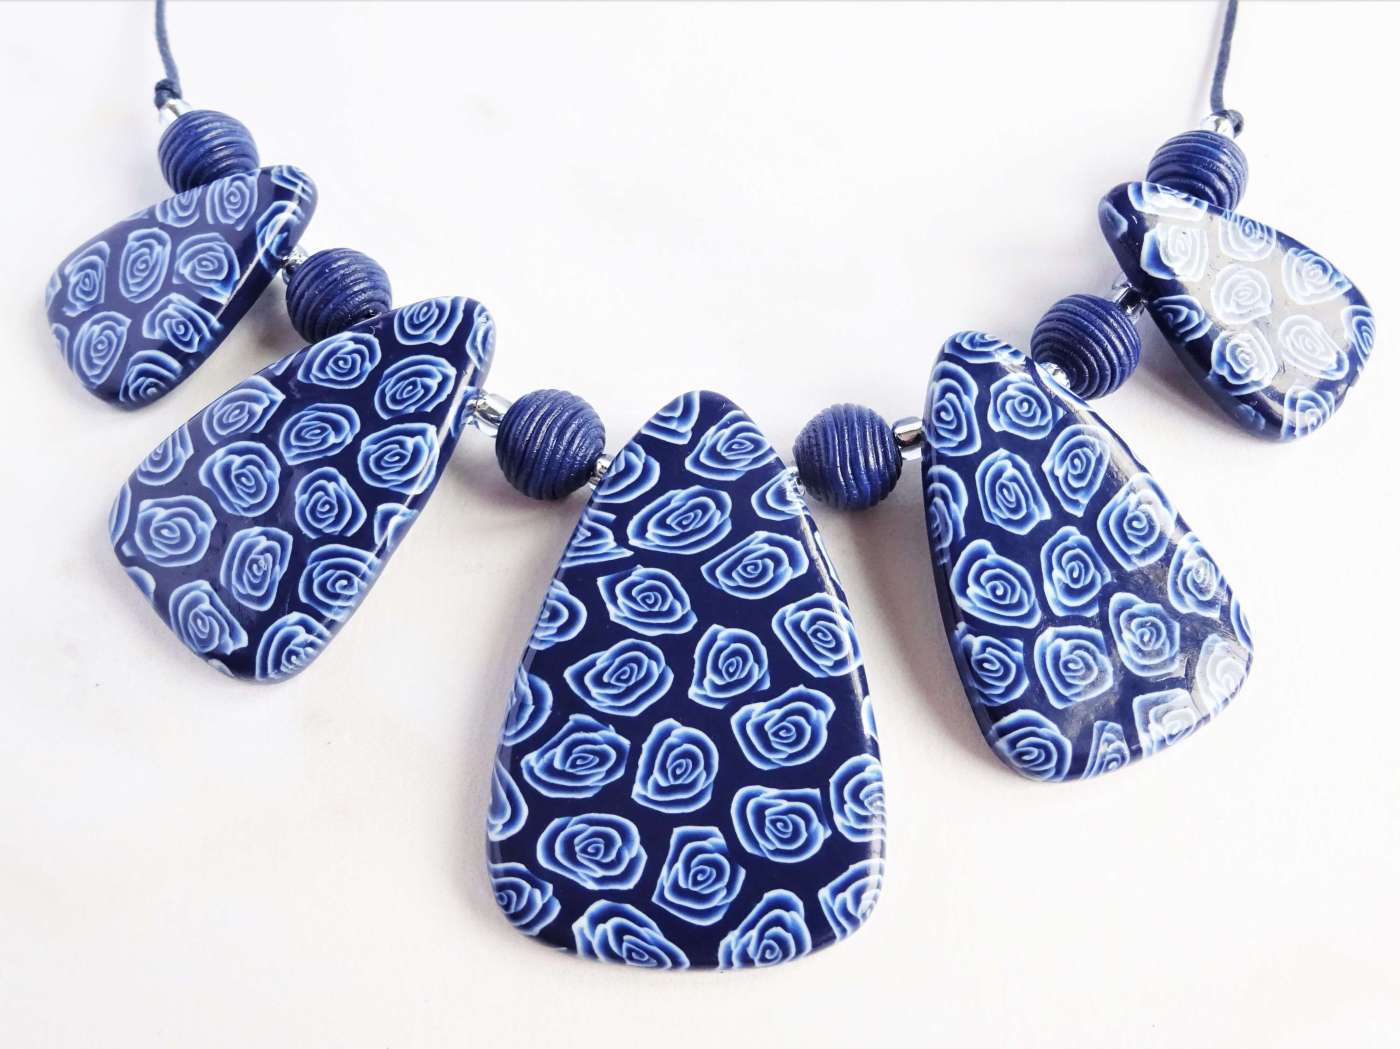
All the finished items of jewellery are listed in my Etsy shop so if you are looking for some rose patterned jewellery and have stumbled across my post then hopefully you’ll find what you are looking for there.
I have linked a YouTube video at the end of this post so if anything is unclear here then that will hopefully help.
As this is going to be a very photo heavy post I won’t keep rambling so, grab your polymer clay and a ruler and come make a polymer clay rose cane with me.
How To Make A Polymer Clay Rose Cane
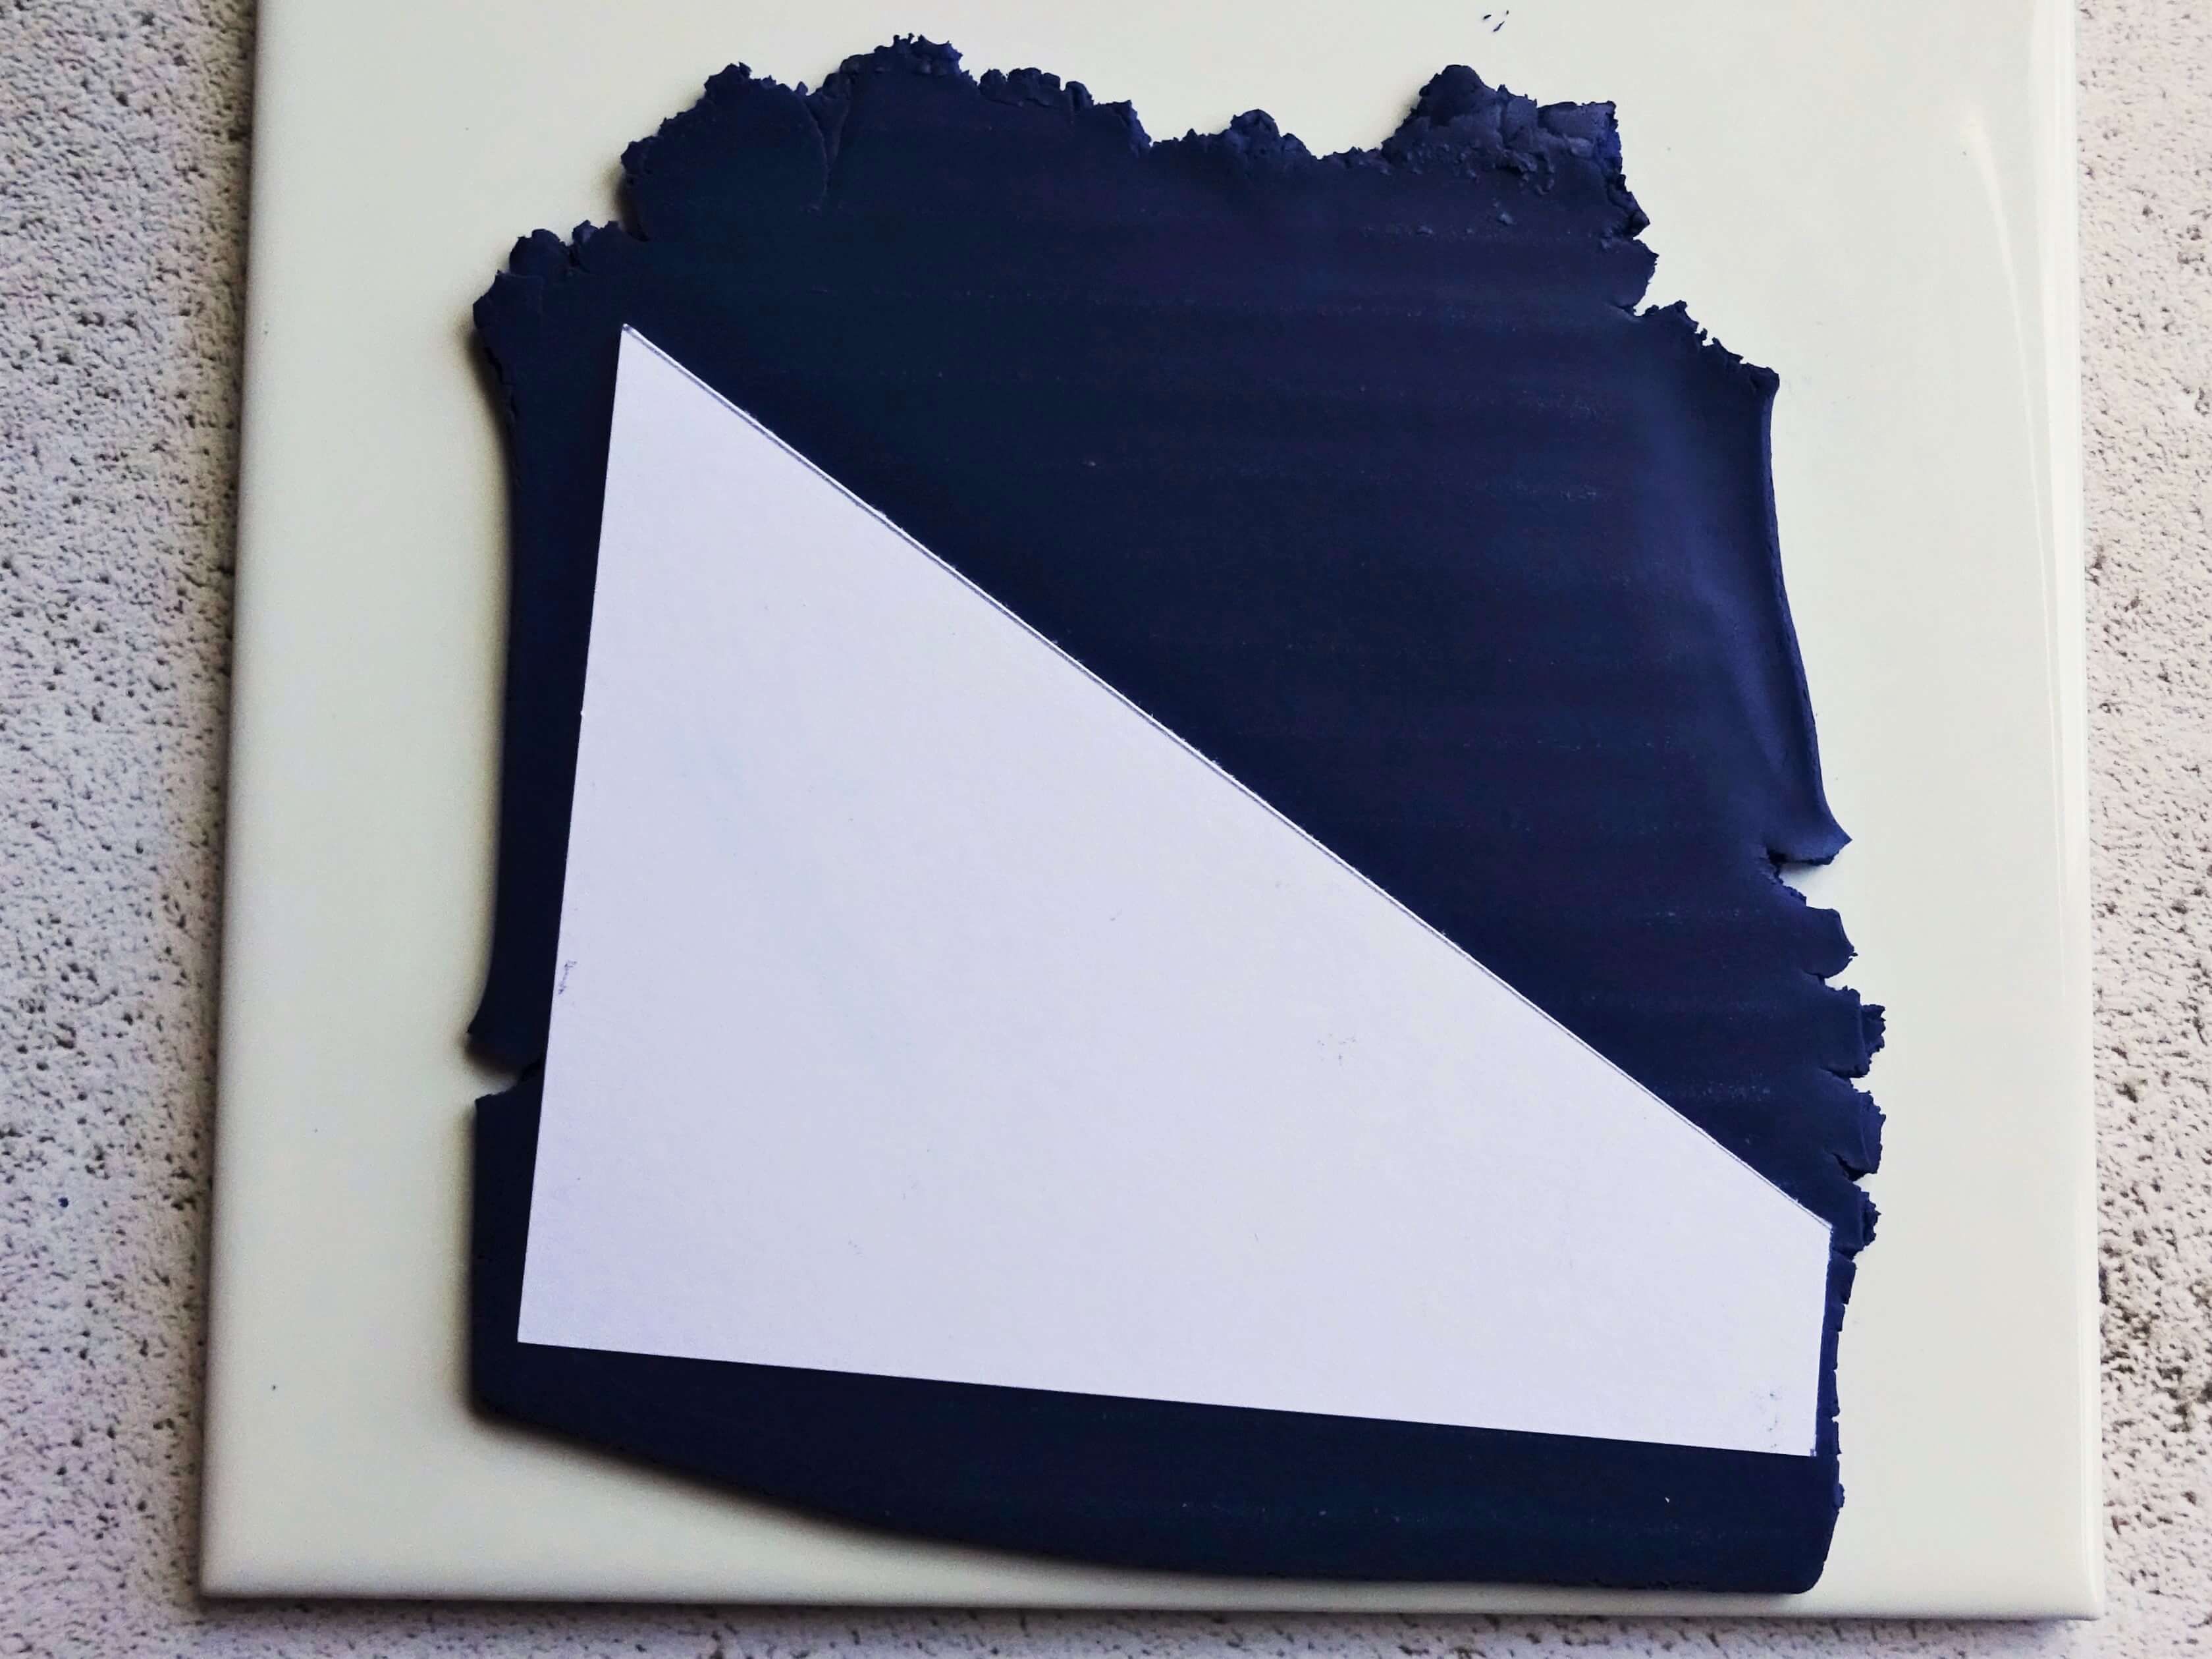
Draw yourself a template for your skinner blend that is 8cm tall on the left upright, 10cm wide and 1 3/4cm high on the right upright as in the photo above.
Begin by conditioning your clay – I am using white and dark blue for this rose cane. Once the clay is soft enough to use, roll both colours through your clay machine on the thickest setting and make sure that your template fits on both colours.
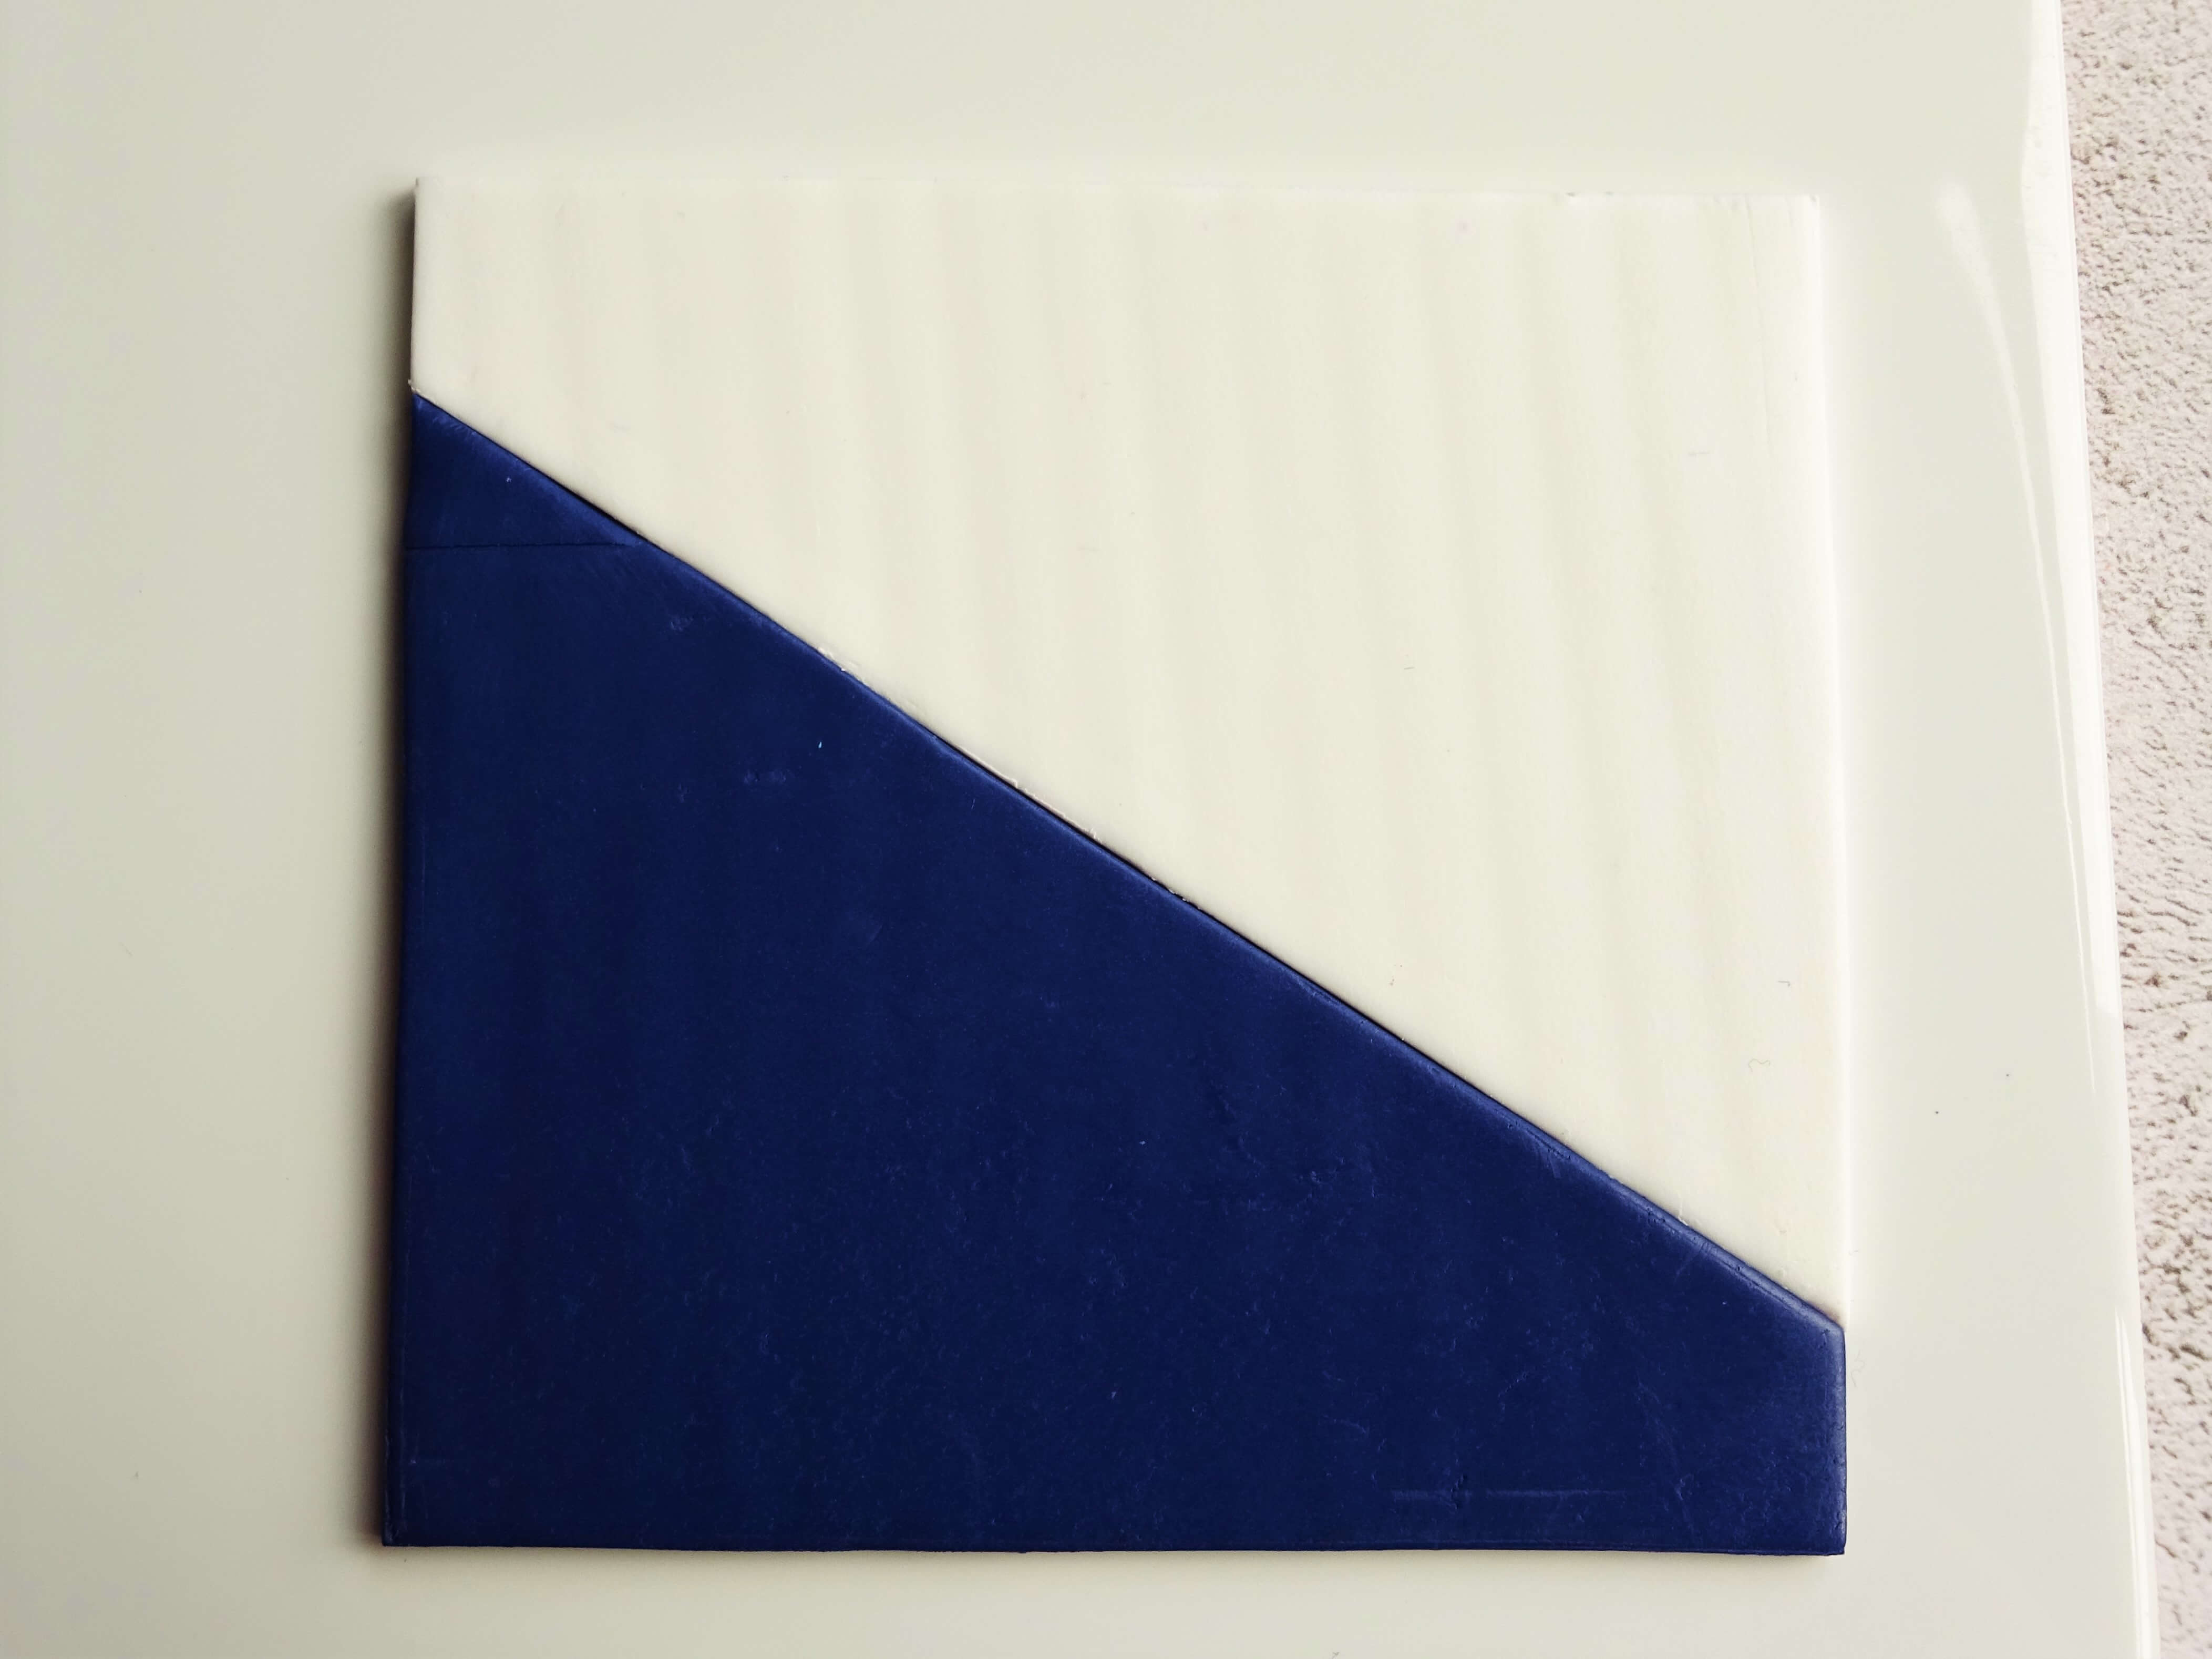
Cut around your template and position the clay shapes so that they form a square. This is the start of a skinner blend. By doing this your rose petals will fade out to white at their tips and help give definition to the flower.

Now, gently roll over the clay to help the shapes stick together.

Once the two clay colours are sticking together, pick it up and fold in half so that the white corners are matching together and the blue corners are matching as in 4a.
With the fold facing downwards, pass the clay through your clay machine (or roll from the folded edge if you are using an acrylic roller) on the thickest setting (number 1 in my case).
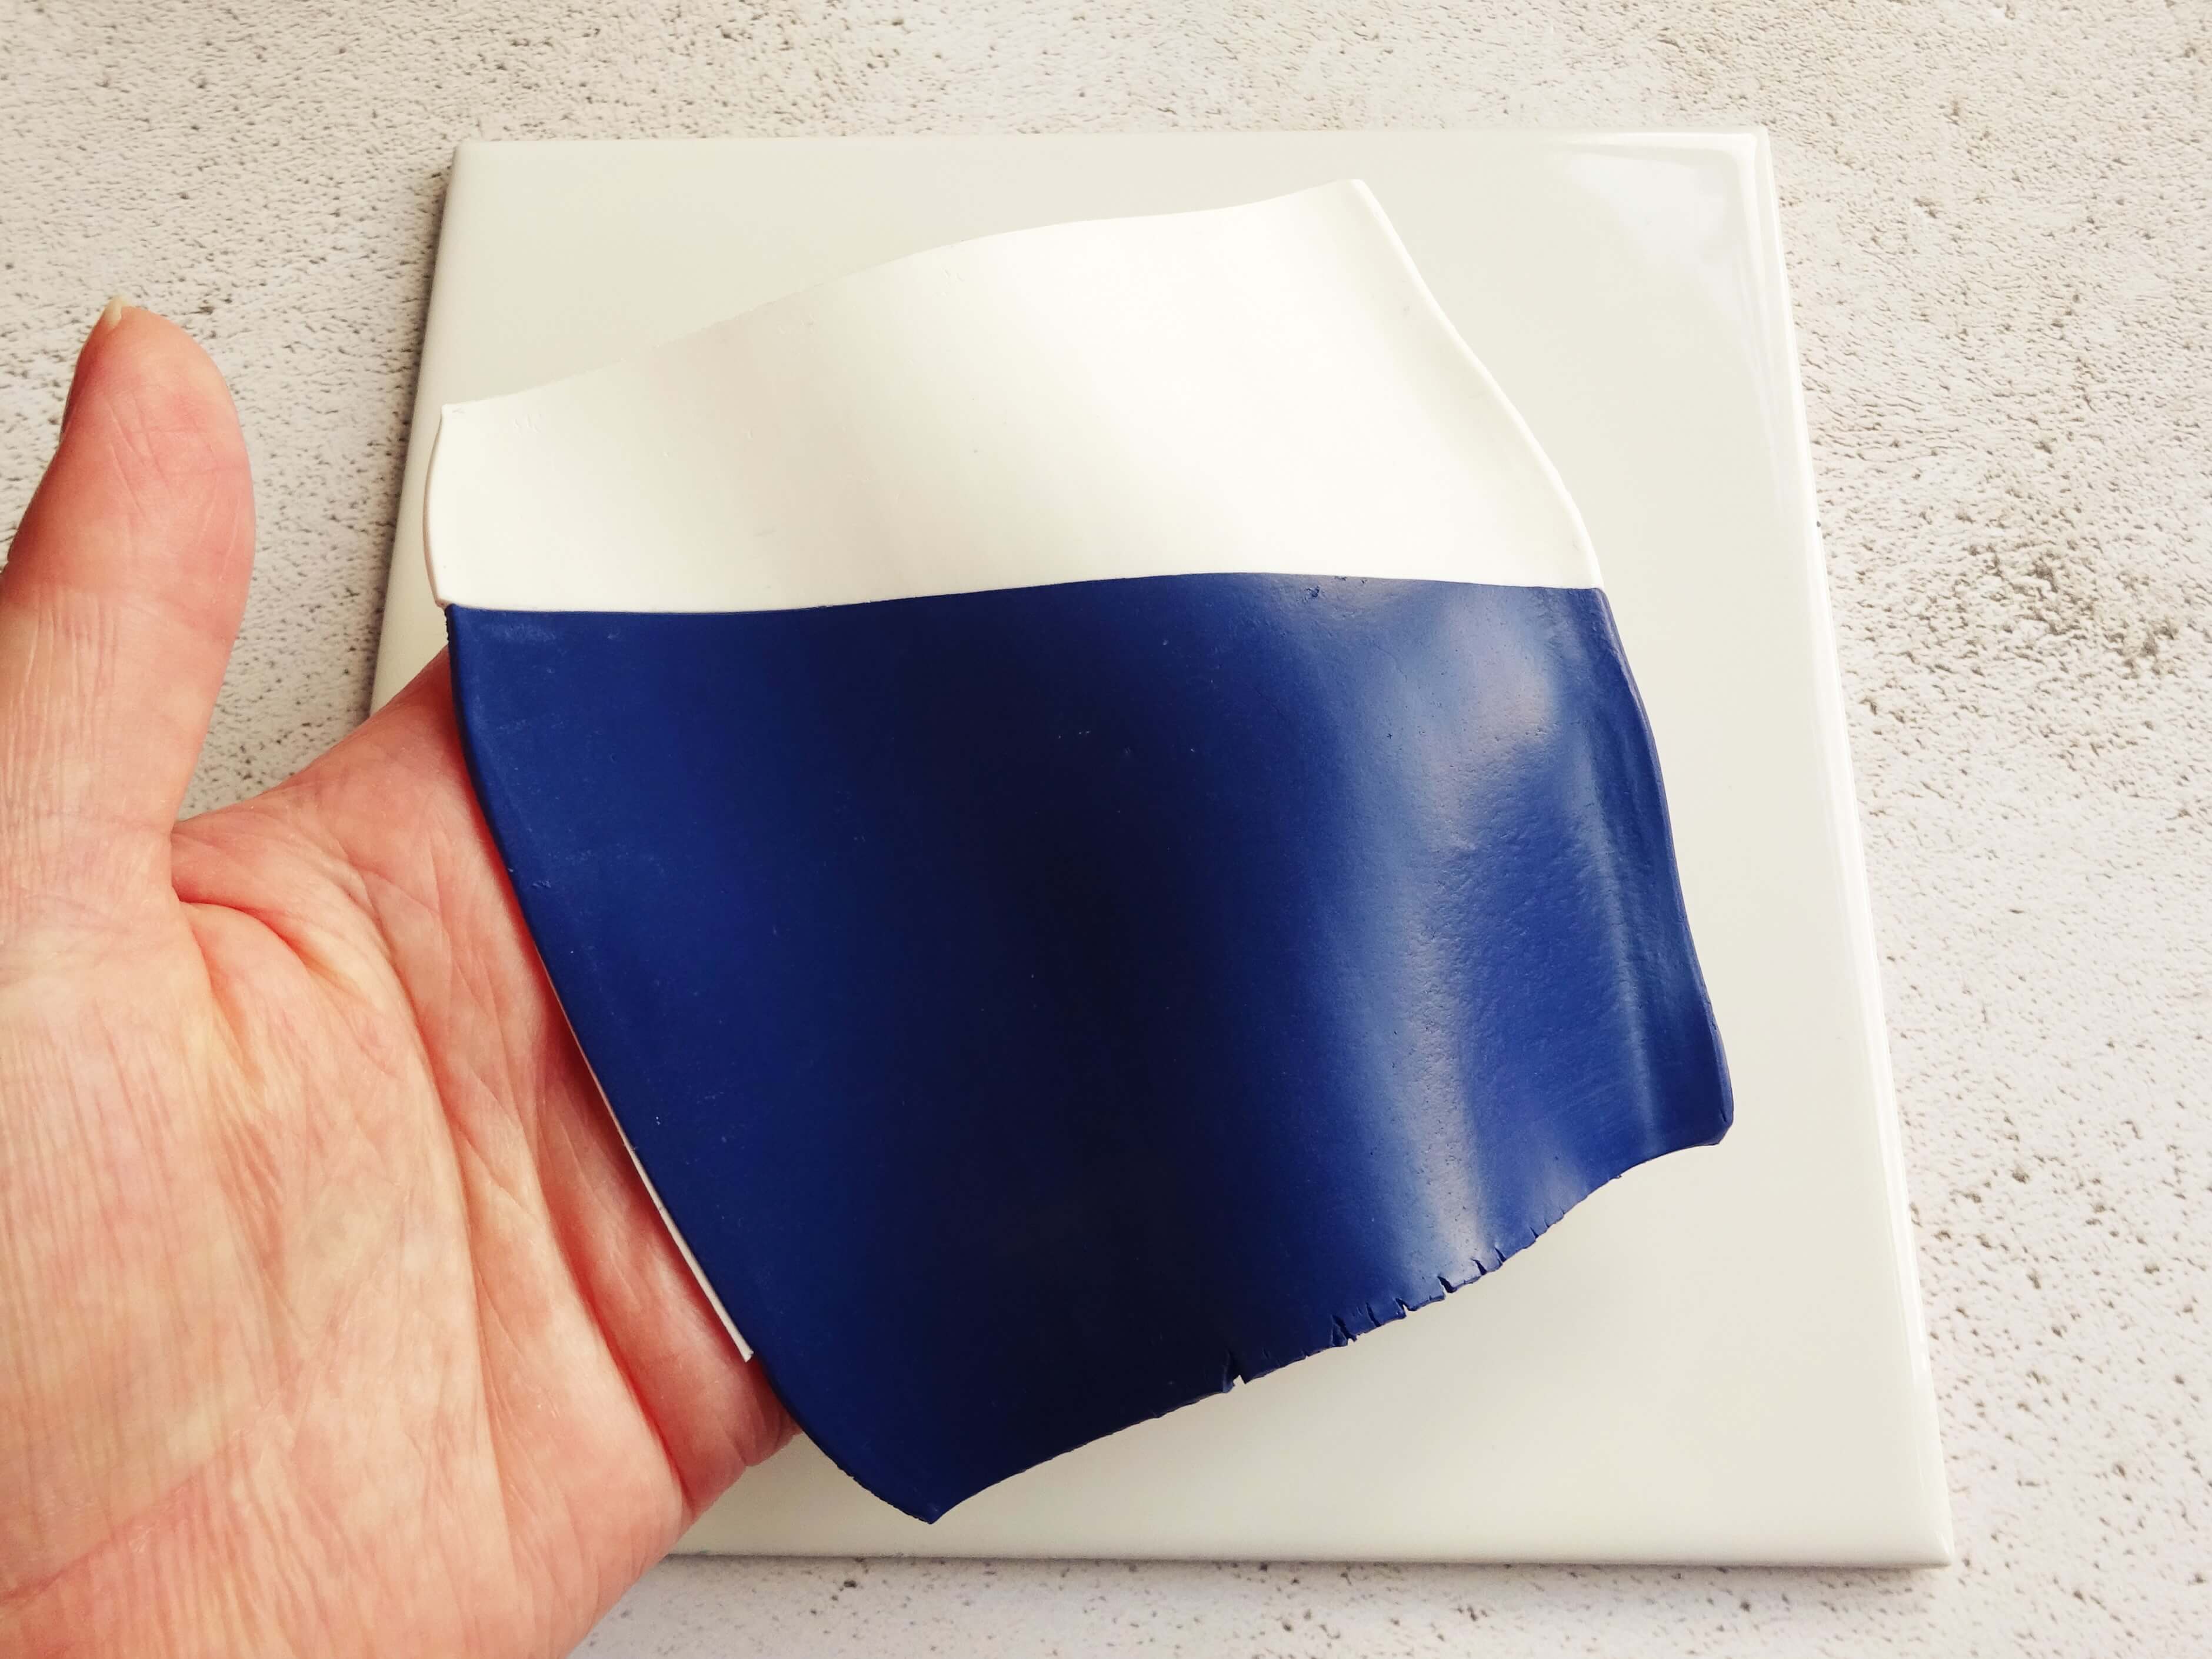
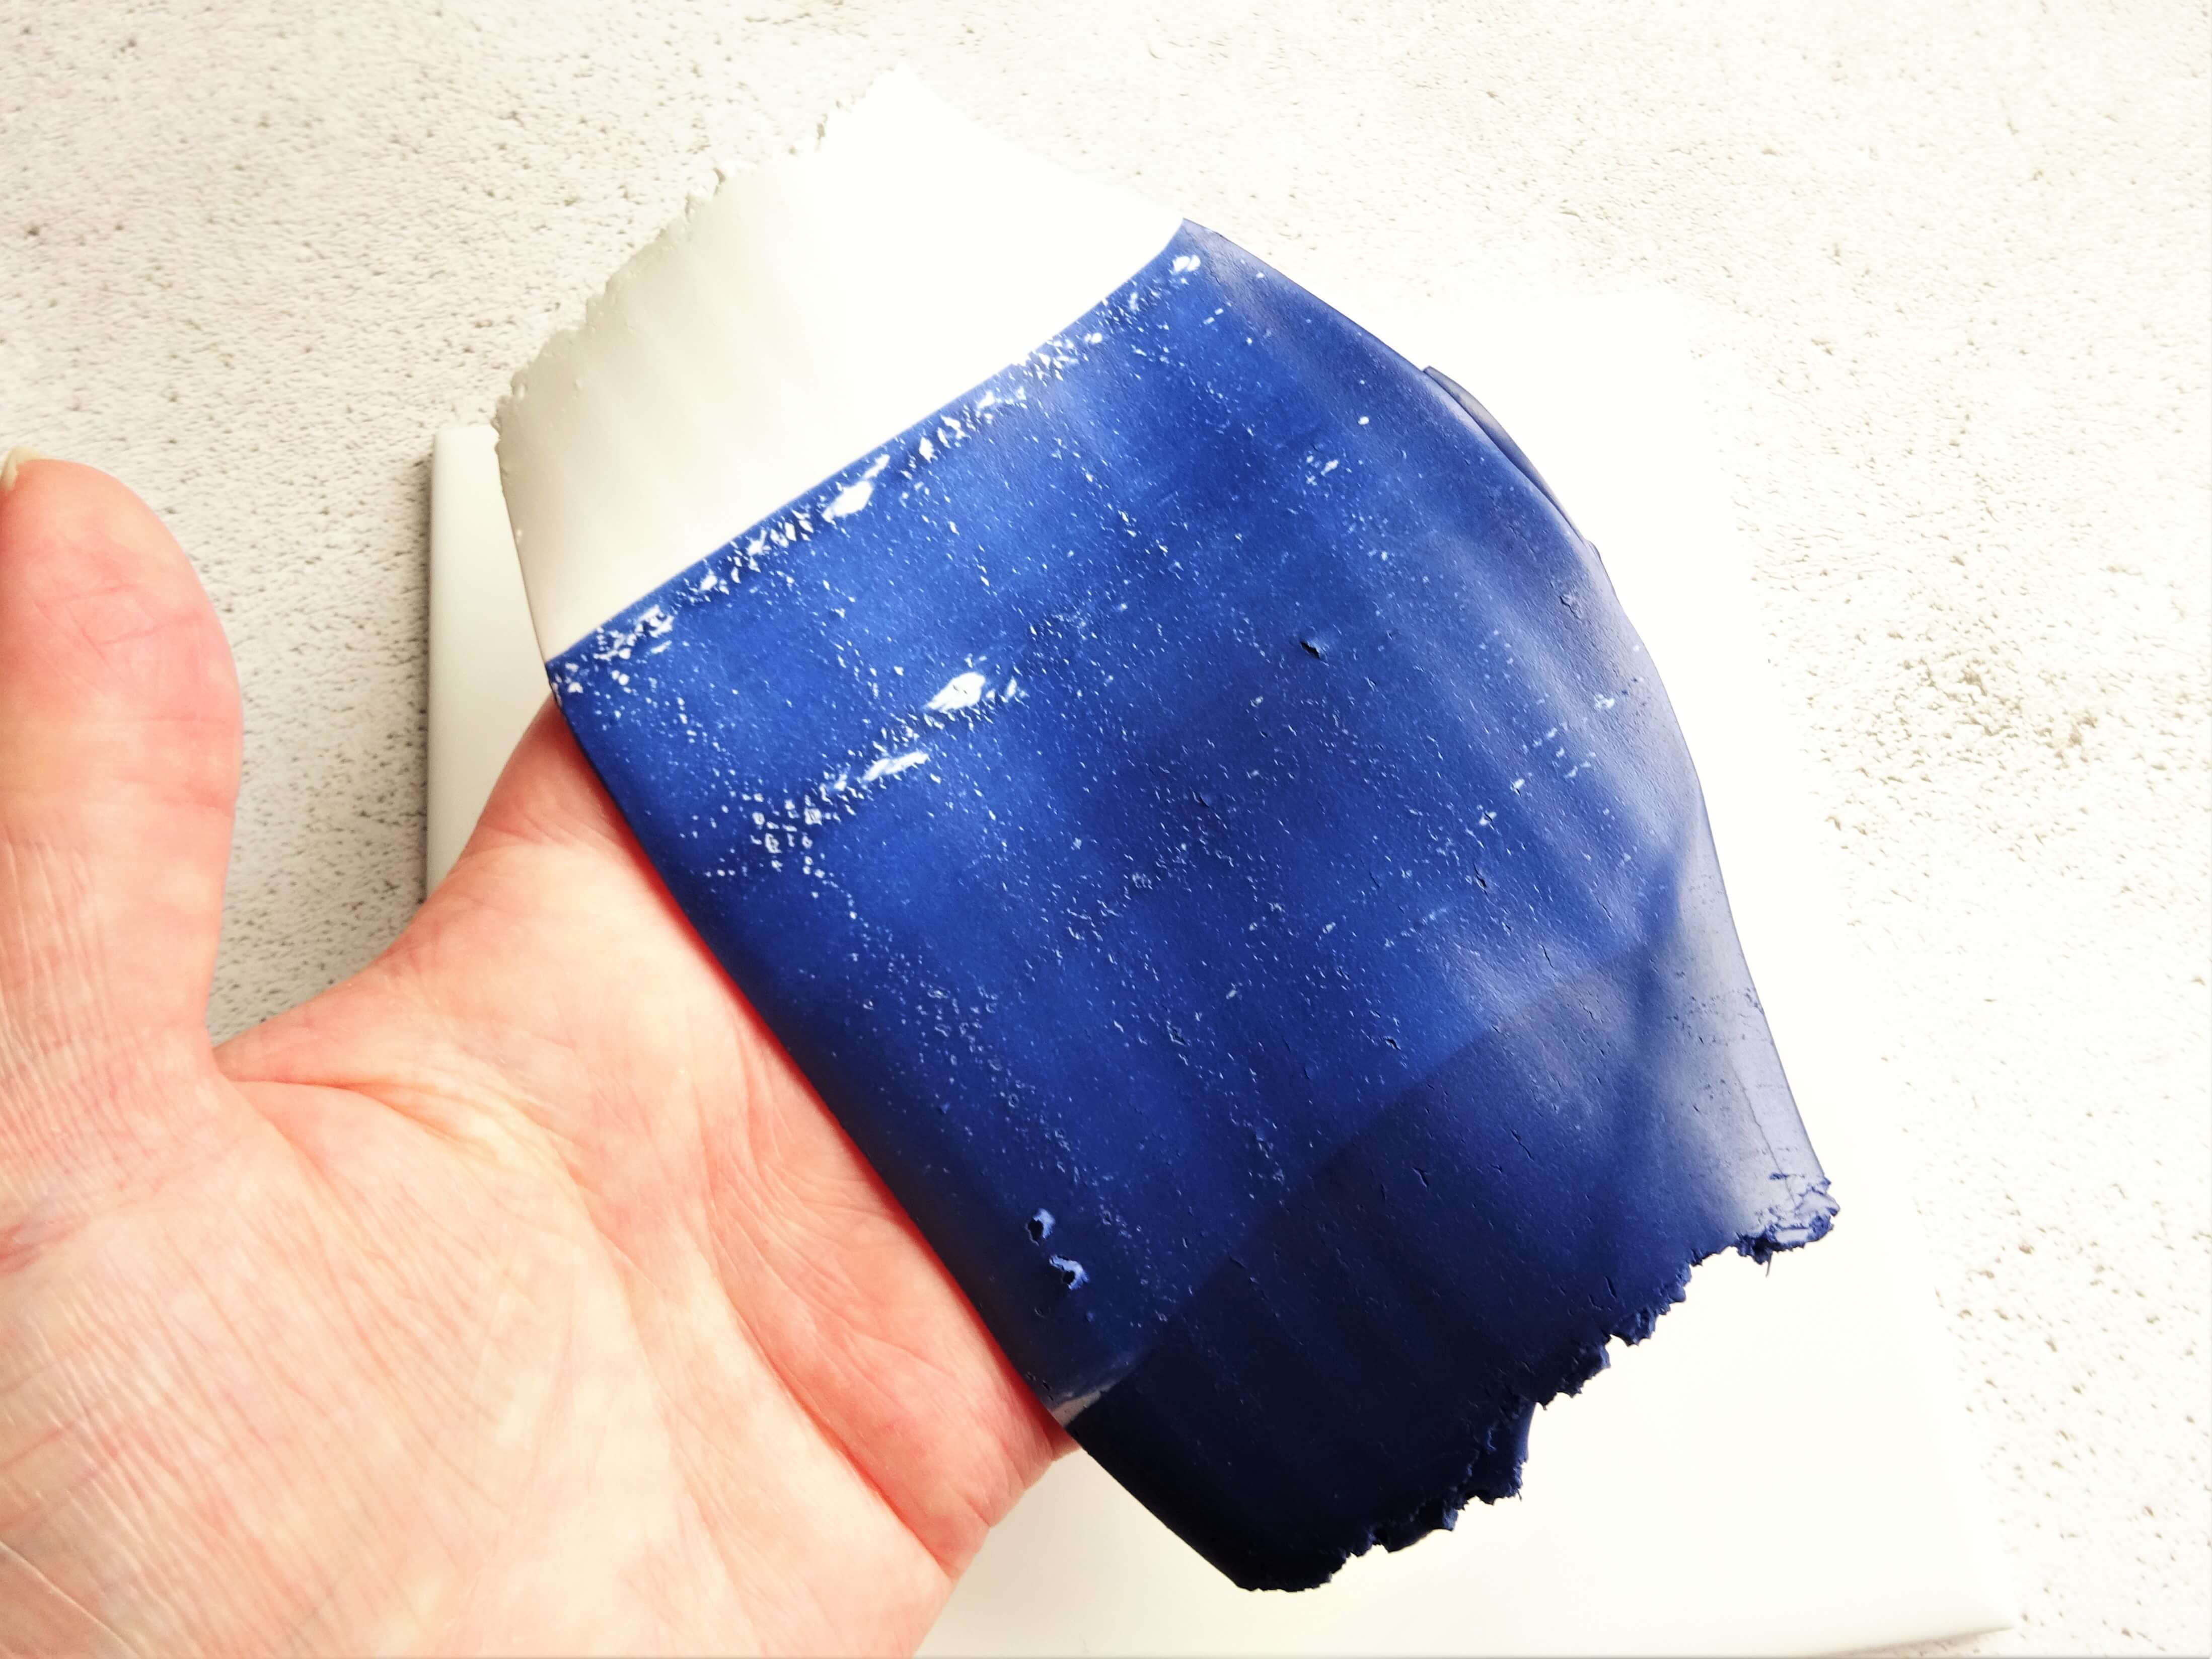
Photo 5a shows how the clay looks after the first pass through the clay machine. Continue folding the clay by matching the corner colours as best as possible (it’s impossible to make this absolutely perfect) and passing through the clay machine on the thickest setting.
Photo 5b shows the clay after folding and passing through the pasta machine several times. There is a clear band where the white is starting to mix with the blue. At this point take the pasta machine thickness down to the next level – number 2 in my case.
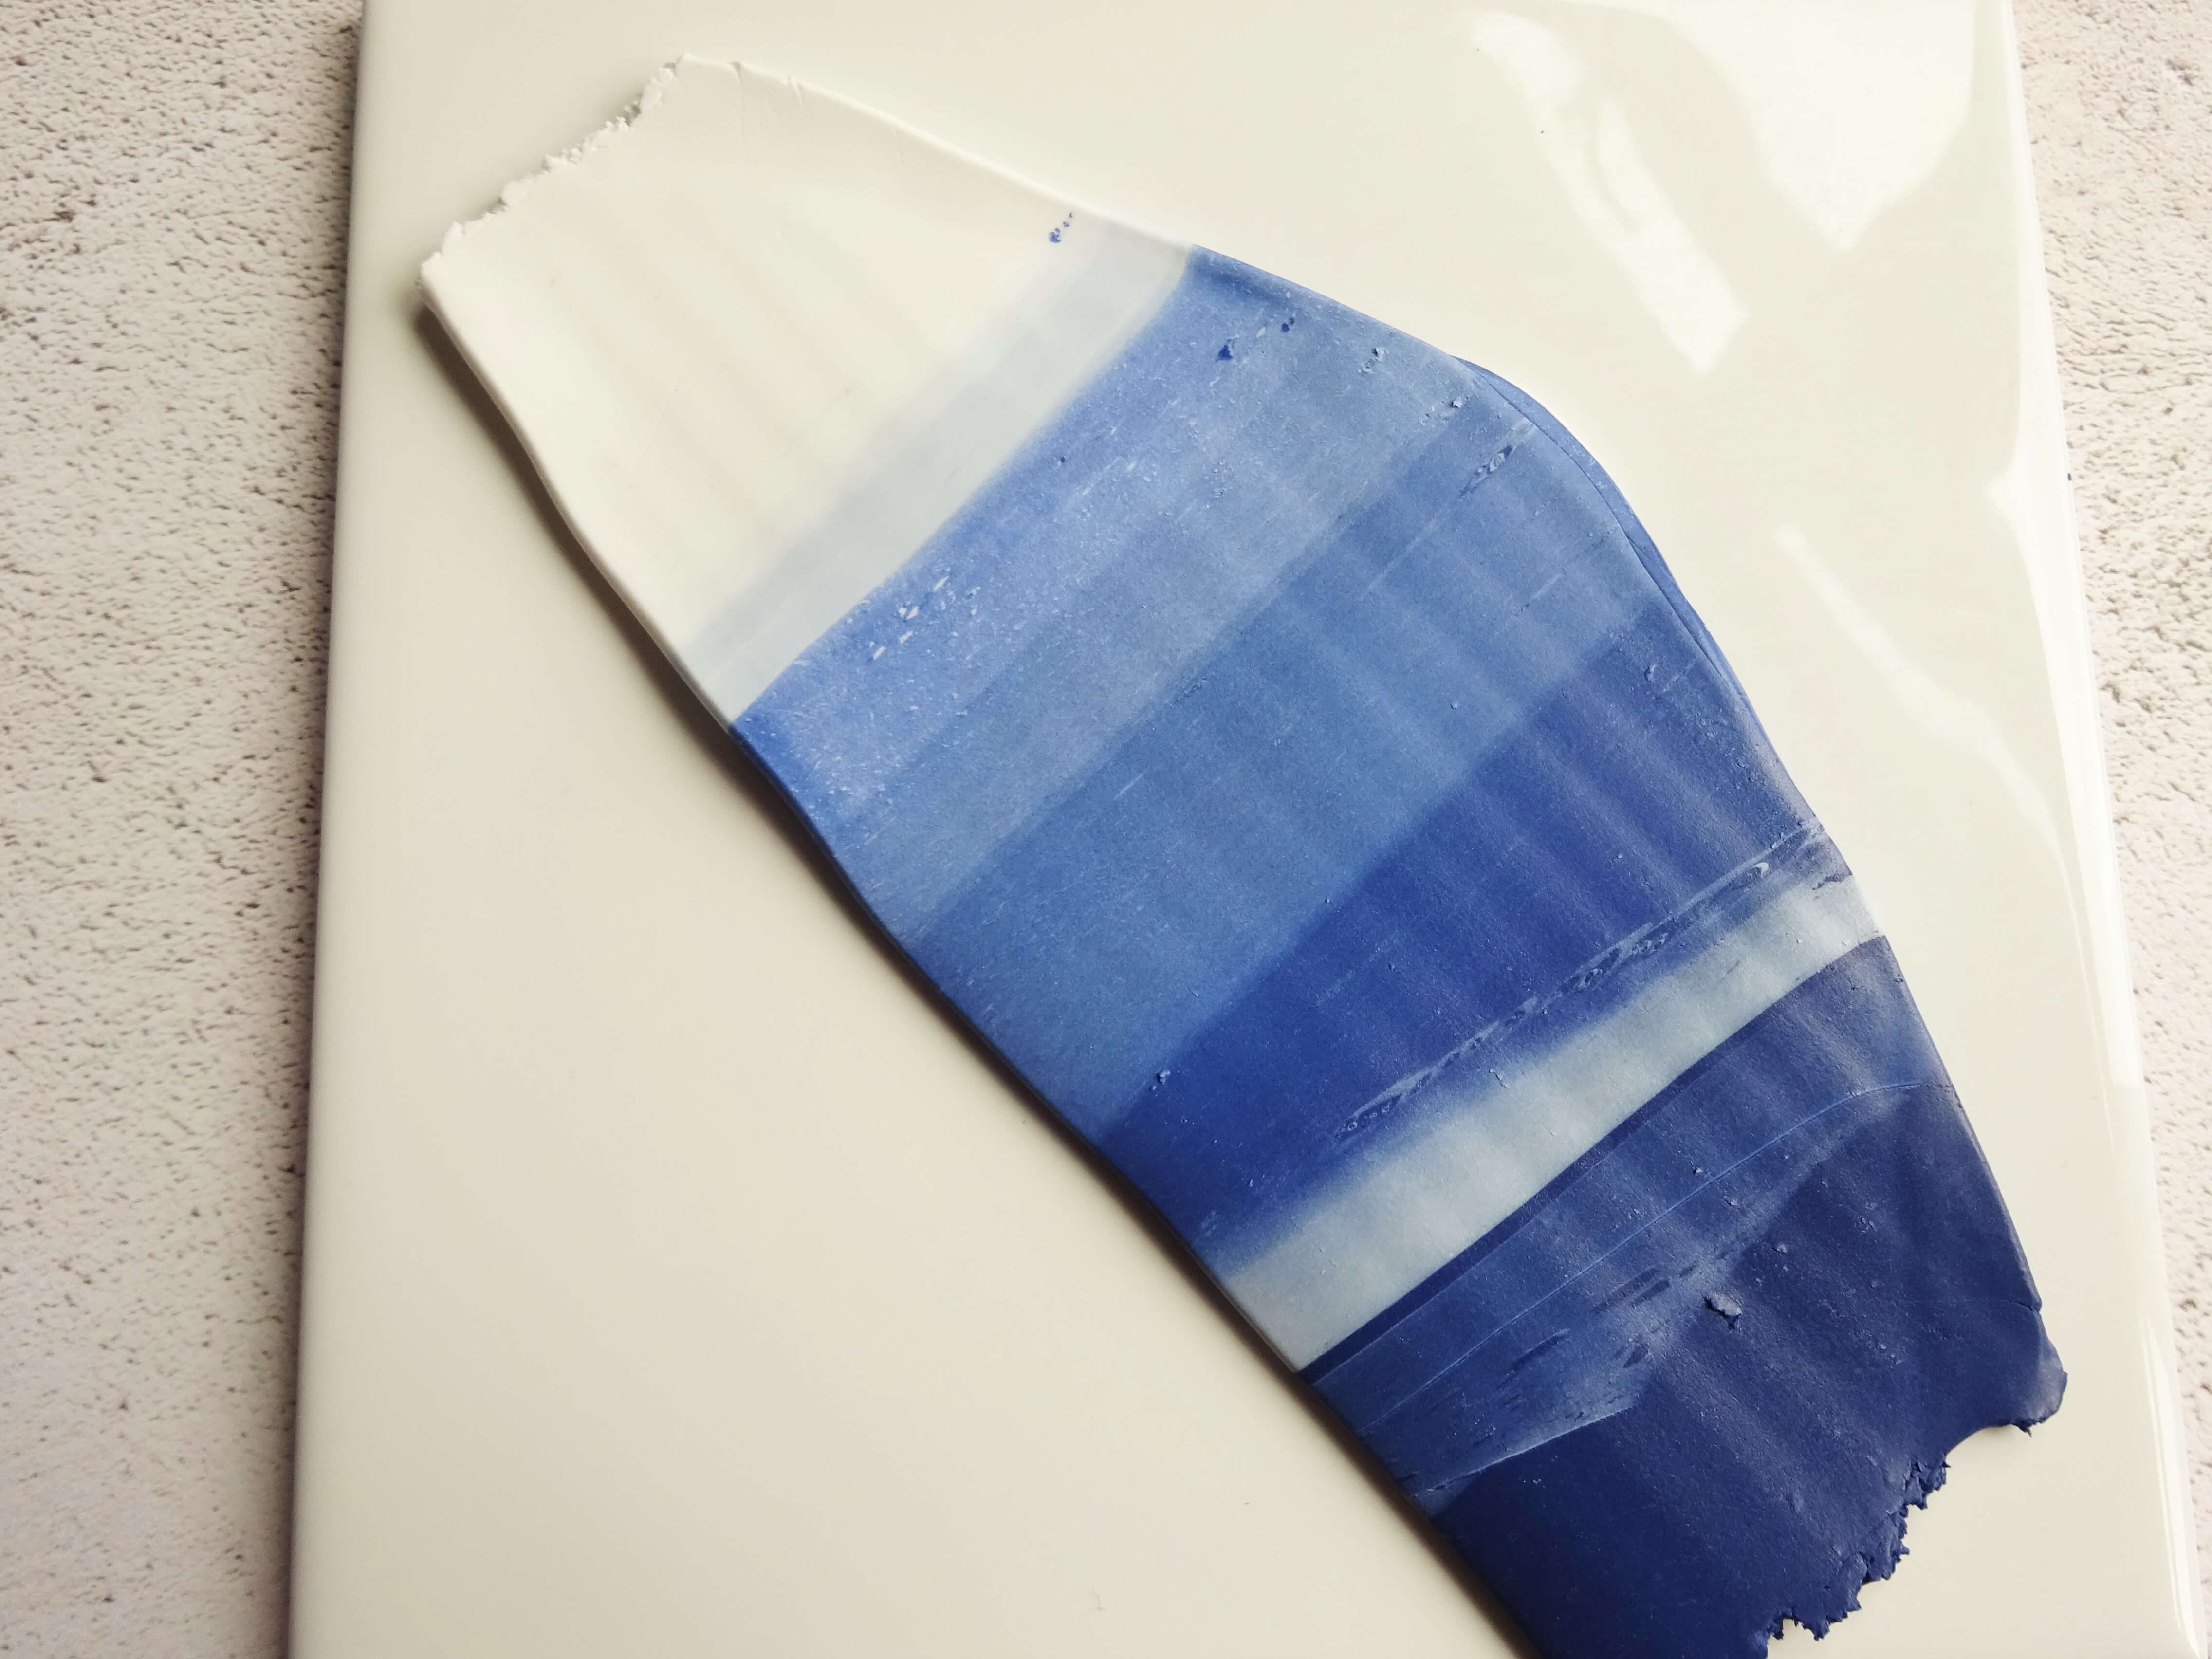
After folding and rolling through the pasta machine several times on a number 2 thickness the colours will start to look a little something like this. There are clear bands on lighter and darker blue with an untouched white like at the top and a dark blue section at the bottom.
Once you reach this point take the clay machine down another level to number 3.
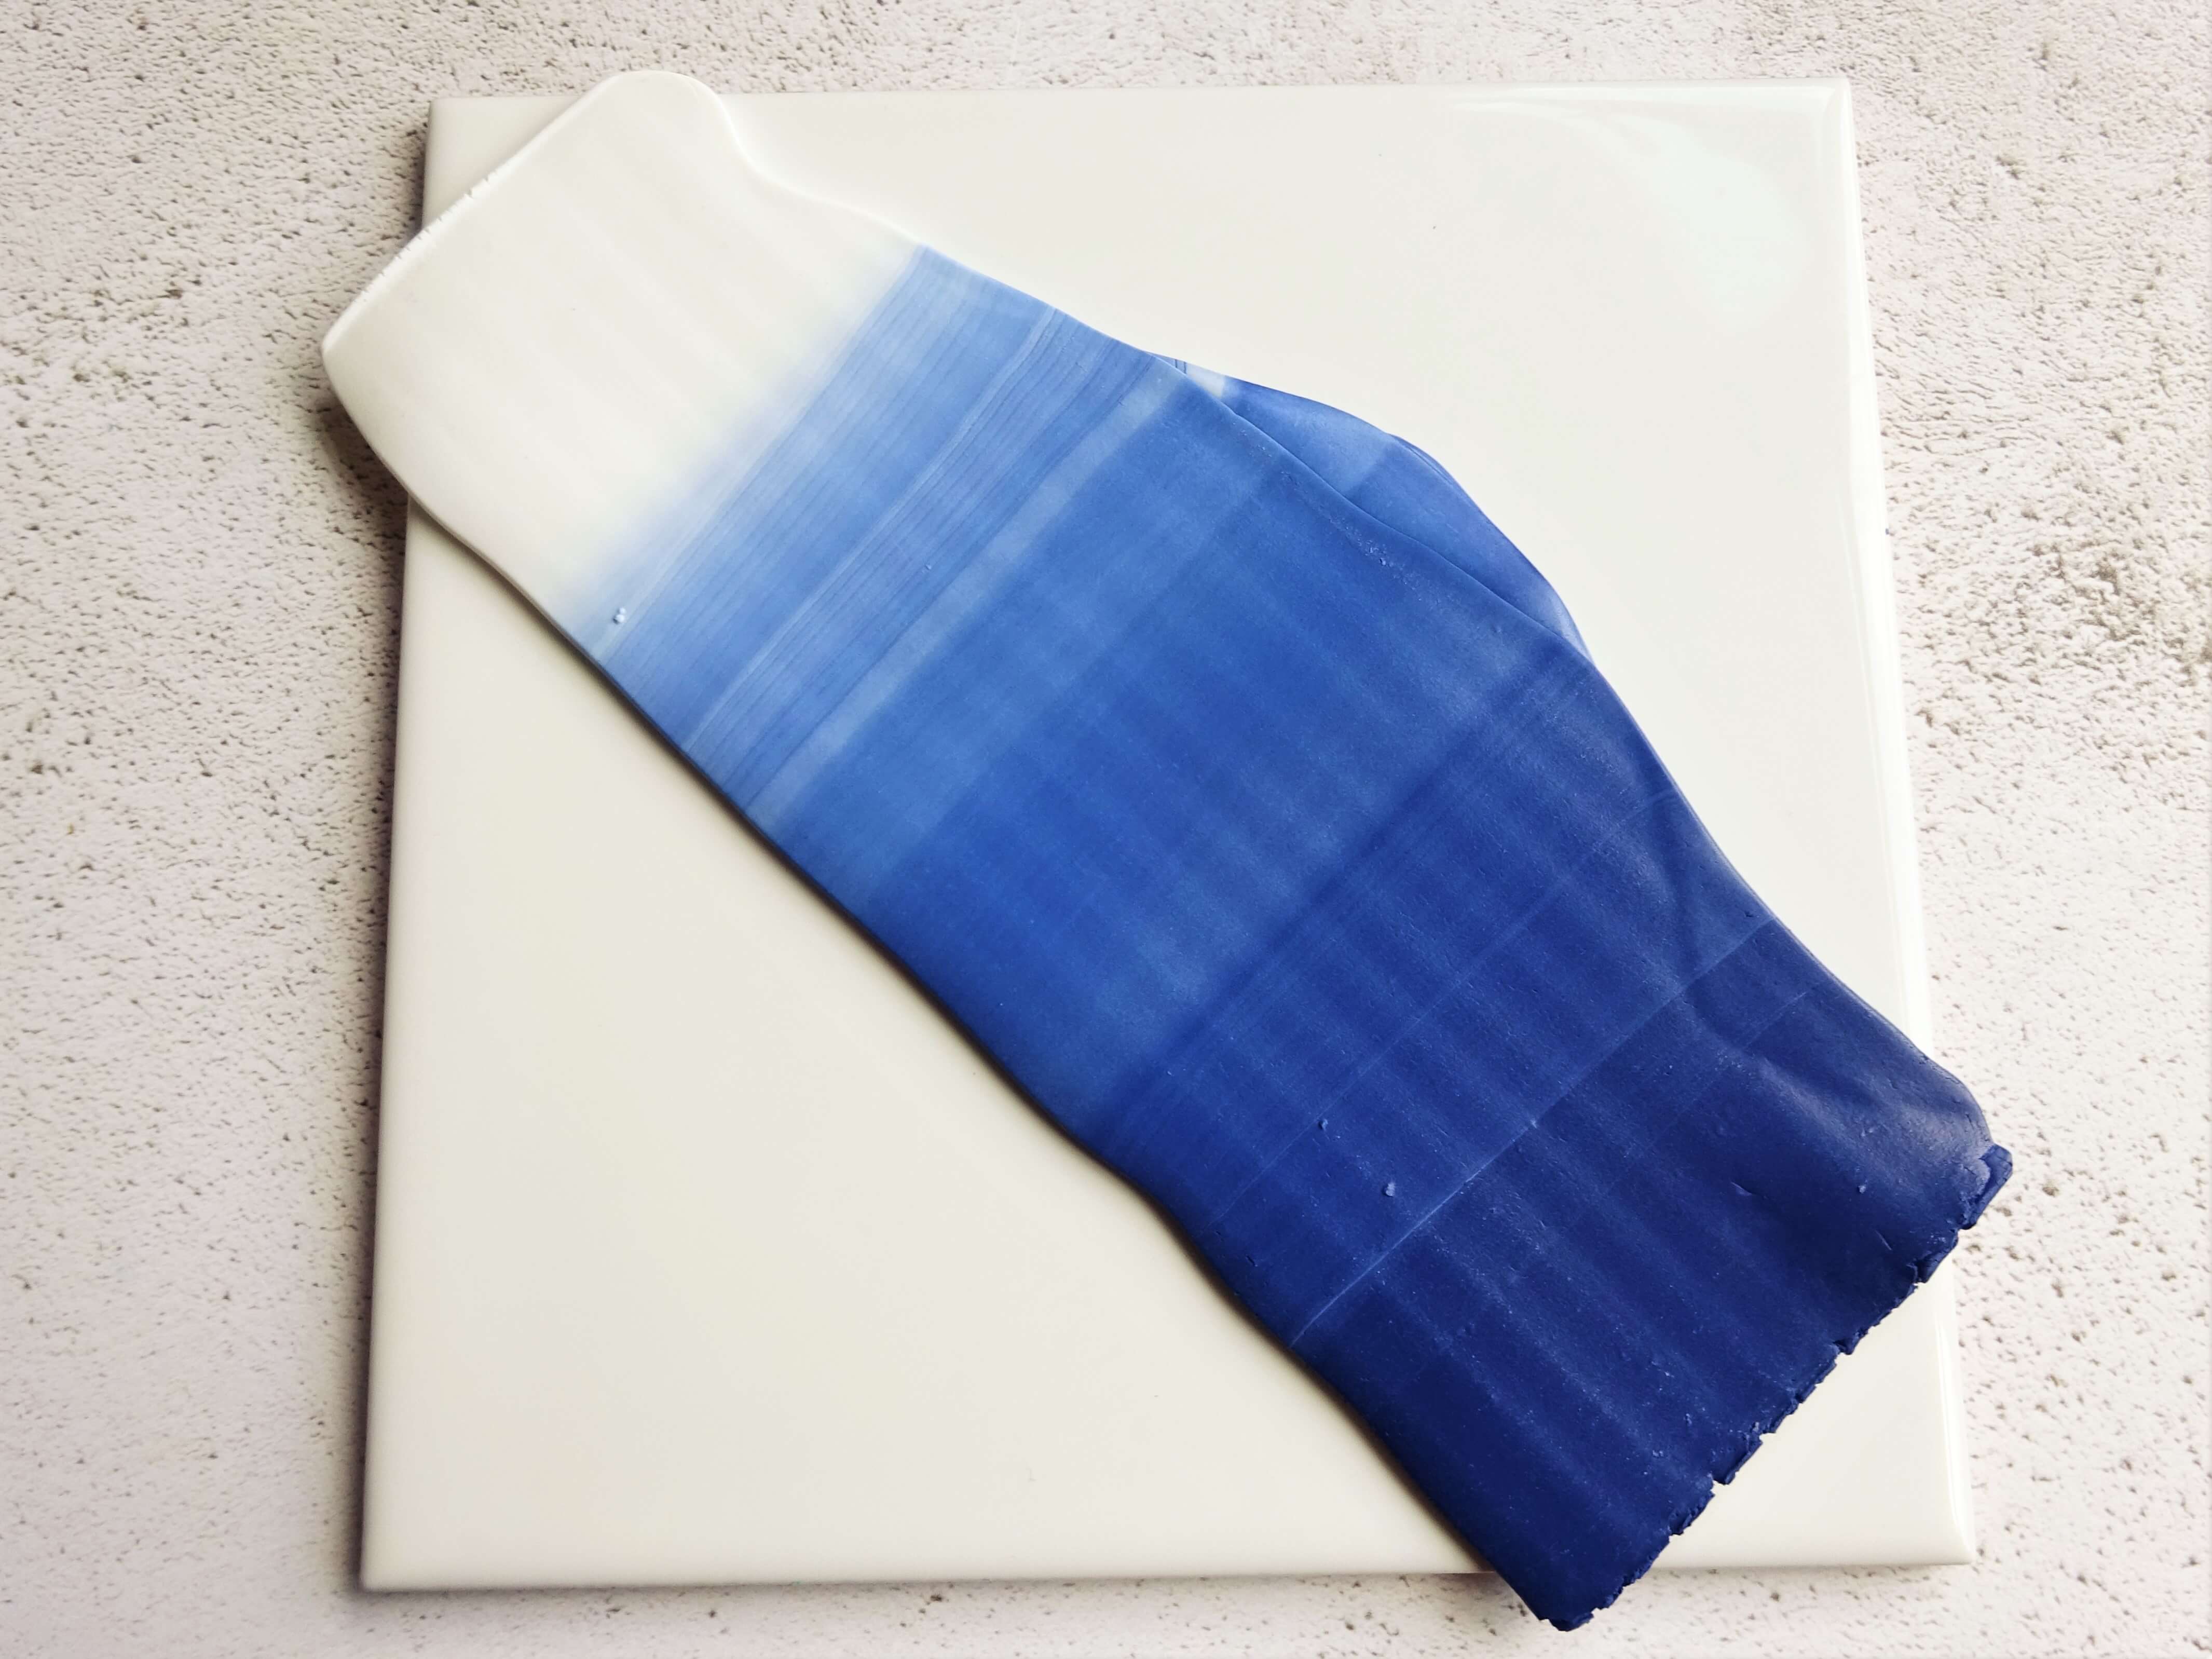
Photo 7 is roughly what your skinner blend will look like after folding and passing through your clay machine on the 3rd thickest setting several times. If you find your clay getting too long for your machine you can fold over the very top and bottom of you clay and reducing the length. If you do this though be careful not to fold so far that you loose the un blended colour at the top and bottom.
Continue this step until there is a reasonably smooth gradient although this will be folded up so if it’s not a perfectly smooth gradient it doesn’t matter.
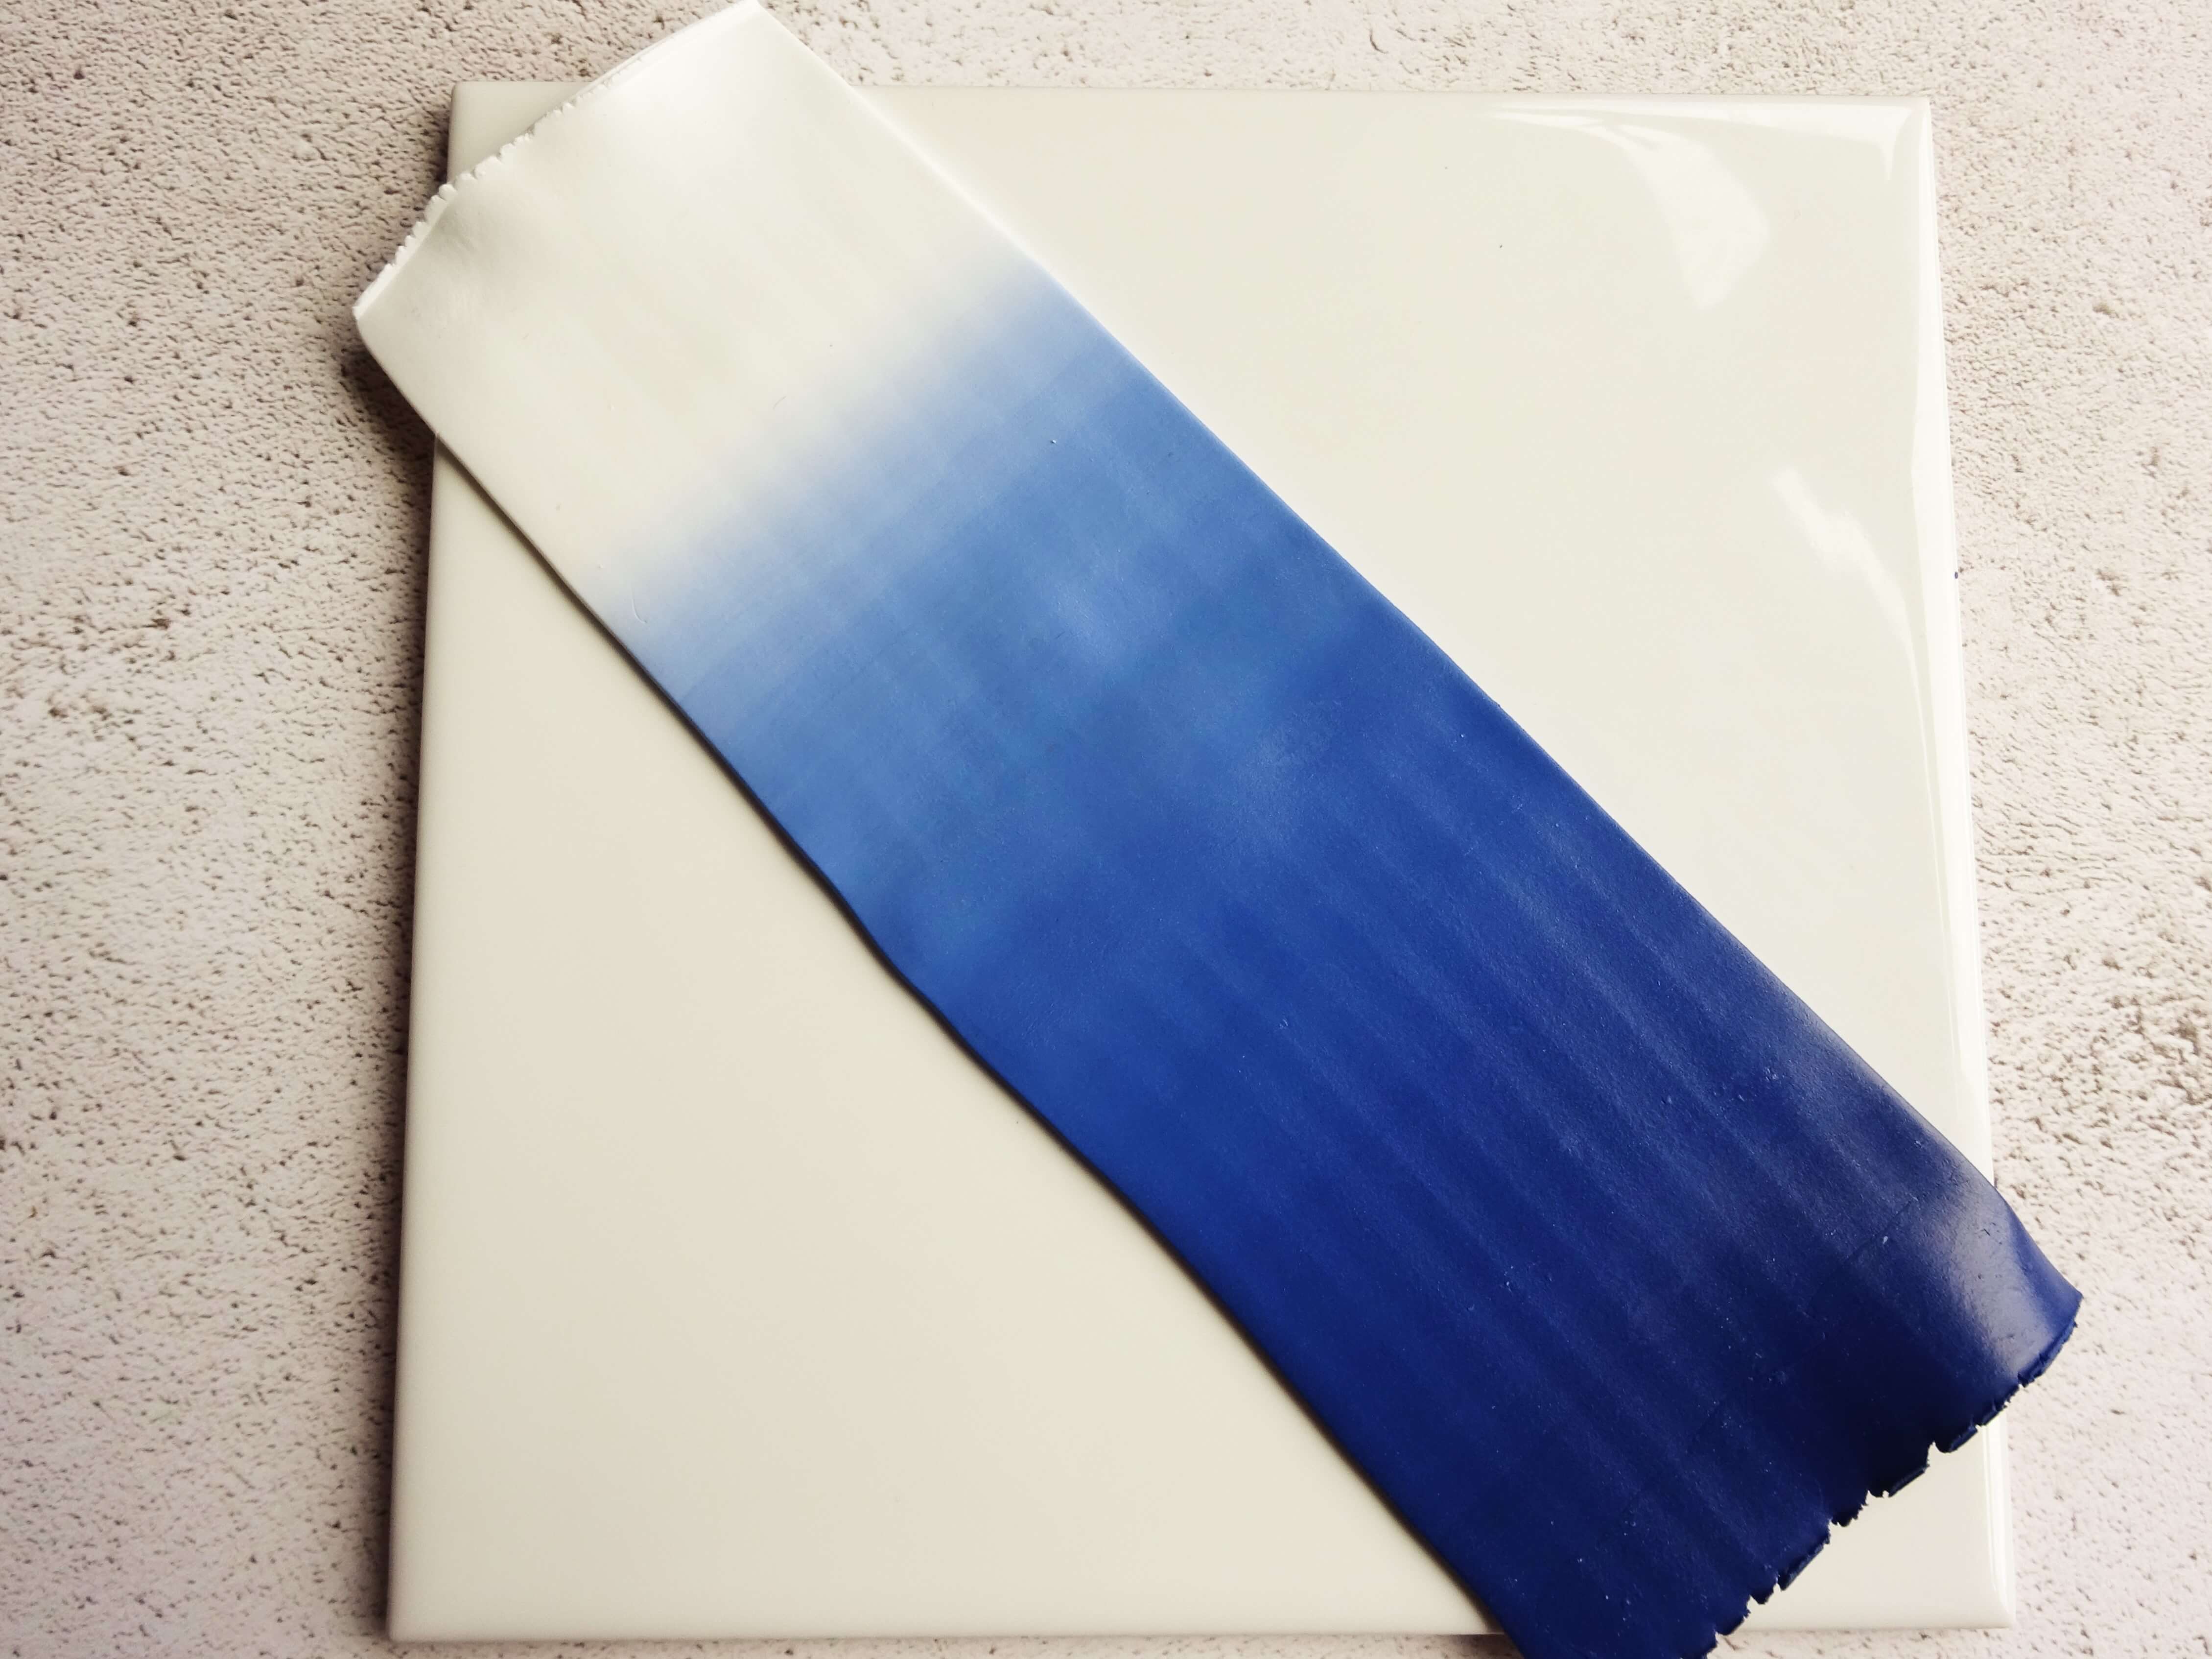
Once a sufficient gradient has been reached take your clay machine down to a number 4 and pass the clay through white edge first. Don’t fold it at this point, just pass in through the machine. This will begin to stretch out the length of the clay.
Take the clay machine down to a number 5 setting and pass the clay through the machine white side first, again without folding. Be careful to support the clay on this final pass through the machine as it is very thin and may stick to your machine and tear your lovely skinner blend.

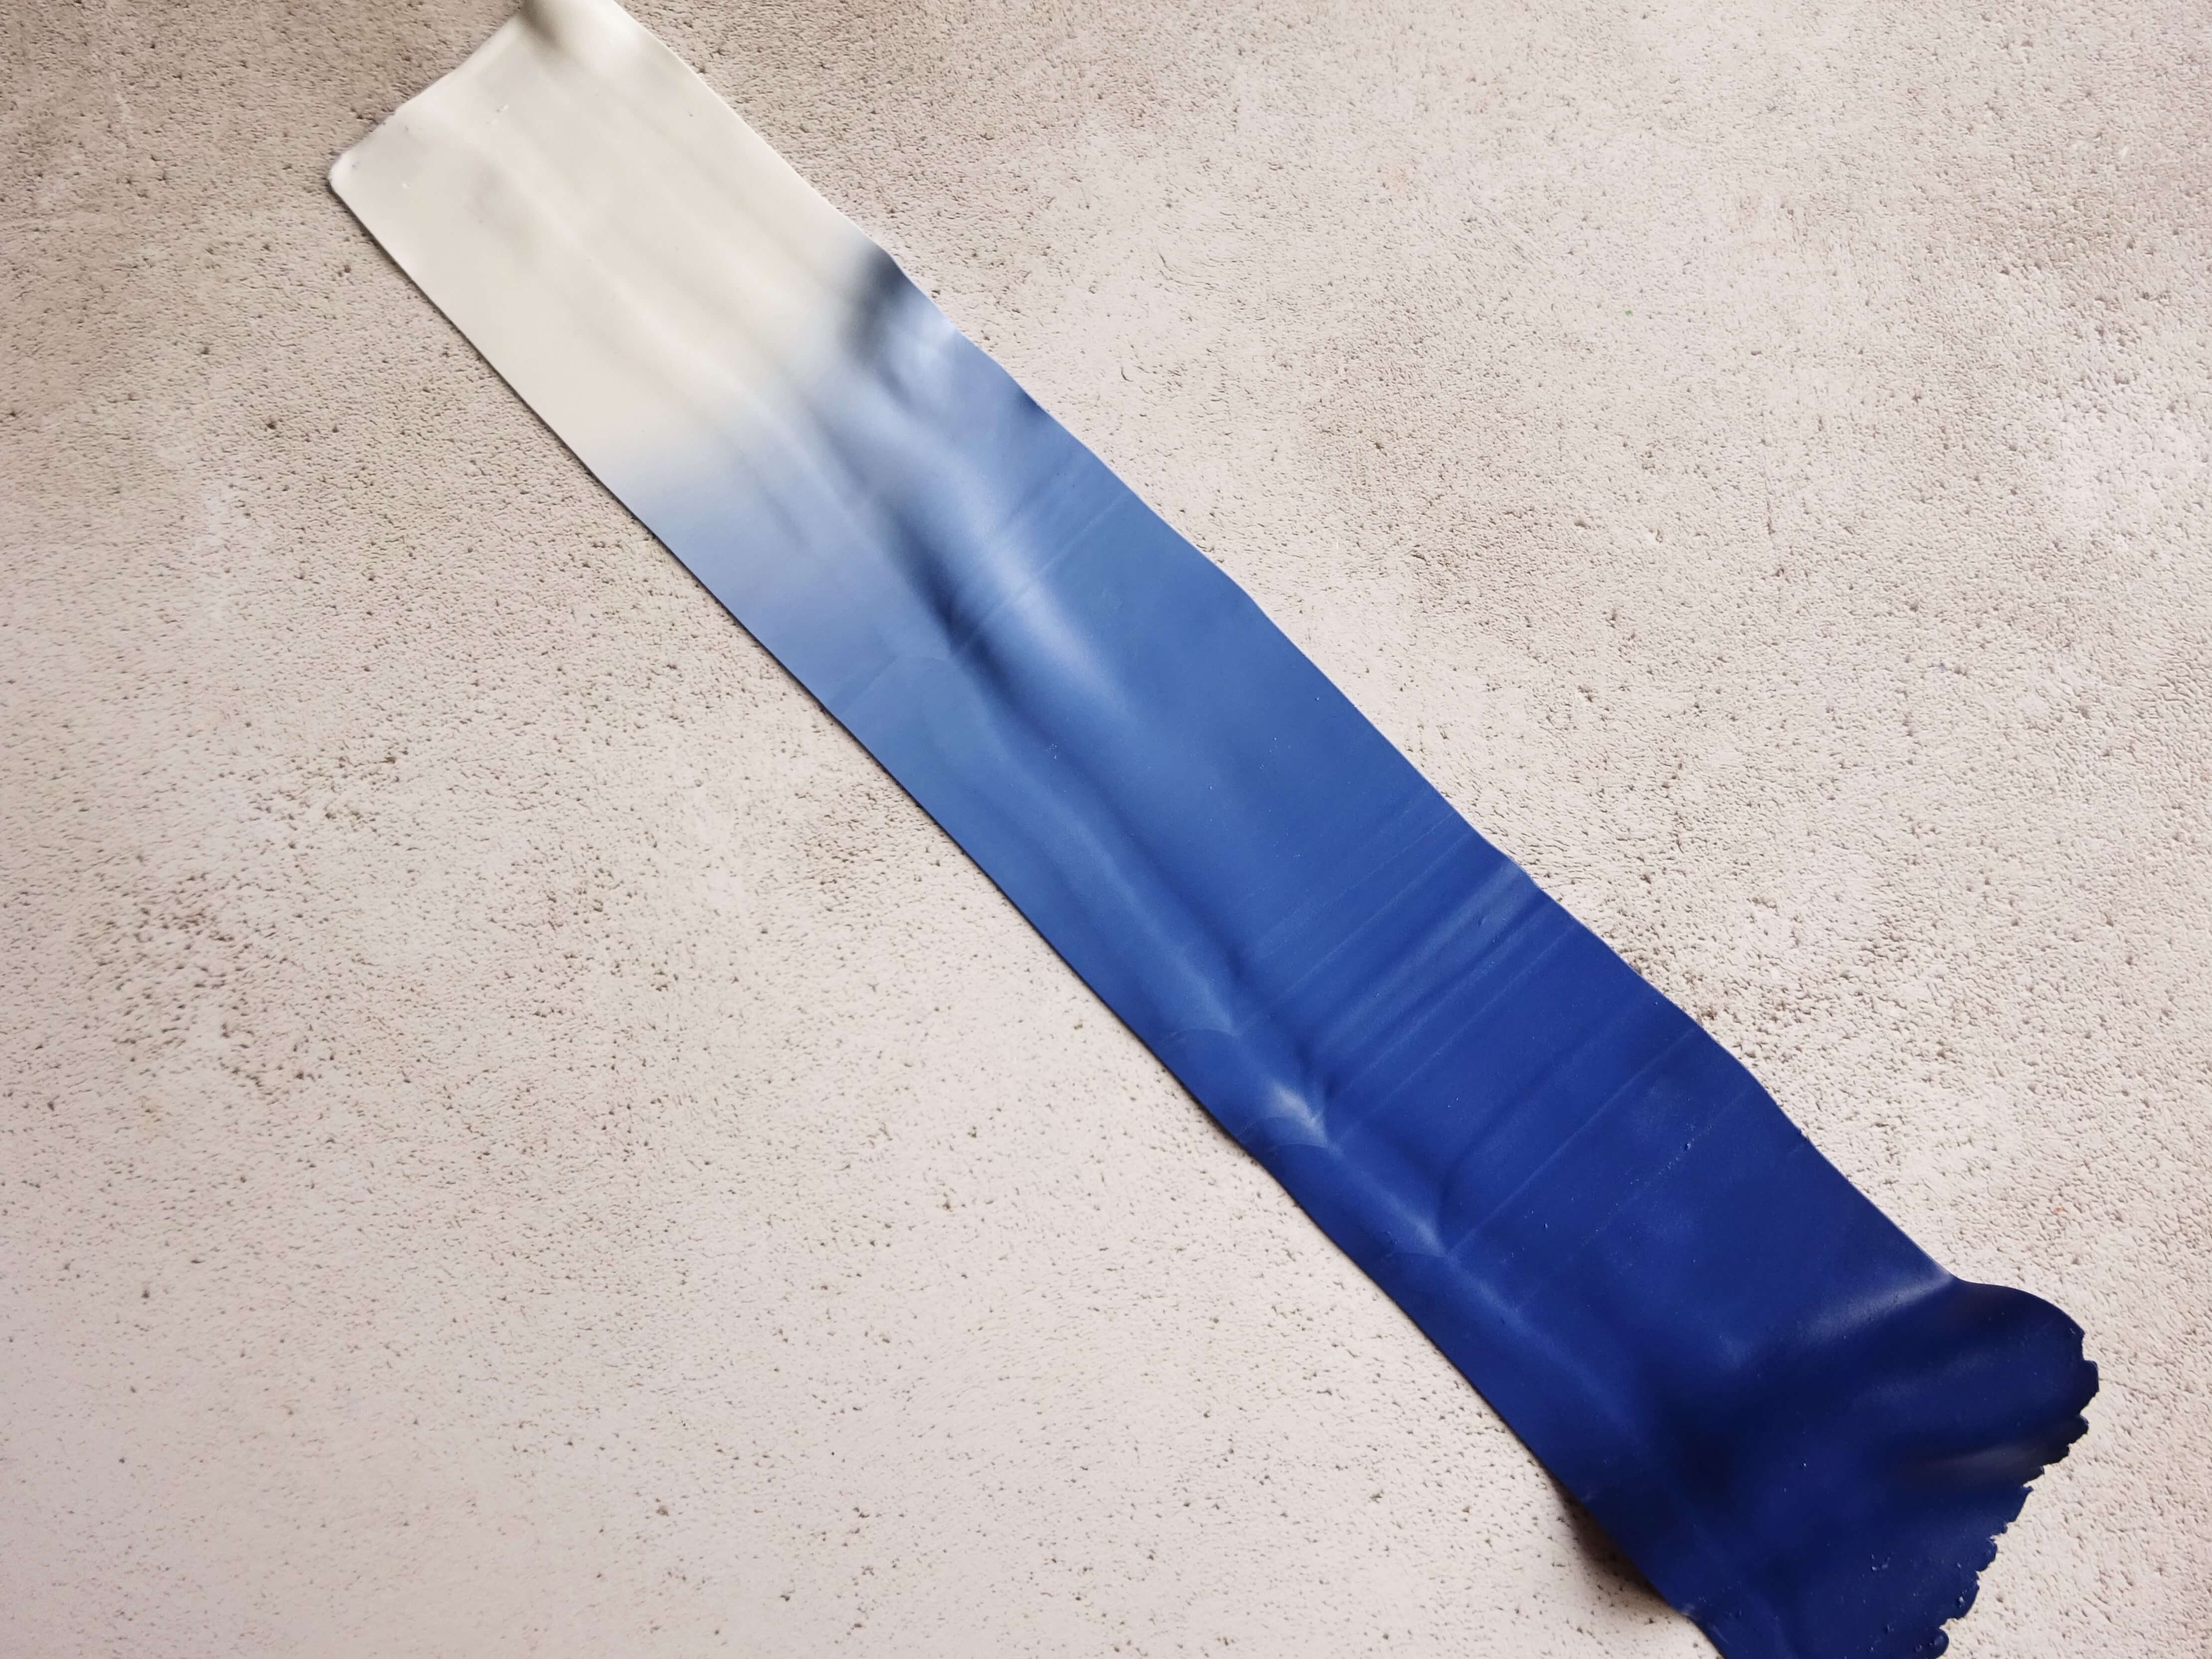
Cut a straight edge on the white clay end and press a small section of it onto your work surface. Start to move the clay side to side so the clay begins to concertina on top of itself.


Continue to concertina the clay until all the clay is used. Make sure to press down along the length of the clay as you fold the layers so remove the trapped air.
Cut off any excess clay an the ends as we need the white side to be all white and the top dark blue to be all dark blue.

Now you need to soften the corners on the stack of clay. Gently press and squeeze the clay ensuring that the colours stay distinct as you really need that white end to stay in place. The clay will eventually get into a place where is can be rolled.

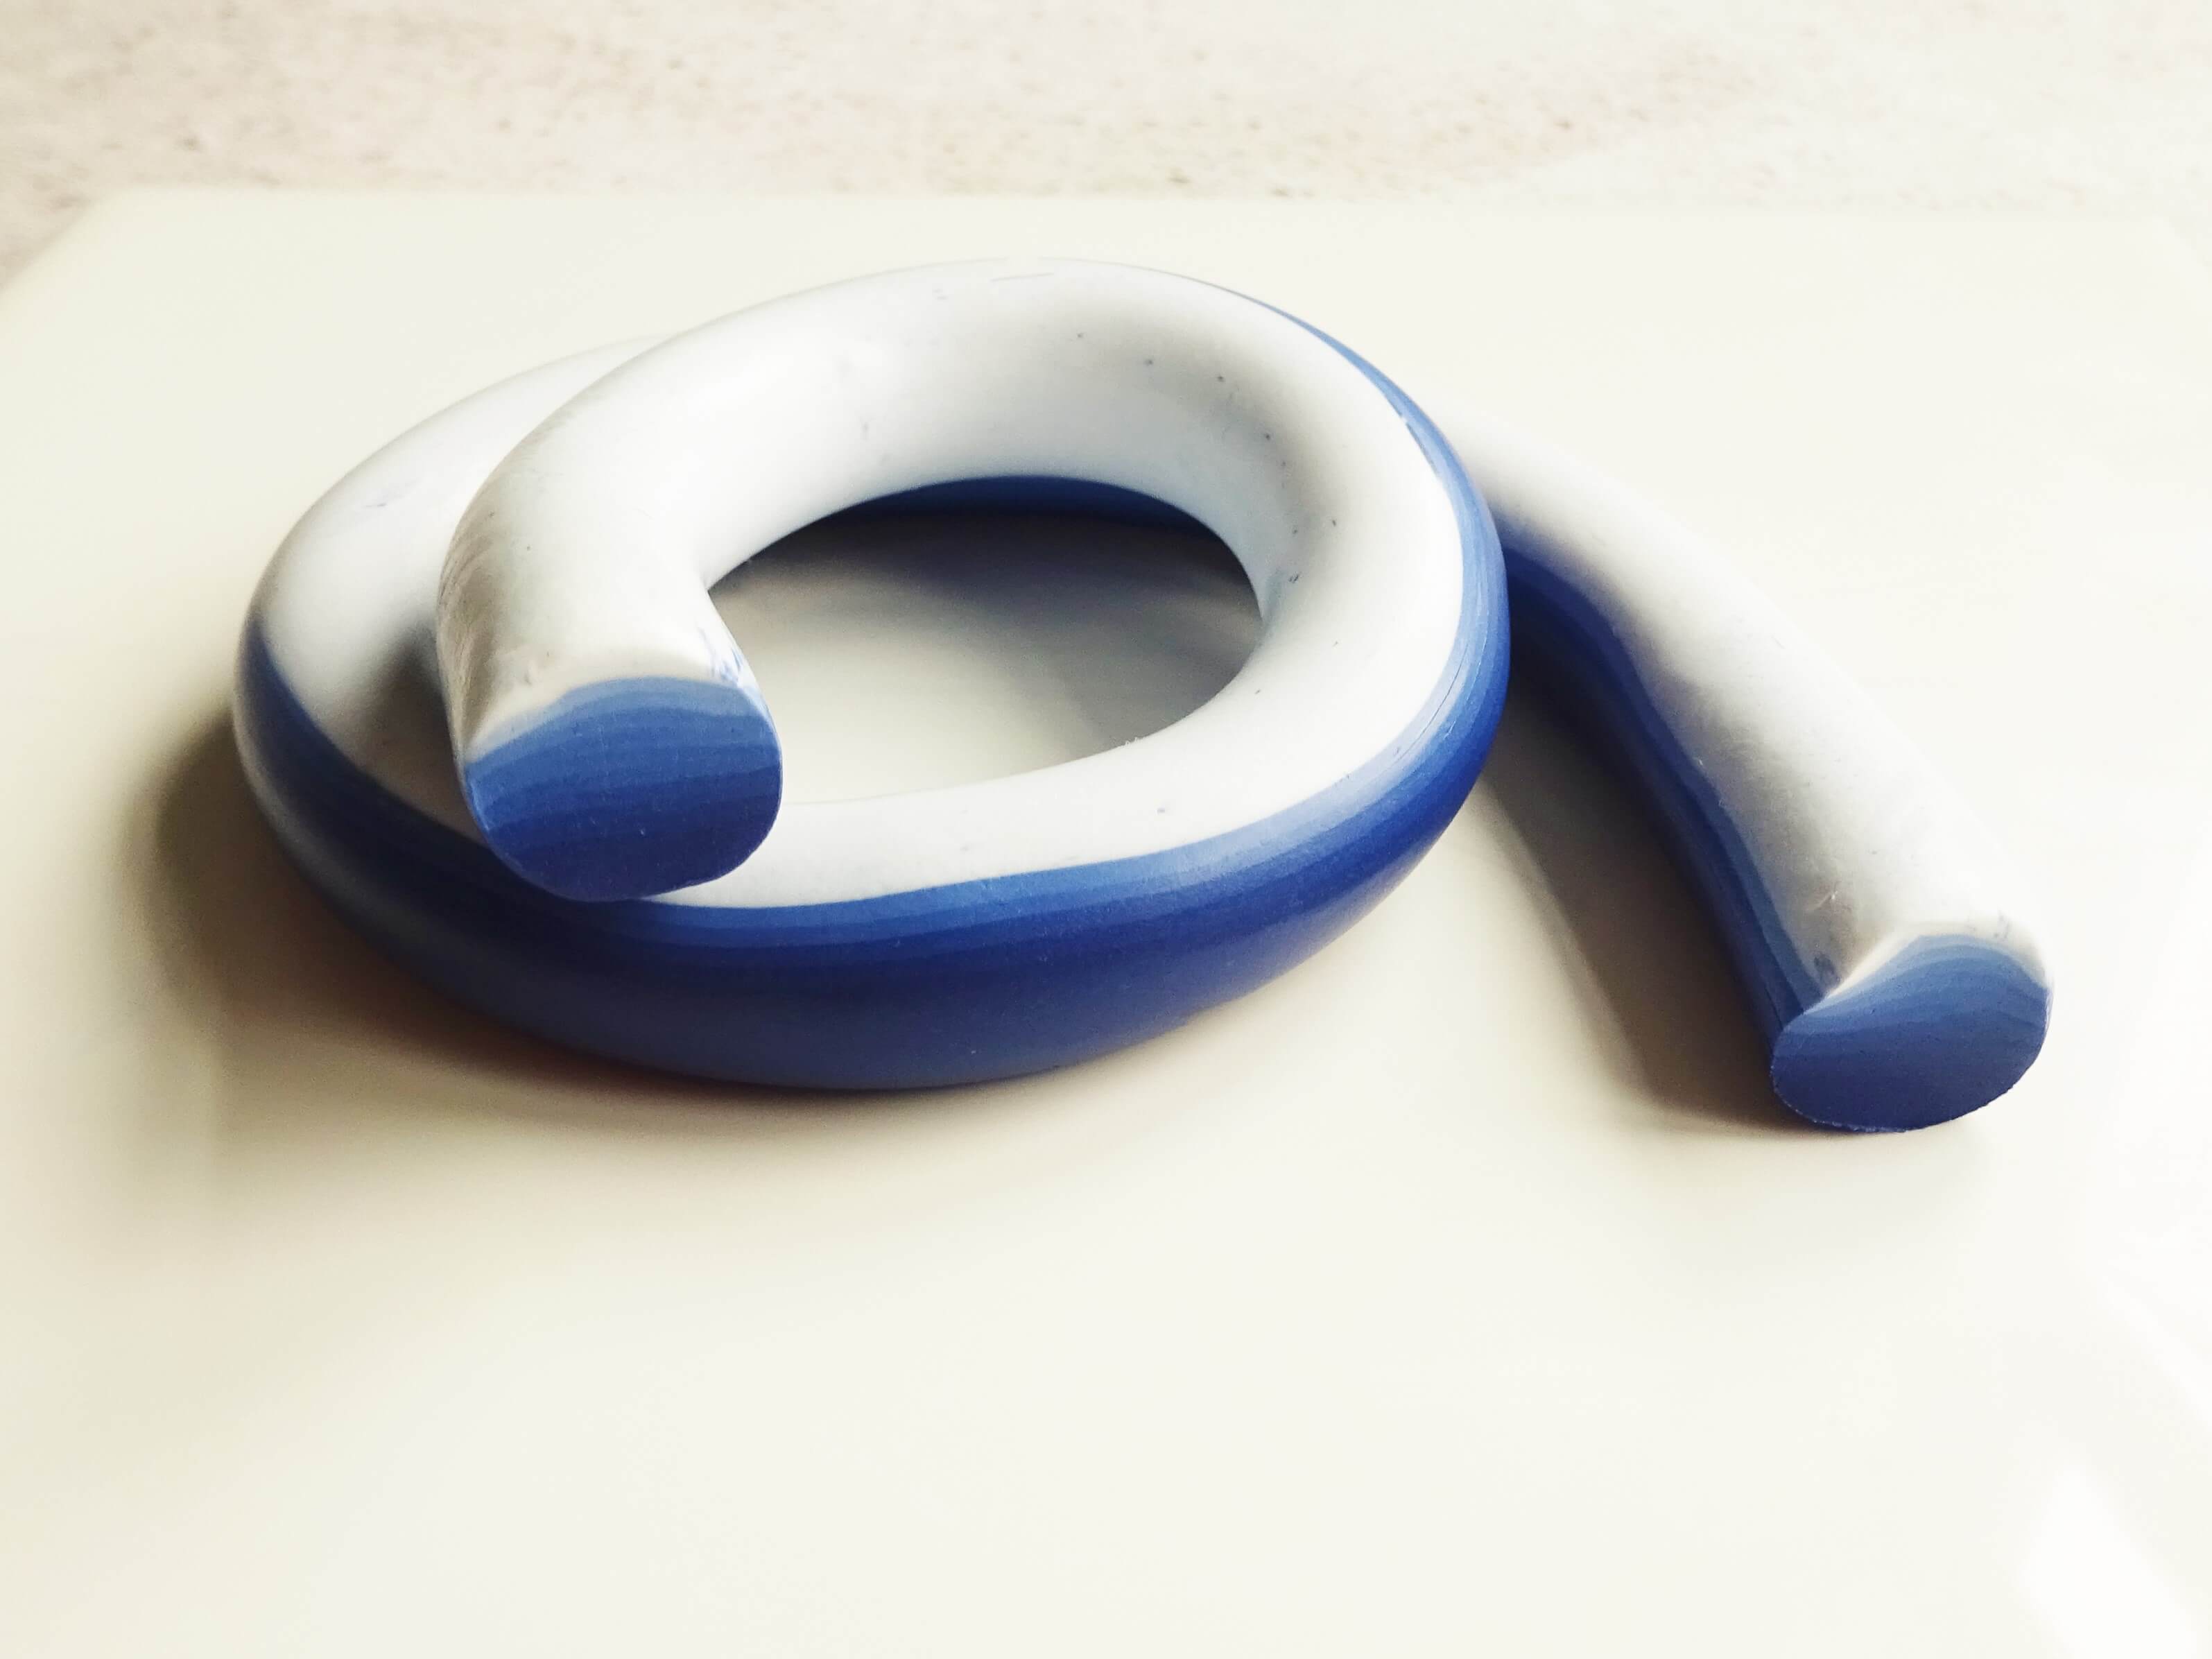
Once the clay can be rolled, gently reduce the cane. You need to keep the lines of colour from distorting so if they look as though they are twisting, twist them back into position and then continue to reduce. The cane needs to be 29cm long.
Once the cane is long enough cut just enough off the ends (they will be messy by this point) so that the cane is 28.5cm long (picture 13b). This measurement is necessary for the next few steps to work properly.

We are now going to cut our cane into 7 pieces. All but 2 pieces are going to be different lengths so I have found it useful to lay them out shortest to longest as we are going to work with them in size order.
The sizes are – 2cm, 3cm, 3cm, 4cm, 5cm, 5.5cm, 6cm

Take the smallest piece of clay and roll it so it measures 6cm long.
Using your acrylic roller flatten the clay reasonably thin whilst making sure that the white is on the top and the dark blue against the surface. This piece should measure about 7.5cm long once it has been flattened.

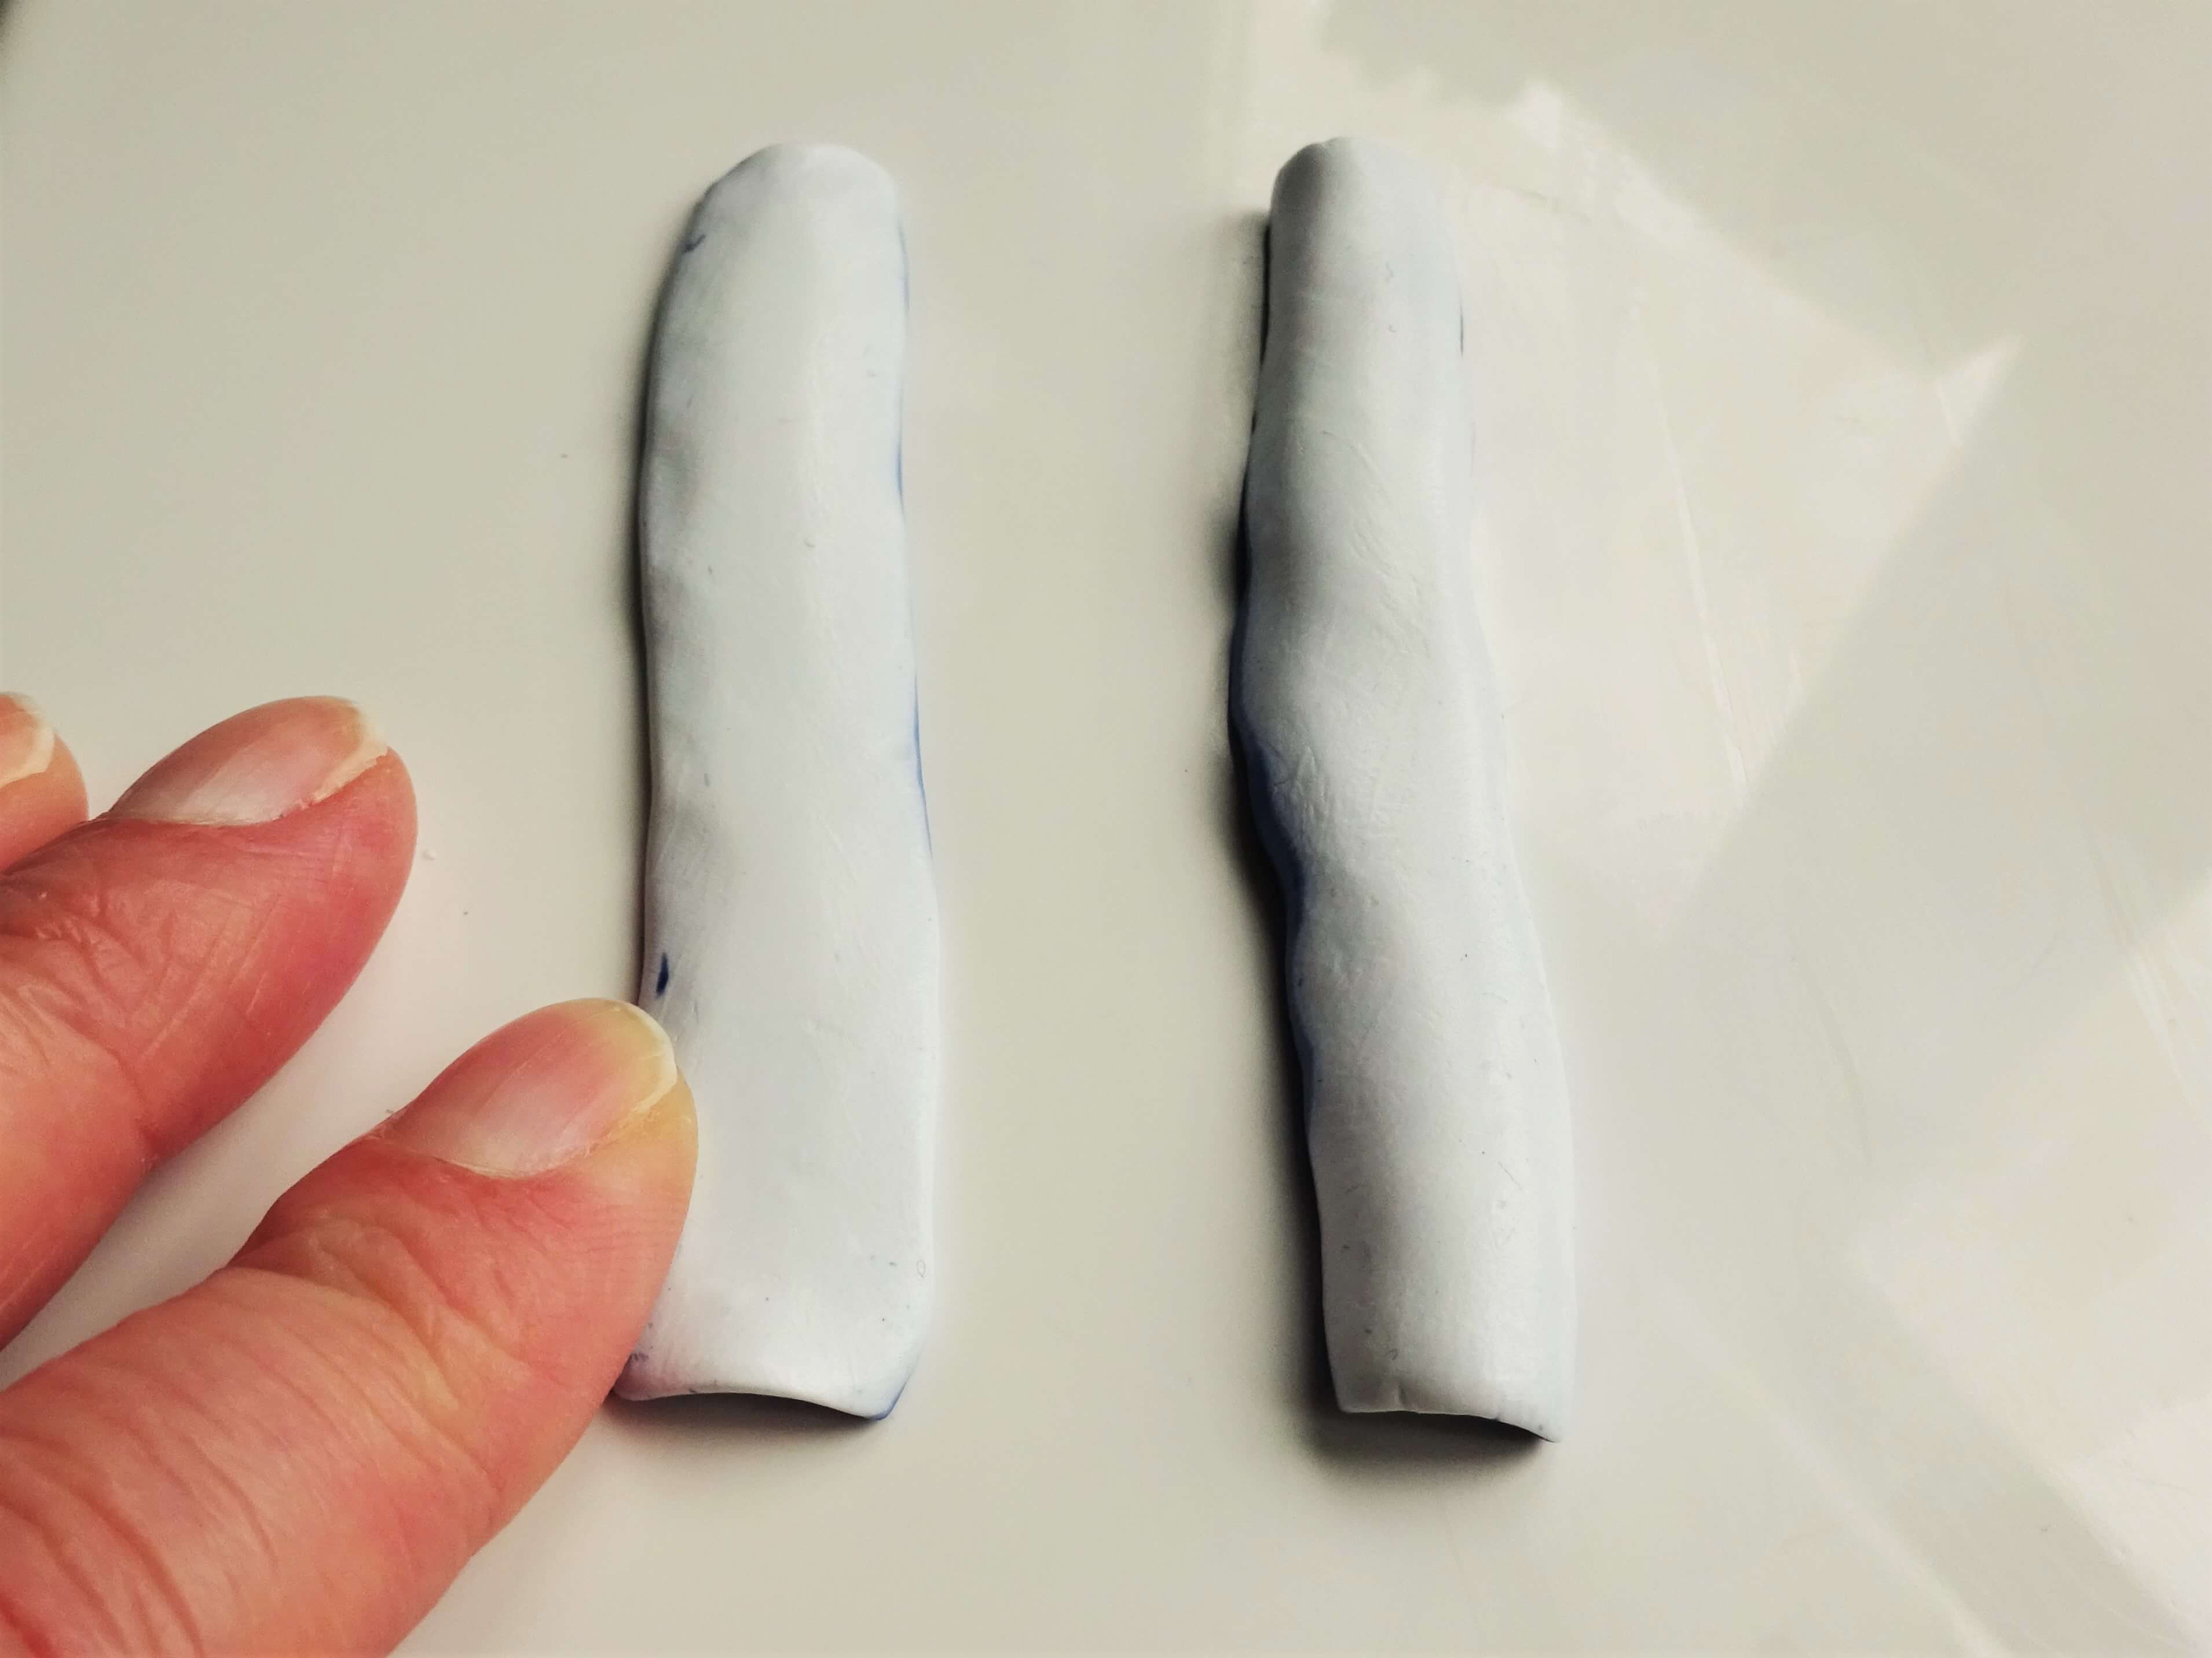
Find the side with the most white on and use your finger to flatten the edge against the surface. The will be the very central swirl of the rose so getting the white in place is essential

Turn the strip of clay over and begin to roll in the flattened white edge as tightly as possible (picture 18a). Continue to roll the rest of the clay so the full width is rolled up (picture 18b). Put this to one side.
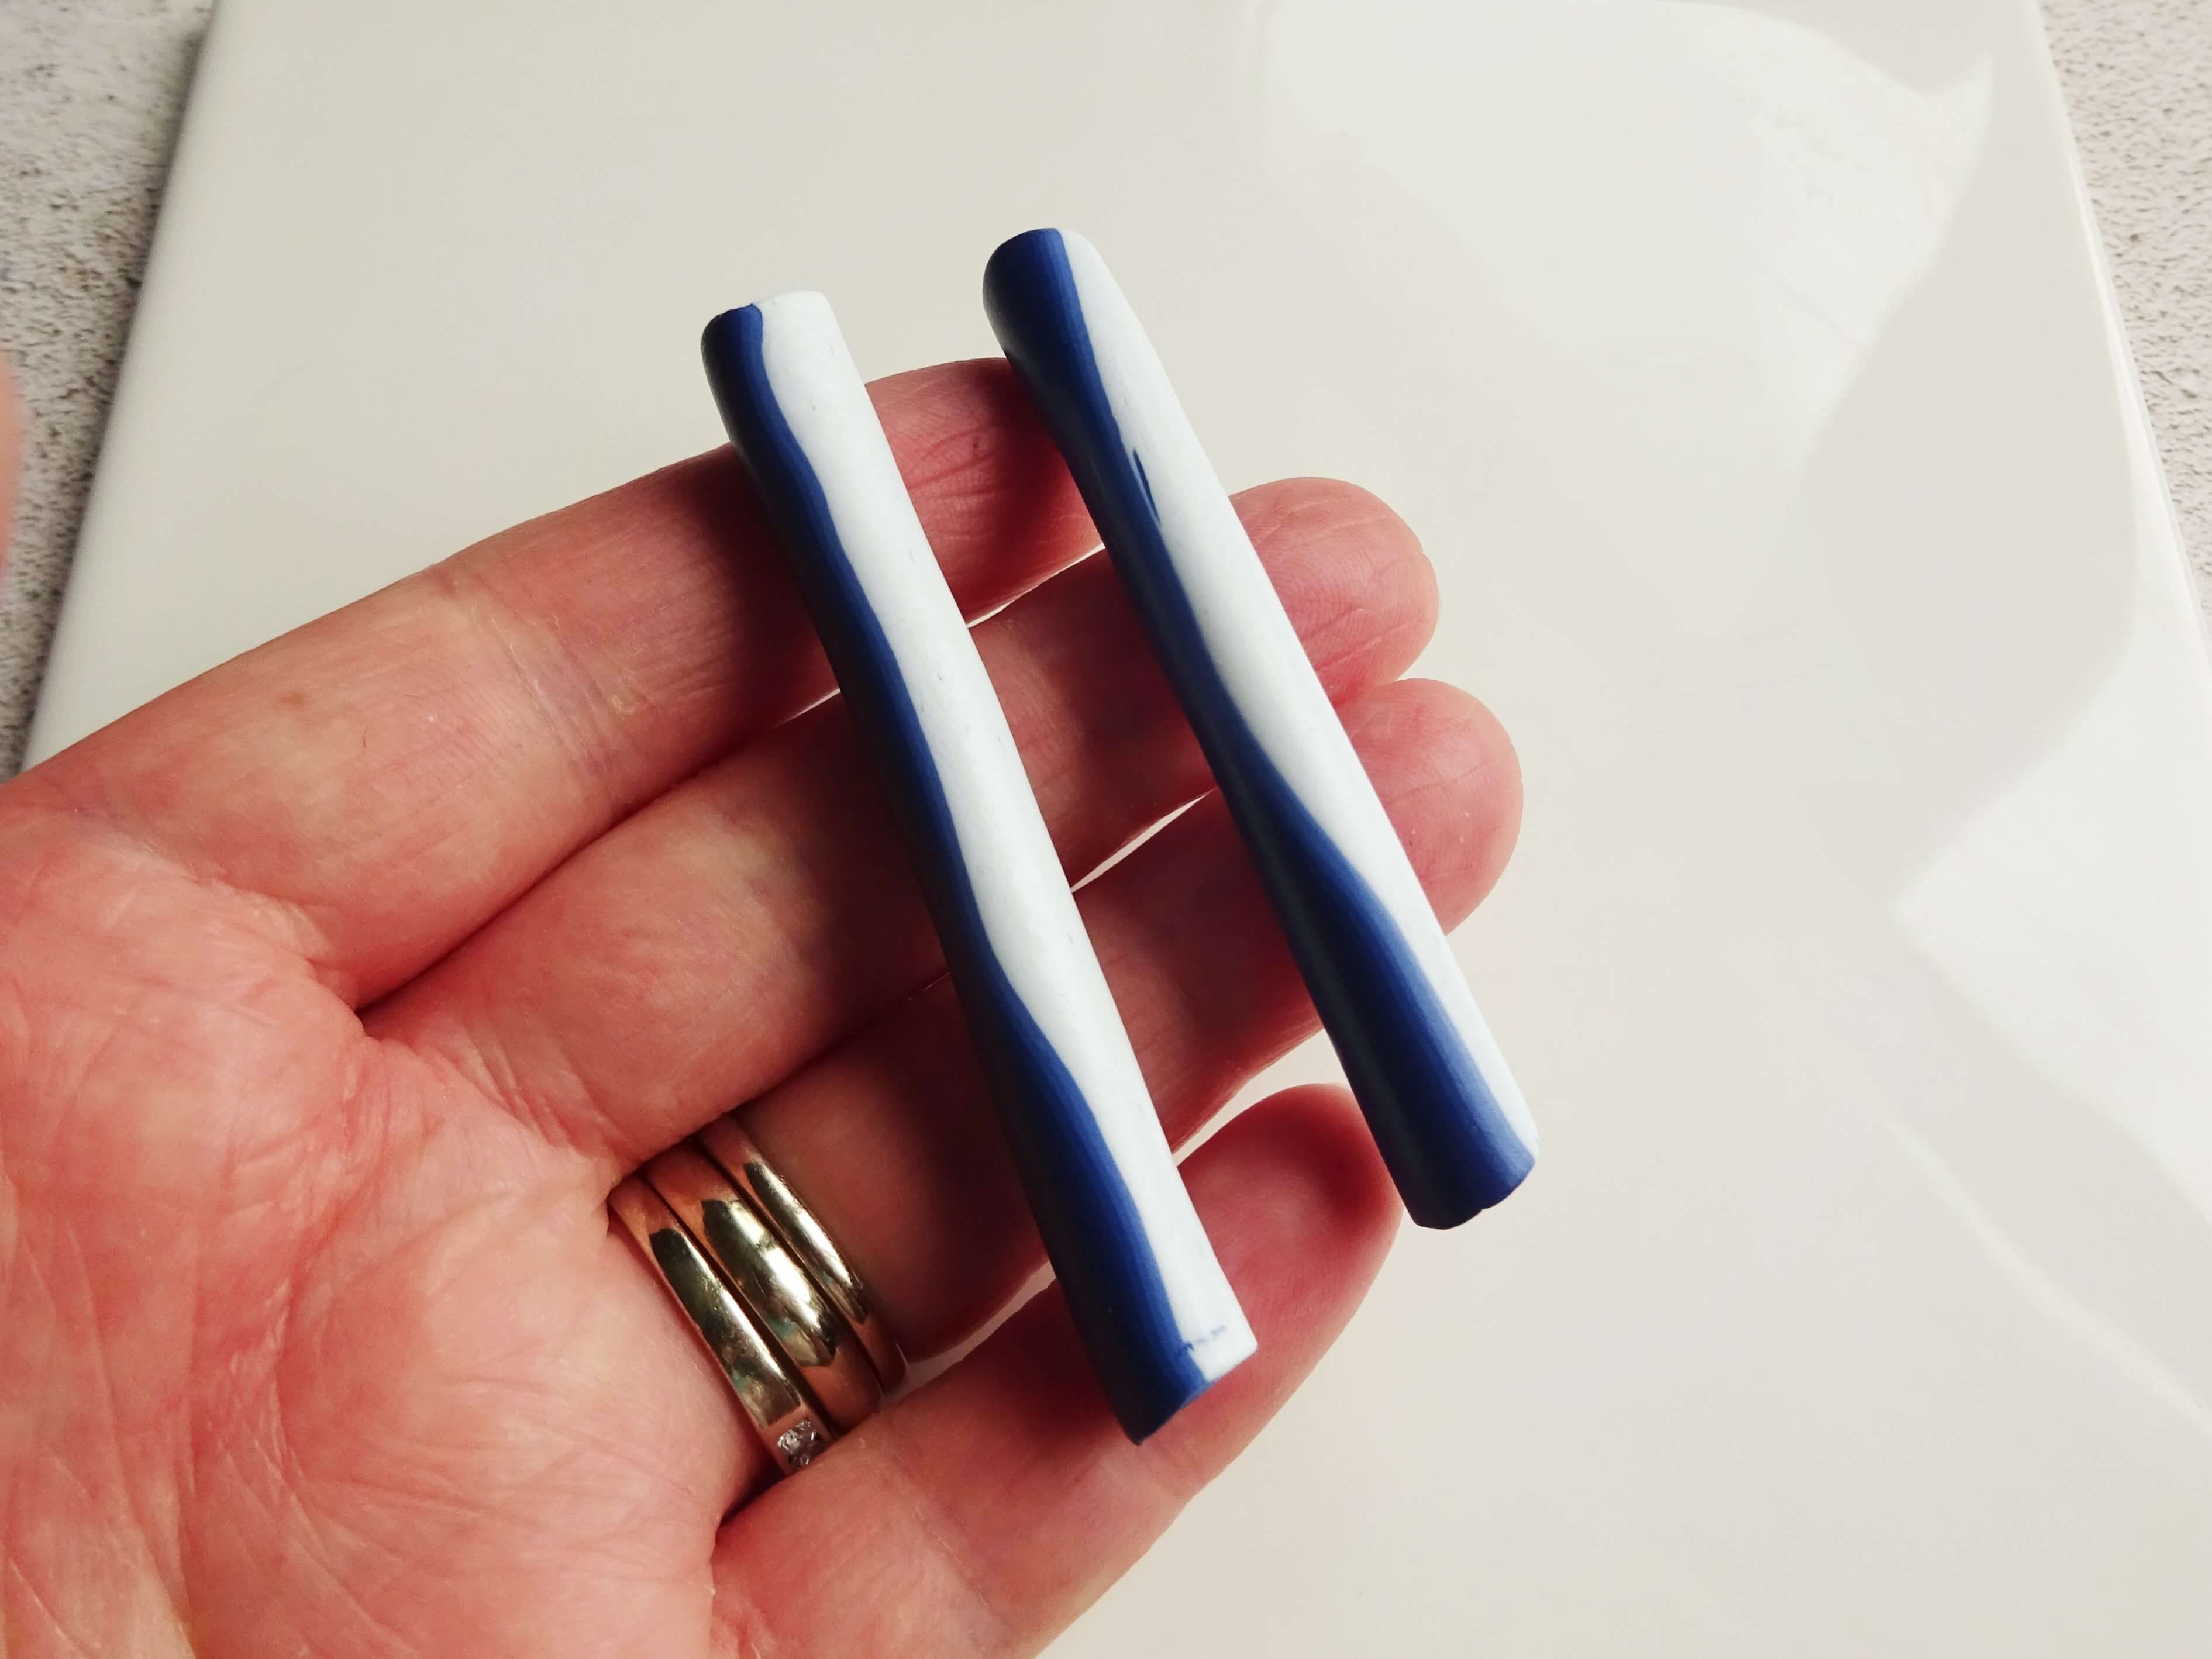
Next pick up the two 3cm pieces and roll them so that they are 6cm long making sure the white and blue layers stay straight.
Using your acrylic roller again, flatten these clay canes so that they measure 7.5cm long (they should be the same length as the middle swirl piece that you just made).

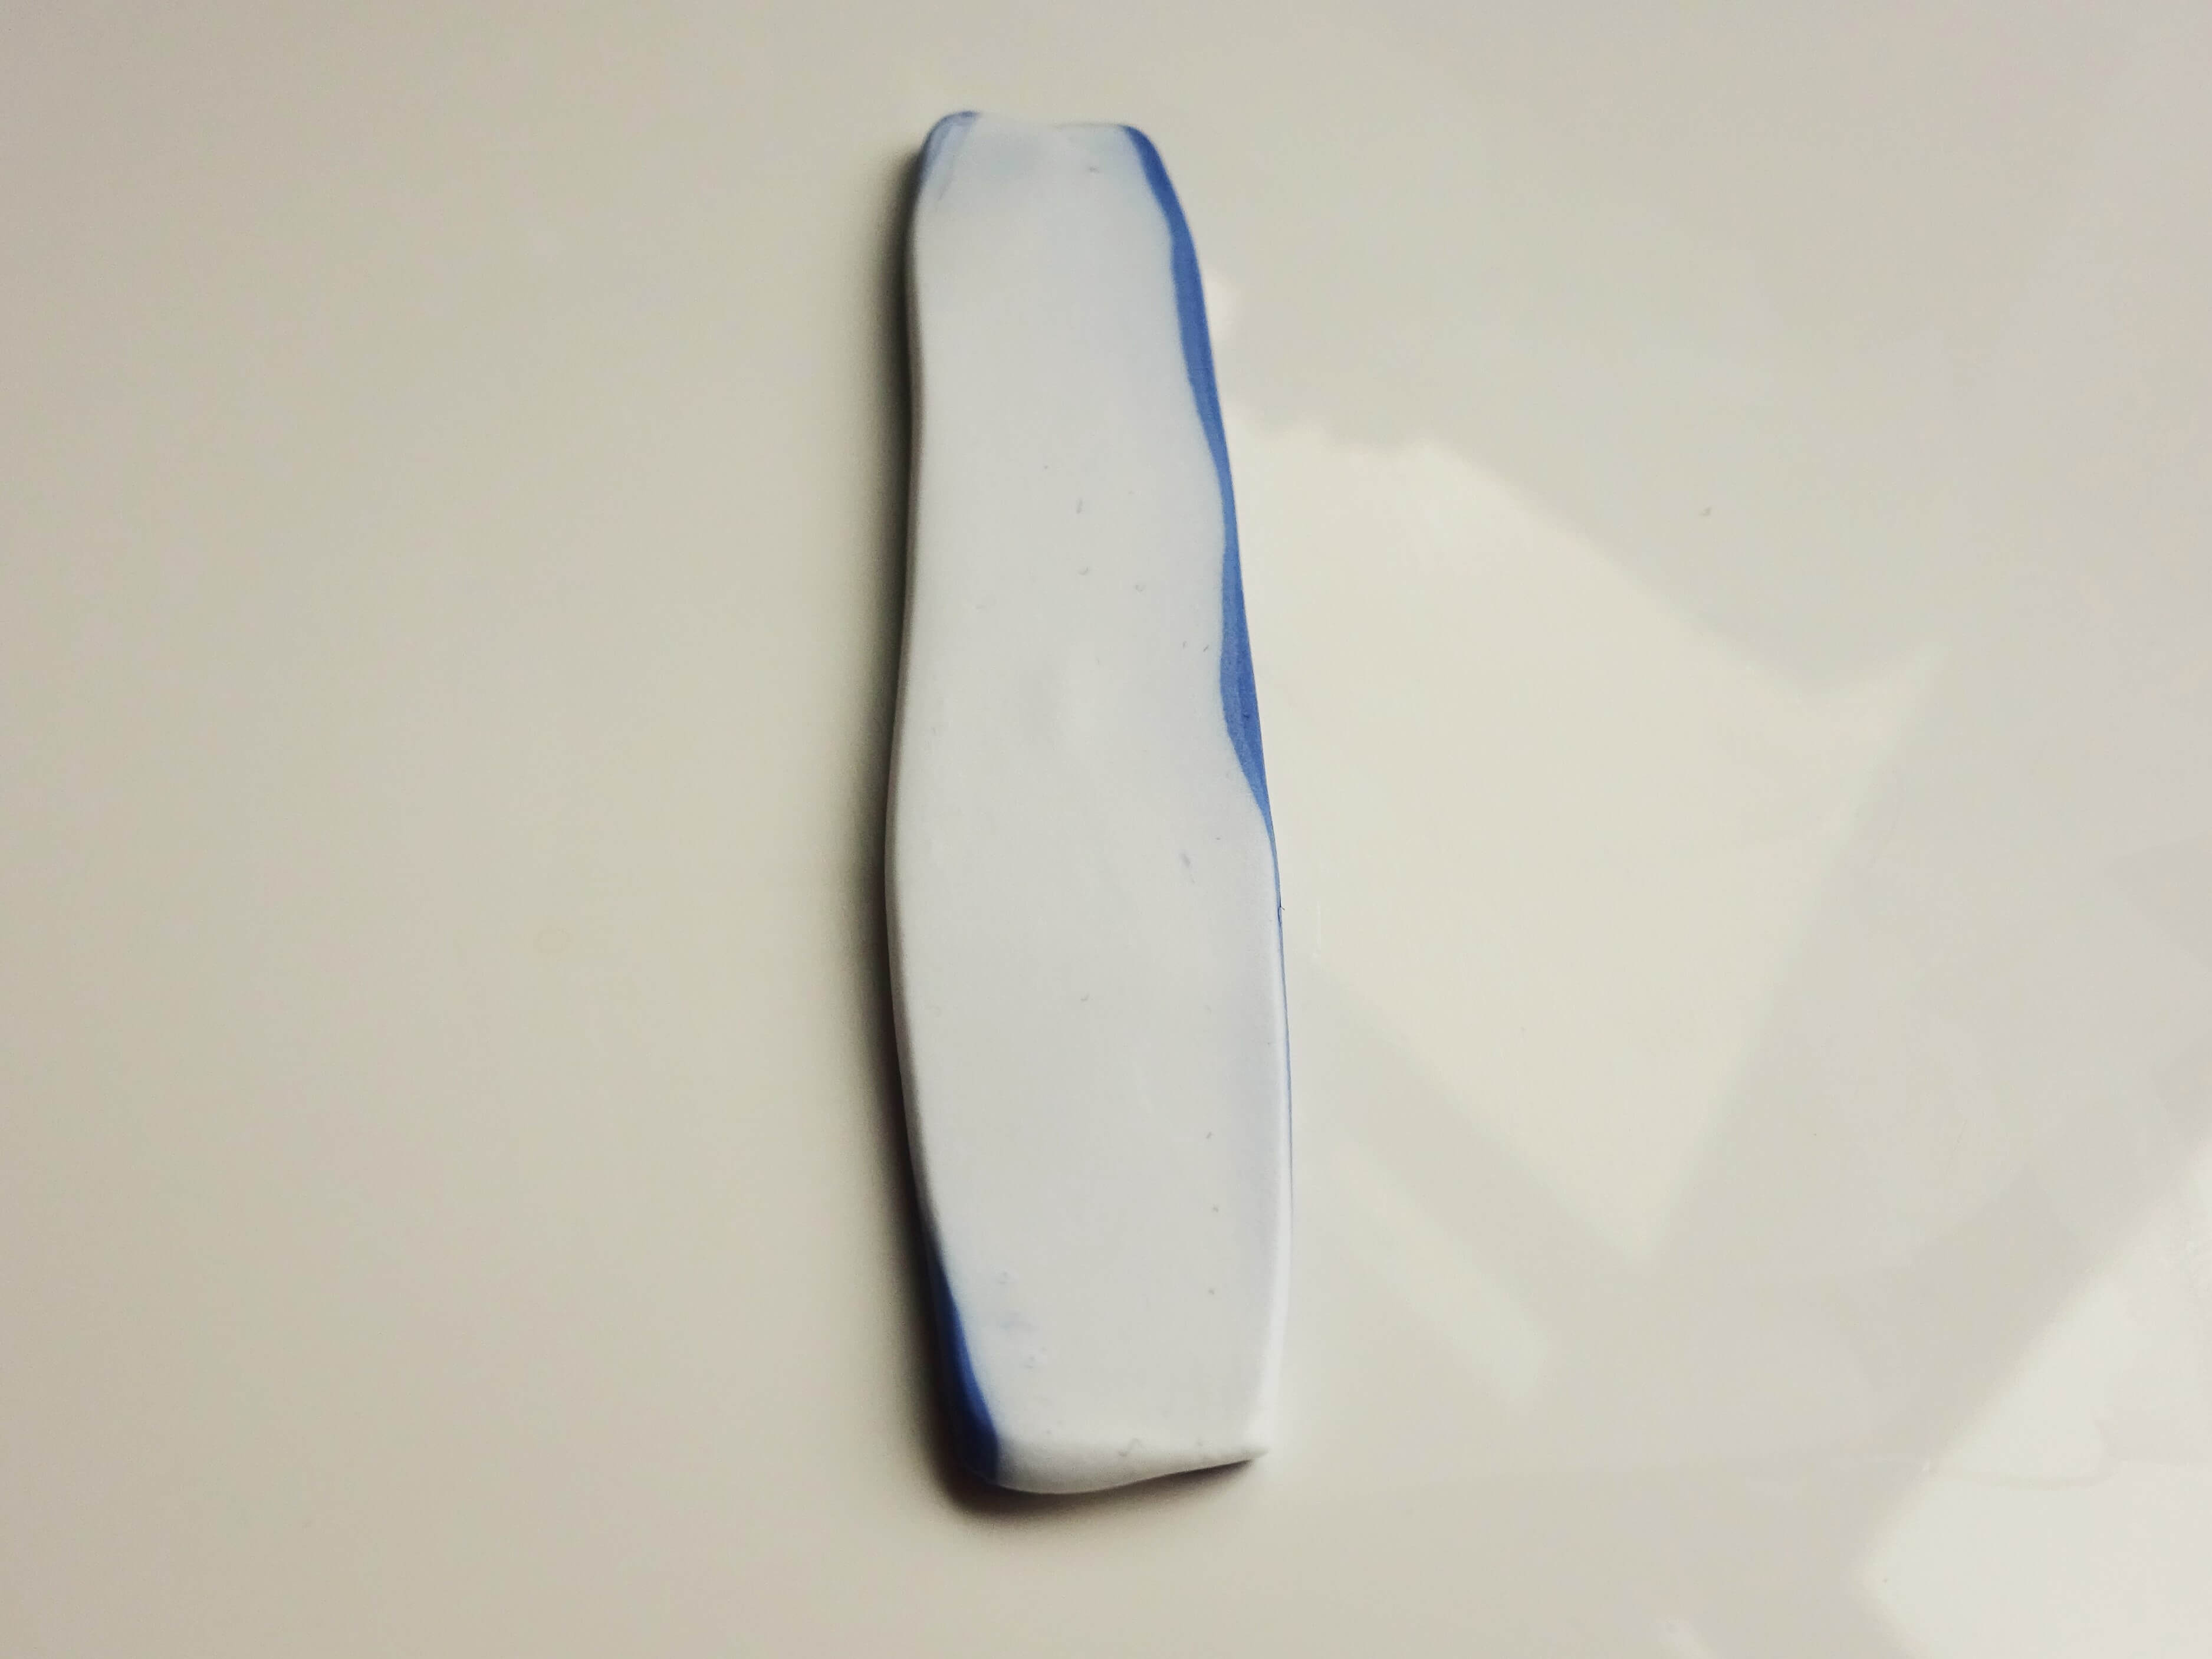
With the blue layer near the surface, use your fingers to flatten both outer white edges (photo 21a).
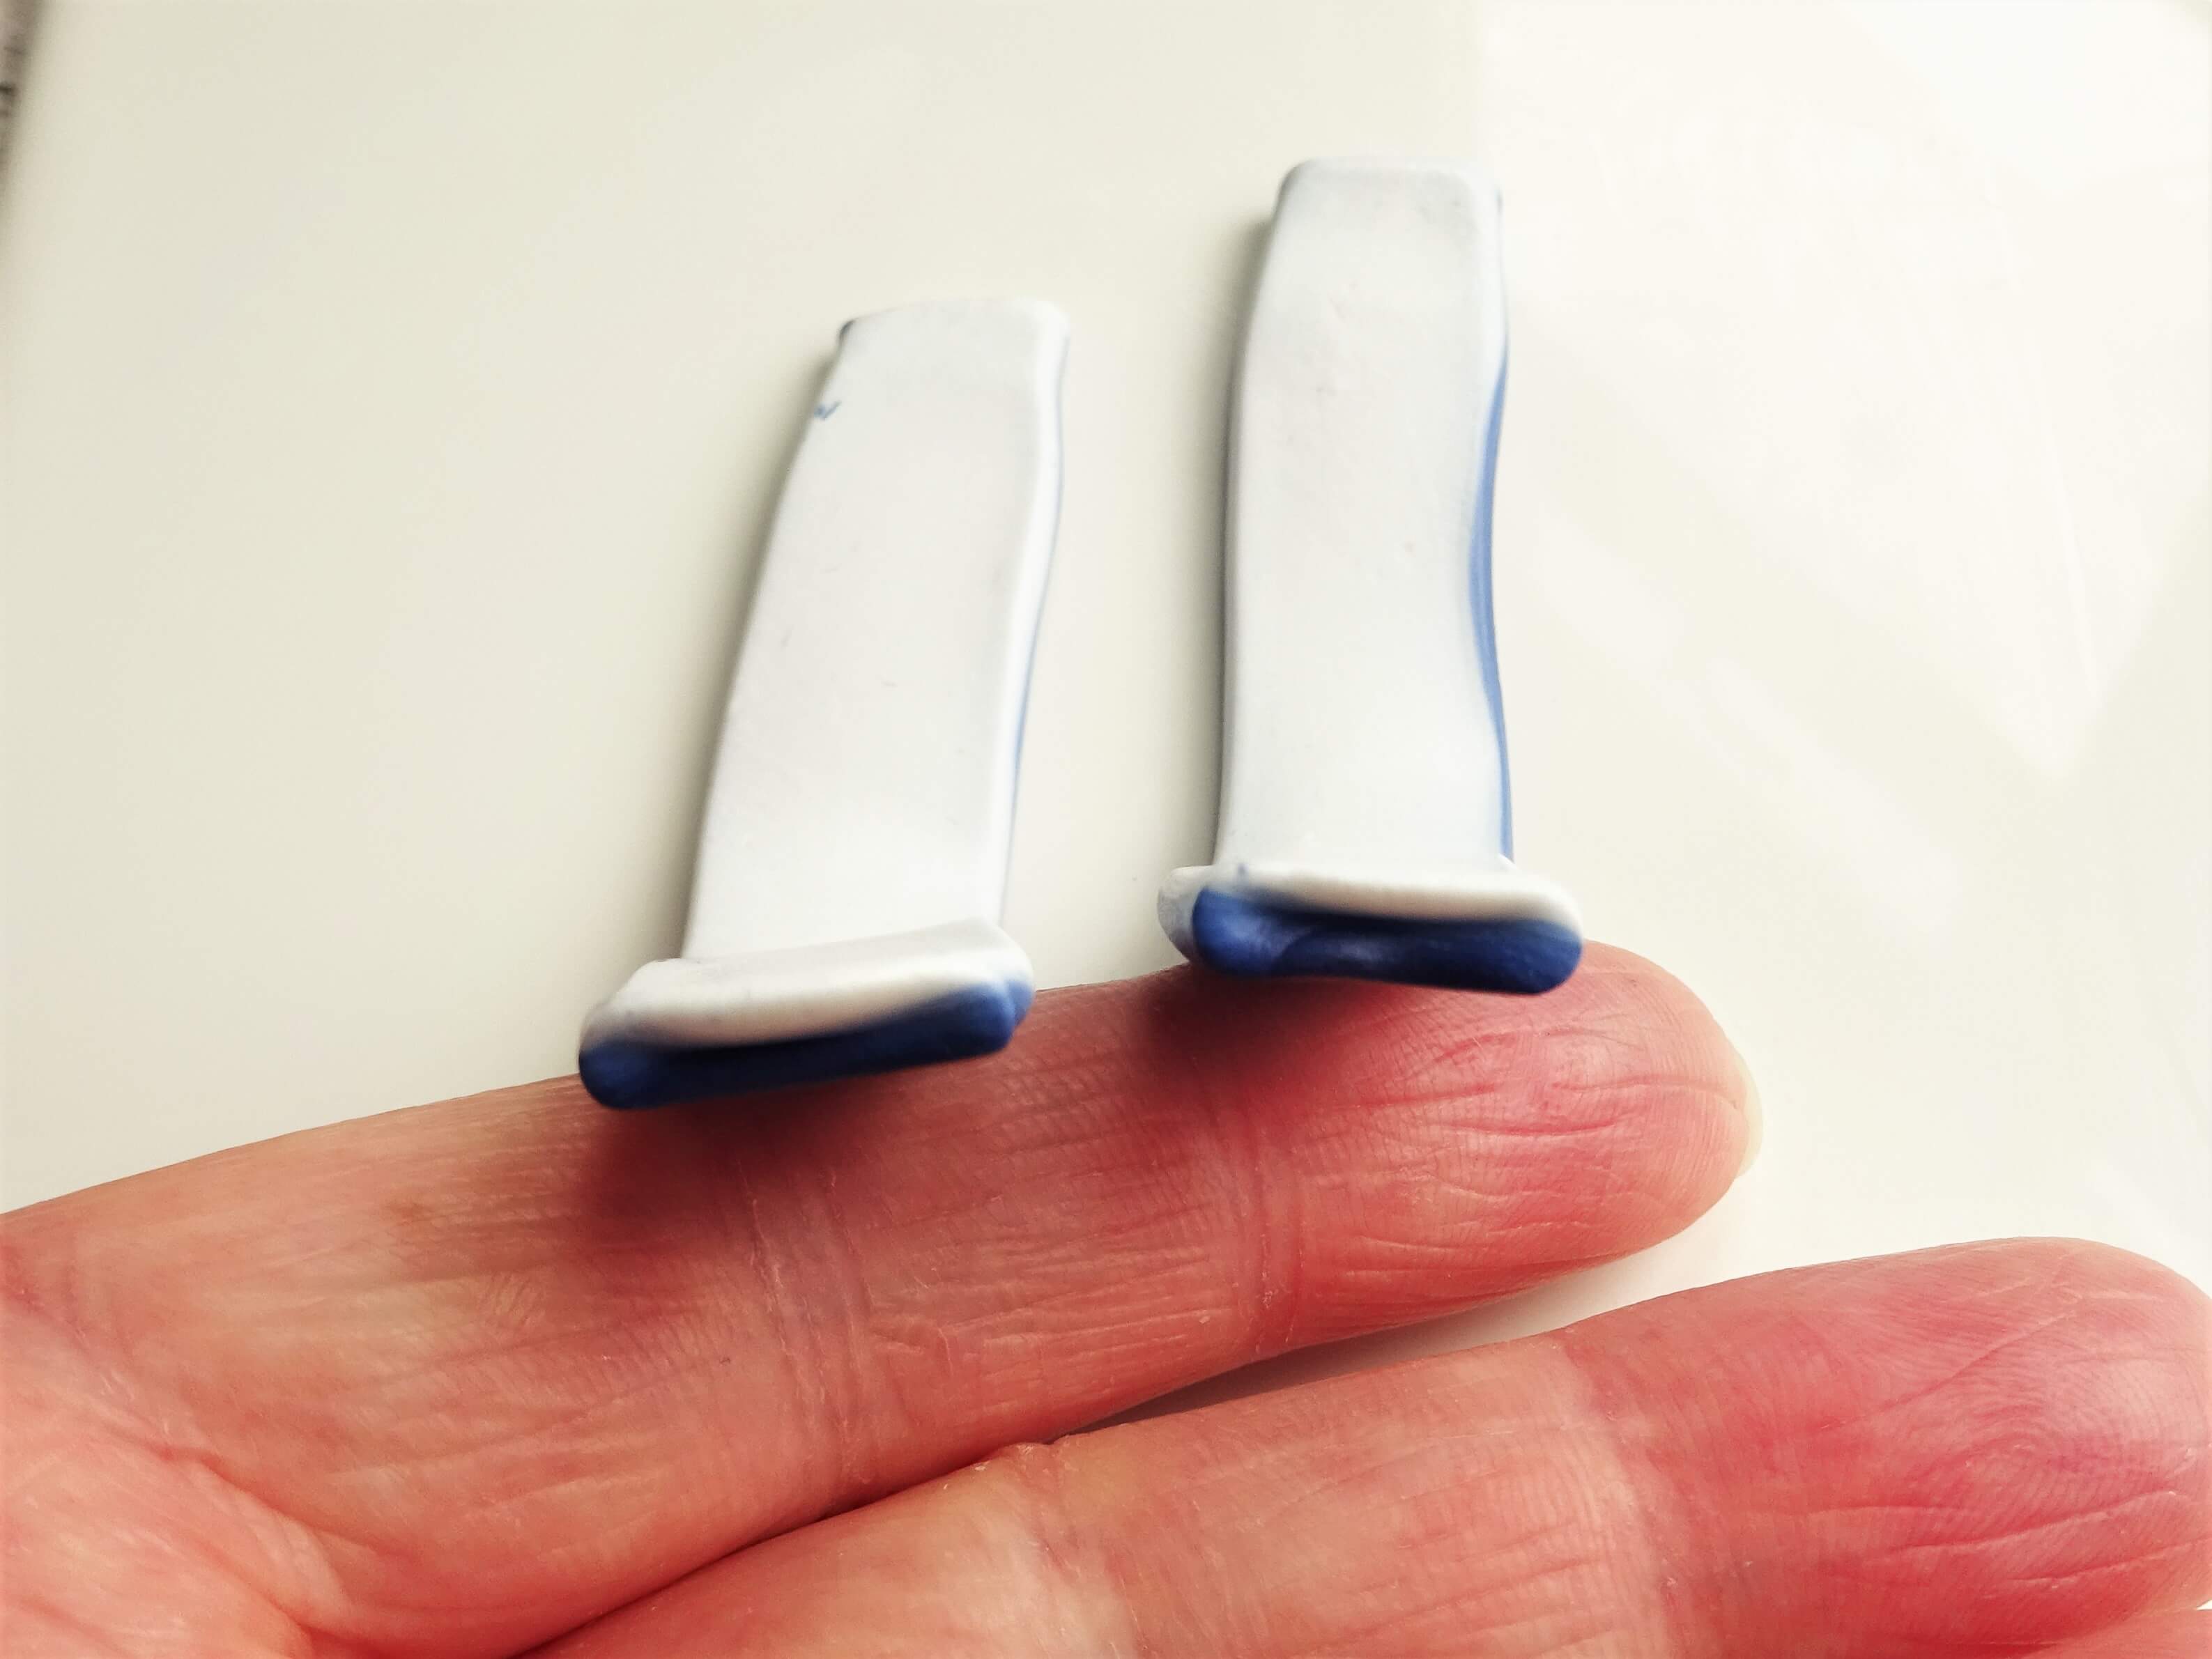
Carefully pick up the clay and press it length ways over something with a rounded shape. I have used a dotting tool but a pencil or similar should work. Press the edges down as this will cause the sides to be thinner than the middle and help give the petals a domed shape (photo 21b)
Repeat steps 20, 21a and 21b for all the clay pieces making sure to lay them back out in size order after shaping.

Pick up the central swirl piece that you made in steps 18a and 18b and one of the original 3cm pieces. Position the swirl in the other piece making sure that the clay covers the outer edge of the swirl piece.

Pick up the next piece that was originally 3cm and position it so that part of it overlaps the edge of the previous petal. I am working clockwise – the swirl is clockwise and I am adding new petals clockwise.

Picking up the piece that was originally 4cm, position it so that it bridges the gap between the two petals and covers the outer edges of them.
Taking the next size up (originally 5cm long), position it so that is covers the newly added petal from step 24 and covers the first petal completely and part of the next petal along.

Taking the piece that was originally 5.5cm long, position it on the cane so that it bridges the gap between the previous two petals.

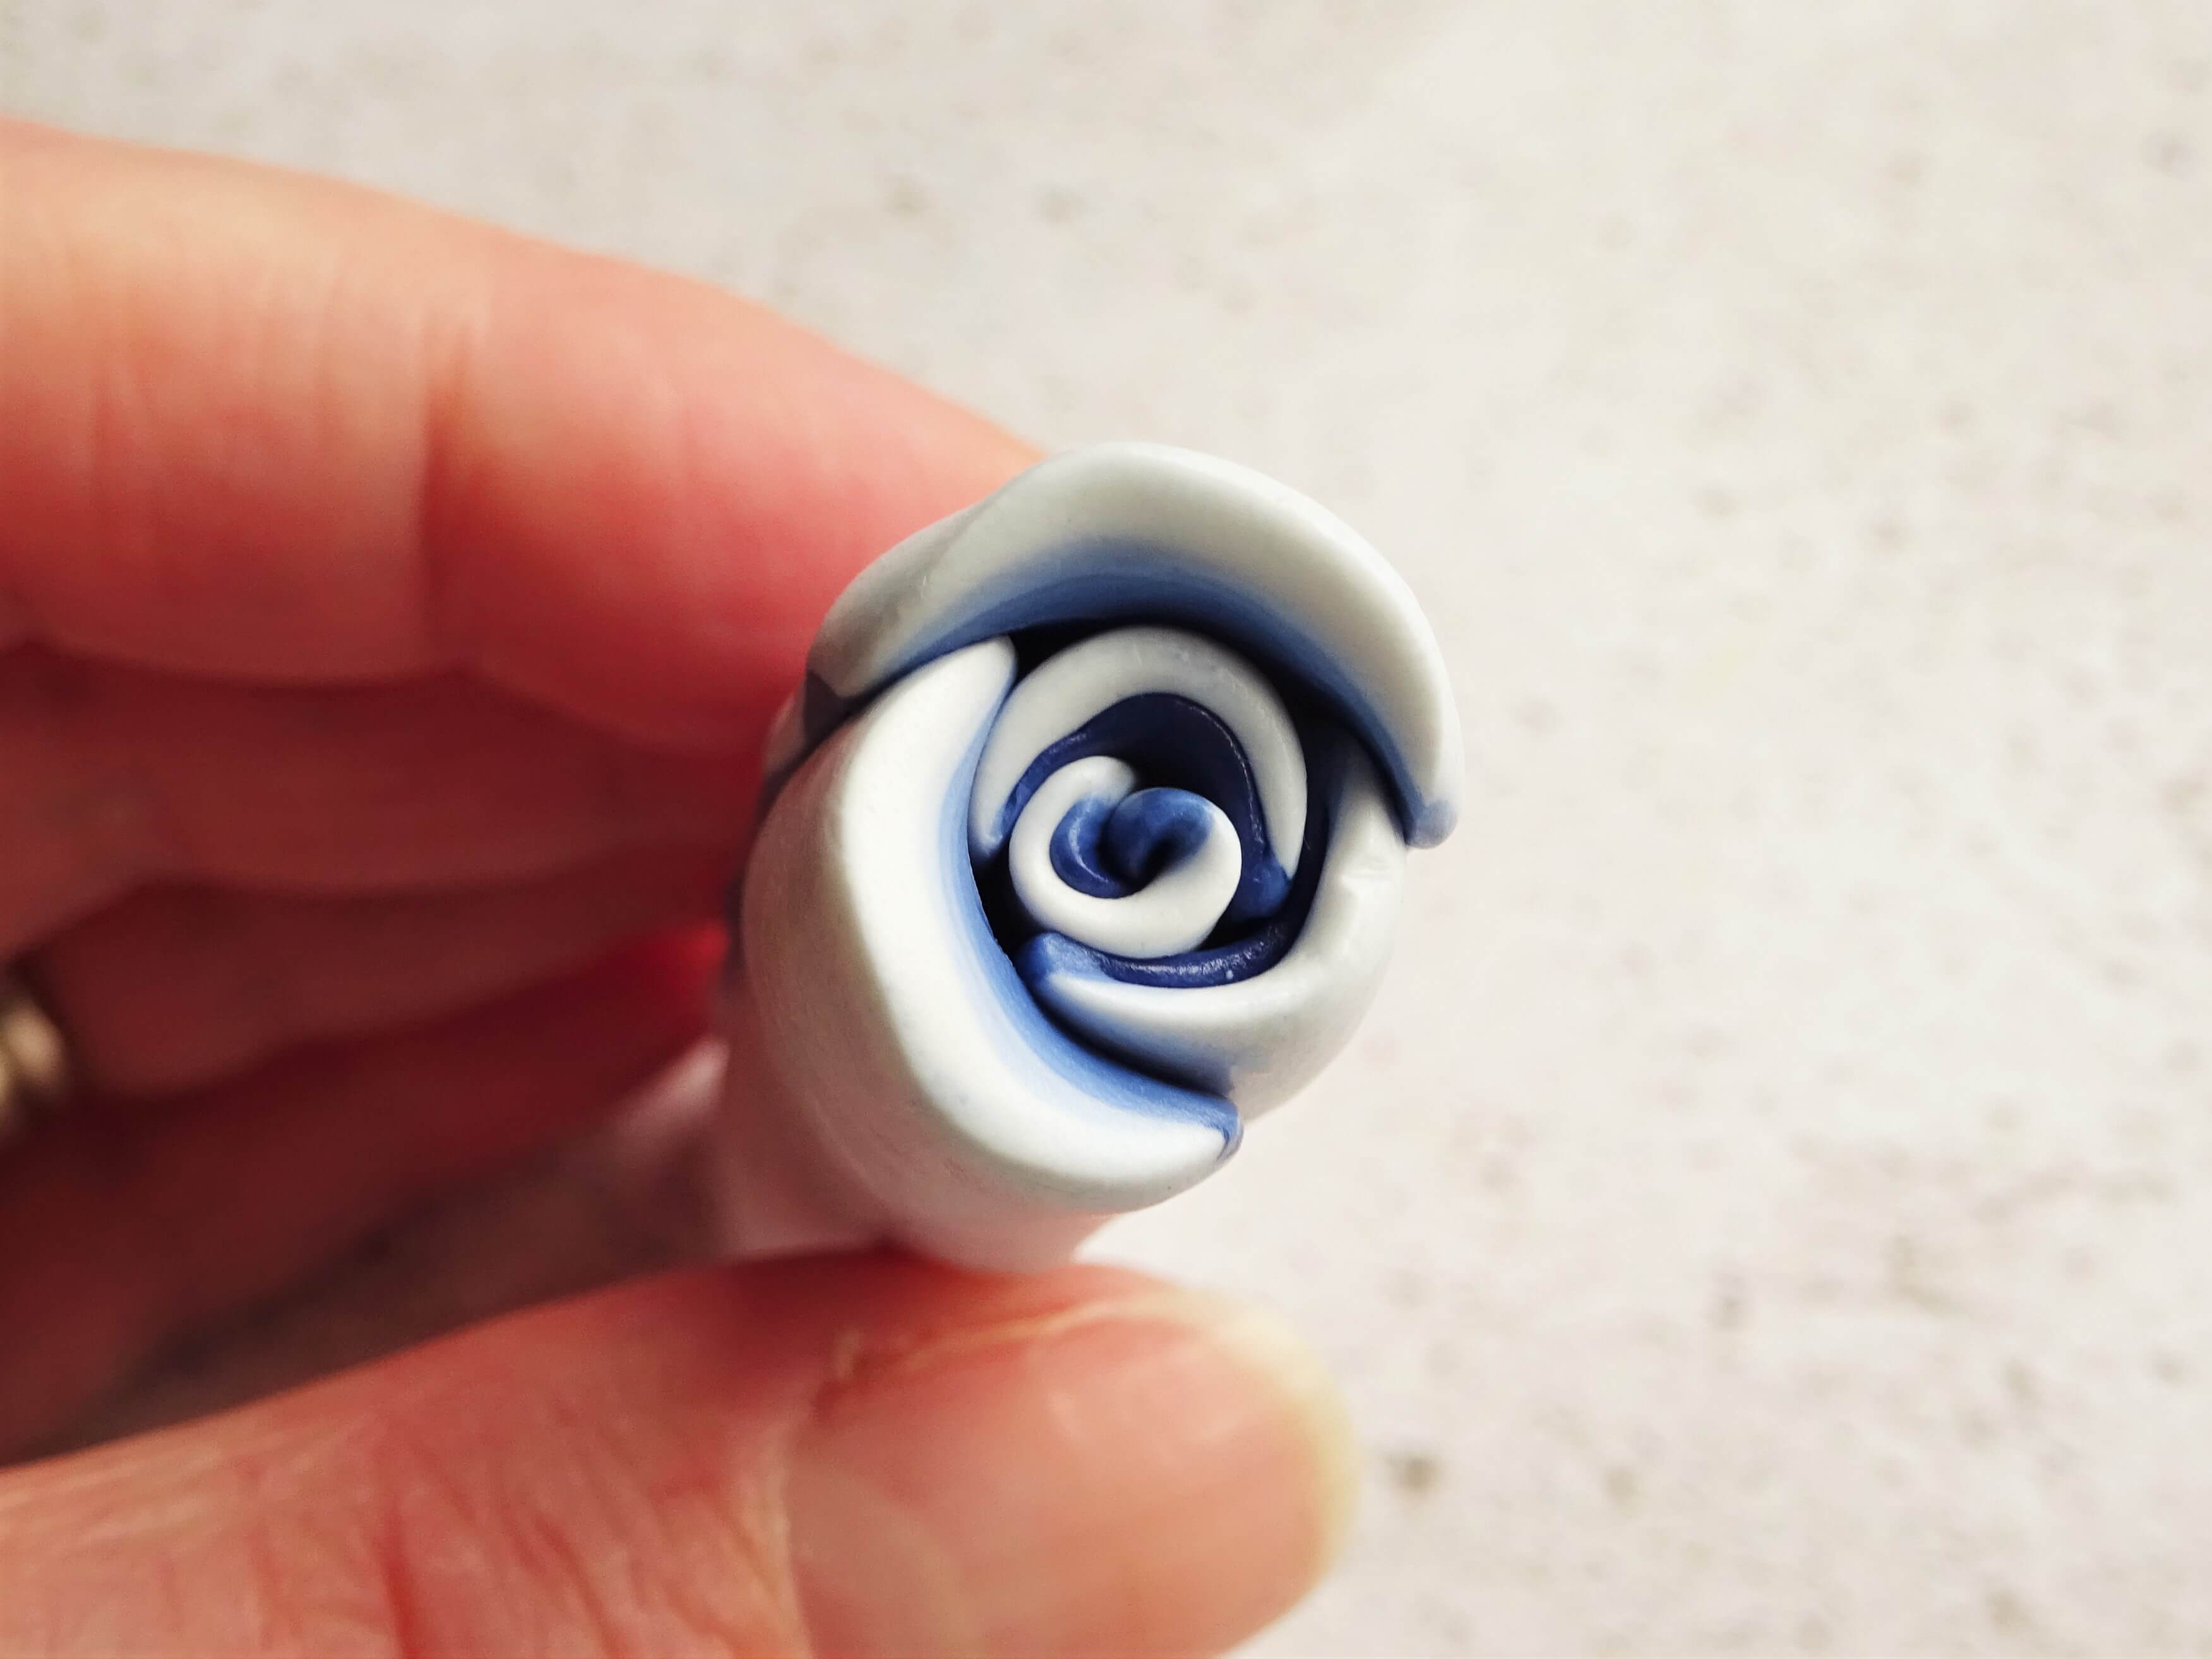
Taking your last piece position it on the cane so that it bridges the gap between the previous two petals. This may need some encouragement by pulling out the outer edges etc. Just be careful not to loose the arc shapes or height in the middle on this piece.
Condition more of your darkest colour and pass it through your clay machine on a number 3. Cut a strip big enough to fill the gap between the outermost two petals. This is because when you reduce your cane down you need to preserve the original rose shape as much as possible and this little dip in could cause distortion.

Wrap your whole cane with one layer of dark blue clay.

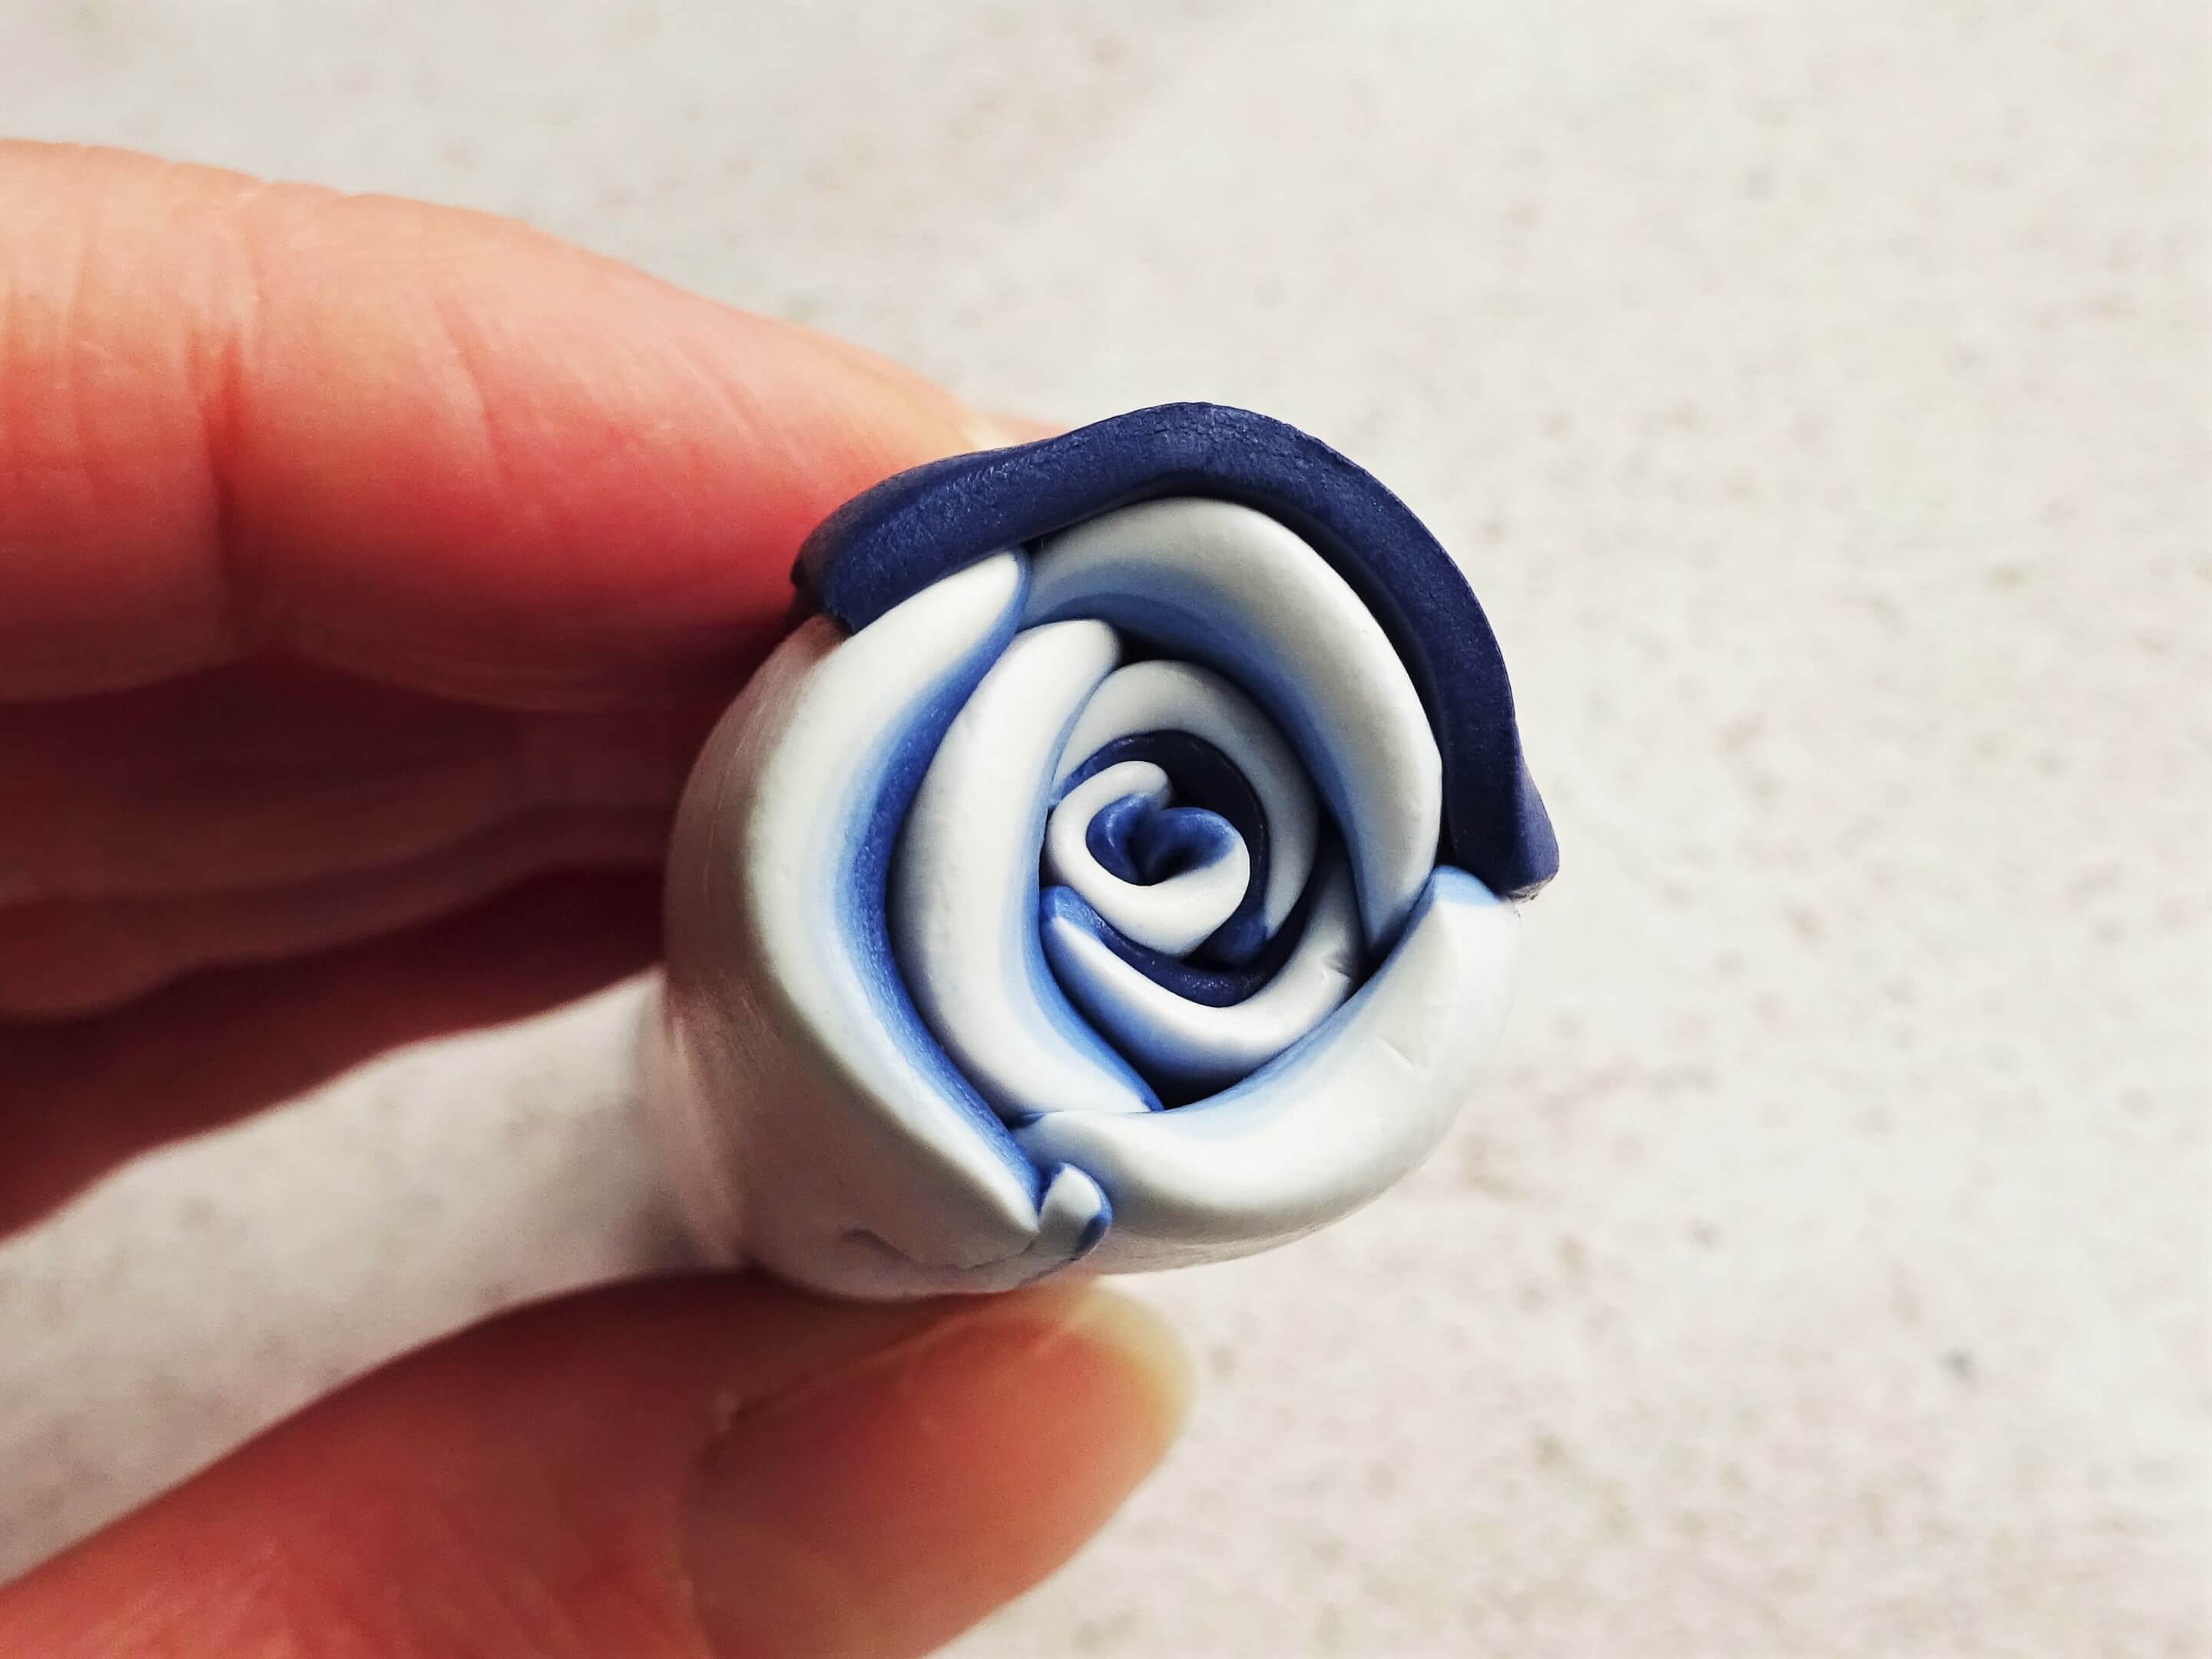
Reduce your cane down and it is ready to be used in all your polymer clay projects.


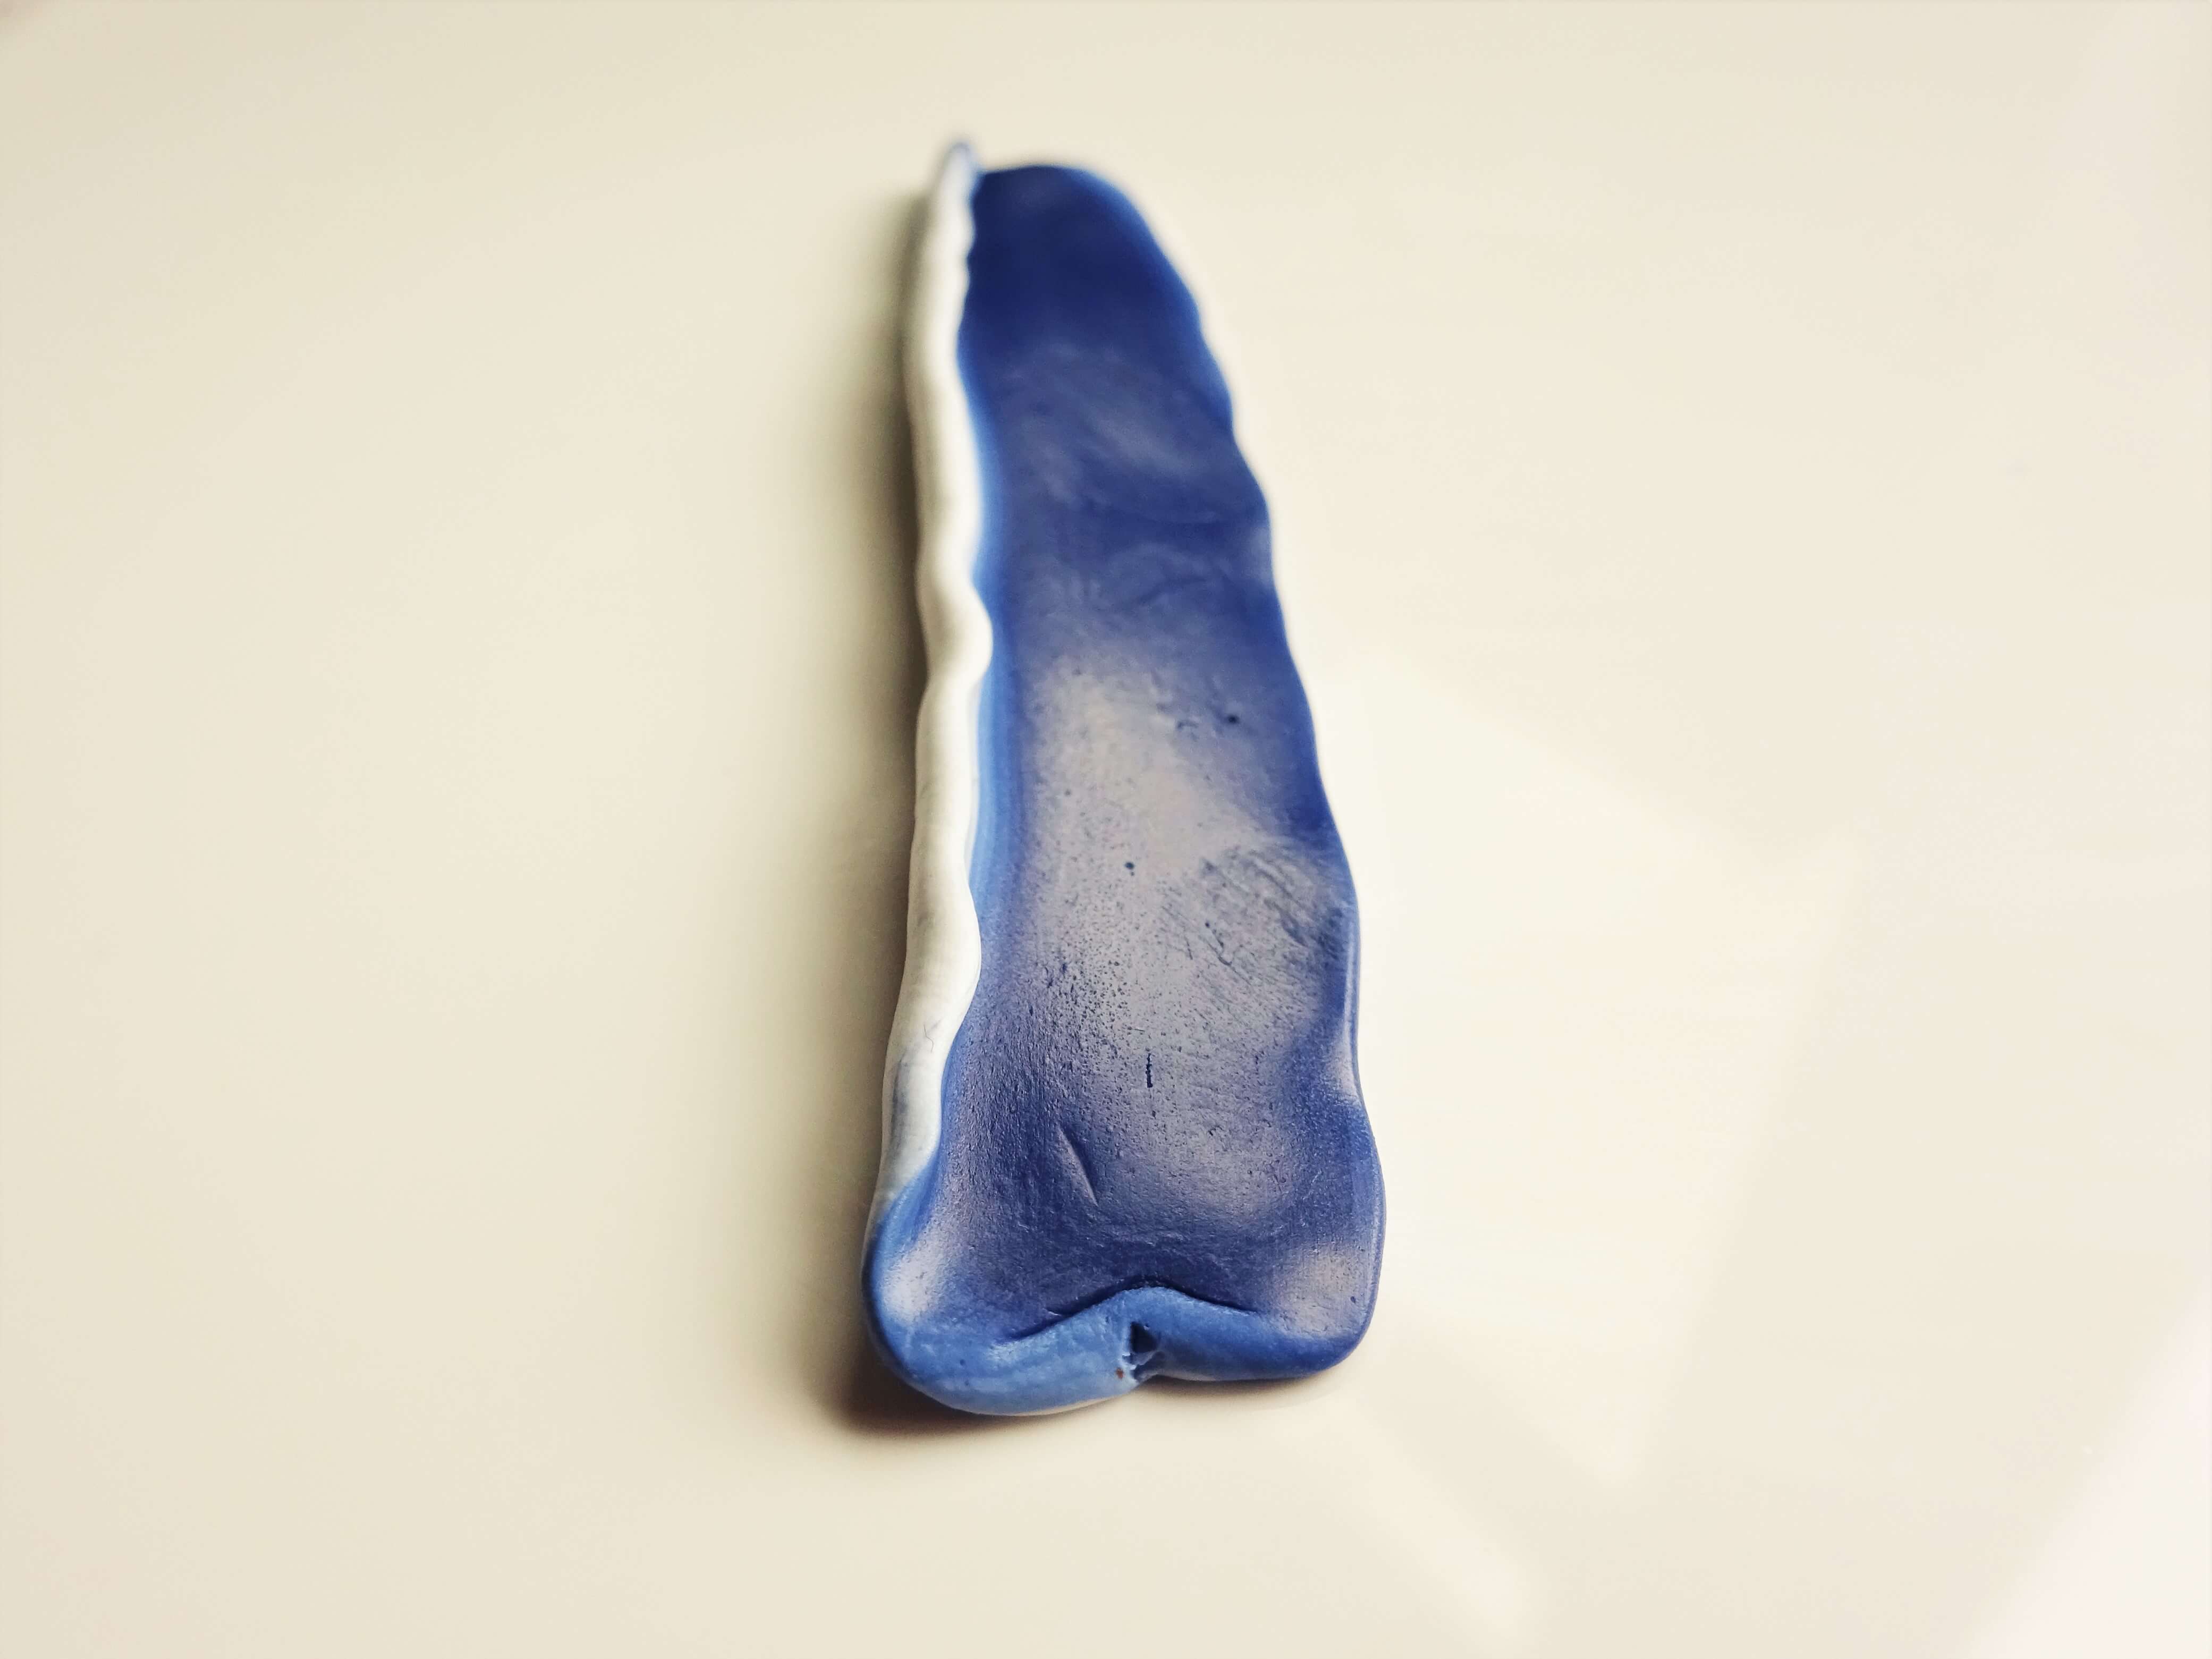
As you can see on the finished pieces the white clay adds real definition to each rose petal and once pieces of the cane are used and rolled out each flower takes on it’s own shape and personality.
Links below for products used are Affiliate links for Amazon (UK, United States and Canada). This just means that if you use my link to buy a product I earn a very small commission, at no extra expense to you (you pay the same regardless how you find the item). Every little extra helps me to offer free tutorials.
Amazon UK
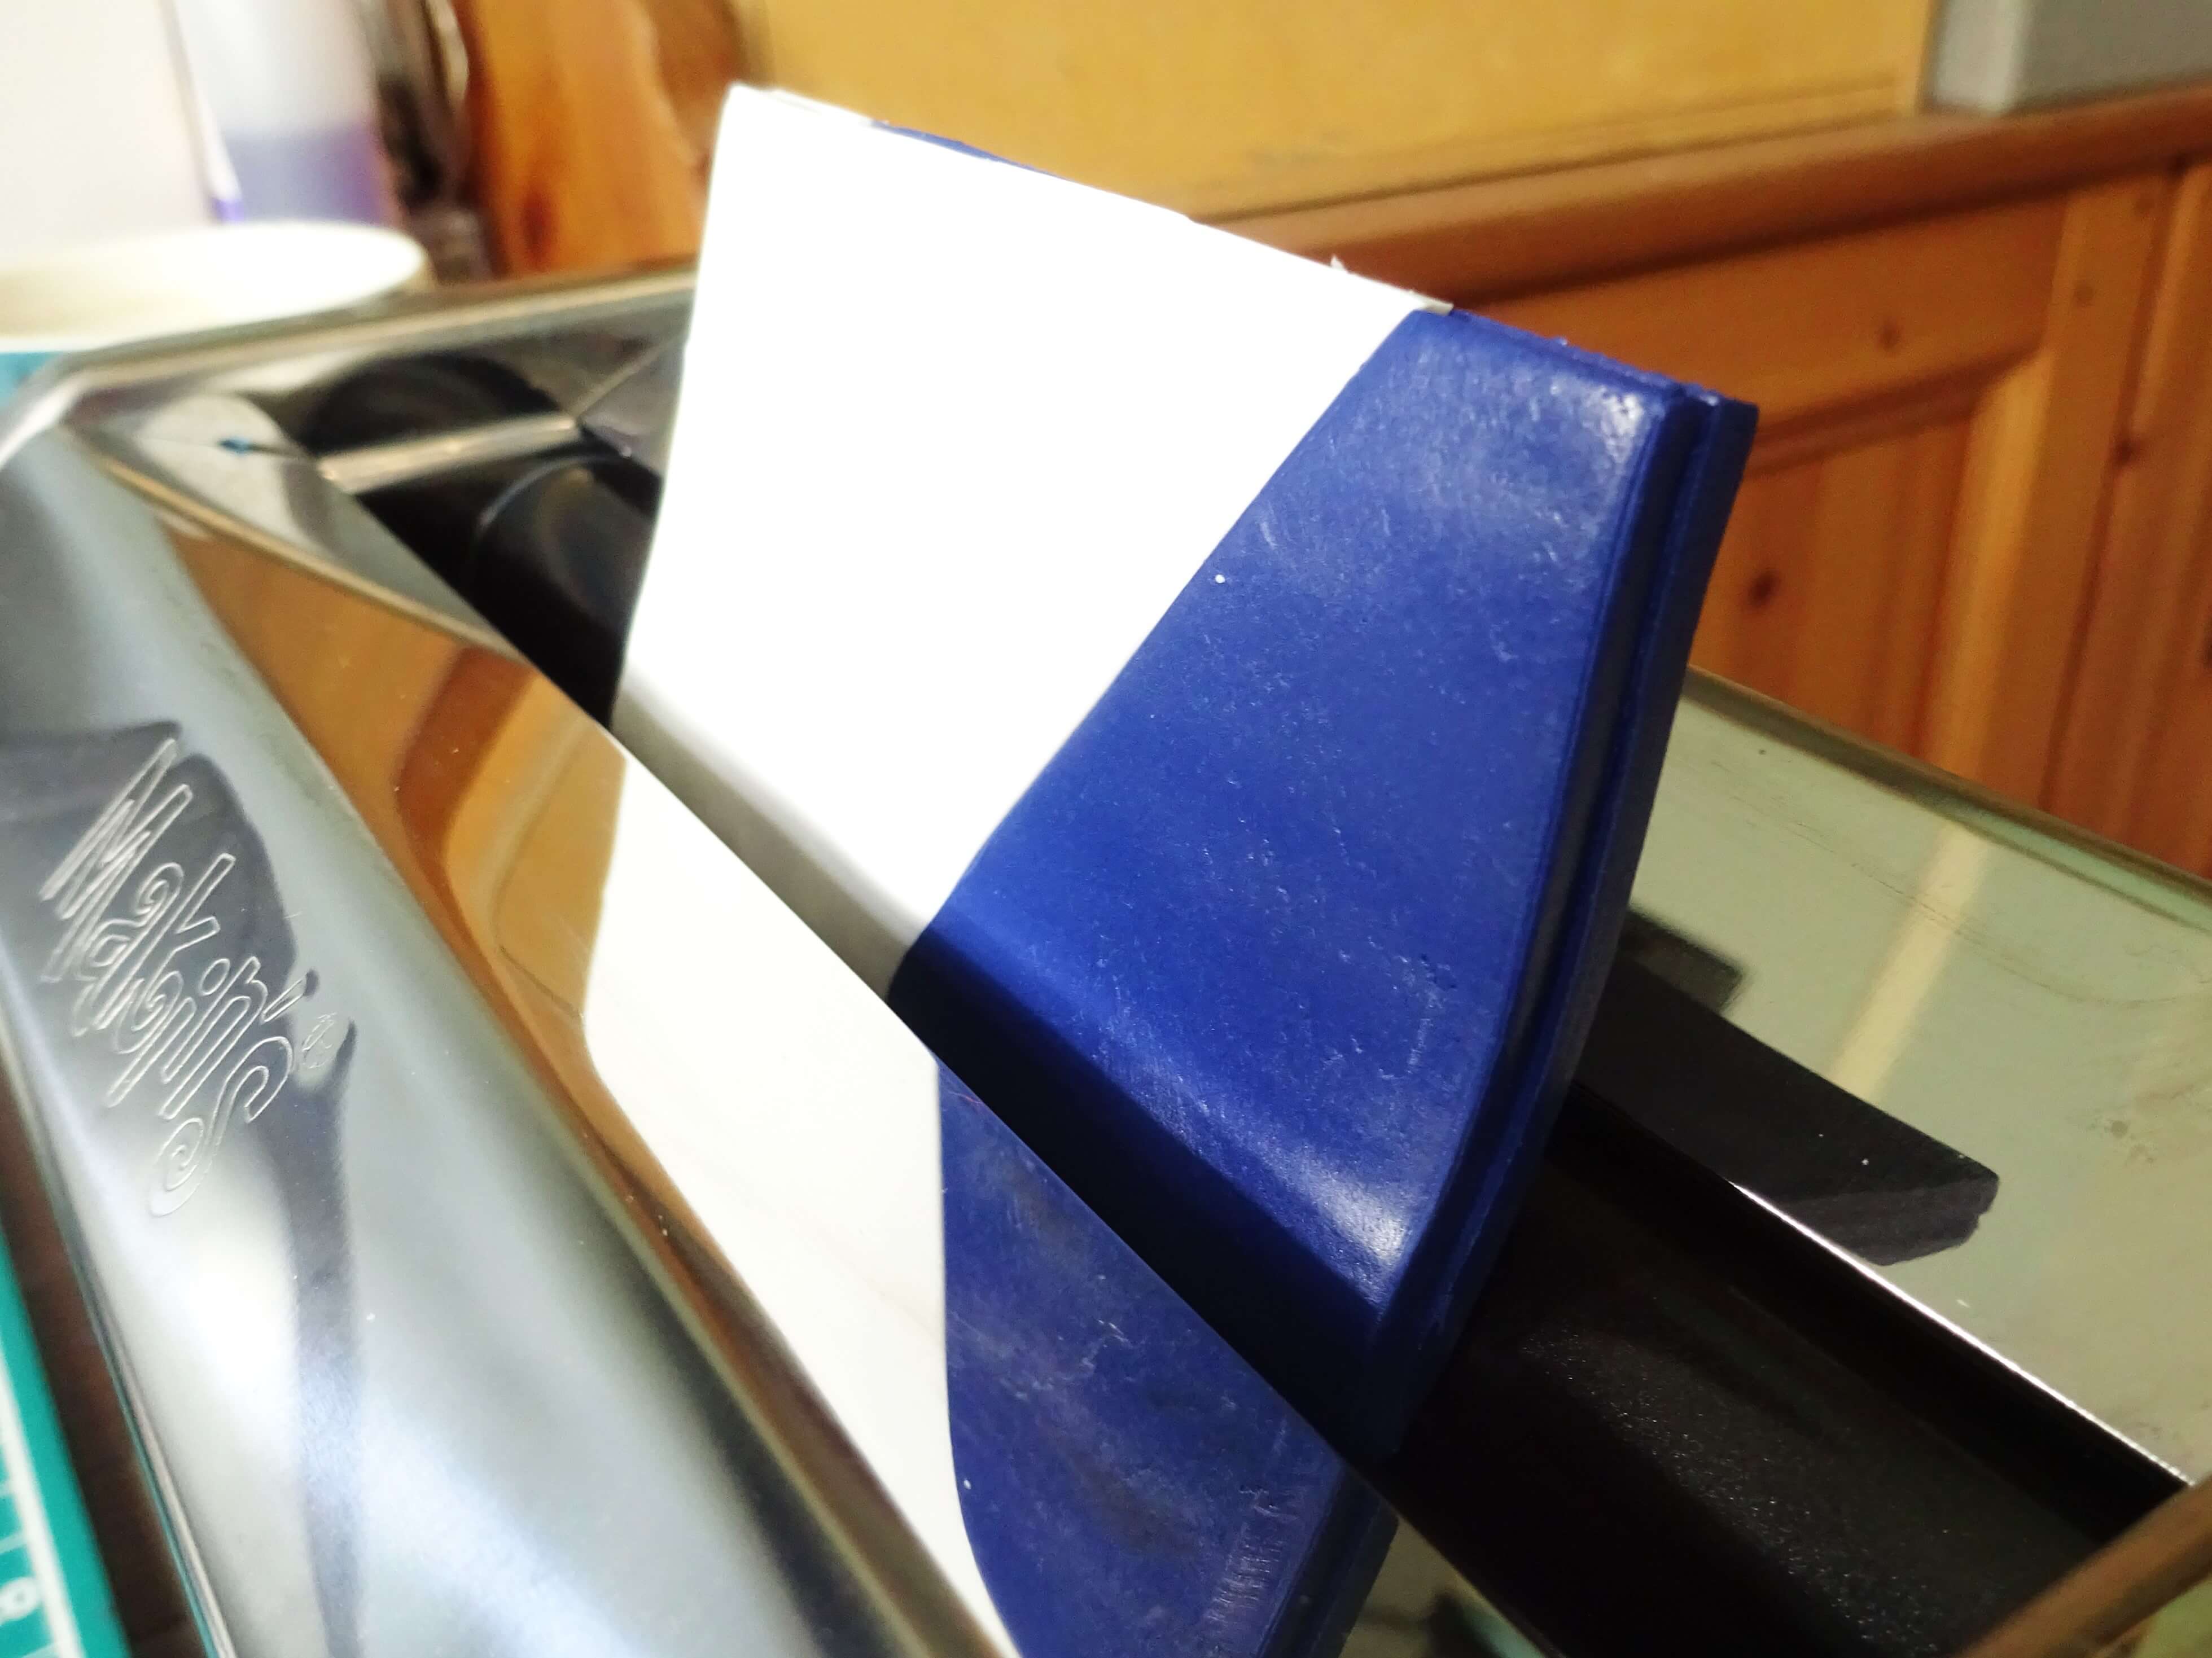
Fimo professional Navy Blue, Fimo professional White, Makins clay machine, Dotting tools, Sculpey Super Slicer
Amazon USA
Makins clay machine, Dotting tools, Sculpey Super Slicer
Amazon Canada
Fimo professional Navy Blue, Fimo professional White, Makins clay machine, Dotting tools, Sculpey Super Slicer
I have other polymer clay cane tutorials for you to check out if you have enjoyed this one they range from a really easy flower cane tutorial to far more complicated flower cane where the flower petals change colour around the edge.
Also, if you have enjoyed this please consider subscribing to stay up to date, leave a like and maybe even a comment – I would love to hear what you think of this tutorial.
I am hoping to sneak in a few Halloween tutorials over the next few weeks ready for spooky season so keep an eye out for those.
Hannah x


You do this so well. Thanks
Thank you so much 😀