
This posts contains affiliate links.

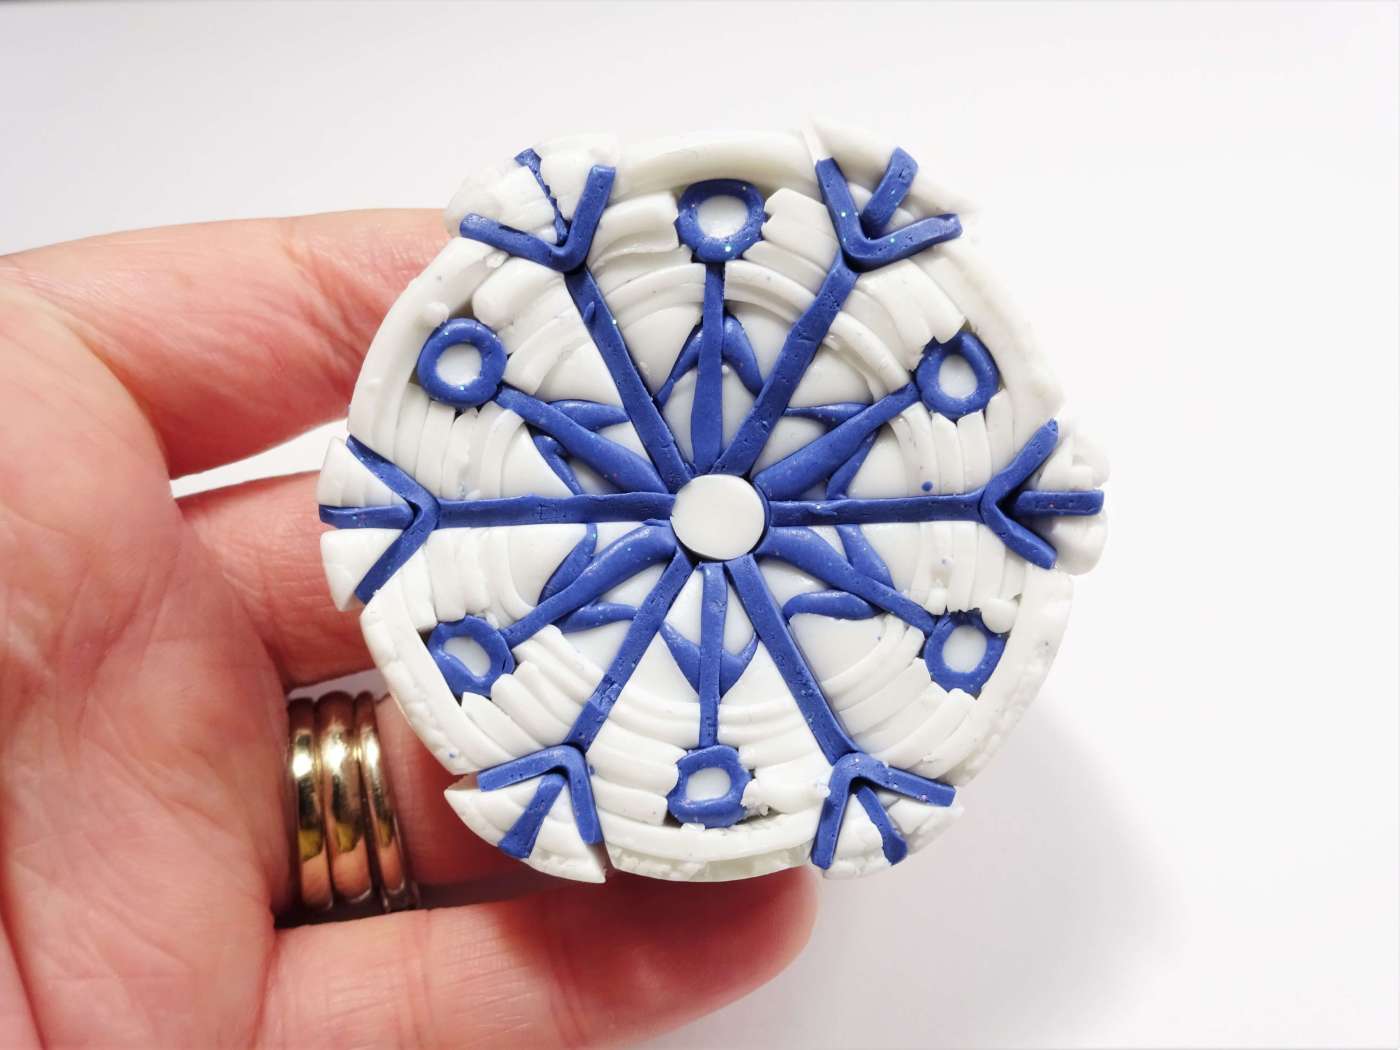
We’ve had a little flurry of the white stuff already and there is nothing more special than seeing the world outside under a blanket of crisp, white snow ( I think that living in the UK allows me to romanticise snow as we don’t really get that much and it only usually lasts a few days before it melts away). It instantly makes me think of Christmas, although I have never actually had a white Christmas, so it seemed only logical to me to make my next tutorial a polymer clay snowflake cane.
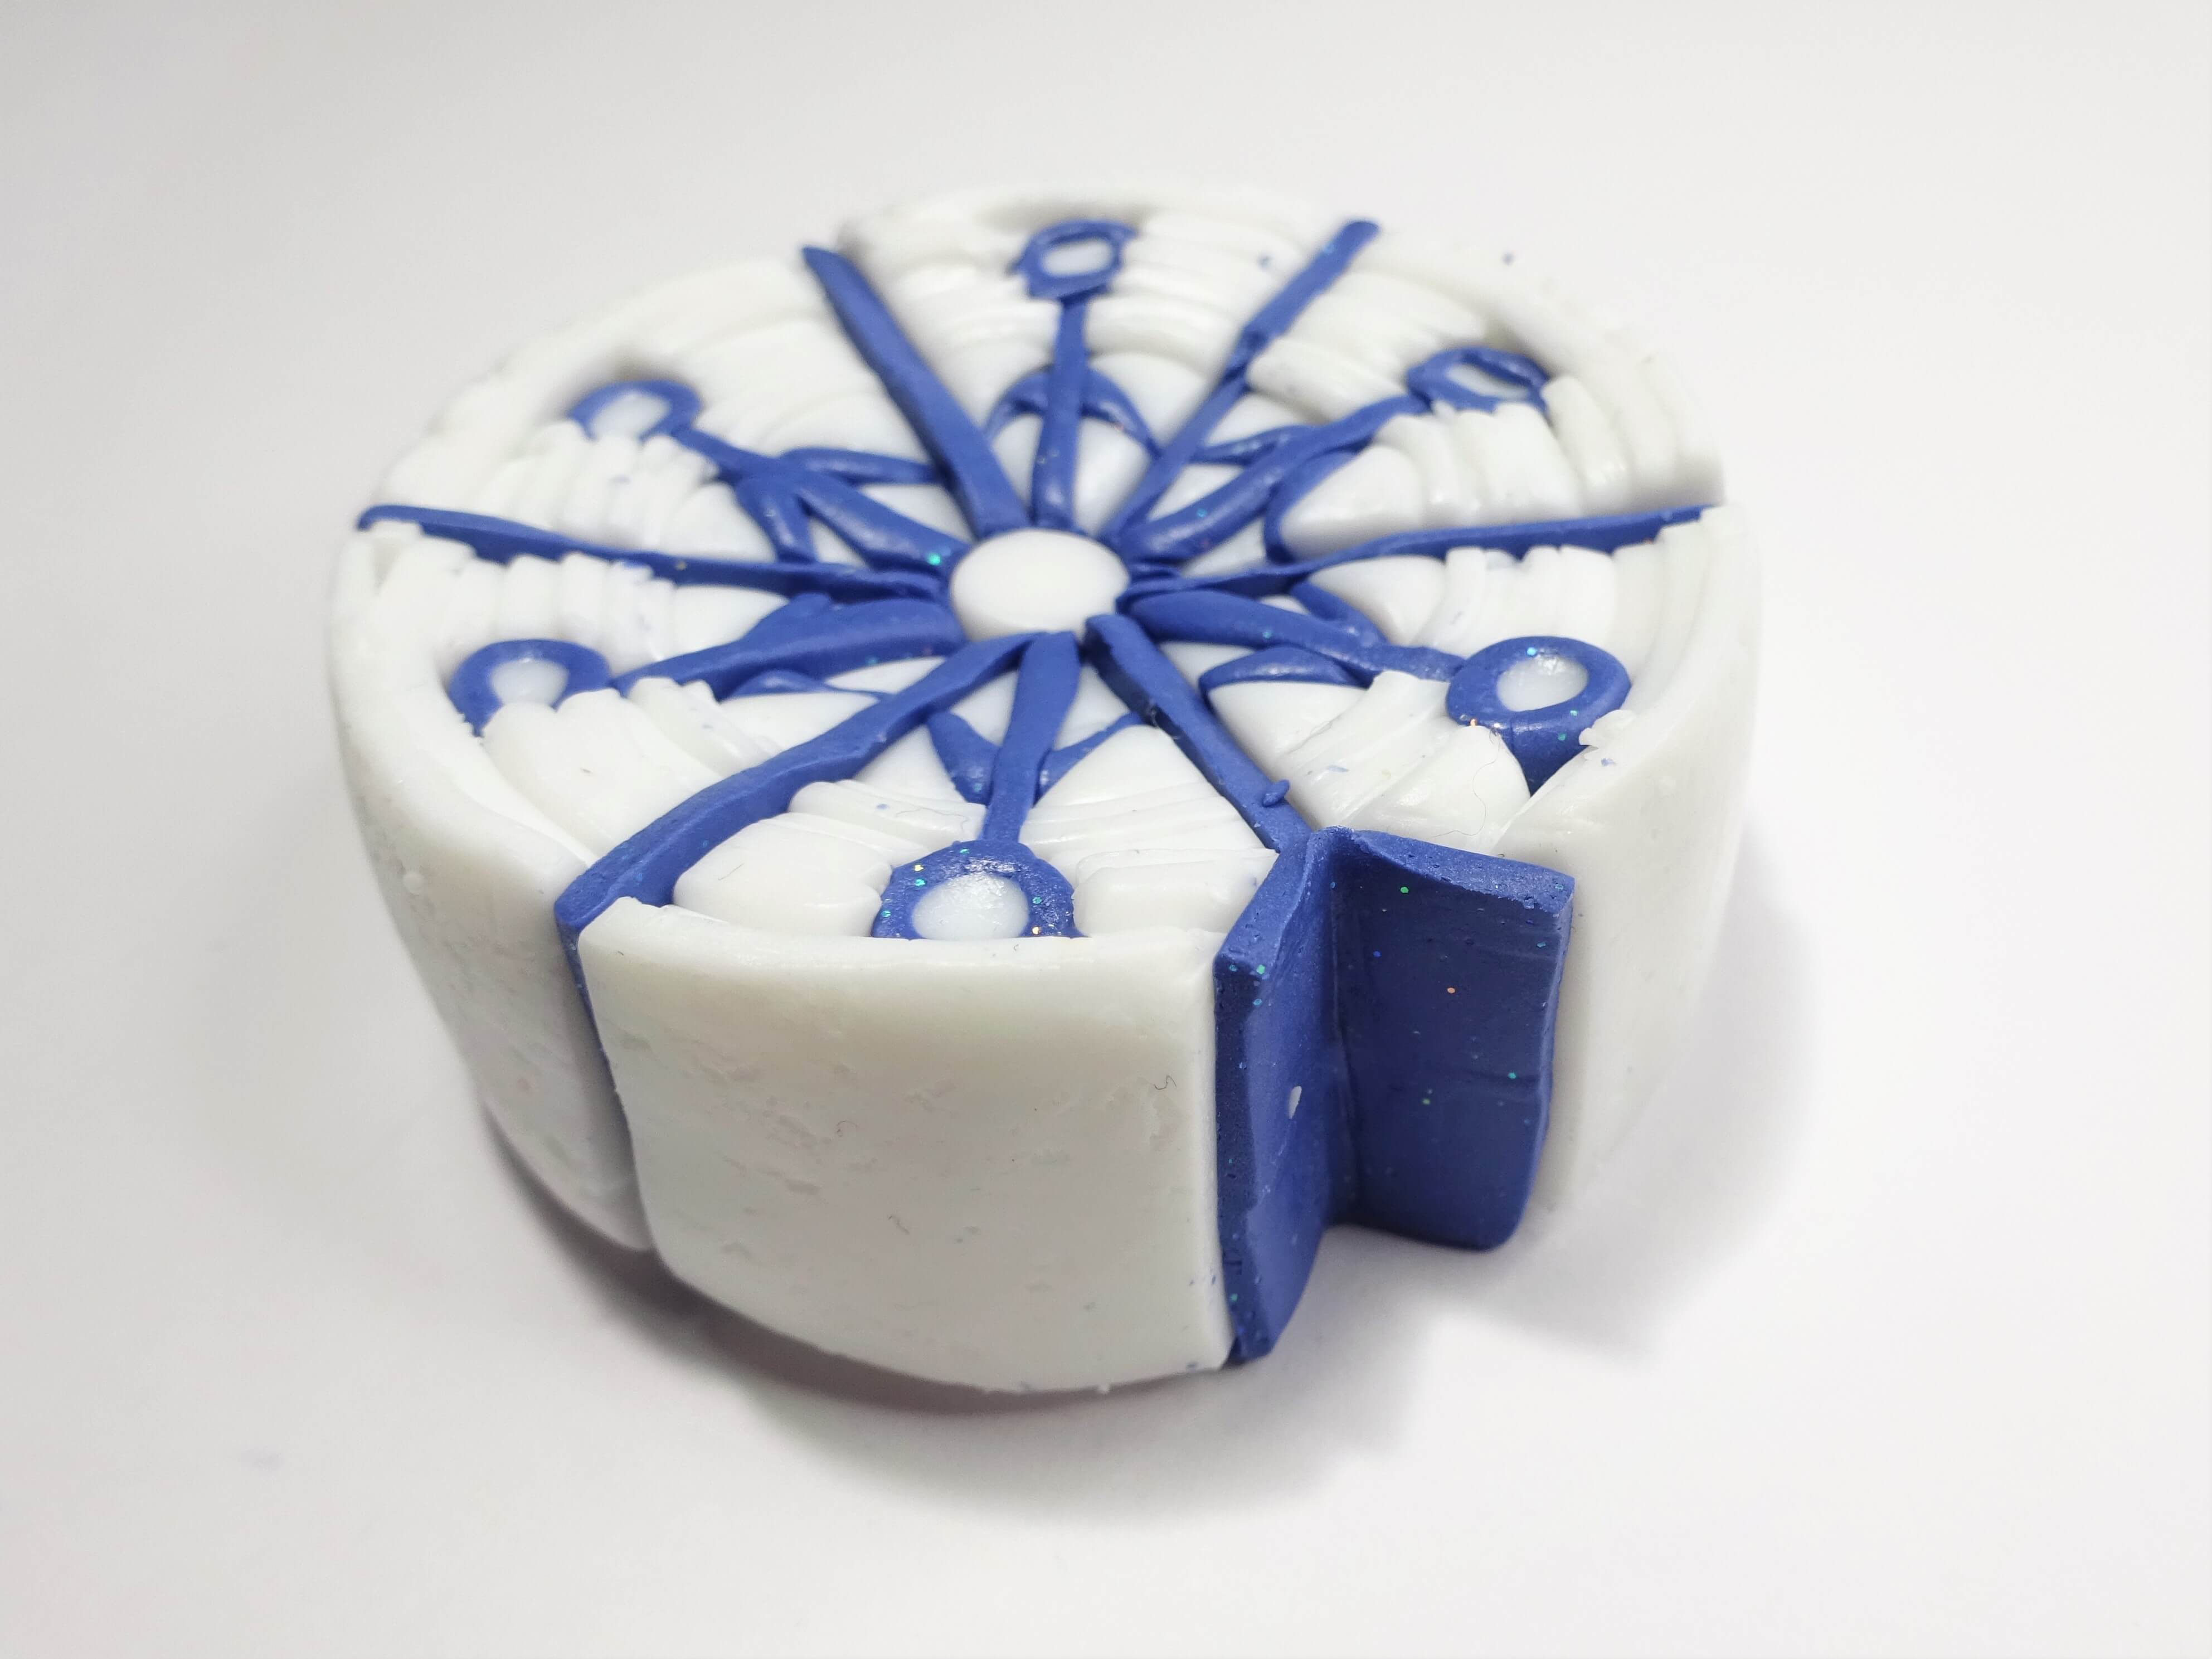
I have tried to make this snowflake cane as easy as possible, because I think it would be all too easy to get weighted down with adding all the lovely little details that snowflakes have, whilst simultaneously adding just enough detail to make it interesting to look at and make. I have made a blue snowflake surrounded by translucent clay for this post but for the YouTube video linked below I have used the same blue clay but surrounded it with white polymer clay. The two different clays produce very different results in the finished pieces with the translucent looking more like glass.
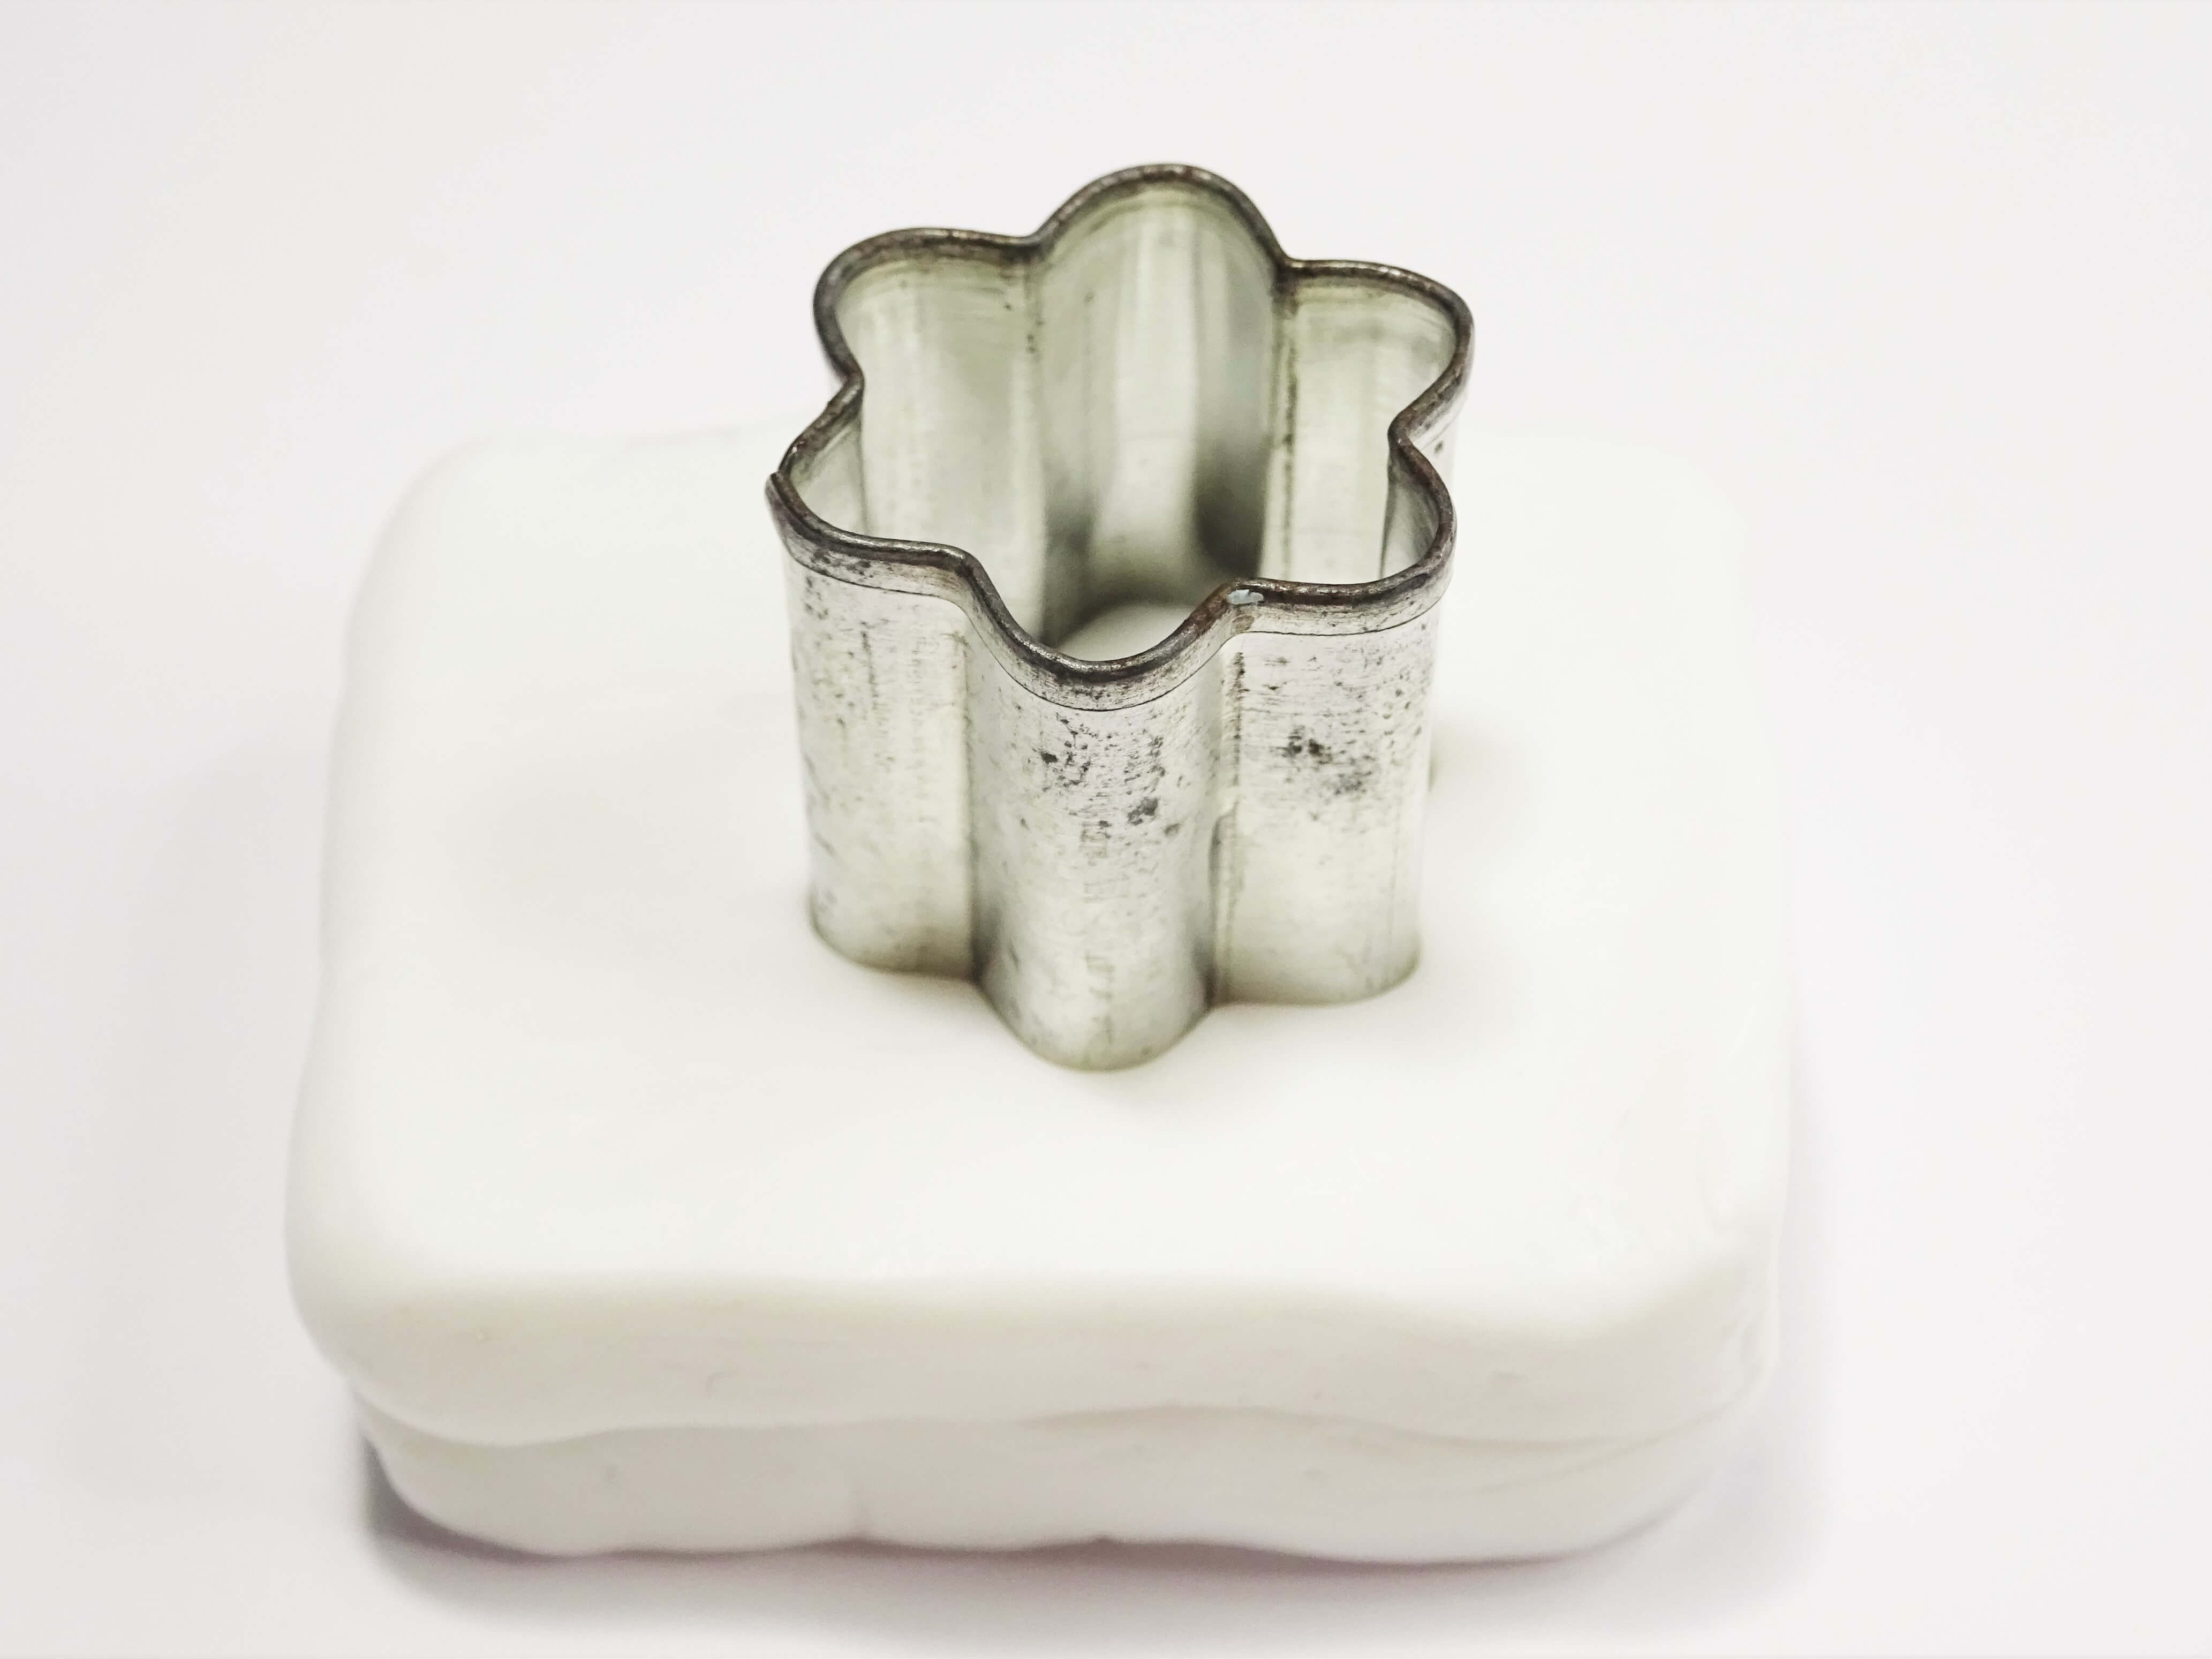
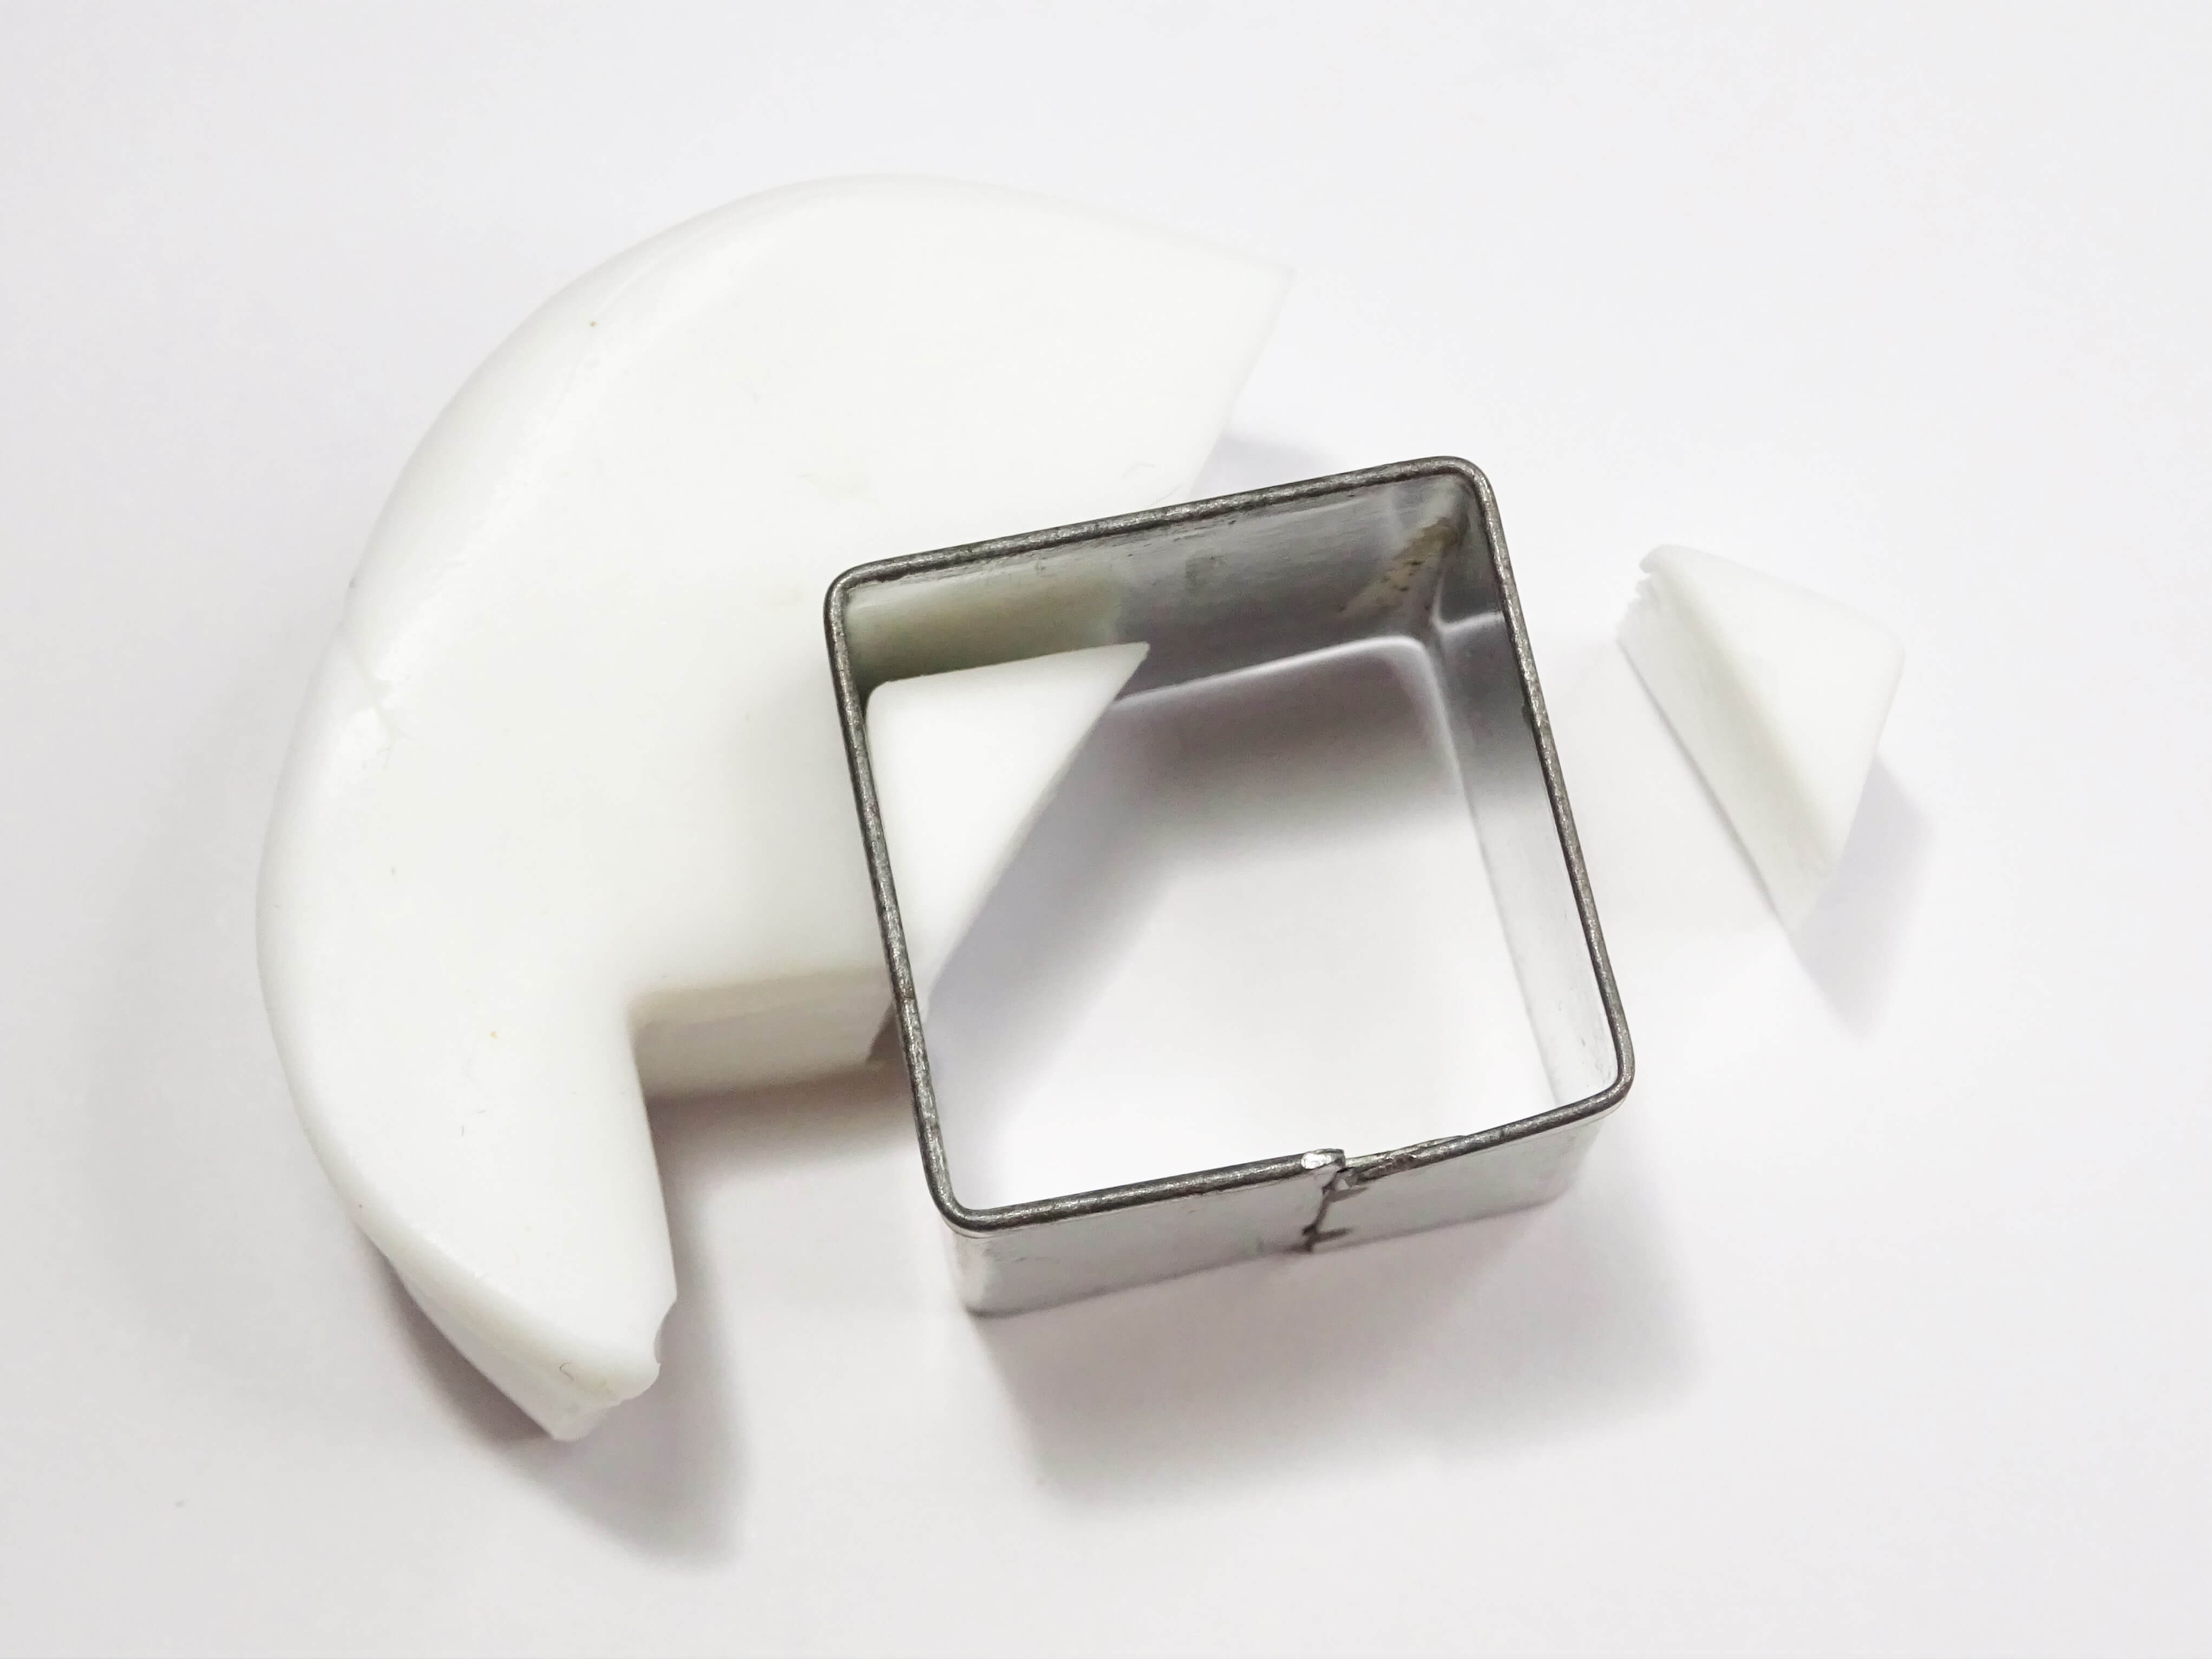
I have a very basic set of cookie cutters that I use every time I work with polymer clay (*Affiliate link – UK https://amzn.to/3DB5yI2 and USA https://amzn.to/305oIbq). I took inspiration from the first cane I wrote a tutorial for – it was an easy polymer clay flower cane and I used 3 of the cutting shapes in this basic cookie cutter tin to form the entire cane. Whilst I needed more than just the cutting shapes to make this cane (cutting blades and some way of rolling out clay are the only other tools needed), there are two cutters that I used repeatedly to help shape and form this snowflake cane. Can you guess which they are?! I won’t keep waffling on, so, lets get going….
How To Make An Easy Polymer Clay Snowflake Cane
You will need to choose two colours of clay for your snowflake cane – one for the snowflake and one to surround it. I have used blue for the snowflake and translucent (looks white until it is hardened) to surround the snowflake. Begin by conditioning both colours of clay.
Next, we need to form the 6 pointed star shape that sits at the heart of the snowflake. To do this pick the smallest flower shape from the cutting set (if you are using a different flower shape make sure it has 6 petals) and make your surrounding clay colour (translucent white for me) into a block so that it is about two thirds the height of the cutting shape.
Use a damp tissue to add some moisture to the cutting shape and push the cutters down into the clay. Don’t press down all the way, lift the cutting shape back out, re-dampen the shape and the put the cutter back in and finish the cut. Carefully lift your you cutter shape and the cut clay should either be on the work surface or very easy to remove from the cutting shape.
This amount of clay will make a small cane so it is perfect for small projects but if more snowflake cane is needed cut a second flower in exactly the same way and layer the two flowers on top of each other.
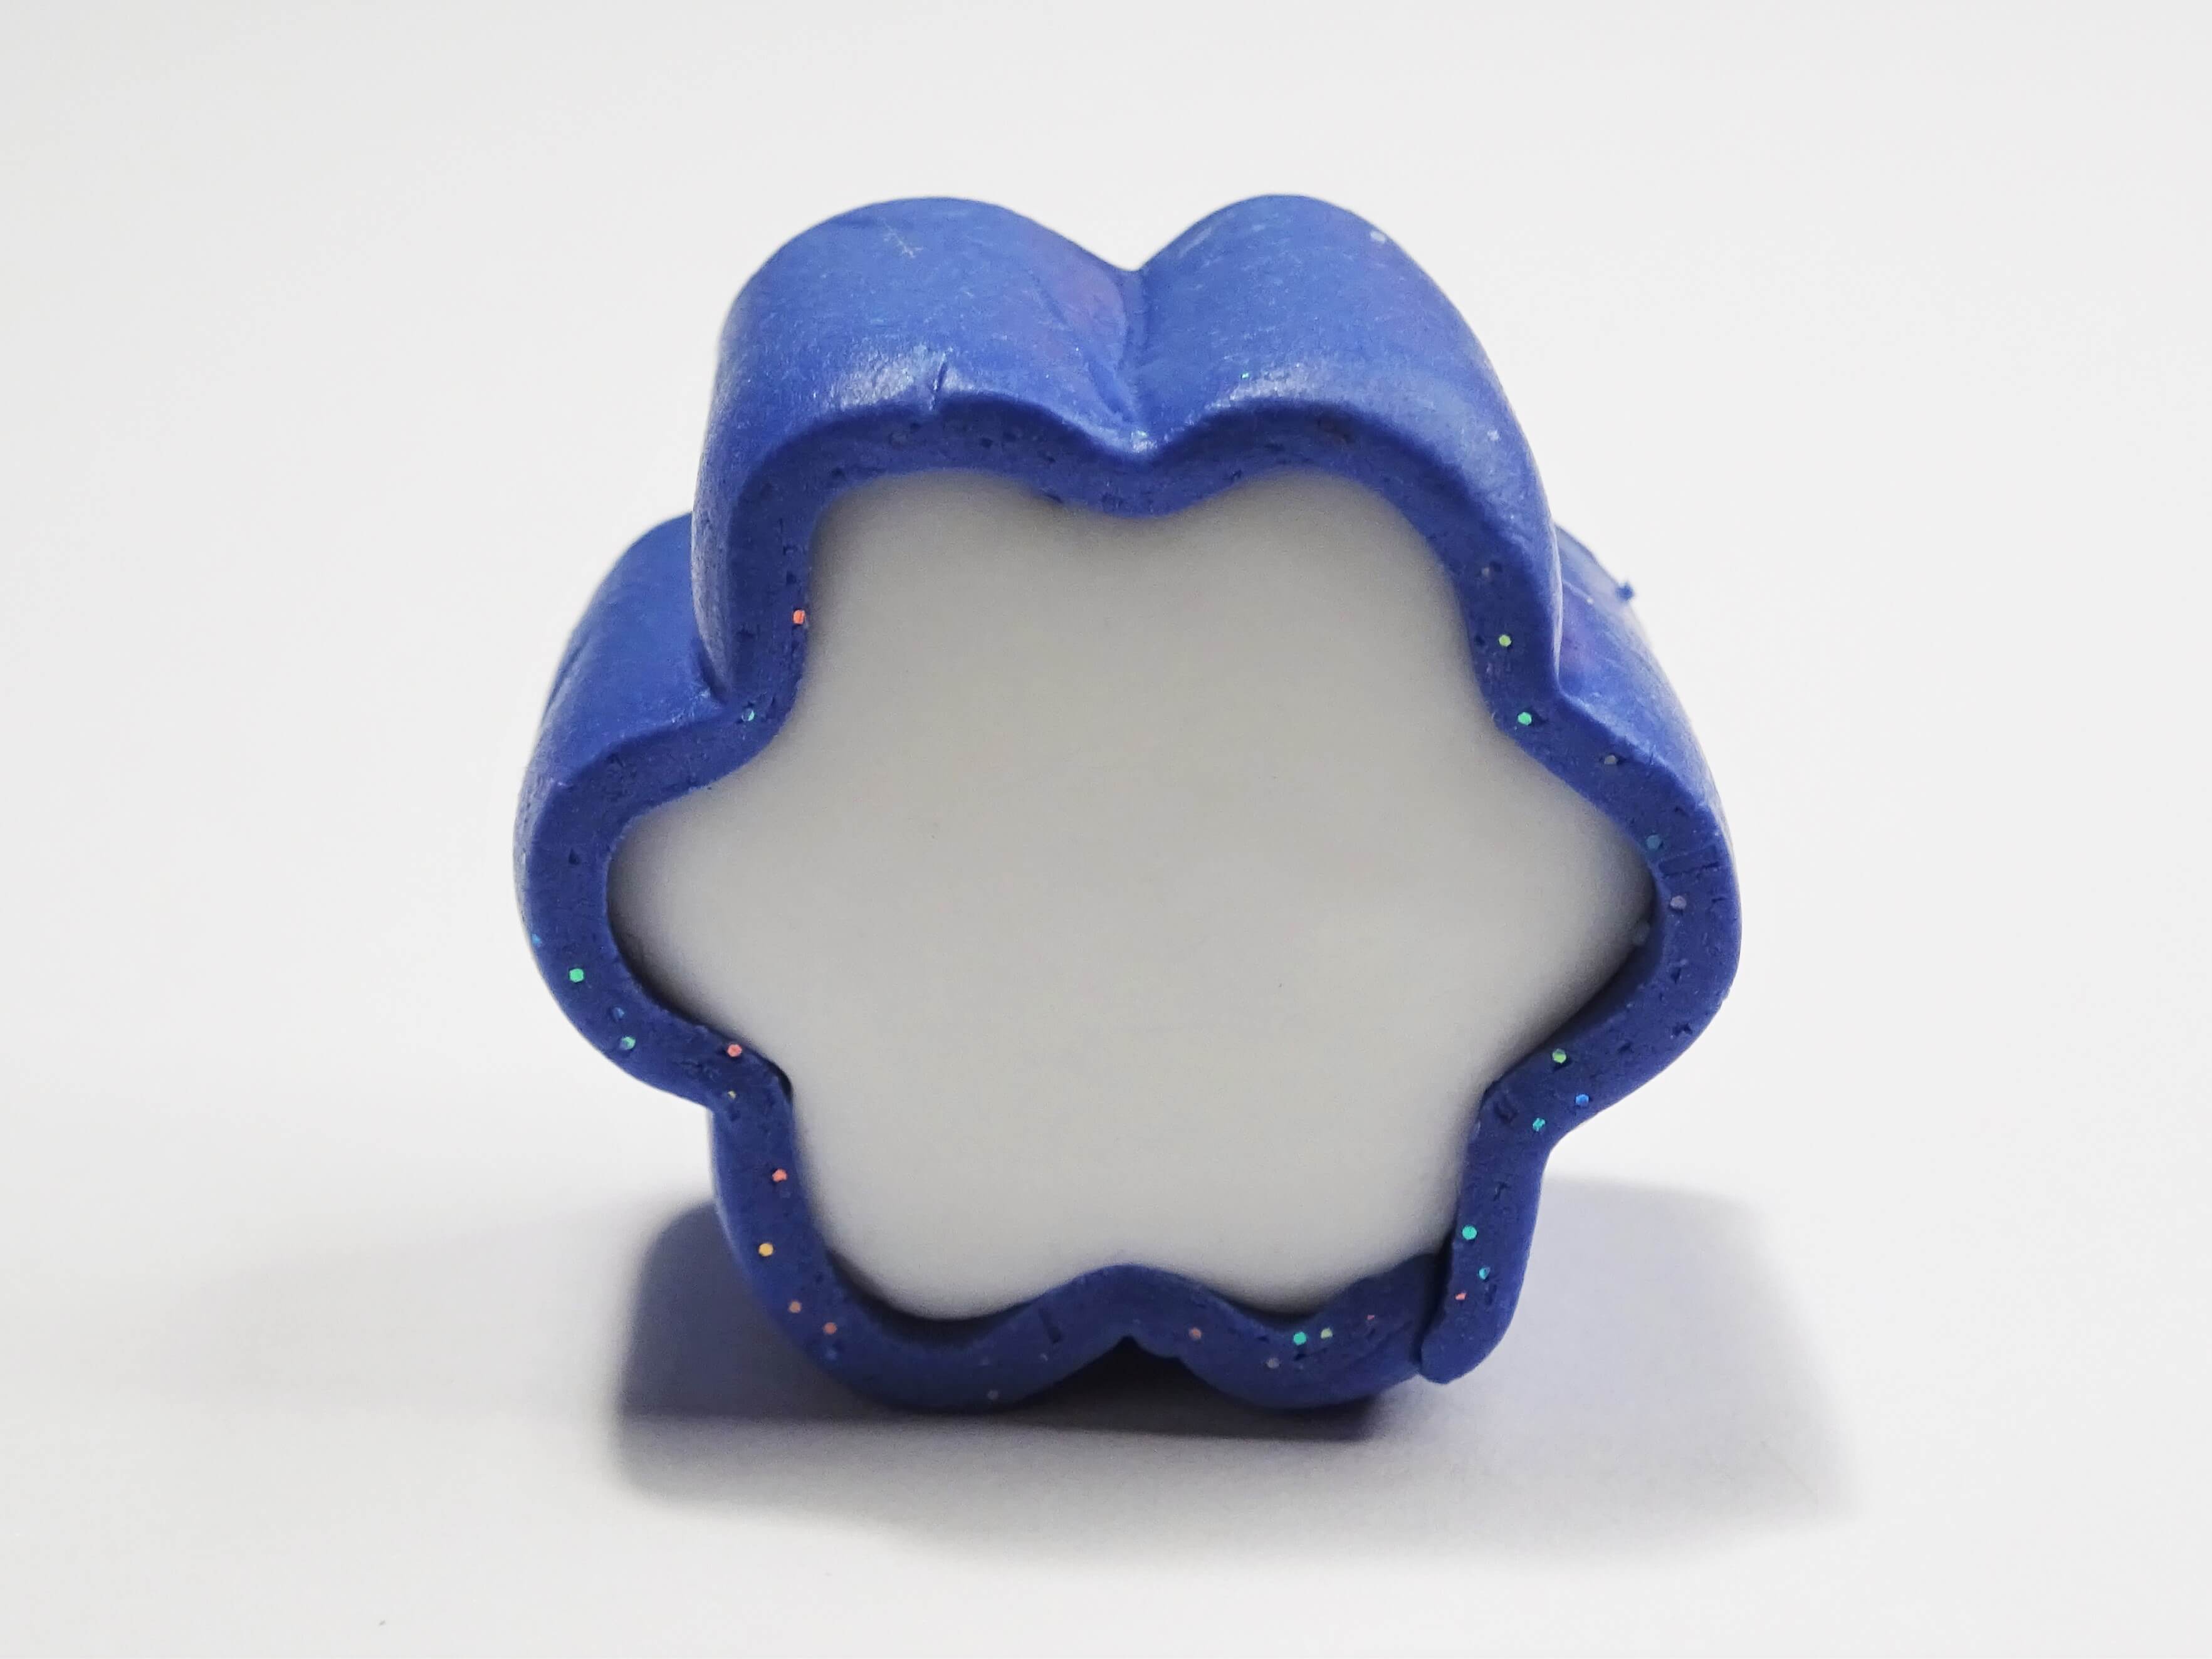
Roll your snowflake colour out by hand or on a number 3 on you machine and wrap it around the flower shape, making sure it fits snugly around the petals.
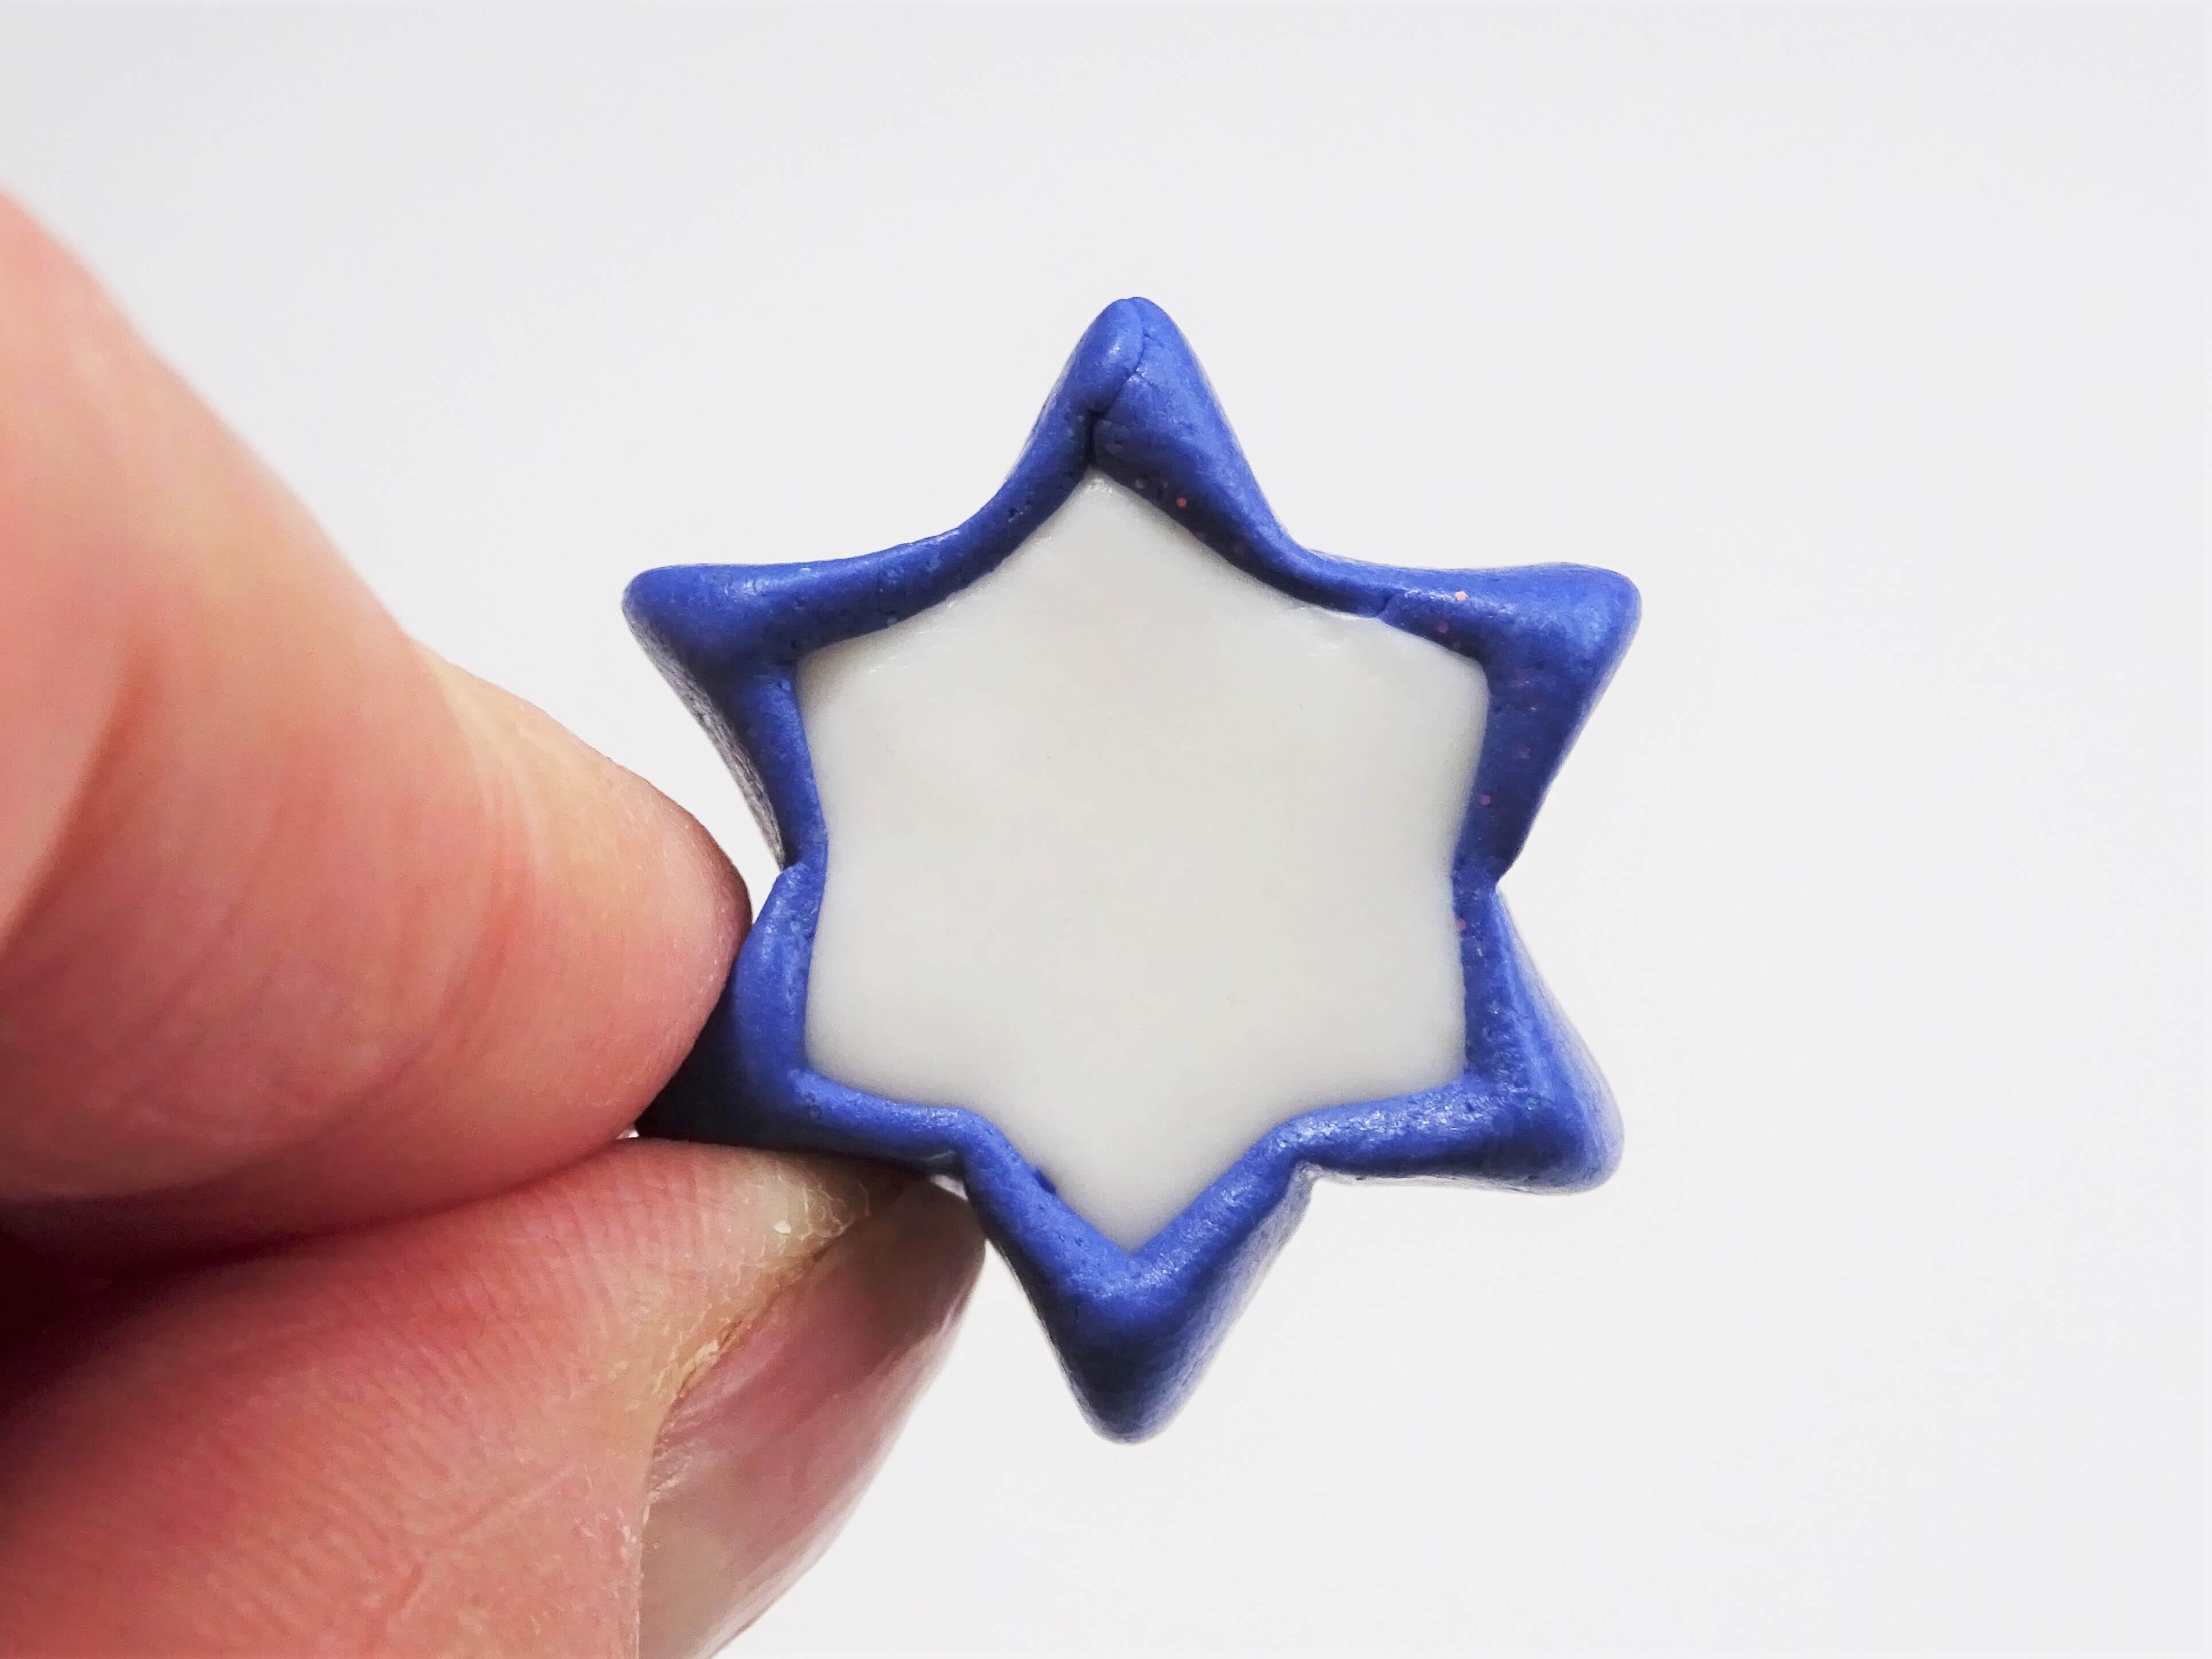
To transform this flower into a star shape, simply use your thumb and finger to squeeze each petal so they form a point. Use the corner of the smallest square cutting shape in the set to push into the dip between the star points to give a neat and crisp shape.
Form more translucent clay into a block at the same height as the star you have just make and cut it in half so you have a straight line. Use just the corner of the smallest square cutter to cut 6 little triangles that are just big enough to sit between the star points.
Put all 6 triangles around the star making sure that the triangle points are sitting straight down in the ‘v’ shape between each star point. Check both ends of the cane.
Use your hand to squeeze the triangles so that they fill any gaps around the star point and reach over the top of each star point.
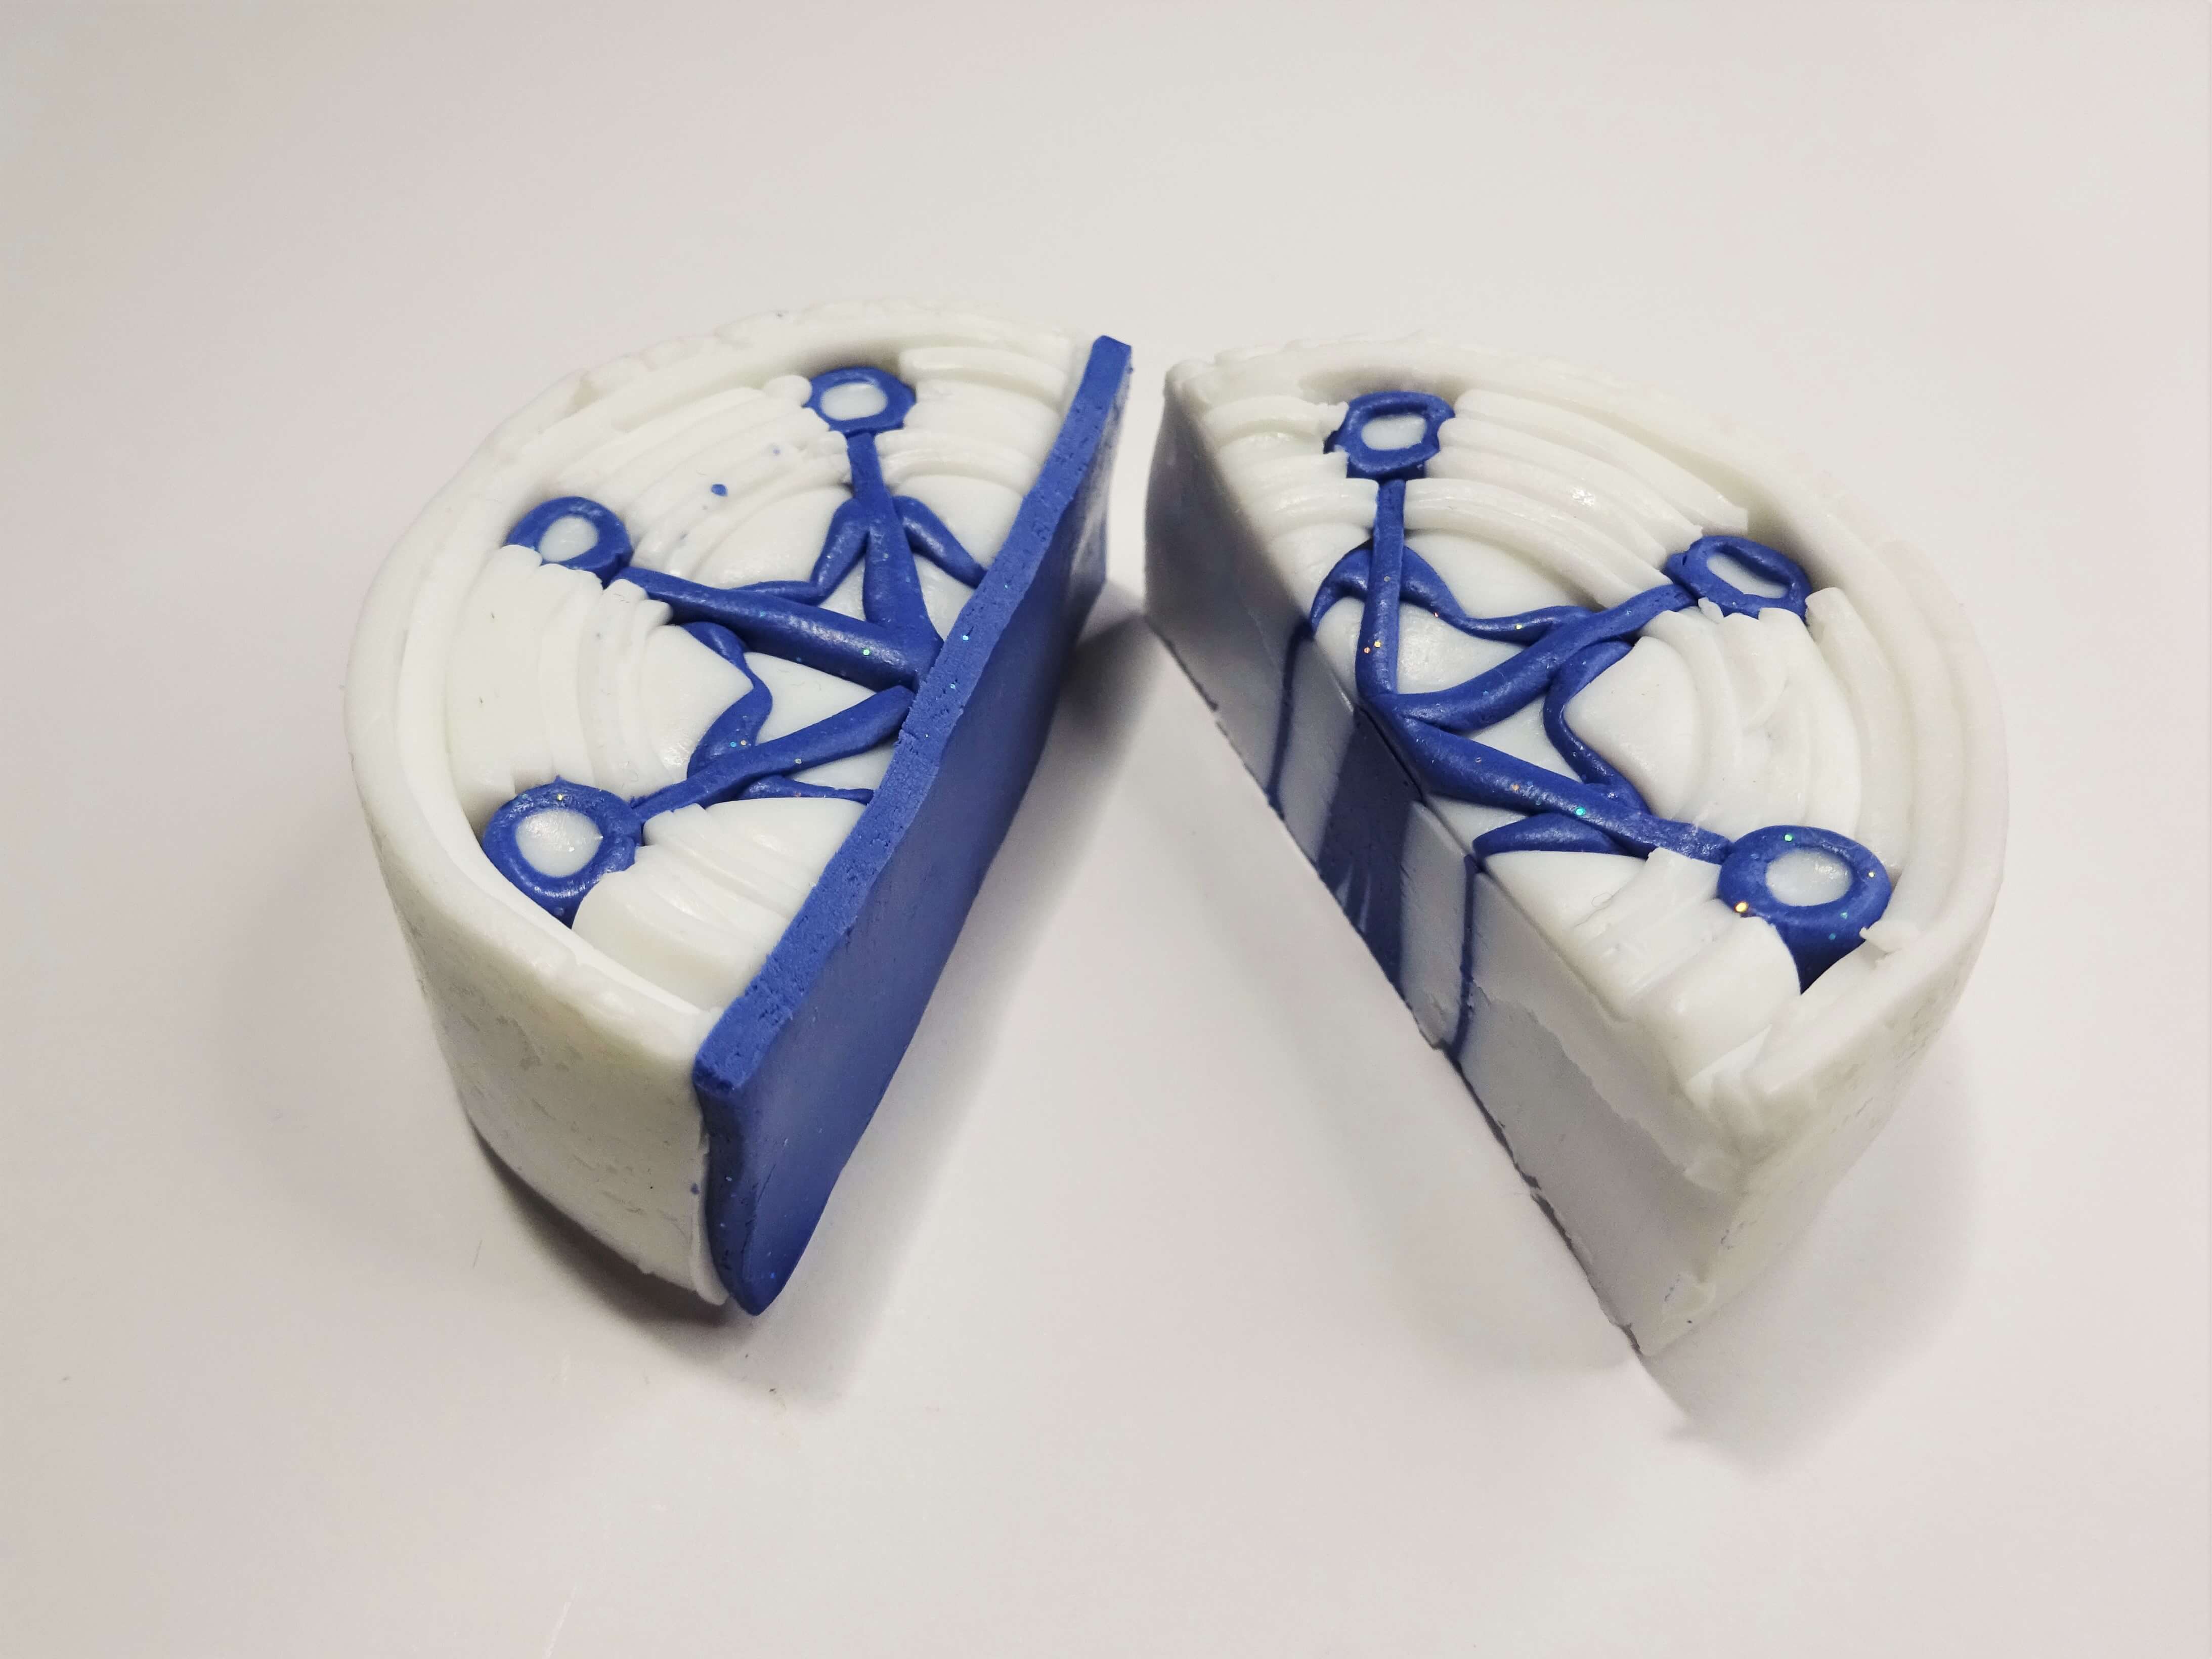
Roll out more translucent/white clay to wrap around the star. Wrap the cane twice. The idea here is to add height to the star points as we are going to add out first details coming out of the top of them. There needs to be enough clay to ensure that the new details doesn’t merge with the star points.

Cut the whole shape in half, cutting from one star point straight across to the opposite star point. Keep your cutting blade as straight as you can so that you cut right through to the star points on the other end of the cane. If you don’t cut straight, gently squeeze the cane back together and then cut again.
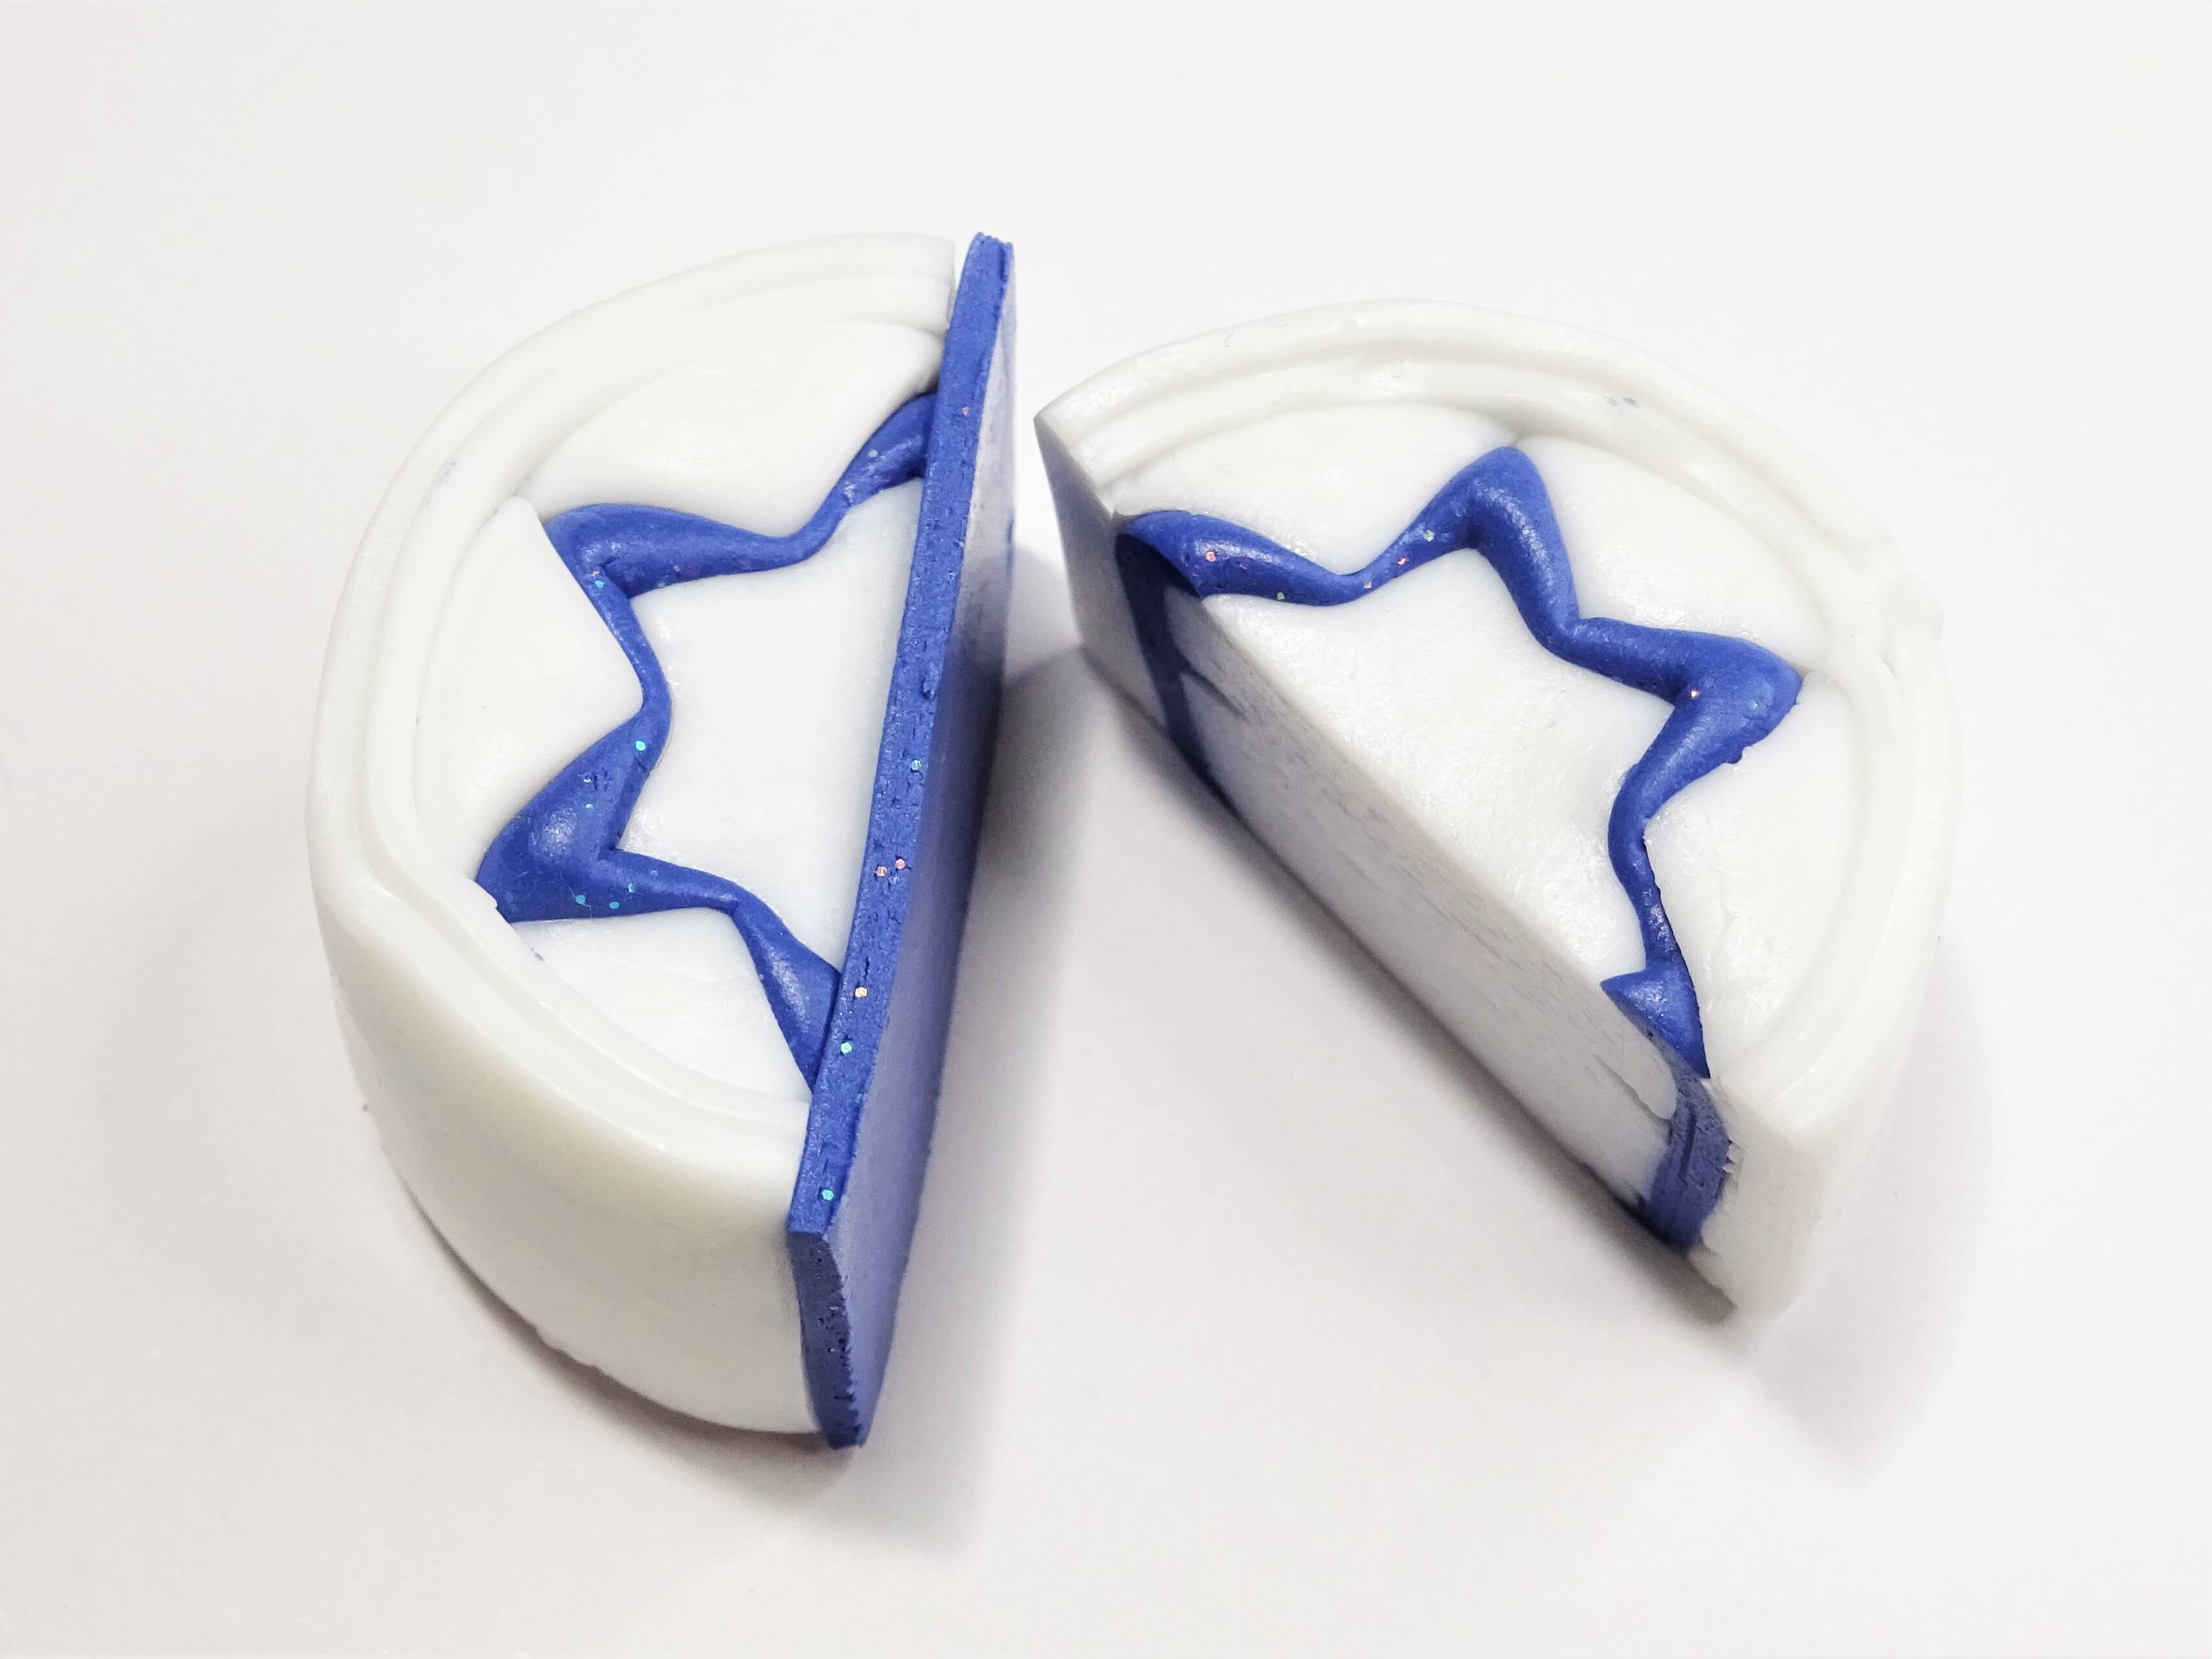
Roll more blue clay out (on a number 4 if using a clay machine) and layer one half of the cut cane onto it. Cut around the cane half making sure that the blue reaches the edge or the white surround.
Put both sides of the cane back together making sure that you match it up at both ends of the cane.
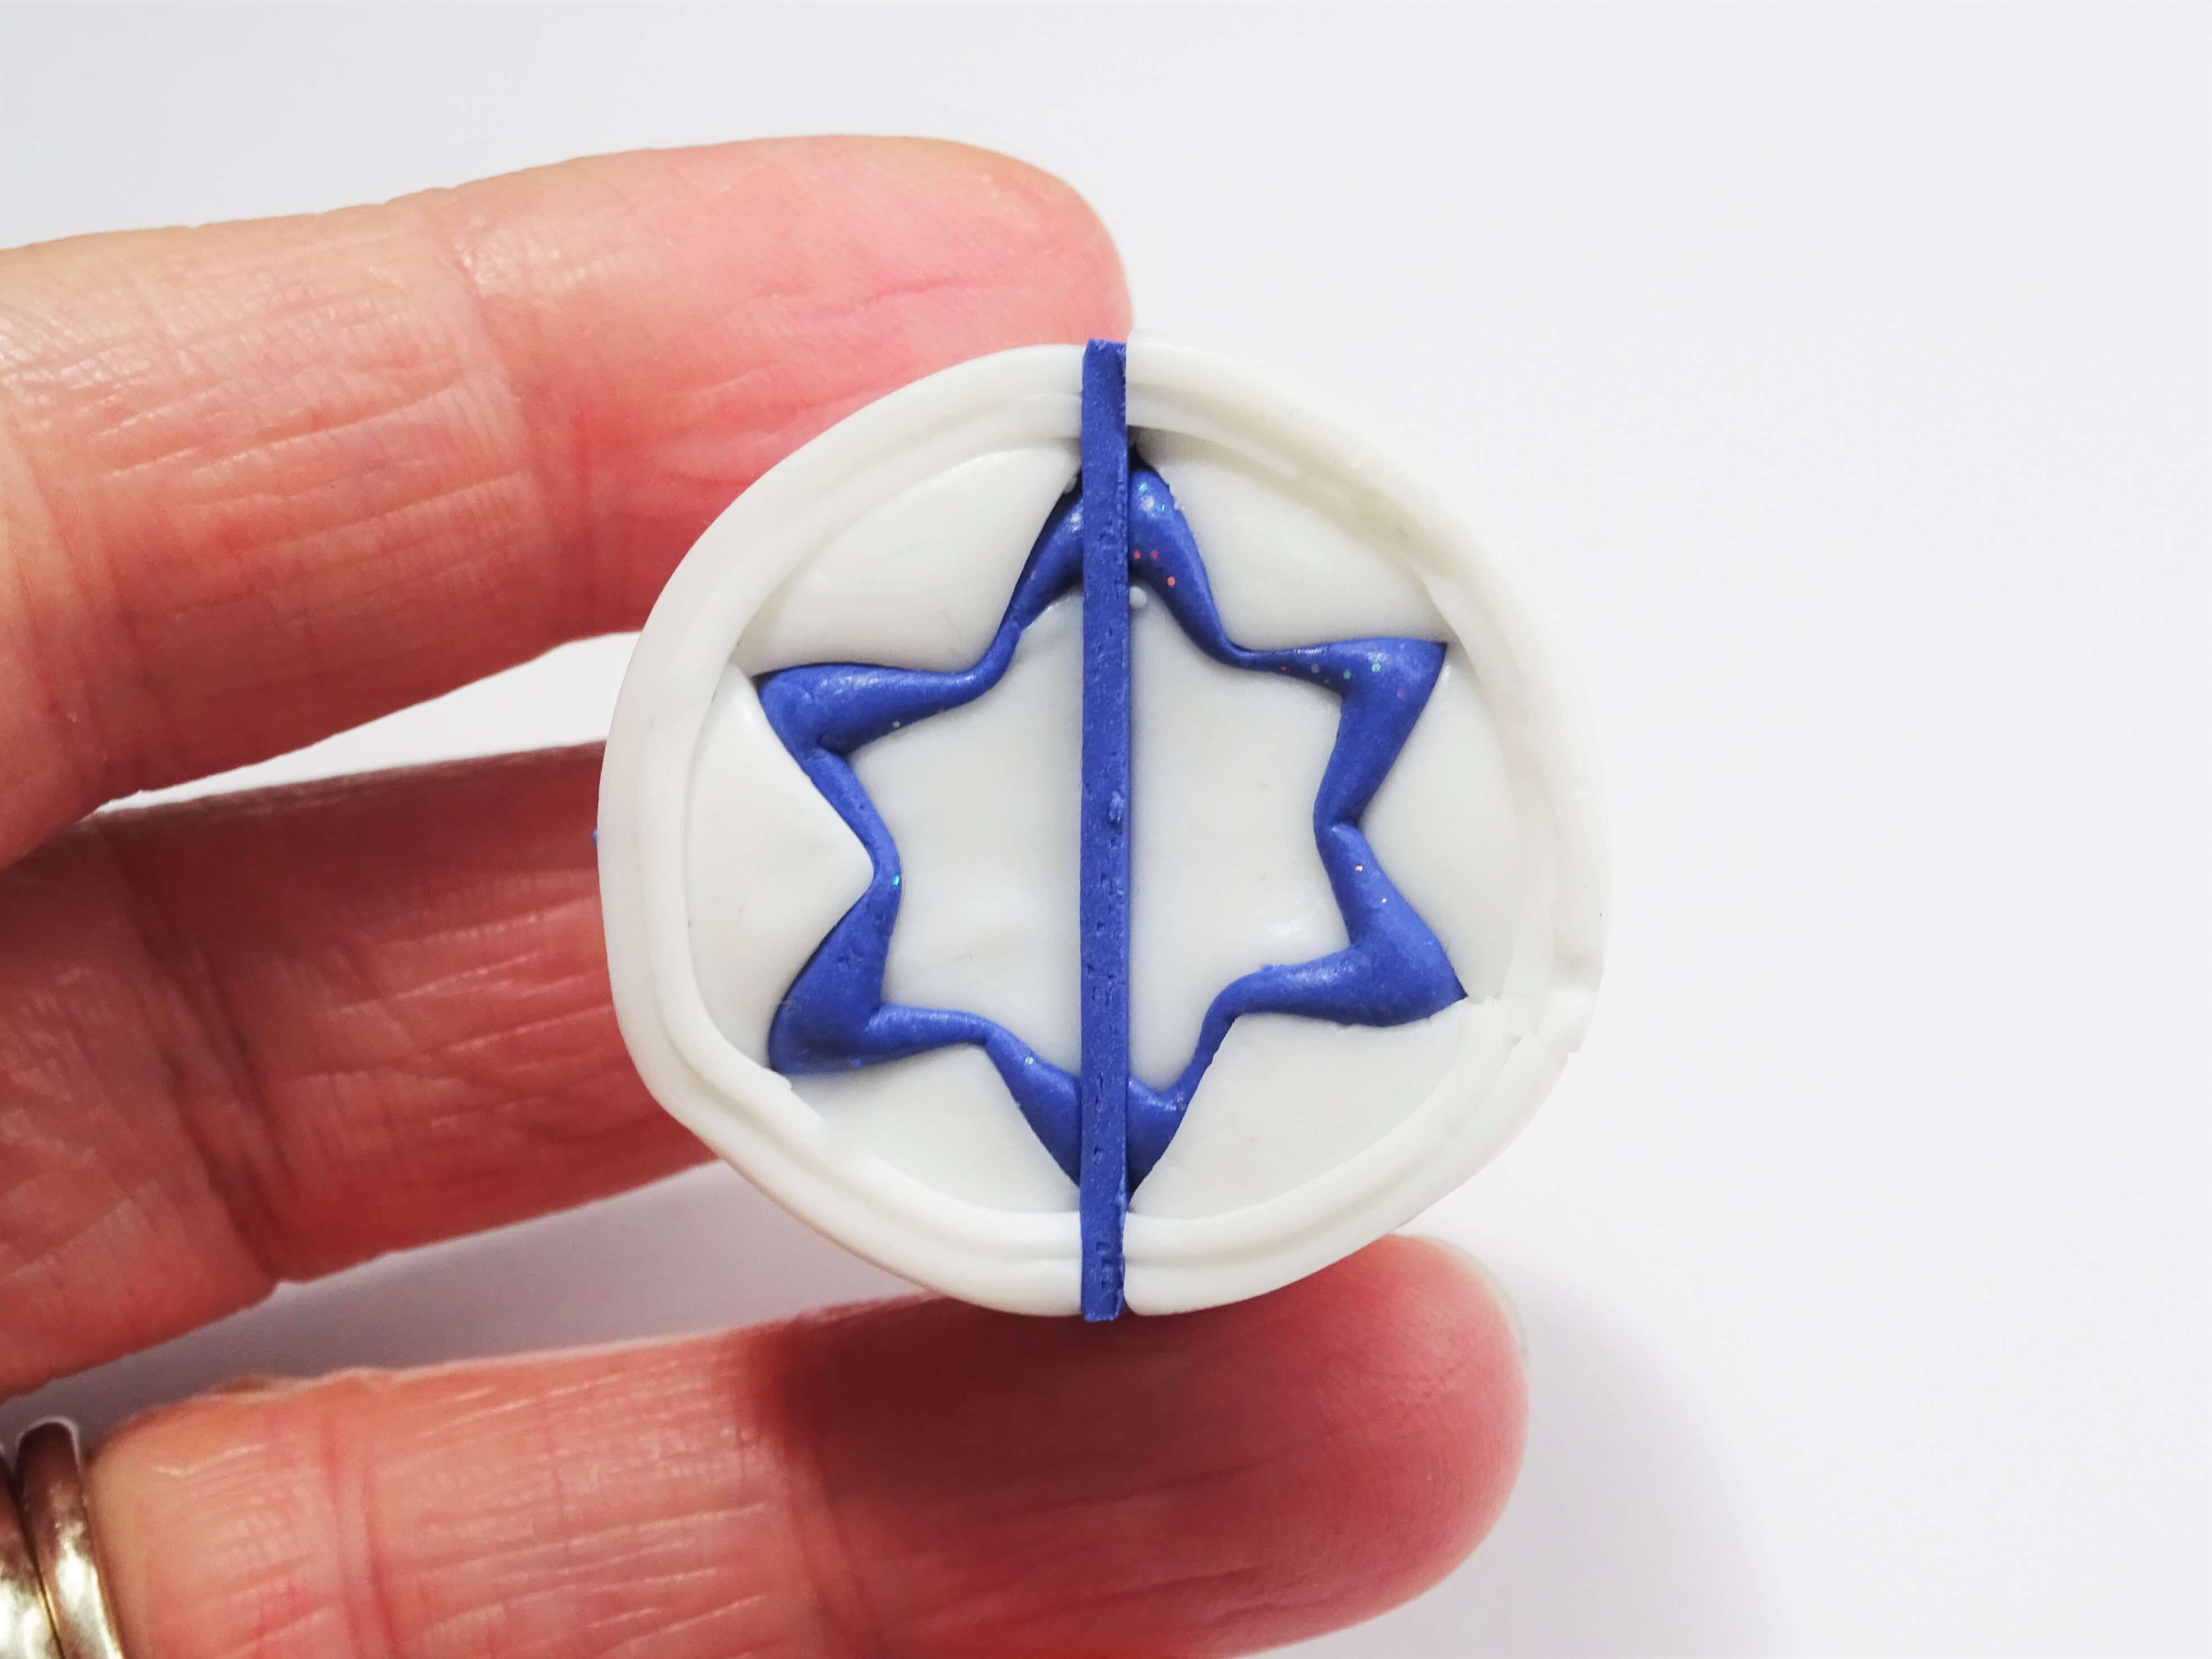
Repeat steps 9 and 10 twice more so that each star point has a line of clay going through it. When cutting the clay for this step try to keep a centre point where the clay crosses in the middle.

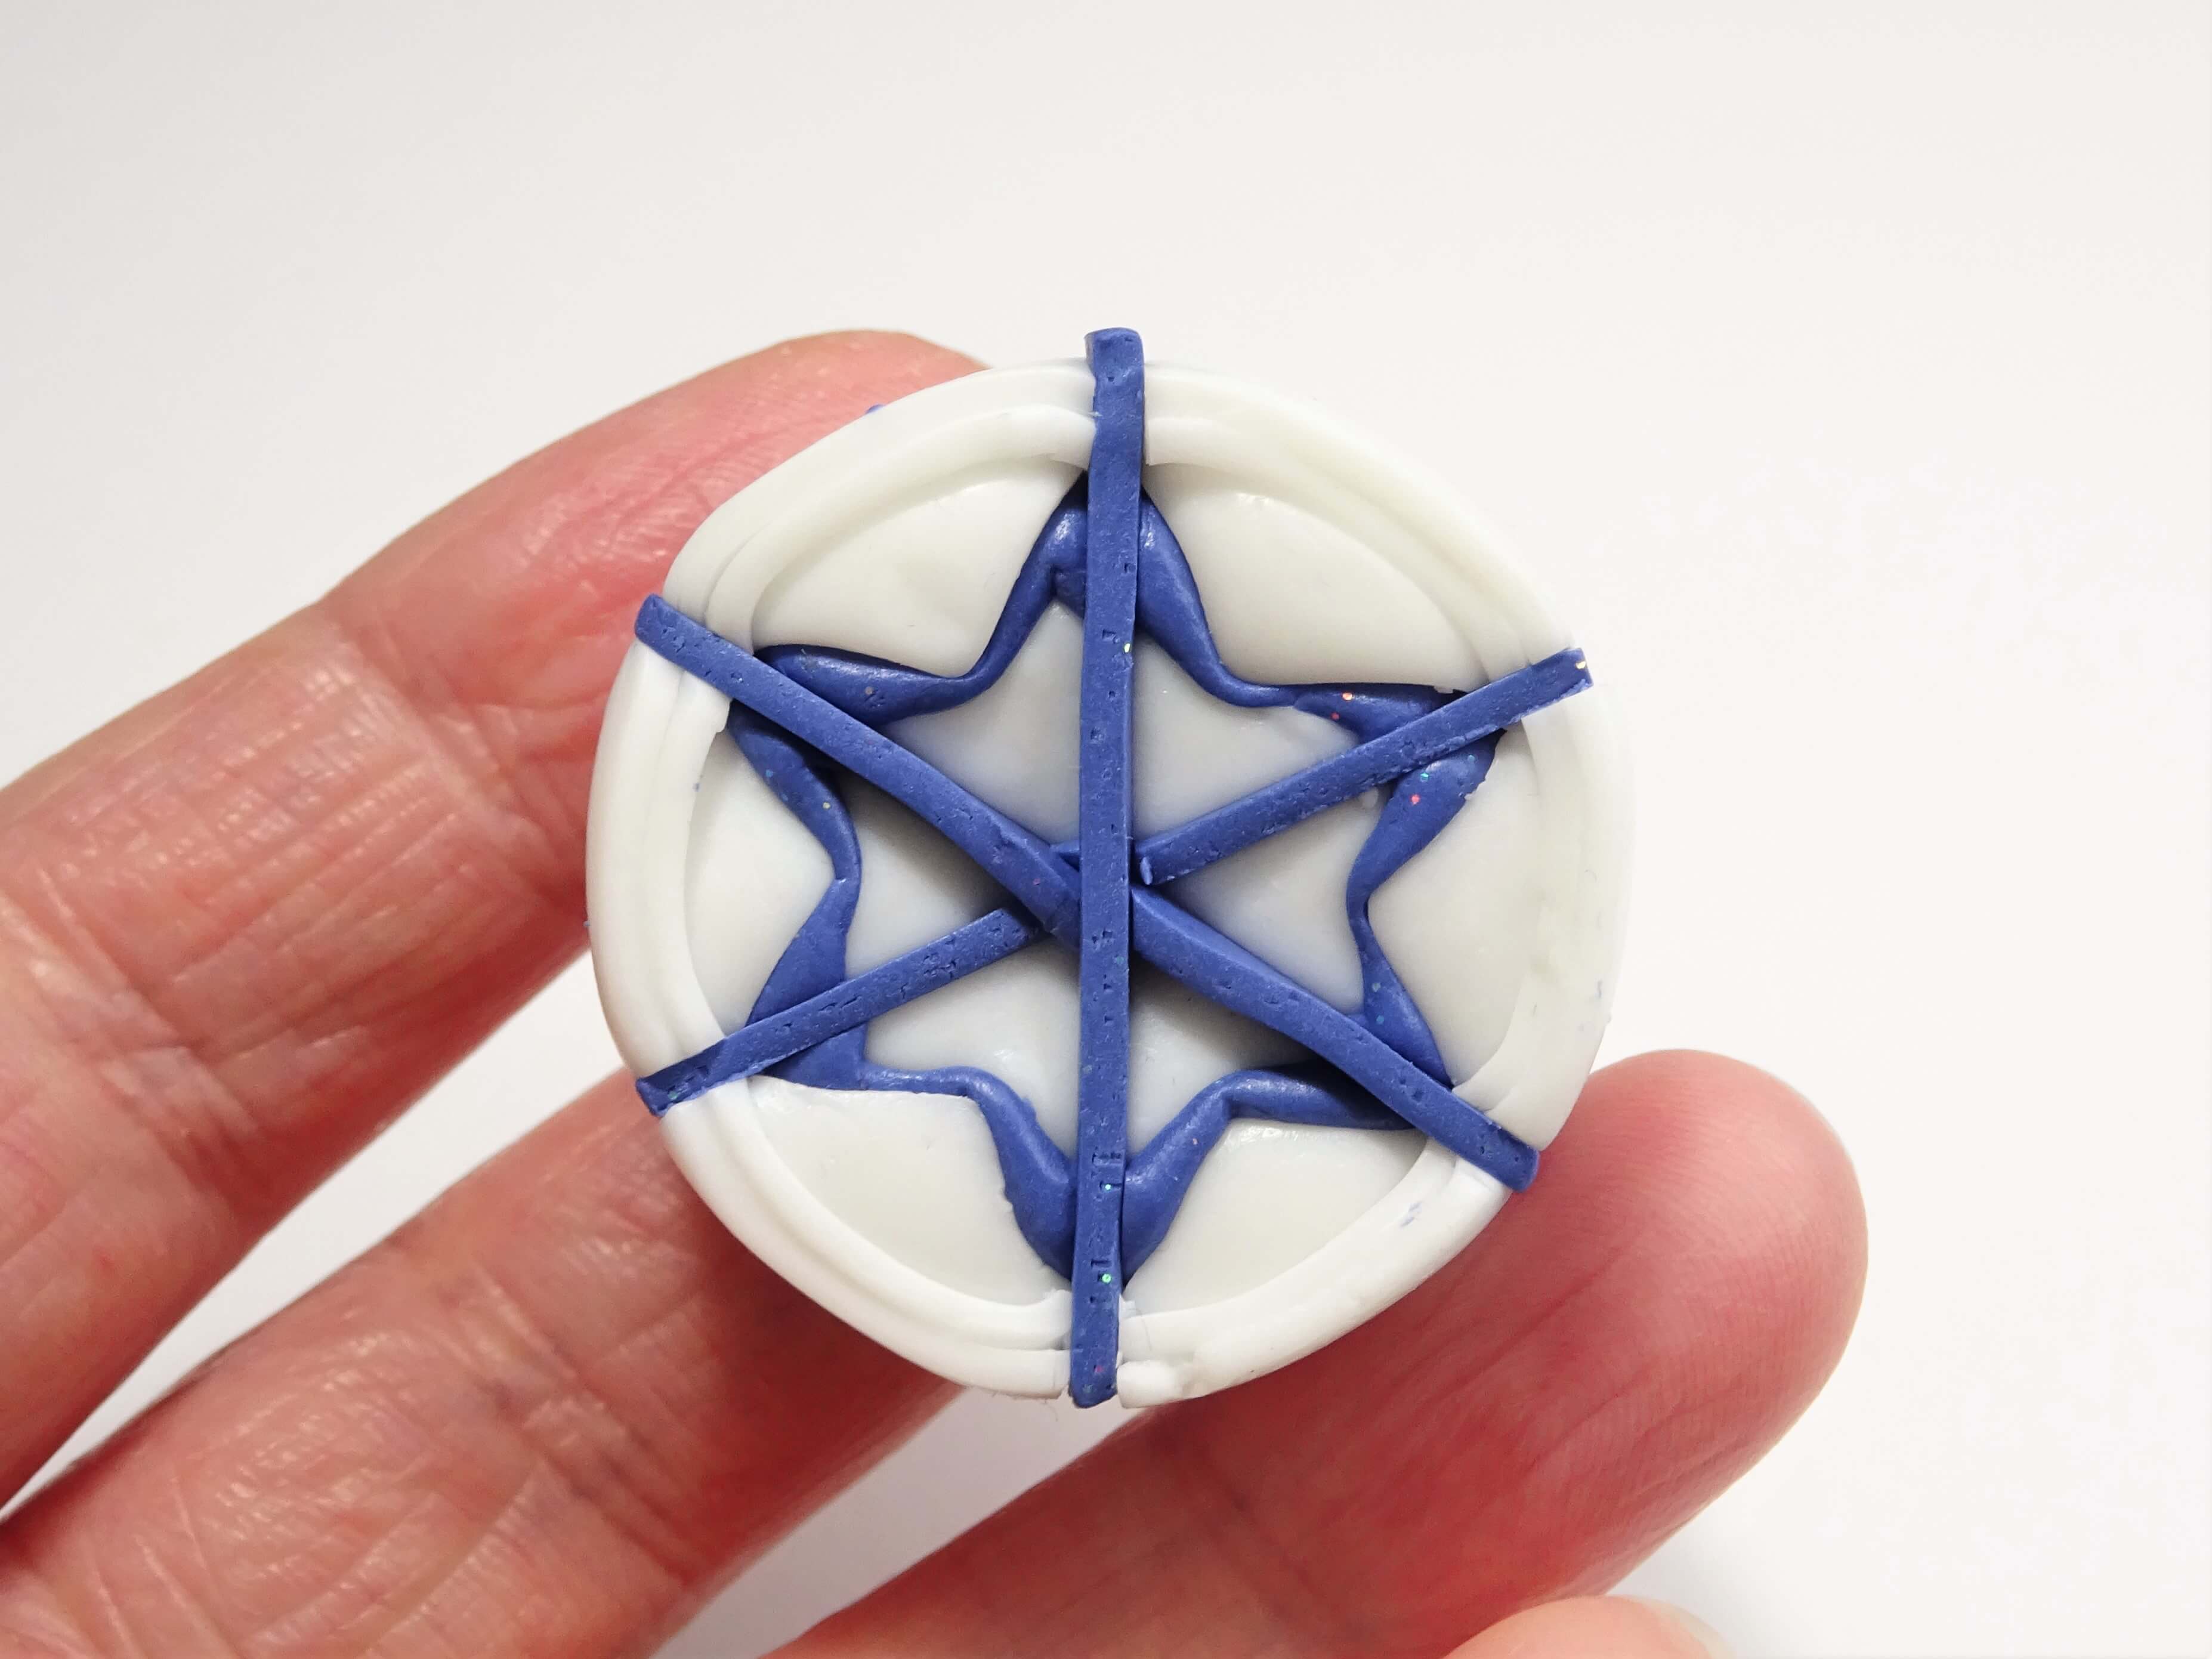
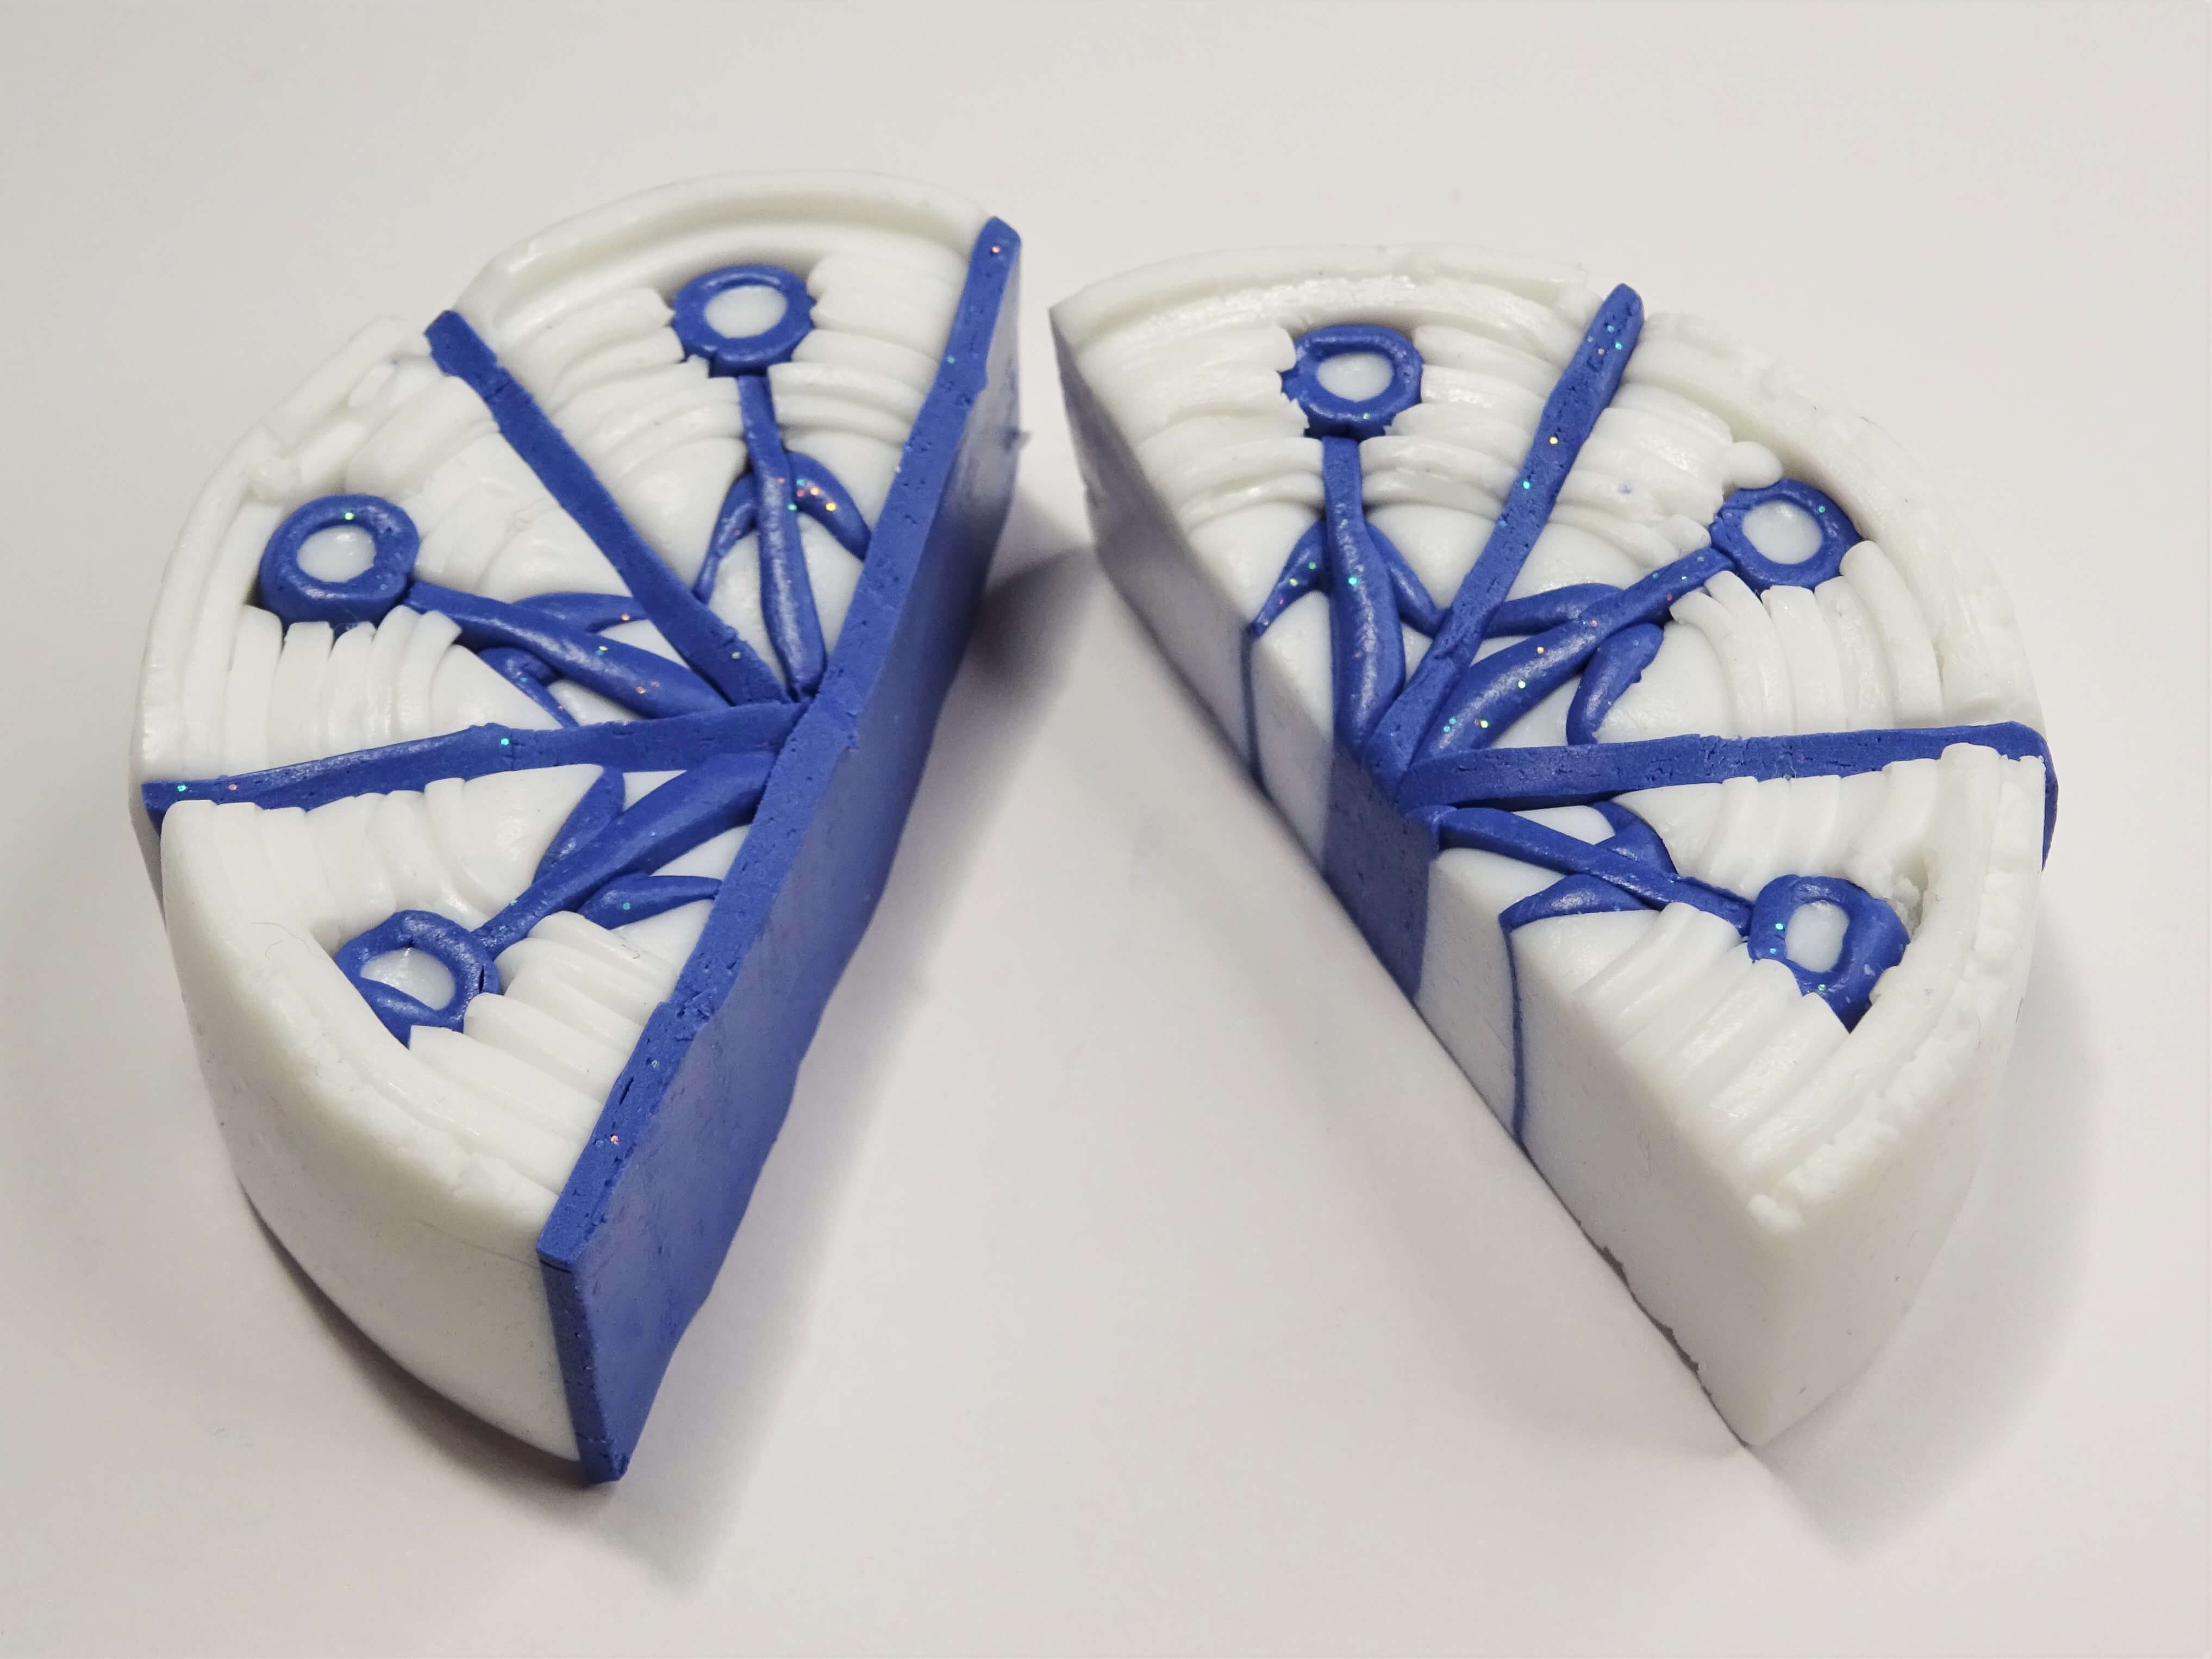
Roll out more white clay so it is roughly long enough to be cut into 6 pieces, each piece being the length of the star cane. Wrap a layer of blue clay (rolled on a number 4 again) around the white to make a bulls eye cane. This step needs to be done by eye as this cane will be added on top of the blue lines in the star cane. You will need to roll the clay so that it is in proportion with the star cane.
Cut your bulls eye cane into 6 pieces at the same length as the cane and place each one on top of the lines of blue clay on the star cane. Make sure no white clay is covering the lines of blue as the bulls eye cane needs to connect to it.

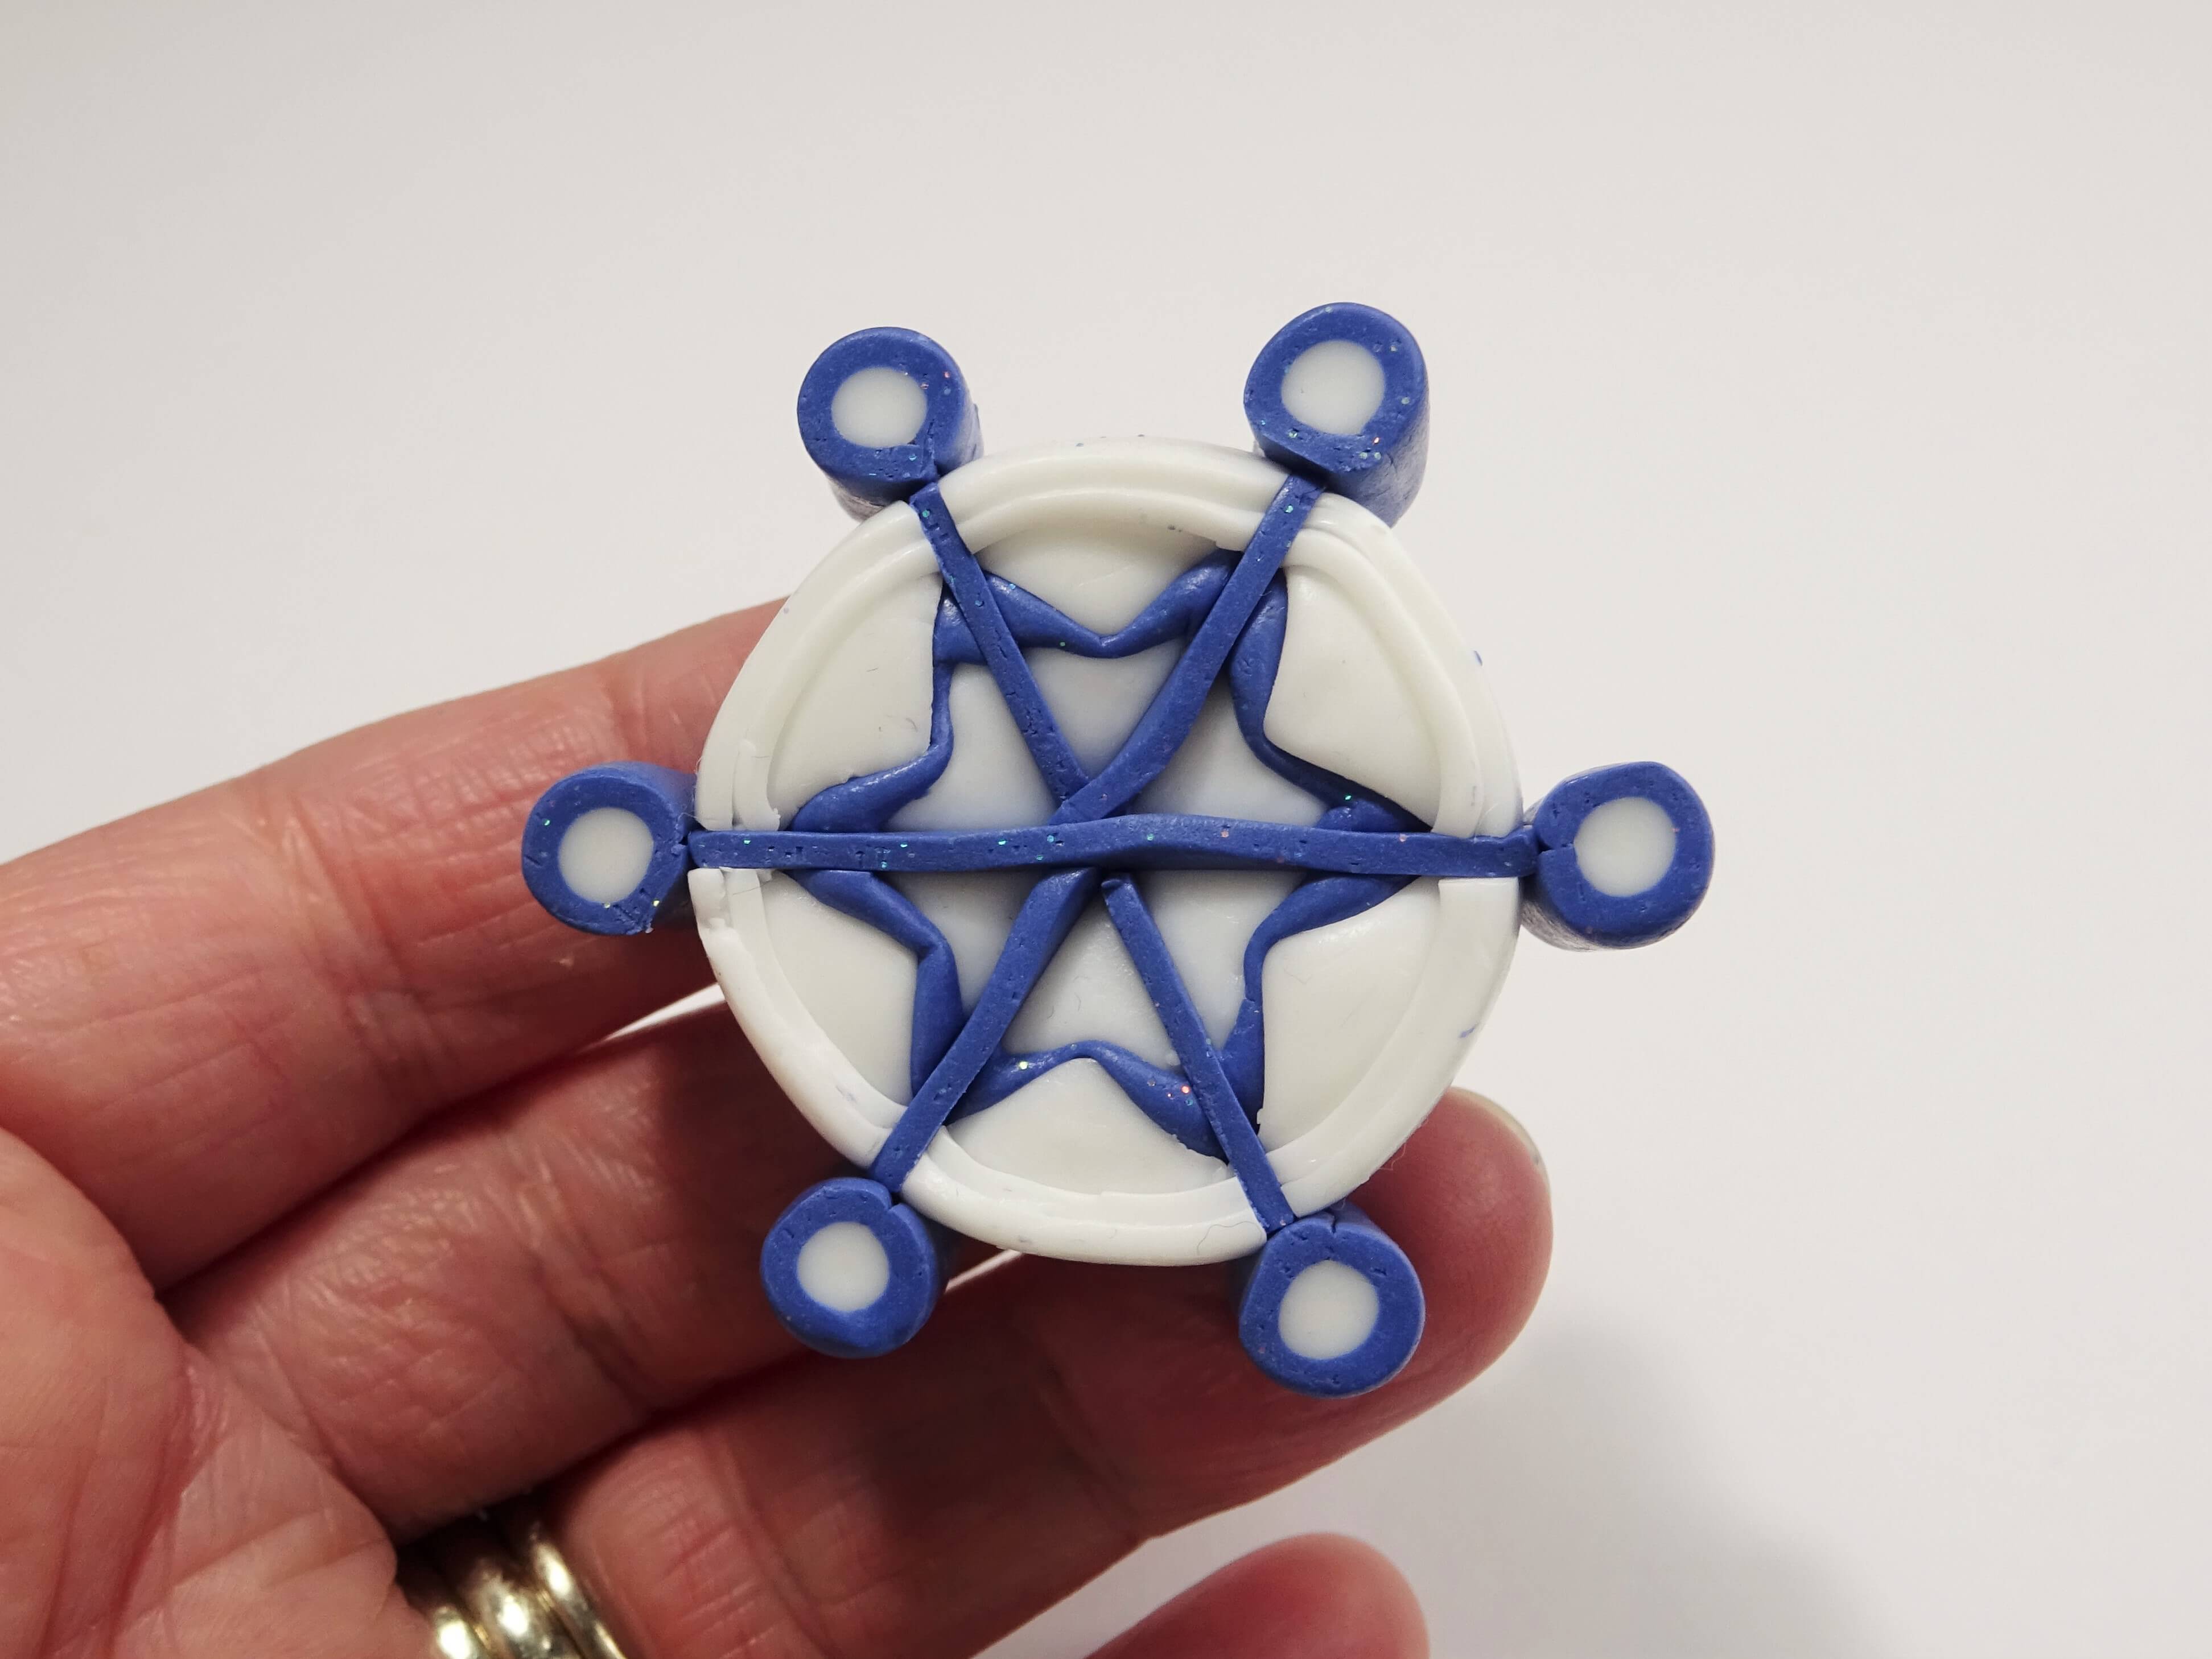
Add rectangles of translucent/white clay in between the bulls eye cane to help support the shape whilst reducing the cane. It took me 3 layers of clay between each point to built the translucent/white to reach the top of the bulls eye canes. Once the top is reached wrap the whole cane in a layer of translucent/white.

Wrap the whole cane in another layer of translucent/white and the cut the whole thing in half, this time cutting through the dips between each star point. Check that the cutting is even front and back.
As you have in previous steps, add a layer of blue clay along one of the cut halves.

Carefully put the can back together making sure it all lines up and then cut a second time between the next 2 triangle points along. Add a layer of blue clay and put it back together.
Cut the clay in half for the last time between the 2 remaining star points. Add a later of clay but don’t put the cane back together.
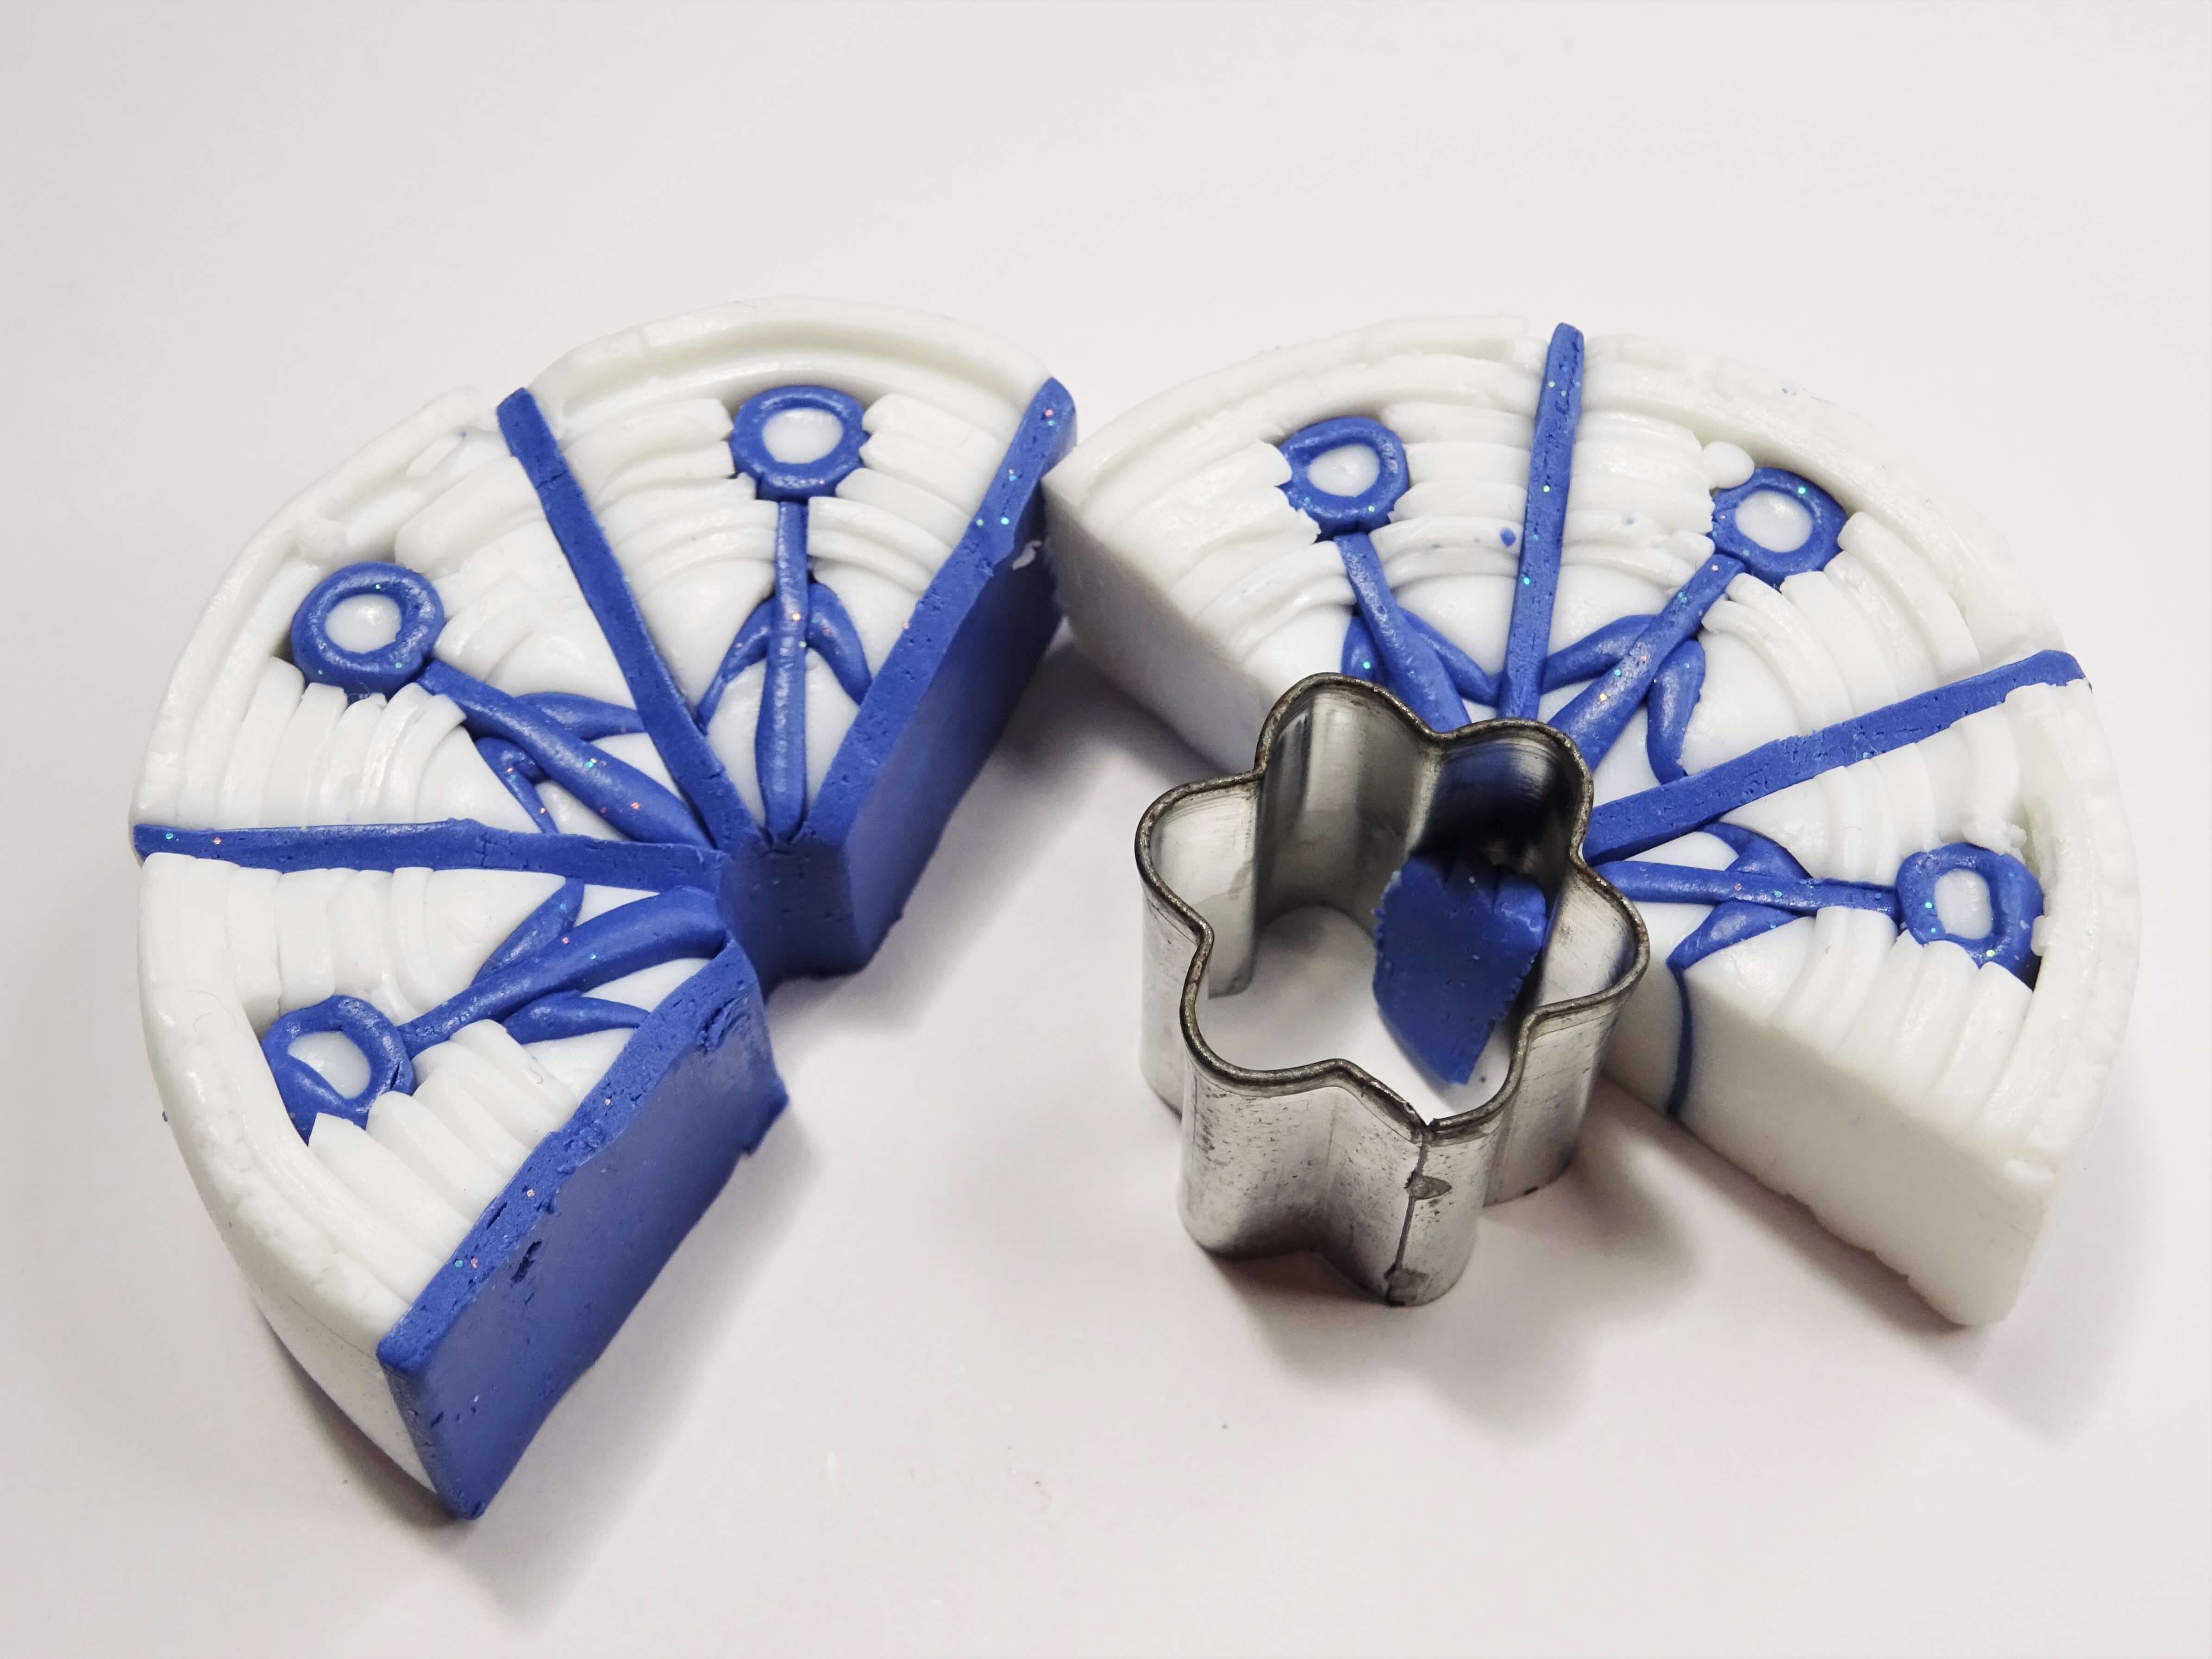
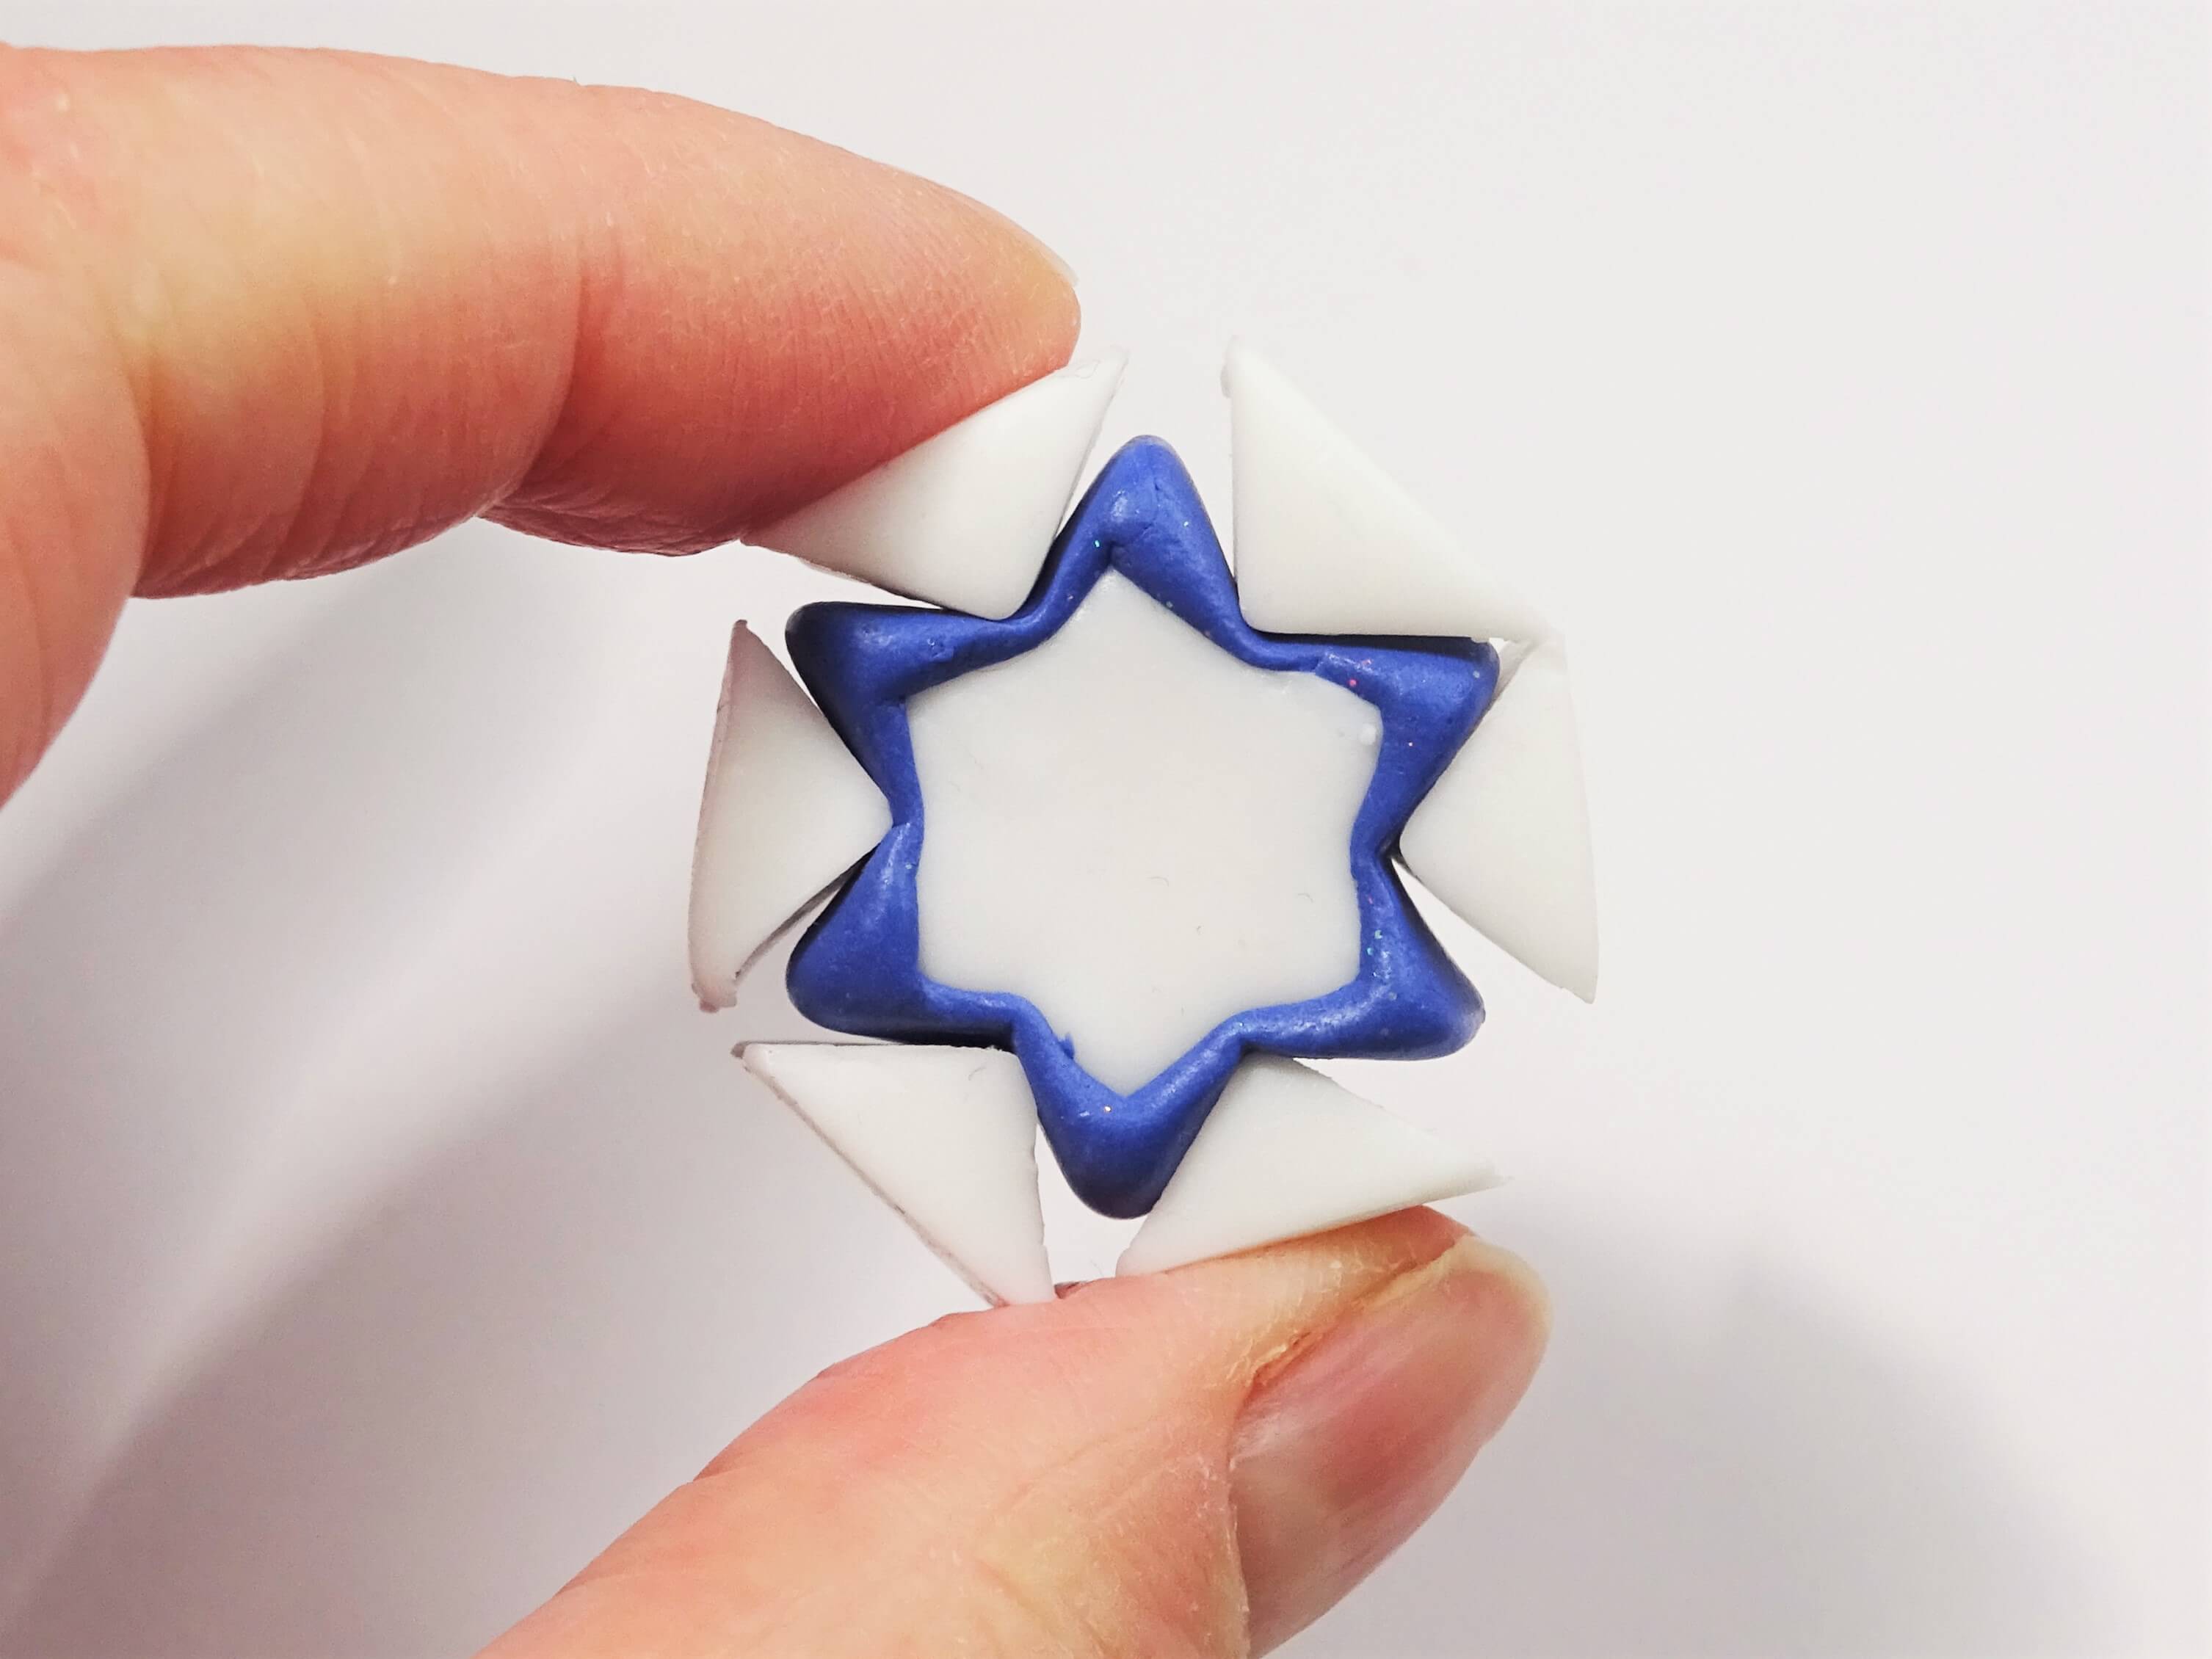
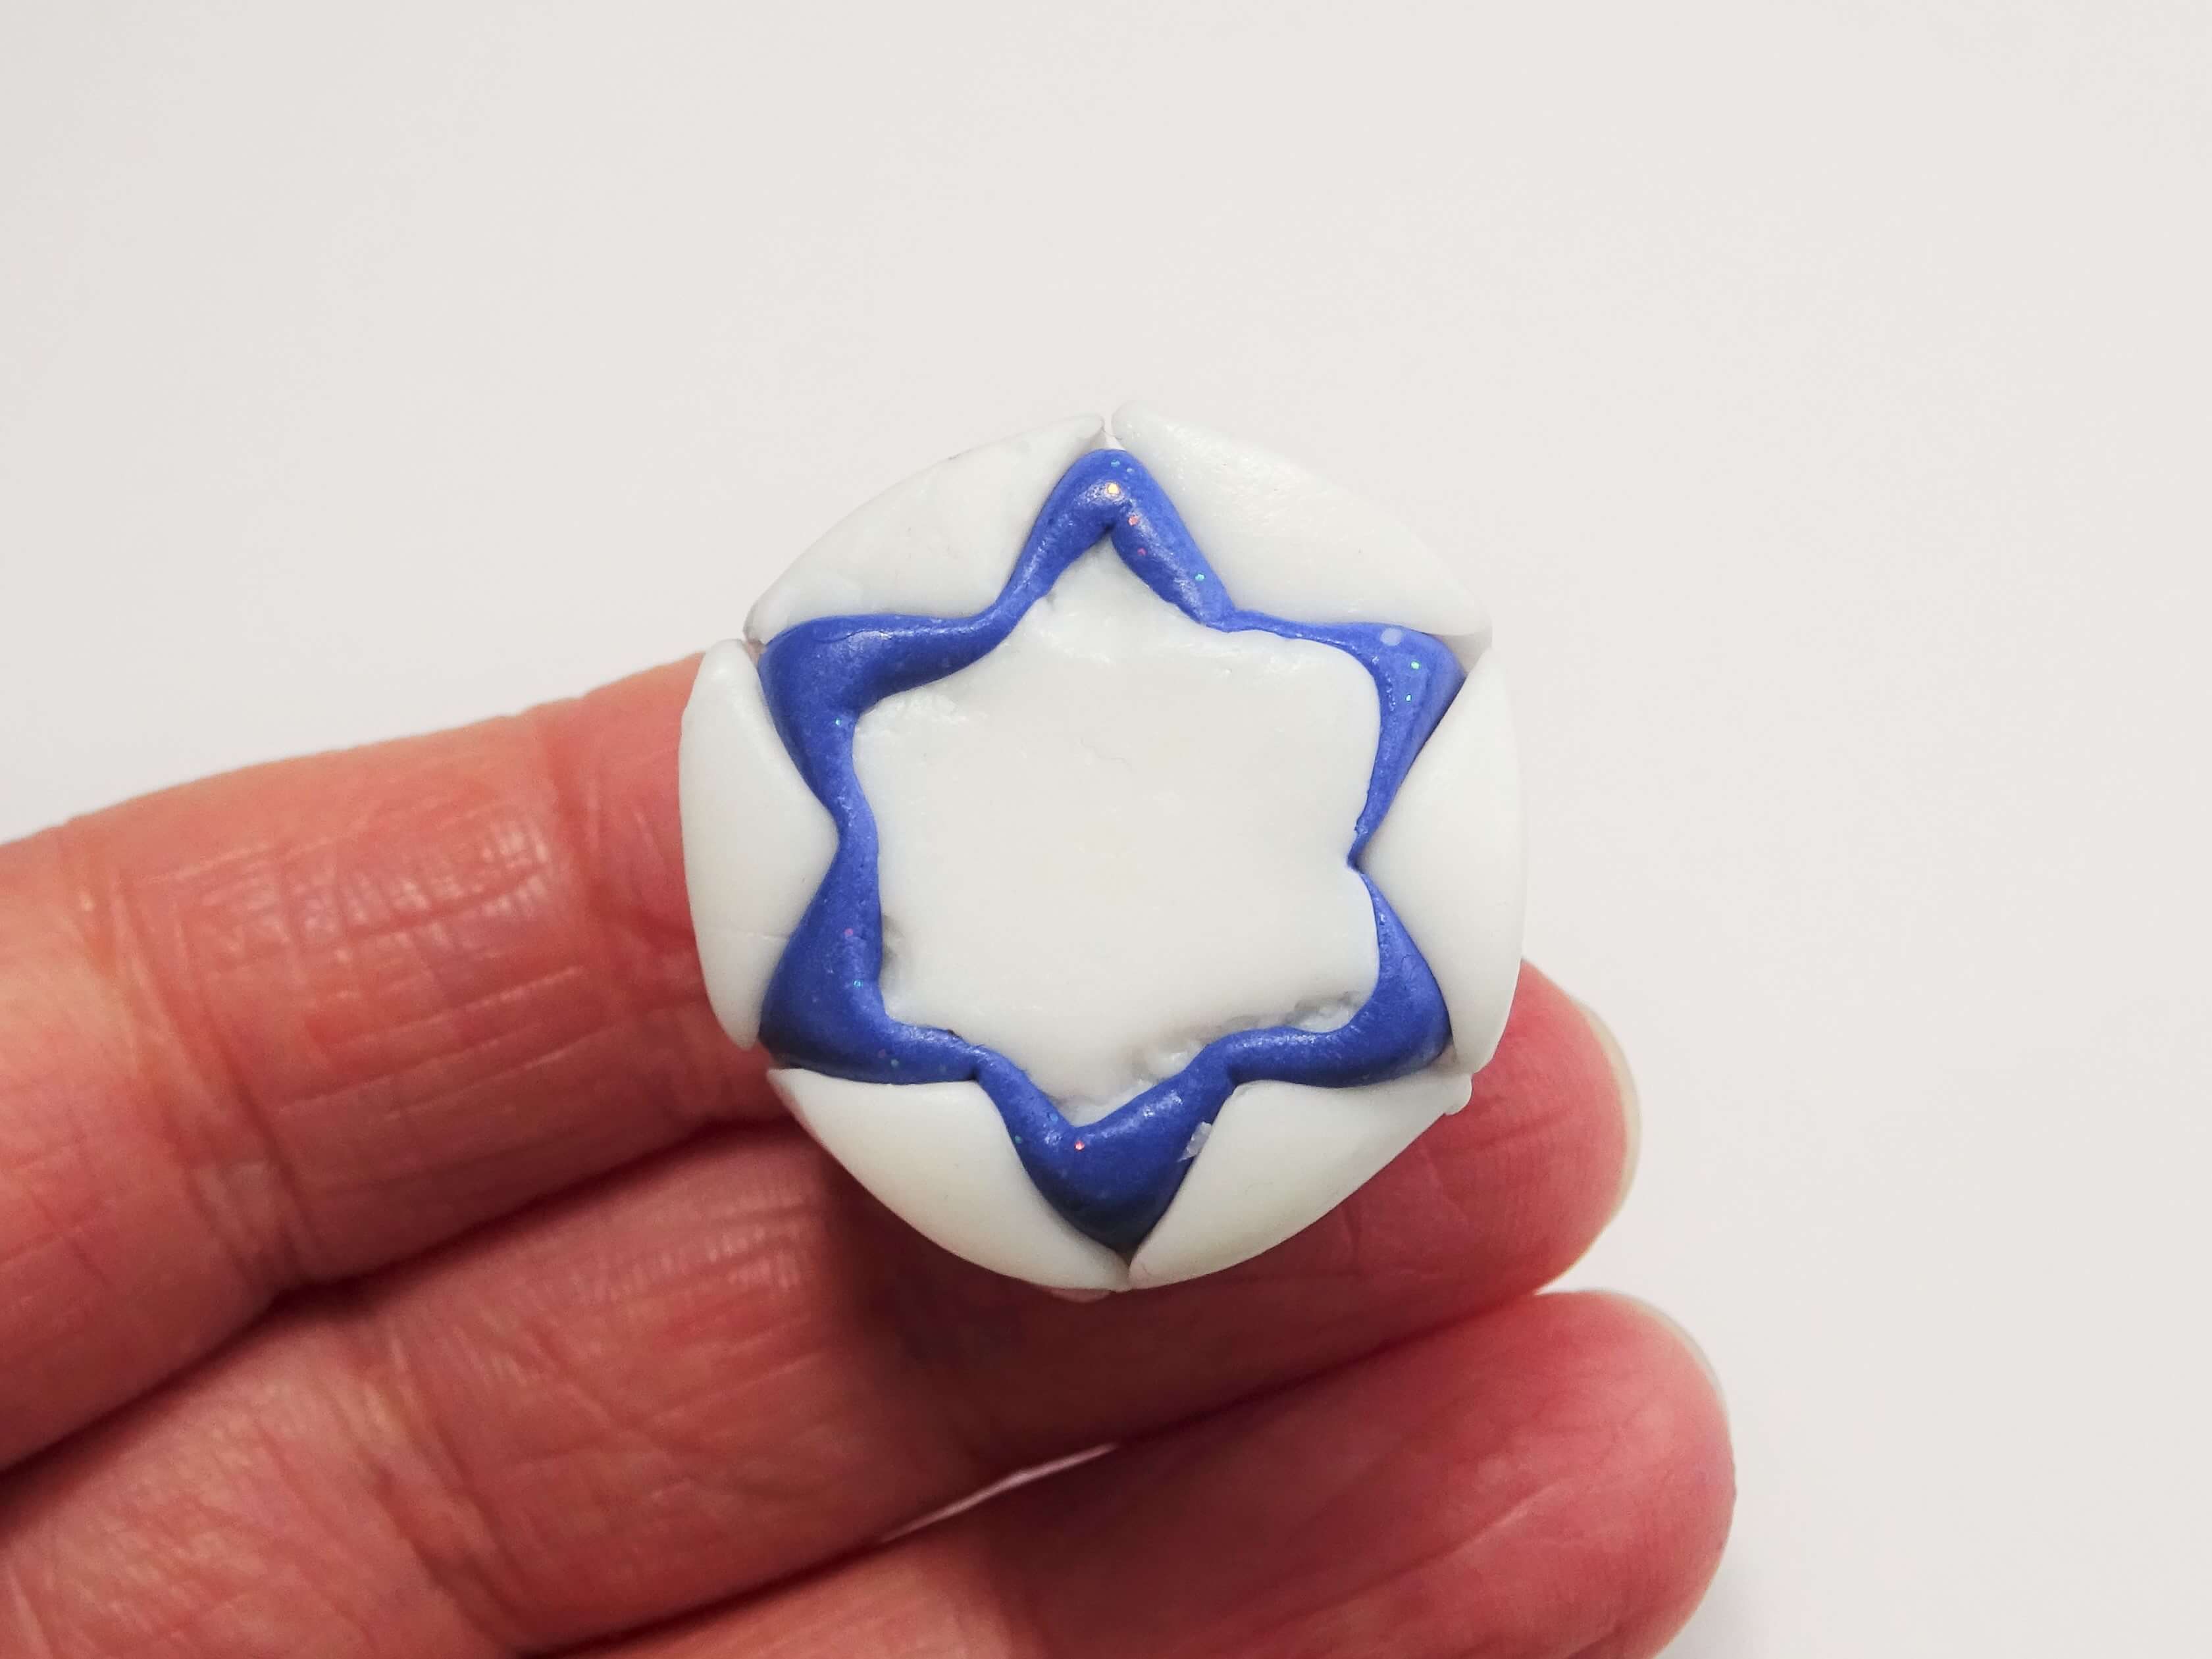
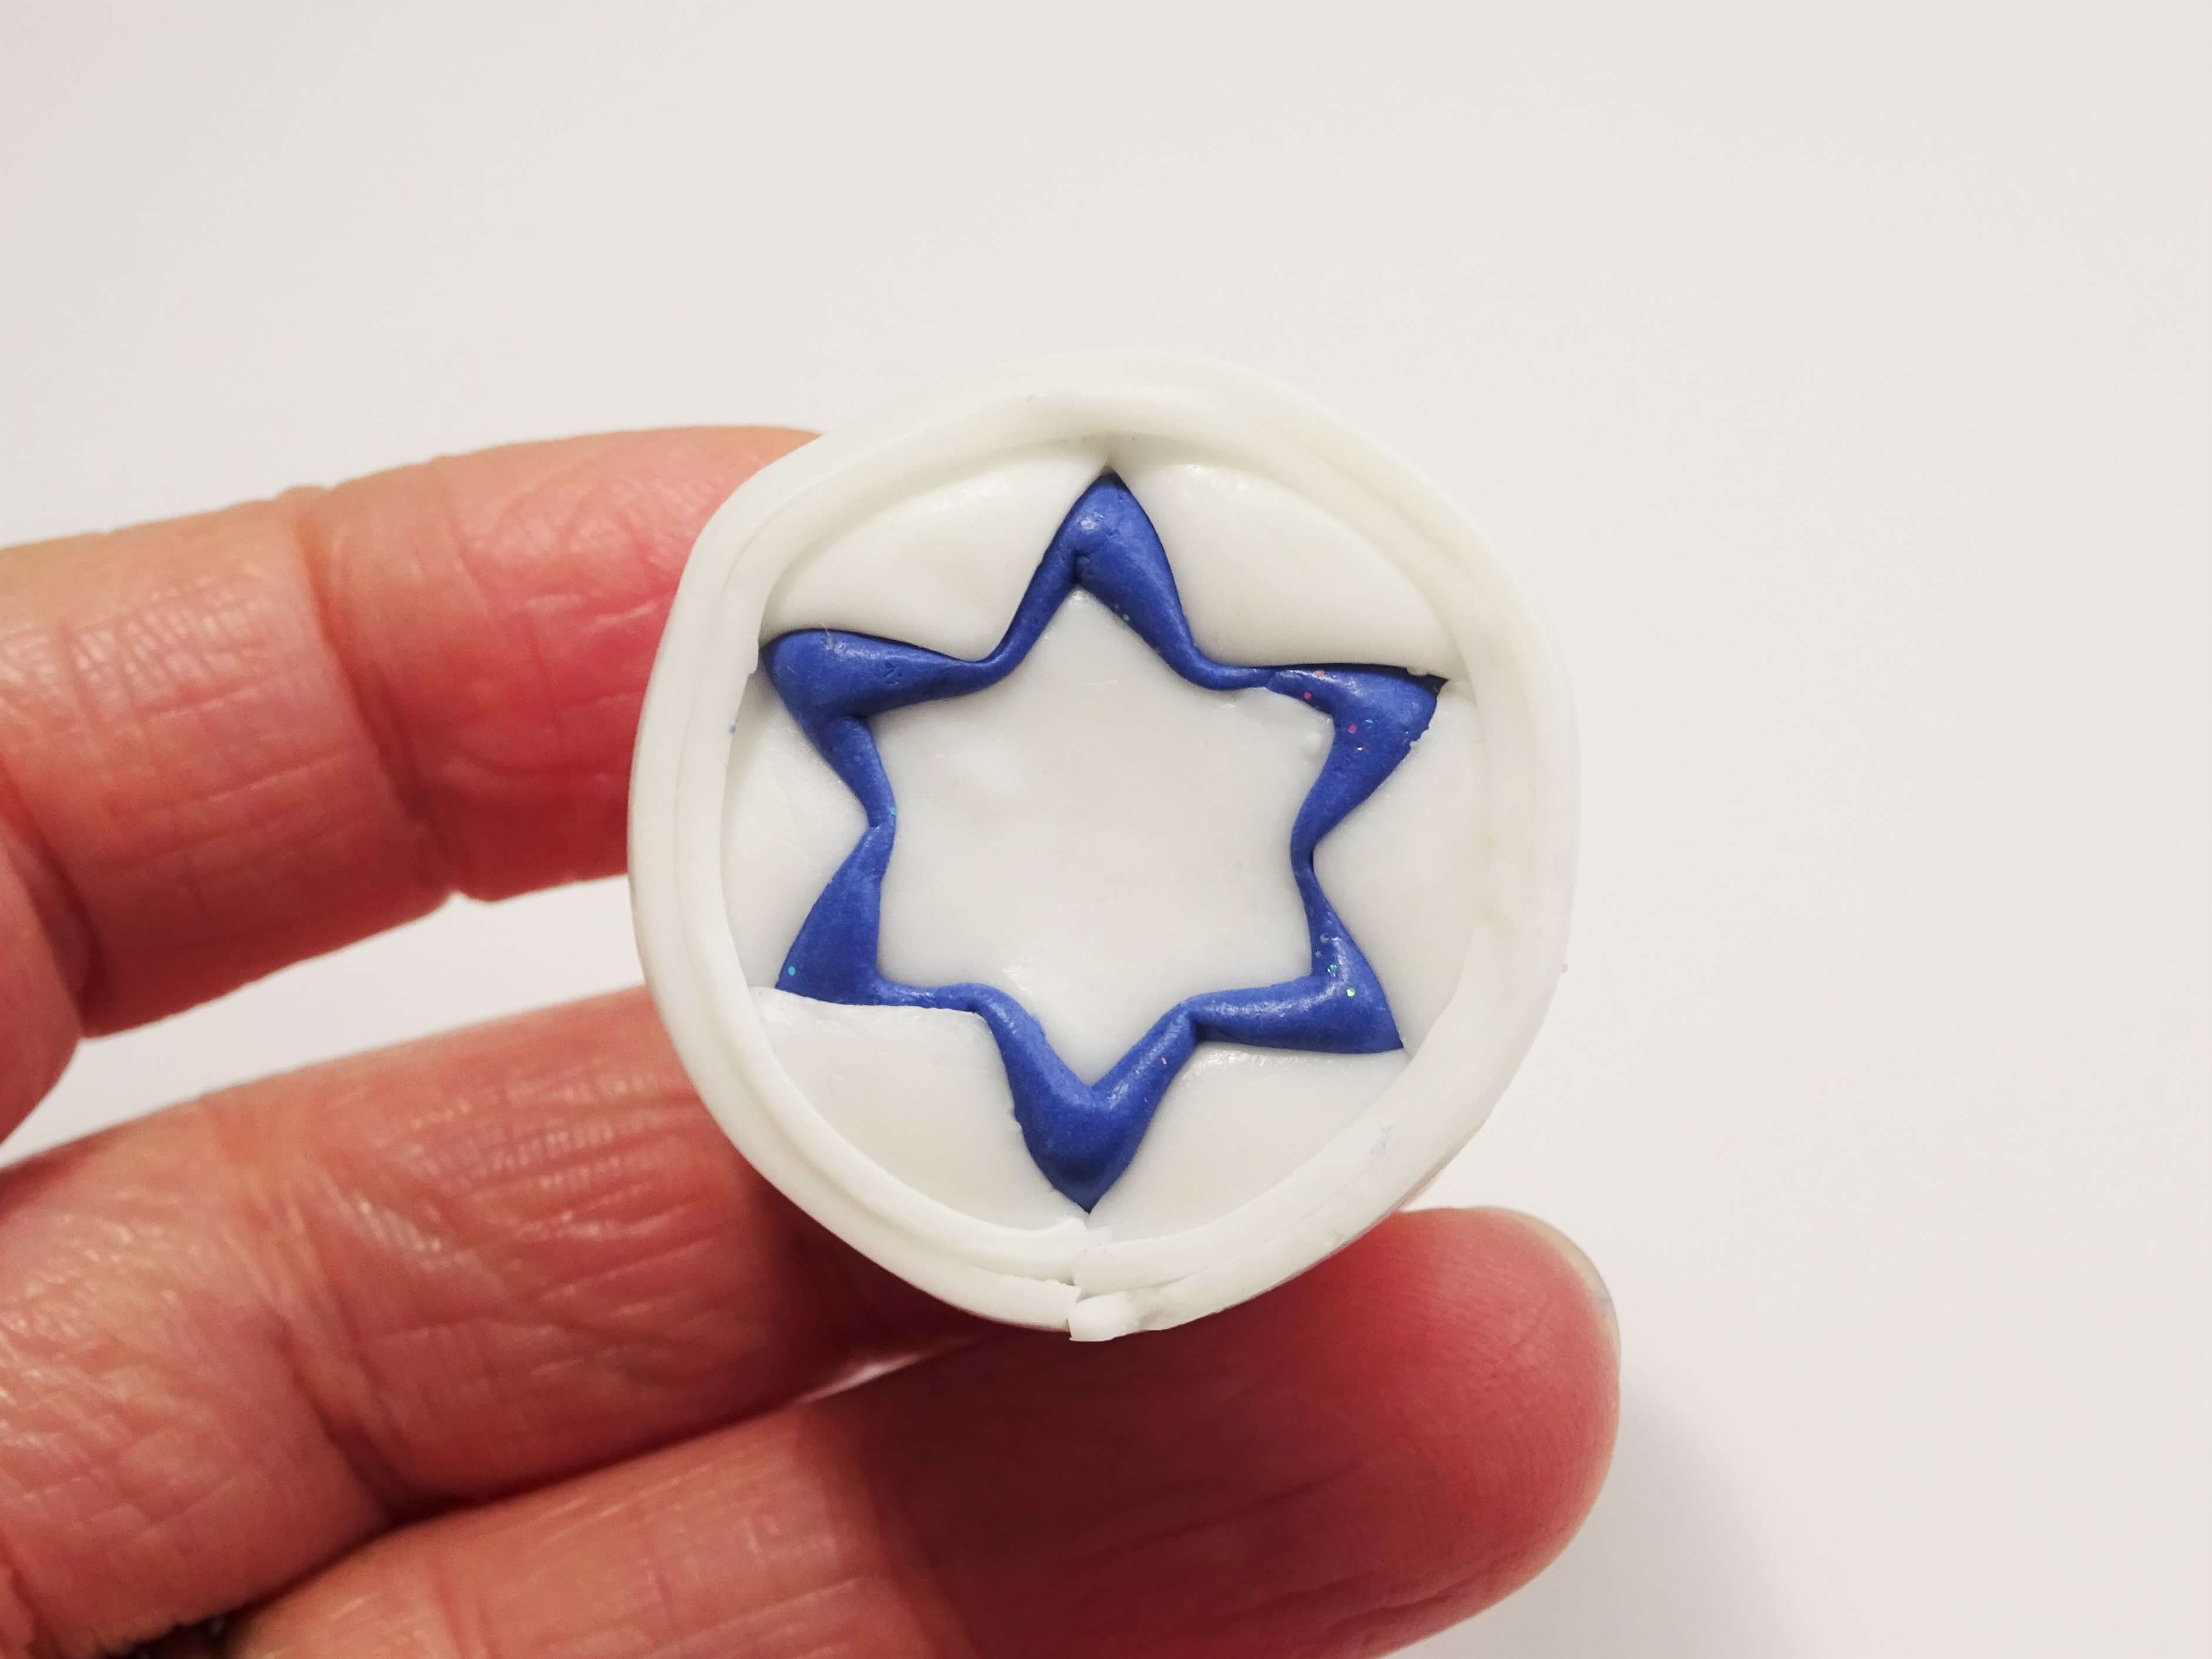
Use one petal on the small flower cutter to cut out the centre of the snowflake cane on each half. Don’t cut any deeper than the one petal and make sure that you are cutting in the same place on both halves.

This newly cut channel needs to be blue so patch any parts where white is peeking through with blue.

Rolls a snake of white clay to the right size to fit into the middle of the snowflake cane. Put both sides back together making sure it all lines up perfectly front and back. At this points it’s really starting to look like a snowflake (hopefully!)
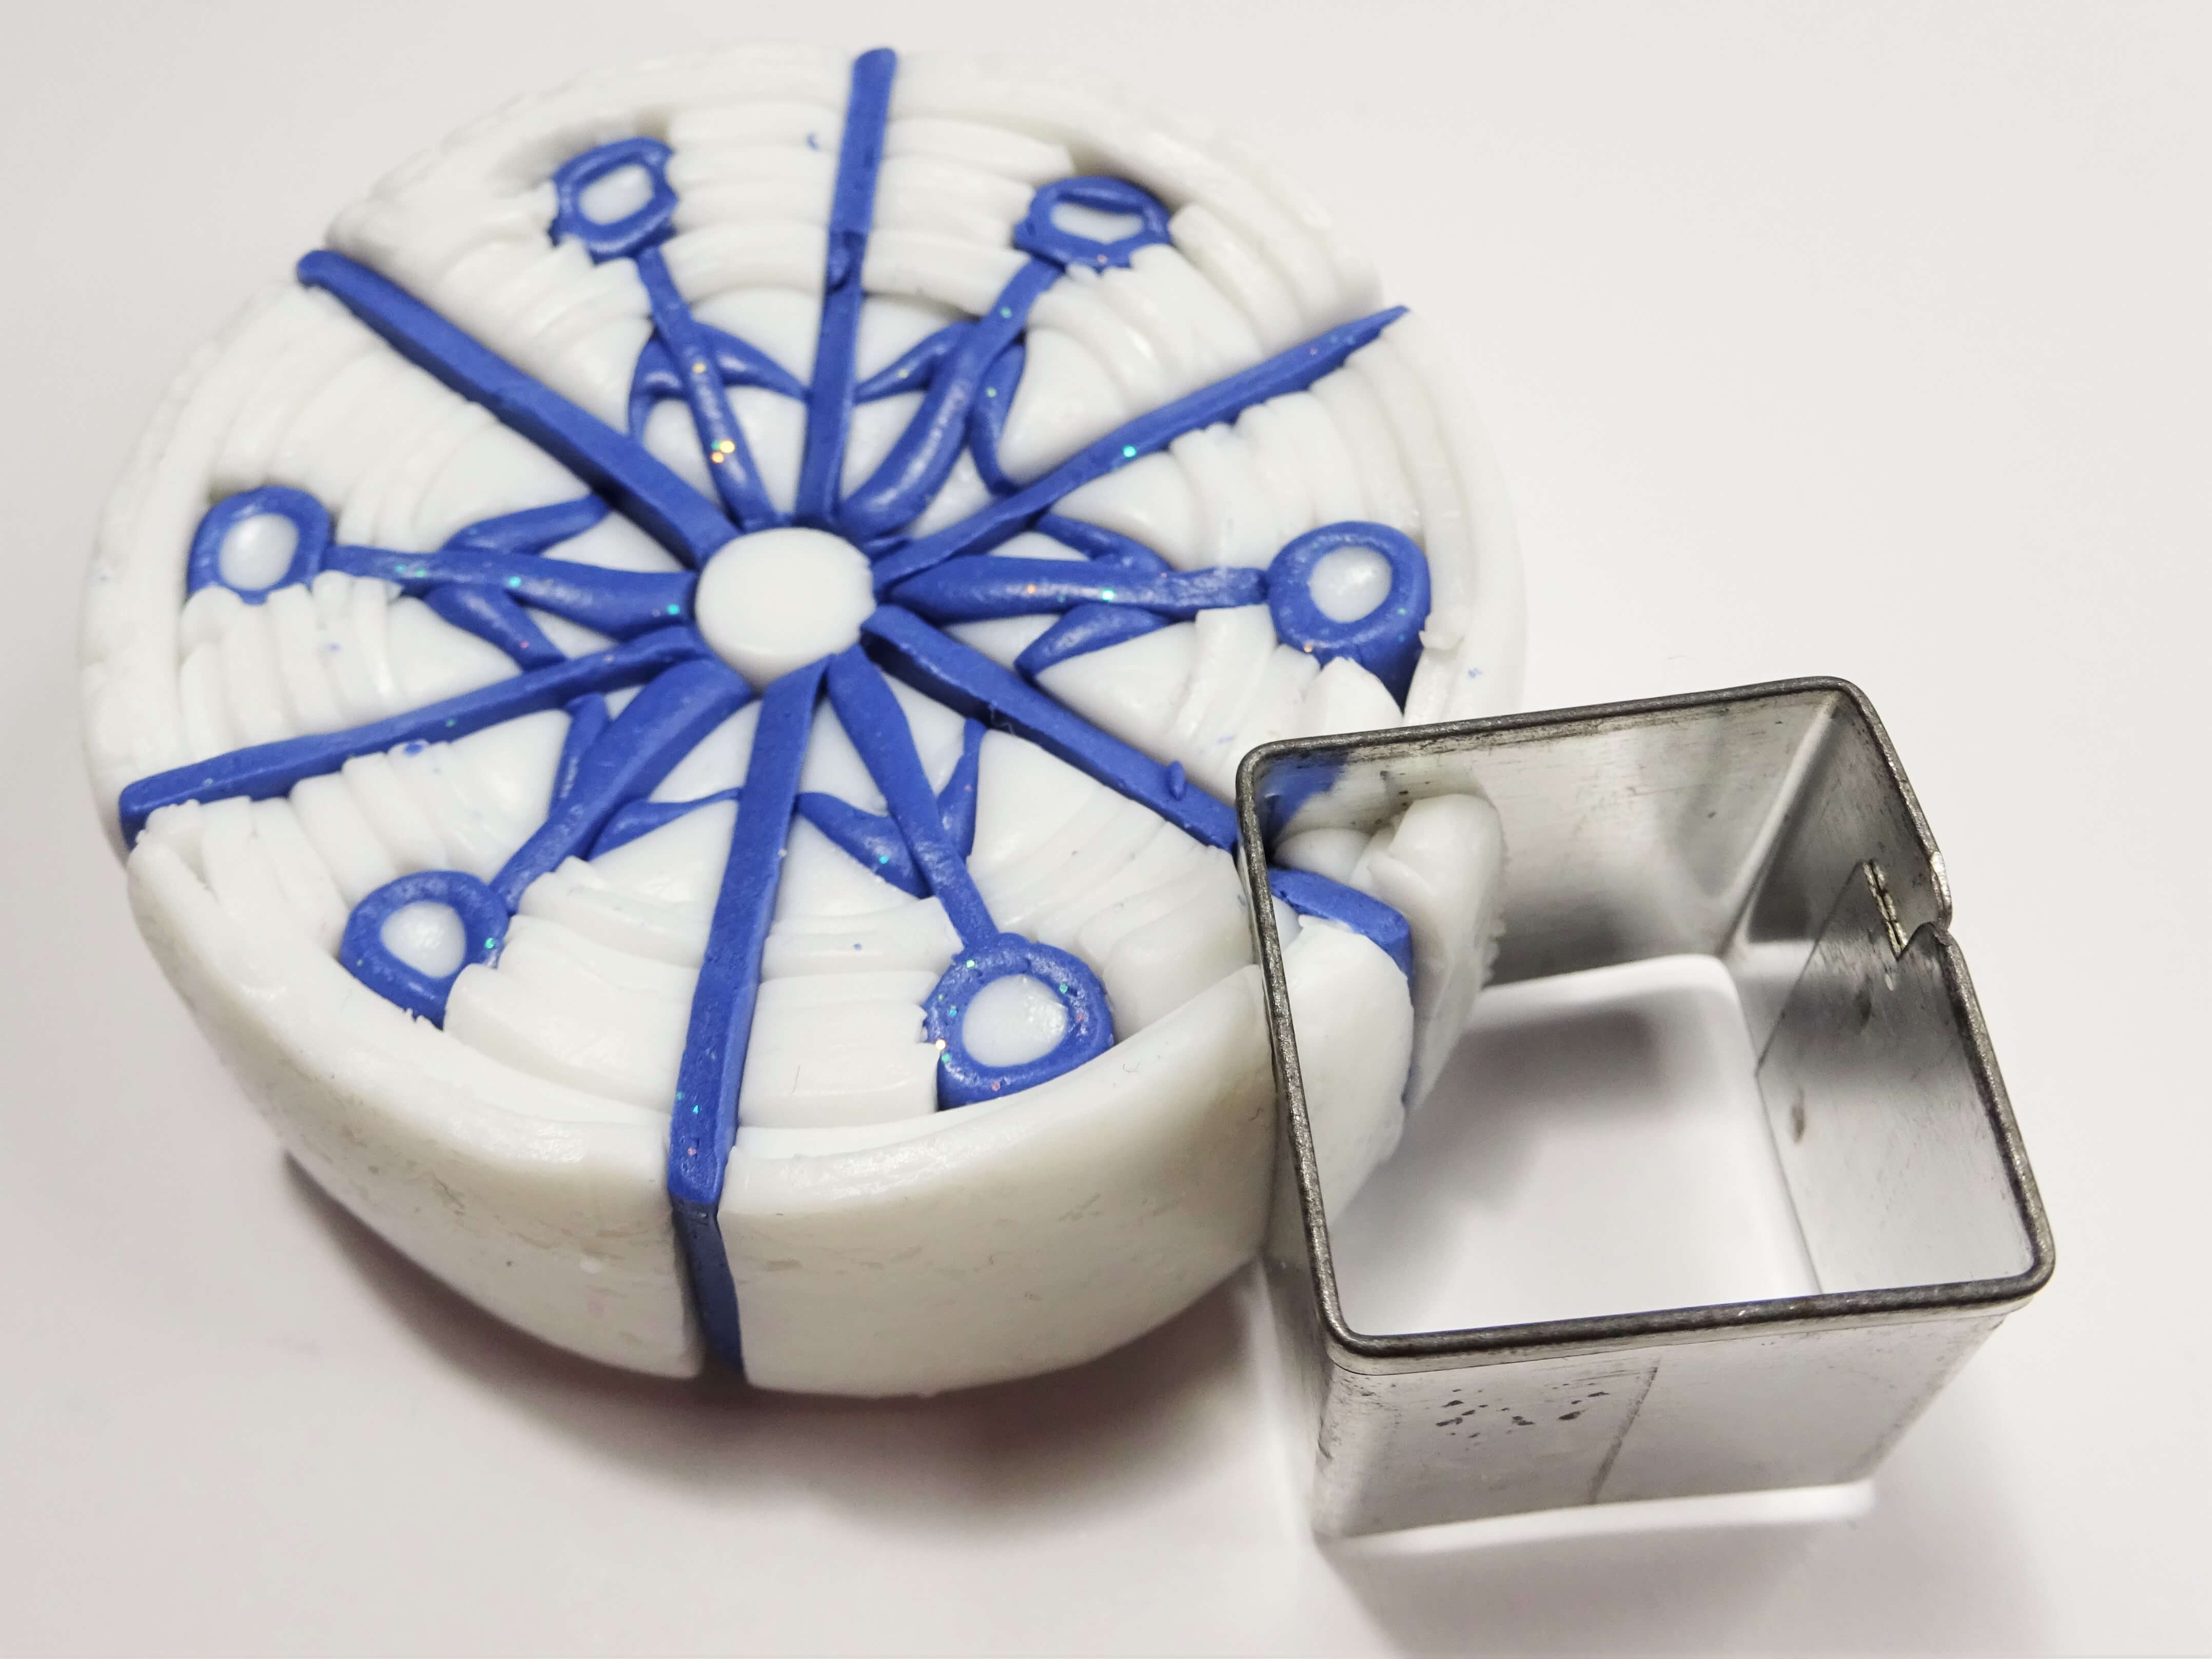
Use the corner of the small square cutting shape again to cut into the cane at the point where the blue layer of clay is exiting. Try to cut straight so that the corner cuts through the blue clay. This will take a small triangle piece out.
Cut small rectangles and fold into a ‘v’ shape to fit into this cut out shape.

Put the triangle piece back it and repeat steps 23 and 24 all around the snowflake cane.

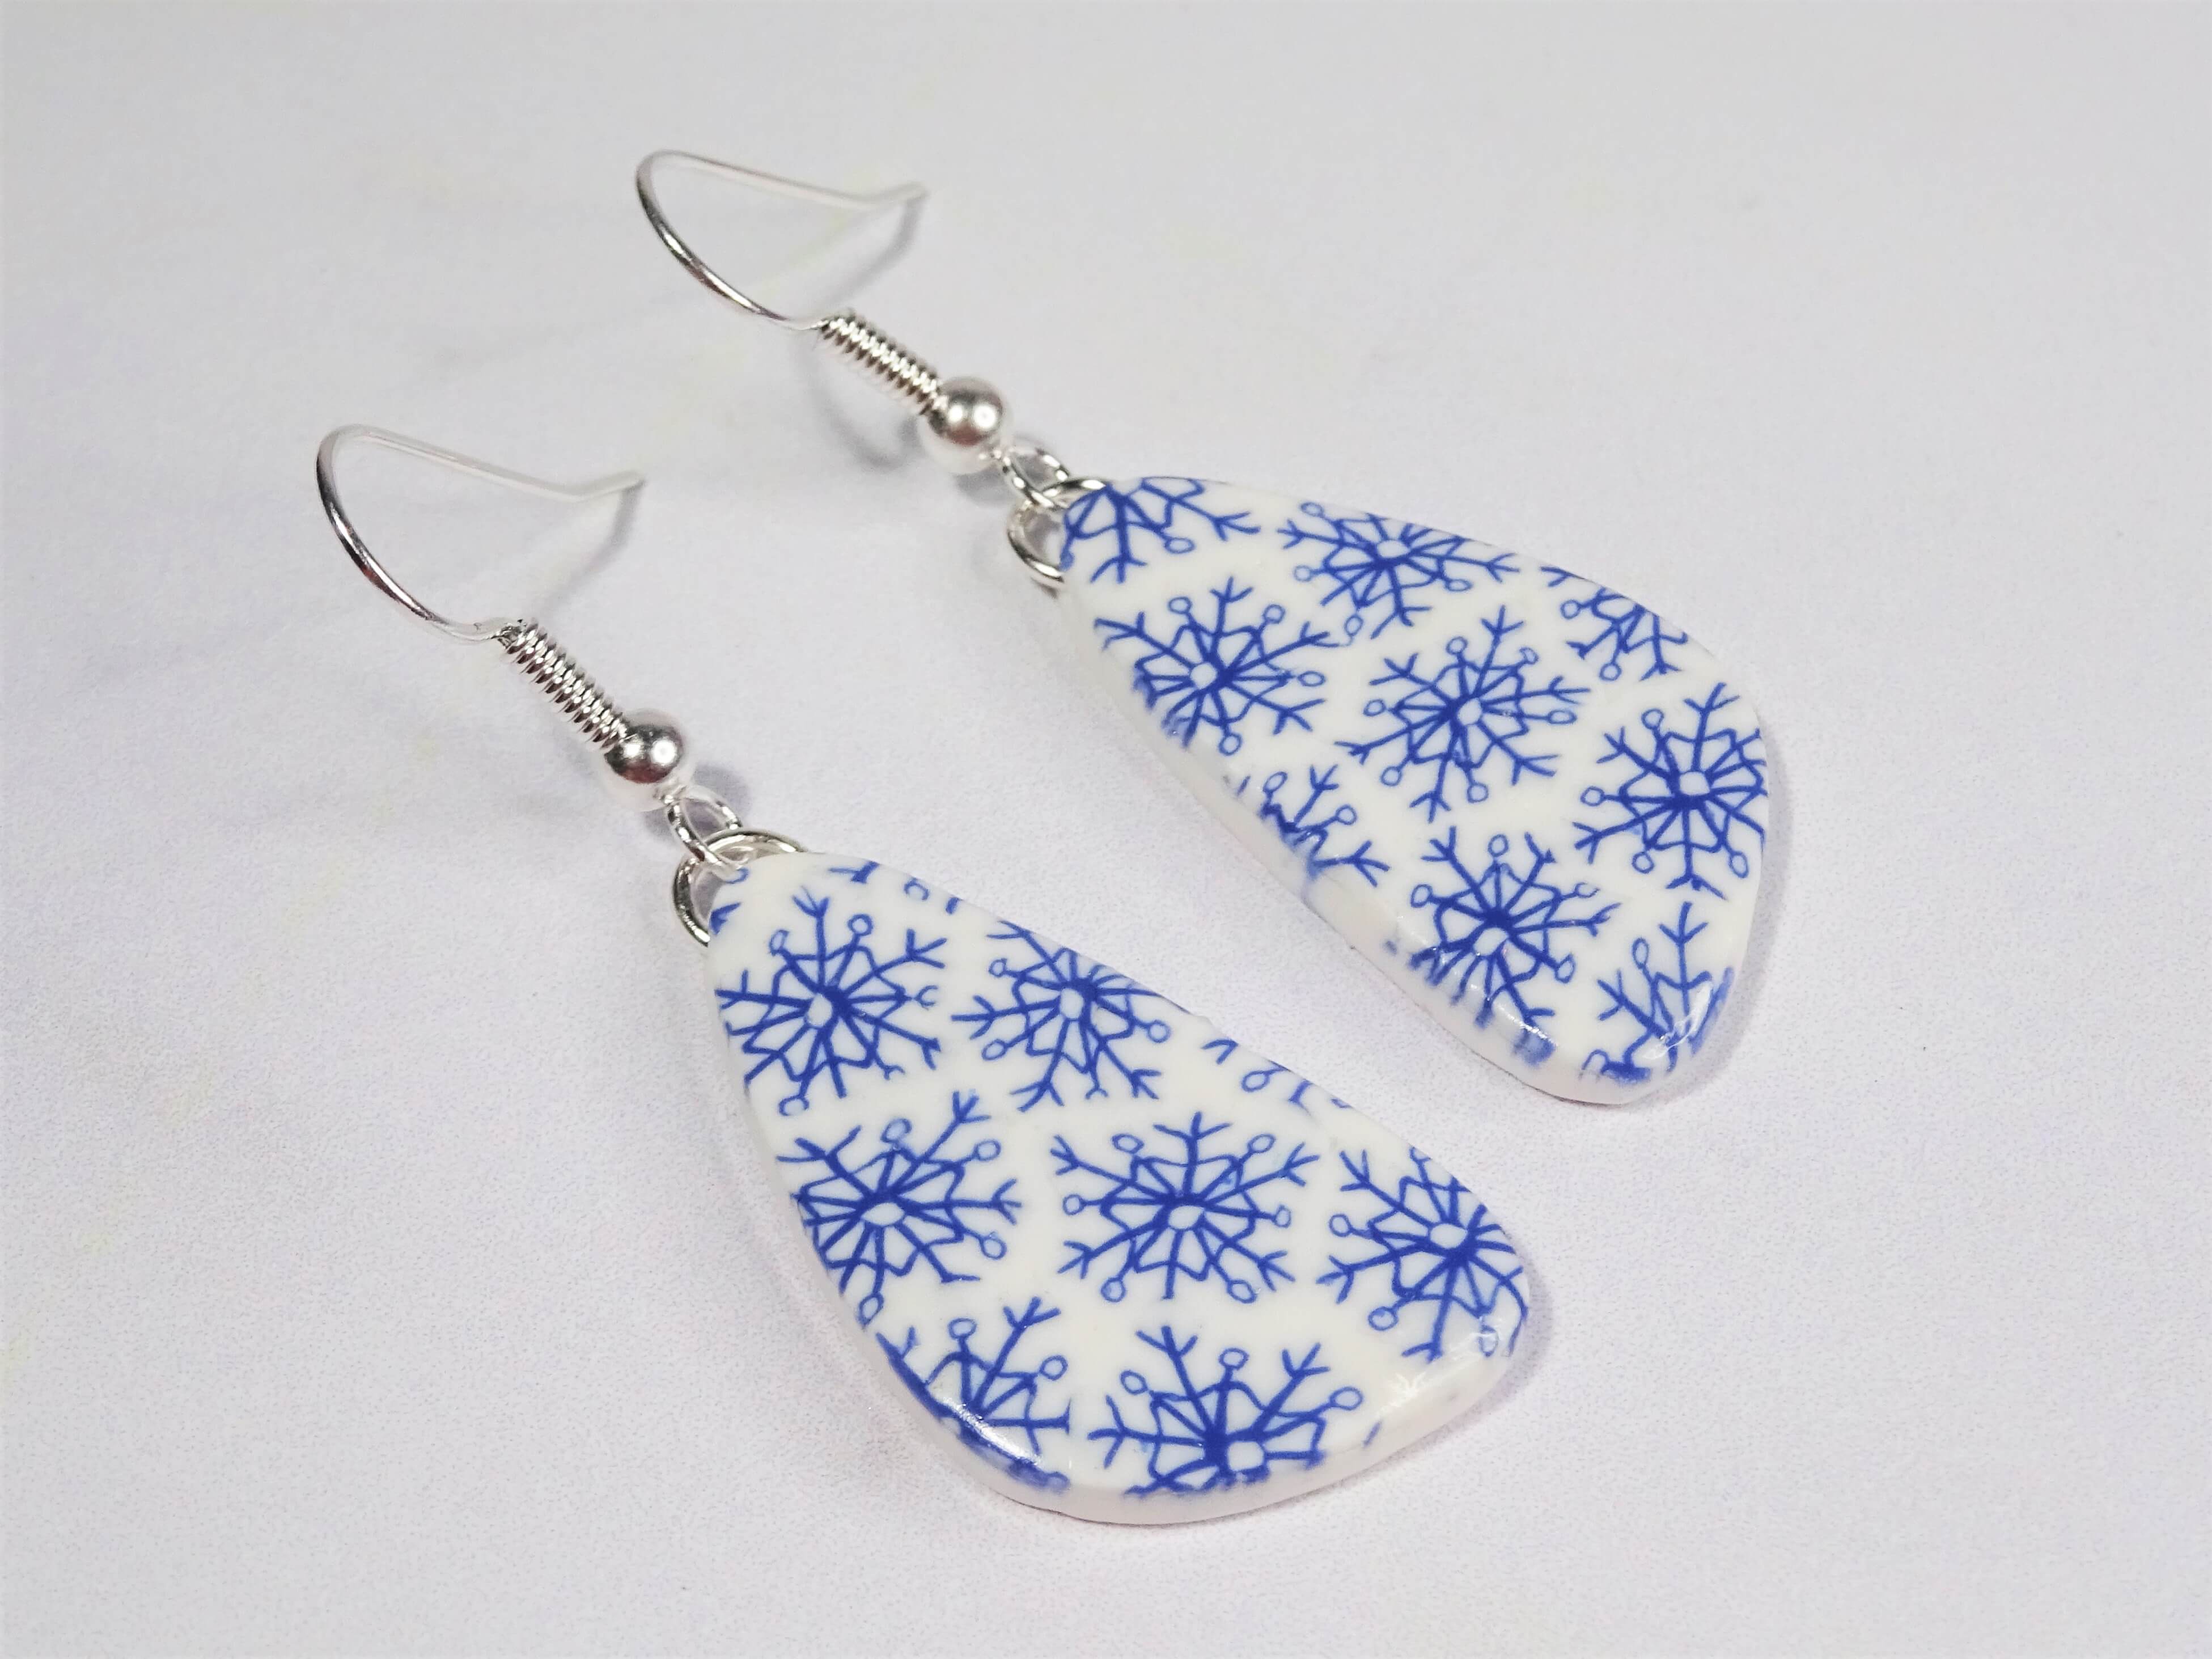
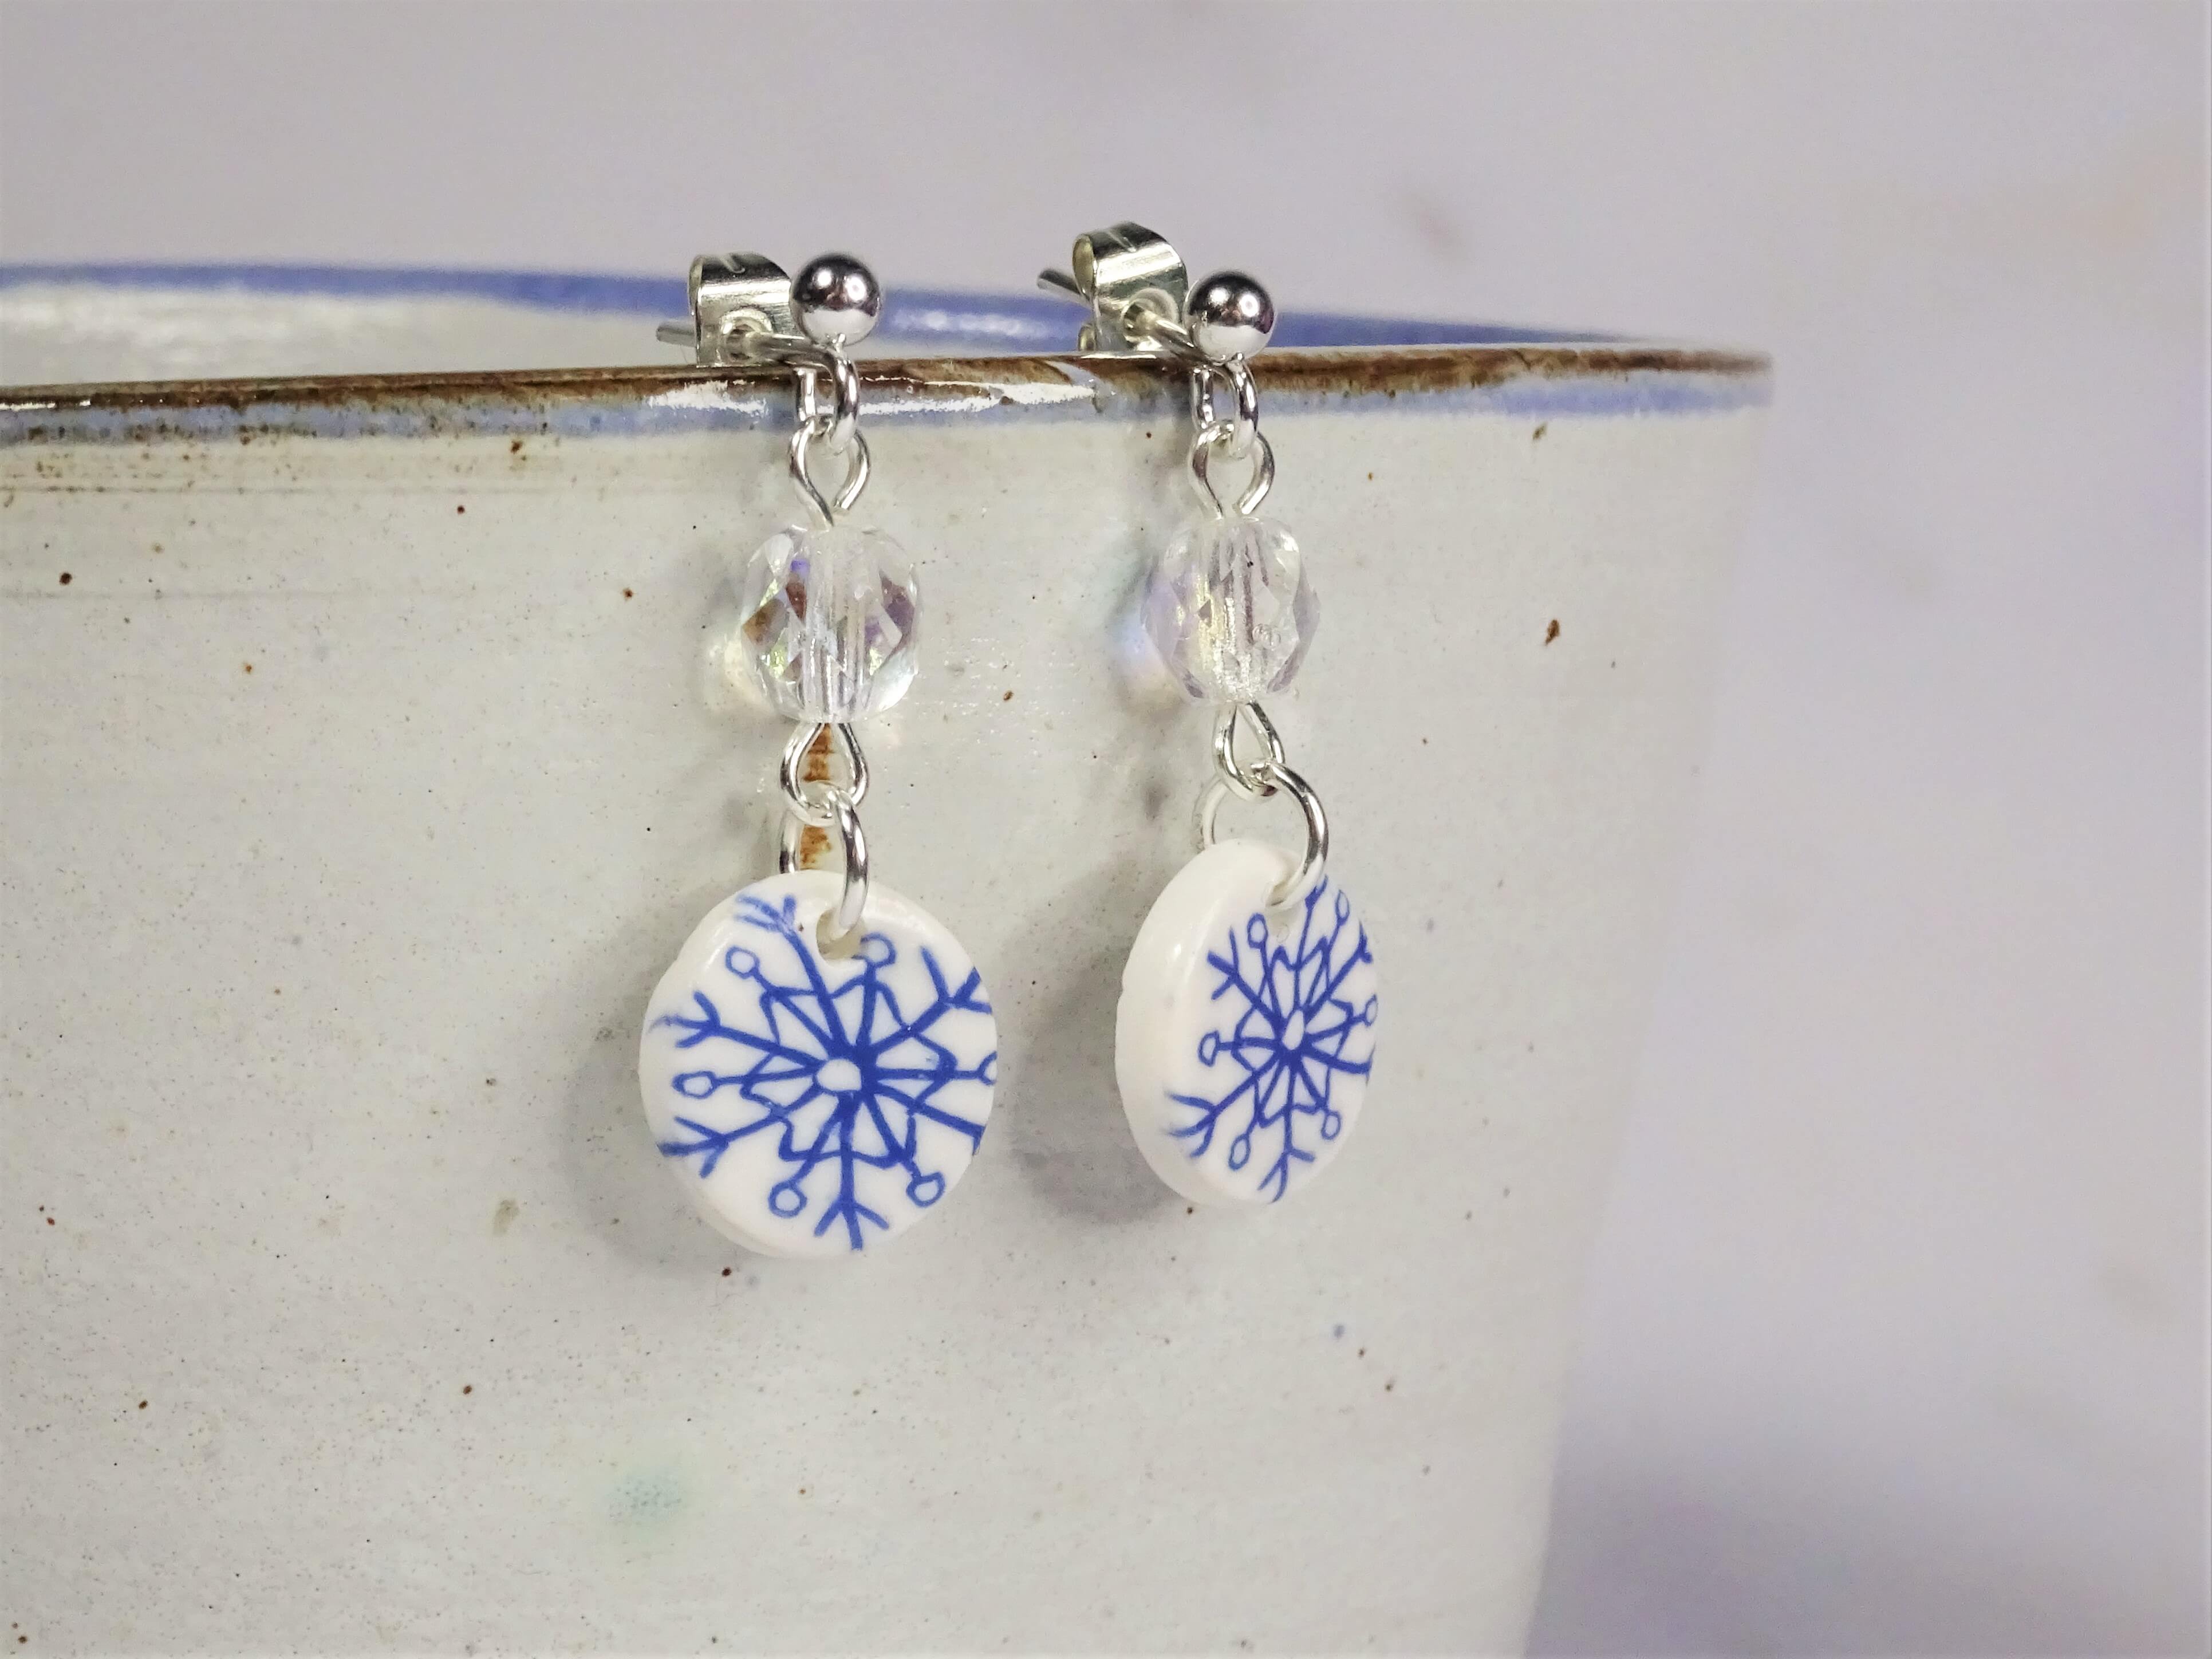
Reduce your cane down by squeezing in the middle to push out air and then gently roll it. Your cane is now ready to be used in decorations and jewellery.


Now obviously the cutting shapes are the star of the show but I just wanted to give an honourable mention to my trusty cutting blades and polymer clay machine that basically never leave my desk as they are in constant use……
Listed below are affiliate links for Amazon UK and USA. This just means that I earn a very small commission, at no extra cost to yourself, if you use my link to buy an item. Any little I earn allows me to continue to offer free tutorials.
UK links
USA links
If this snowflake cane has got you interested in seeing more then don’t forget to check out my step by step guide to a perfect polymer clay rose cane, if you are on the hunt for more Christmas tutorials then I have a sparkly wonder with hot fix crystals and liquid polymer clay and a cute little reindeer slab for those festive earrings.
Hannah x


Easy? Are you sure.? It does look more involved than easy but it is beautiful.
Ha ha, well maybe easier would be a better word 😀