

Please note – this post contains affiliate links

It’s amazing how quickly Christmas can creep up on you. One minute its all pumpkins and ghosts and then, suddenly, the kids are handing me scraps of paper scrawled with random lists of all the things they want under the Christmas tree. As ever I am totally behind with things.
So, what do I do when I am faced with an endless list of things to do? I make Christmas decorations of course!
I have these gorgeous Swarovski hot fix crystals and Christmas seemed like a great time to use them in my crafting. I have hyped up the sparkle on this project by using liquid polymer clay and glitter to fill around all the detail.
There is a YouTube video showing this tutorial linked at the bottom of this post.
Hot Fix Crystal and Liquid Polymer Clay Ornament Tutorial
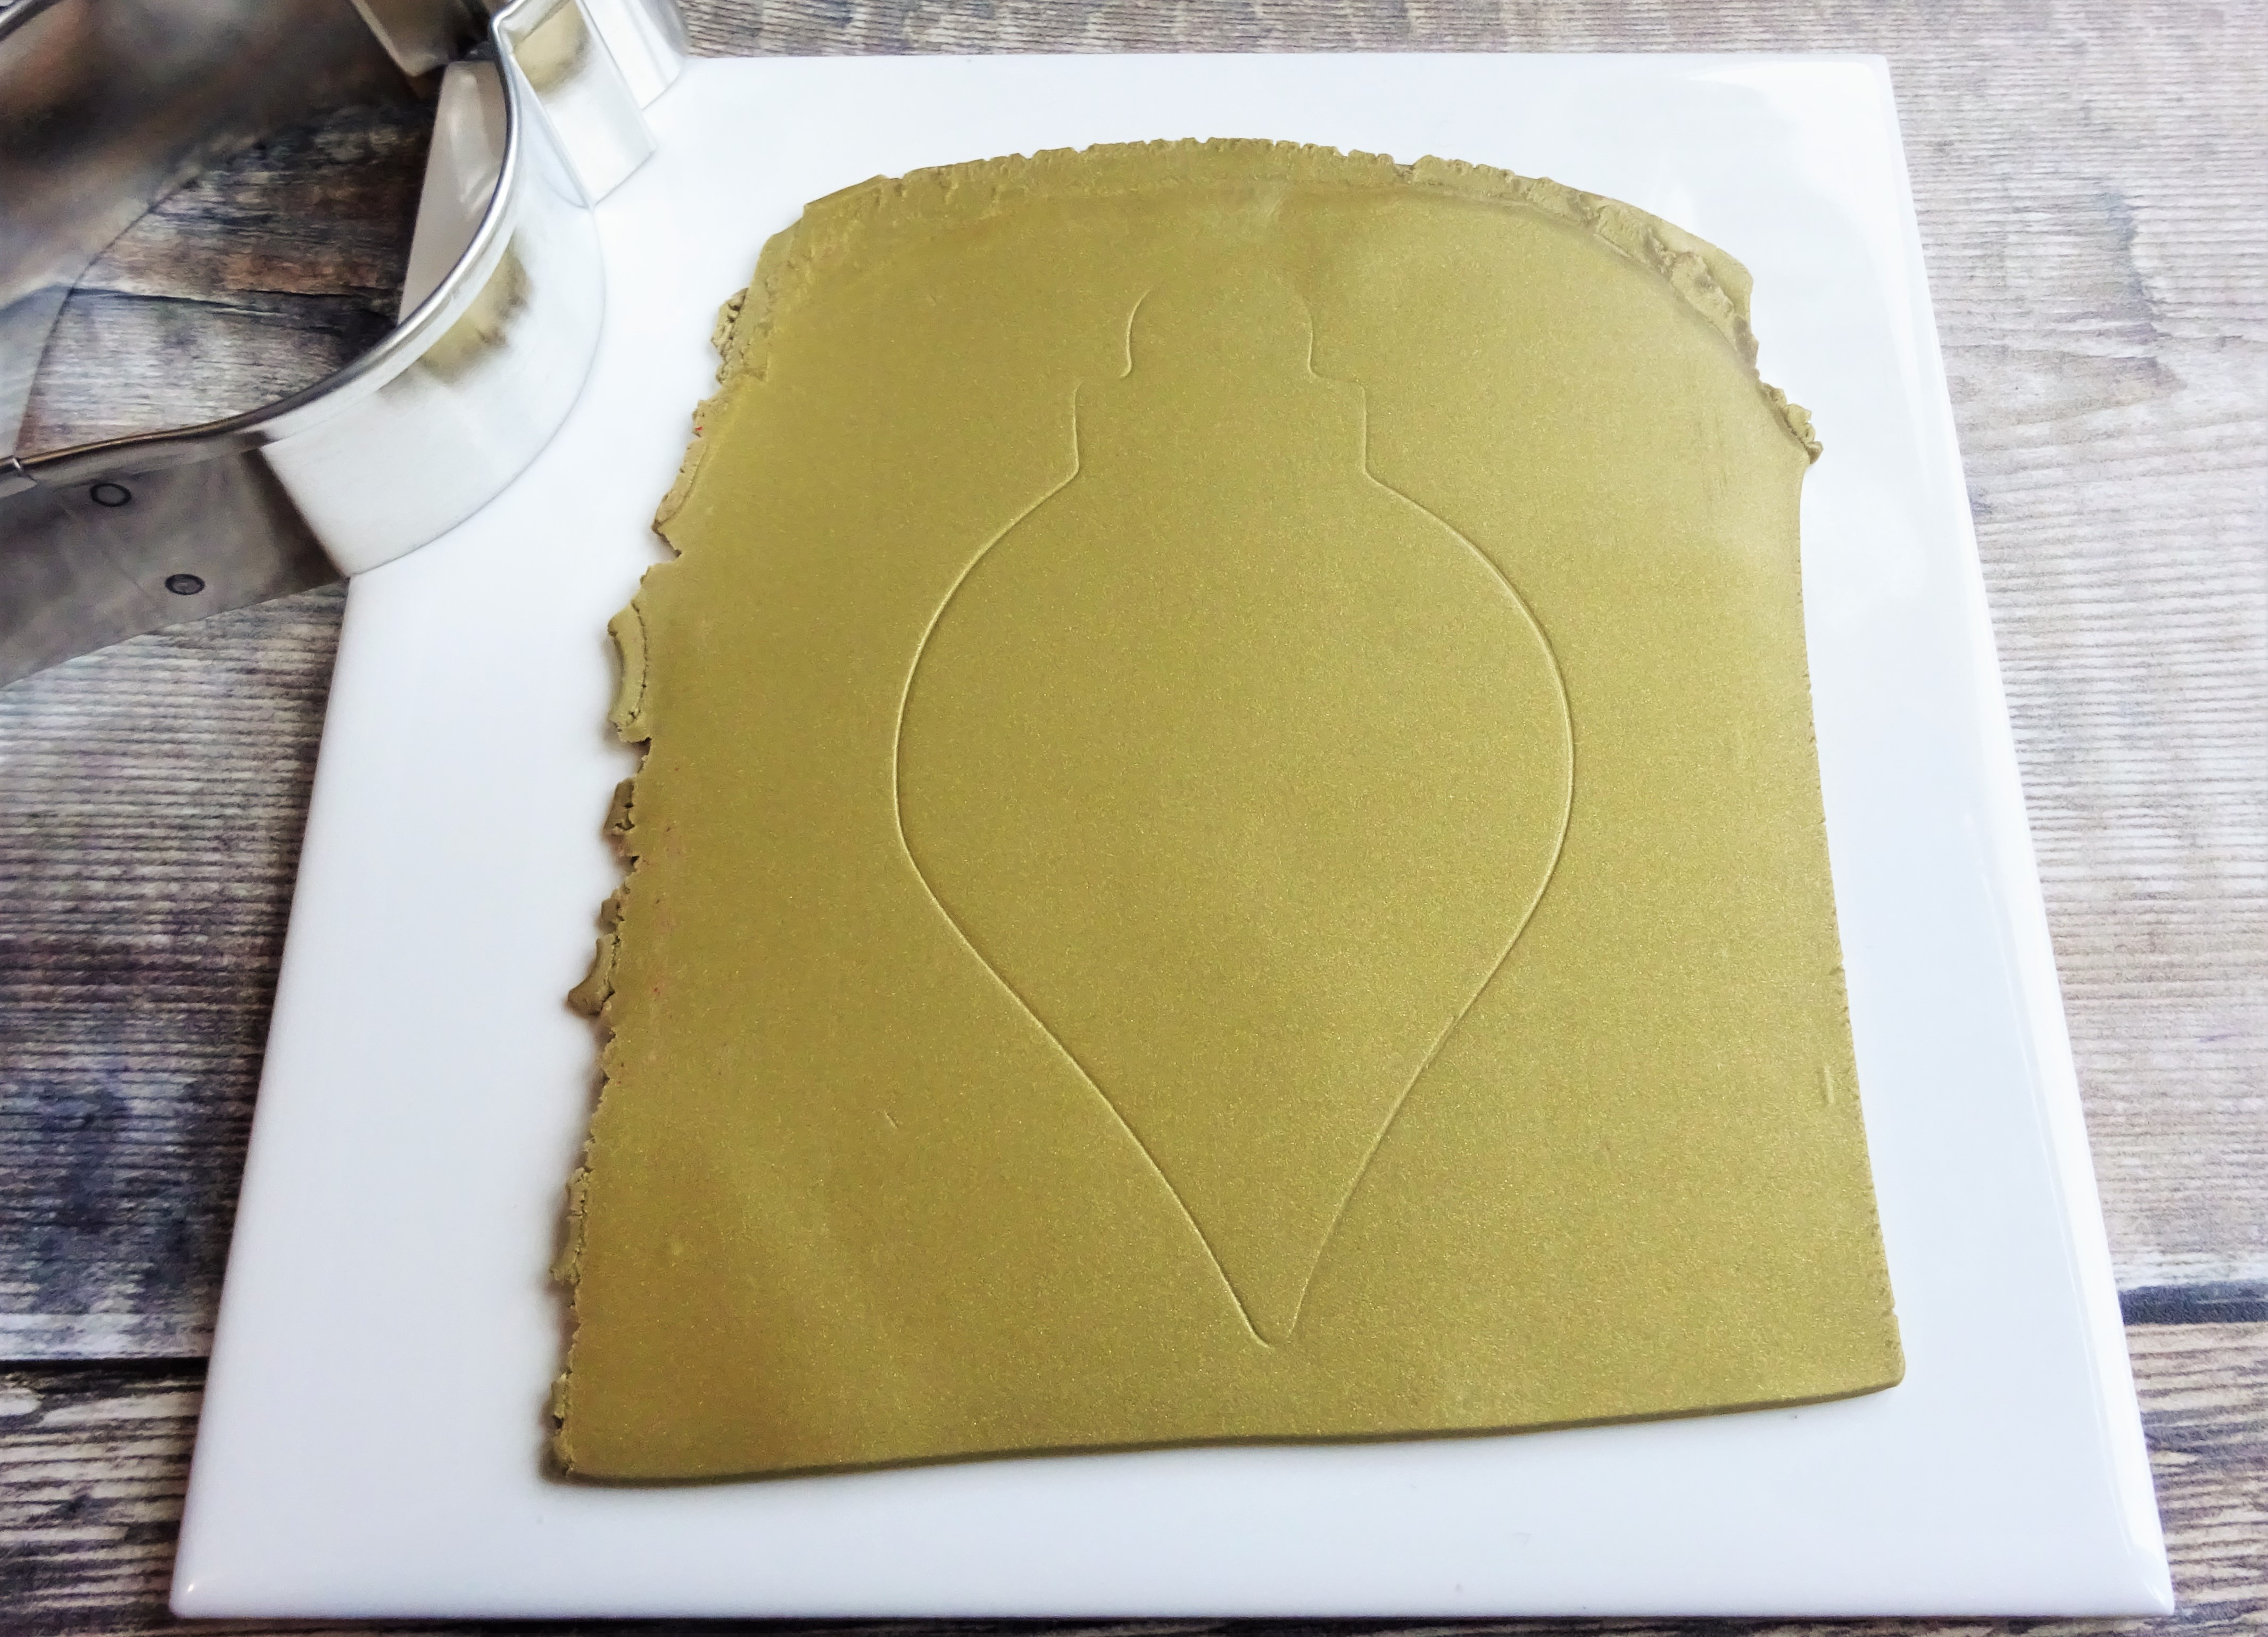
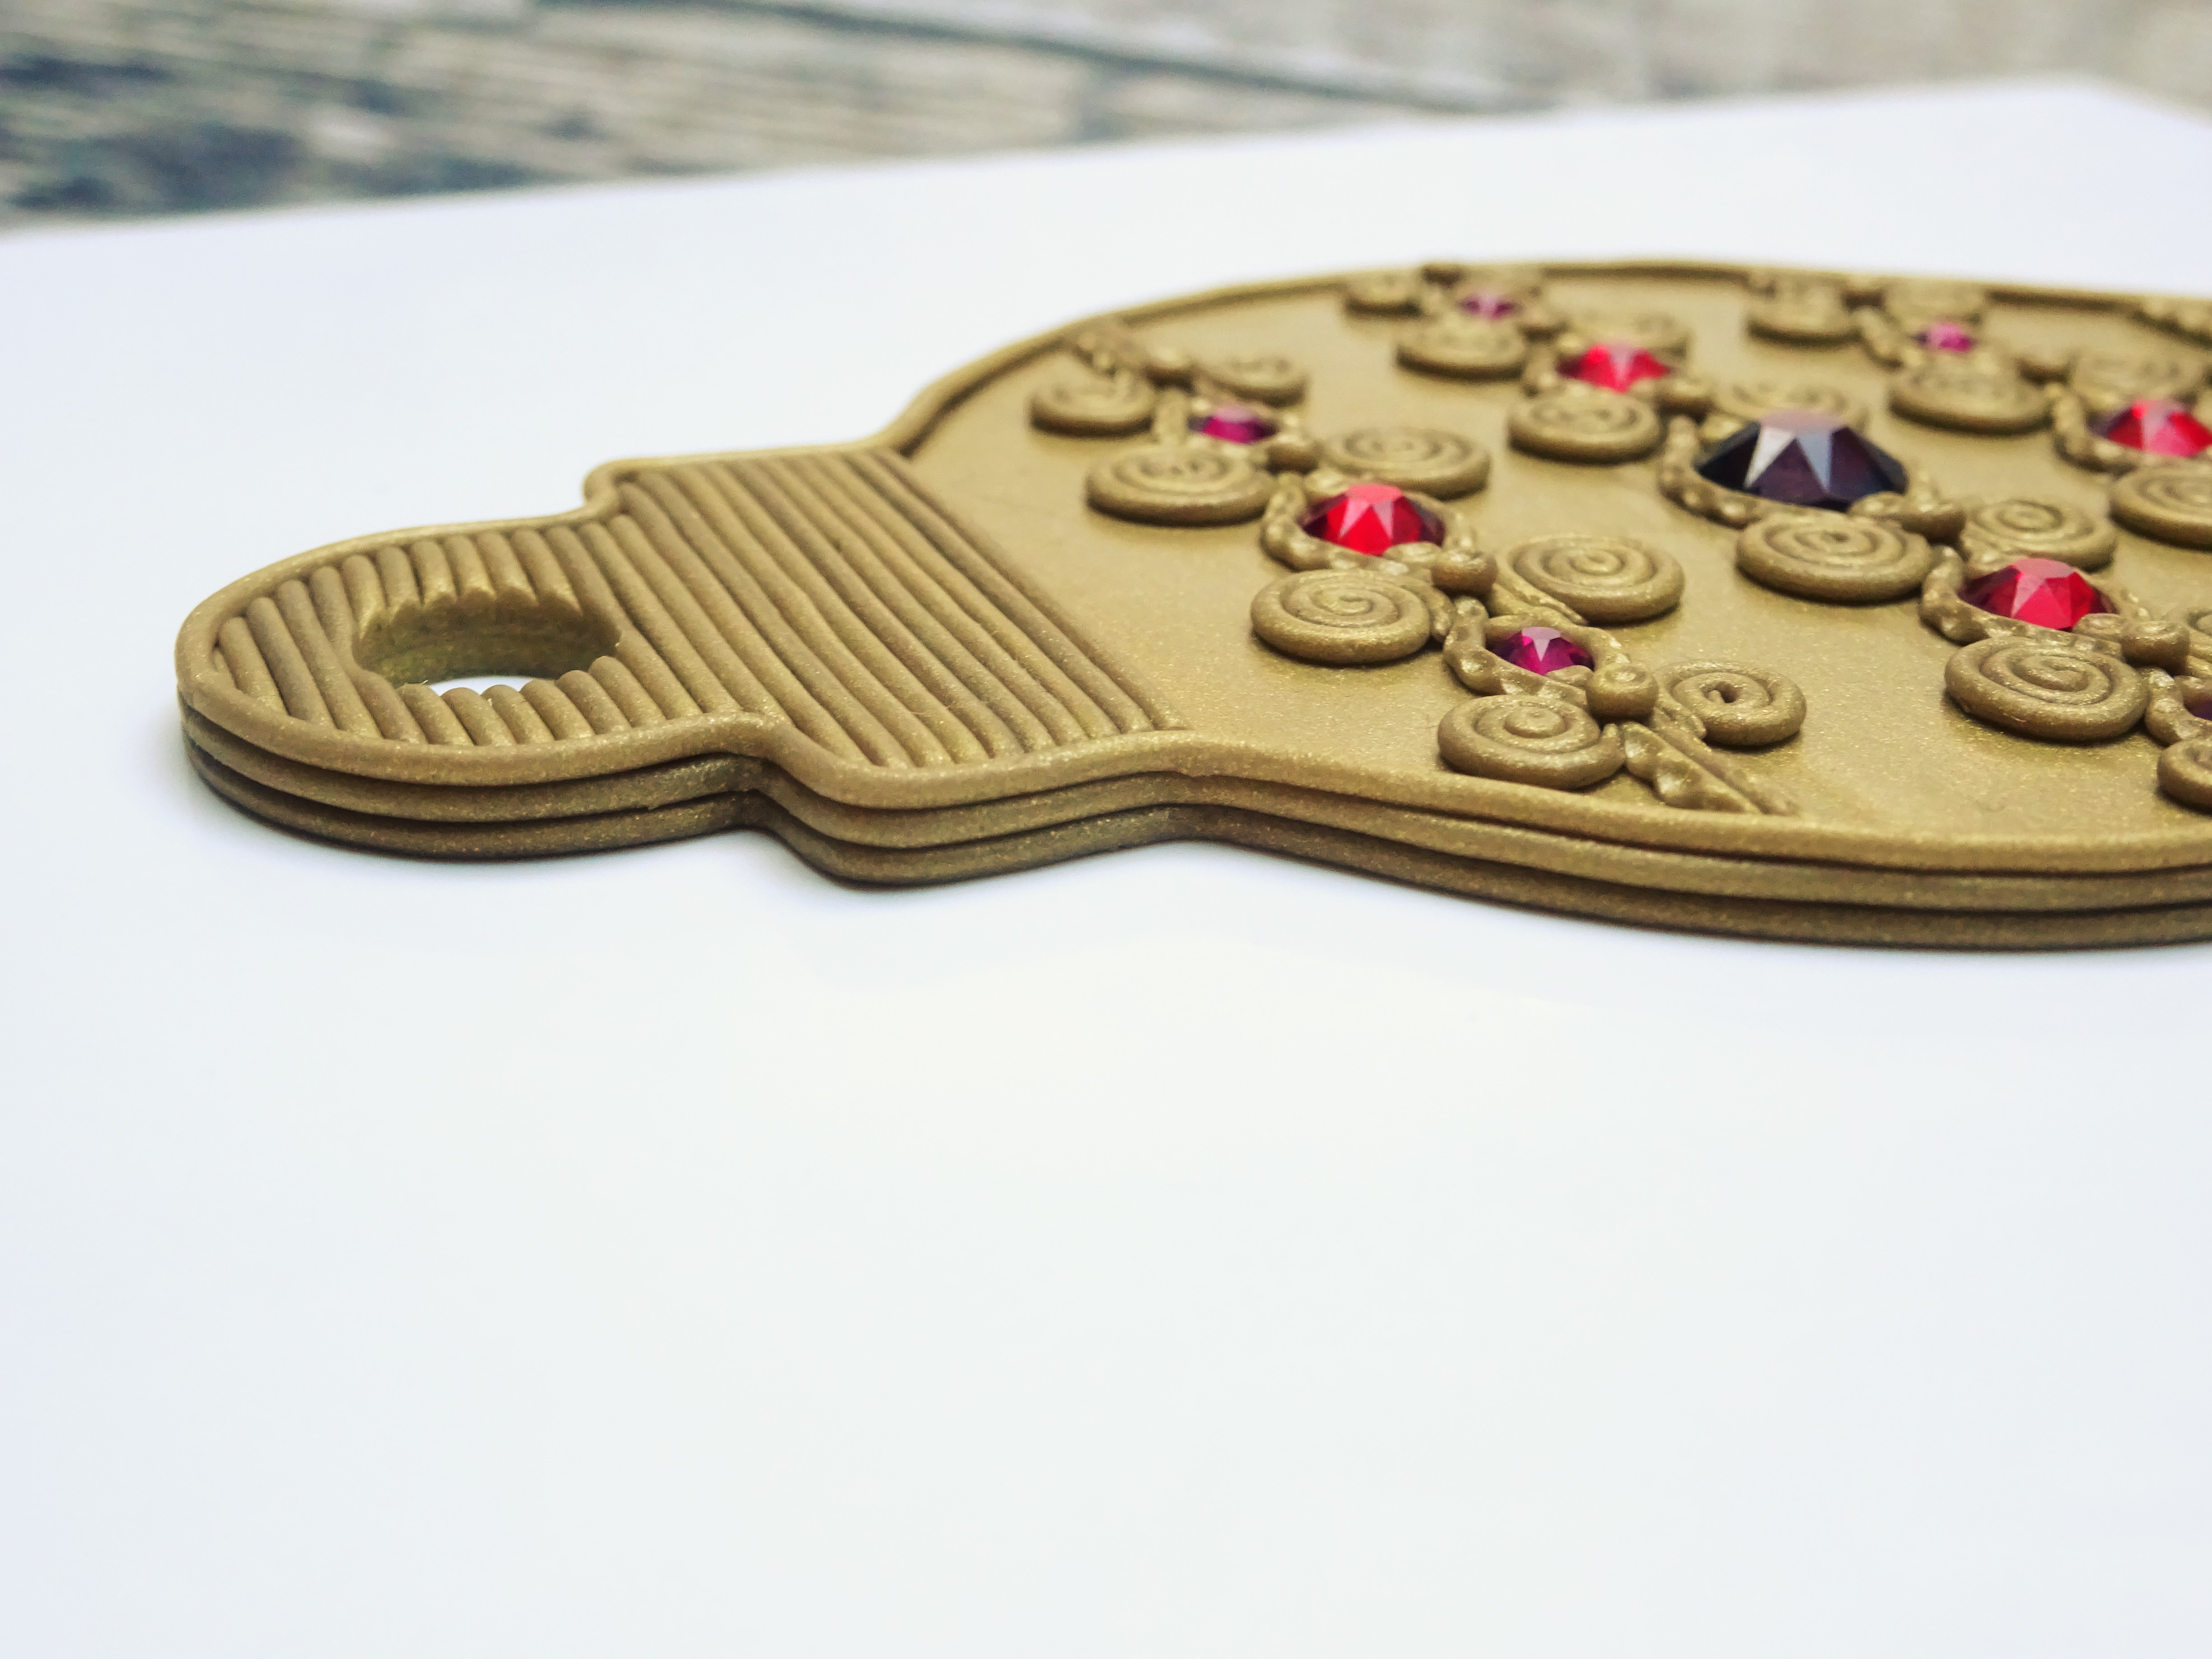
- Condition your clay and roll it out on a number 3 on your clay machine. I have used Premo Accents in Antique Gold. Using your chosen ornament shape to gently press it into the clay to leave a faint outline of the shape. I have an ornament shape but if you don’t have one you could simply use a round cutter and adjust the tutorial accordingly.
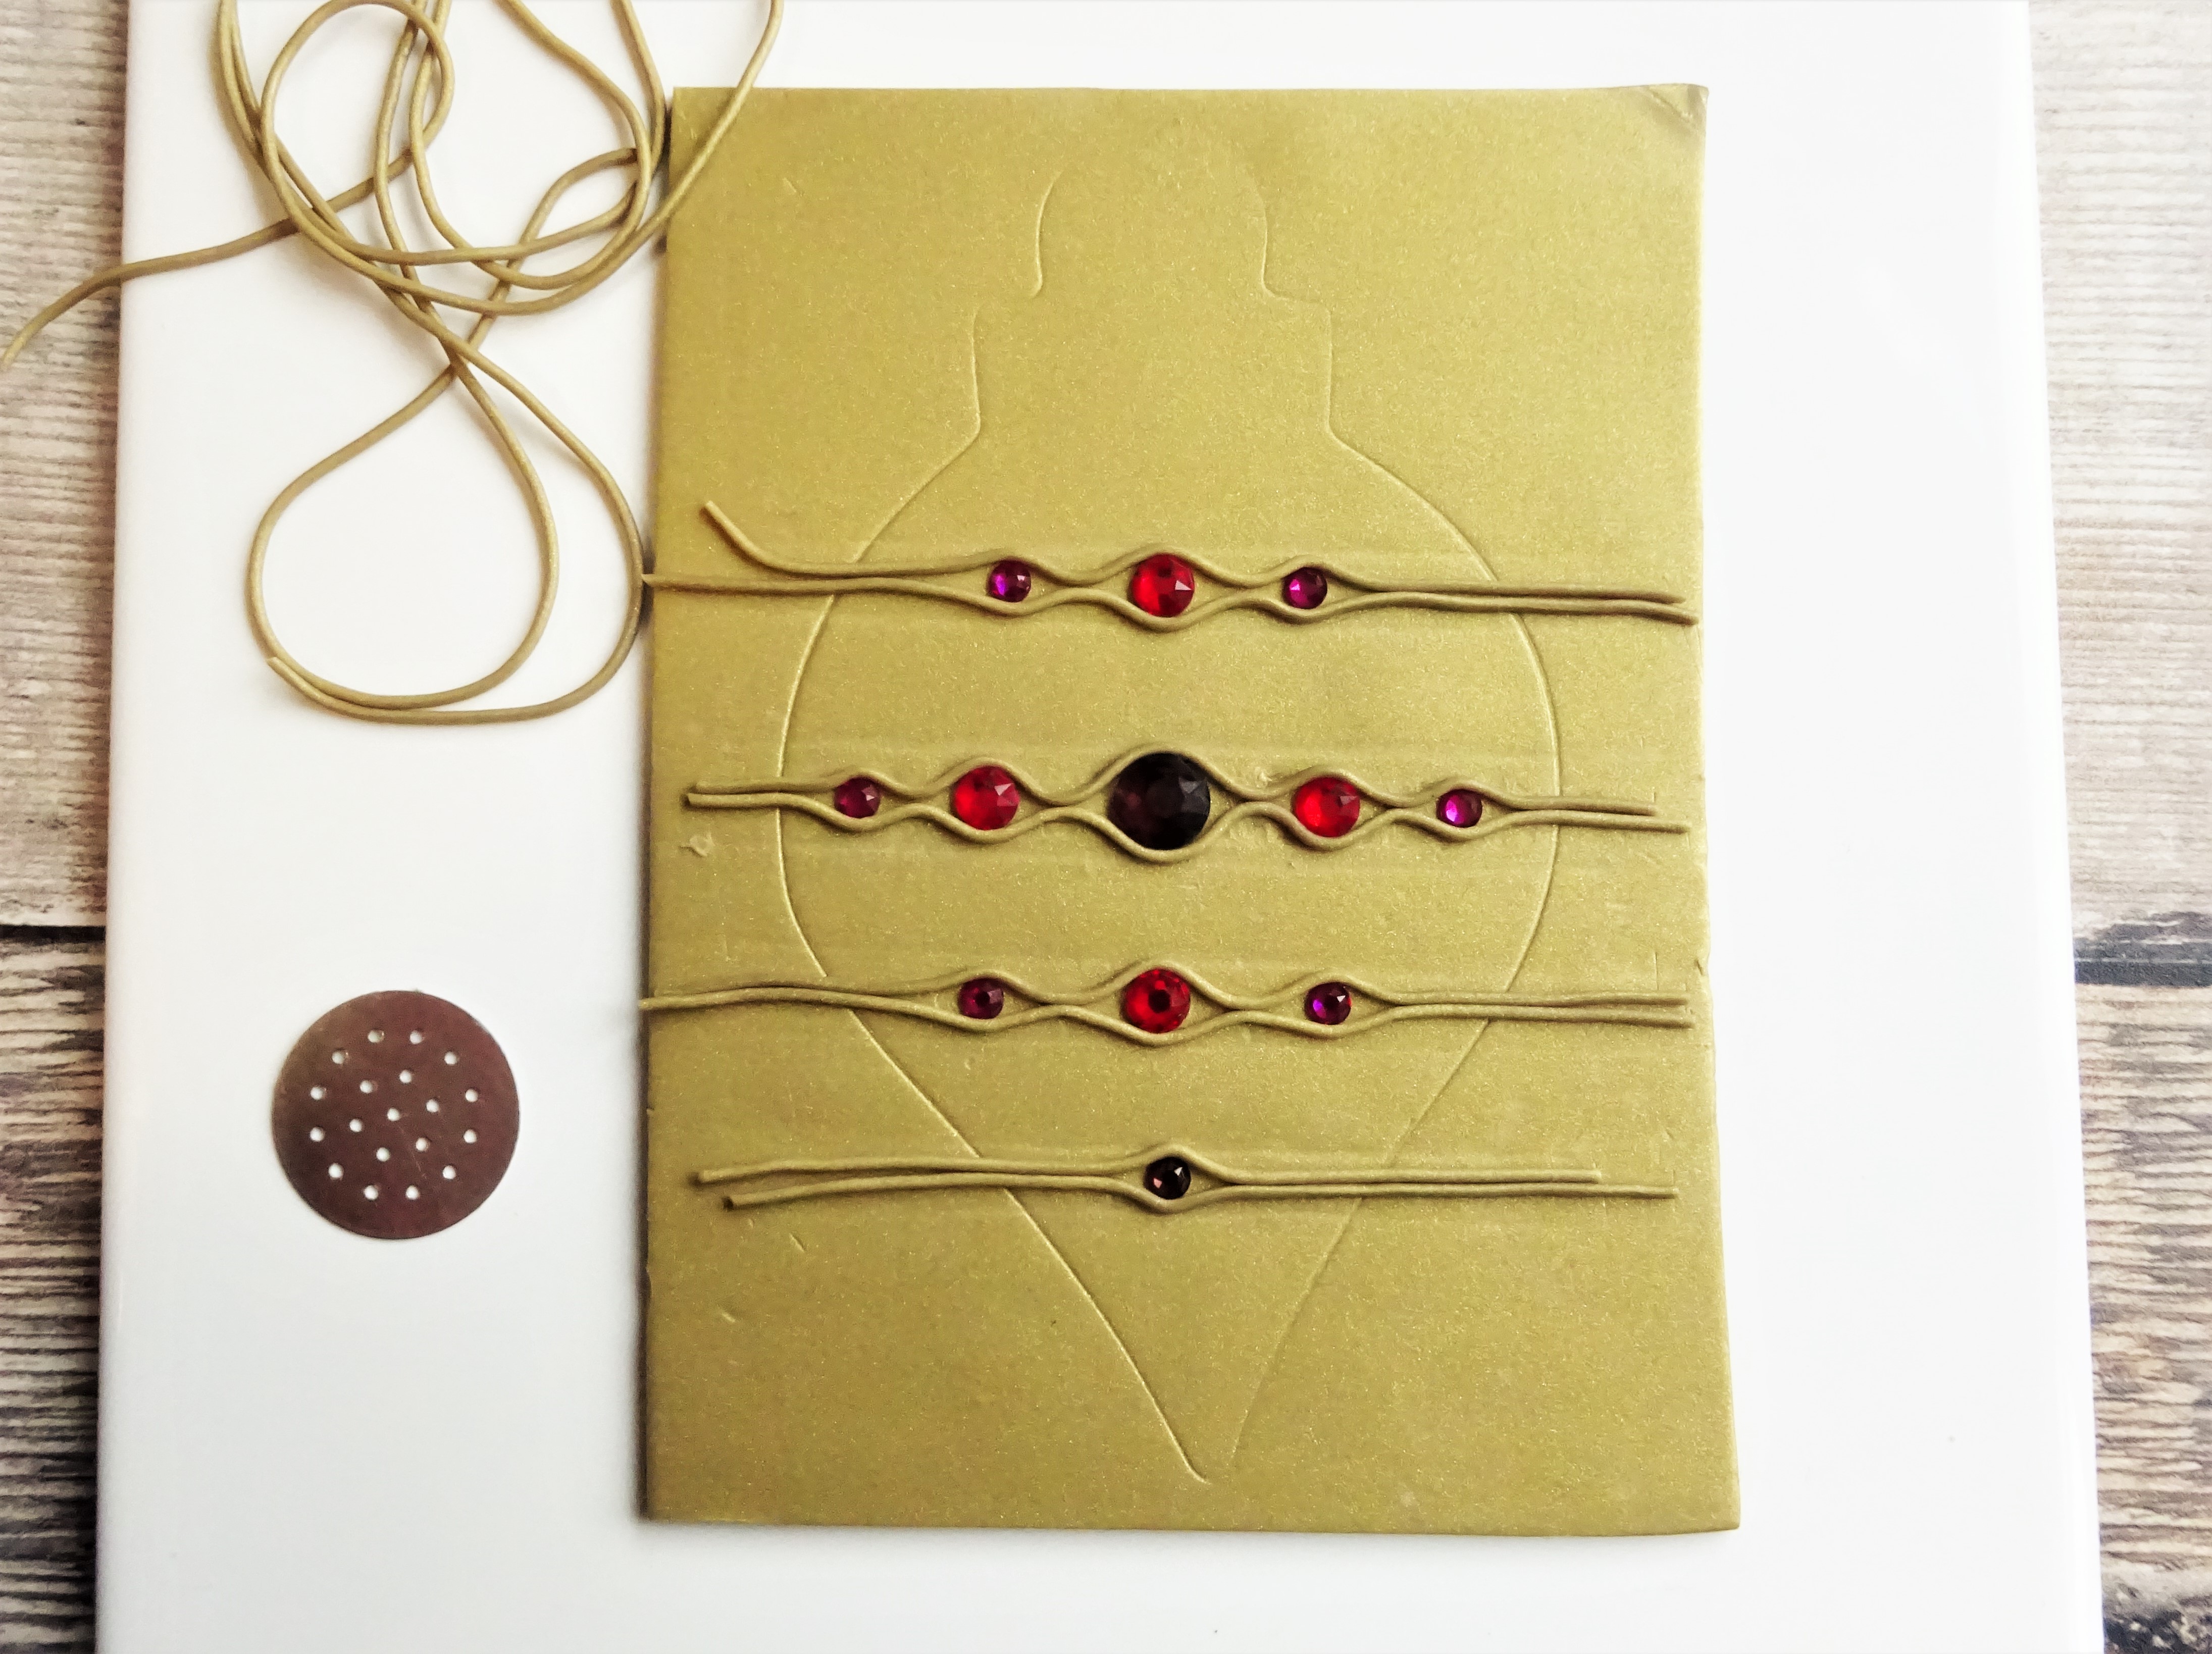
2. Position your hot fix crystals on the clay so that they fit nicely in your chosen shape. Run more of the same gold clay through your extruder using the disc with 19 small holes. Position the snakes of clay on around your crystals as shown so that the clay snakes are ‘hugging’ the crystals.

3. Next make several swirls of clay by using the snakes of clay. To start a swirl gently roll one end to make a point and then roll inwards. Once the desired size is reached cut the clay and then roll the cut end to make a neat finish.
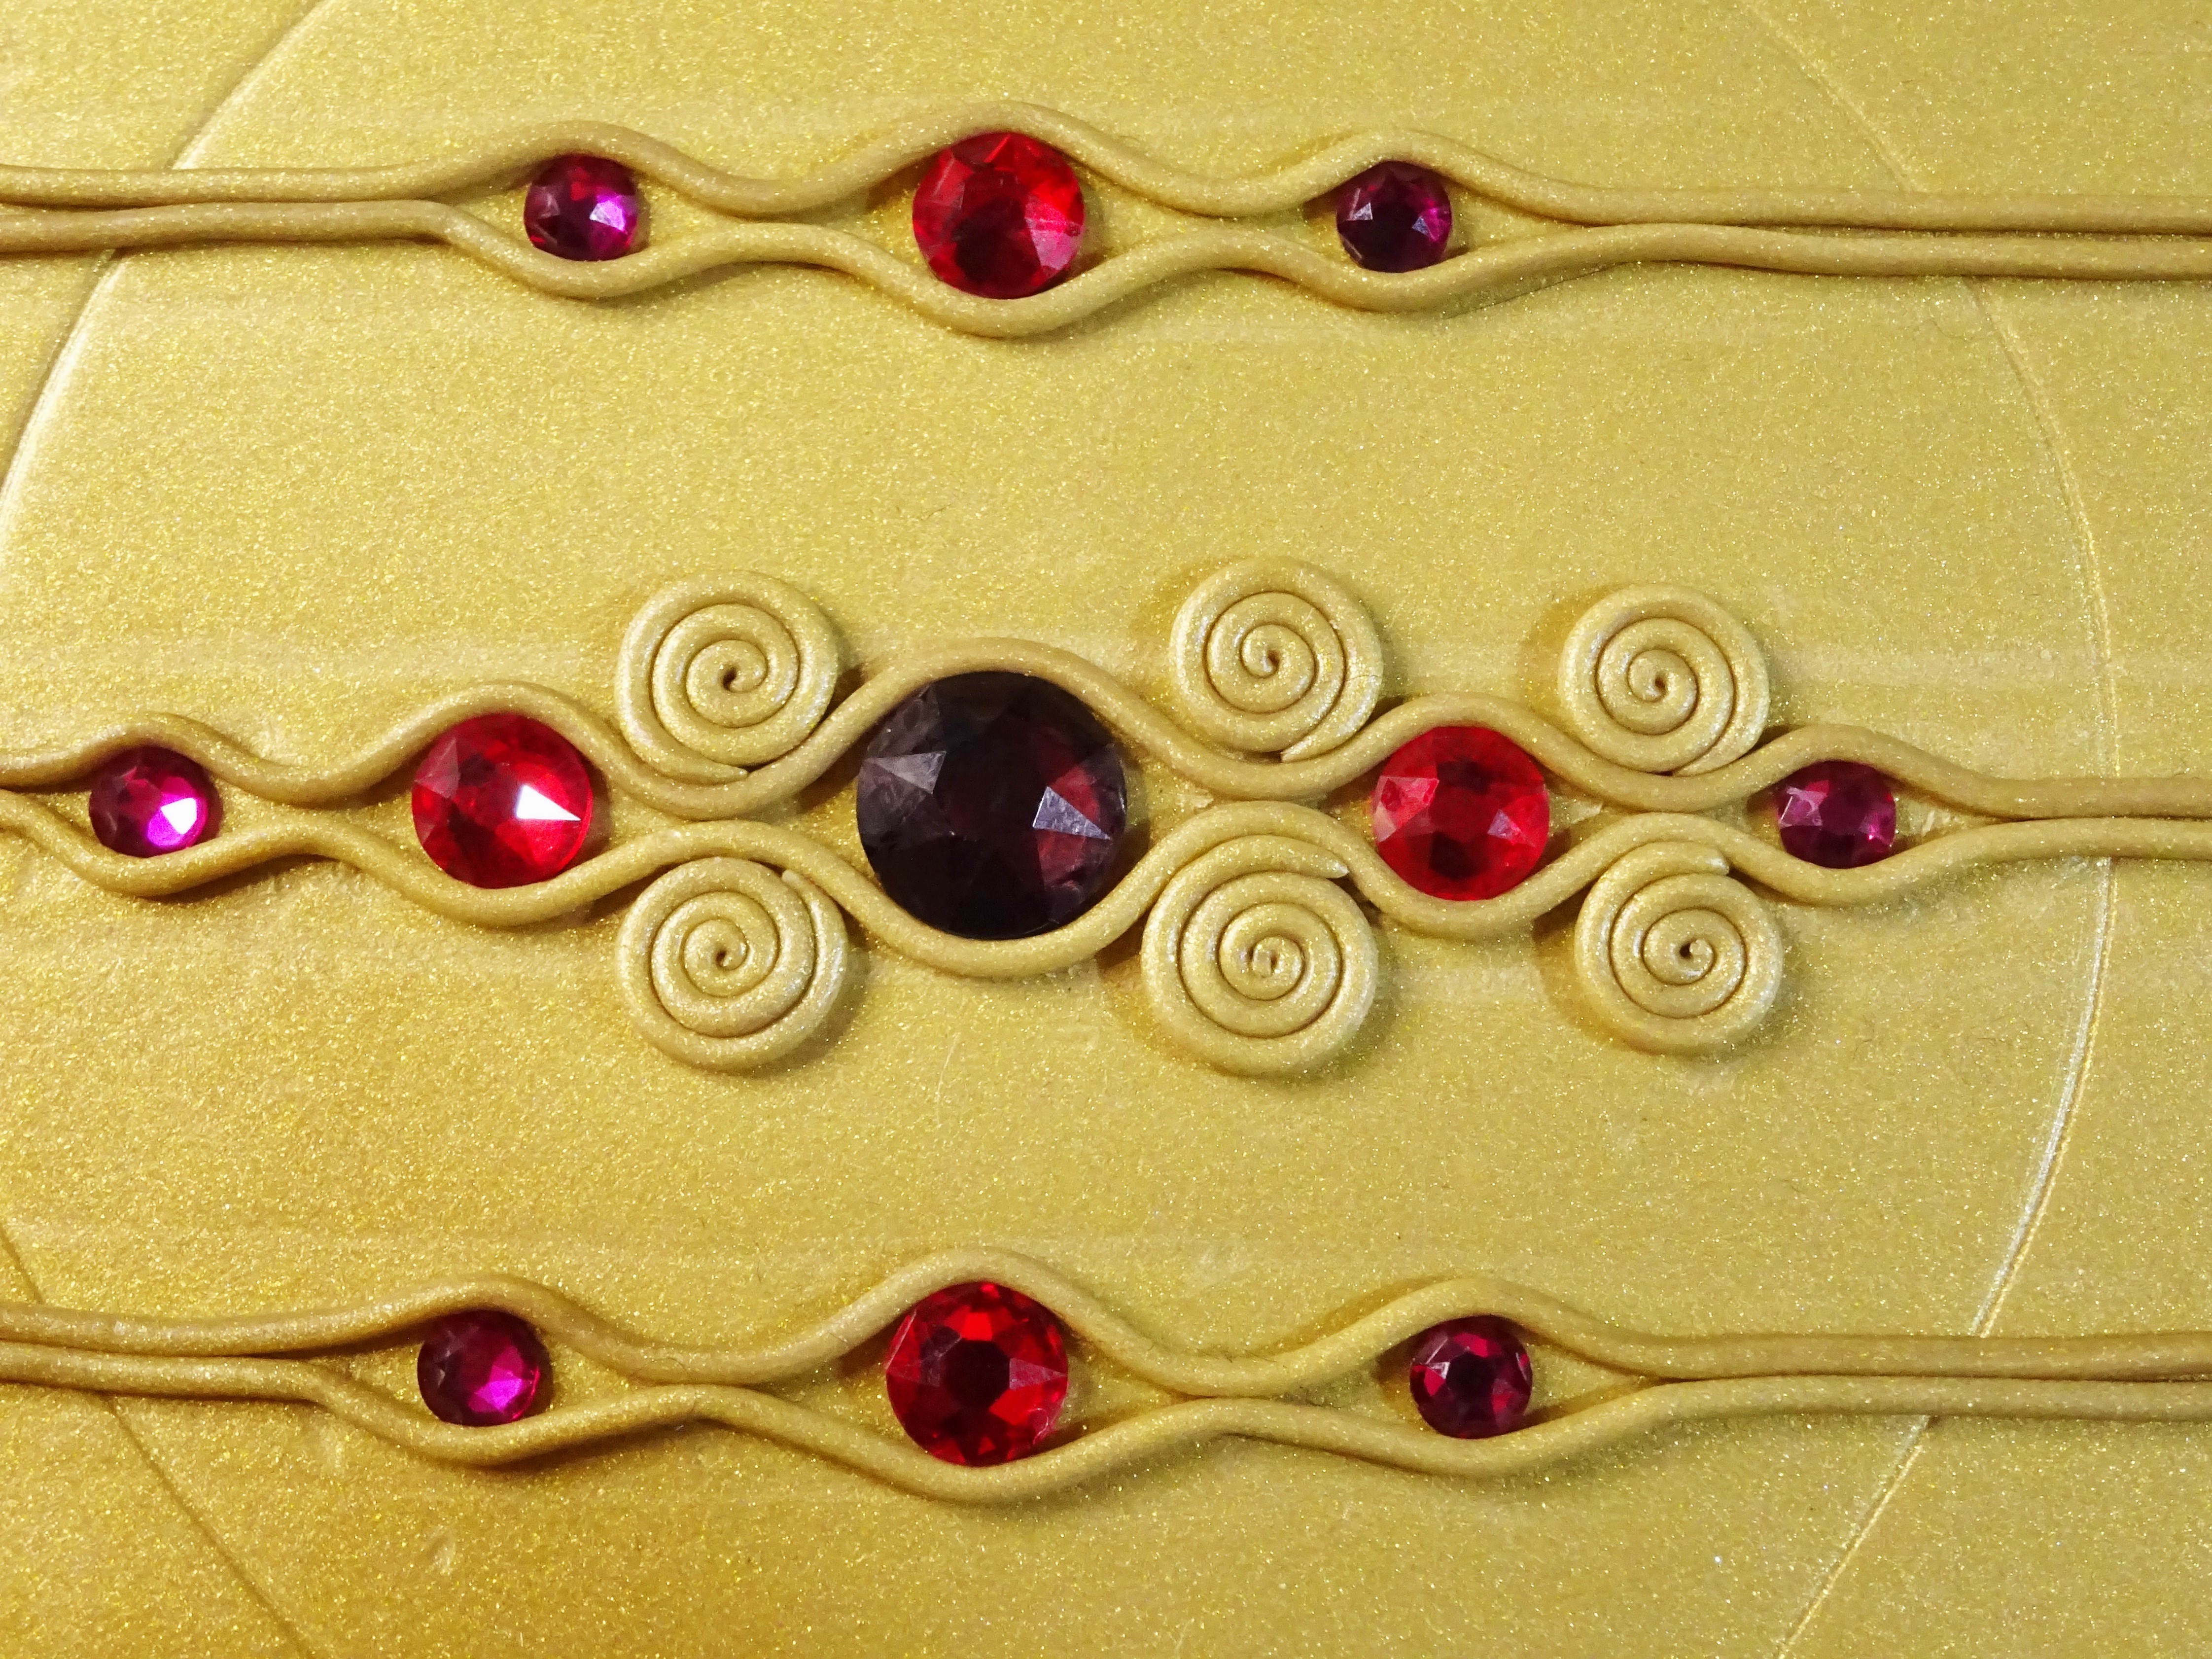
4. Start to position the swirls on the clay at the point where the clay is dipping in around each crystal. Try to make this symmetrical so that is looks balanced.
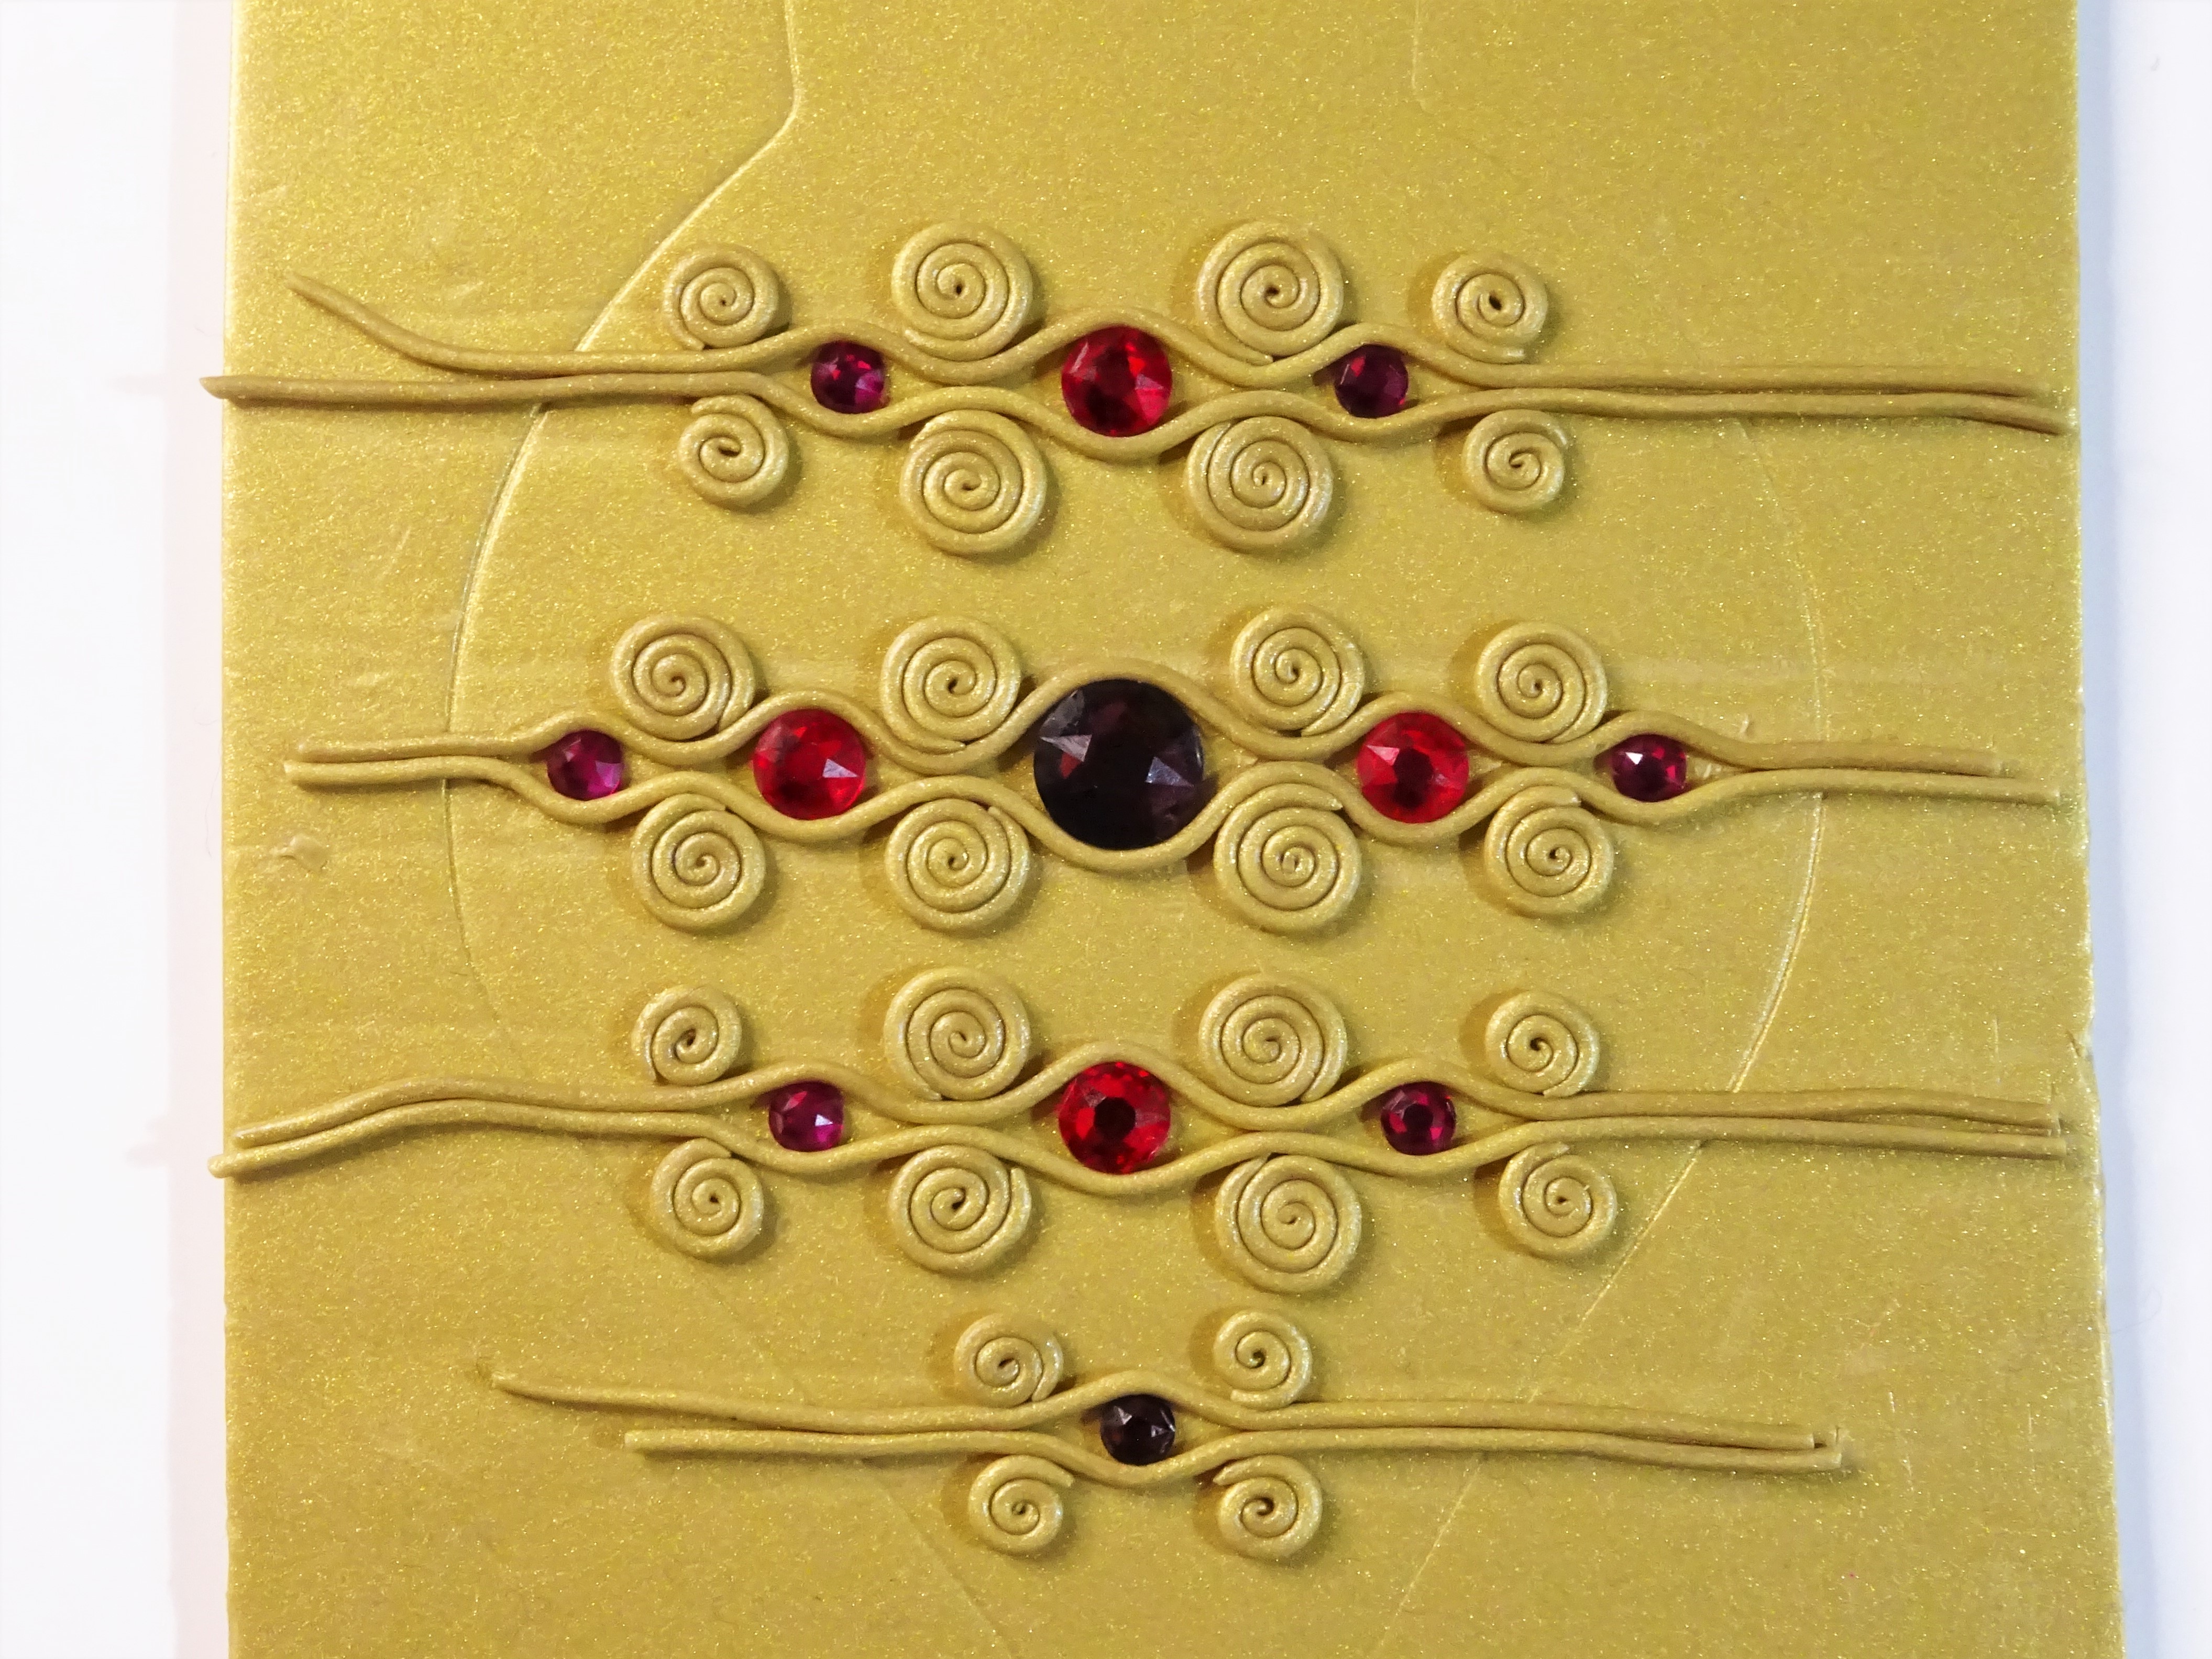
5. Continue making and adding swirls around every crystal. As the crystals get smaller (if you have used graduated sizes) and you move towards the edge of the shape you may need to make you swirls smaller.
6. Using the clay snakes again cut small pieces and roll them into balls. Position these between each swirl and on either side of the crystals. Again, the size of clay balls my need to alter to suit the size of the crystal.

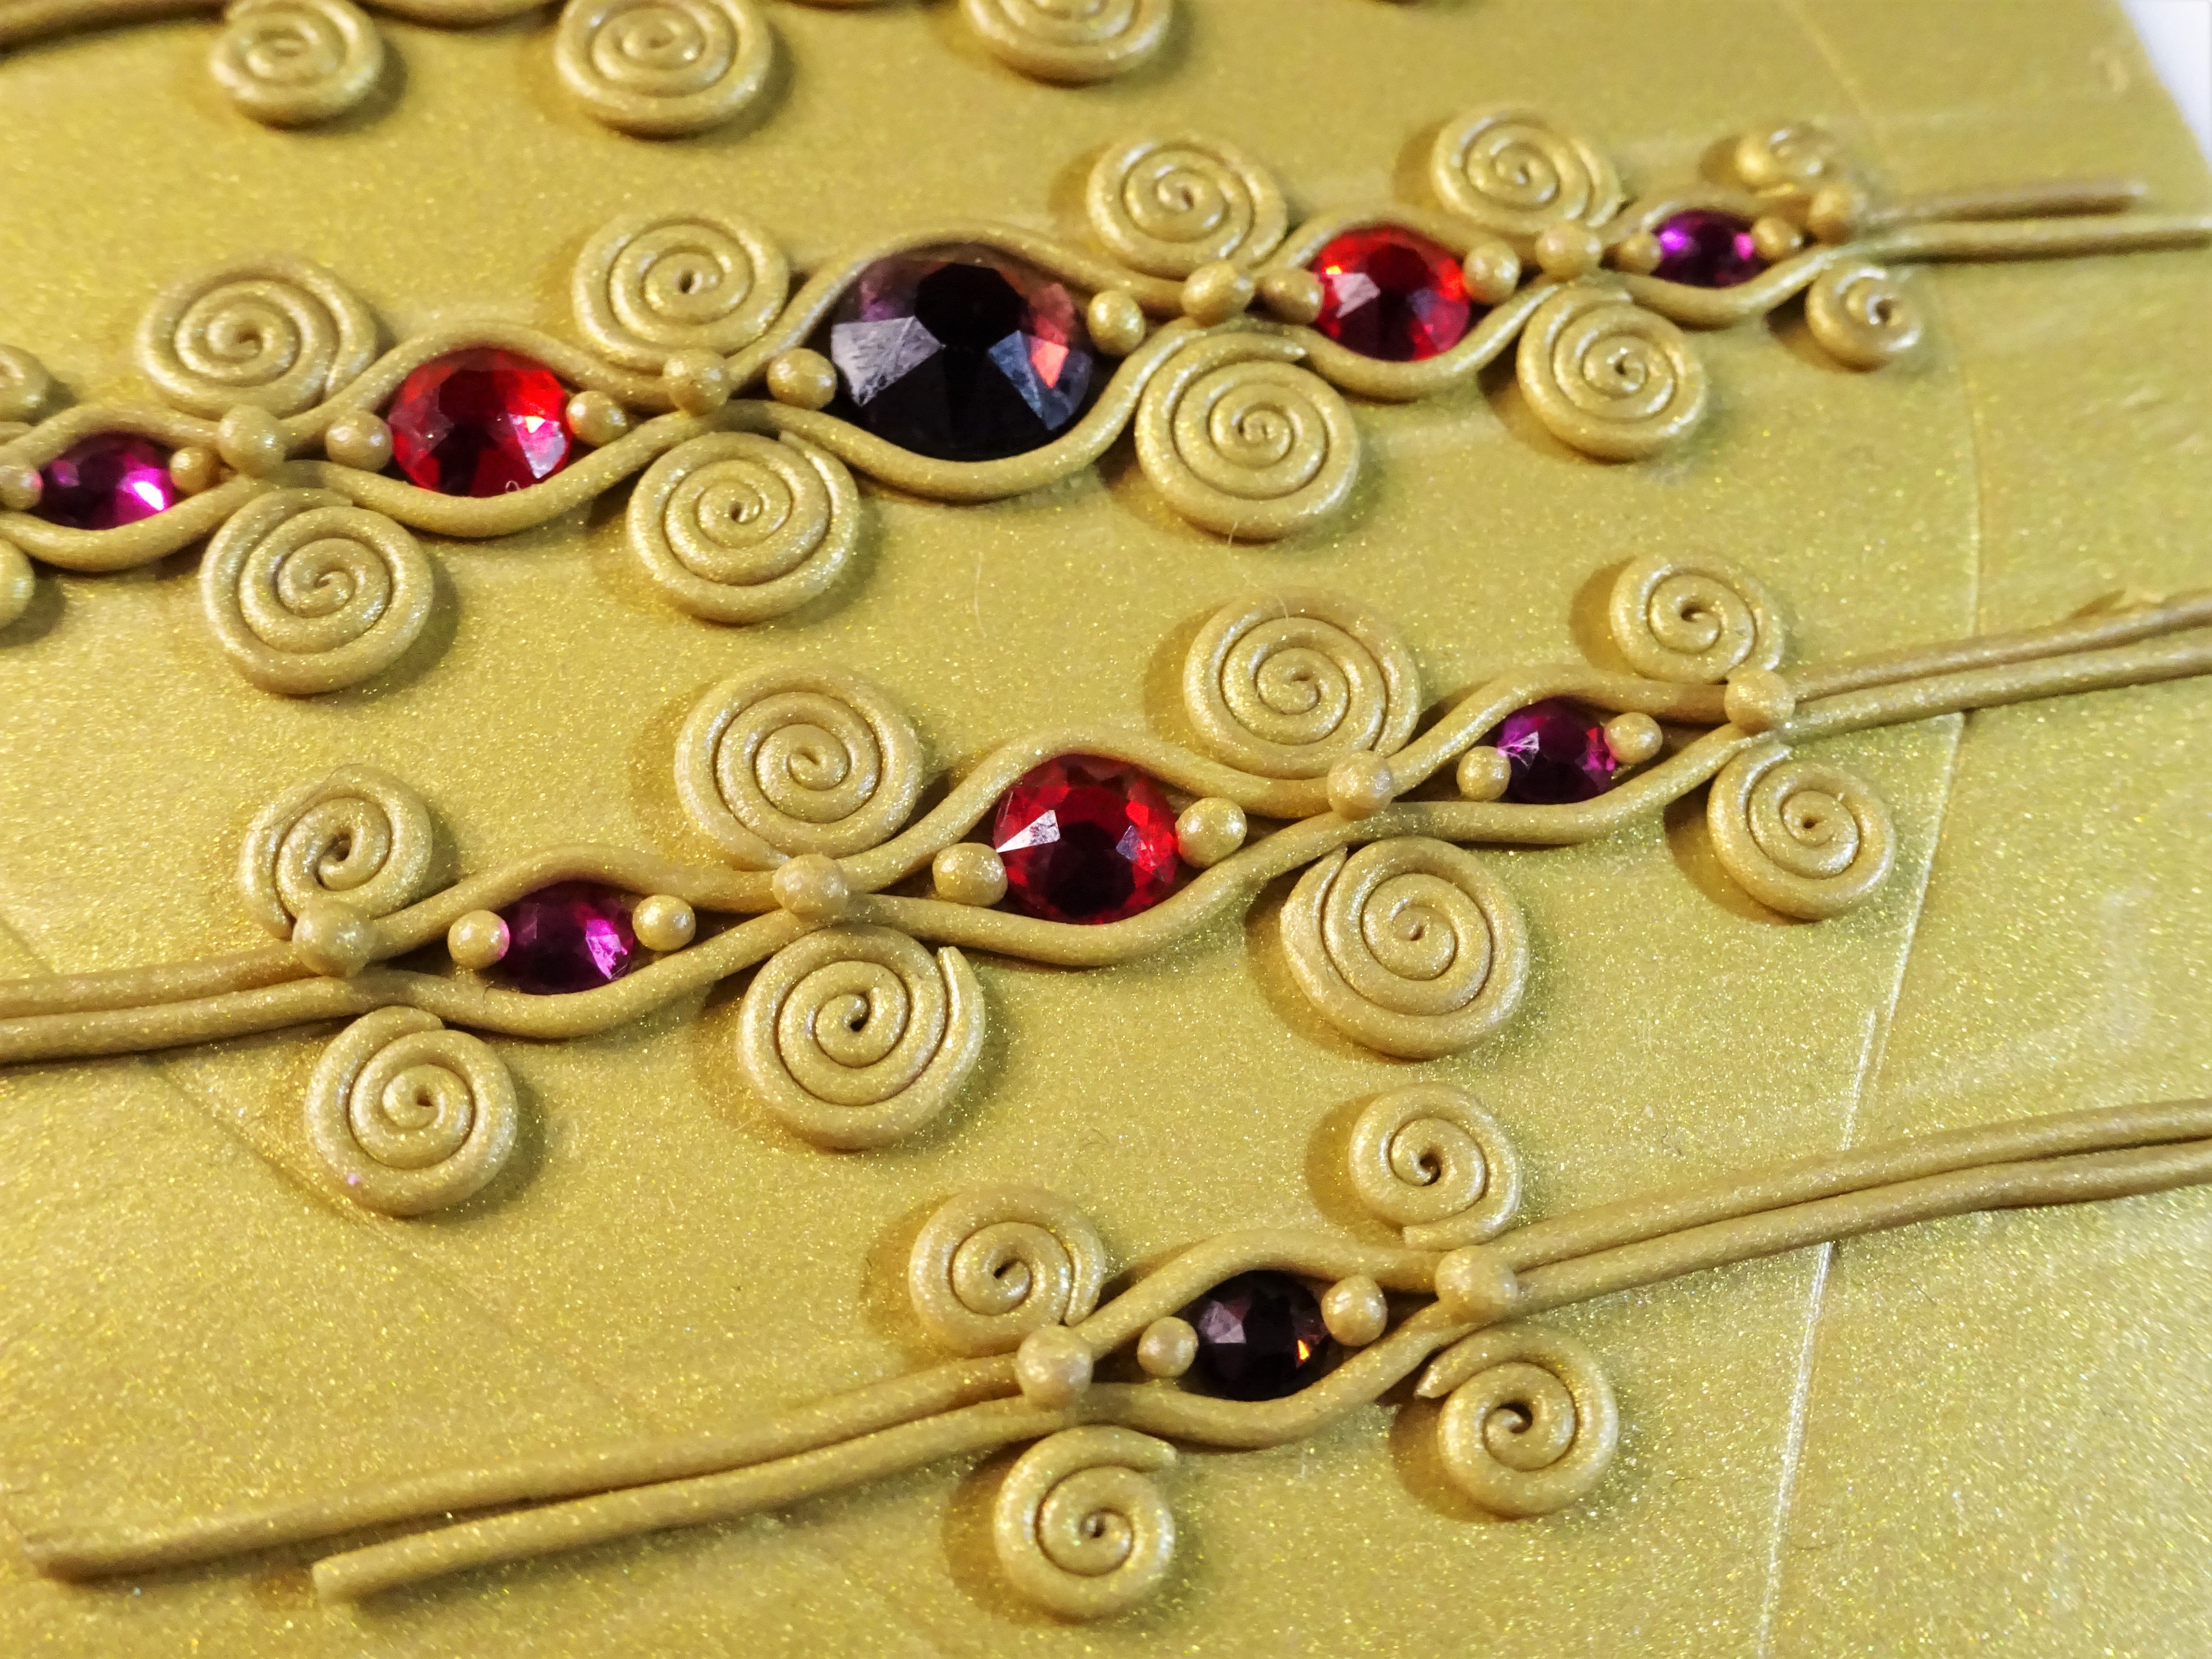
7. Take a ball tool and press into the centre of the clay balls. Having the extra clay pressed around the crystals will help hold them in just in case.

8. I added further details by using the same ball tool to add dots into the clay snakes running around the crystals. I pushed towards the crystal to help secure it in place.

9. If you have used an ornament shape, decorate the top handing part by adding a section of clay snakes at the point where the top of the ornament begins.
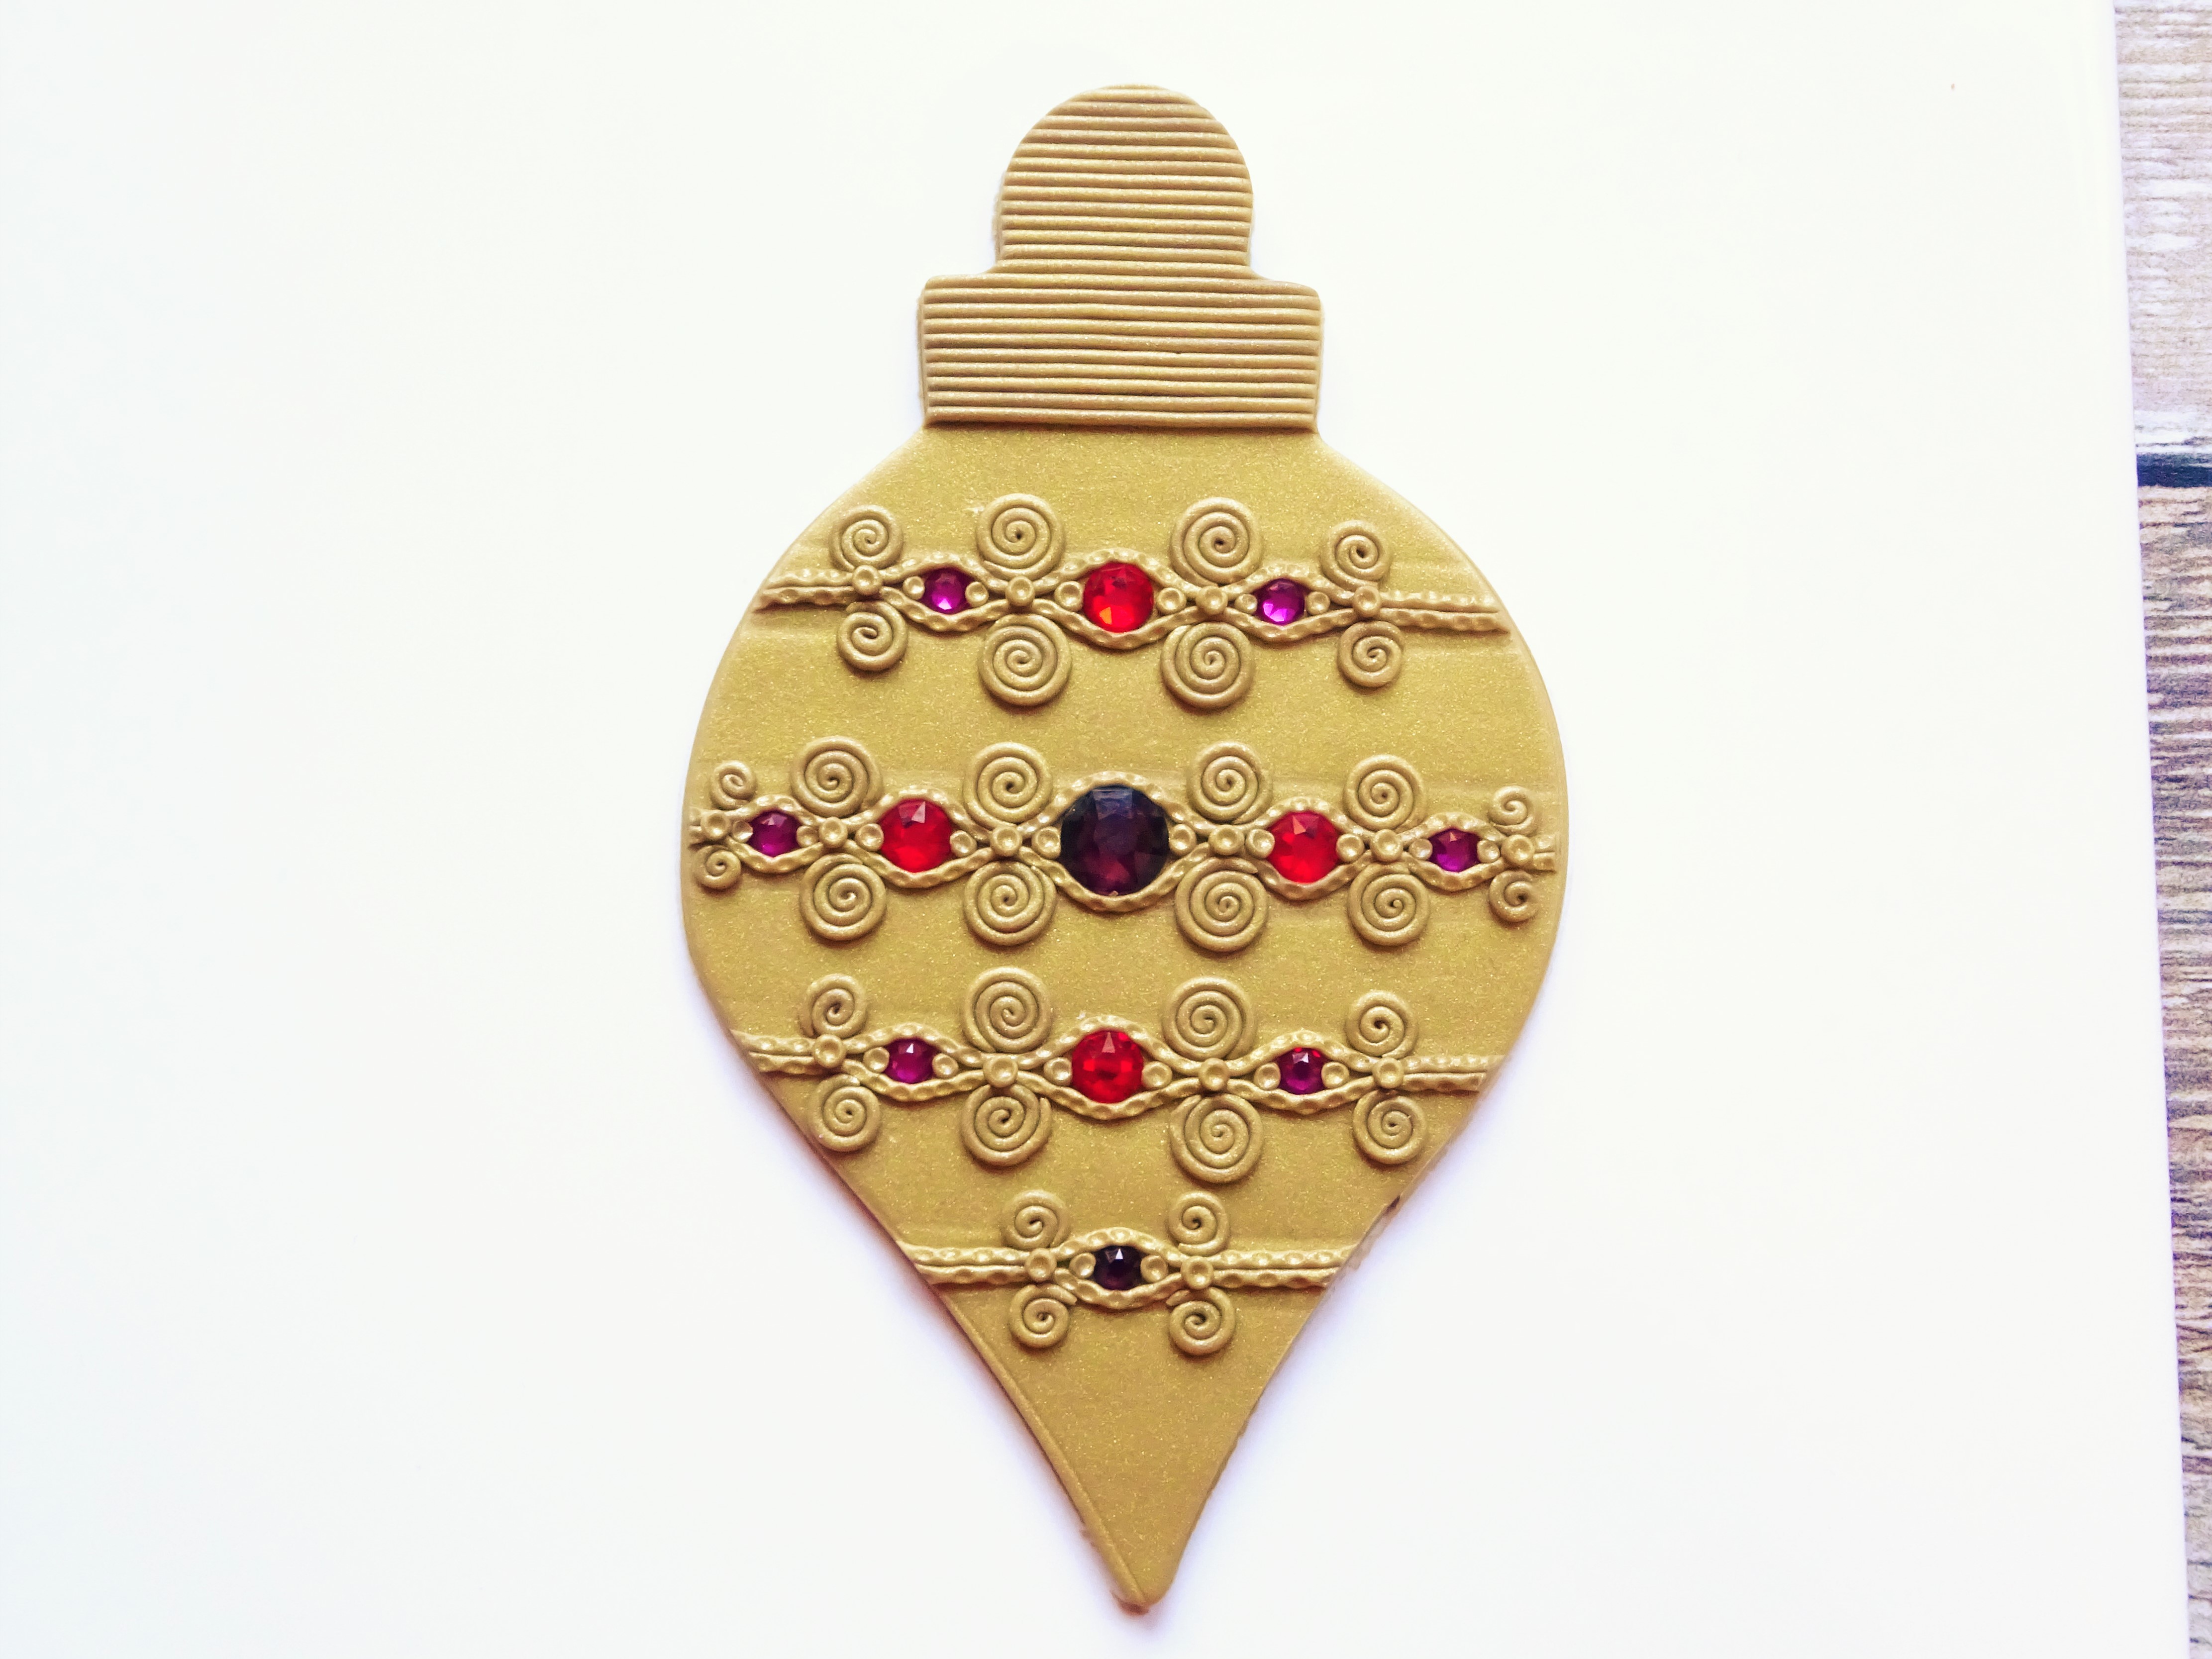
10. Cut your shape out carefully and give a light dusting of perfect pearls in heirloom gold. This is optional but I’m always looking for added sparkle! It really helps to bring out all the details too.
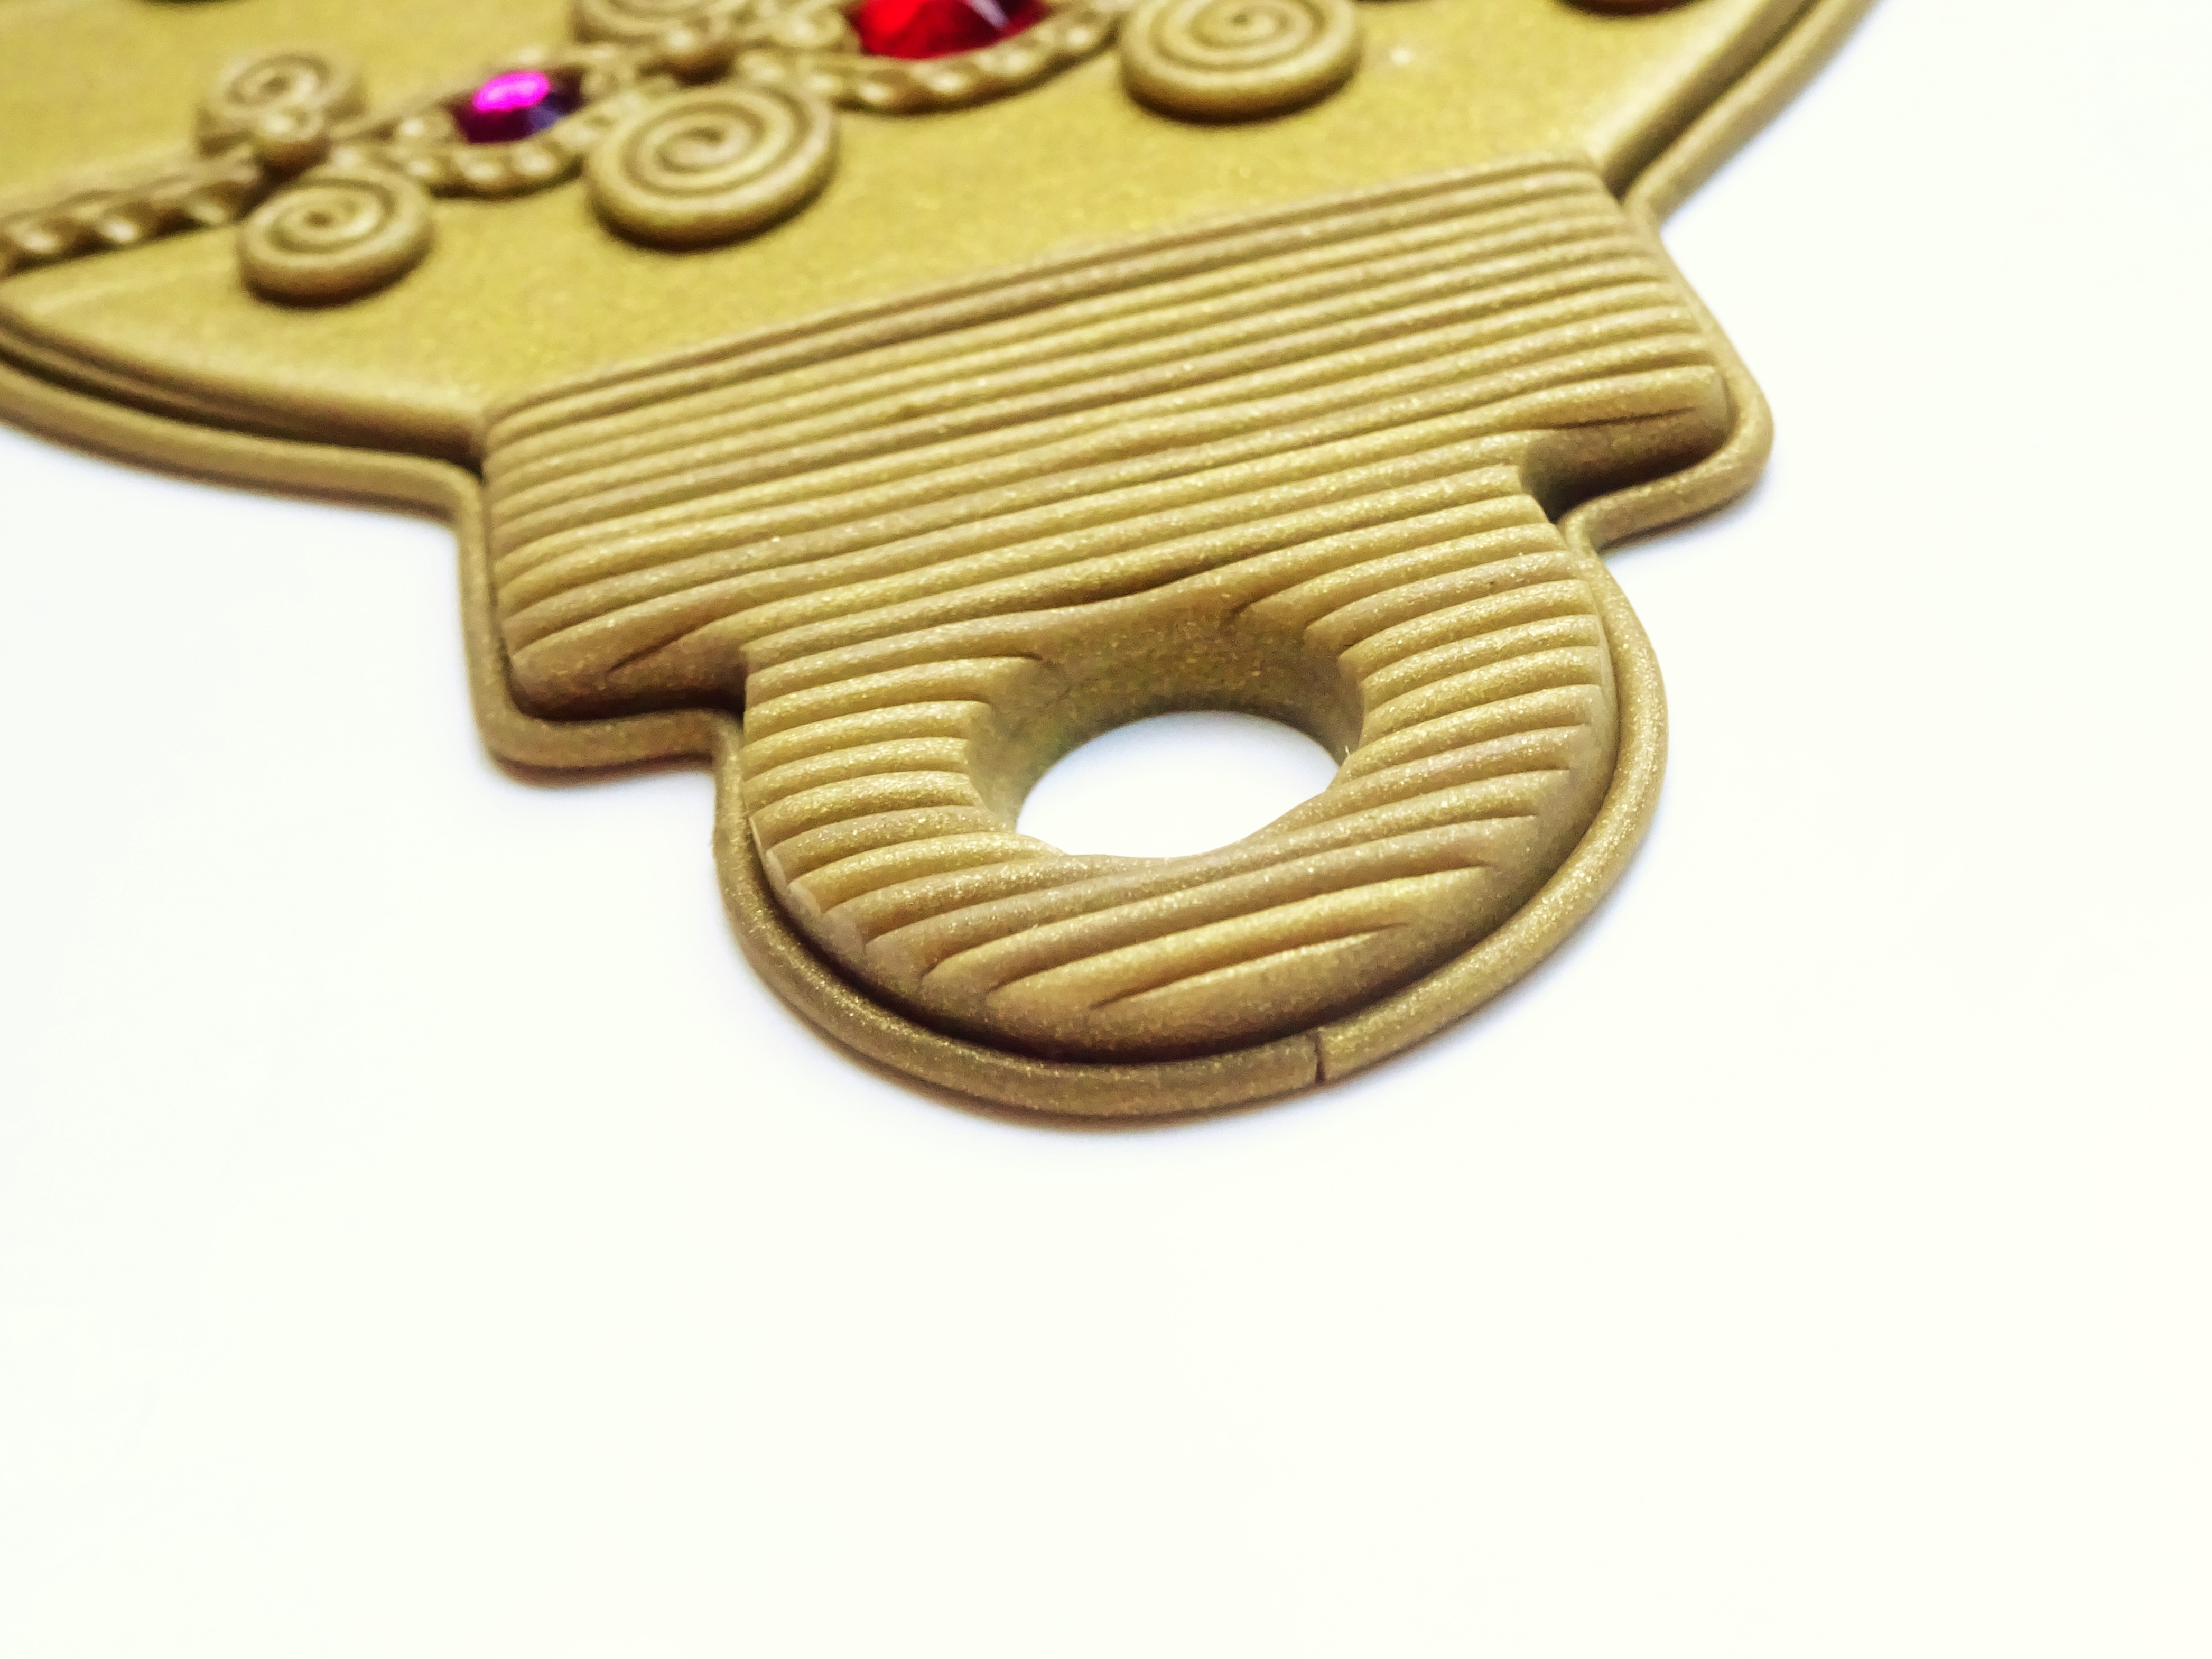
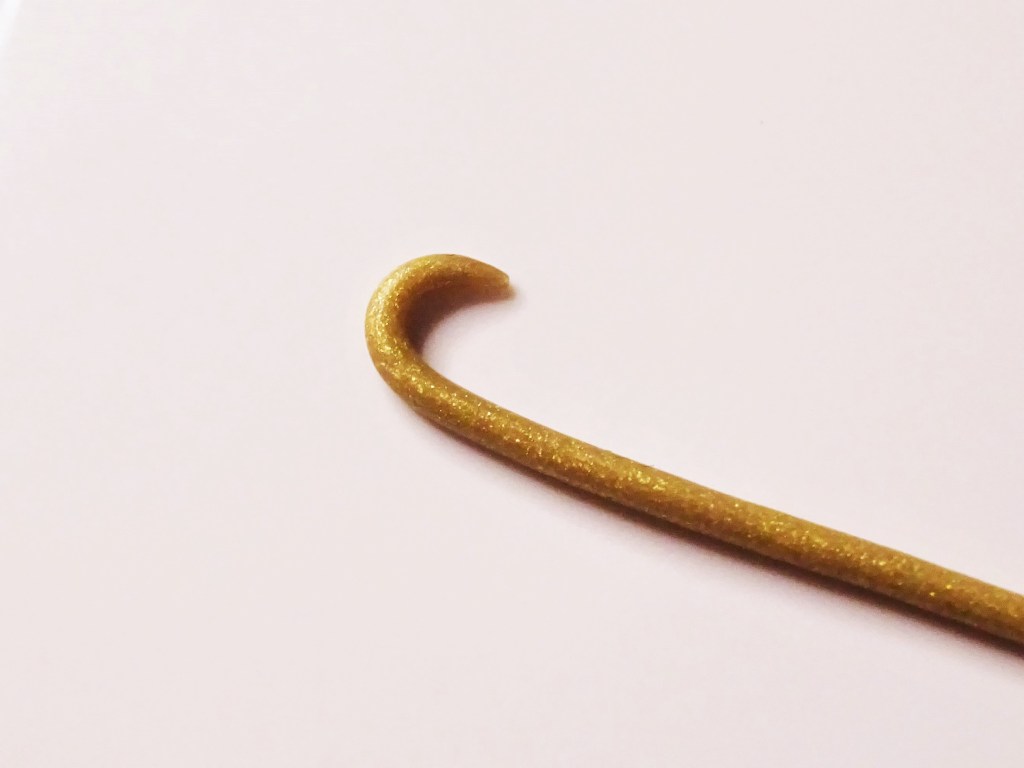
11. Use a small circle cutter to make a loop at the top and then wrap around the entire shape with a snake of clay. To do this cut a neat edge at the top of a clay snake and position at the top of the ornament (it will get covered by the ribbon) and press the snake all around the base of the shape. When you reach the start cut the clay and press in the ends.
12. Wrap two more snakes around the shape building one on top of the other. The top snake of clay needs to be raised over the edge of the shape a little to act as a barrier for the liquid clay.

13. Pour some liquid clay into some sort of container (I use a large plastic measuring spoon) and mix in some glitter using a lolly (popsicle) stick. Carefully start filling each section of your ornament with the now glitter liquid clay using a small ball tool to help move it around and to push it into the tight spaces. Please check out the YouTube video linked below for more information on how to do this.
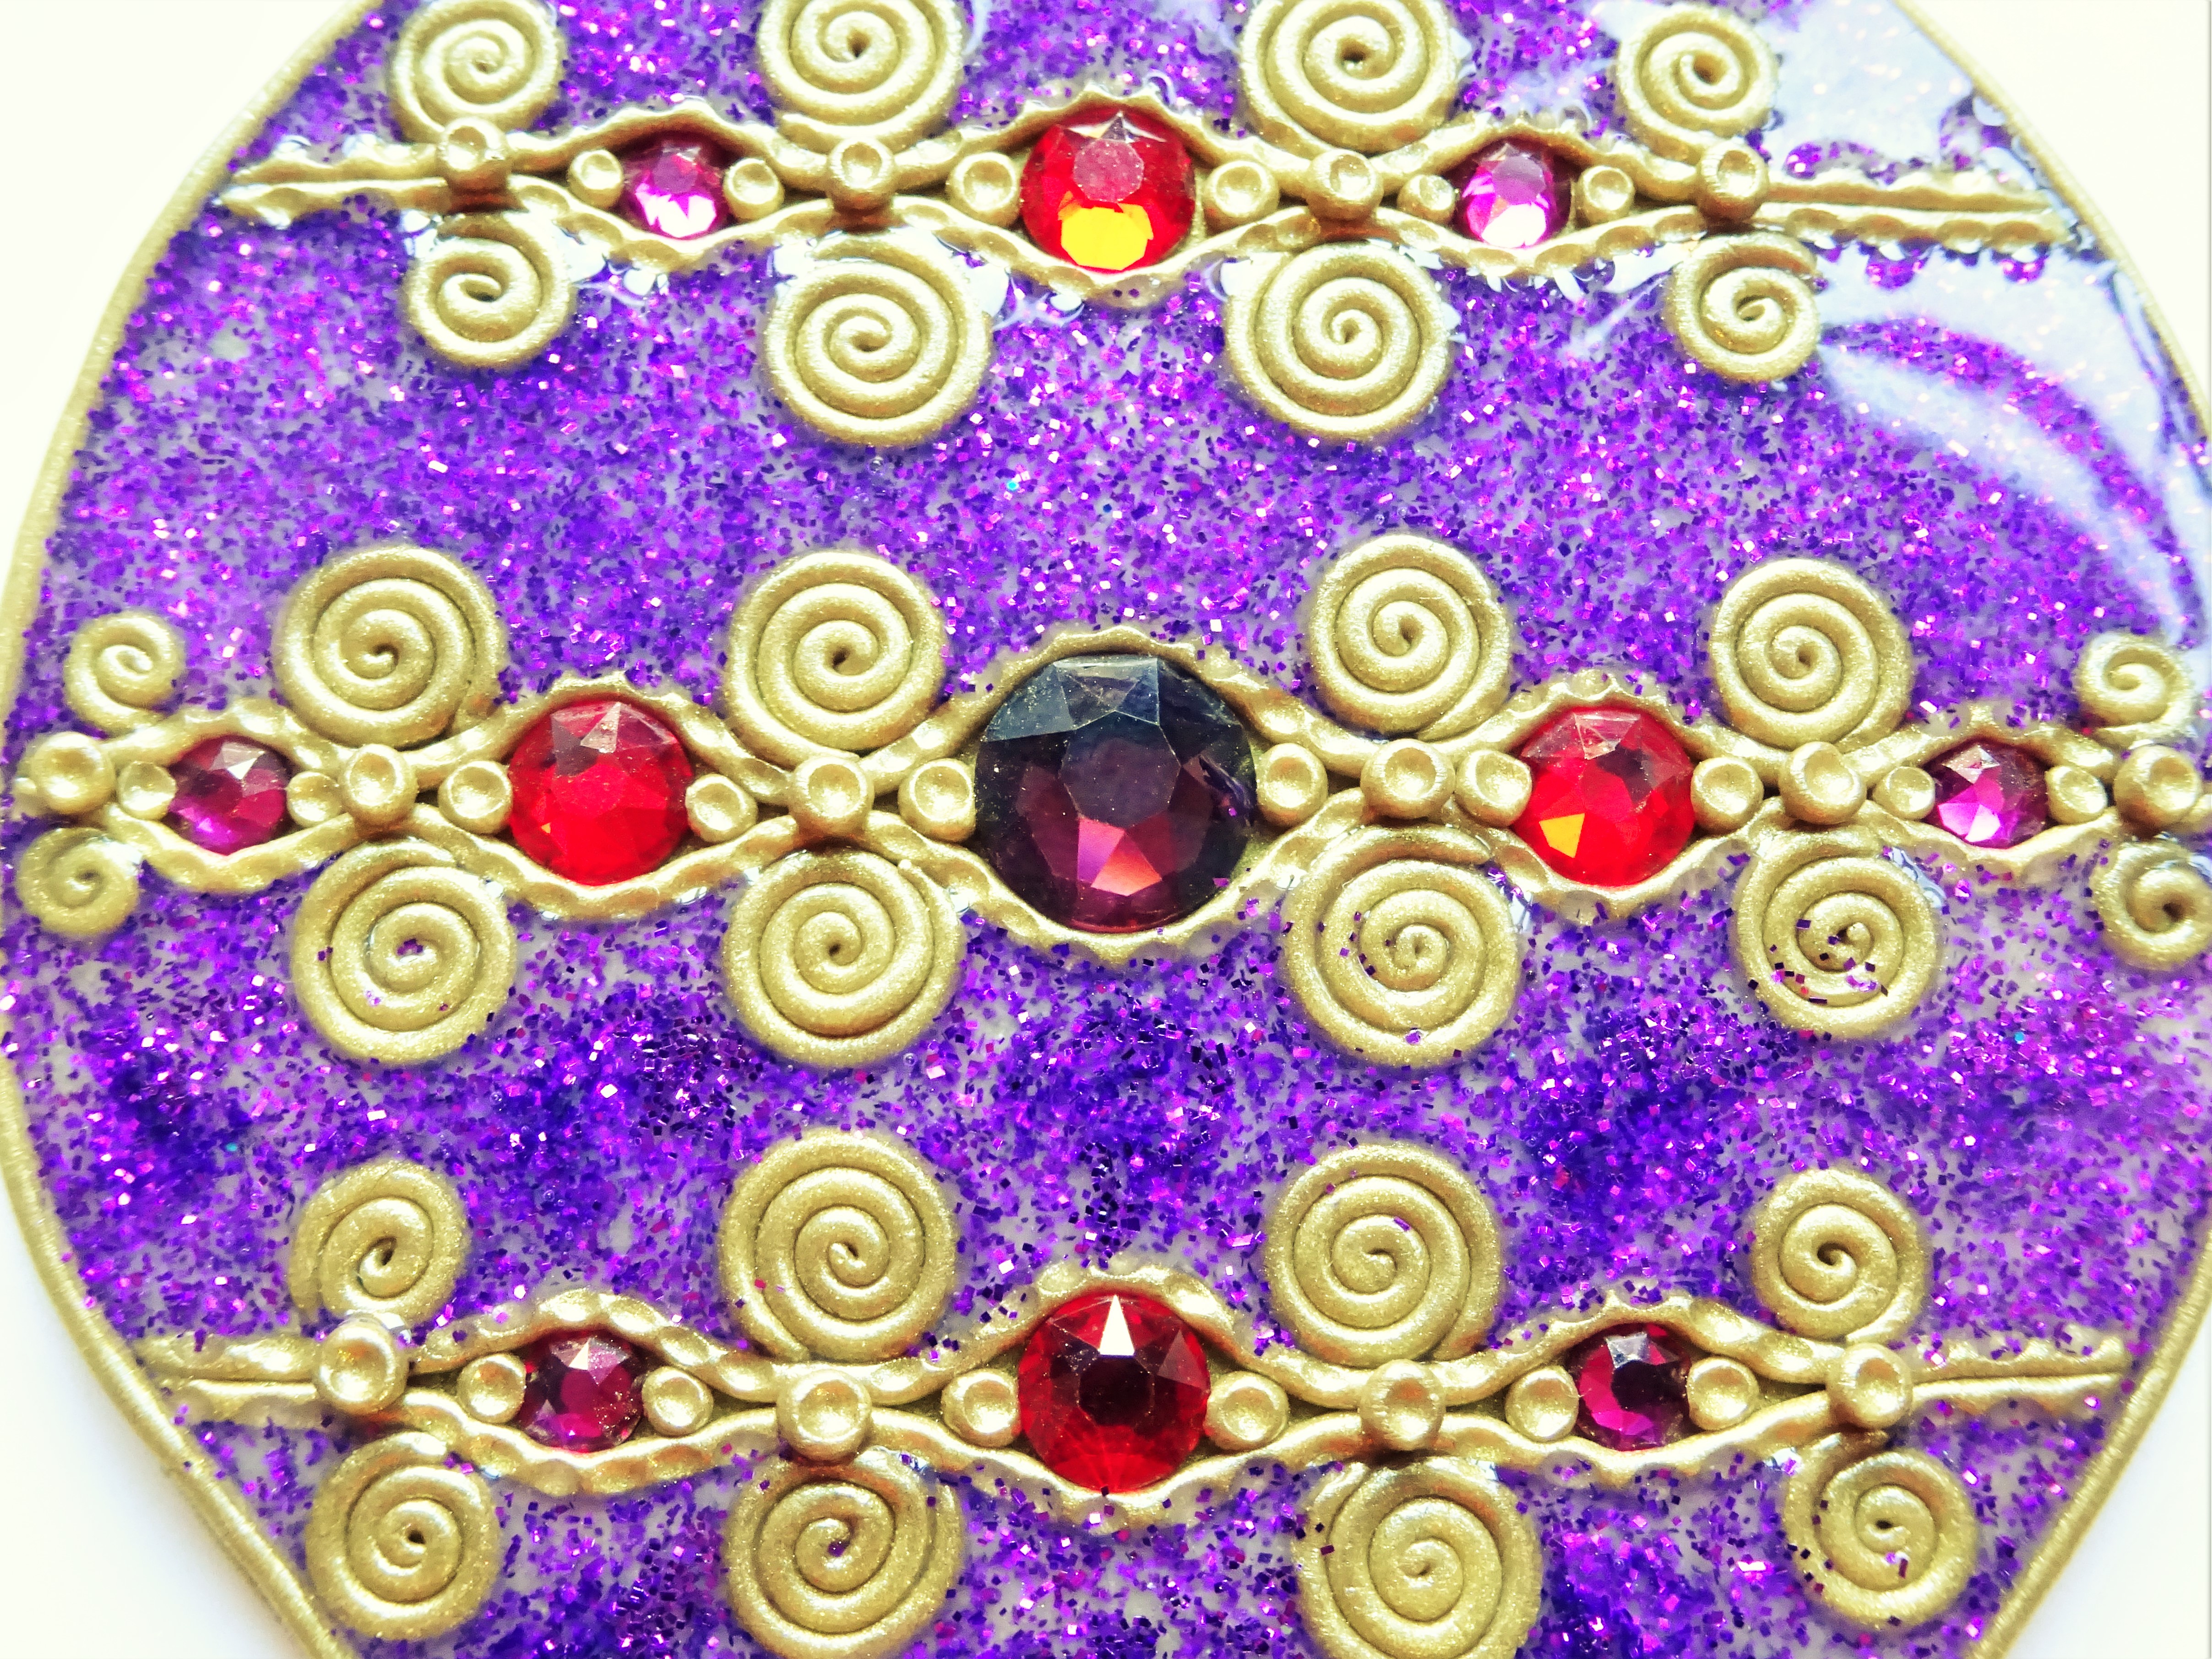
14. Pop the ornament into the oven at the temperature and time indicated on your clay packet. Once out the oven leave to cool and then give two coats of varnish.
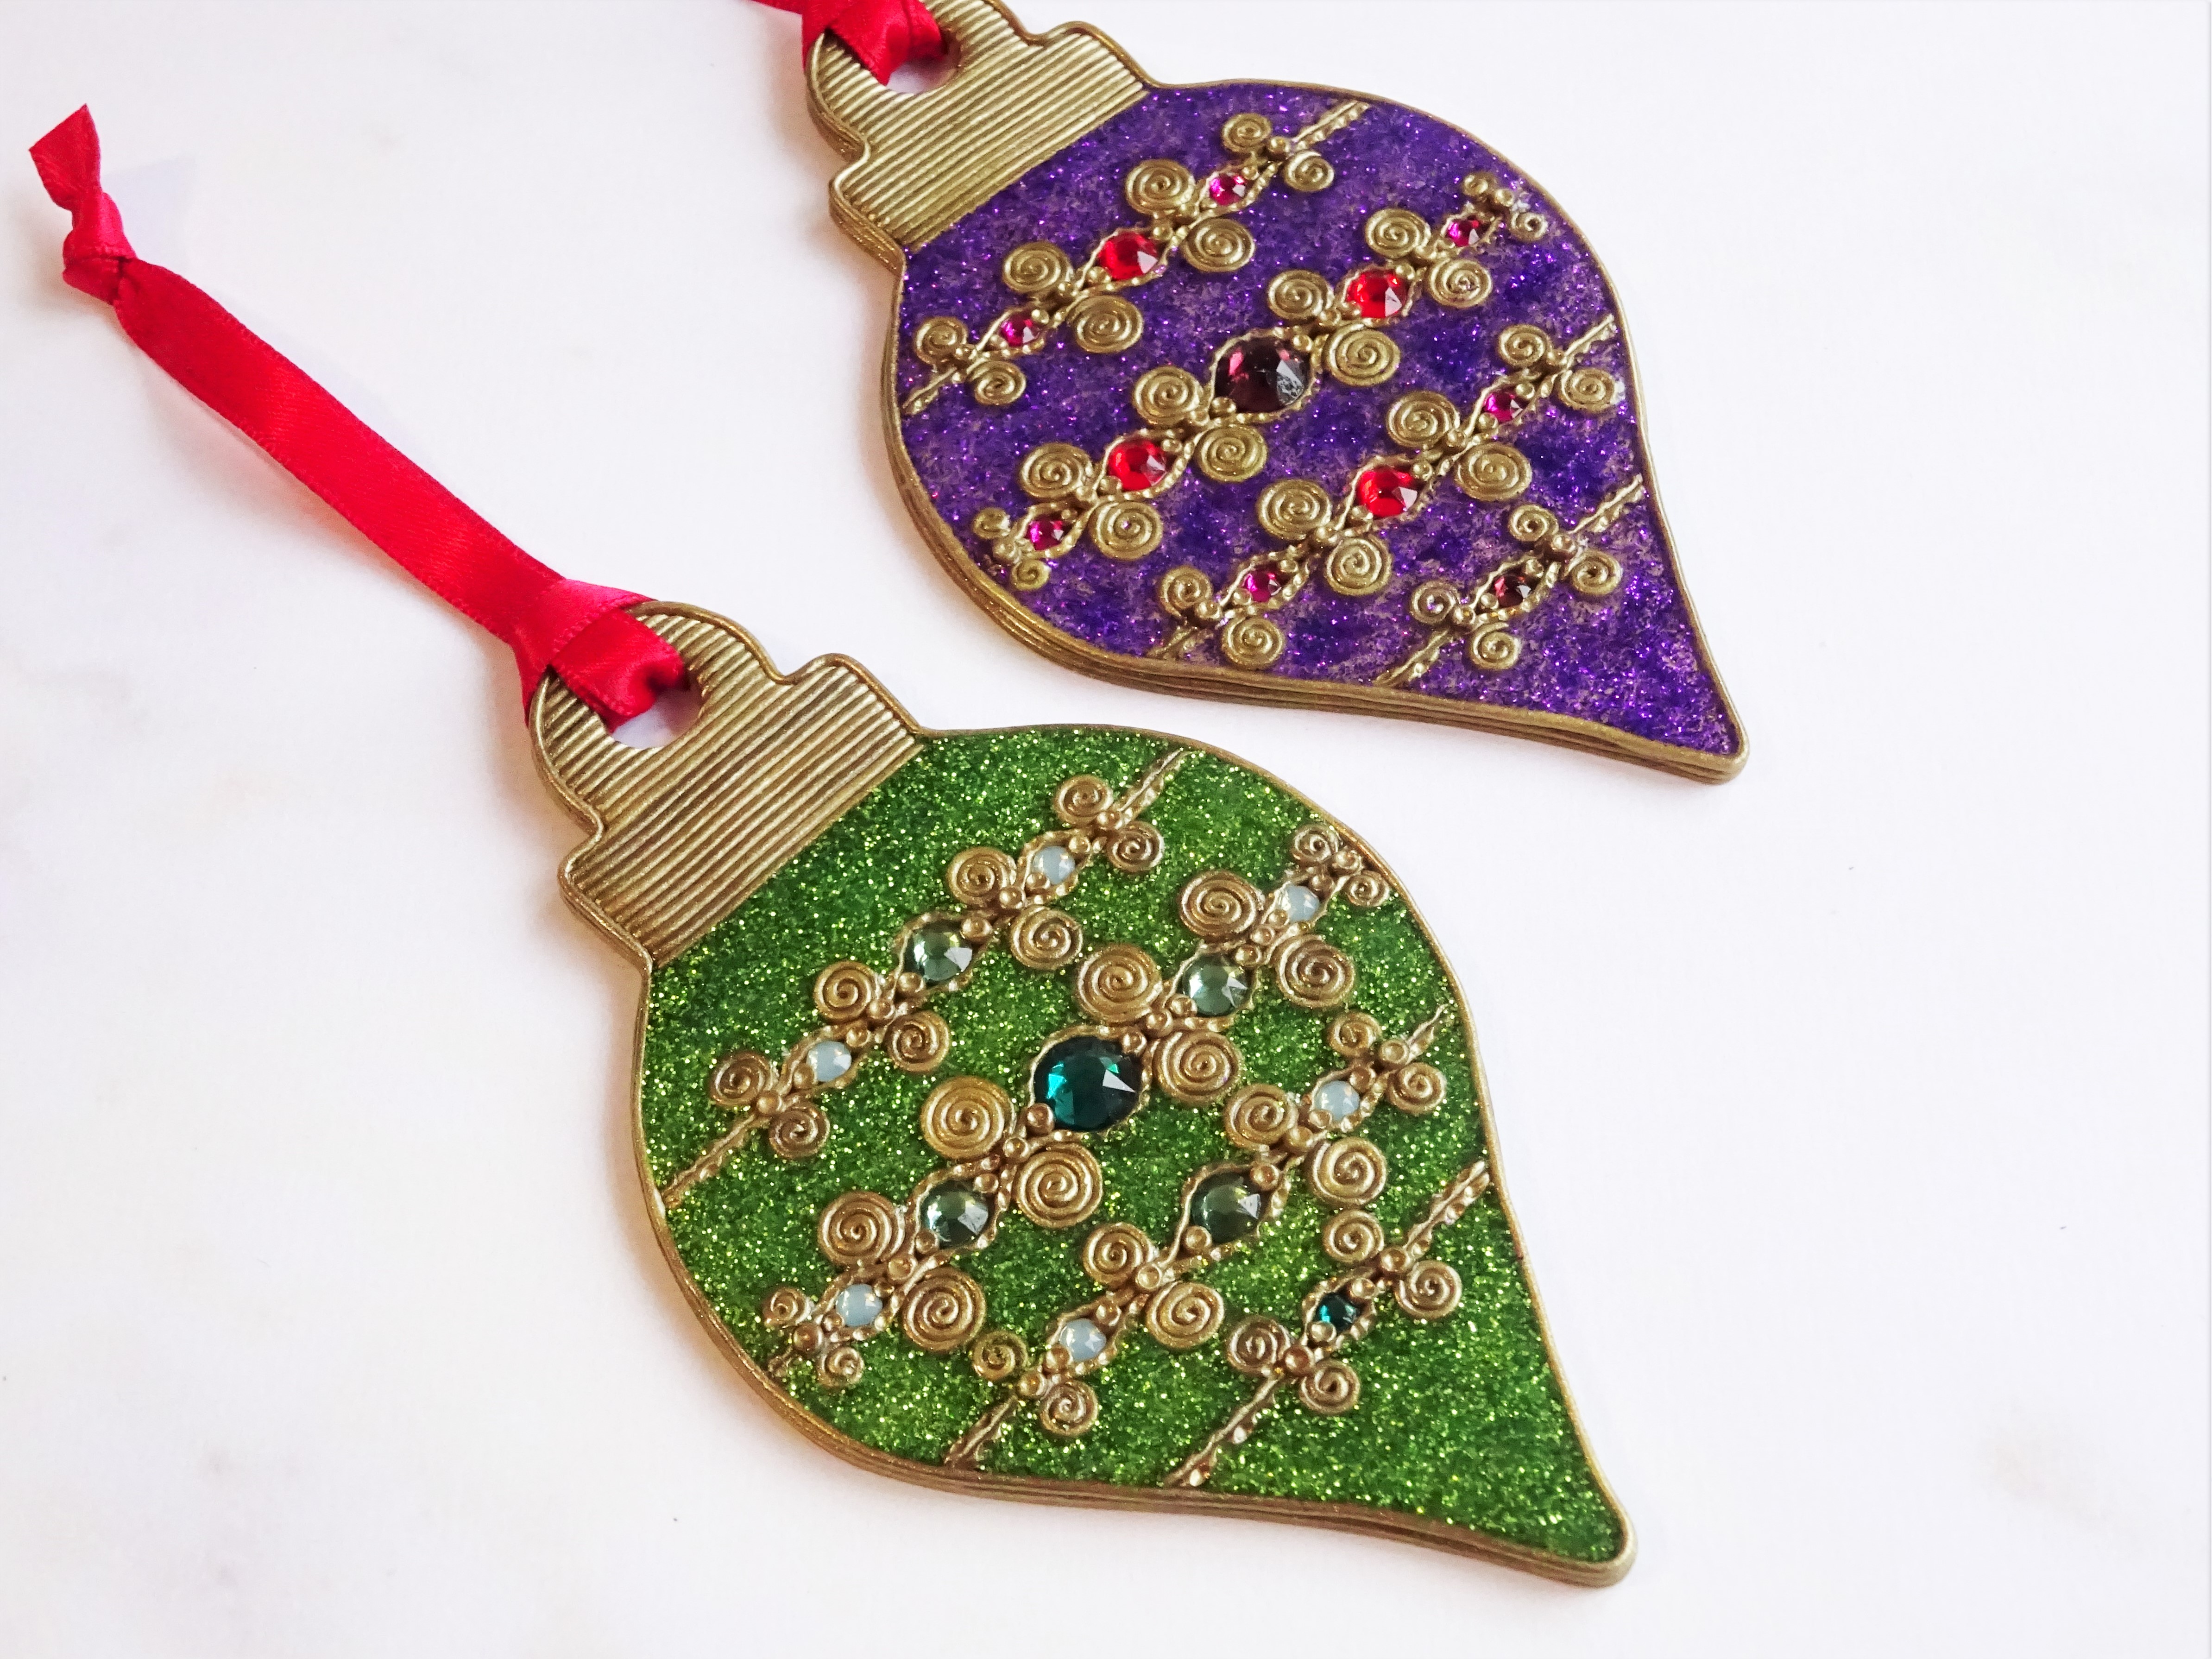
15. Add some ribbon to the top and your new decoration is ready to hang on your tree.
If you enjoyed this then don’t forget to check out my other polymer clay tutorials.
Here are the links for the products used. These are affiliate links for Amazon UK and Amazon US.
UK
Premo Accents Antique gold clay
Ornament cutters (not the ones I used but these look cool)
Perfect Pearls in Heirloom Gold
USA
Premo Accents Antique gold clay
Ornament cutters (not the ones I used but these look cool)
Perfect Pearls in Heirloom Gold
Happy Christmas Crafting!
Hannah x

