
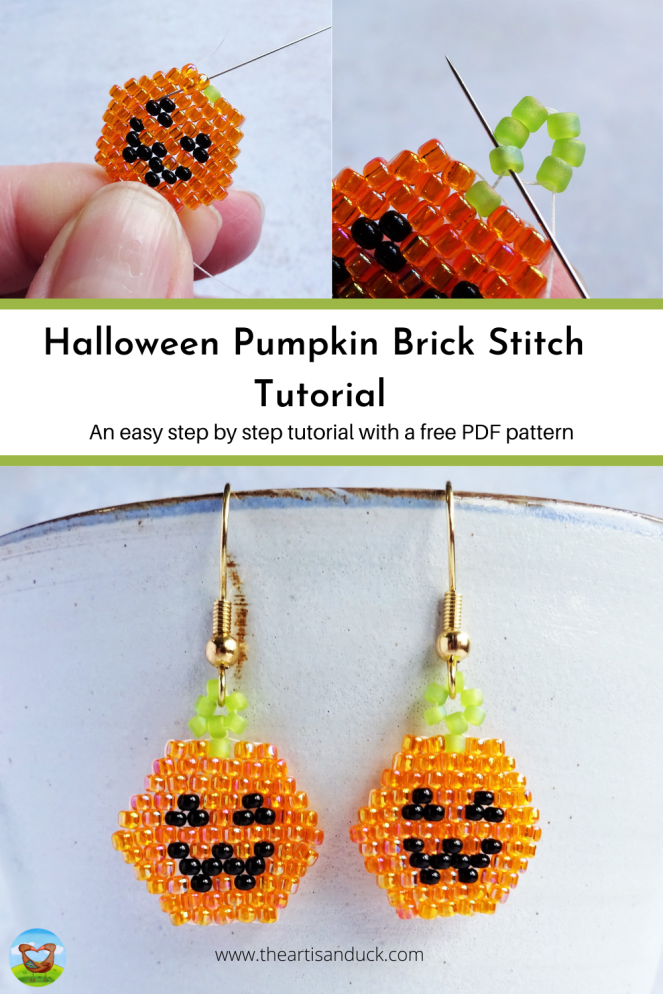
I’m sticking with the Halloween vibe (don’t forget to check out the cute polymer clay ghosts in my last post) with this pumpkin beadweaving tutorial. I’m using my firm favourite brick stitch as it is so versatile.
For these brick stitch pumpkins I have photographed some of the key points, such as starting brick stitch and how to knot the threads, so that it is suitable for beginners but I also have a PDF that I put together with the whole pattern on. I also have a YouTube video at the bottom of this post for this tutorial.
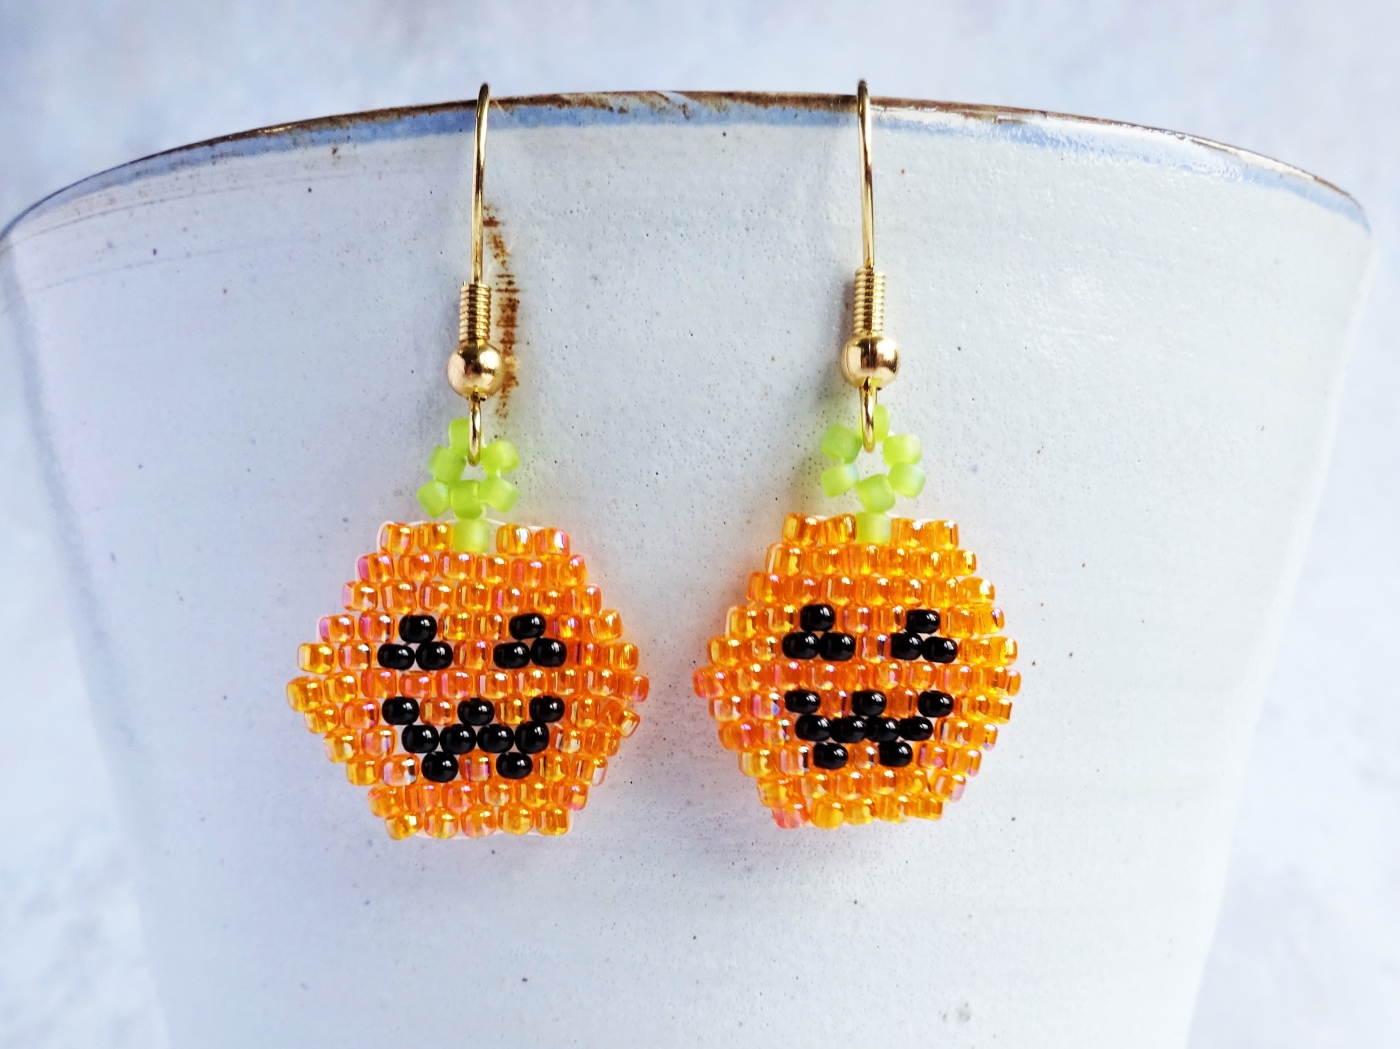
For my brick stitch pumpkin earrings I have used size 11 seed beads in orange, light green and black.
Before you head into the tutorial, I have added to the Halloween Brick Stitch Tutorial family a Brick Stitch Witch Hat Tutorial, a Brick Stitch Bat Tutorial and a Brick Stitch Ghost Tutorial so now you can make jewellery to last you all spooky season long!
How To Bead Weave A Brick Stitch Pumpkin
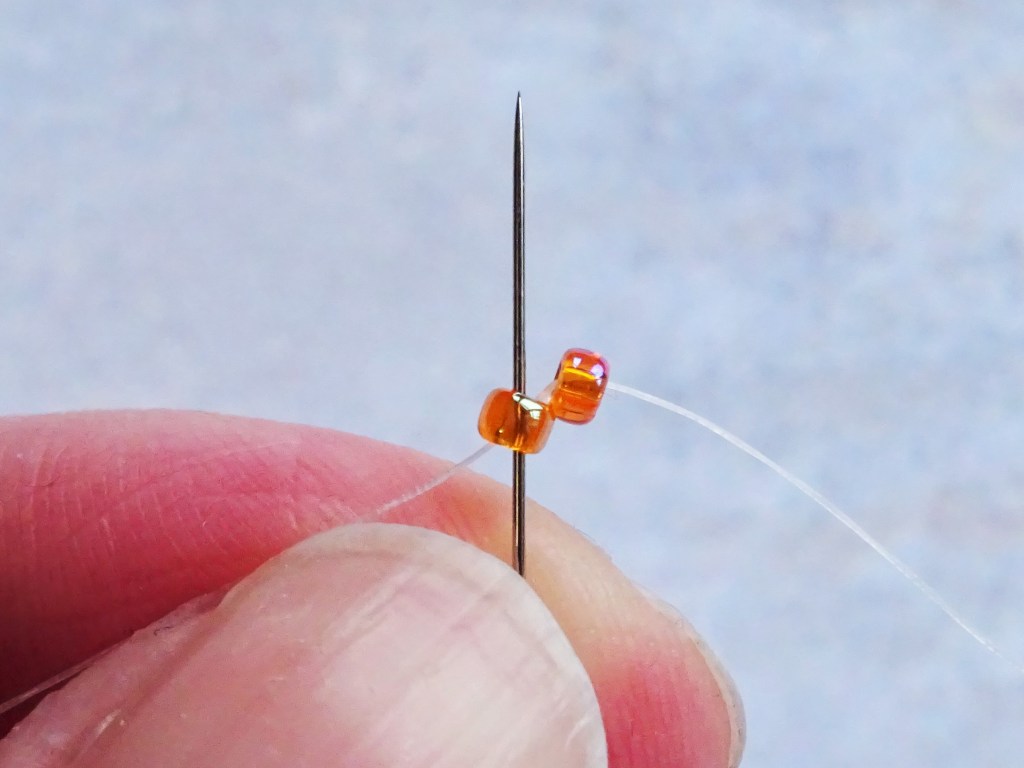

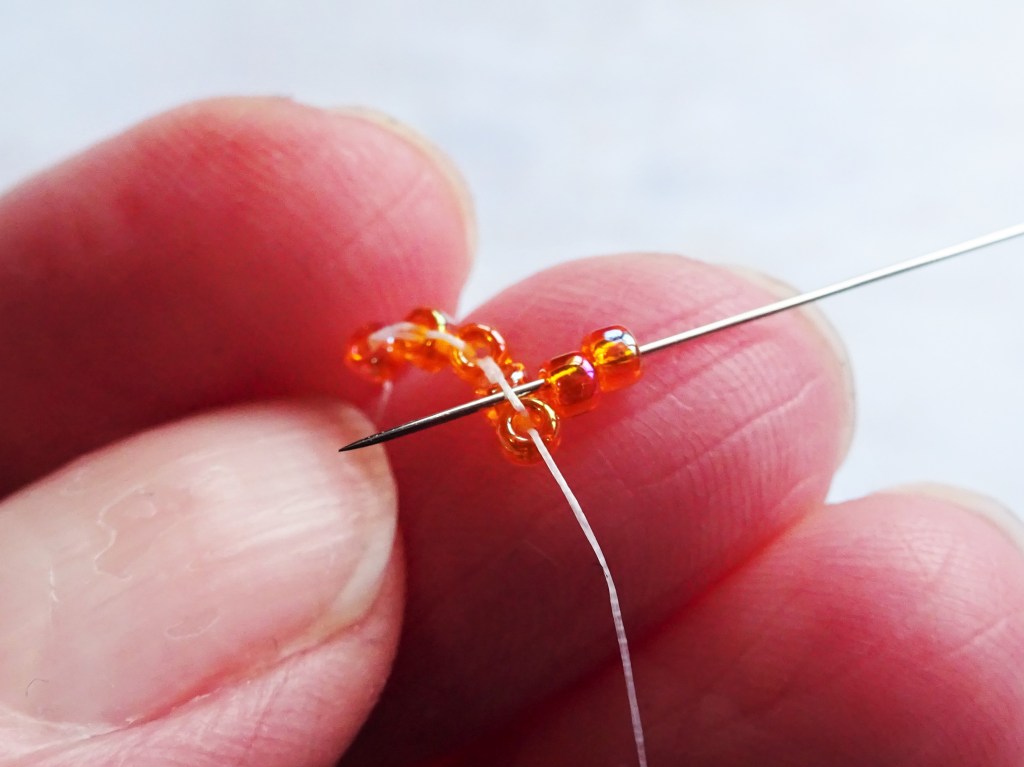
- Start at the bottom of the pumpkin on the pattern on the PDF. Add a needle onto a long length of beading thread an pick up 2 orange beads. Leave a length of thread at the end as this will need knotting and weaving in at the end. Take the needle back up through the first bead added and pull tight. This will make the beads sit side by side.

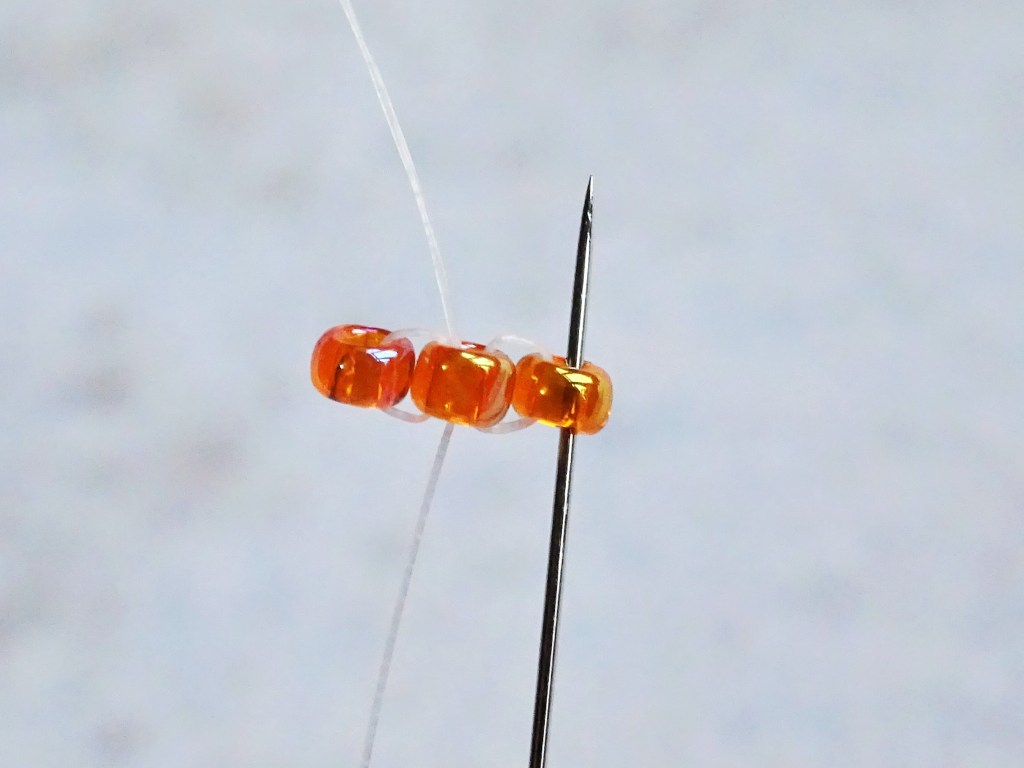
2. Pick up another orange bead and take the needle back up and through the you originally exited from (the middle bead in the set of 3). Pass the needle through into the newly added orange bead so that the thread is at the end of the row and ready to add another bead.

3. Add two more beads as in step 2. That completes the first row. The beading may be wobbly at this point but when other beads are added the beads will sit better.

4. To start the next row, because the row is increasing in beads, pick up 2 orange beads and take the needle through the bridging thread that sits on top of the beads on the row below. Then take the needle up thorough the second bead on the thread and pull. This will make the beads sit on top of the lower layer.

5. Continue adding beads in this manner, using the bridging thread to secure them, but only one bead at a time until all the bridging threads are used.

6. Because this row is increasing in width the final bead to be added cannot use the bridging thread. For this final bead take the needle behind the thread that is securing the previous bead on. From here take the needle up through this last bead again and pull the thread to tighten into place.

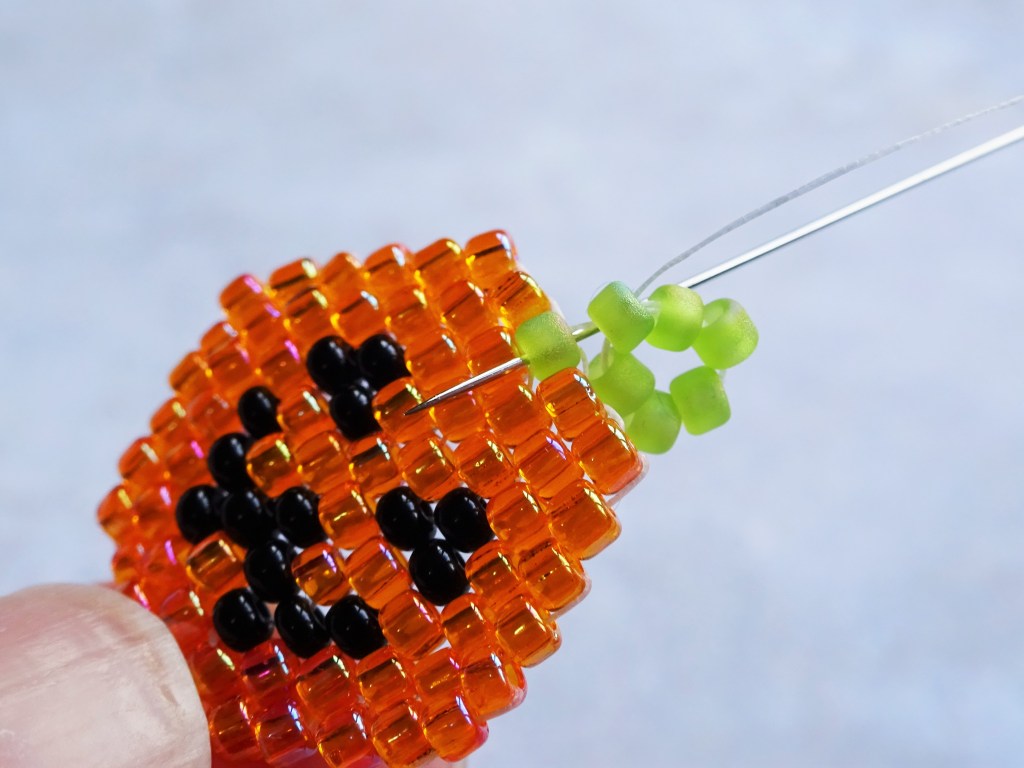
7. Follow the pattern adding the black beads as shown in the PDF. When the pattern shows the width of the pumpkin decreasing begin your new layer with only one bead and only add beads as far as the bridging threads go.


8. Continue up with the pattern until you reach the top. To add the green loop on the top take the needle (it will be exiting through the end of the top row) and take it down through two beads. Then take the needle back up the orange bead just below the green and then the green bead.


9. Pick up 6 green beads loop the needle and thread through them a second time.
10. Take the needle down into the green bead on the last row of the brick stitch and pull to tighten.


11. To knot both the thread loop your needle under a thread that links the bead and partially pull through. When the thread forms a loop pass the needle through the loop and pull. This will knot the thread. Pull the needle into the next bead down and the knot will pull into the bead. Repeat this knotting process several times and cut off any excess thread. Repeat for the tail thread.

If you are making into earrings then attach your earring hooks and you are now Halloween ready.
The brick stitch collection is always growing so if you have enjoyed this then have a look at my other free brick stitch tutorials and patterns. If Halloween is still your thing then there are these cute brick stitch ghosts, if you plan to move straight along to Christmas then there are these really festive brick stitch Christmas trees, I have you covered for Valentine’s Day with brick stitch hearts and many more besides. There are more general beadweaving tutorials available too.
So, Trick or Treat?
Hannah x

