
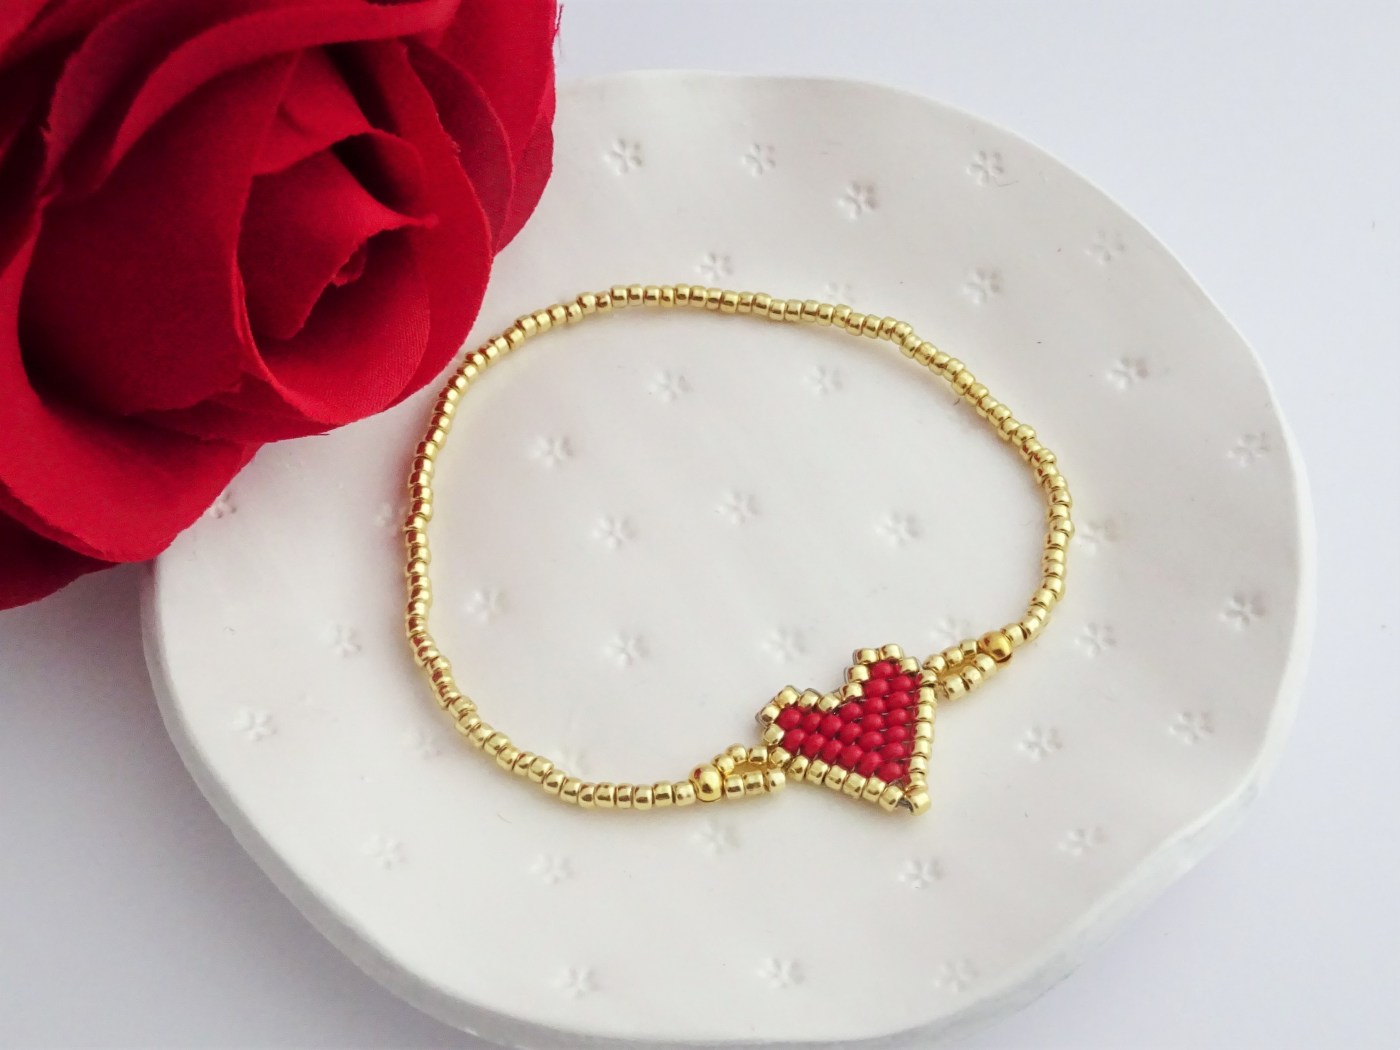
I’m back with another beadweaving tutorial. I thought I would show how to increase and decrease using brick stitch and, with Valentine’s day fast approaching, I though a heart would be a great way to show it.
If video is more your thing then jump down to the bottom of this post where you’ll find a YouTube video on this bracelet.

What you will need for the brick stitch heart bracelet –
- Preciosa Size 11 Seed Beads in Opaque Red
- Toho Size 11 Permafinish Galvanised in Gold
- Wildfire 0.006in / 15mm in Grey
- Gold Crimp Bead
- Gold Crimp Cover
- 0.5mm Beading Elastic
Let’s Get Beading….
Please note – I turn the beadwork every time I start a new row so that I am always beading in the same direction. It helps me keep track of the stitch and keep the tension even.
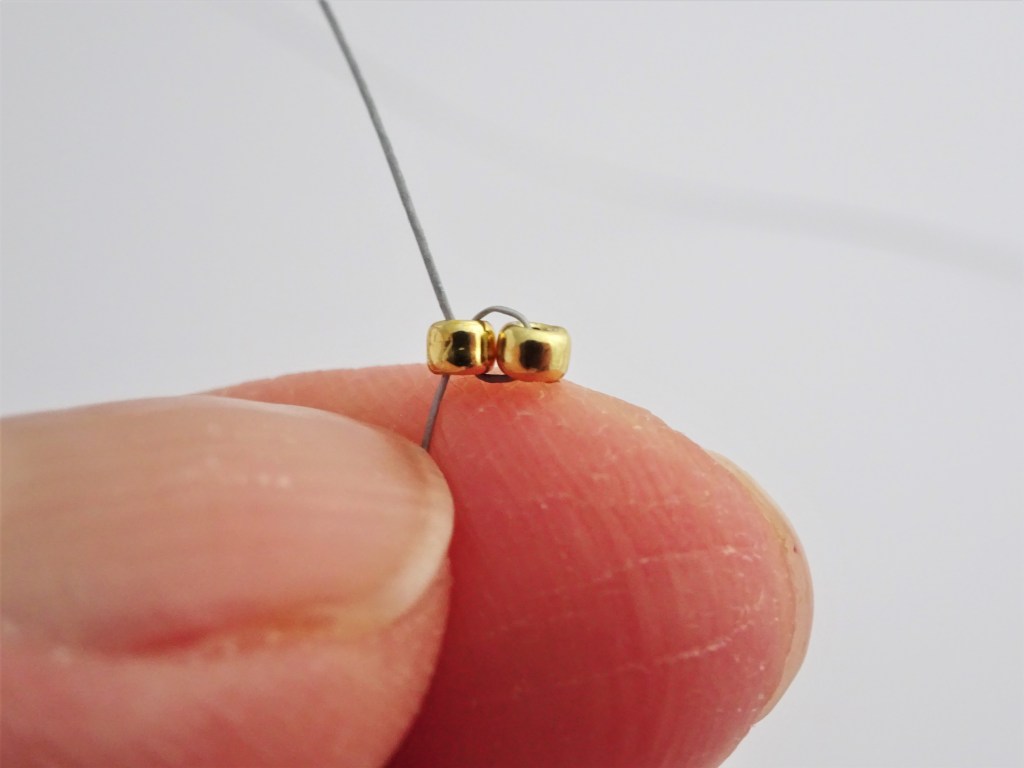
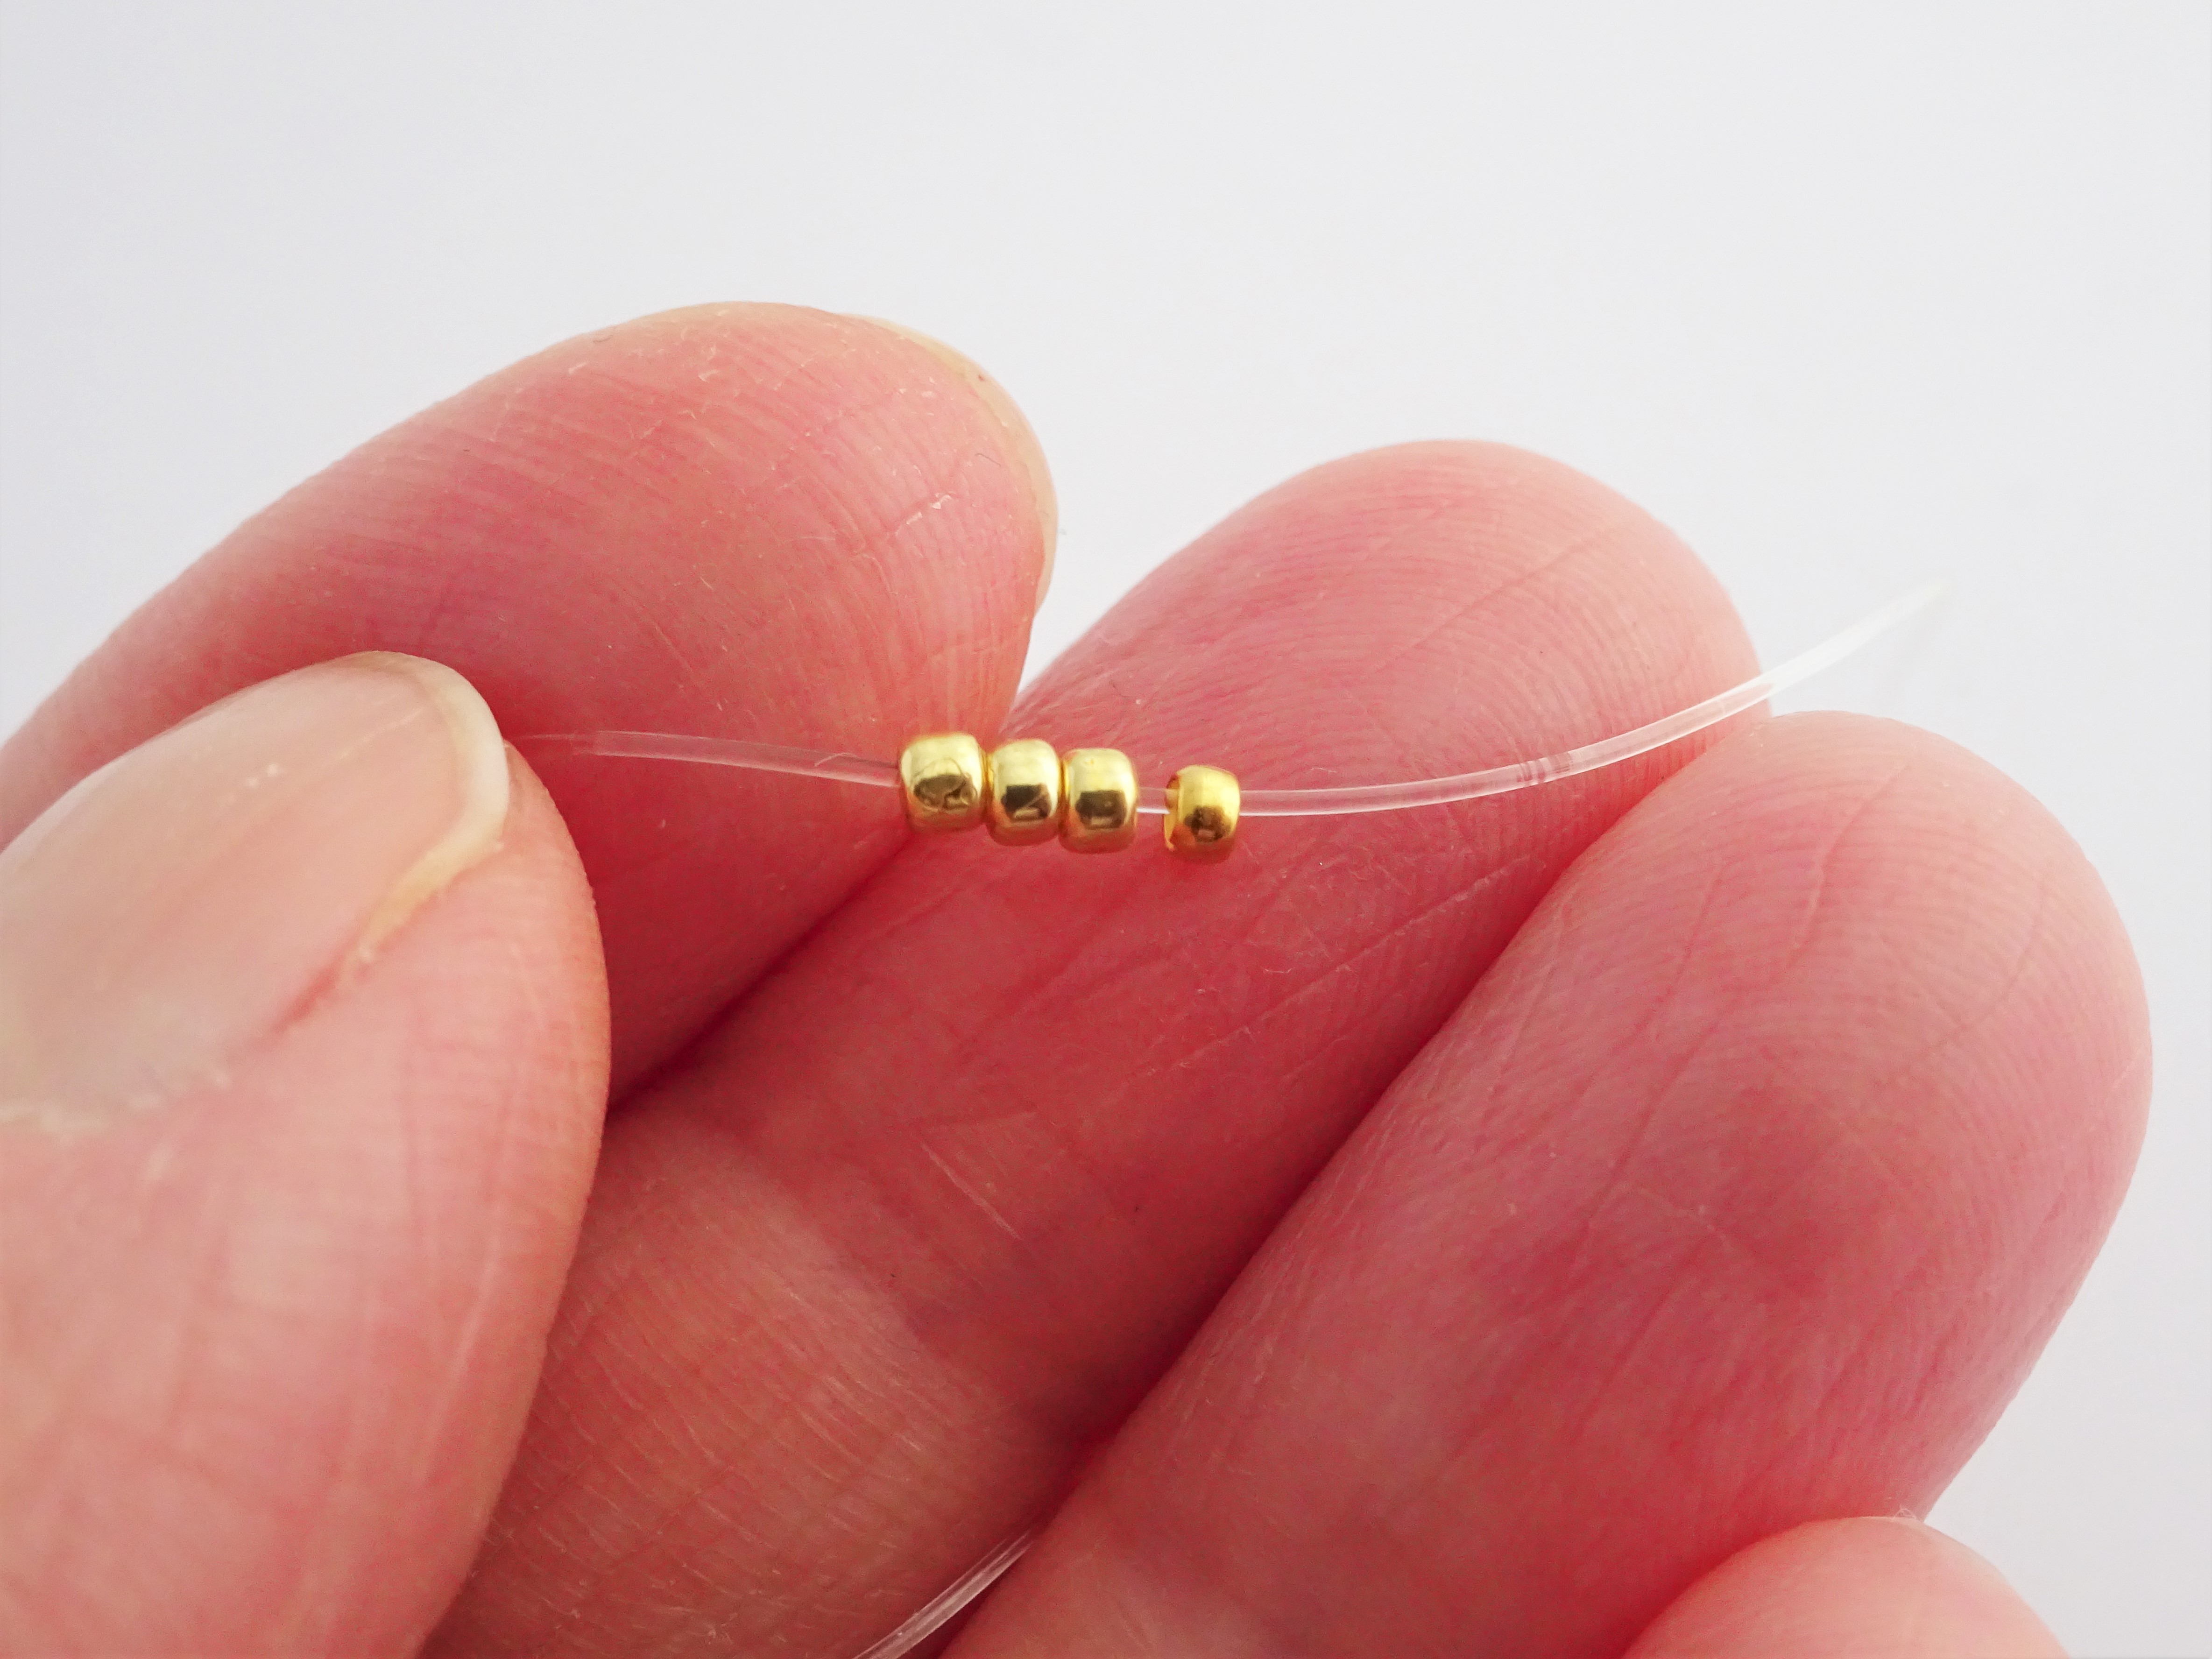
1. Cut half an arm span of wildfire. Pick up 2 gold seed beads and take the needle back up the first gold bead. This will make them sit side by side. Leave a small tail of thread to knot and weave in at the end.
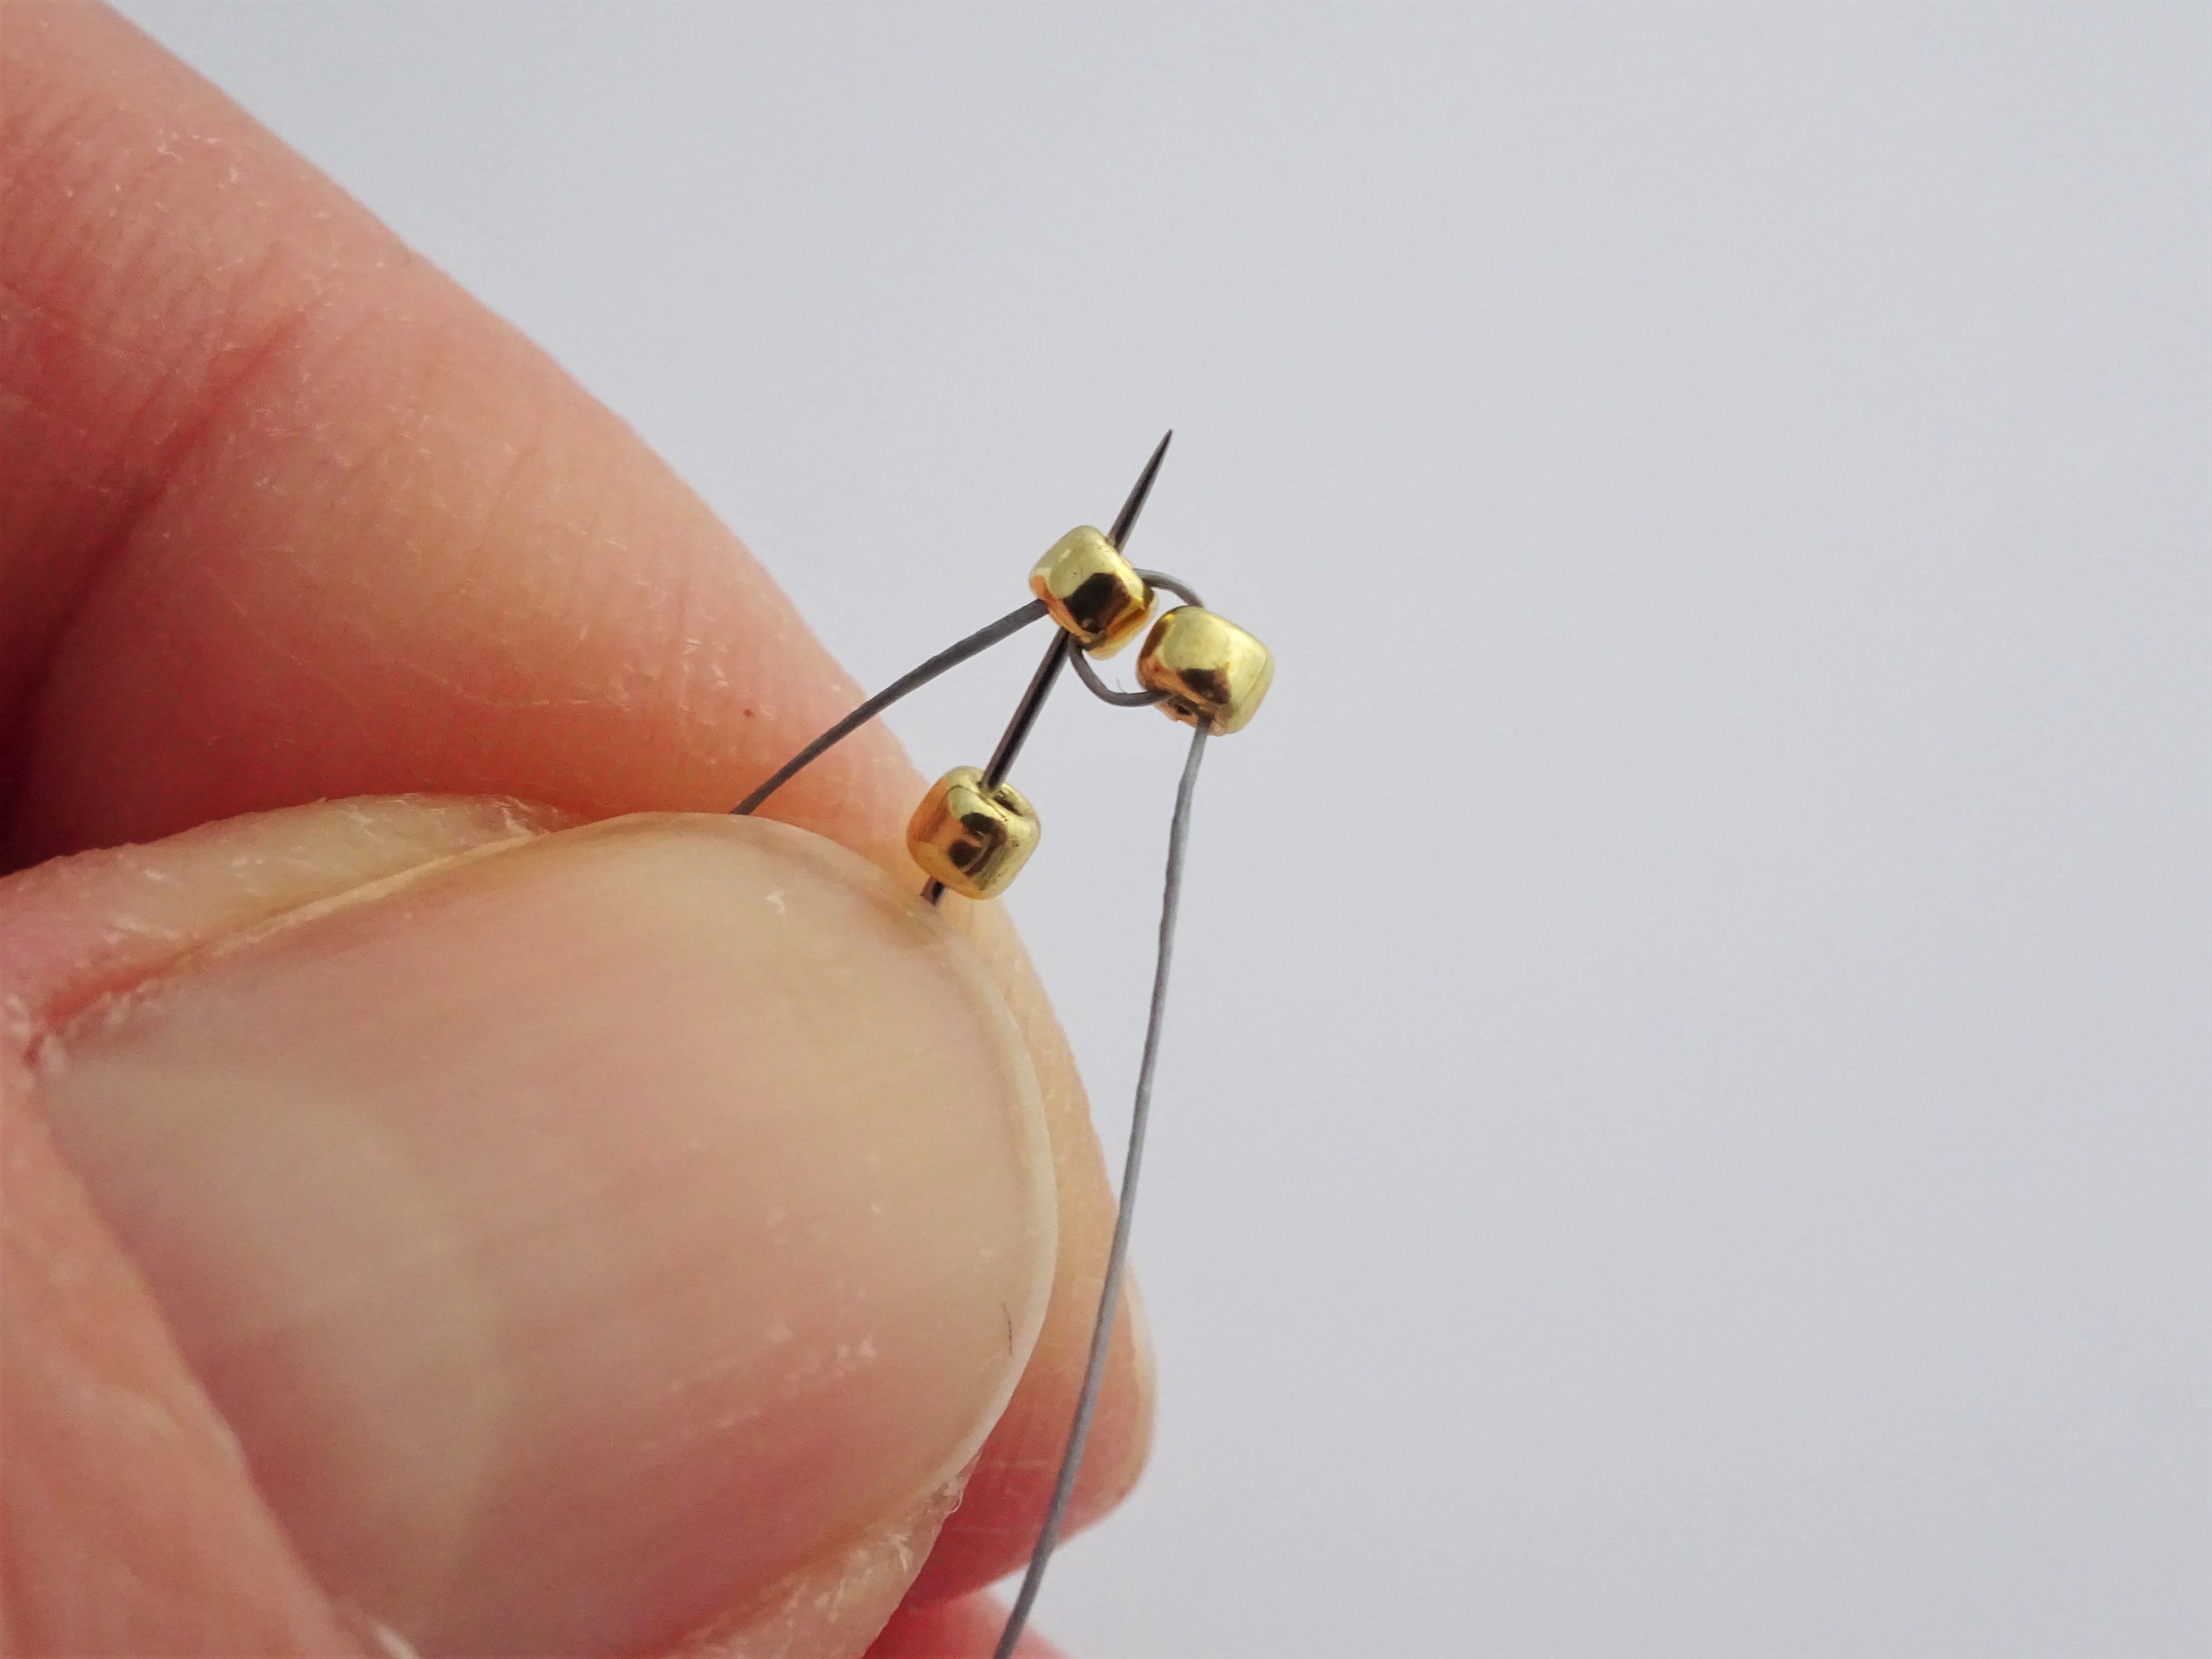
2. Take the needle back down the second gold bead so the both threads are exiting out the bottom, one thread per bead. Pick up another gold and take the needle up the next gold along.
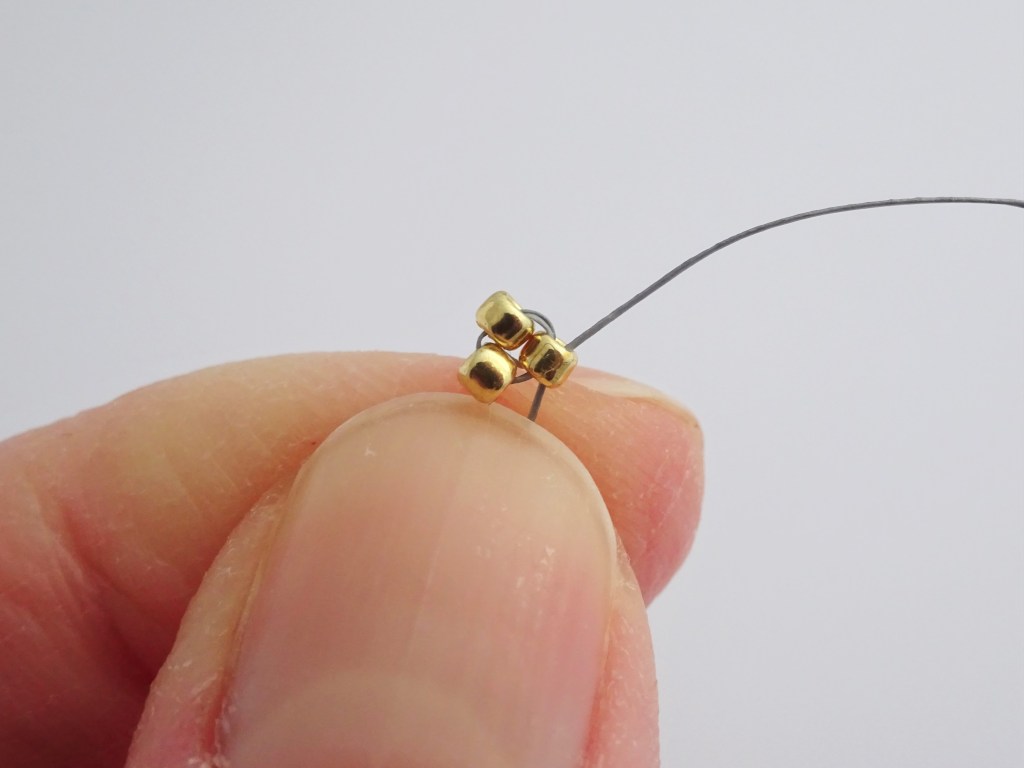
3. Pull to tighten the threads. The beads will form a triangle shape.
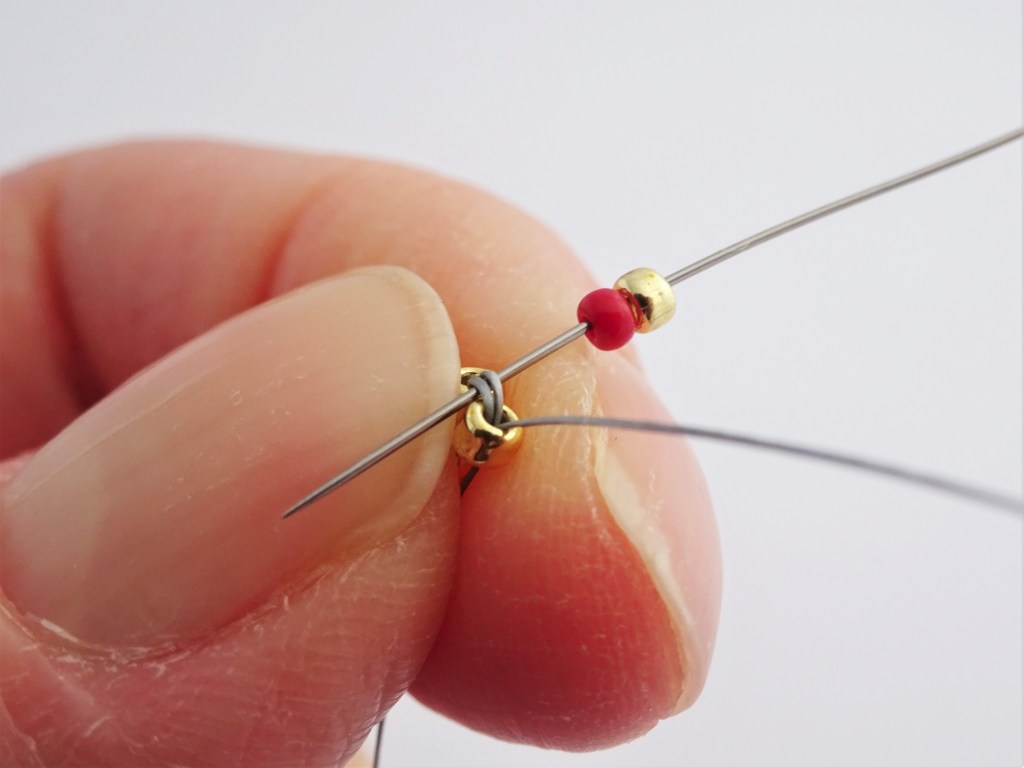
4. Pick up 1 gold and then 1 red seed bead and take the needle under the bridging thread between the gold seed beads on the lower level.
This is the start of increasing the brick stitch – because there will be 3 beads on this level (2 below) we add 2 beads to begin with.
5. Pull the thread to tighten and take the needle back up through the red seed bead added in step 4.

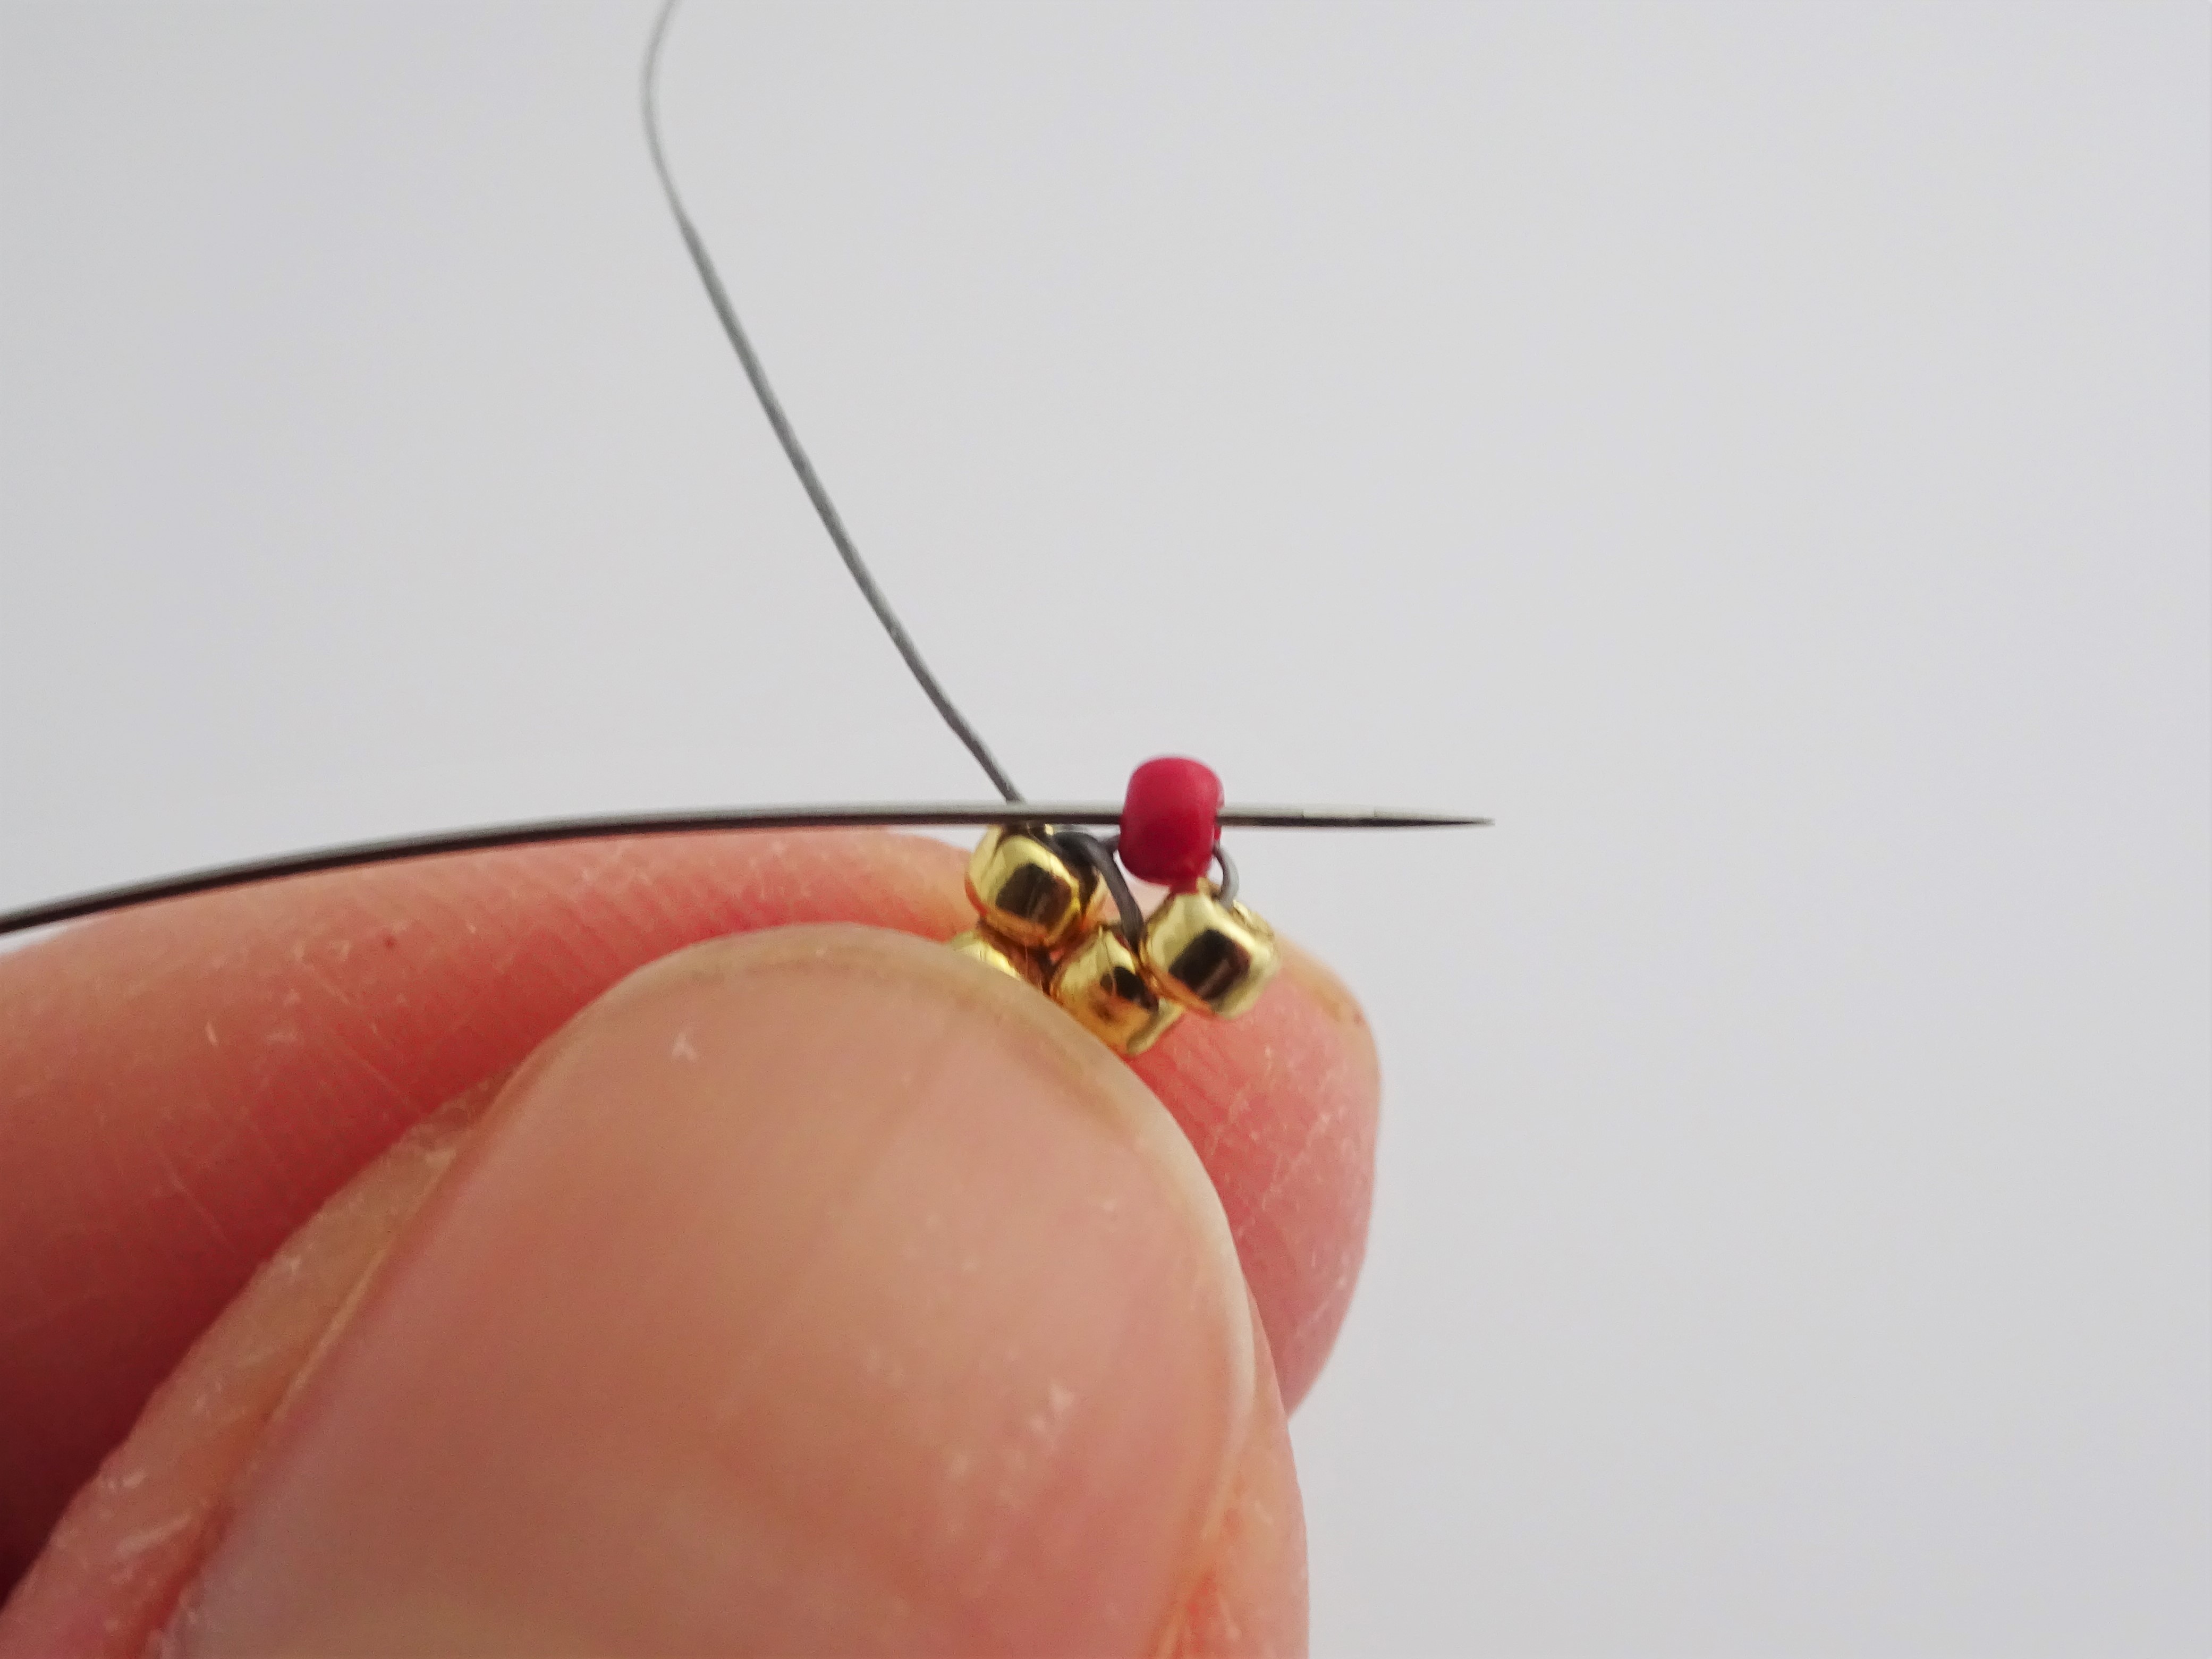
6. Pick up 1 gold seed bead and pass the needle behind the thread going up through the neighbouring red seed bead.
We have added an extra bead on this level so we need to use the thread going up the neighbouring bead as opposed to the bridging threads on the beadwork below to secure it in place.
7. Take the needle back up through the gold seed bead. Pull the thread to tighten and position the beads correctly so that they sit neatly in a row.
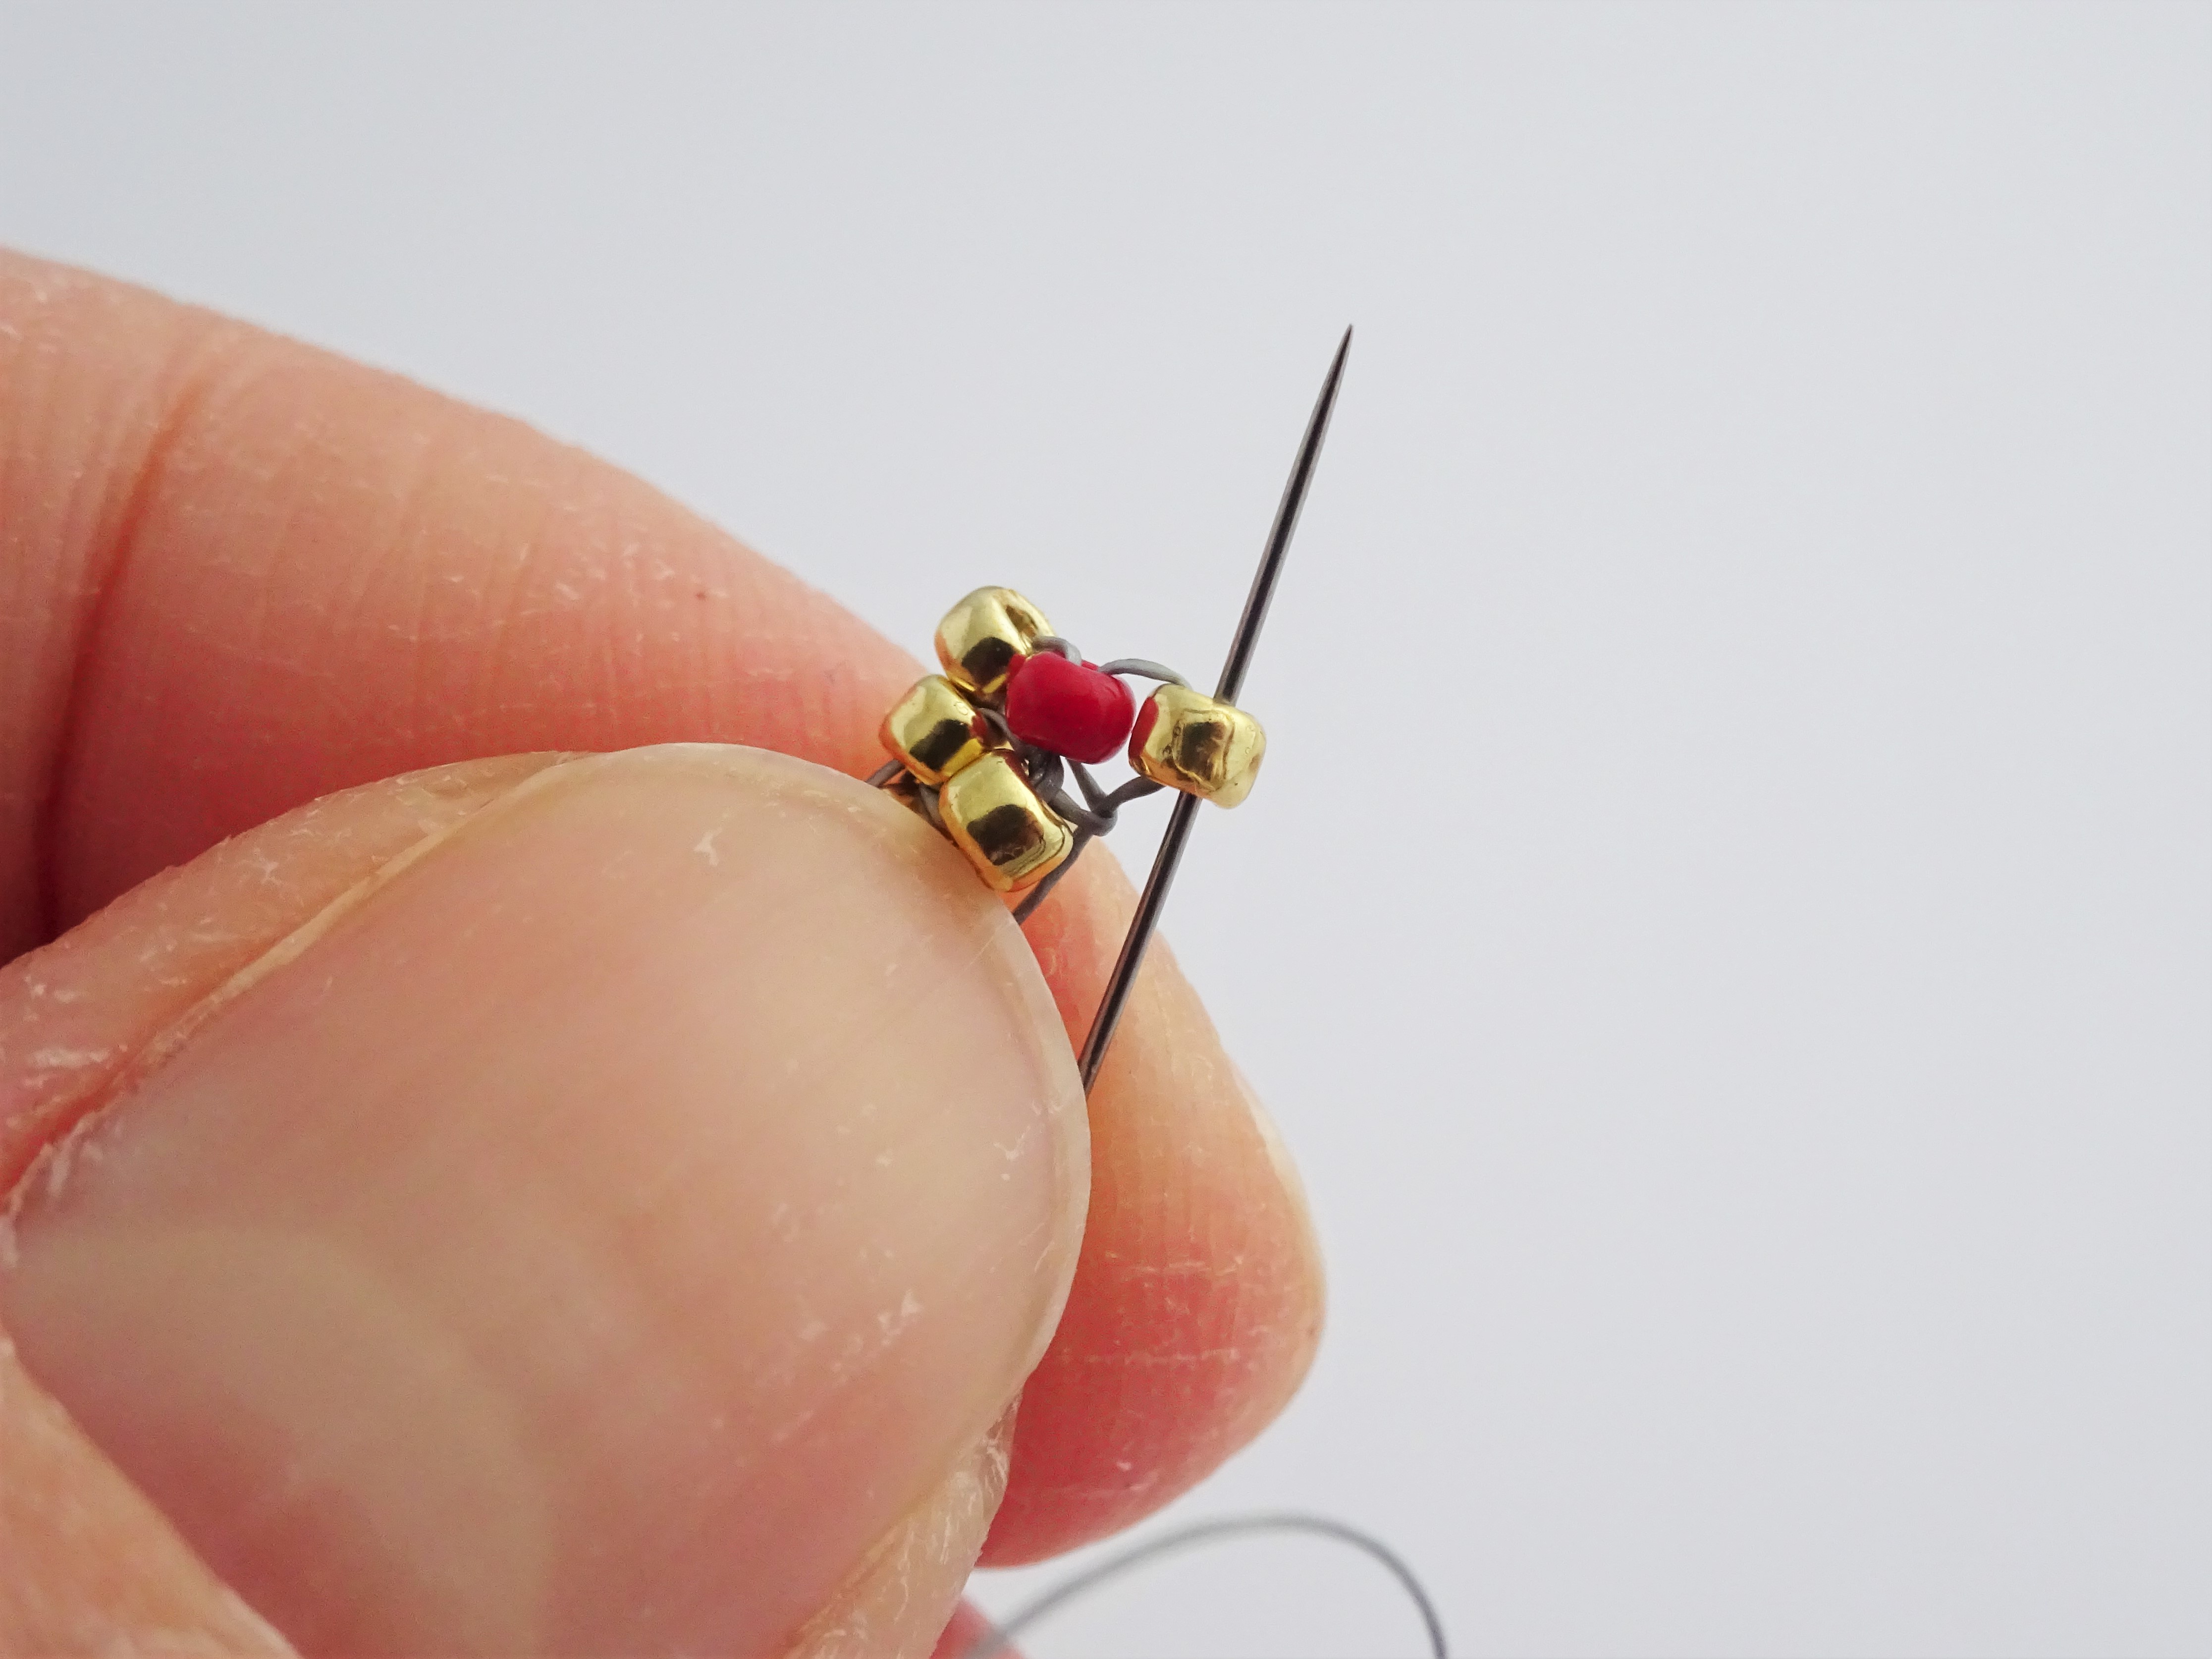
8. Just like the level below, because we are still increasing the brick stitch, pick up 1 gold followed by 1 red seed bead and take the needle under the bridging thread on the beadwork immediately below it.

9. Take the needle back up through the red bead added in step 8 . Pick up another red bead and pass the needle under the bridging thread directly below it.

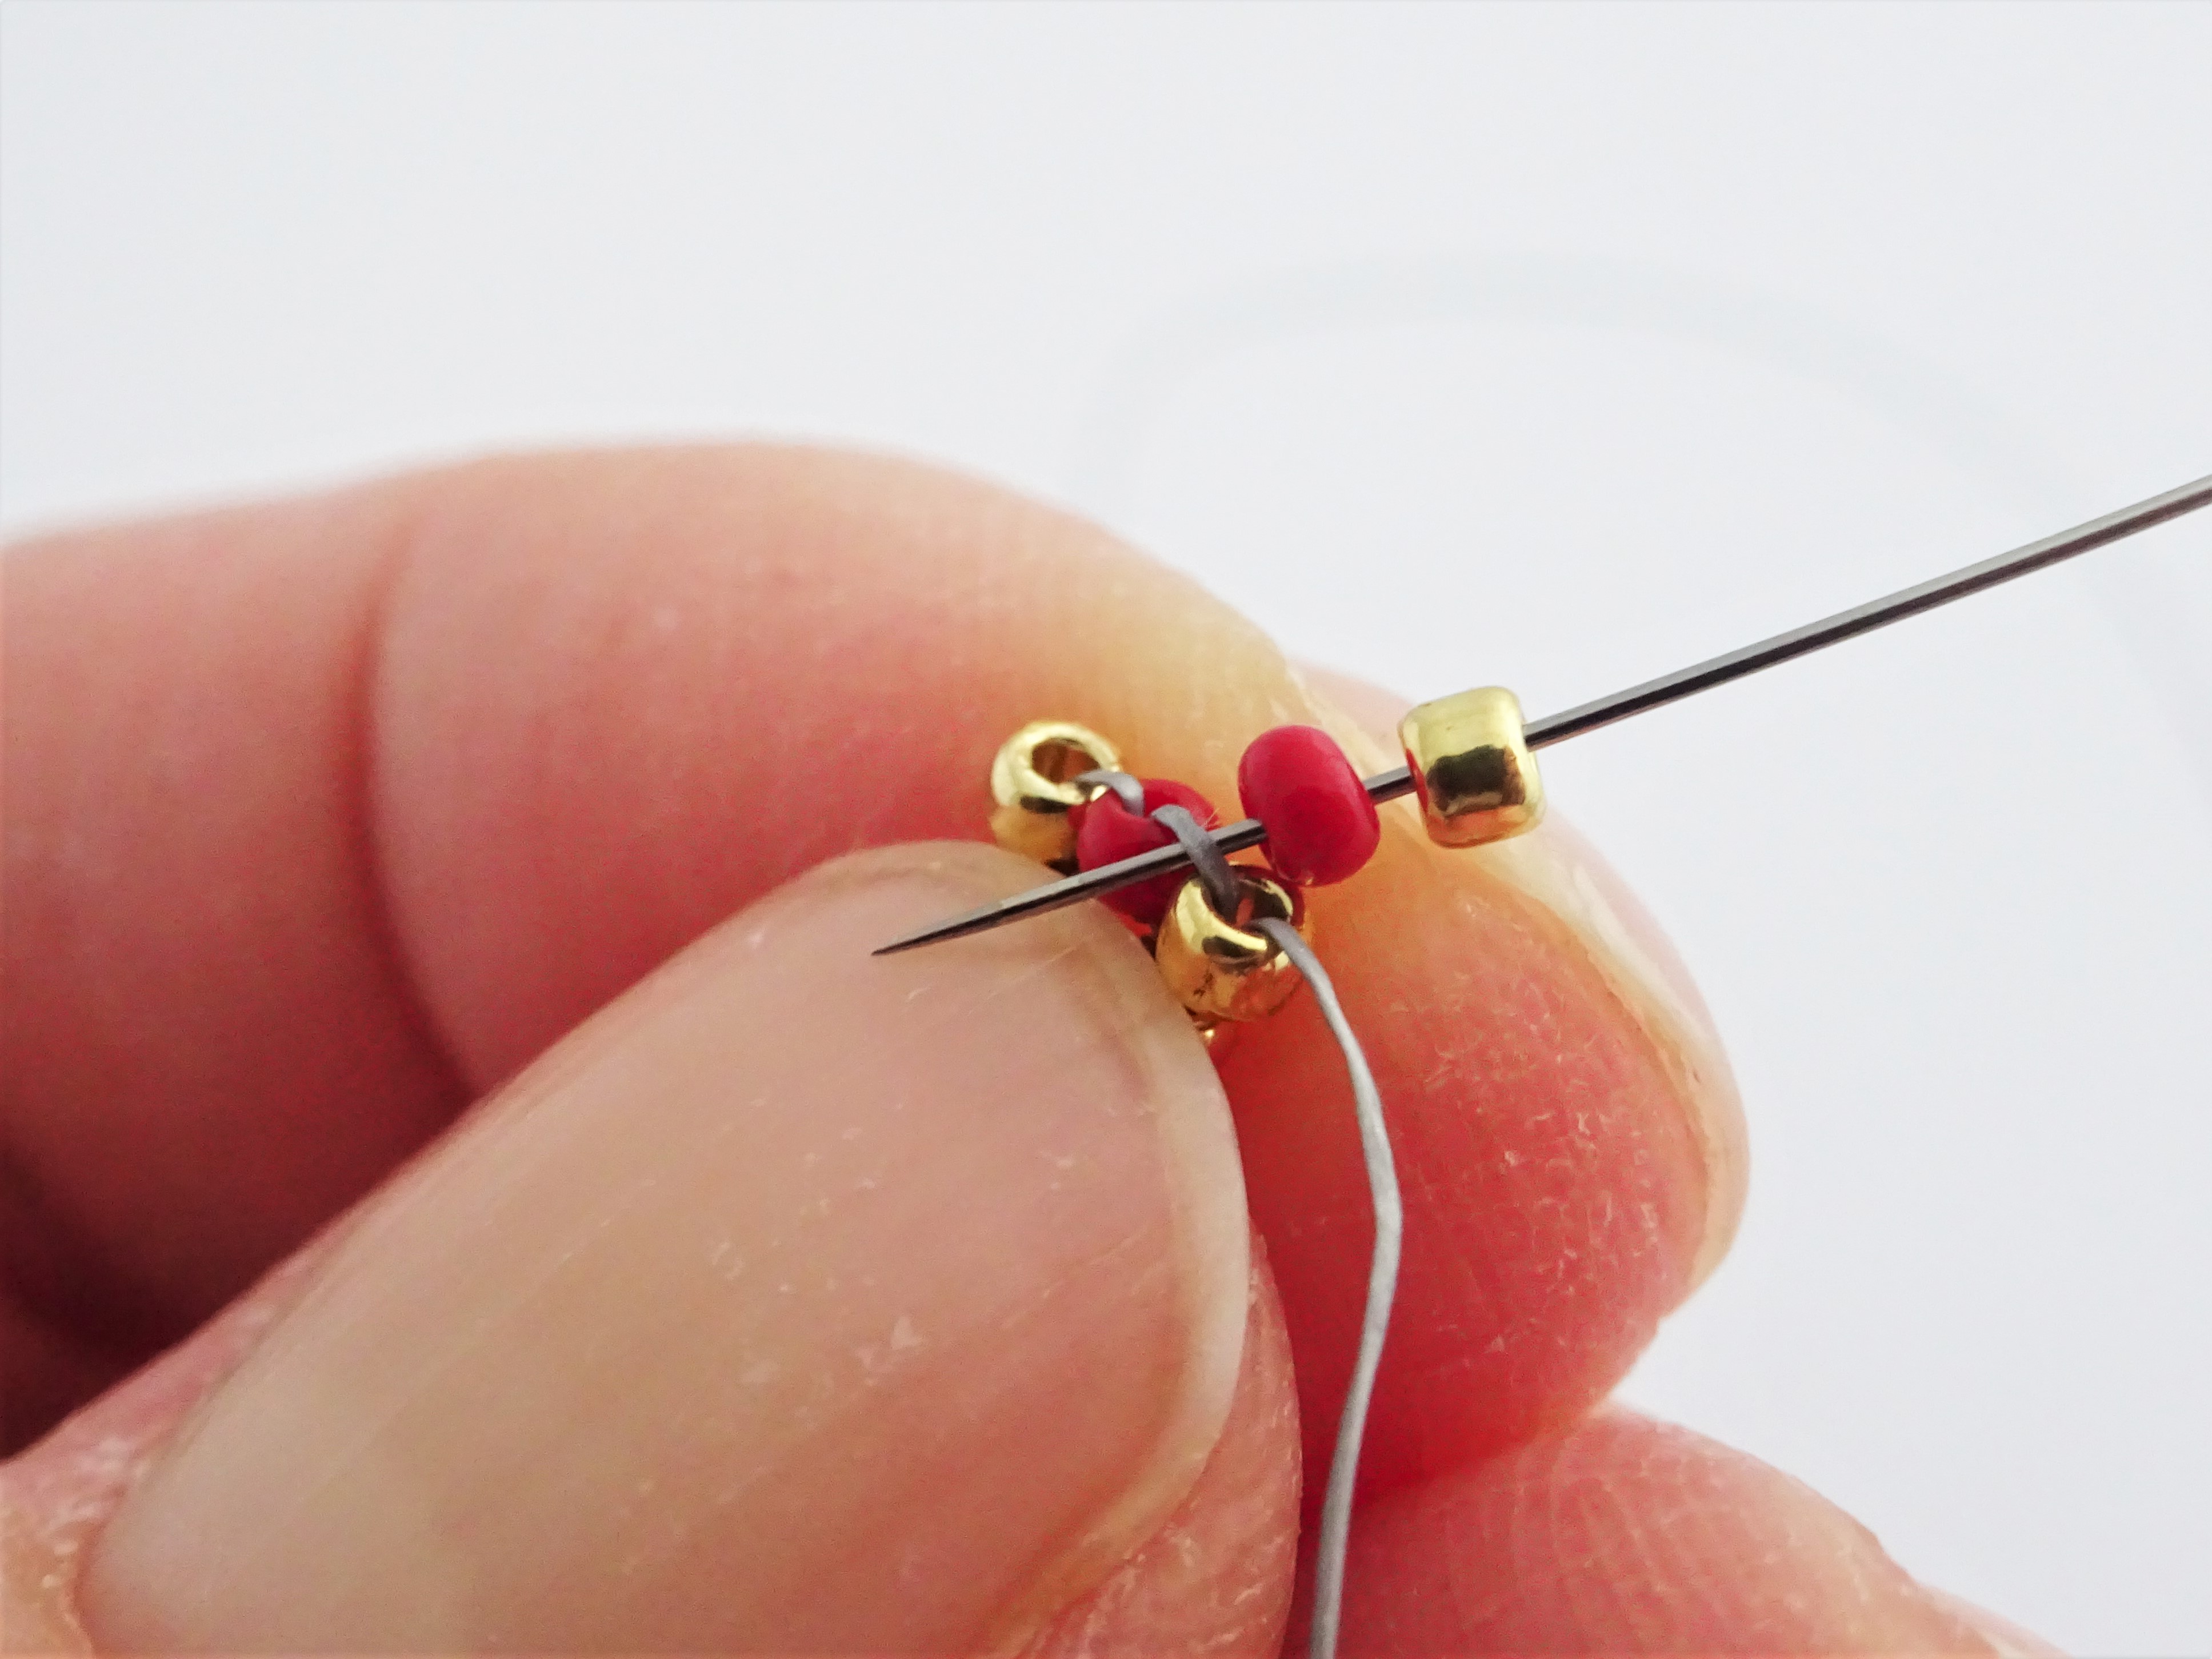
10. Take the needle back up the red bead just added. Pick up 1 gold bead and pass the needle behind the thread passing up into the neighbouring red bead.

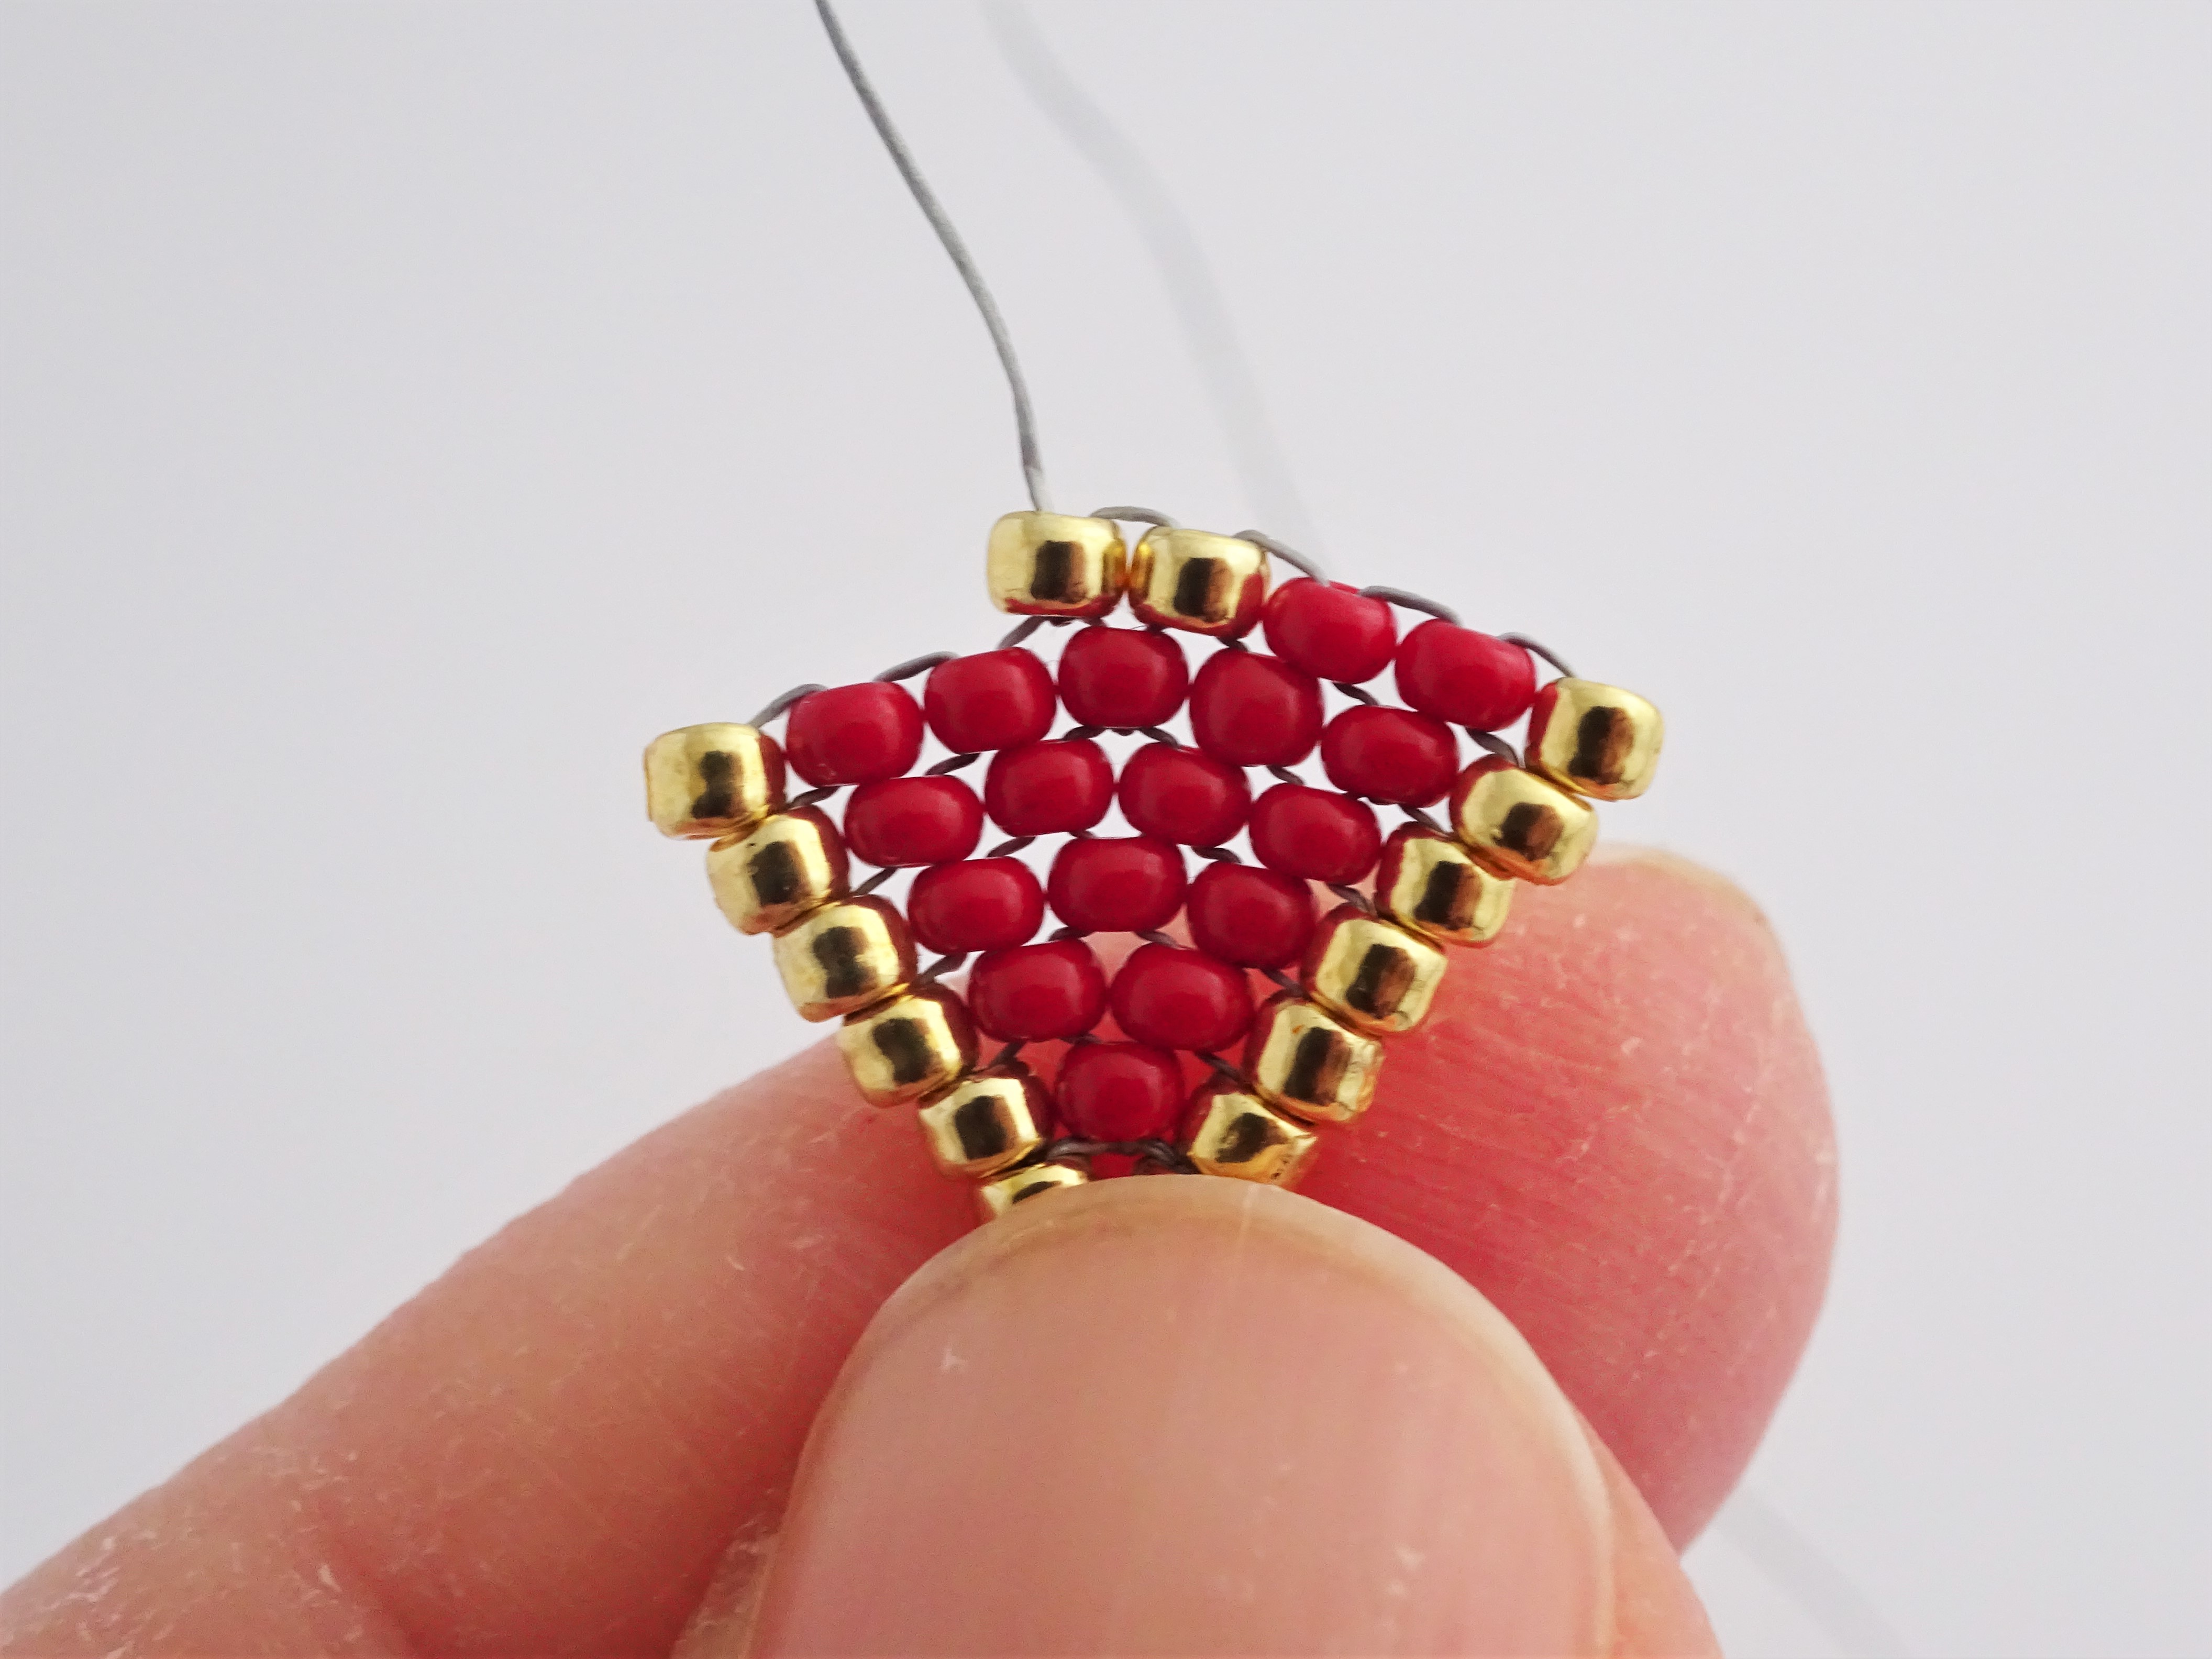
11. Take the needle back up through this last gold bead and pull to tighten. The beadwork should be taking on the triangular shape of the bottom of the heart.

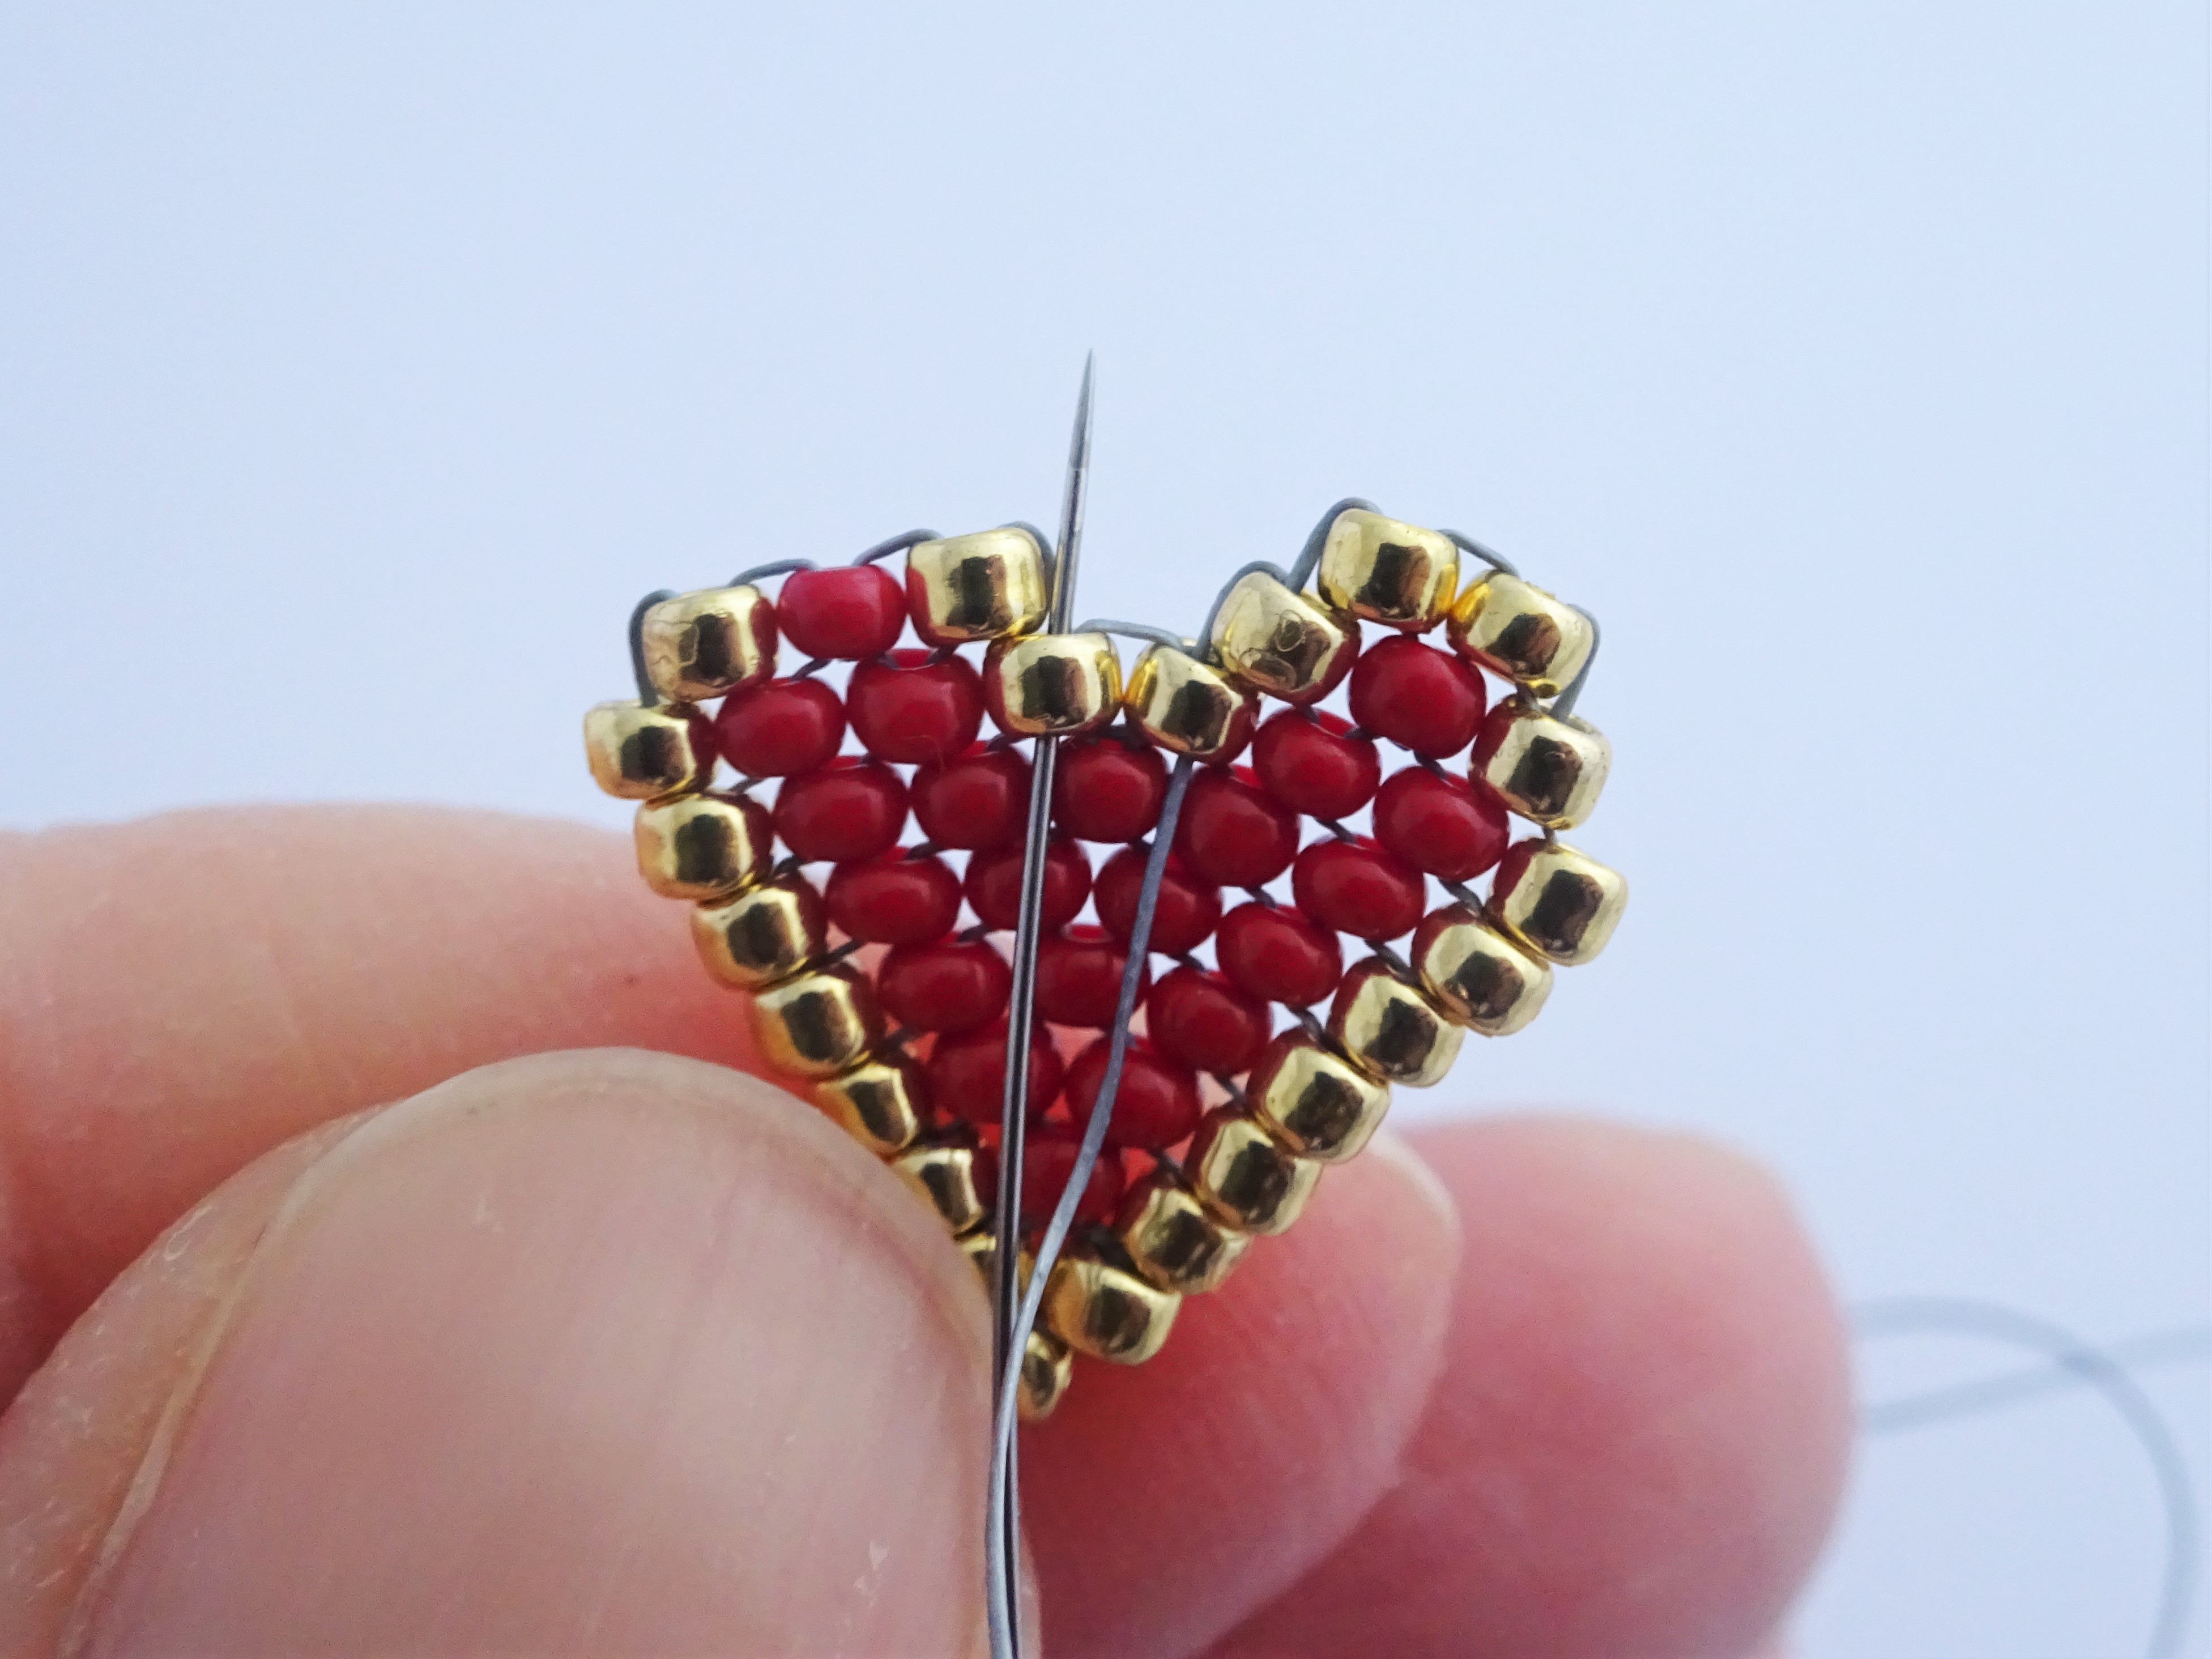
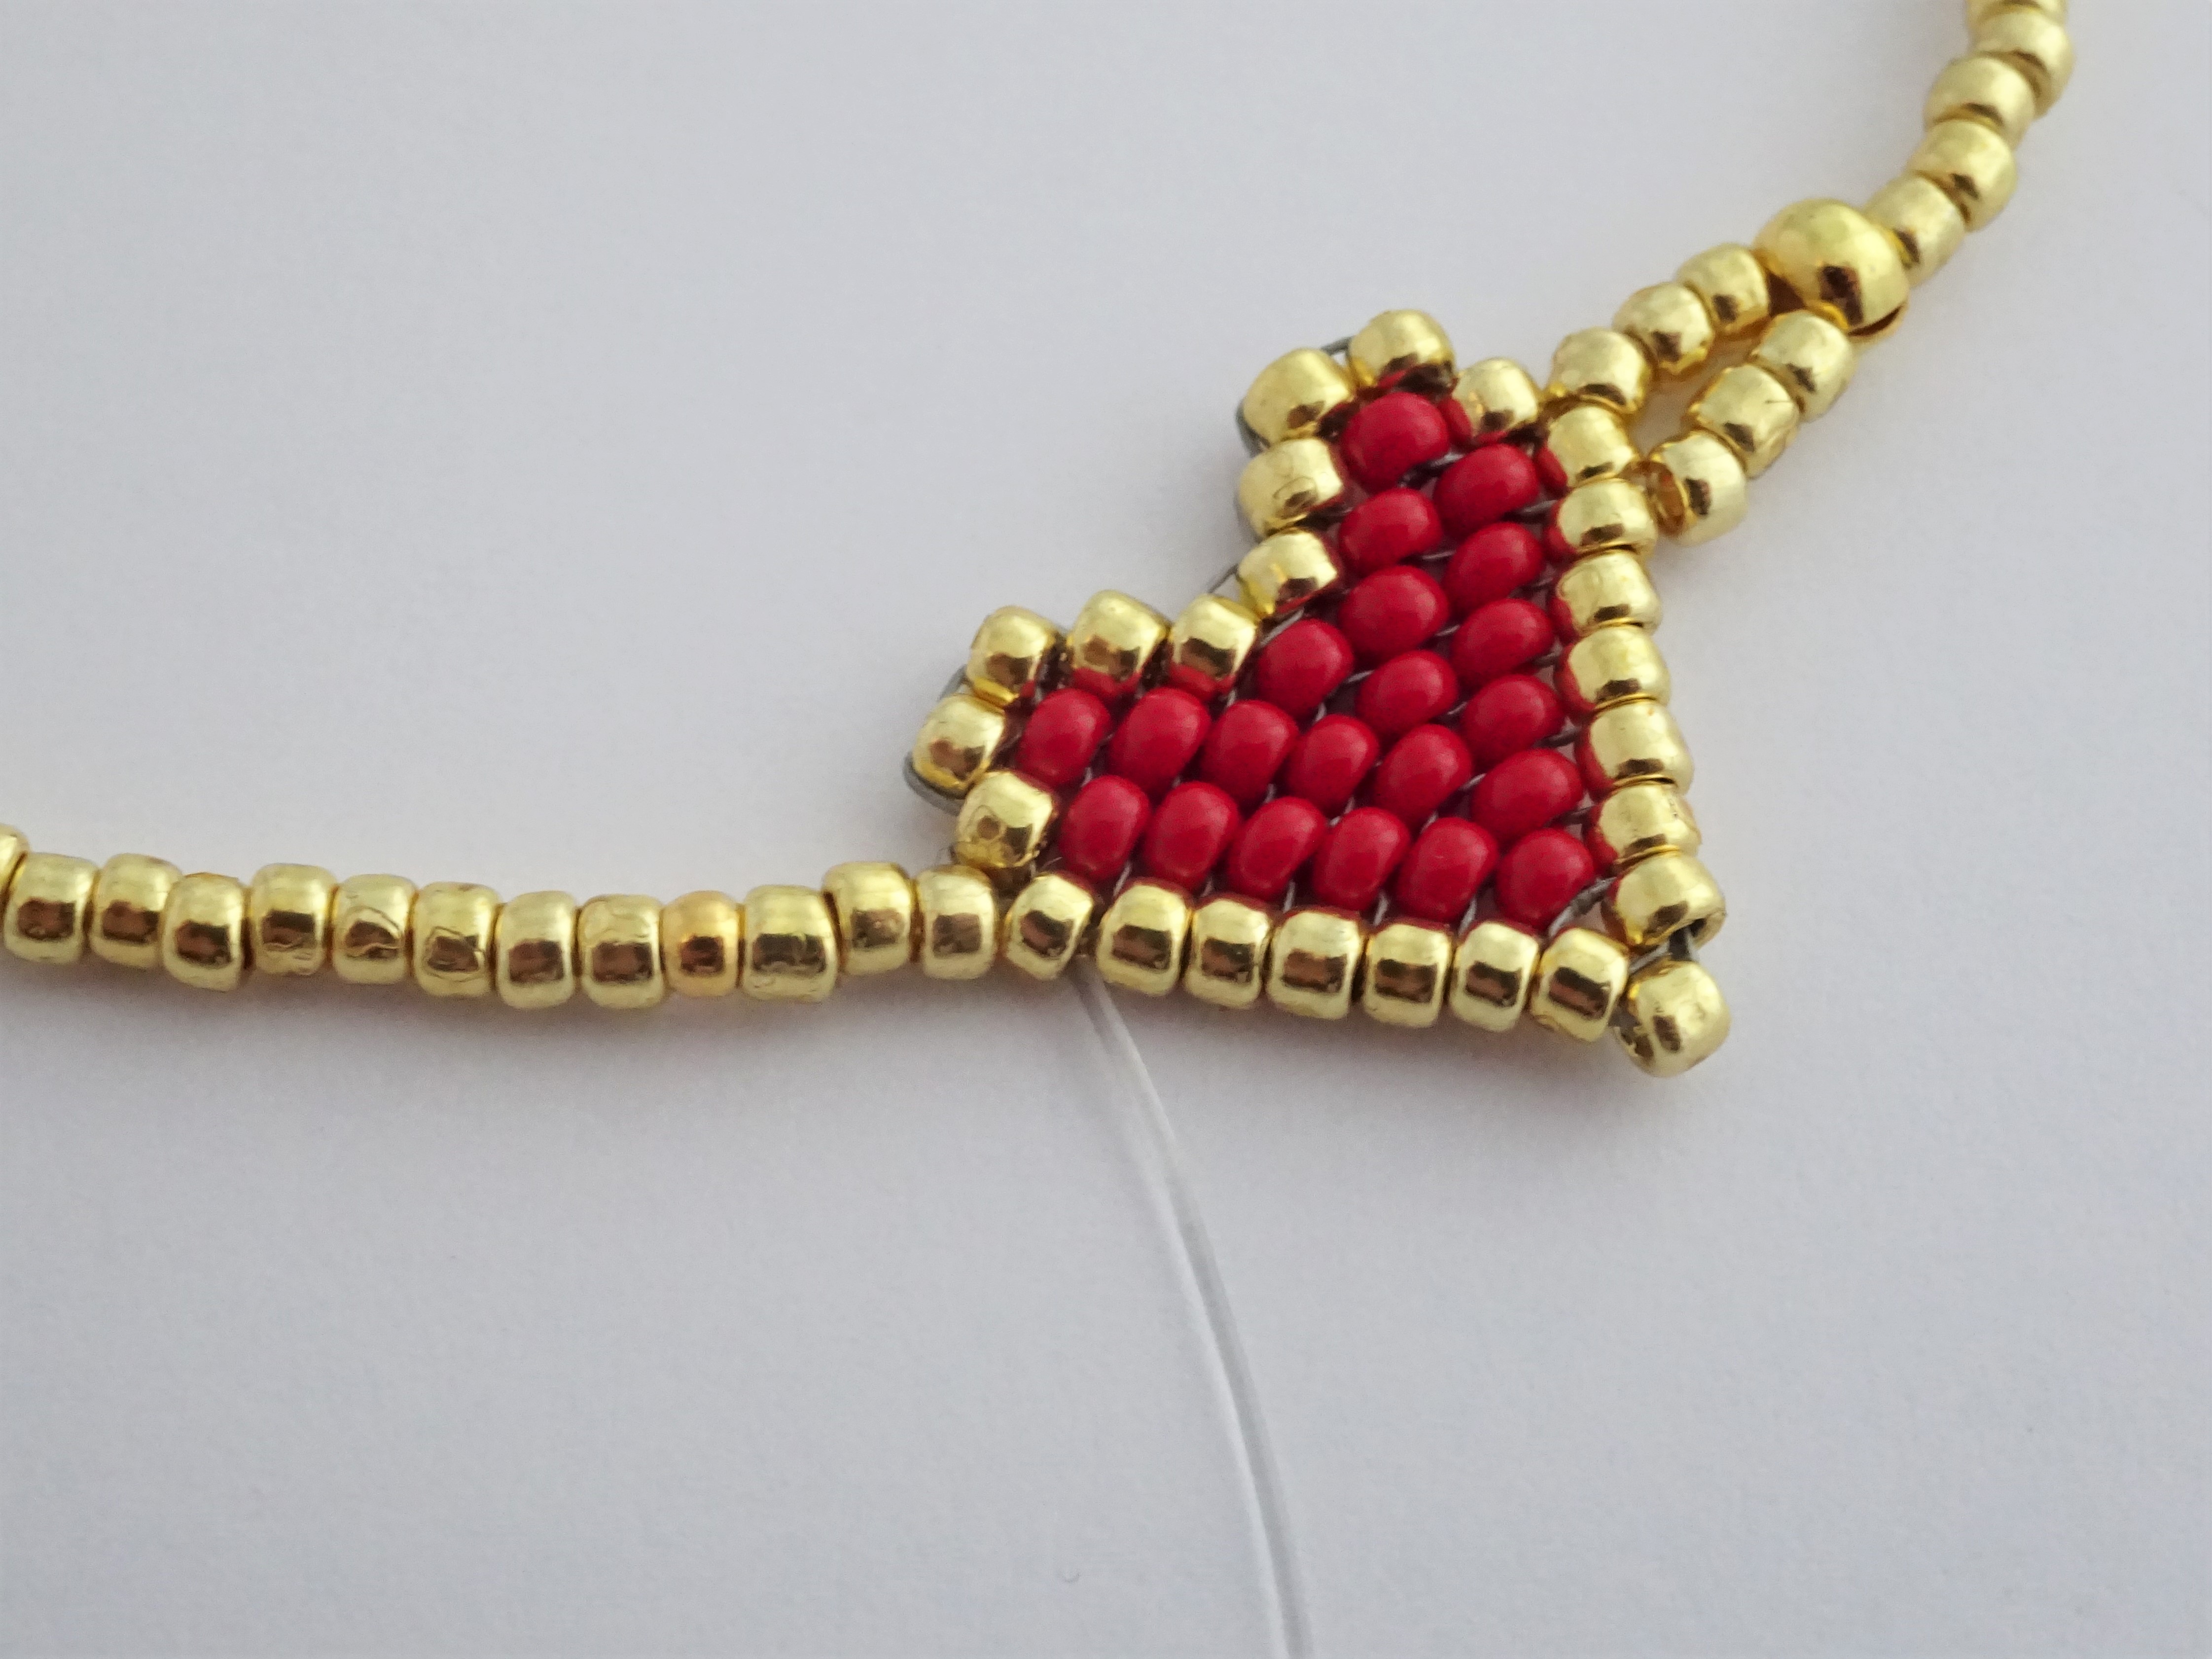
12. Continue on with this stitch adding a new red bead with each new level. Stop when there are 5 red beads in a row with a gold on either end.
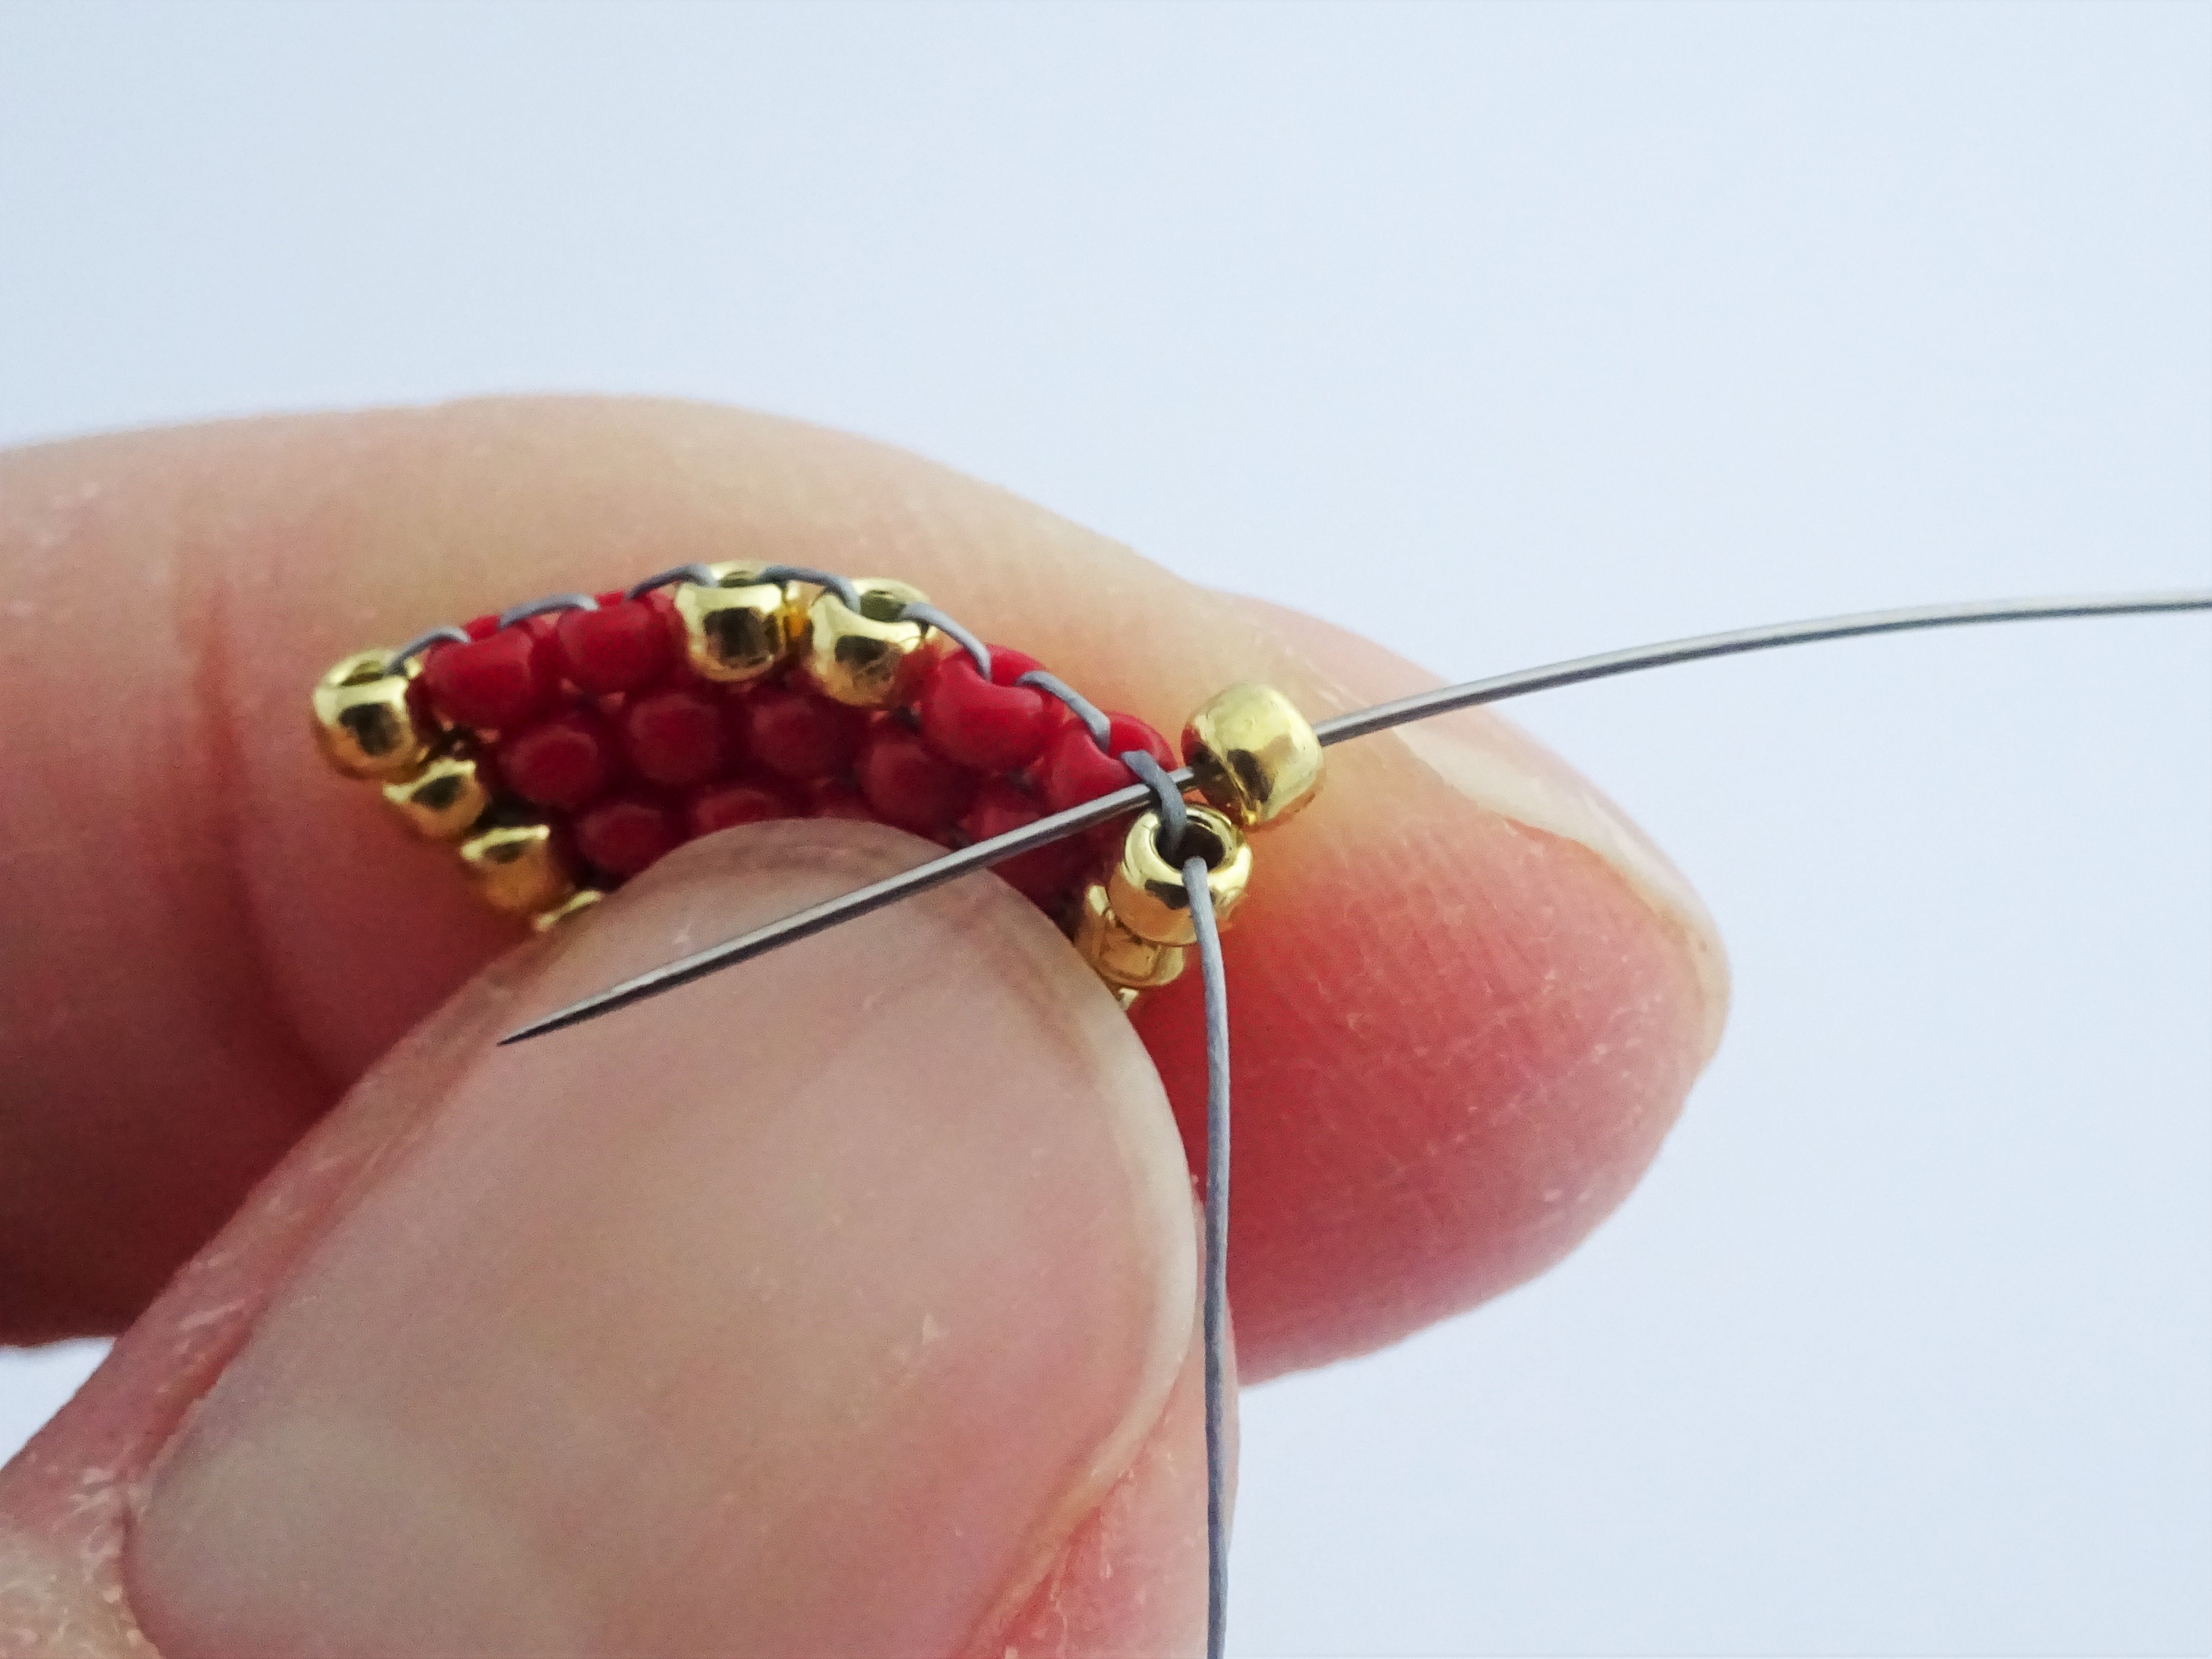
From here pick up 1 gold and then 1 red and pass the thread under the bridging thread on the beading below.

13. Pick up 1 red bead using brick stitch.

14. Add 1 gold using brick stitch.
15. Pick up another gold using brick stitch.

16. Using brick stitch finish the row with 2 red and 1 gold seed beads.
17. Pick up 1 gold bead and pass the needle under the bridging thread on the beadwork below.
We have stopped increasing now so only 1 bead is picked up at this point.

18. Go back up through the gold bead to finish the stitch and then add a red and then a gold using brick stitch.

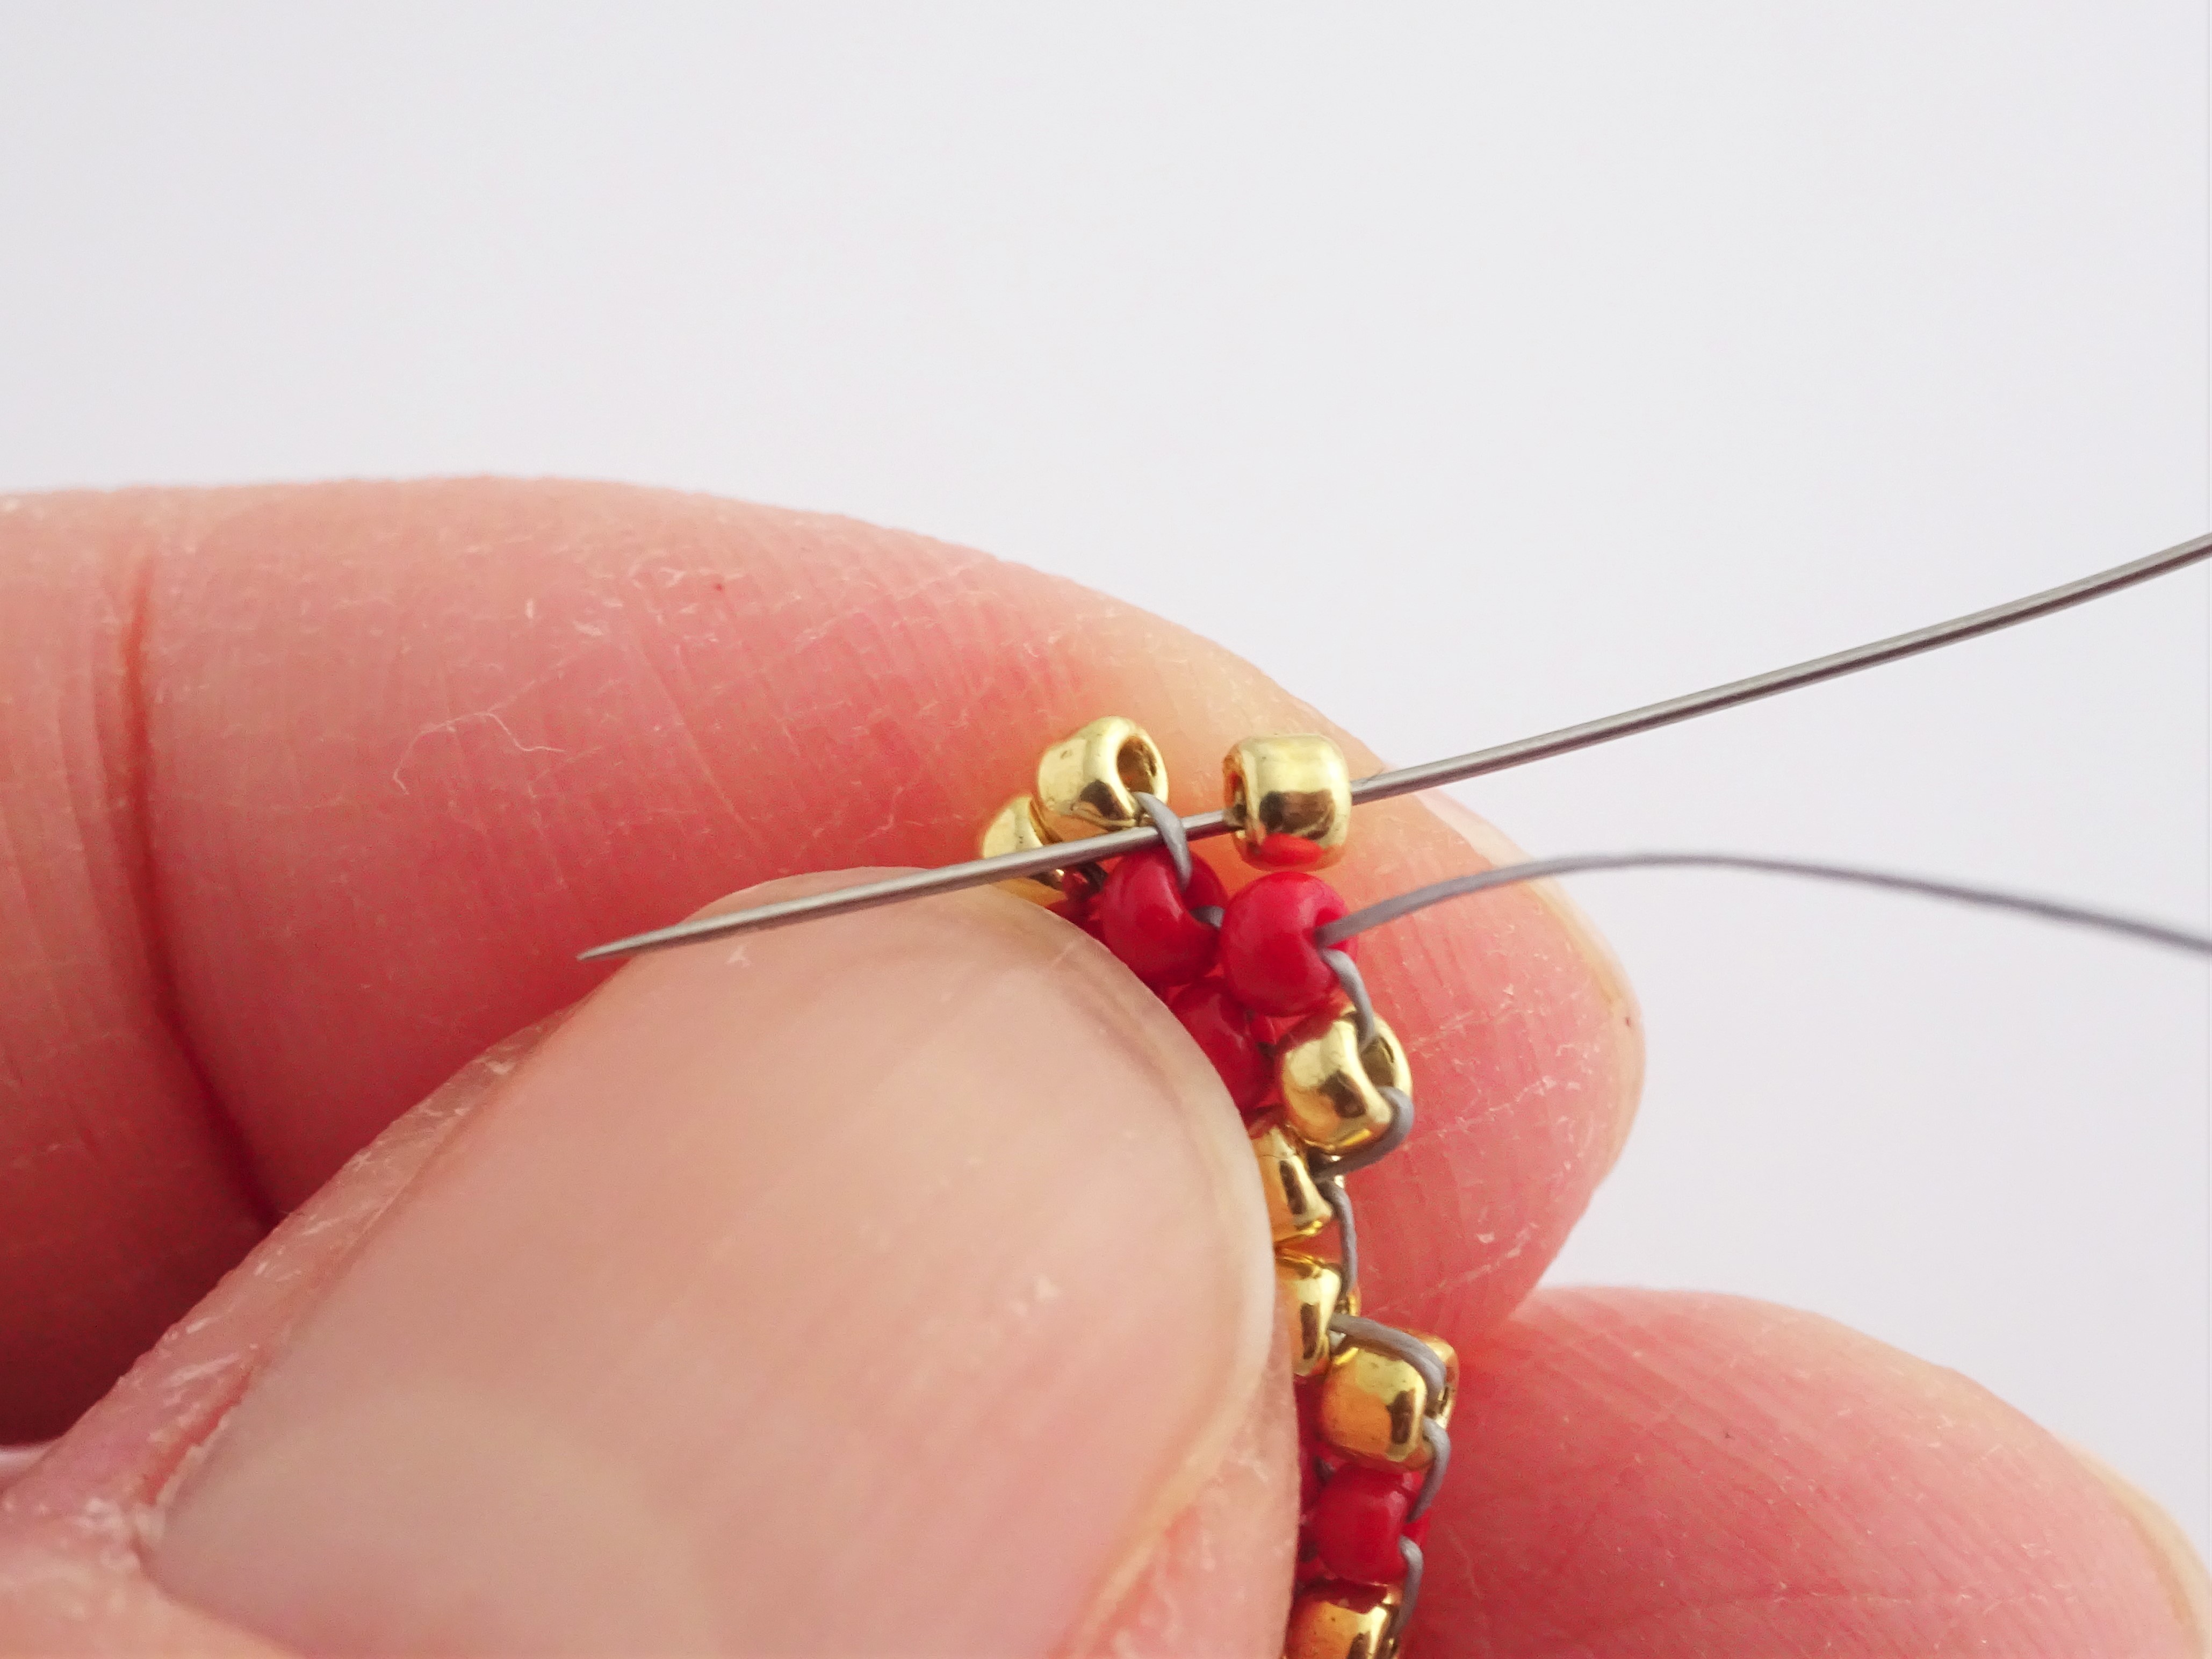
19. We need to make the ‘v’ shape at the top of the heart. To do this take the needle down through the gold bead just below the top row of beading.

20. Take the needle up the next gold seed beads along.

21. Pick up 1 gold bead and attach using brick stitch.
22. Add a red and then a gold using brick stitch. We are no longer increasing the row length so we can use the bridging thread on the lower beadwork for the last bead in the row.

23. Pick up 1 gold seed bead attach using brick stitch.
24. Add another gold bead with brick stitch and take the needle down through the gold bead on the row below.
We are now moving down through the beadwork to get the needle to the other side to add the final beads.

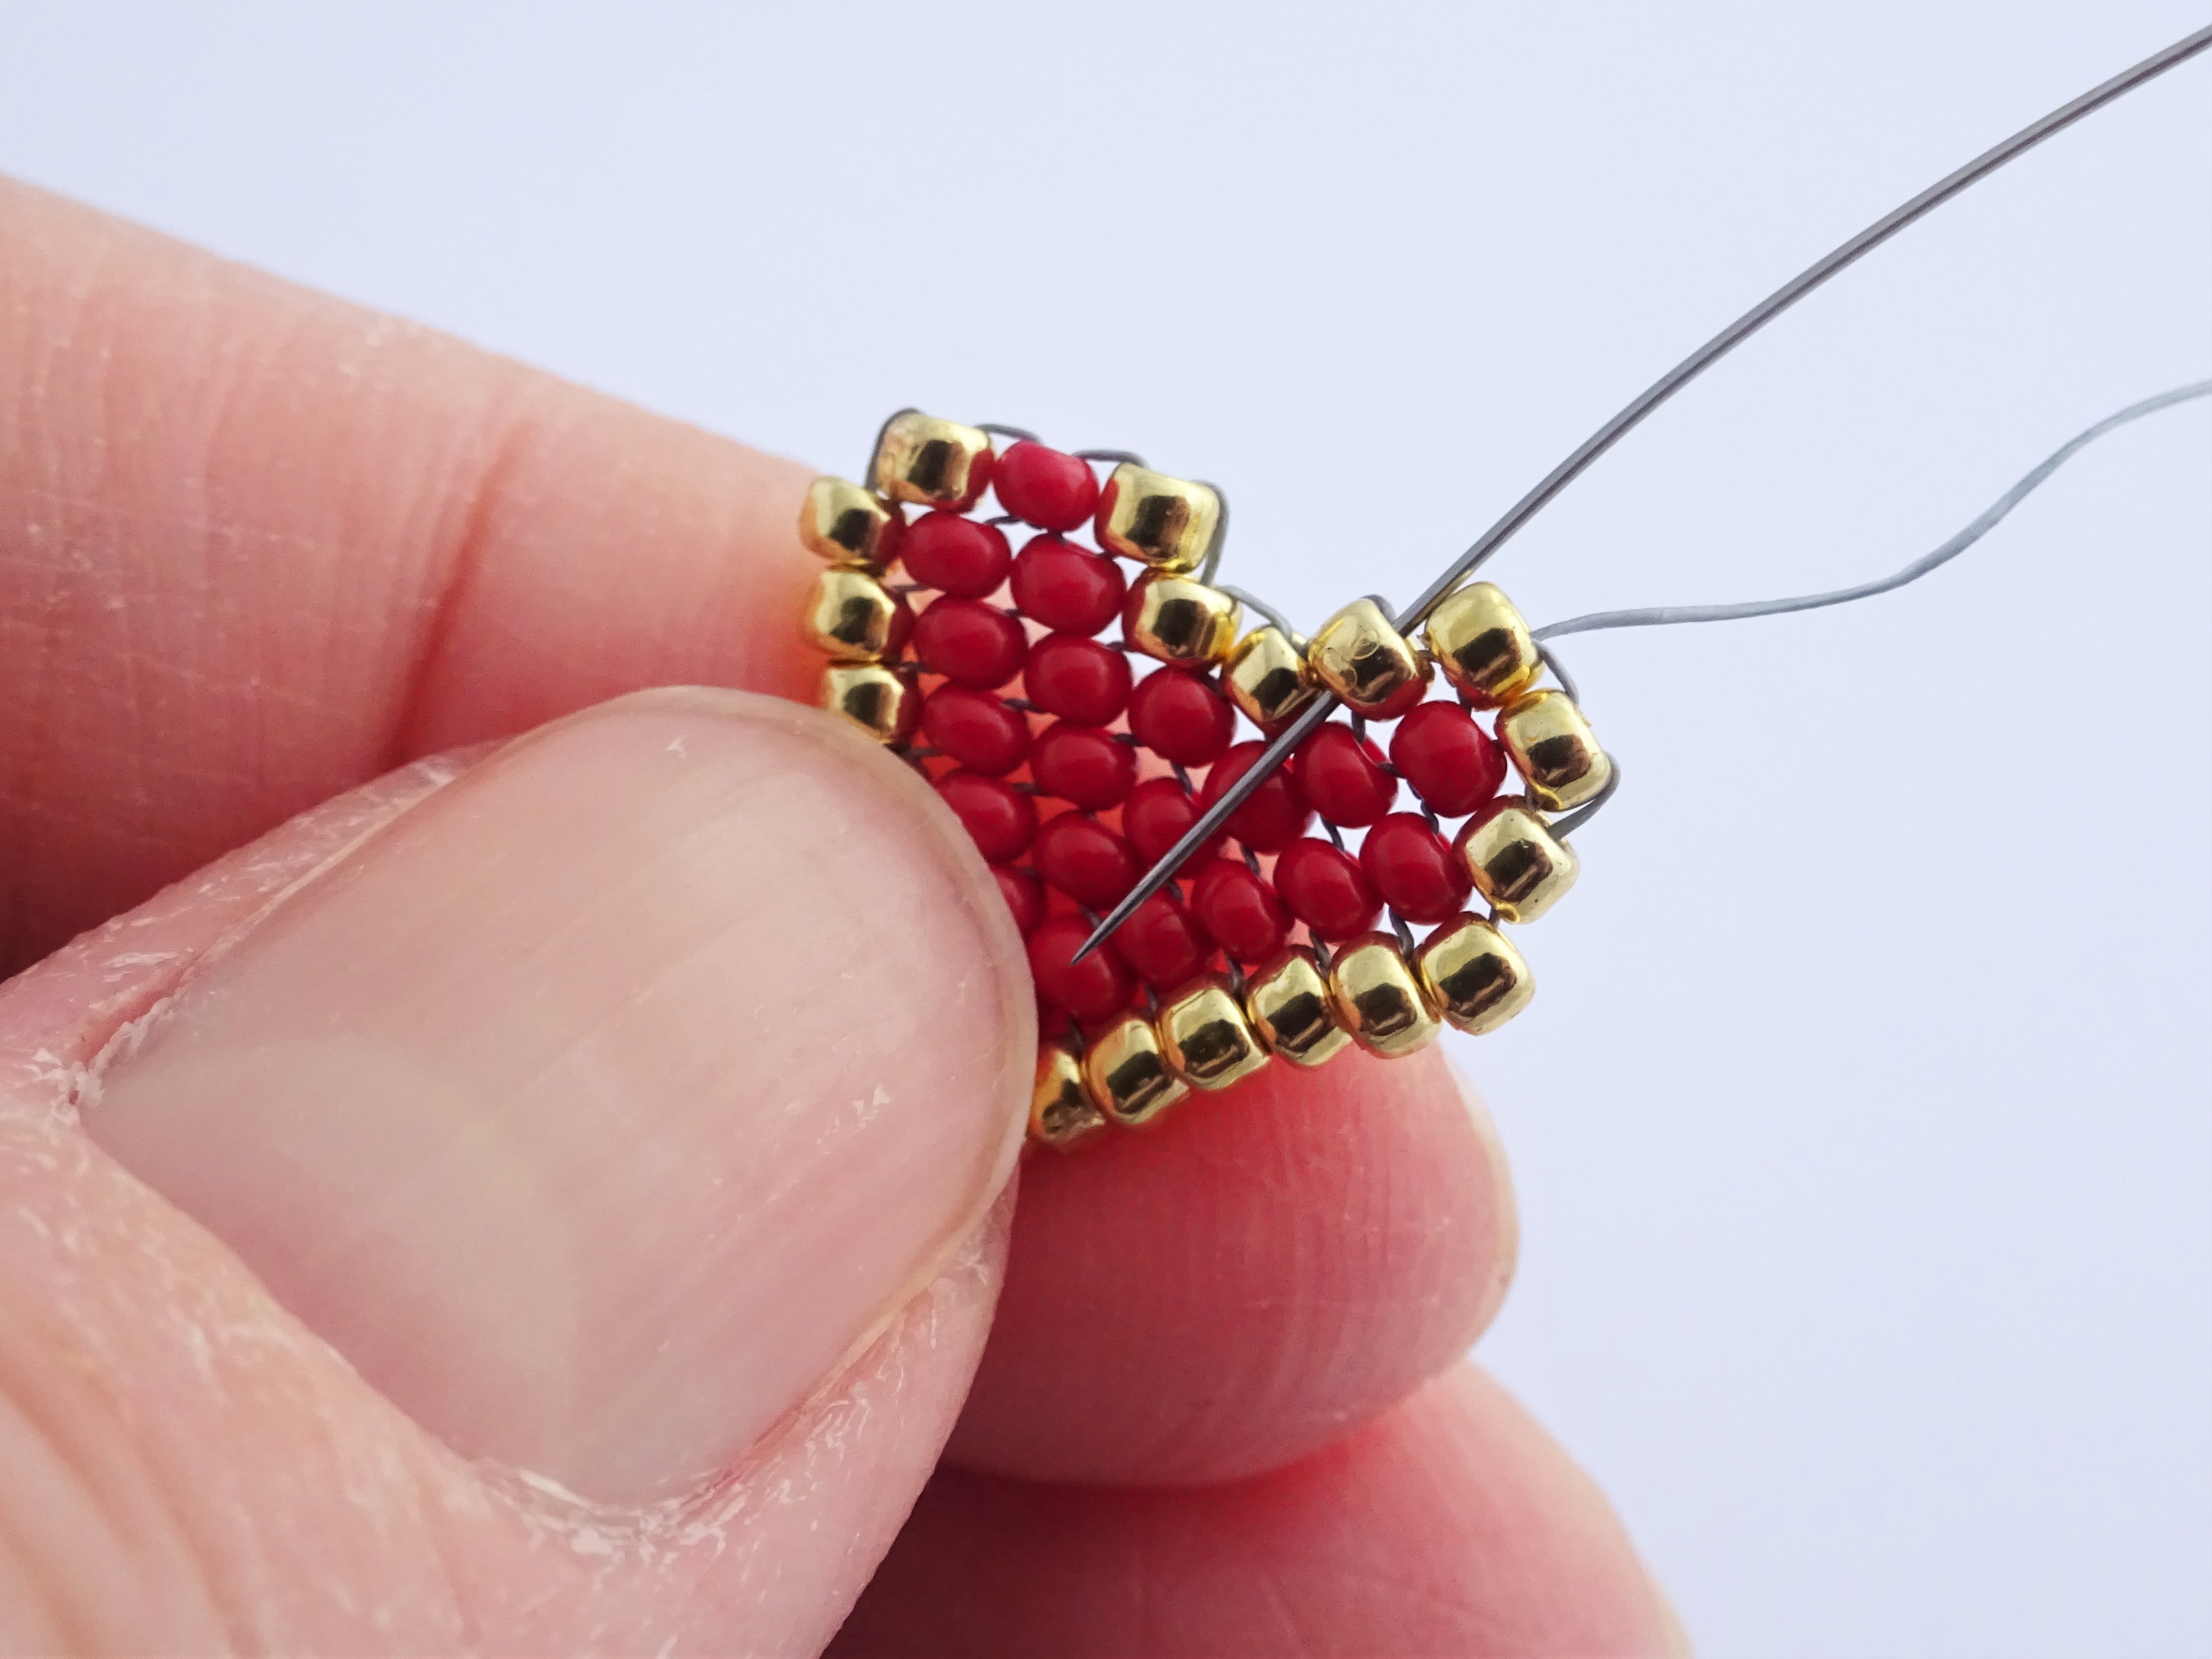
25. Take the needle down through the next gold down.
26. Take the needle across and up through the next gold seed bead along.

27. Take the needle up through the top gold bead.

28. Add 2 gold beads using brick stitch.

29. Take the needle down through the gold bead just below.

30. Weave both ends in knotting as you go. Cut off and excess thread.
For more information on how I knot and weave in the ends I have some detailed instructions here.
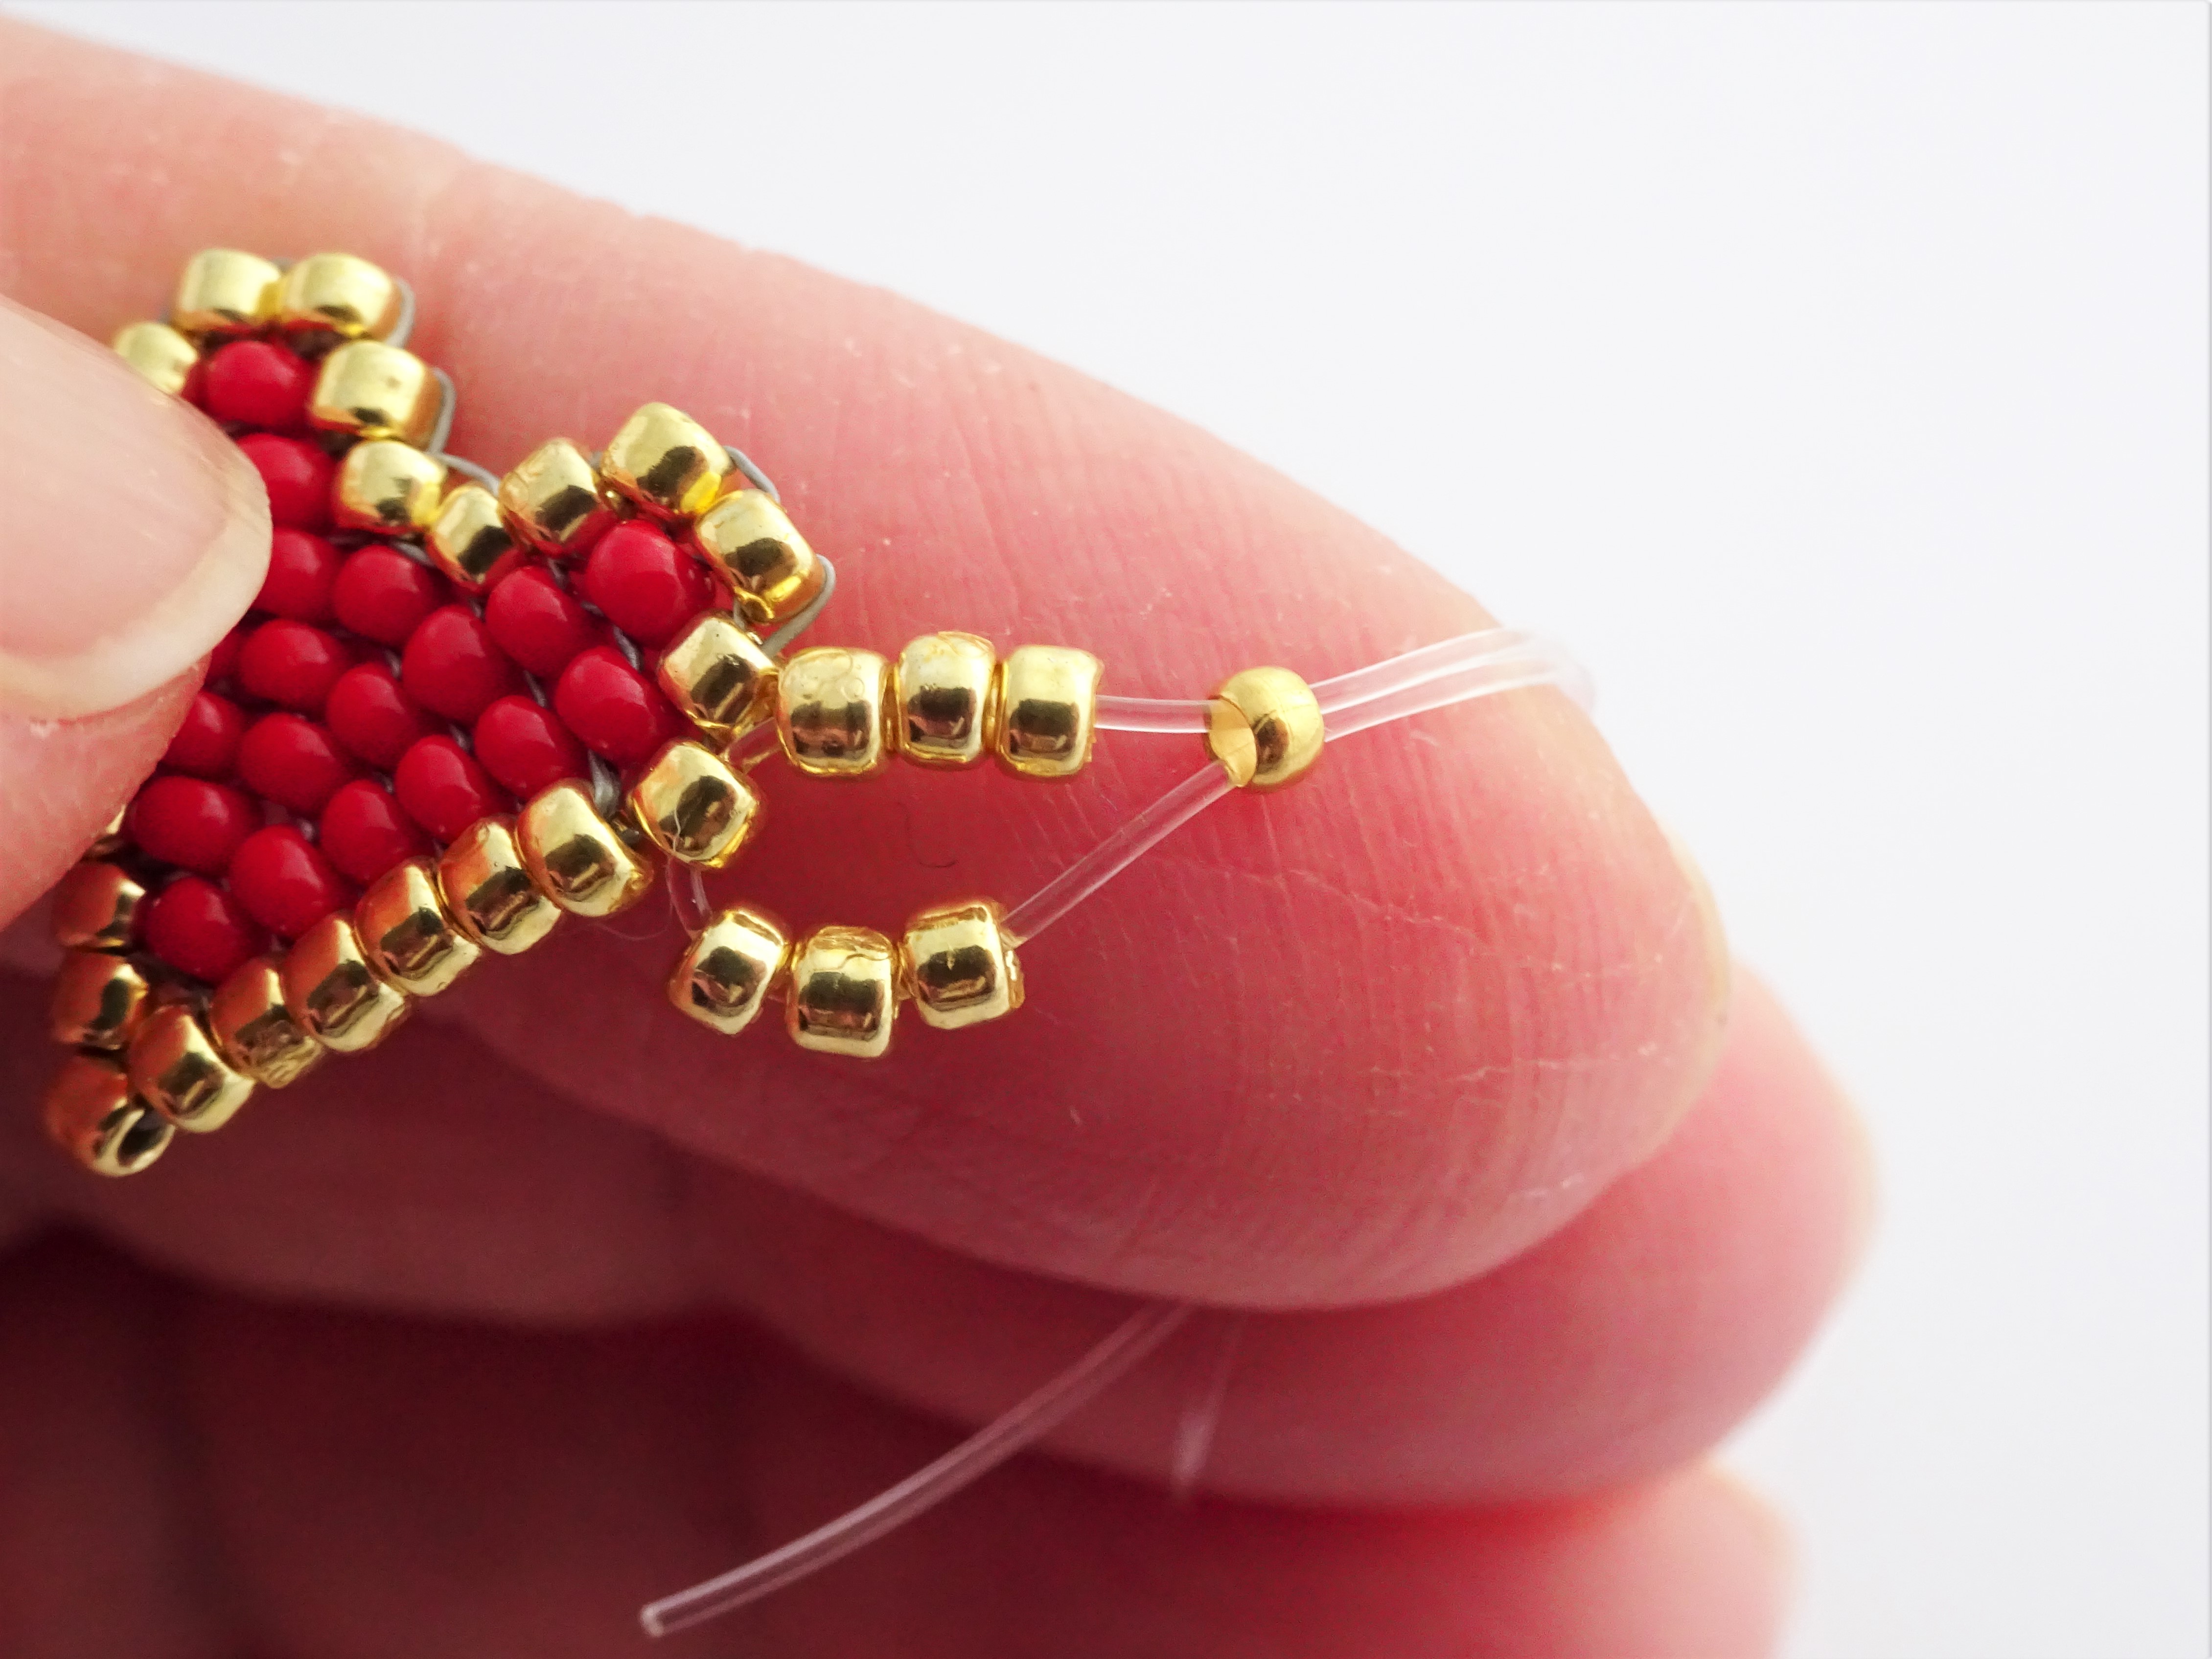
31. On length of beading elastic (big enough to go around your wrist with a couple of inches extra) pick up 1 crimp bead and 3 gold seed beads.

32. Take the end of the elastic with the gold seed beads on it through the widest point on the heart – it is the last gold seed bead before the beadwork decreases.
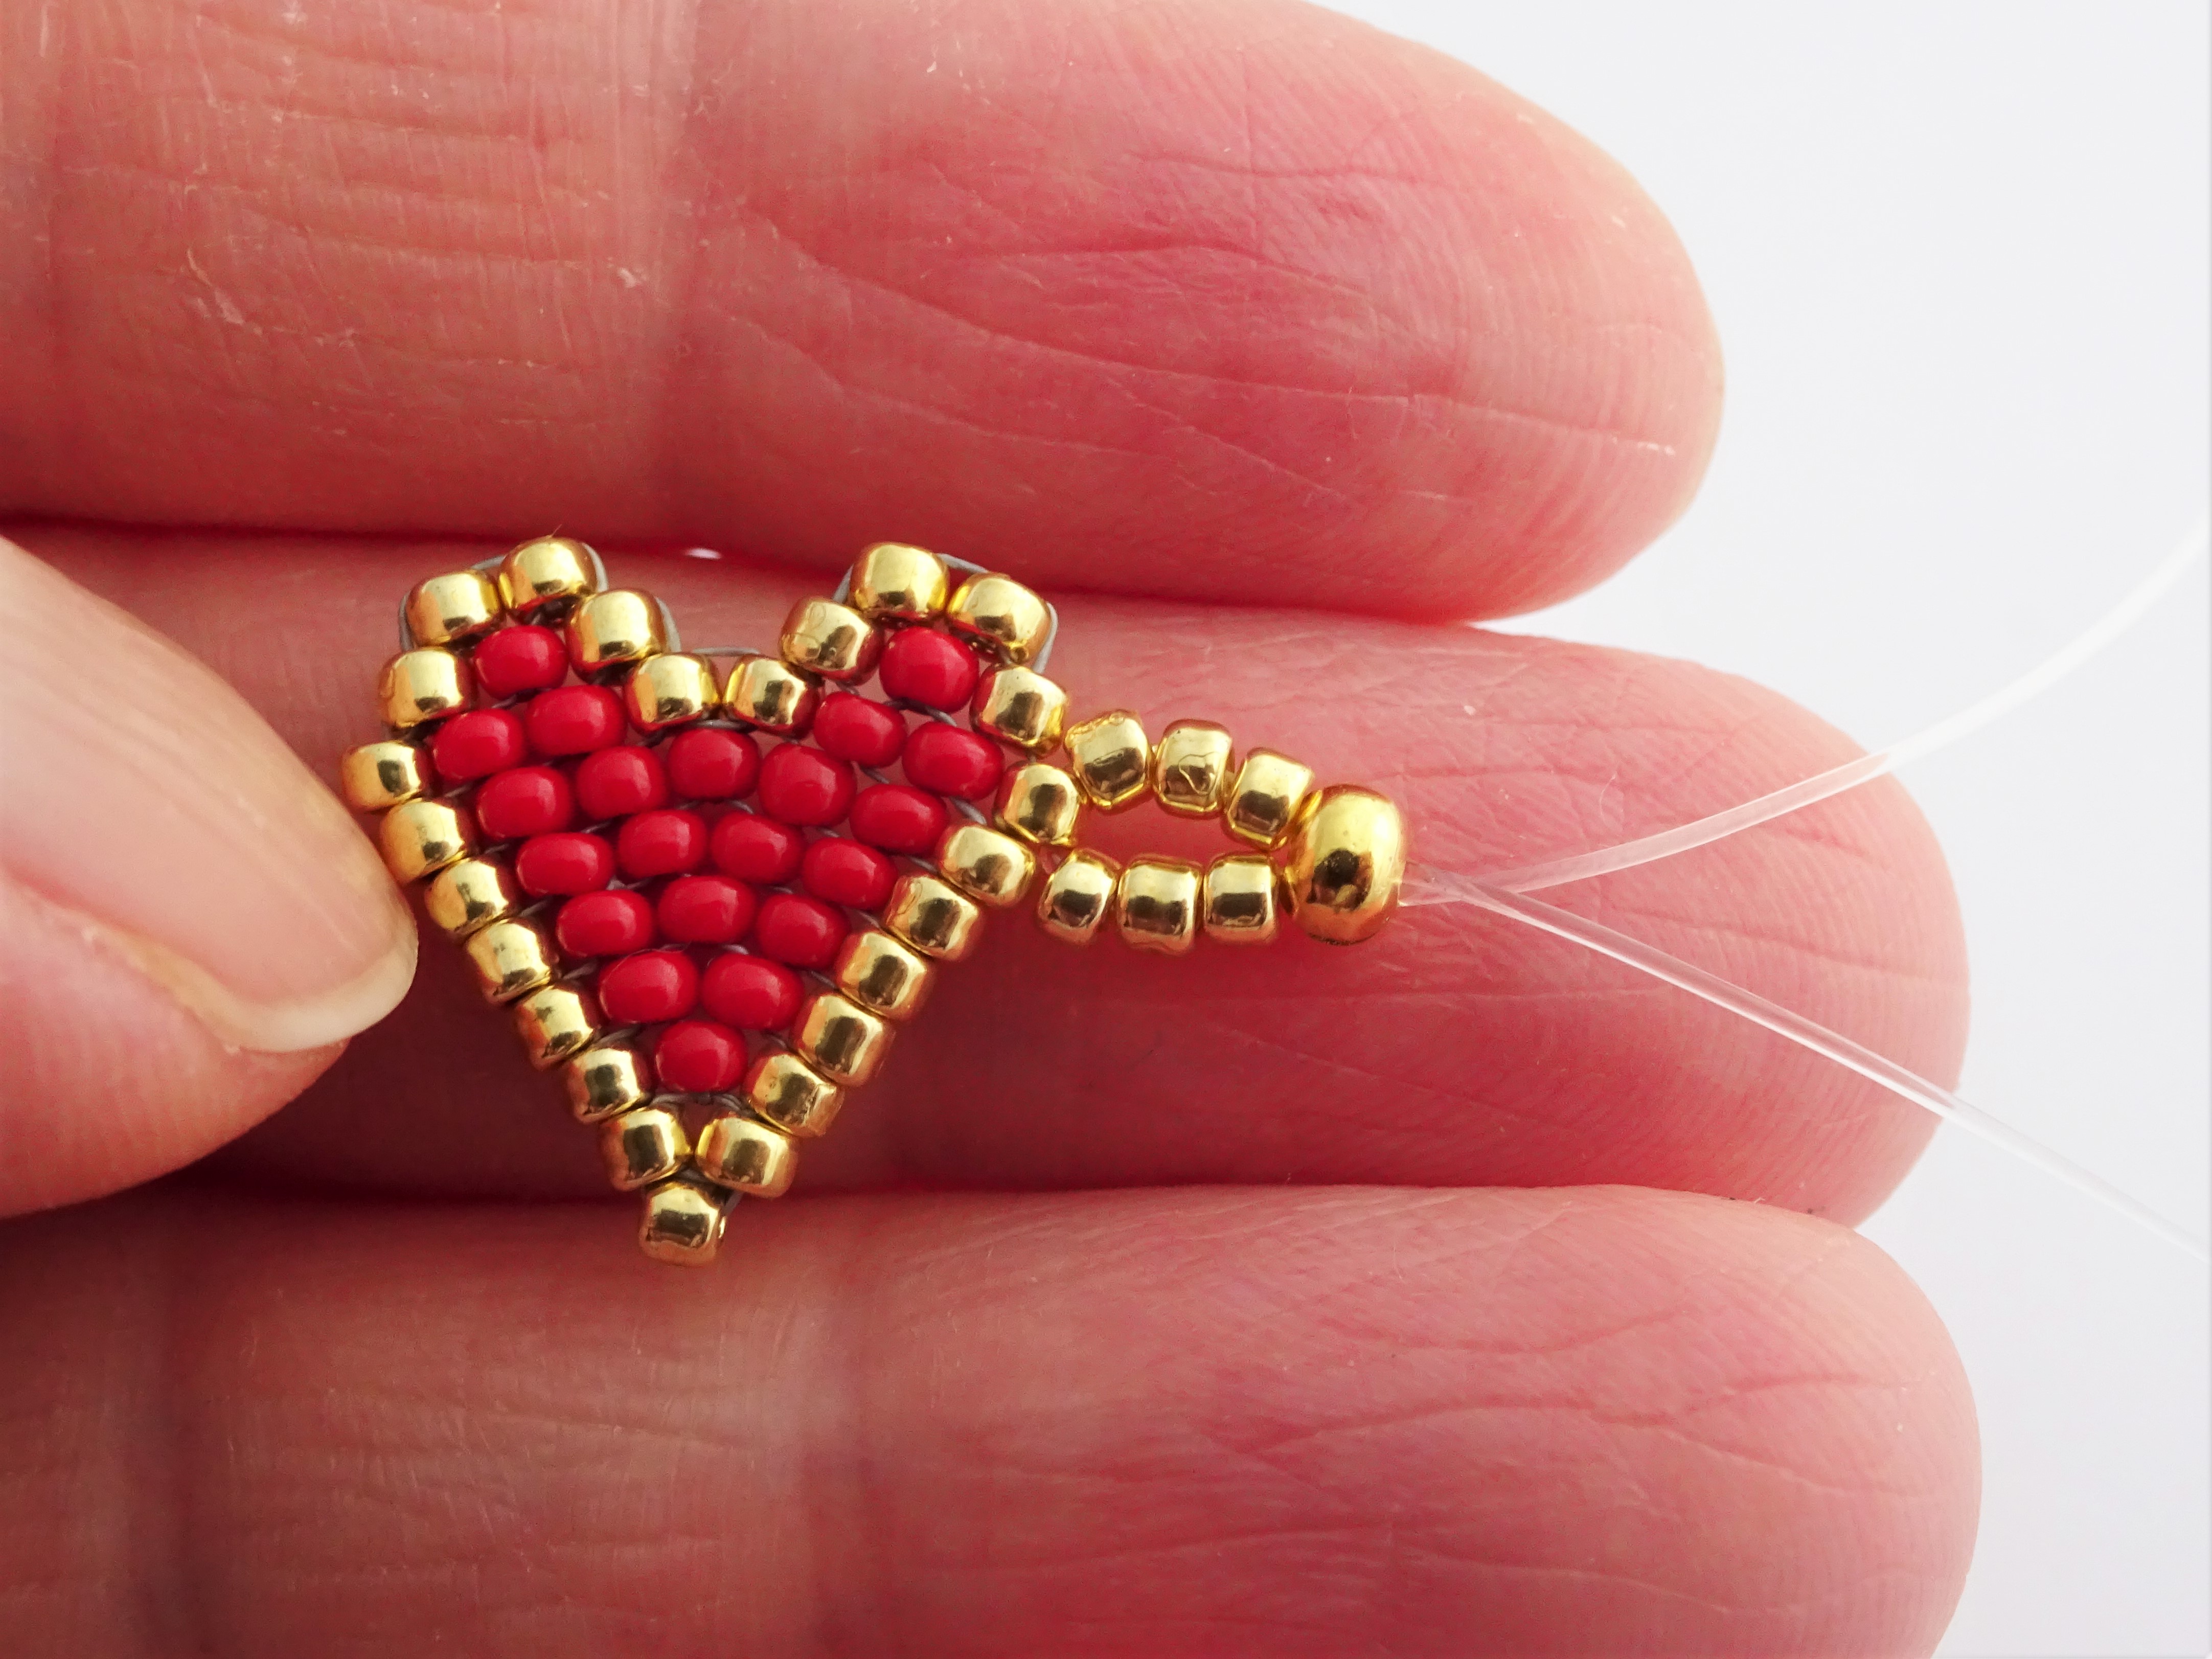
33. Pick up 3 more gold seed beads and take the elastic through the same crimp bead. This tail of elastic only needs be long enough to fit through the crimp and enough to hold onto whilst you flatten the crimp. The rest of the length is needed for the bracelet.

34. Use flat nose pliers to flatten the crimp bead.
35. Use a crimp cover to hide the crimp bead.

36. Add gold beads to your elastic until it is nearly long enough to fit your wrist. Its needs to be 1/4″ smaller than the desired finished length (ie, if you want and 7 1/2″ bracelet stop stringing beads when it is 7 1/4″ long).

37. Pick up 1 crimp bead and then 3 gold seed beads.
38. Take the elastic through the gold seed bead at the widest point on the heart on the other side.

39. Pick up 3 more gold beads and take the elastic through the crimp bead.

40. Flatten the crimp bead, attach a crimp cover, cut off any excess elastic and admire your work 🙂
As well as this brick stitch heart bracelet tutorial I also have a trio of hearts brick stitch necklace tutorial and, if you fancy trying a different stitch, a right angle weave heart tutorial showing how to make a basic RAW heart and then add lots of lovely beaded detail.
I have made this in red and gold as a nod to Valentine’s day but it would make a lovely jewellery set for brides, bridesmaids and flower girls. It could be made in colours to suit the wedding theme.
If you have enjoyed this tutorial then I have a brick stitch flower tutorial perfect for summer jewellery (or make it in frosty whites and blues and call it a snowflake!)
I have now made this into a YouTube tutorial.
I hope you enjoyed that as much as I did making it.
For more Beadweaving tutorials you can click here.
Whilst you are here don’t forget to sign up to my mailing list to keep up to date with what is happening.
Don’t forget to tag me @theartisanduck on Facebook and Instagram if you make this or any of my tutorials. I would love to see.
Hannah x


This is something I might can do, Now if I can remember where it is when I need it. Beautiful…thank you.
You can do it. I have every faith in you 😀
Oh! Thank you for the vote.LOL
😁
Amazing tutorial, and your heart bracelet turned out so cute! Today I’ve featured your project on Crafts on Display. I hope you enjoy it, and keep up the amazing work! https://craftsondisplay.com/jewelry/heart-bracelet-161276/
That is so kind, thank you so much 😃