
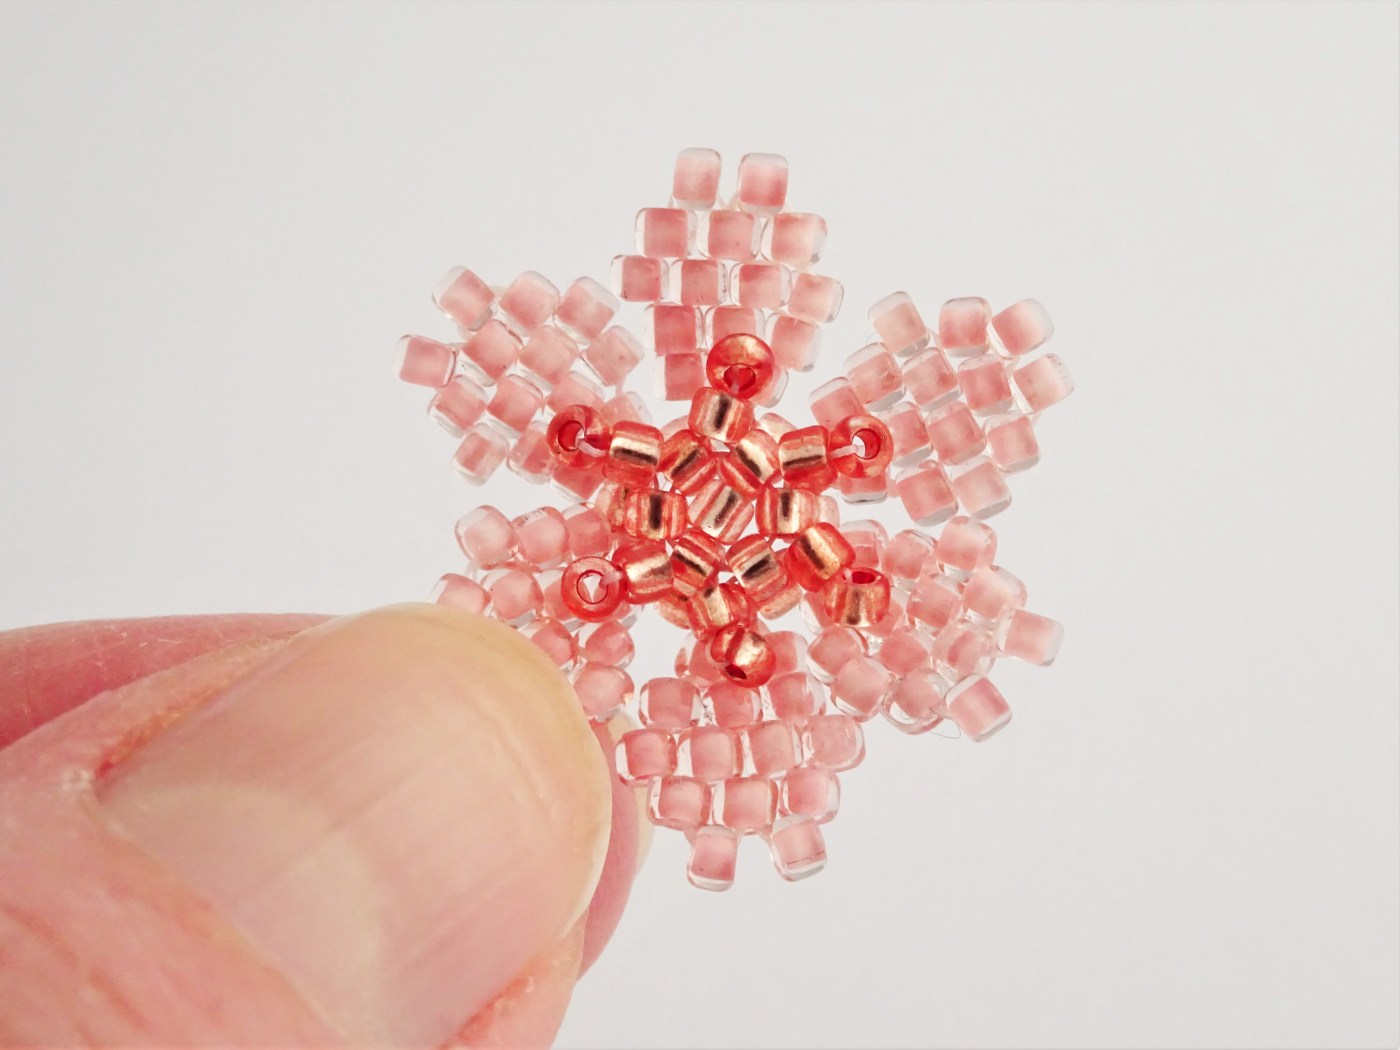

I’m back with a little bit of Beadweaving. I love the idea of taking a relatively simple stitch and making it look a little more fancy. This tutorial uses only two different colours of seed beads so is a great one for using up any in your beading stash (yep, I have a whole trolley of beads waiting to be used!)
The resulting flower is really delicate looking and could be used in so many ways. I have stung them on beading wire but you could so easily add beaded loop to hang from earring wires or a chain or add elastic to finish your flowers in a bracelet.
Scroll to the bottom of this post for a YouTube video showing the whole process.
You will need –
- Size 11 seed beads in two different colours ( I used pale pink and a salmon pink/orange)
- Wildfire beading thread in Crystal
- Beading needle
Brick Stitch Flower Tutorial

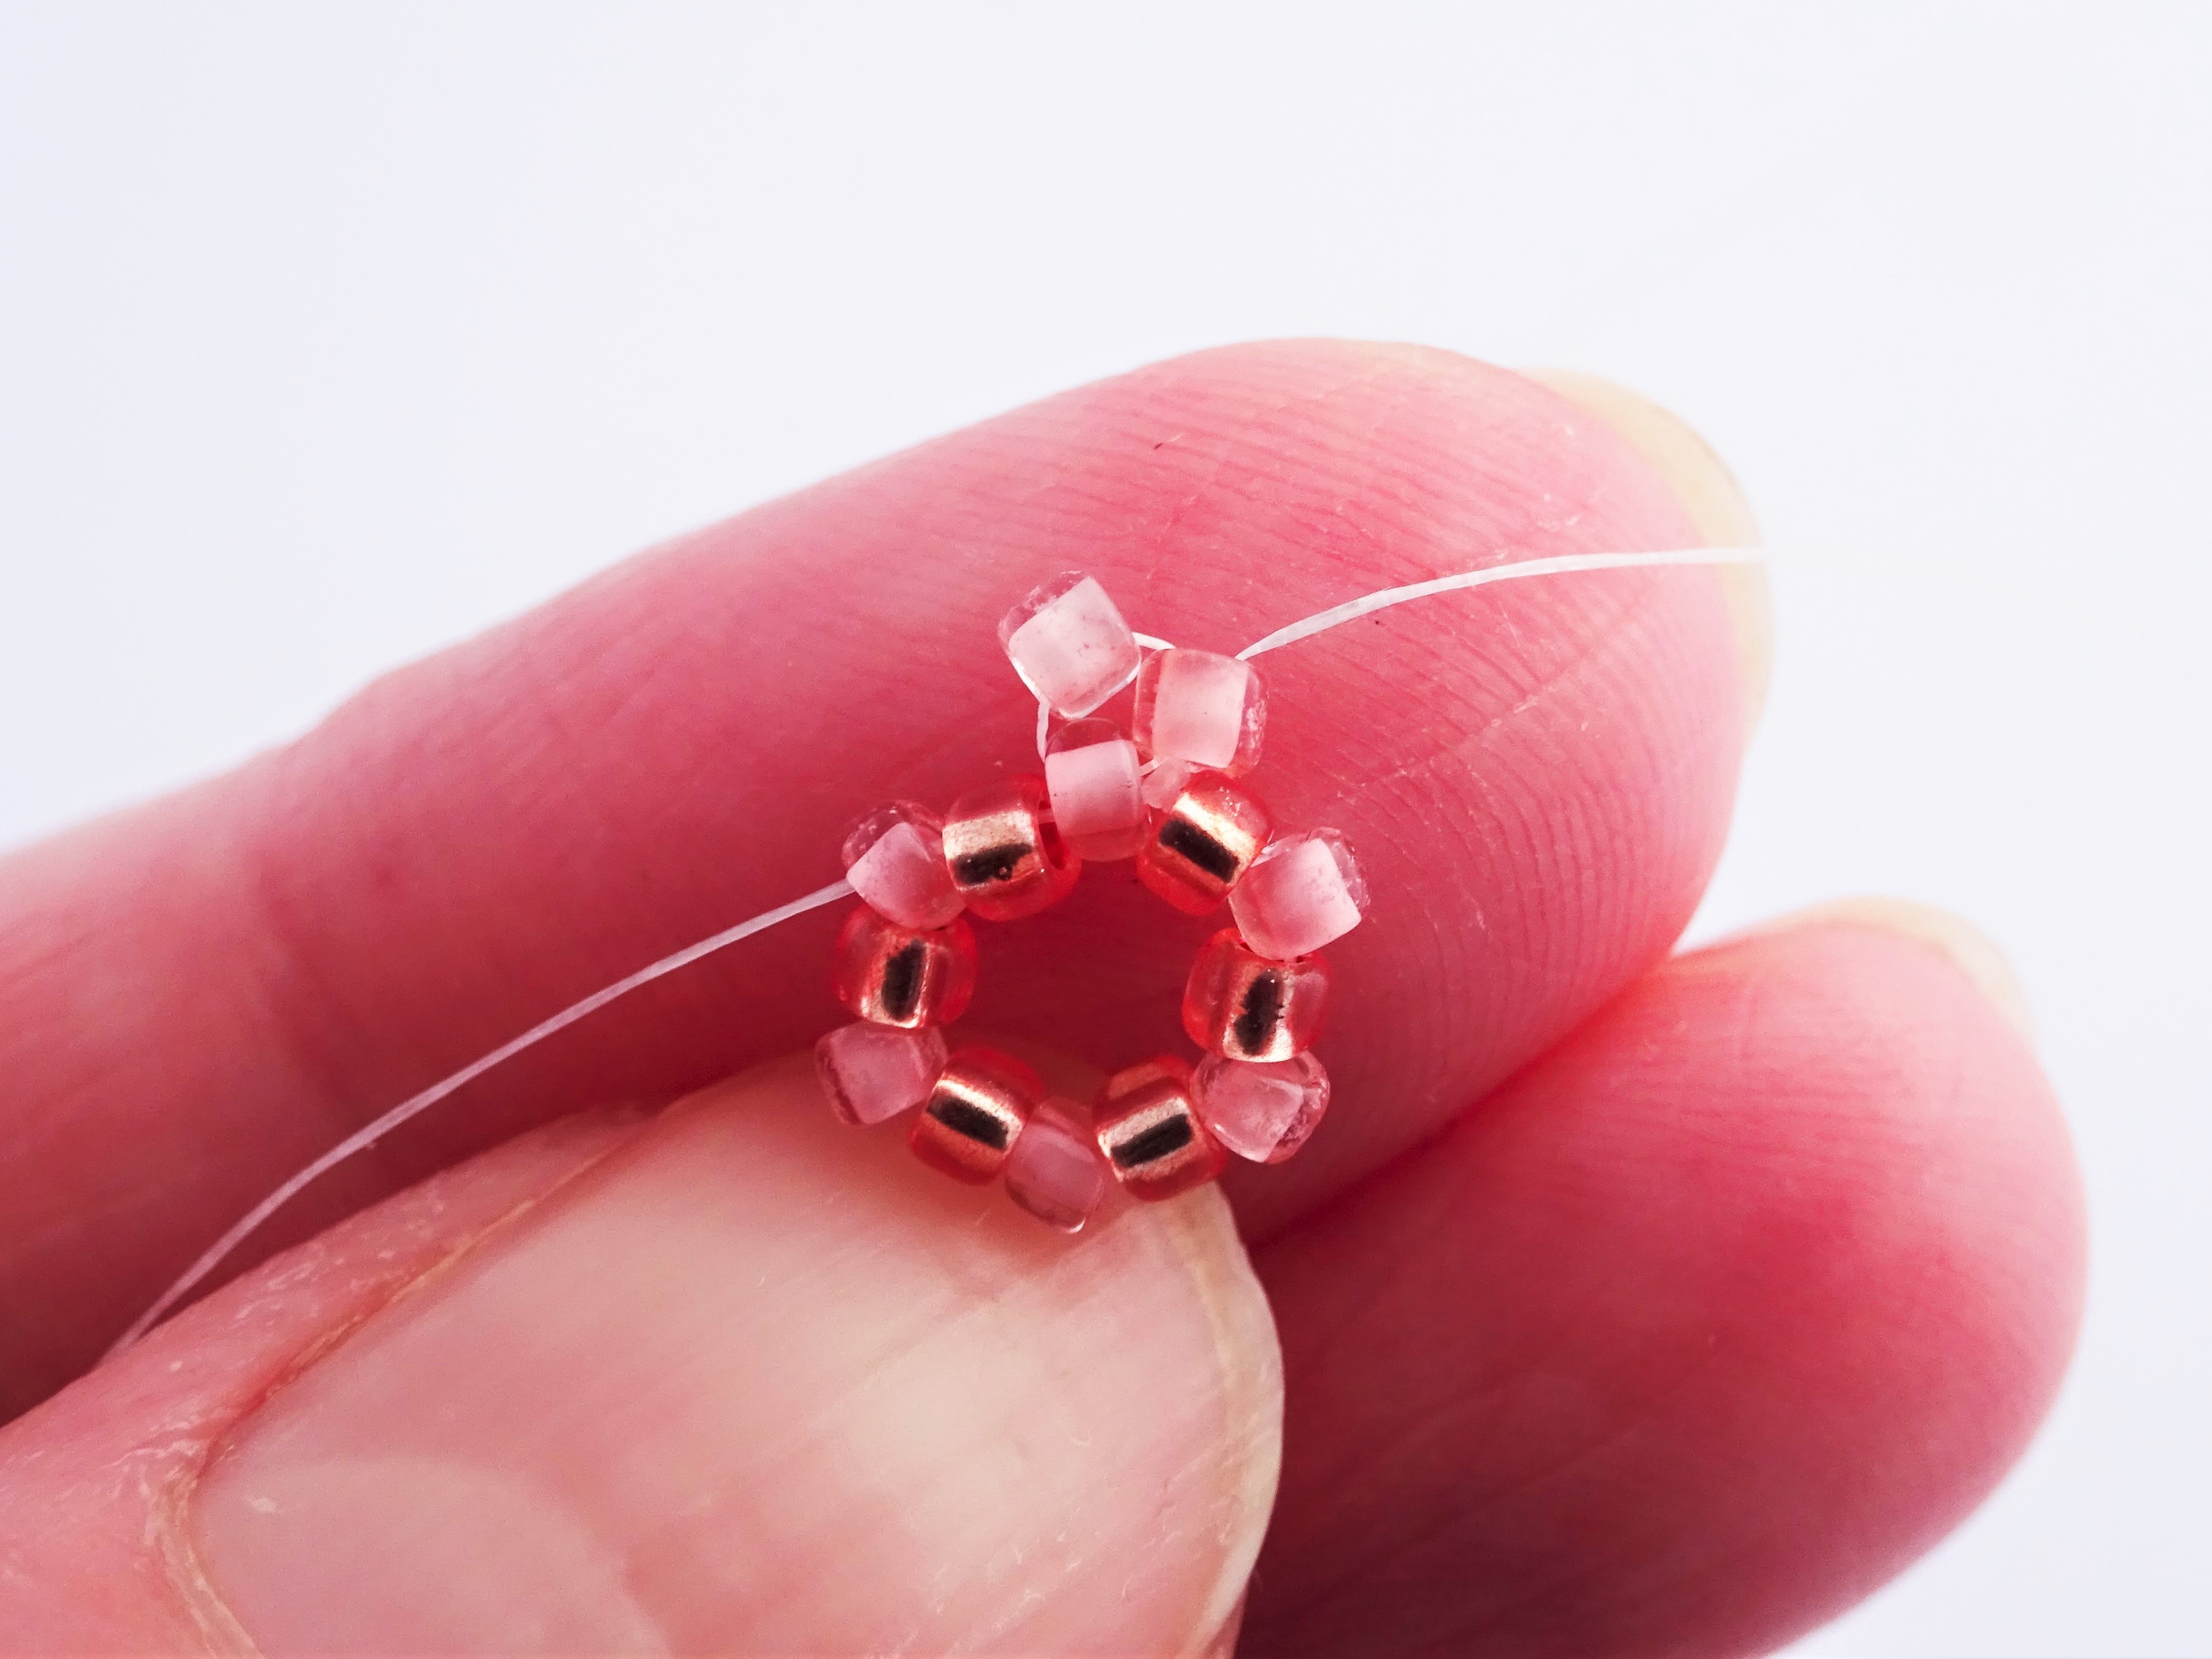
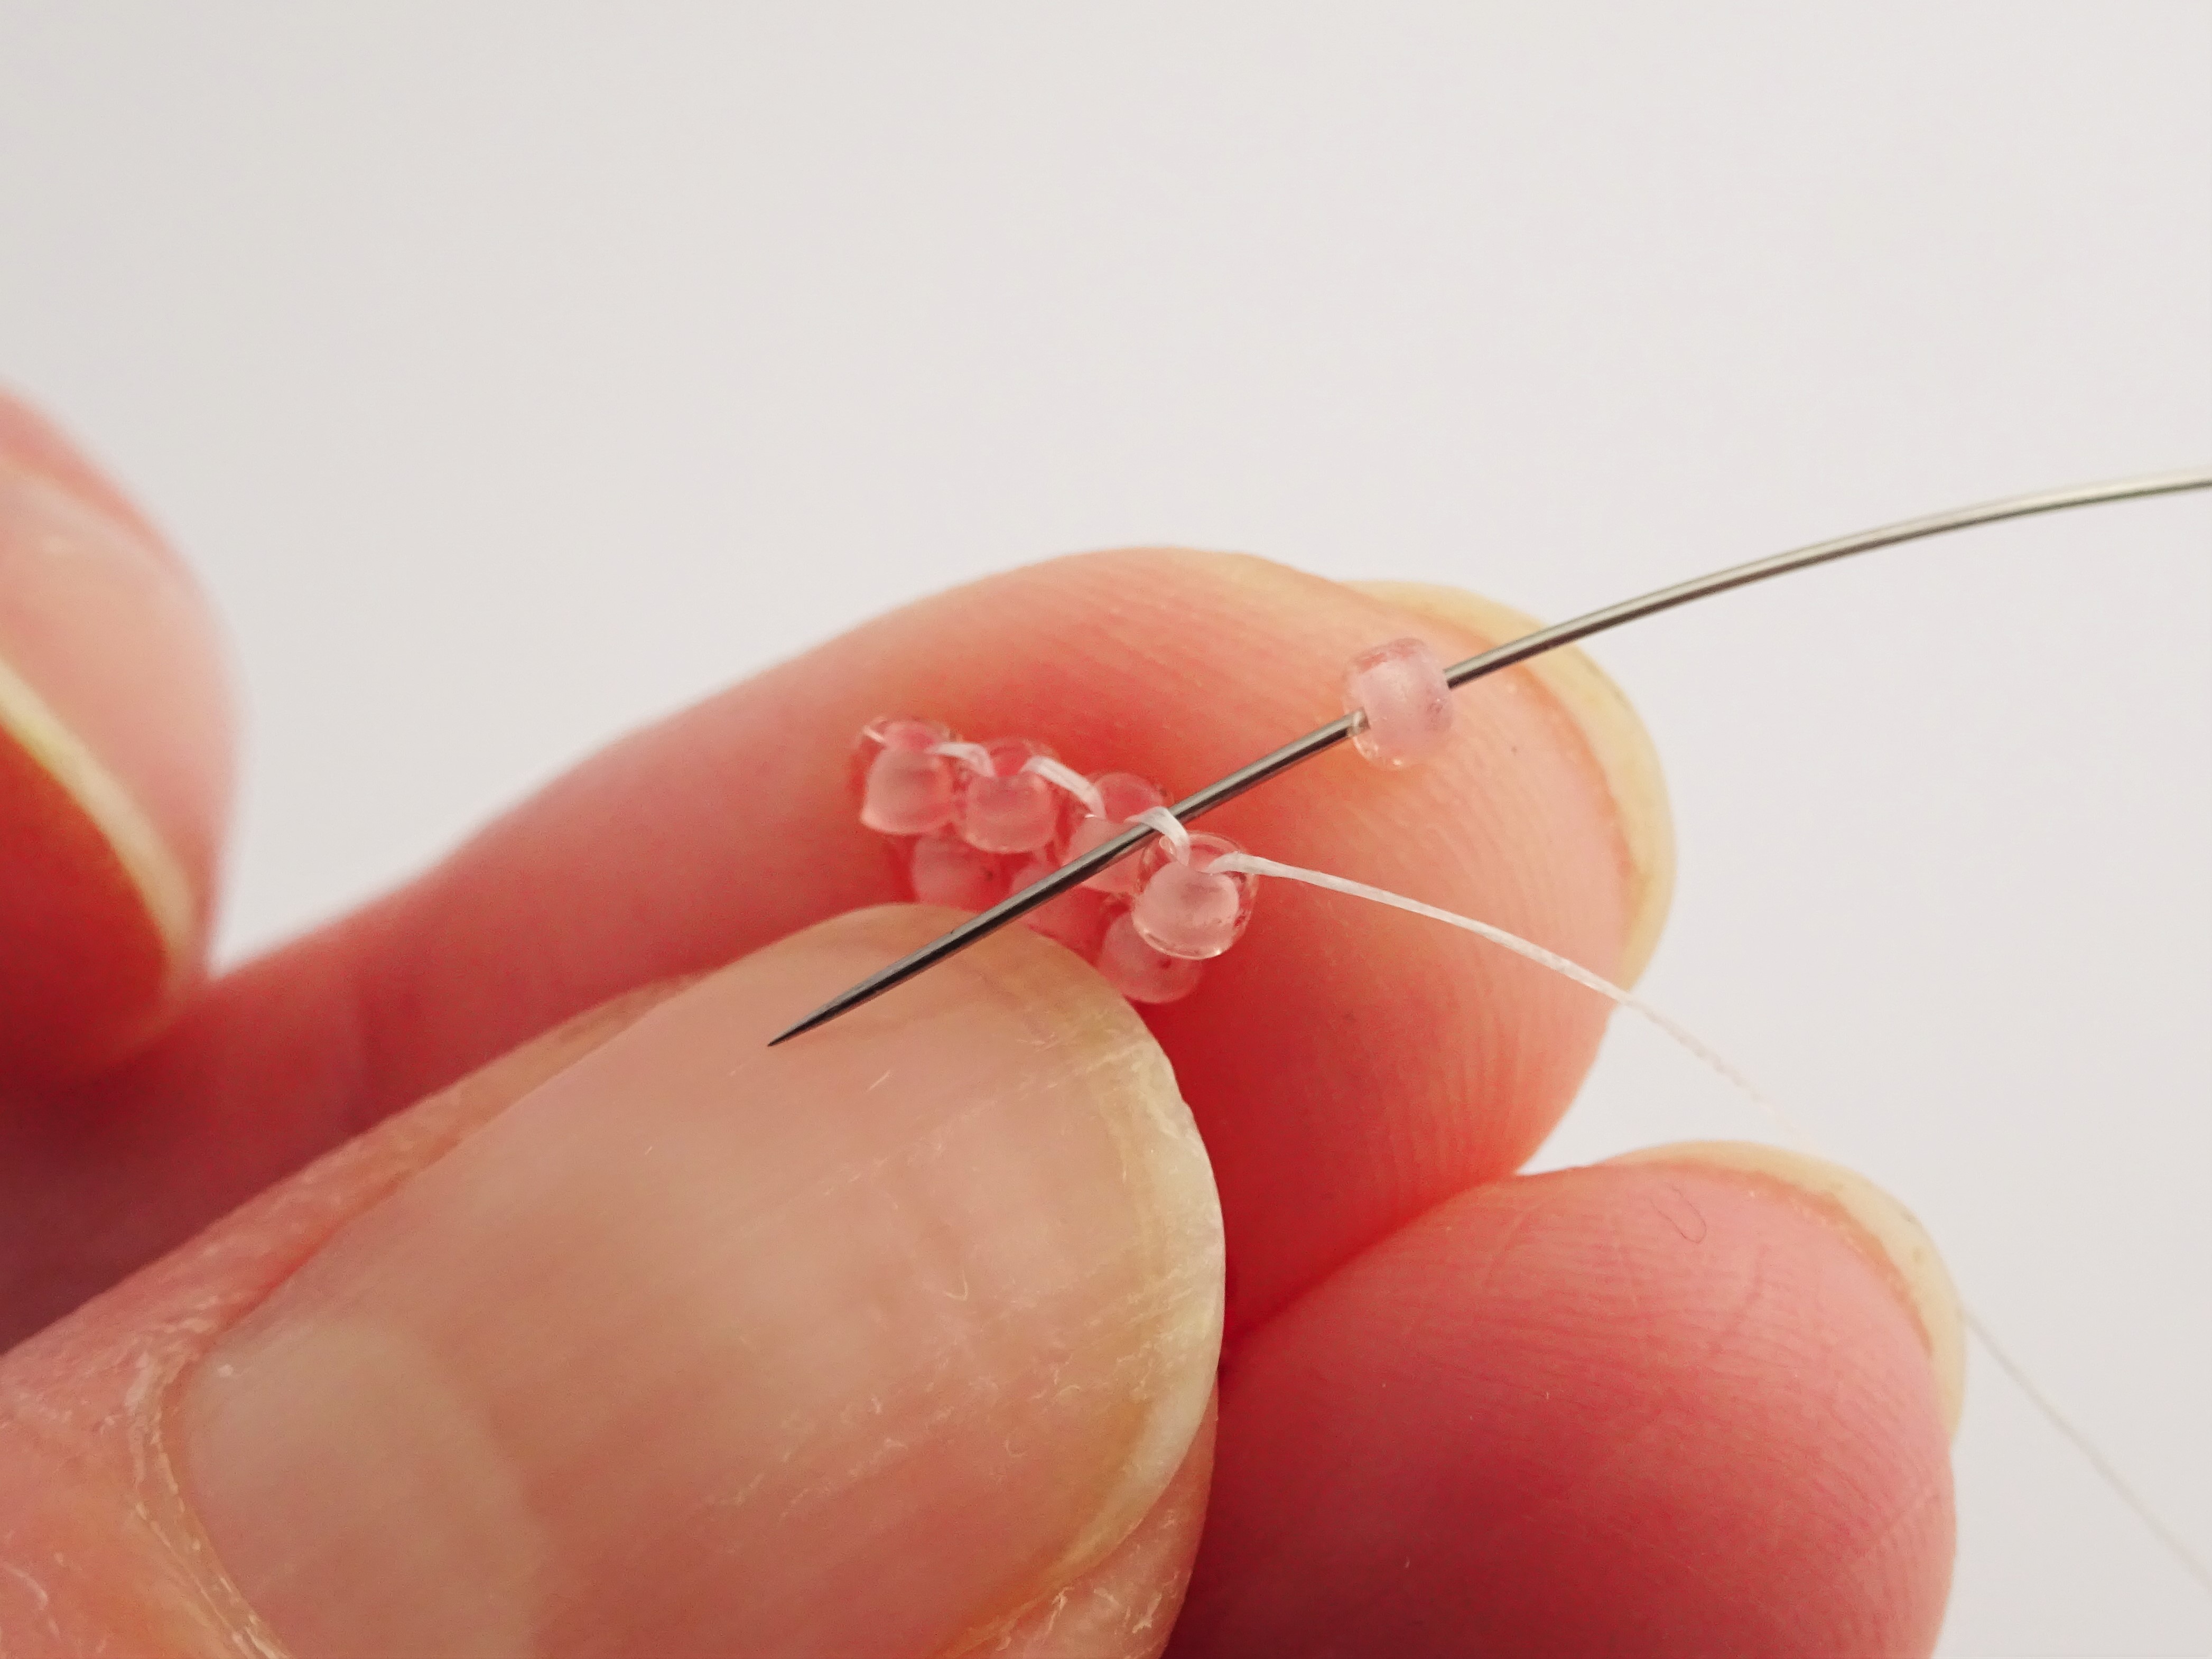
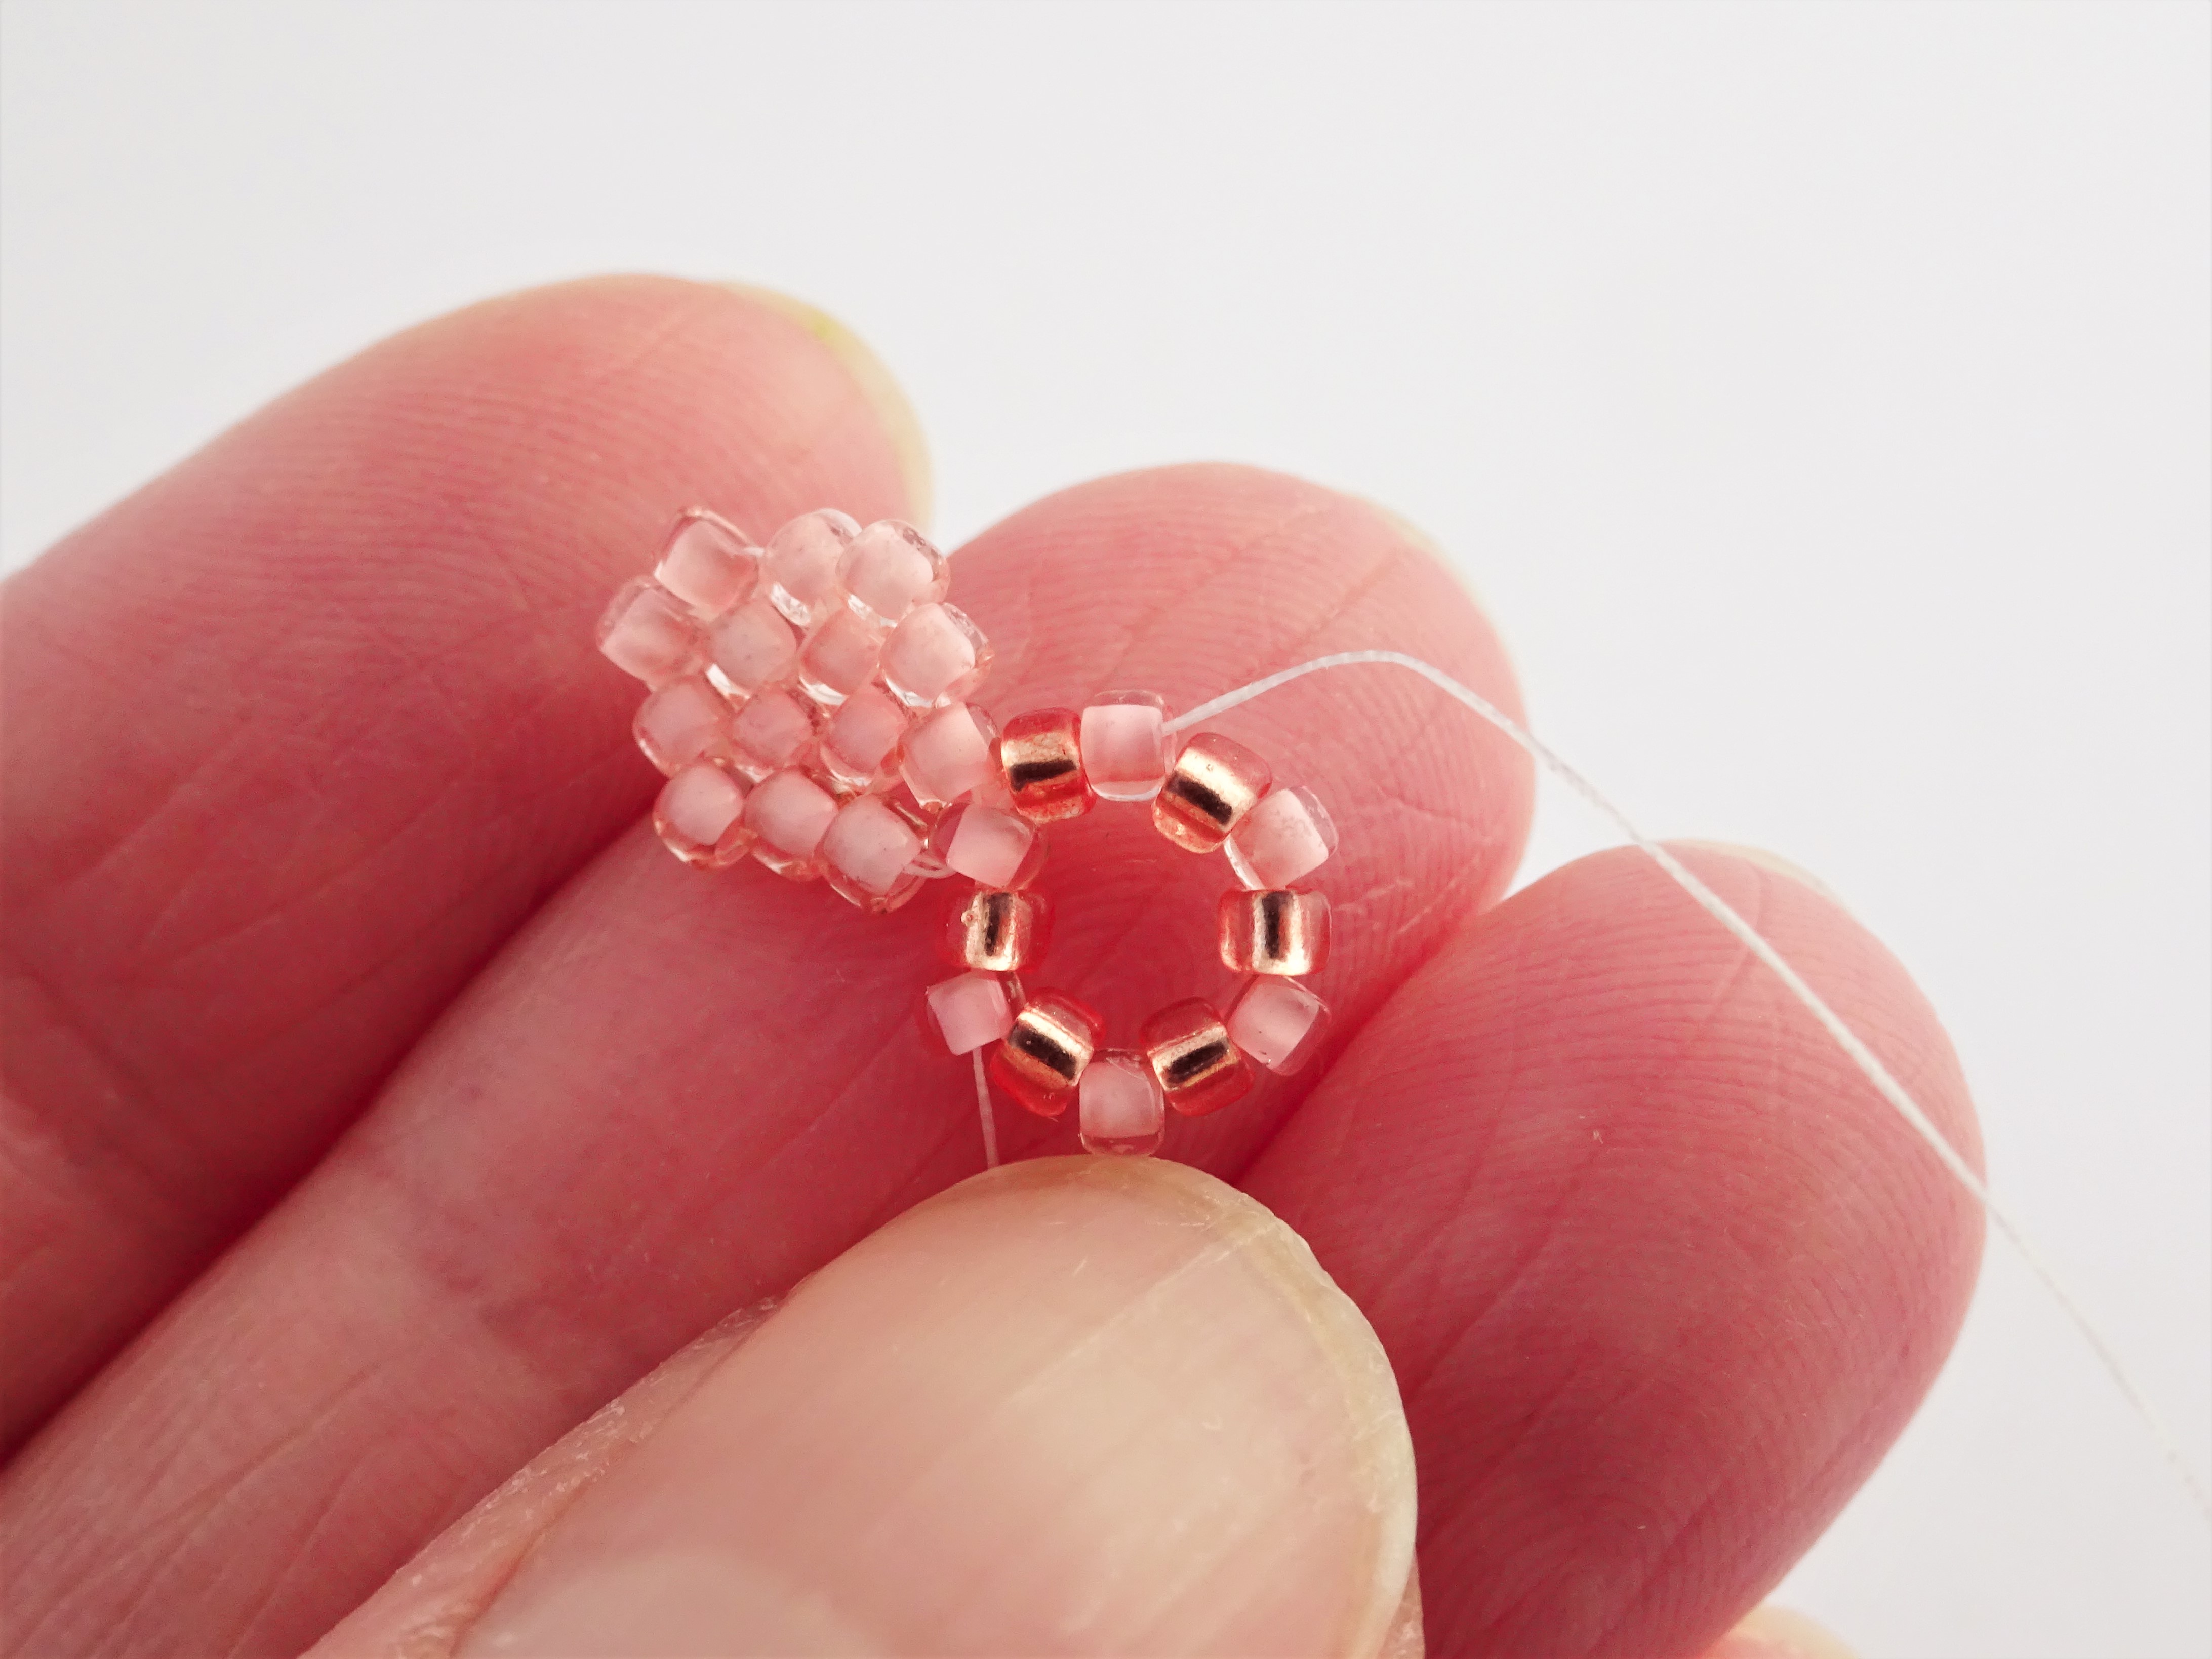
1) Pick up 6 of each colour bead, alternating the colours, and tie a knot to hold the beads in a circle.
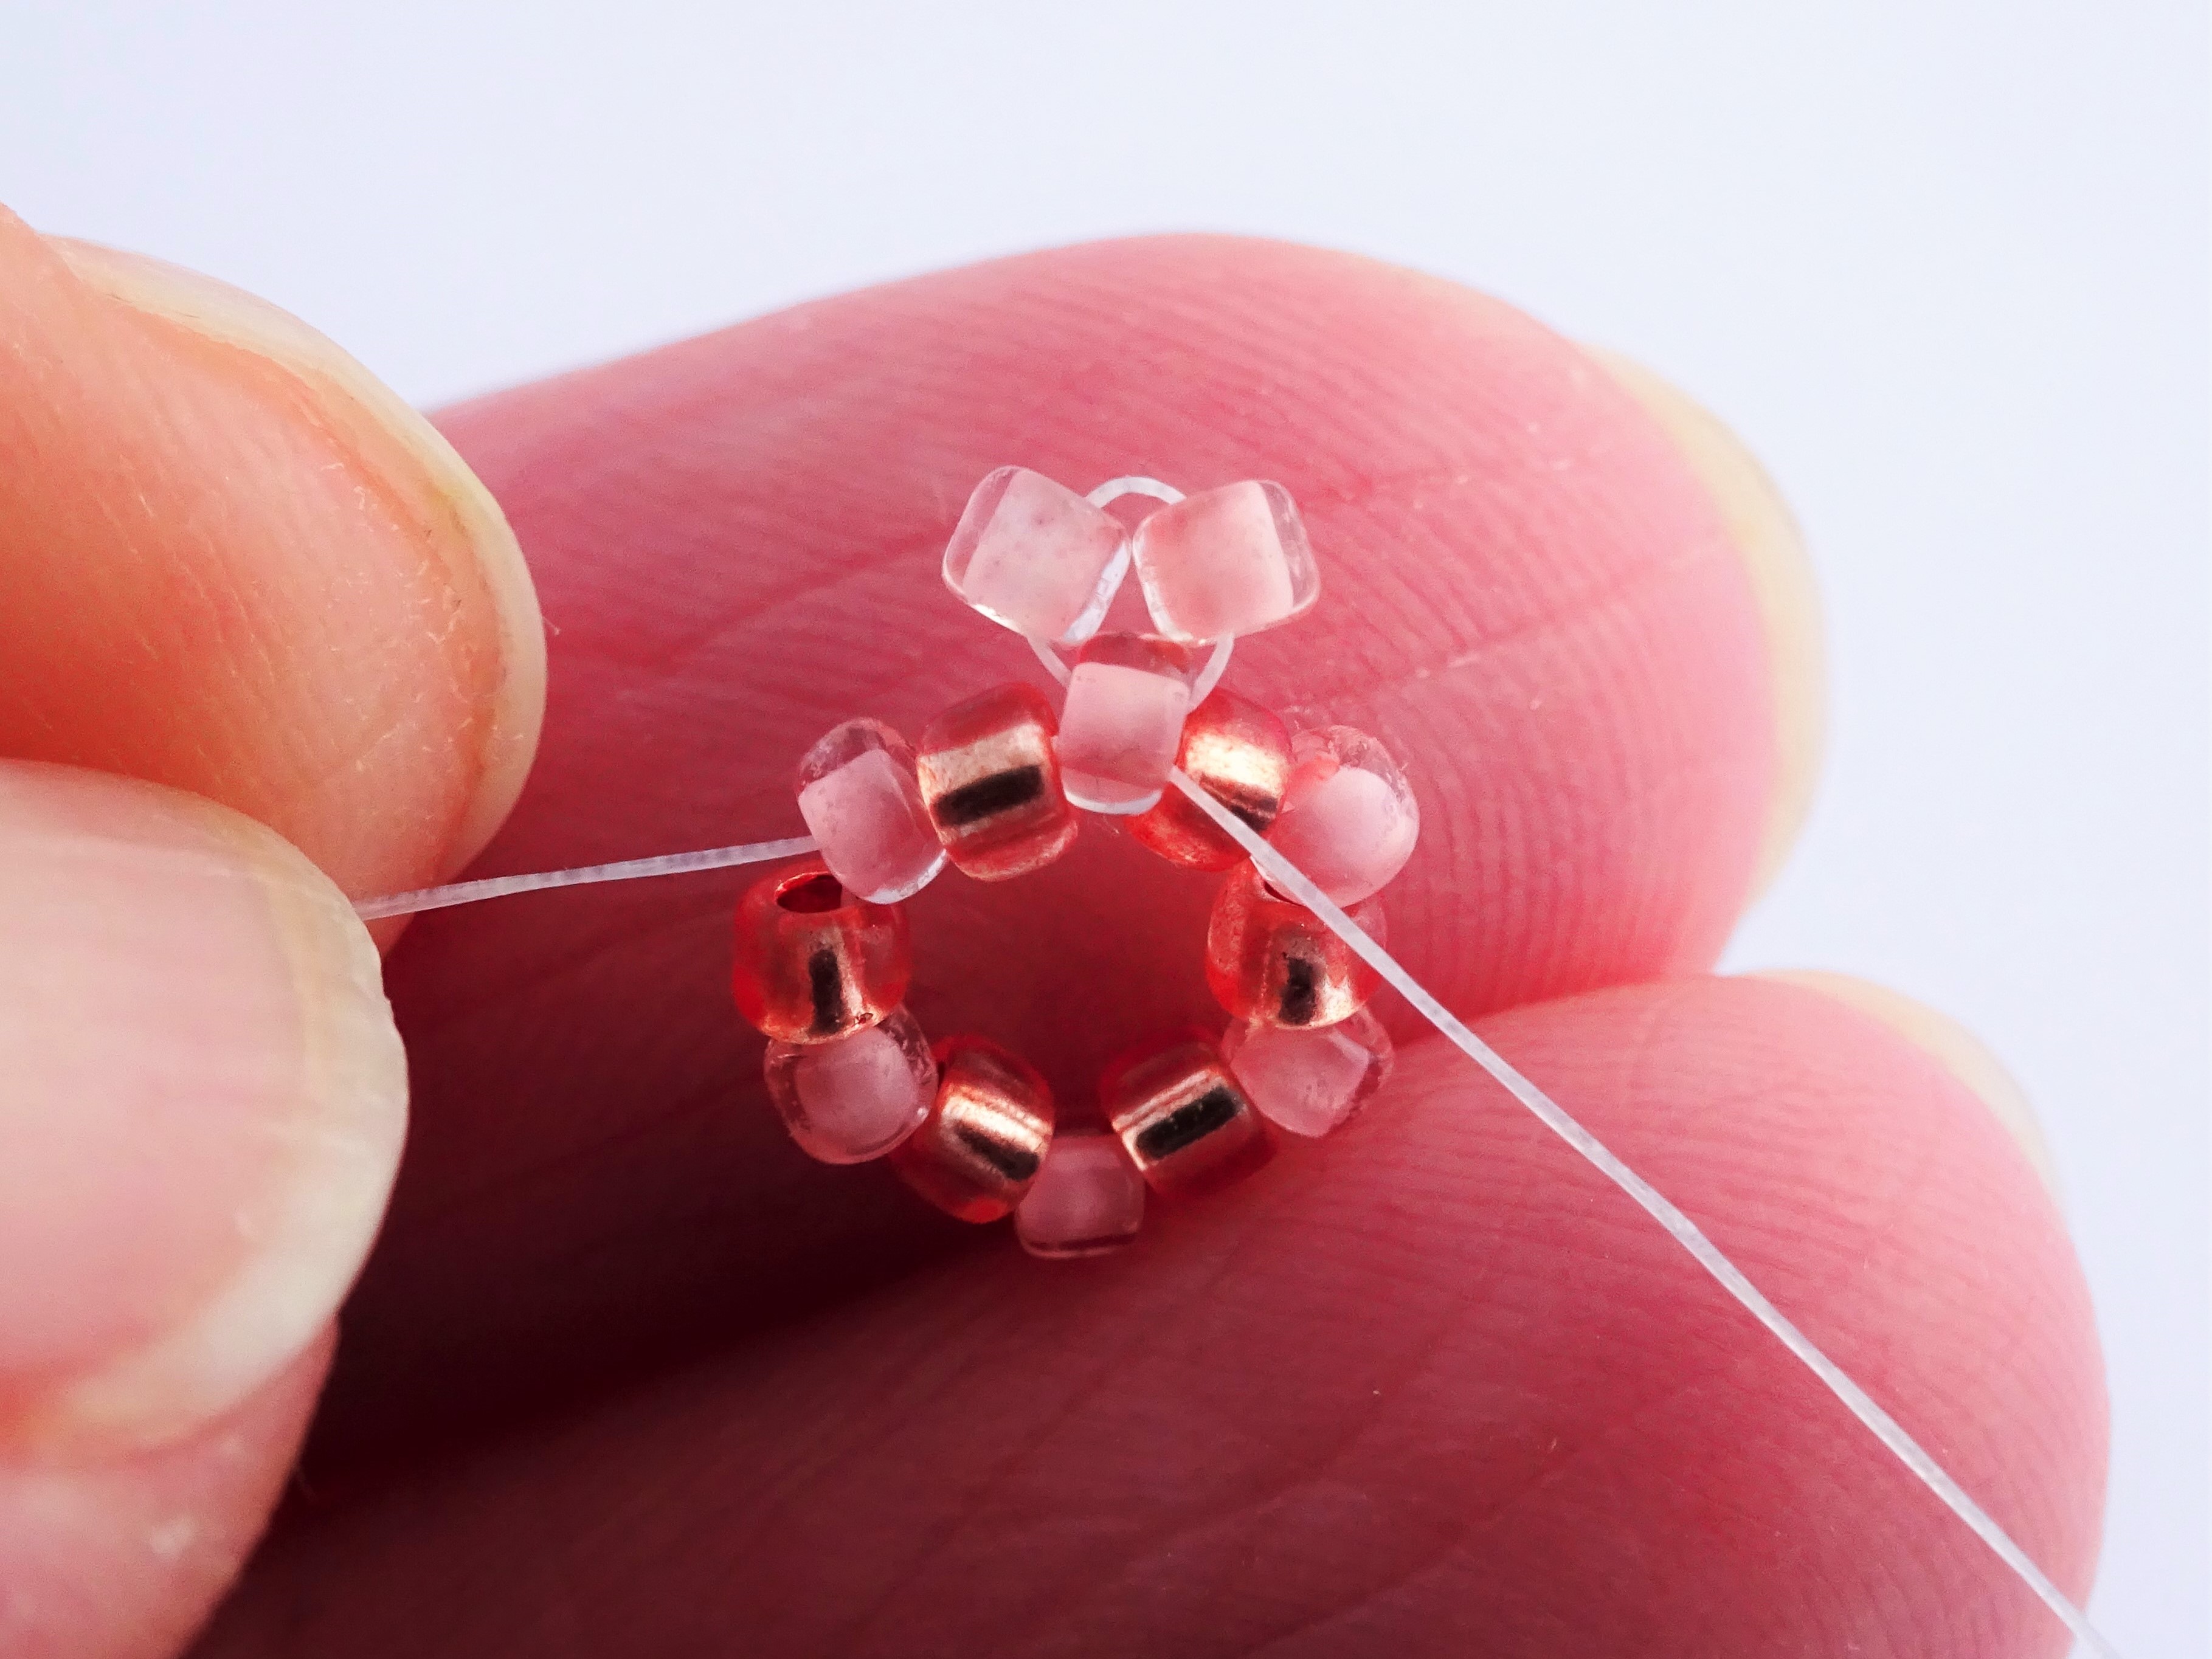
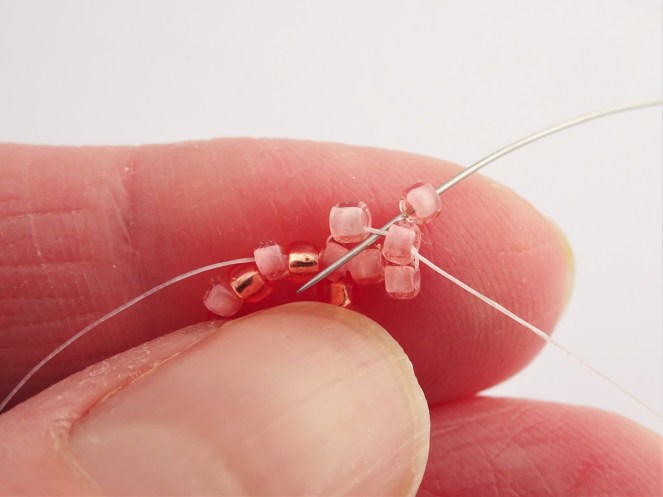
2) Move the needle so the thread in exiting out of one of the pale pink beads and pink up two more beads. Take the needle through the original pink bead again. This will make the new beads sit on top of the circle. This is the start of a petal.
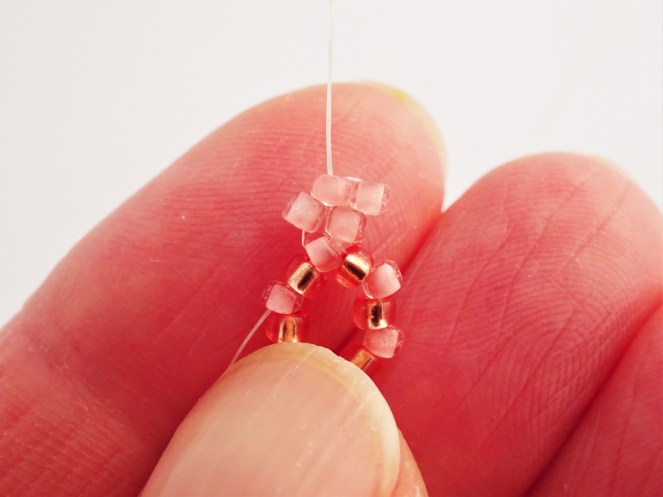
3) Take the needle up through the nearest new pink bead. This will allow you to add another layer of beading.

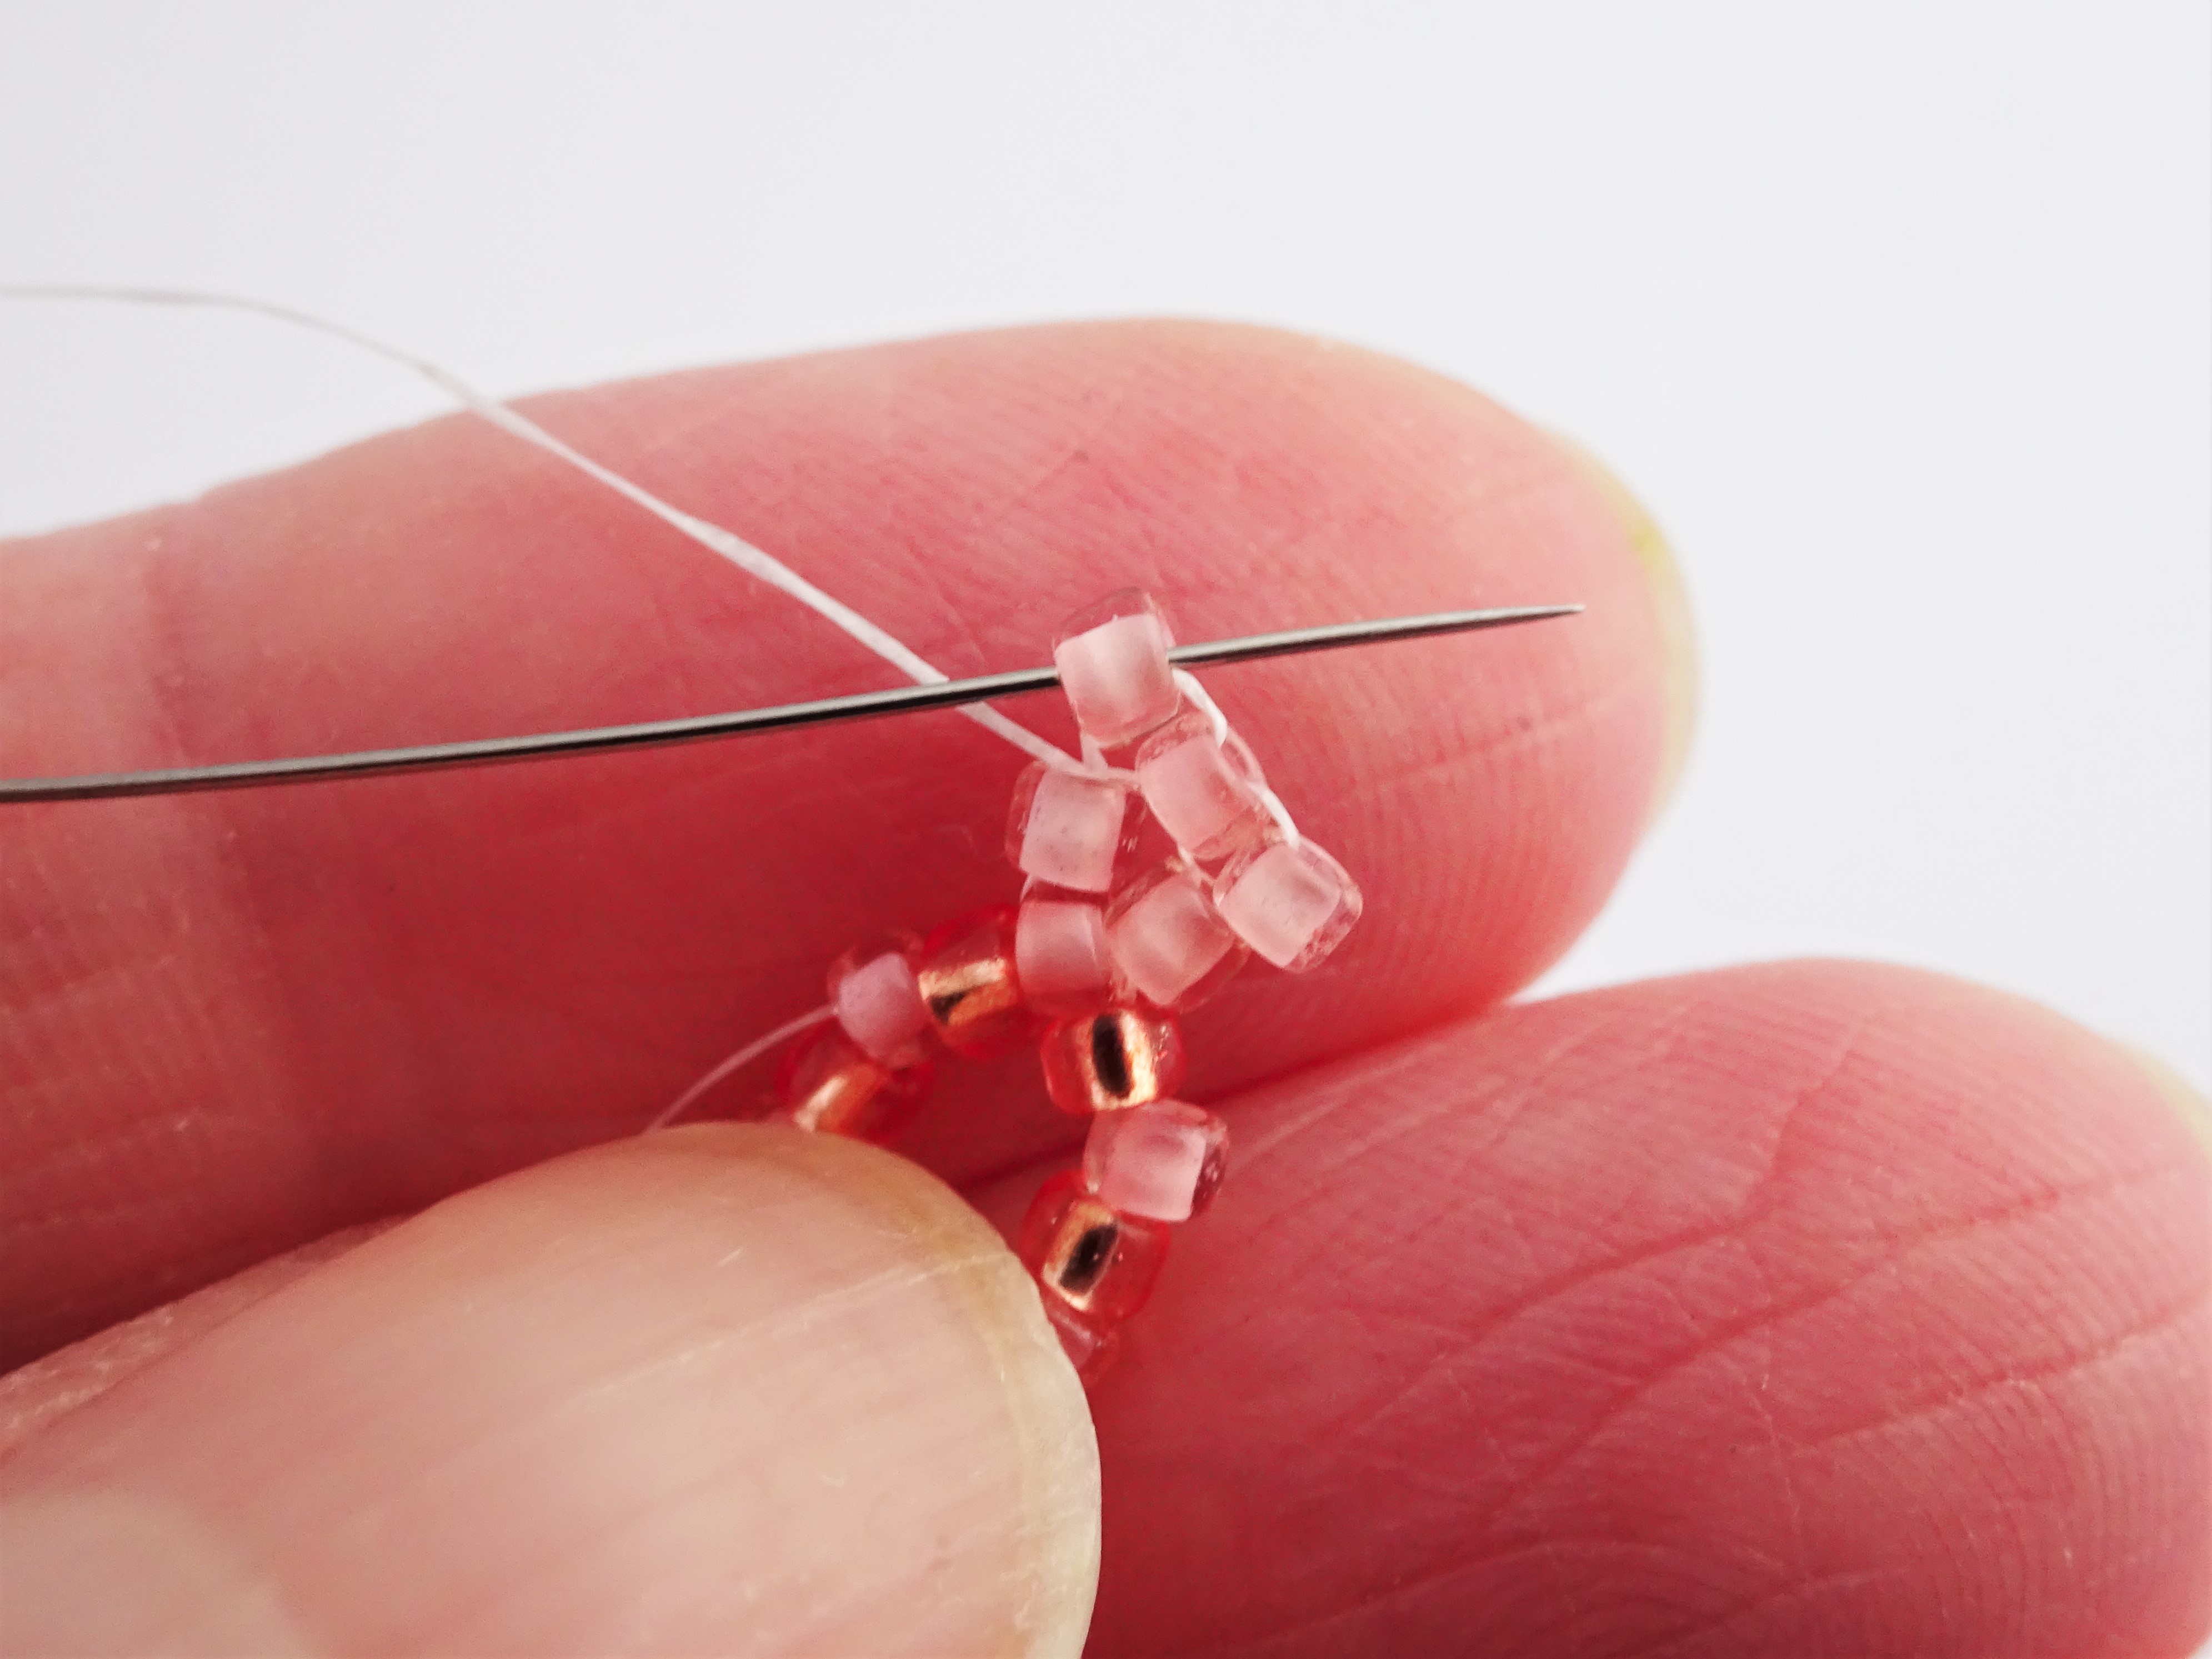
4) Pick up two more pink beads and take the needle under the thread that is bridging the two beads added in step 2.
5) Pull the thread through and take the needle up into the bead sitting directly above it.
6) Pick up another bead and take the needle under the thread that is going up into the adjacent bead. There is no bridging thread here so this is another way to secure the bead.
7) Pull the thread through and take the needle up through this new bead.

8) Add two more beads as you did in steps 4 and 5. We are still increasing the width of the petal here.
Please note – I turn the beadwork with each new row so that I am always beading in the same direction.

9) Add one more bead by picking up a bead and securing the thread under the bridging thread below it.
10) Add the last bead in the row as you did in step 6 and 7.
11) We need to bring in the beadwork now to shape the top of the petal. To do this pick up 1 bead to start the new row of beading. Secure it as you have done on the previous rows.
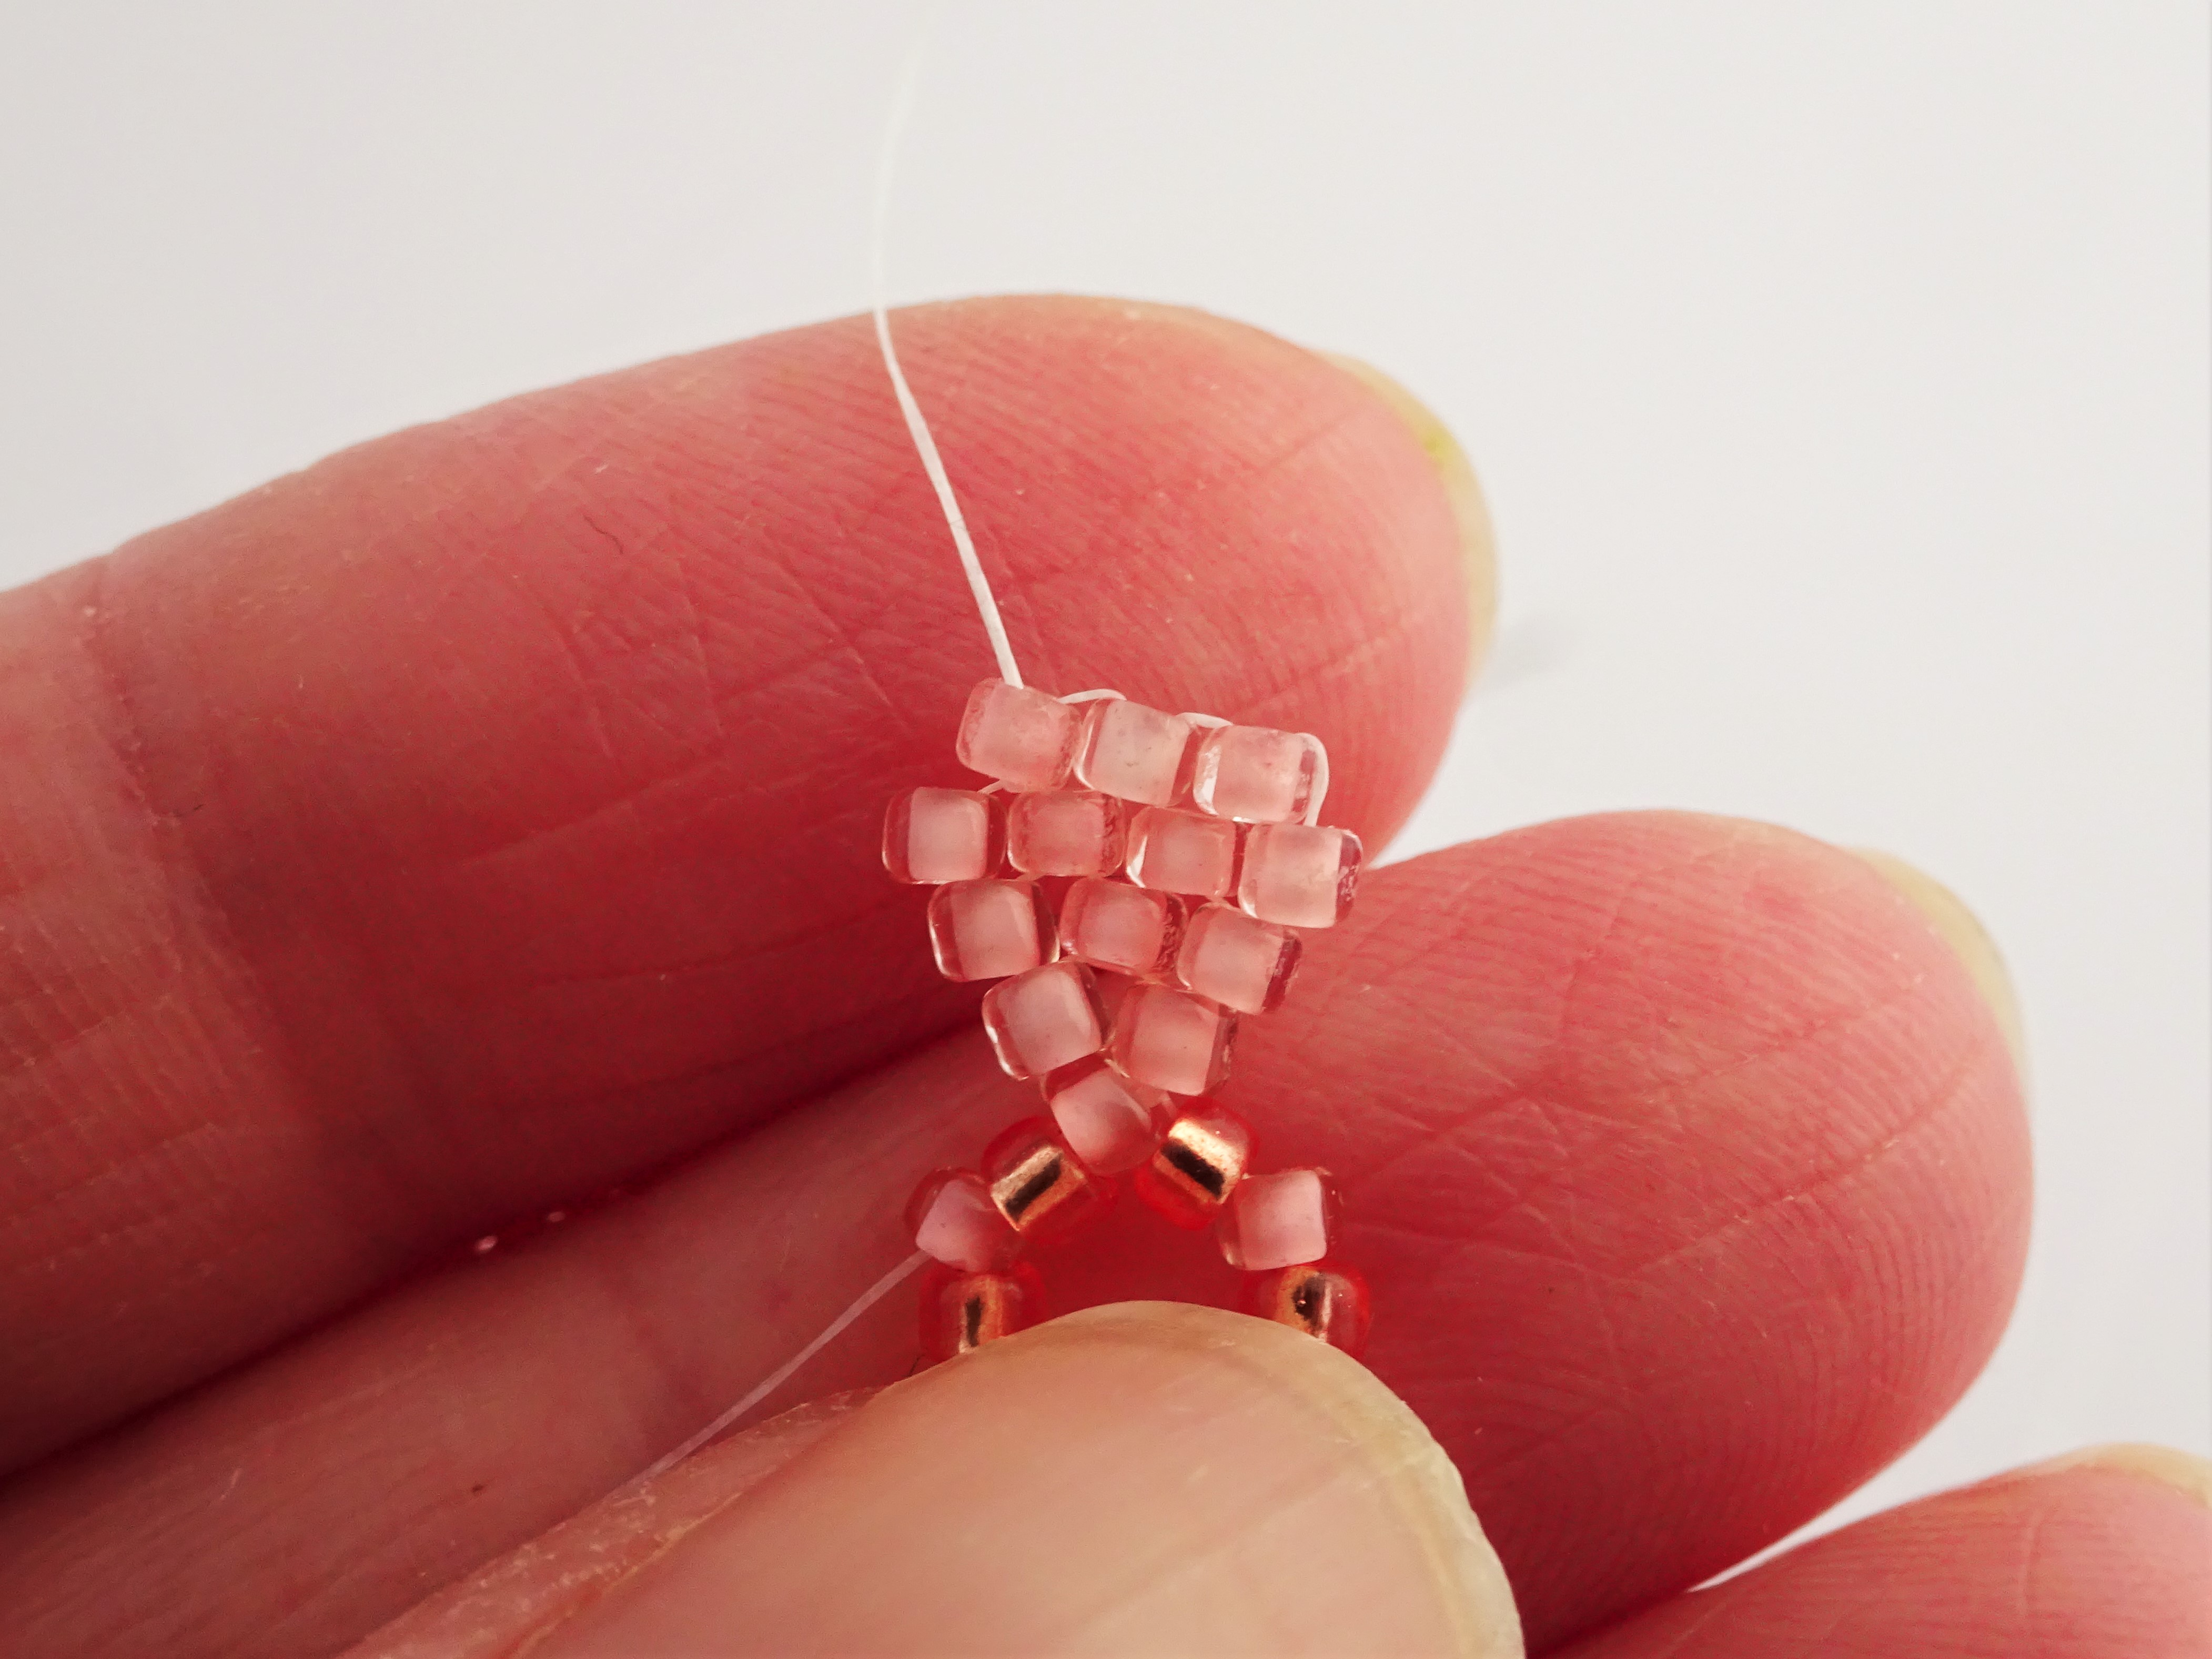
12) Add two more beads, one at a time, as you did in step 11.
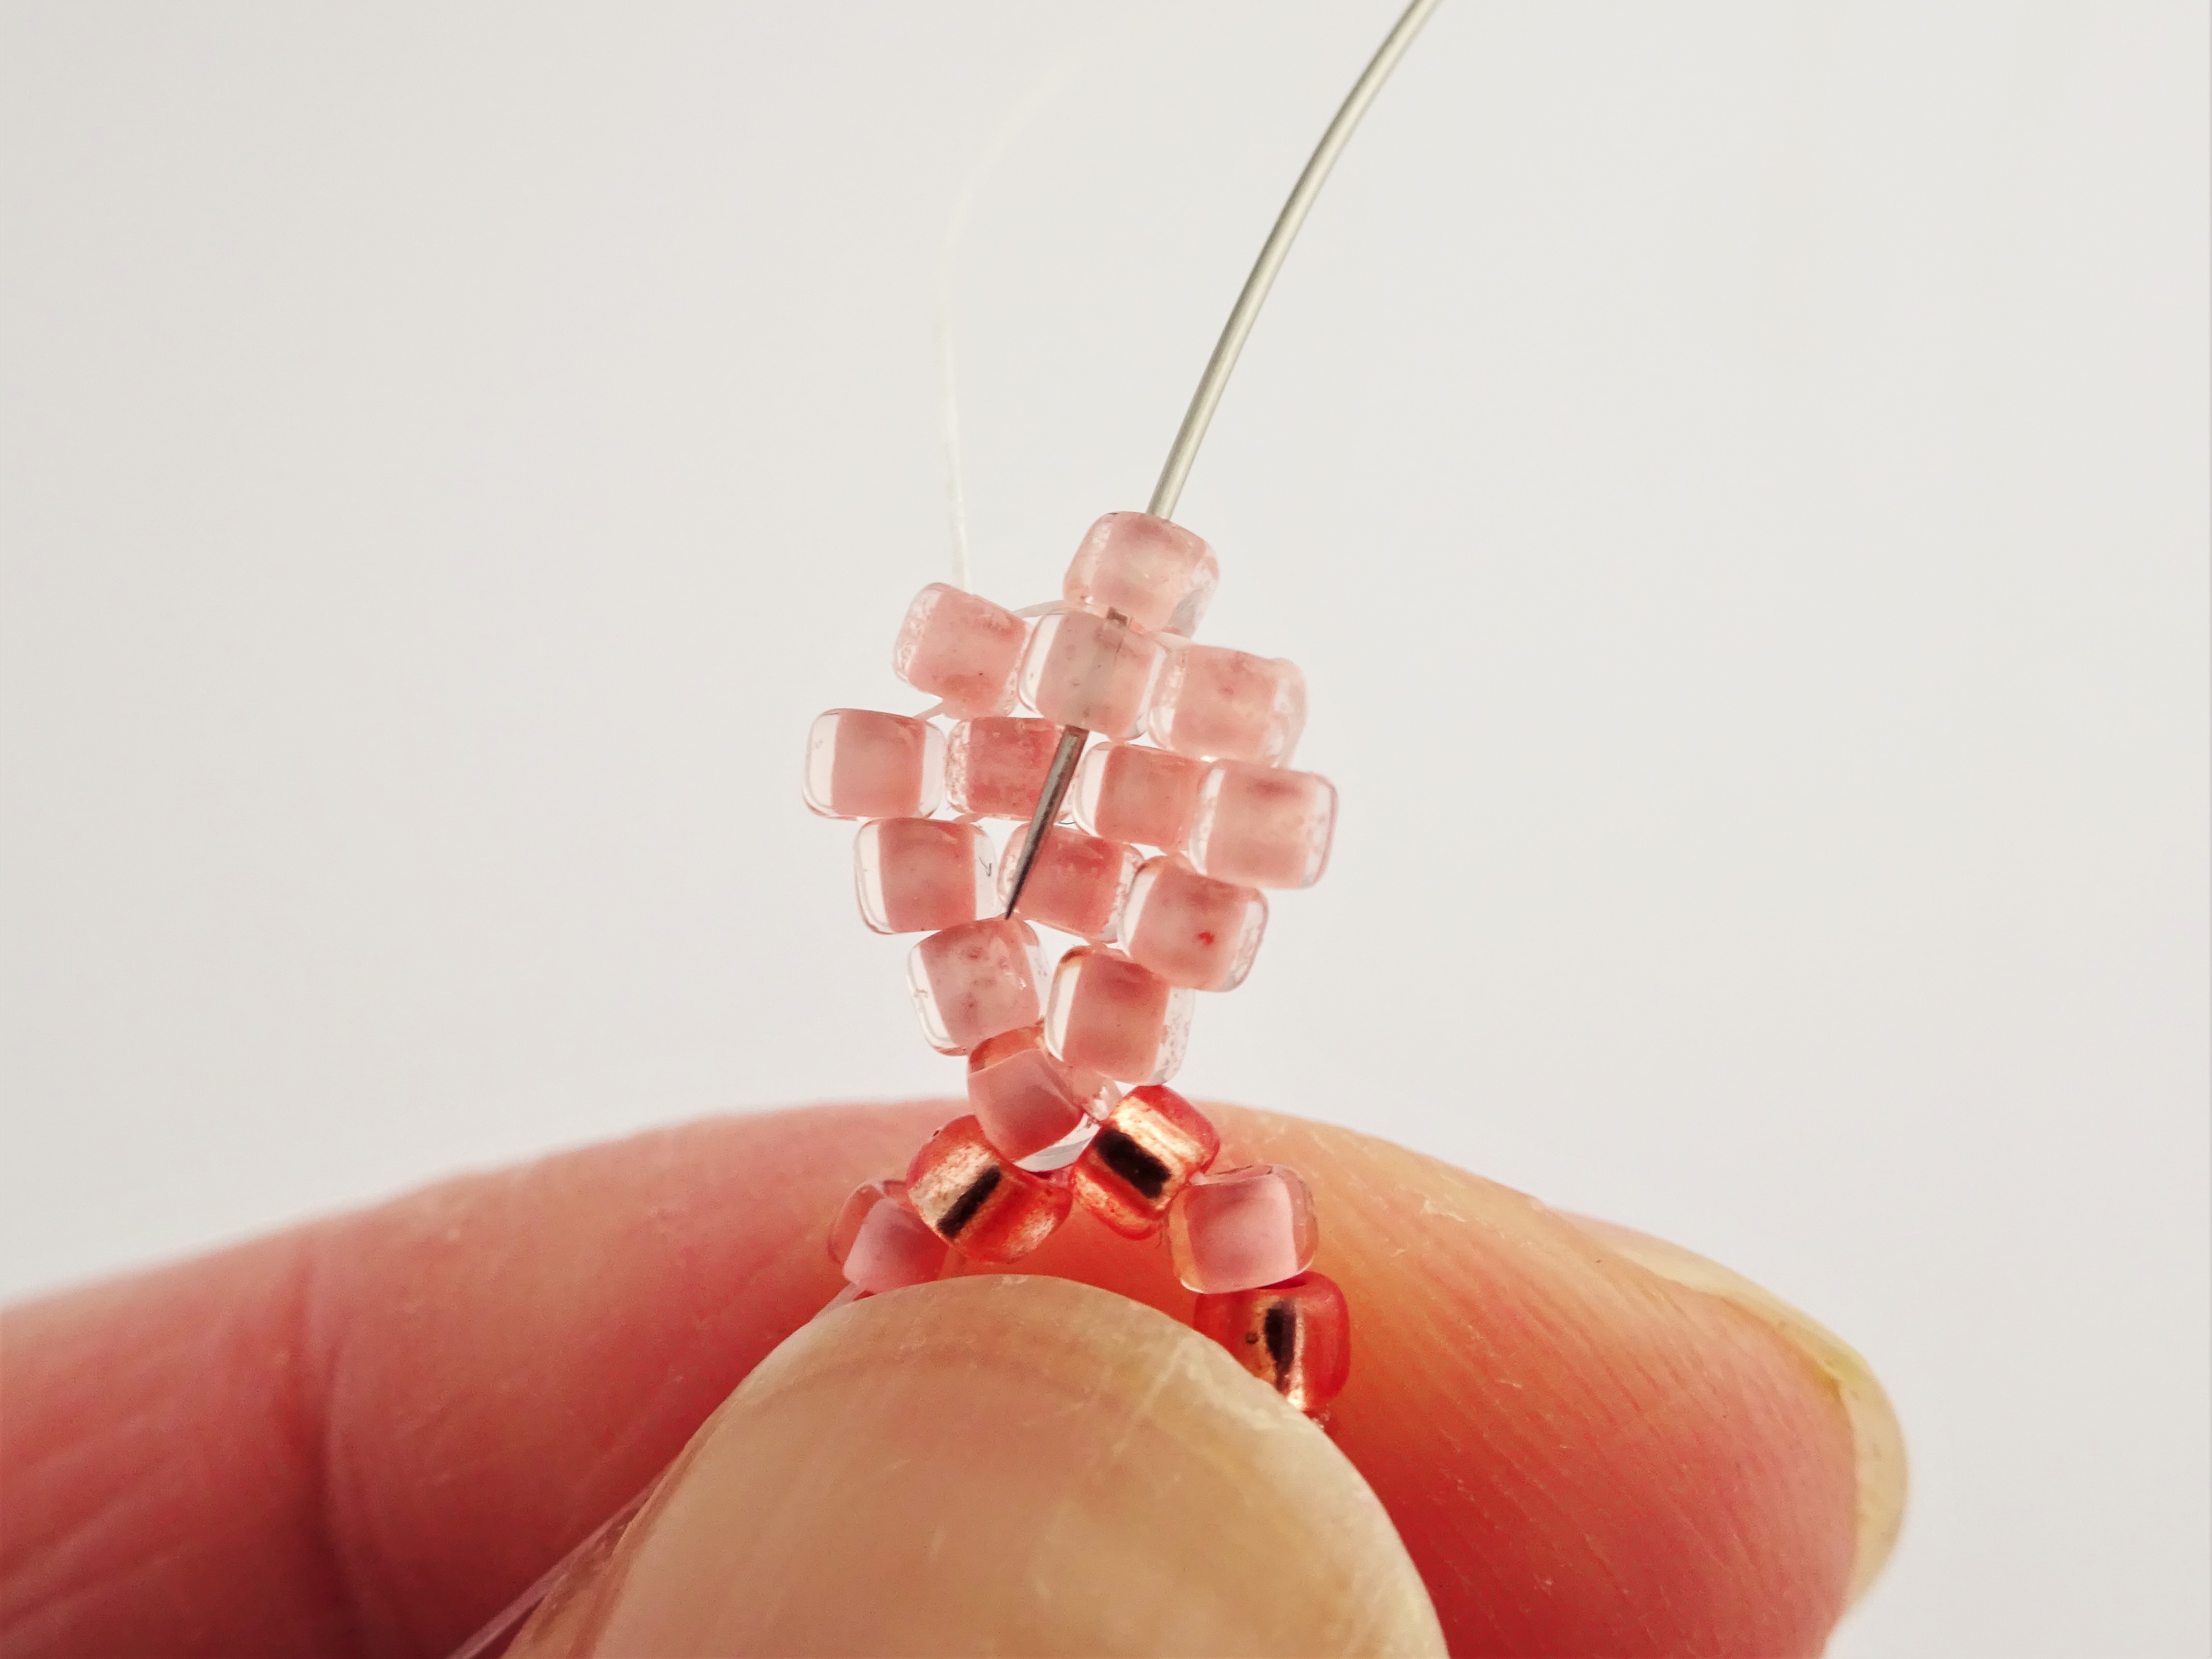
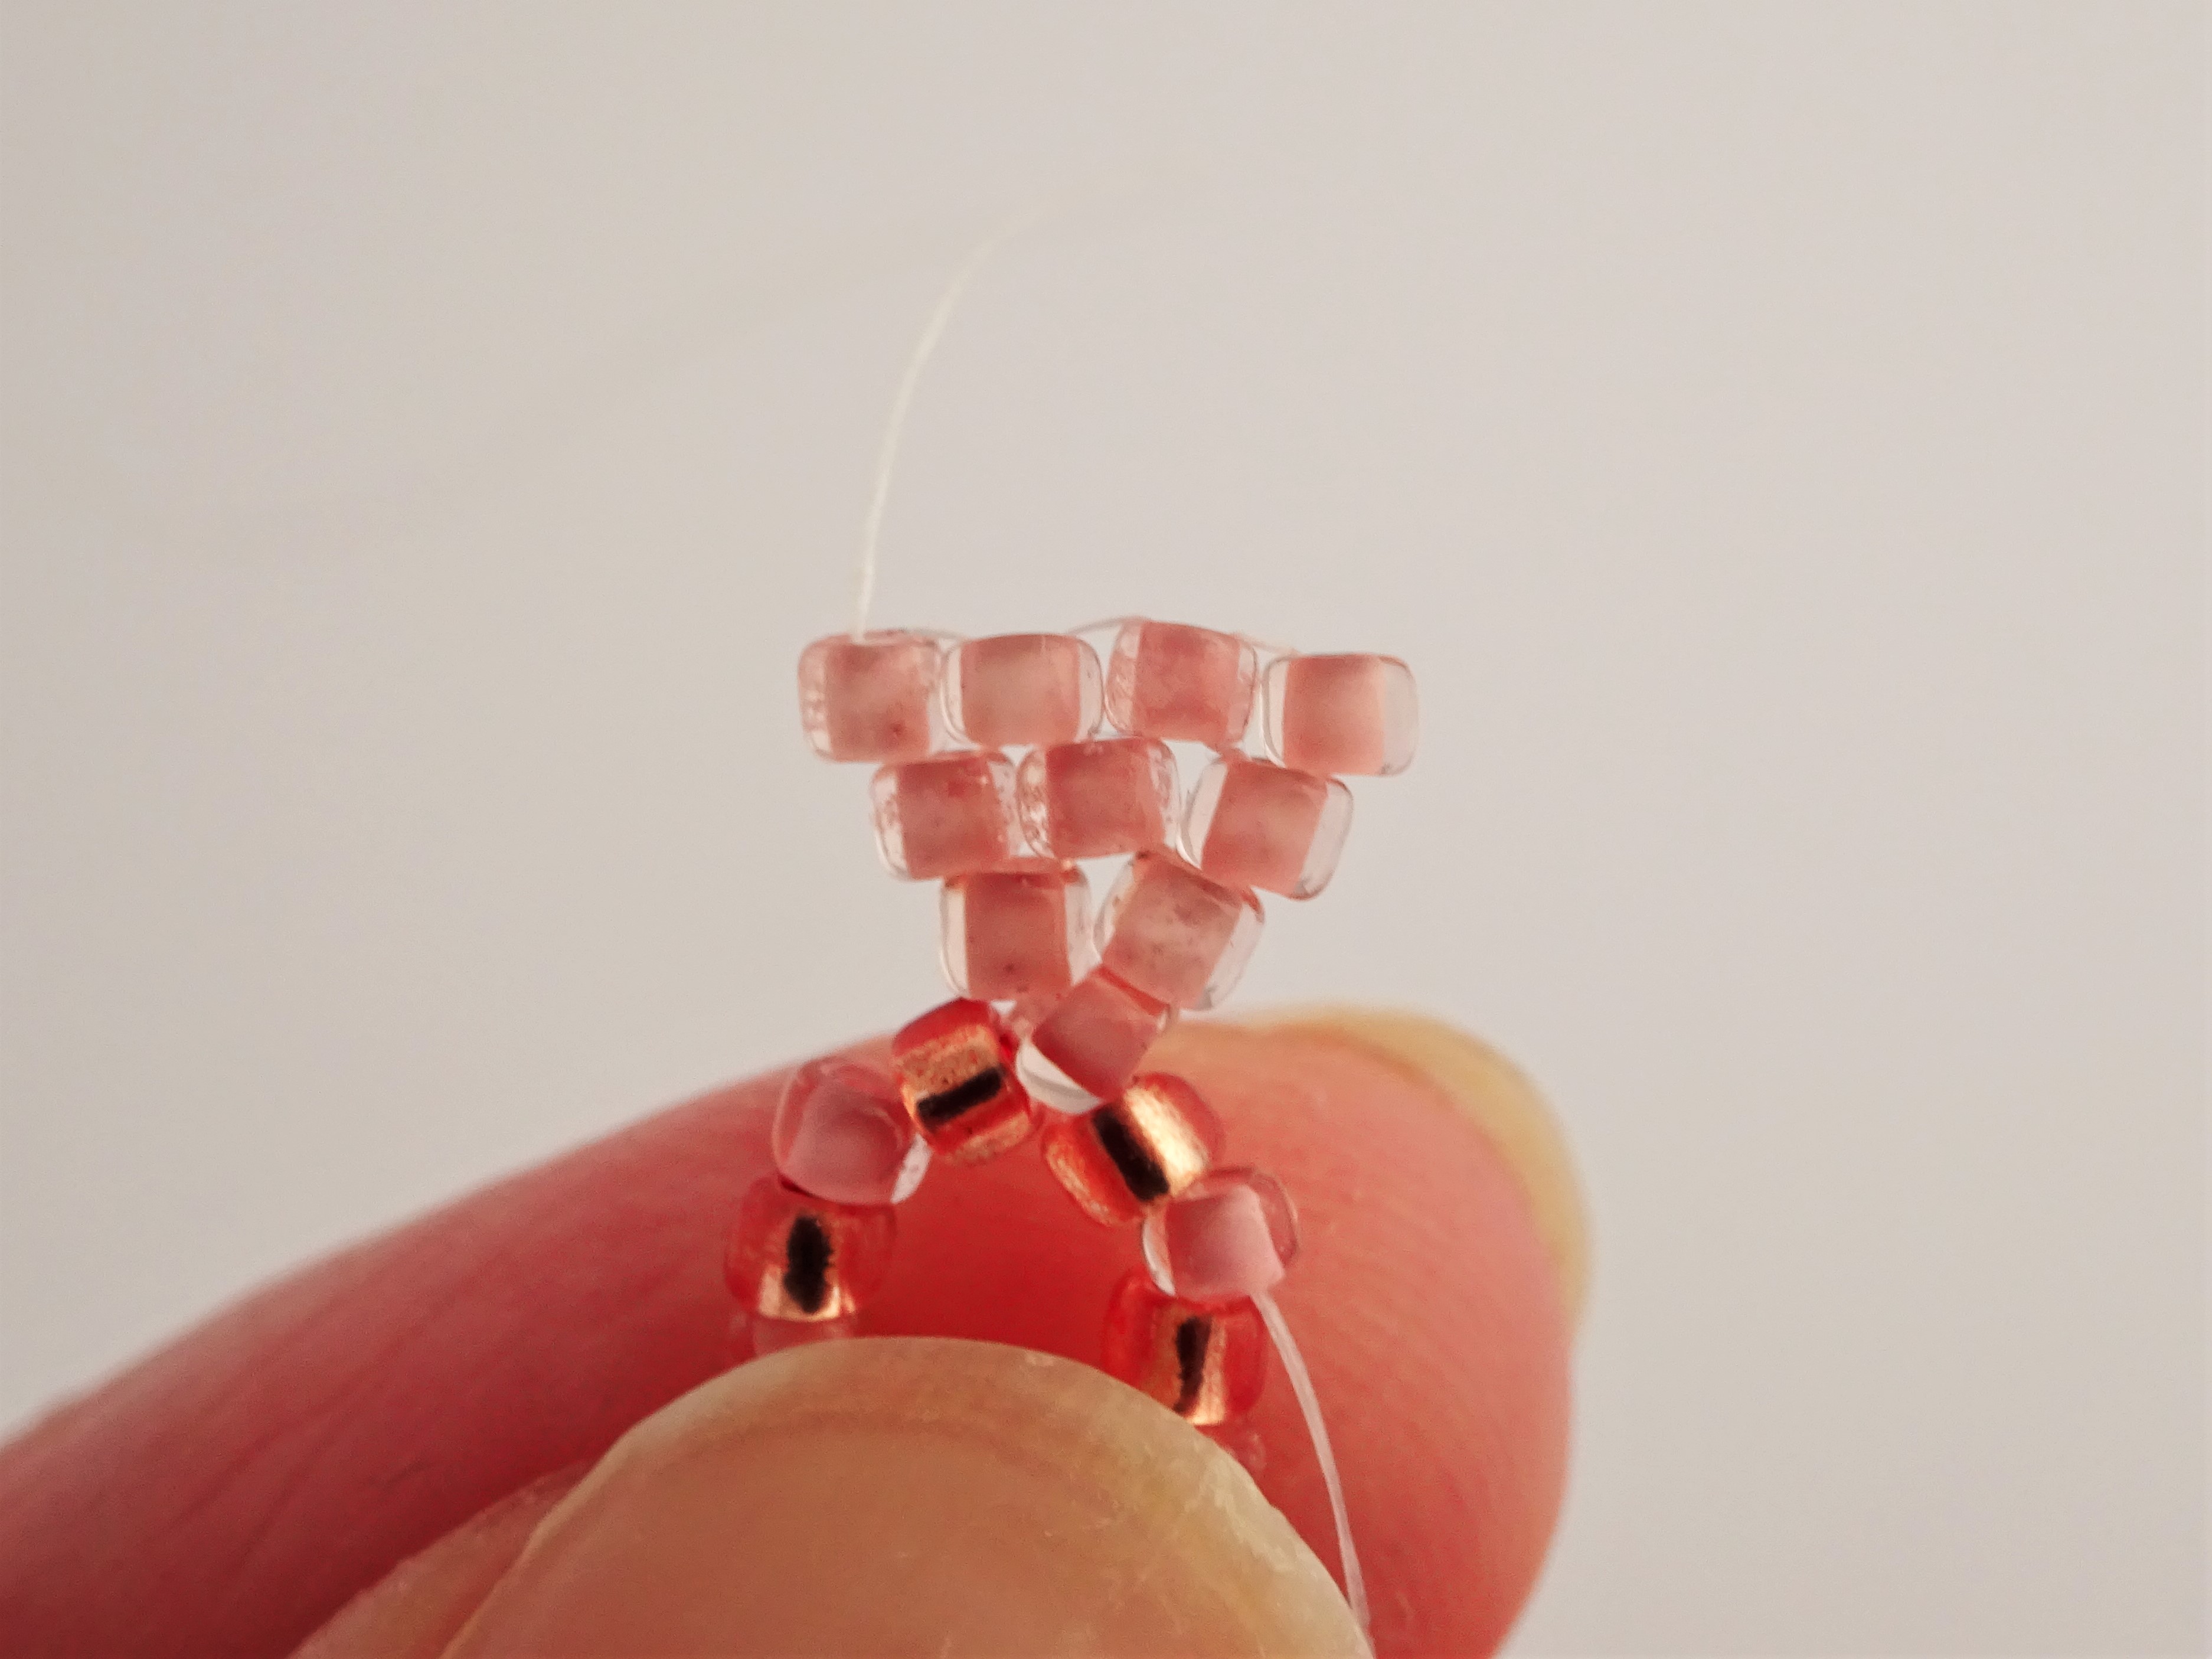
13) To add the shape at the top of the petal pick up 1 bead and take the needle down into the the middle bead on the row below.
14) Pull the thread through and take the needle up through the third bead along.
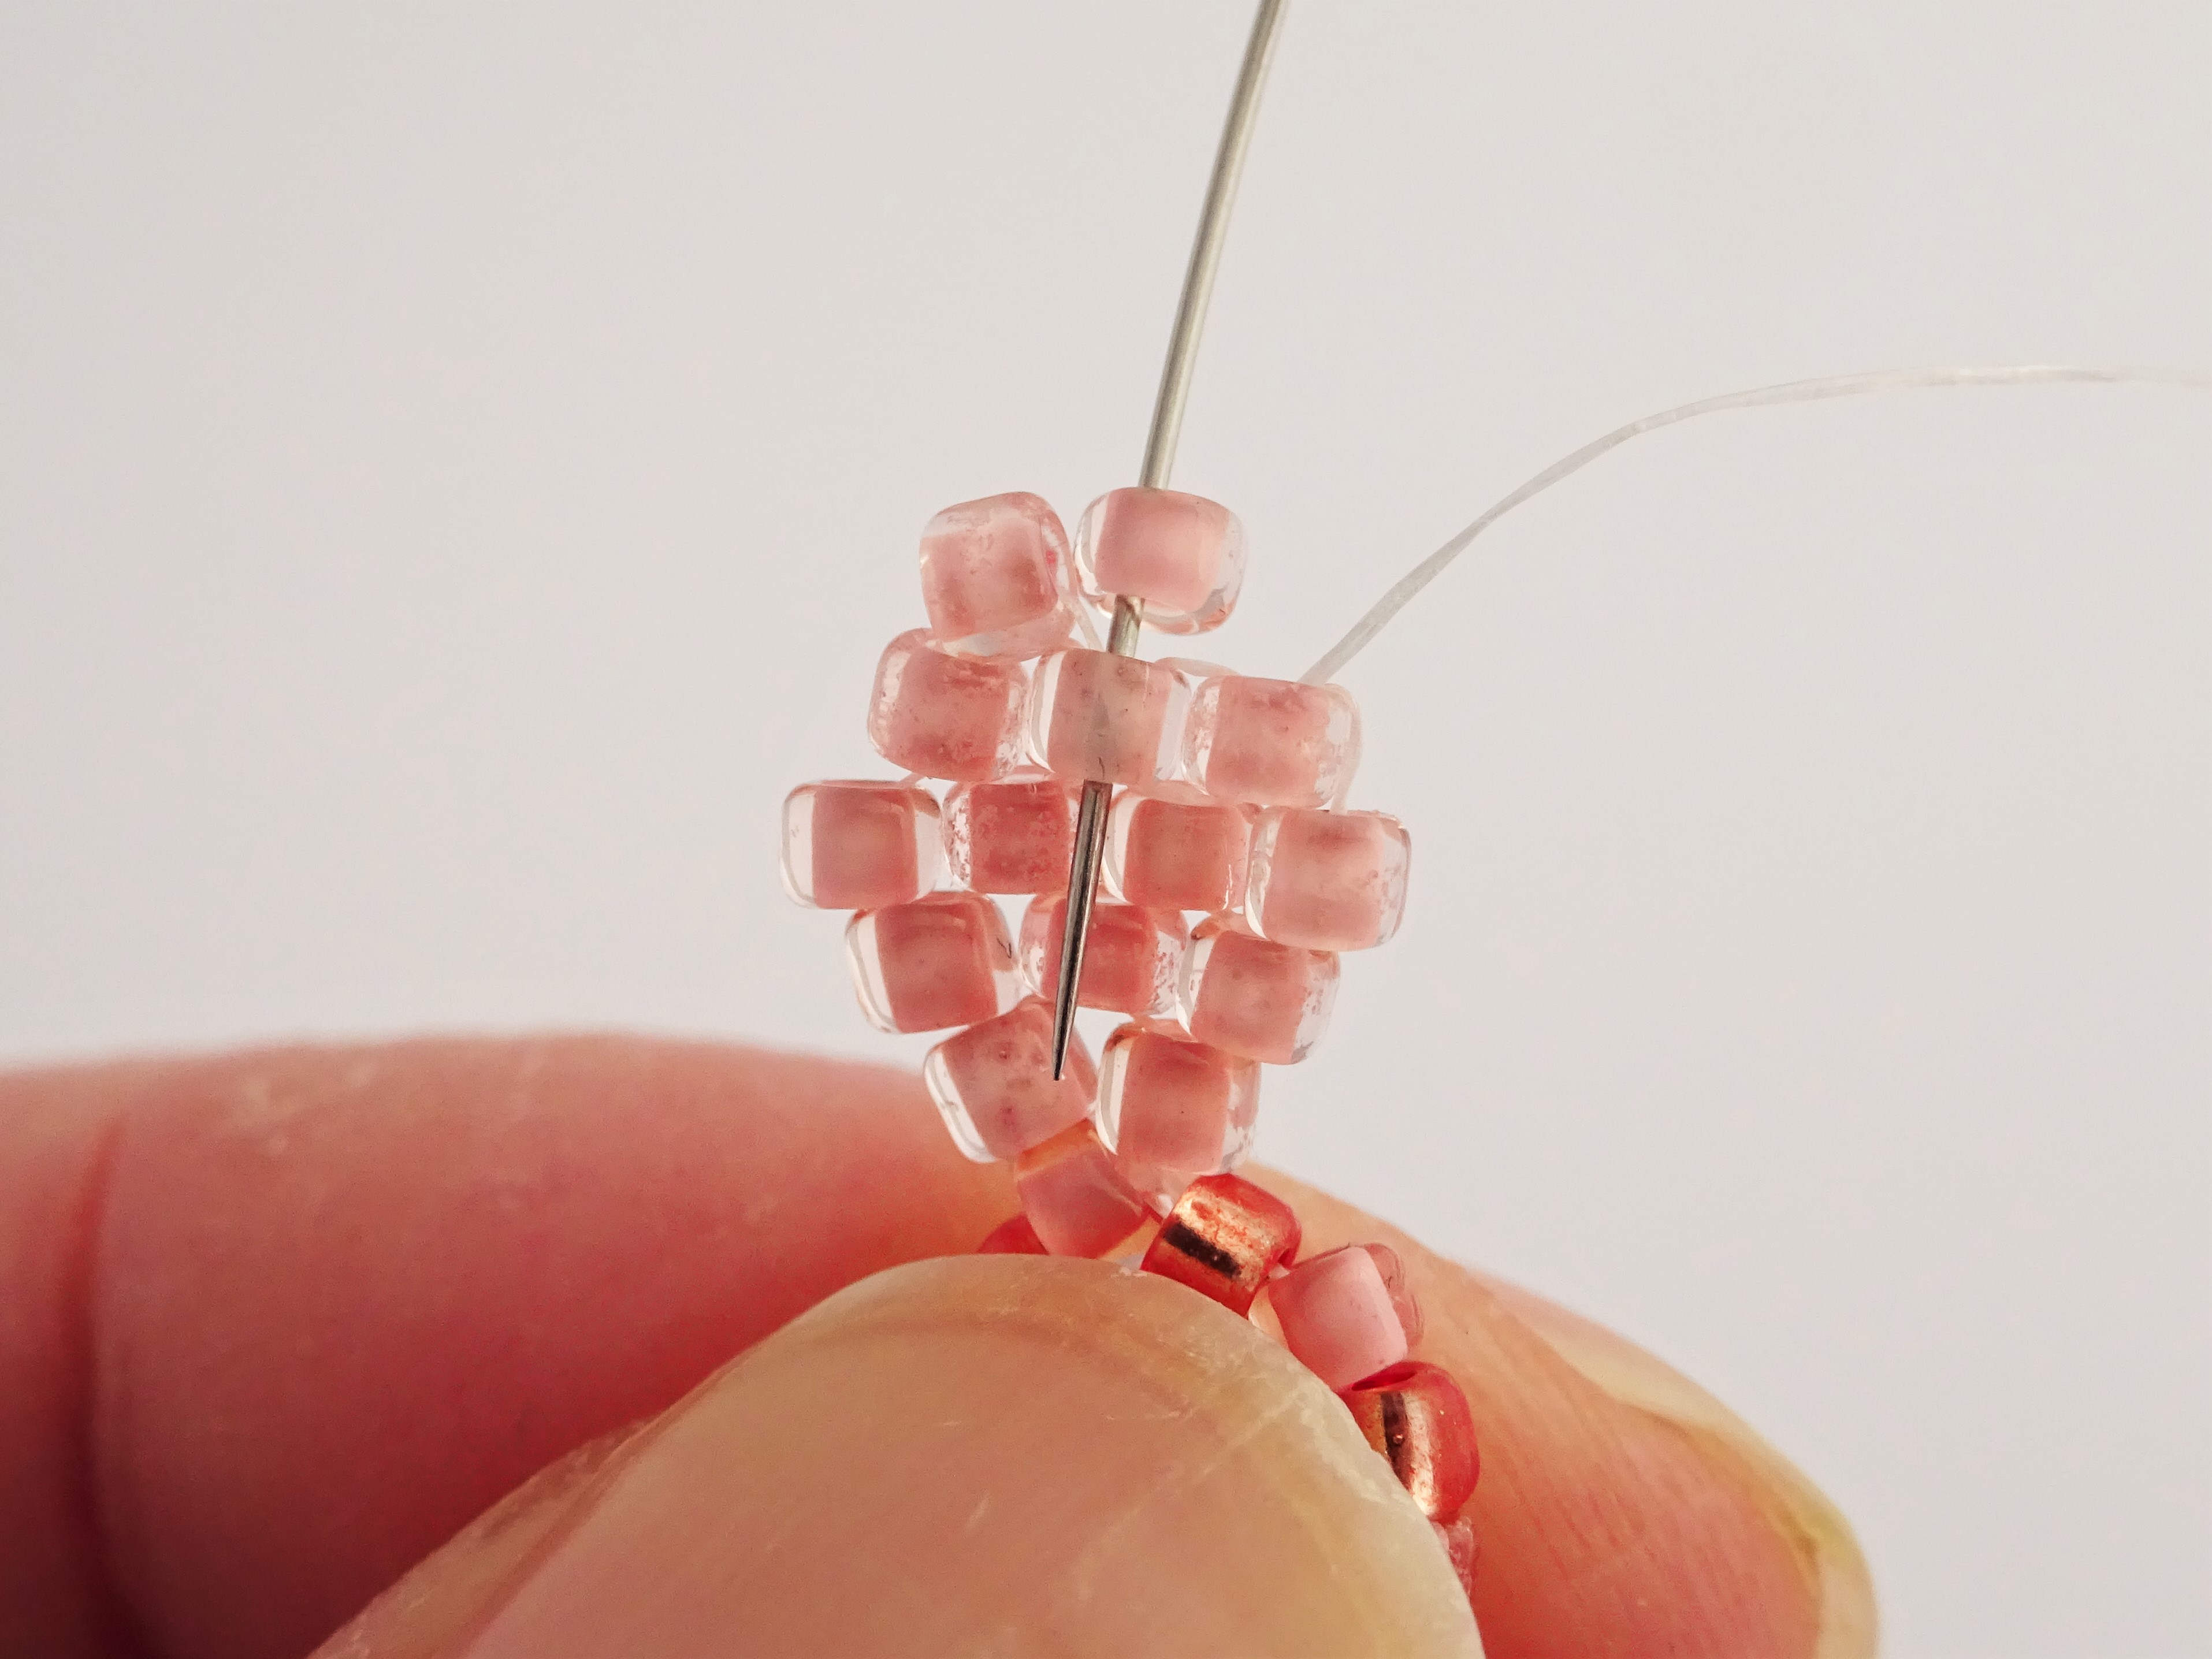
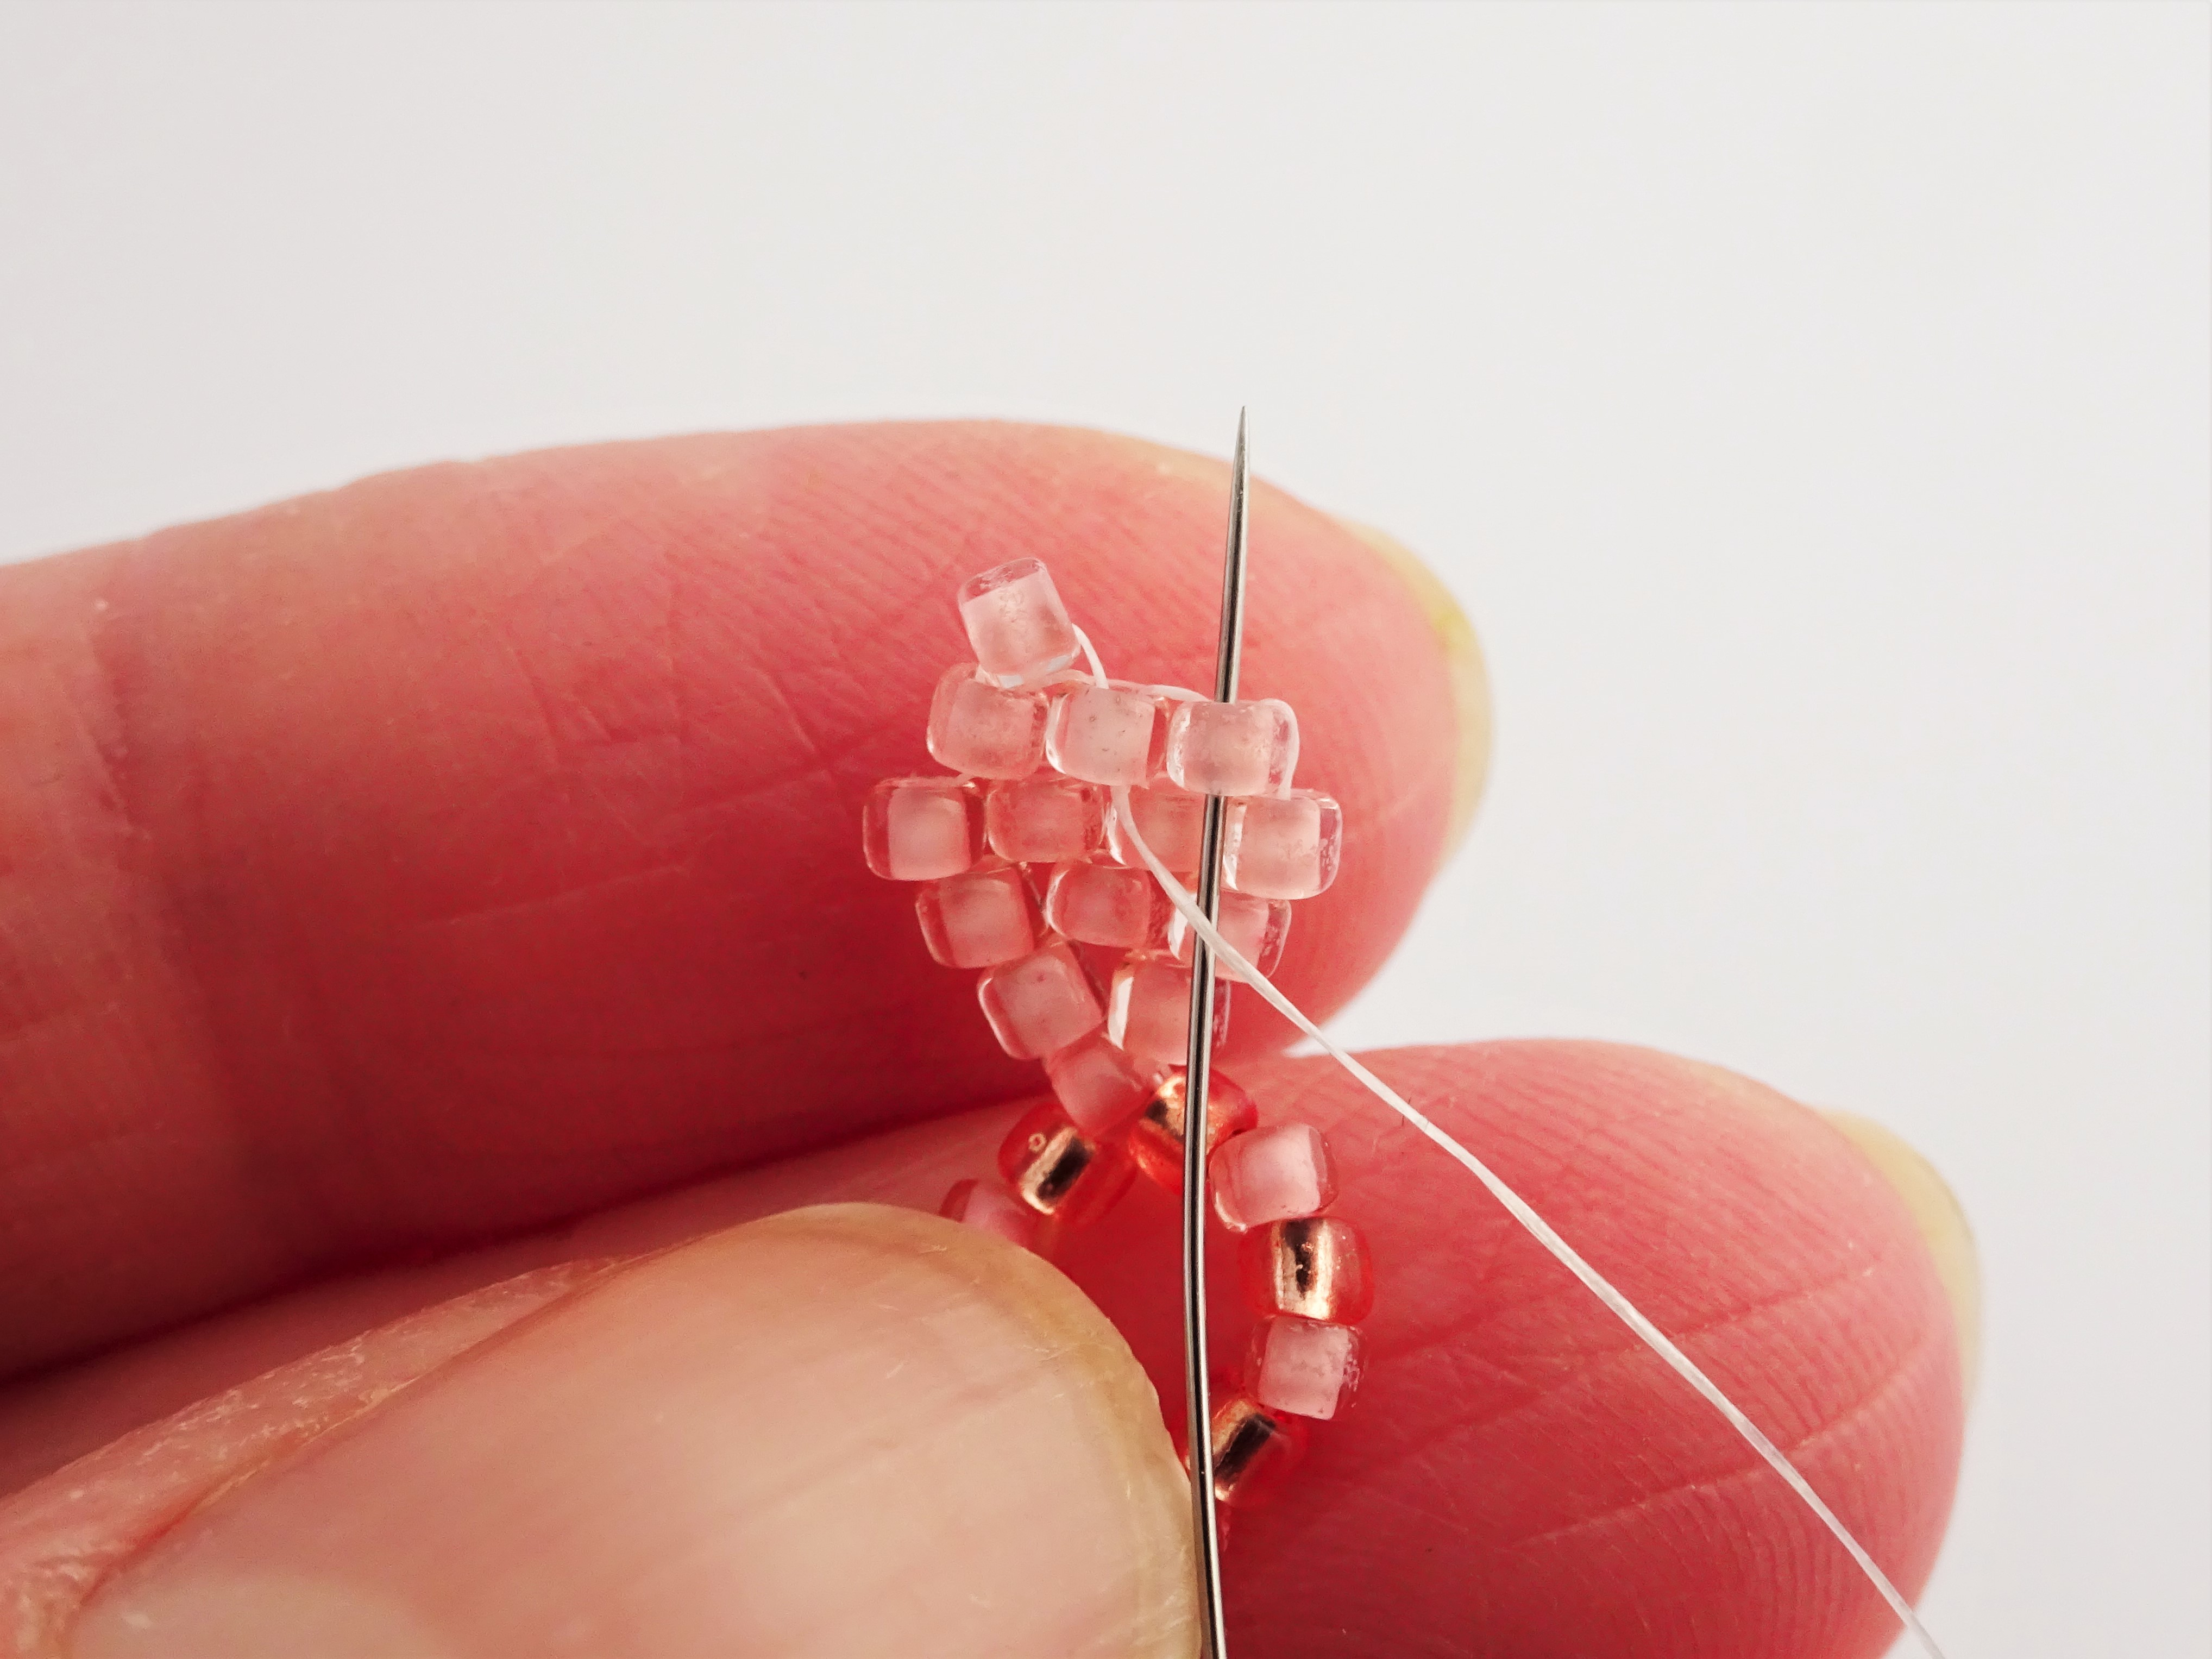
15) Pick up 1 more bead and take the needle back down the middle bead on the row below. Pull the thread to tighten.
16) Move the needle down through the beadwork towards the ring of bead. Once back at the beginning bead move the needle through the beadwork along to the next pale pink bead along.

17) Repeat steps 1 – 16 all the way round so there are 6 petals in total.

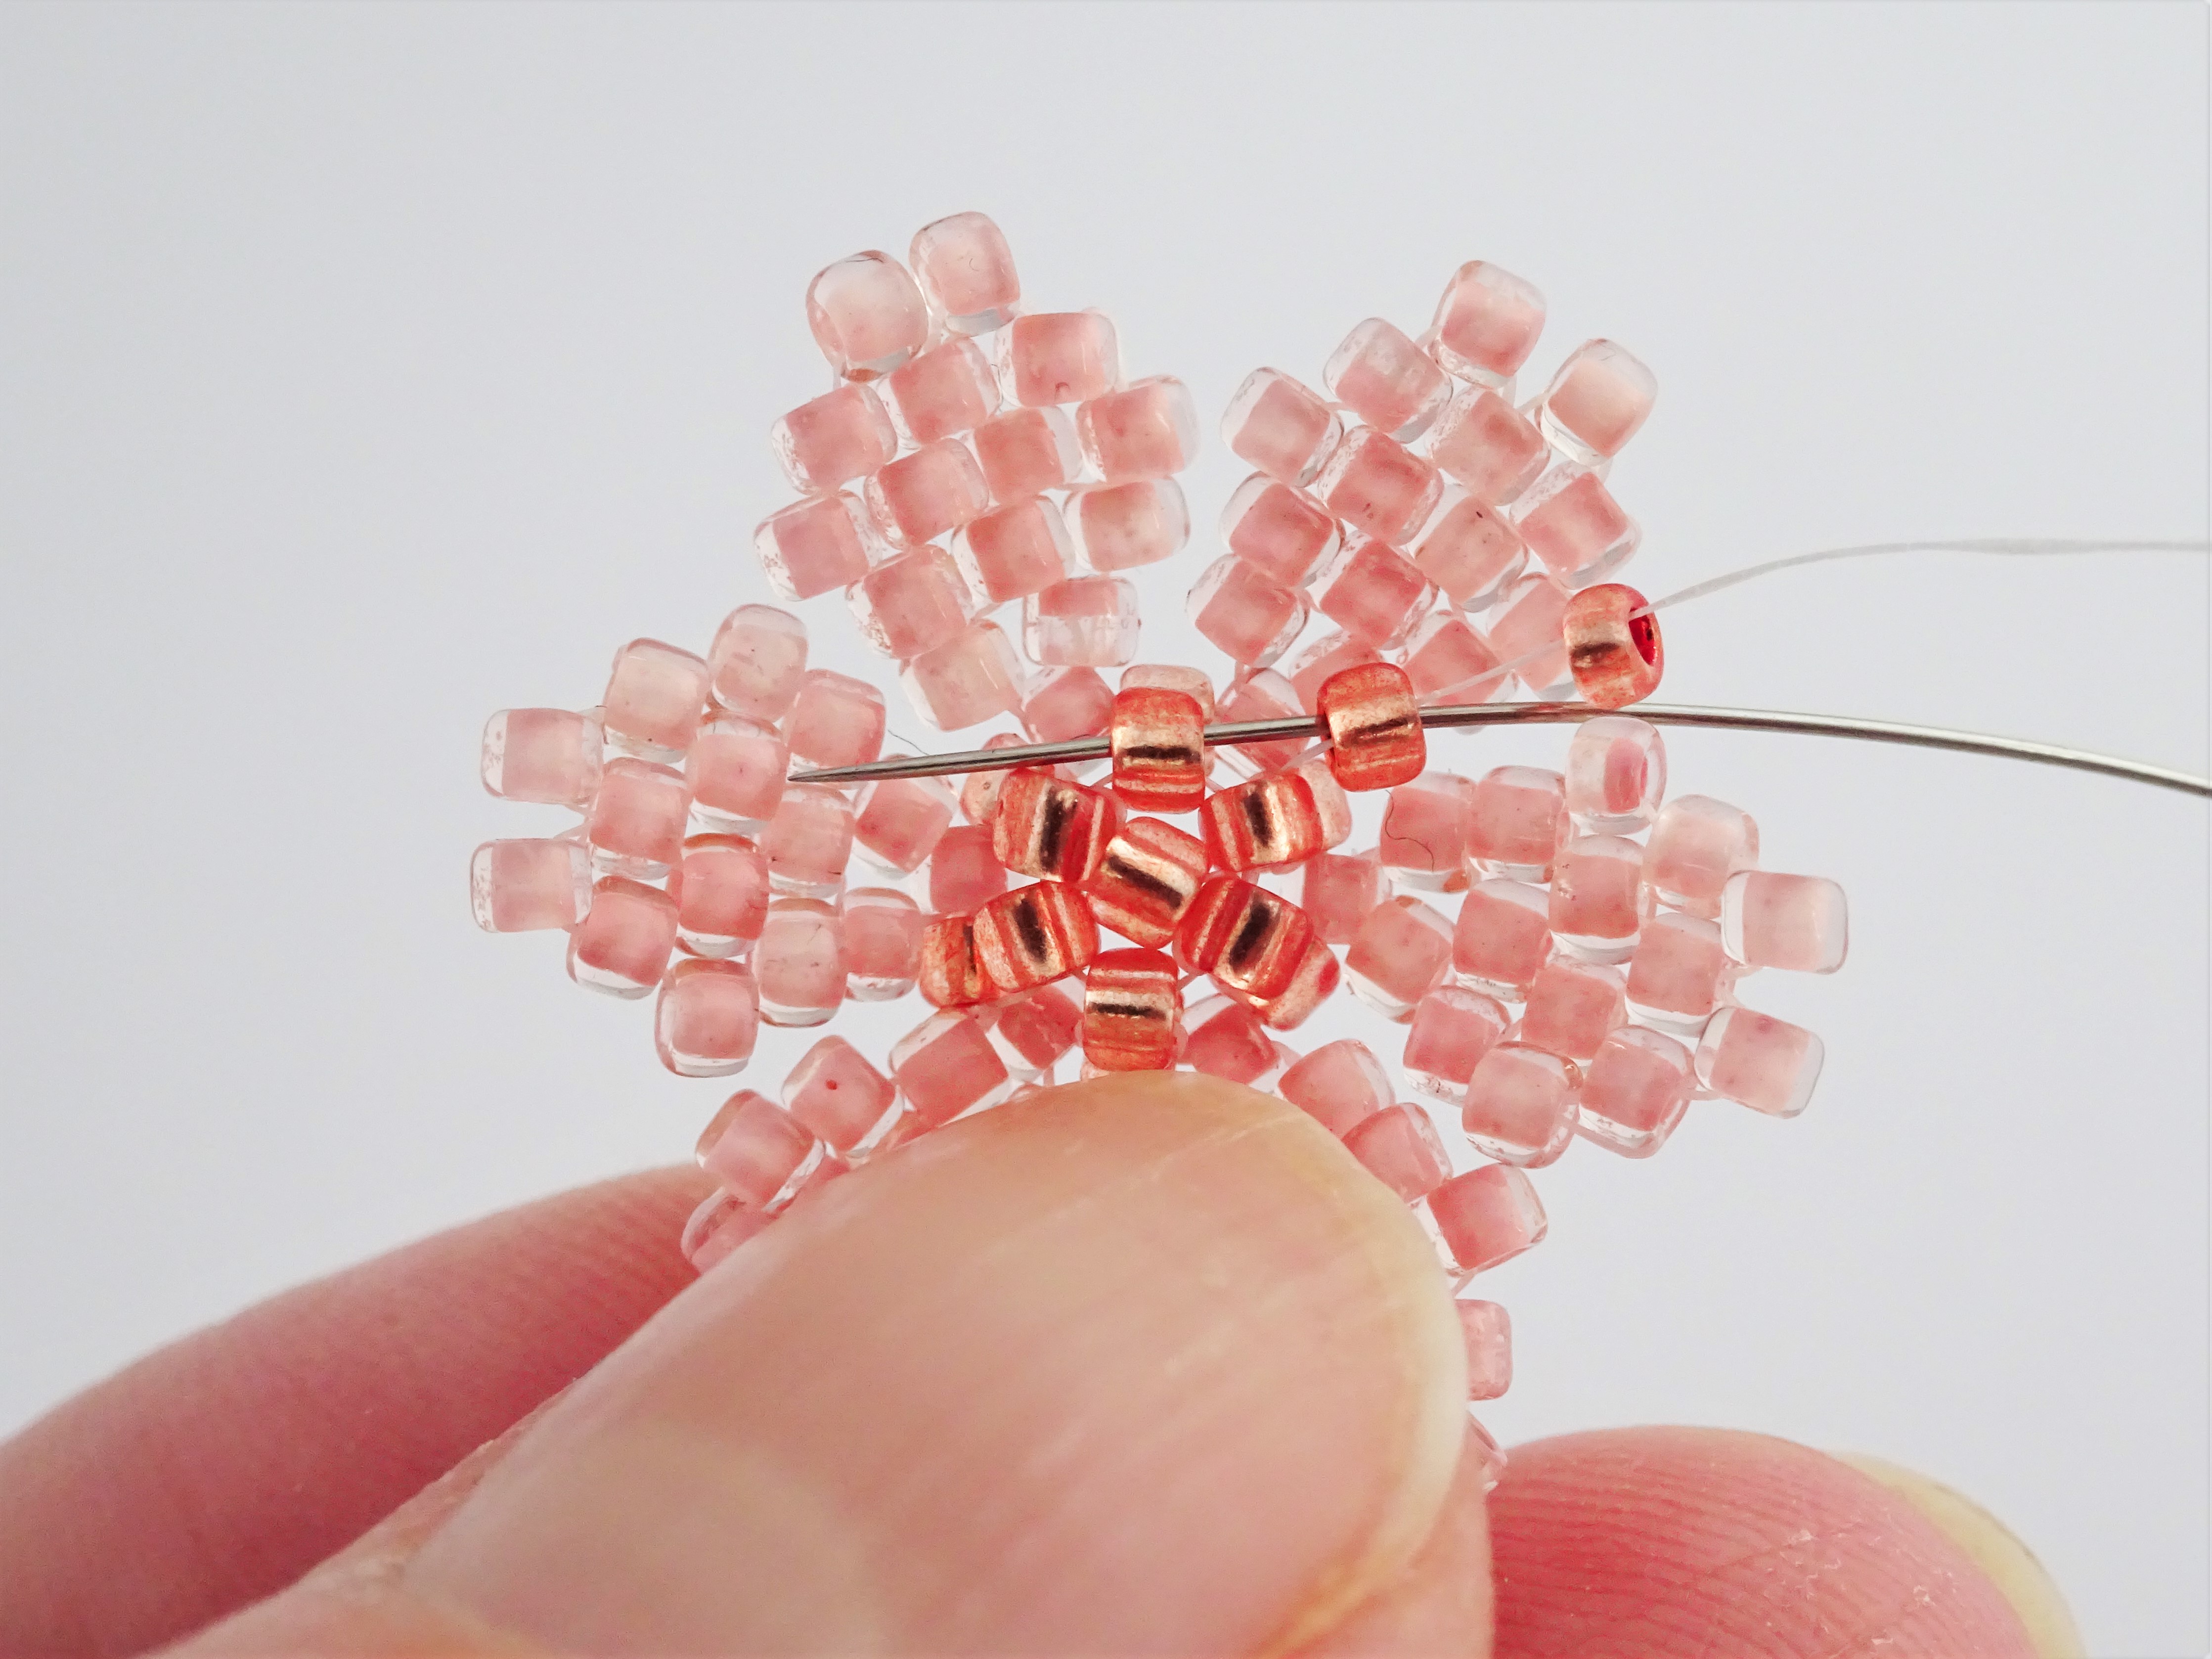
18) Move the needle along to a salmon pink bead and pick up another salmon pink bead. Take the needle through the bead you exited from so that the new bead sits on top of the lower bead.

19) Move the needle through the beadwork so that it exits out of the next salmon pink bead along and repeat step 18 all the way around the circle.

20) Take the needle up into one of the salmon pink beads just added in step 19 and take the needle through all the beads in that row of beading. Pull the thread to pull the beads to form a circle.

21) Pick up another salmon pink bead and take the needle into the bead directly opposite. Take the needle back through this new bead and into the bead you originally exited out from.
22) For the finishing details pick up 2 more salmon pink seed beads and push them down towards the rest of the beadwork. Take the needle back through the lower bead only and then pass it into the next salmon pink bead in the circle.
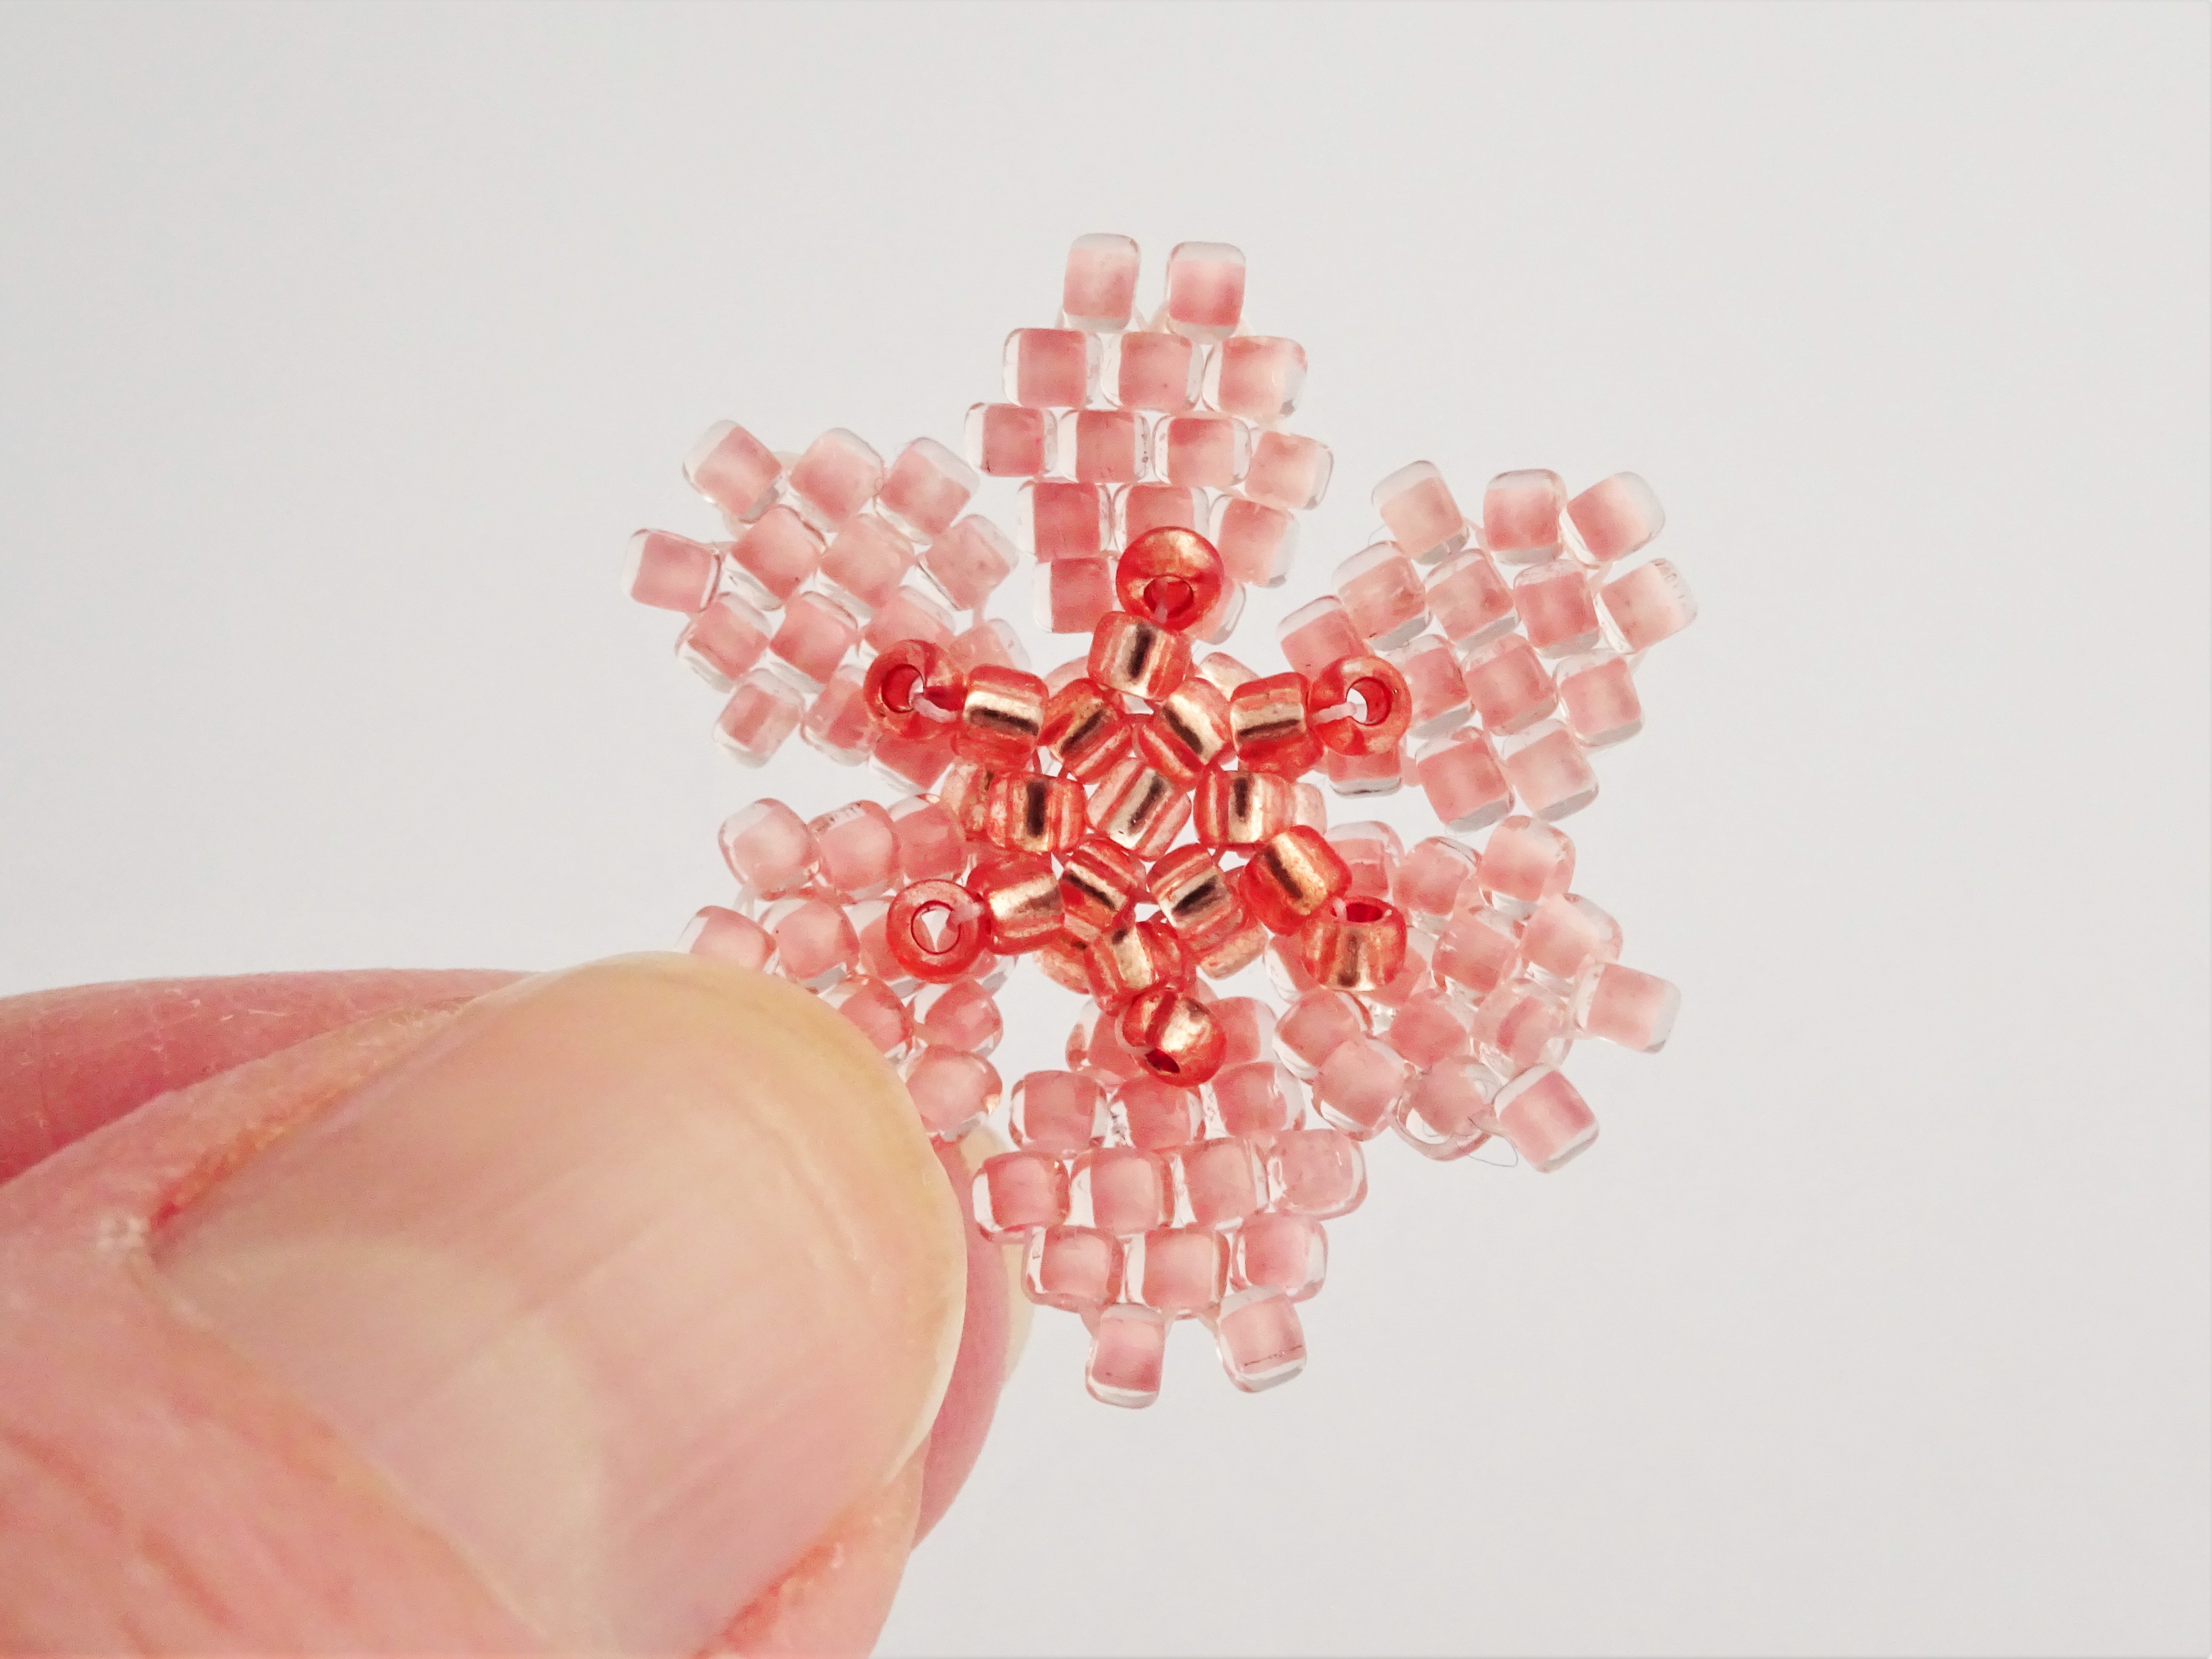
23) Repeat step 22 all the way around and knot your threads and weave in the ends. Cut off any remaining thread.
Check out the bottom of this beadweaving blog post to see in more detail how I knot my beading threads.
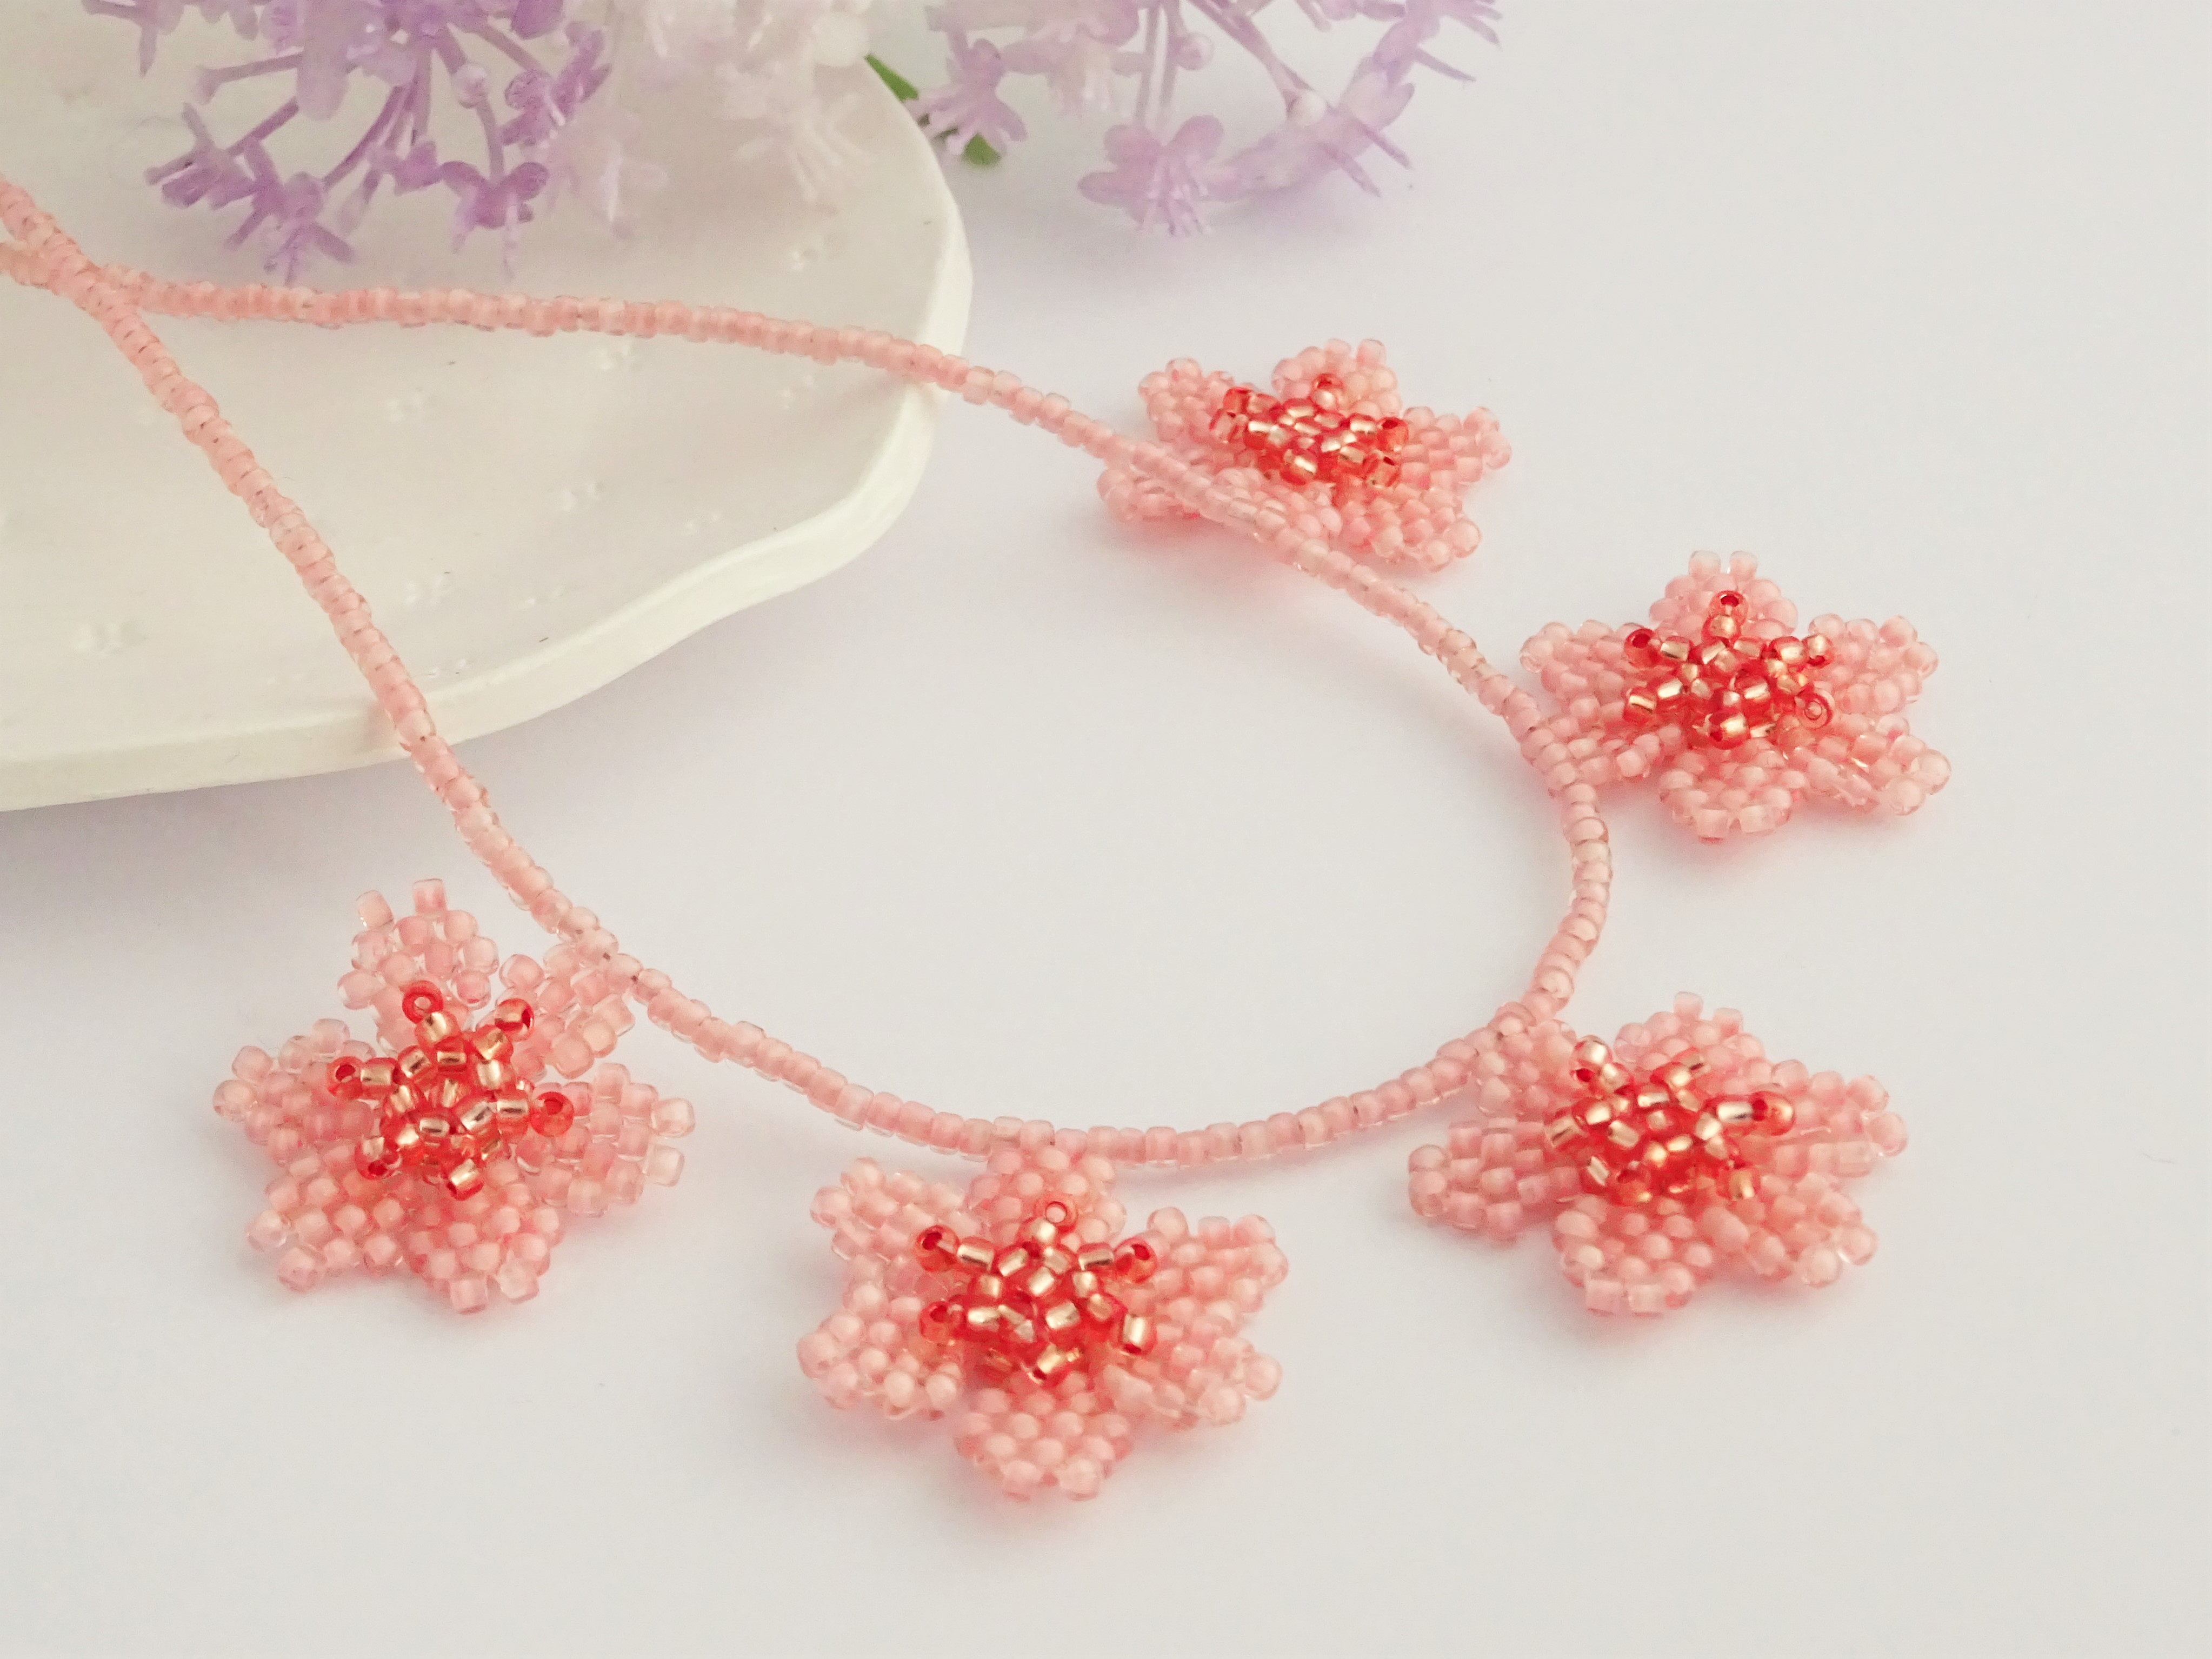
It’s surprising once you have the hang of these flowers how quickly you can make them! As I said at the start I strung 5 of them on beading wire and used the pale pink beads to fill in the gaps. Finished with crimp beads and a clasp and, et voila, a perfect summer necklace.
I have another tutorial for a brick stitch heart bracelet here so don’t forget to check that out before you go.
There are more general Beadweaving projects to get stuck into as well if you fancy sticking with me for a little longer.
I have the whole project here on YouTube 🙂
Thanks for reading.
Hannah x

