

Please note this posts contains affiliate links. All affiliate links are clearly marked as such.
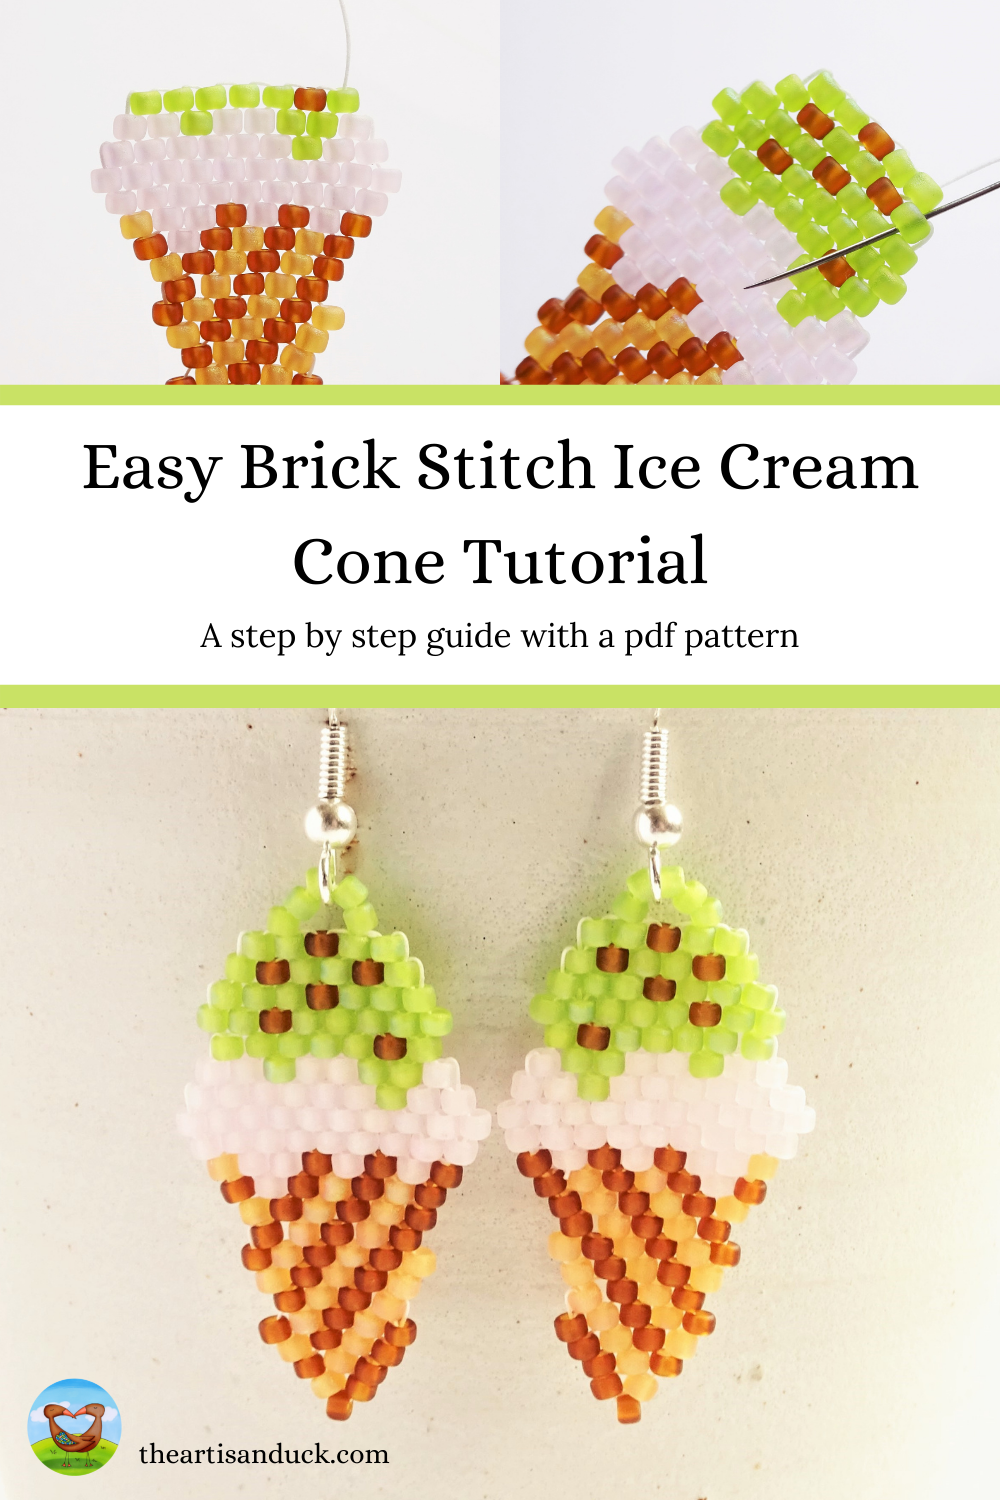
I am not someone who will spend any amount of time getting ‘summer ready’, in fact quite the opposite. The thought of swimwear and shorts leave me shuddering whilst I look longingly at my chunky knit jumpers and warm fluffy socks. But I do love ice cream to help cool off on hot summer days and its the perfect way to ensure I keep my chocolate intake sufficiently high 😂 So, doing what I know best, I have made a brick stitch pattern for a double scoop (yes, the double scoop is definitely the required ice cream amount) ice cream cone complete with waffle cone, melting ice cream and chocolate chips. Yummy!
I have chosen a delicious mix of strawberry ice cream topped with mint choc chip but feel free to choose your own flavours. Replace the choc chips for multi colour beads as sprinkles or just keep it plain. Whatever your ice cream choice, these earrings will ensure you are most definitely summer ready without a swim suit in sight.
This is a very photo heavy post as I seemed to be very enthusiastic when it came to covering the basics of brick stitch so it’s a great one if you are learning brick stitch. I have prepared a basic pdf of the pattern for you to save and print off if you wish.
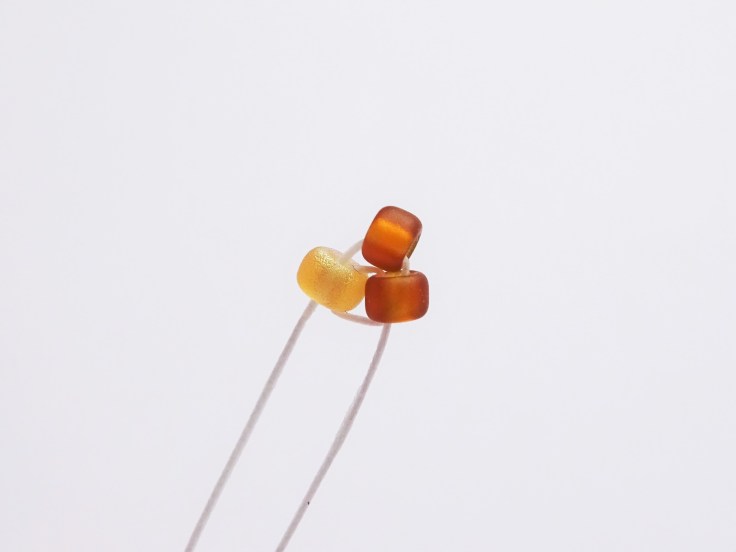
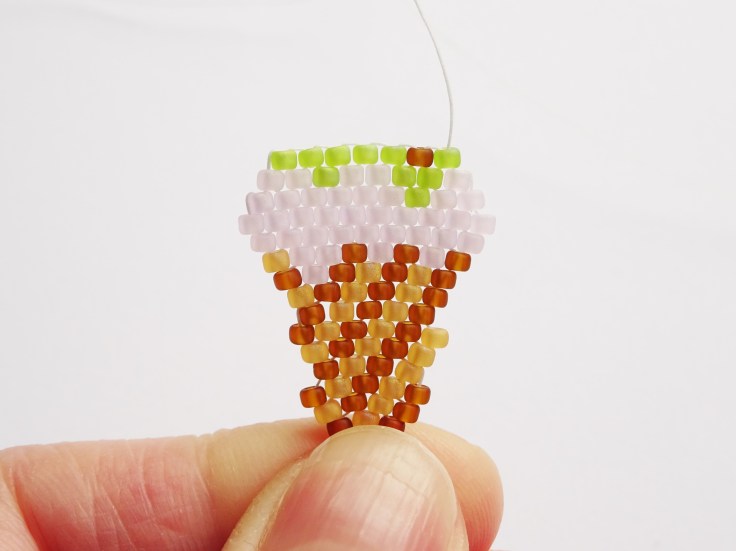
I have used Matsuno size 11 seed beads in Topaz Frosted AB, Dark Topaz Matte, Baby Pink Frosted AB and Lime Frosted AB.
Easy Brick Stitch Ice Cream Cone Tutorial
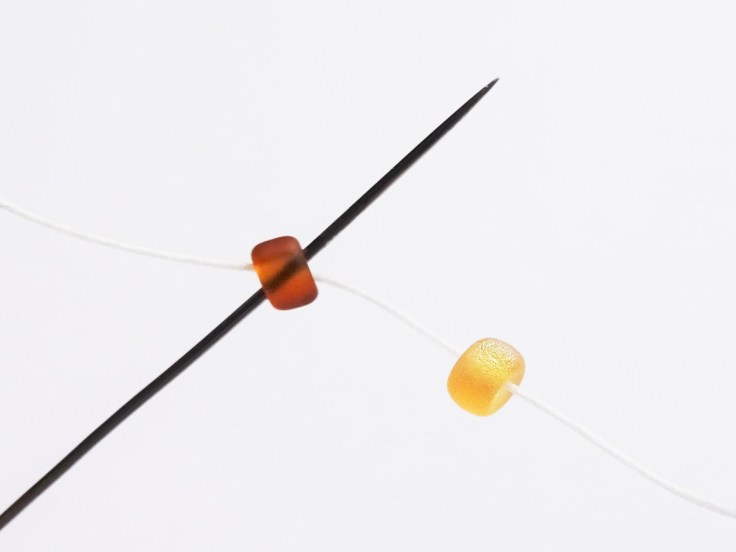
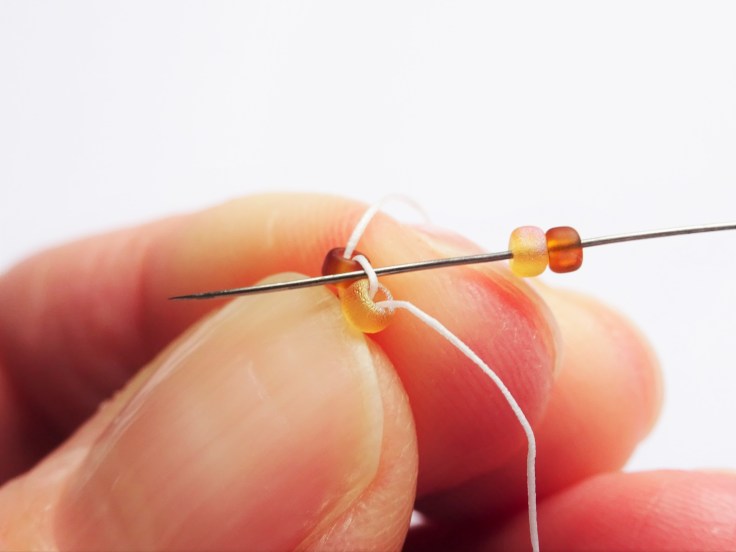
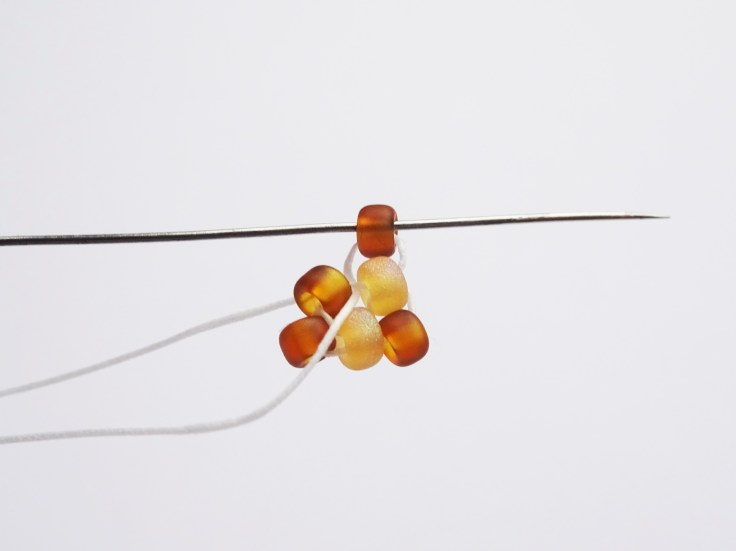
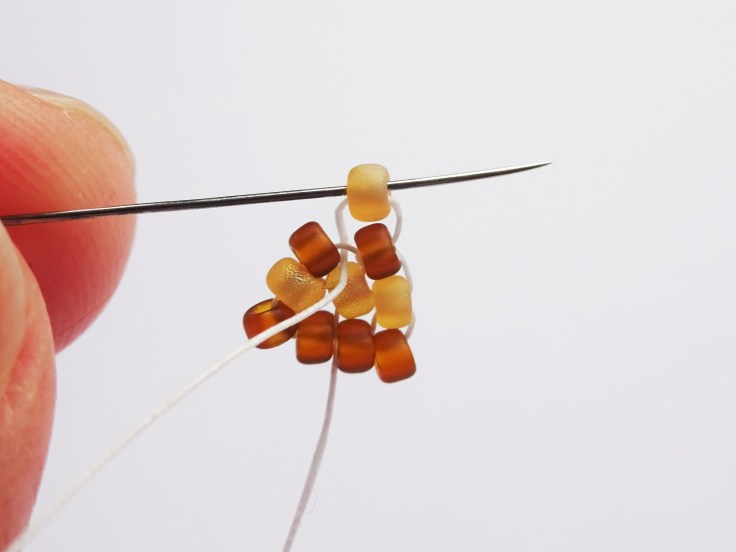
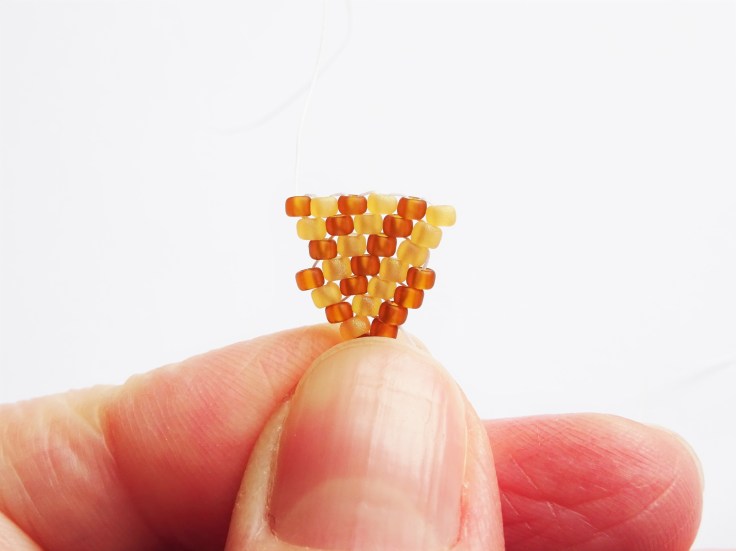
Add a needle to an arm span length of beading thread. We are starting with the base of the ice cream cone so pick up one dark brown first and then, one orange seed bead. Move them down towards the bottom of the tread ensuring that you leave some thread to weave in at the end. Take the needle into the dark brown again and pull though to make the beads sit side be side.
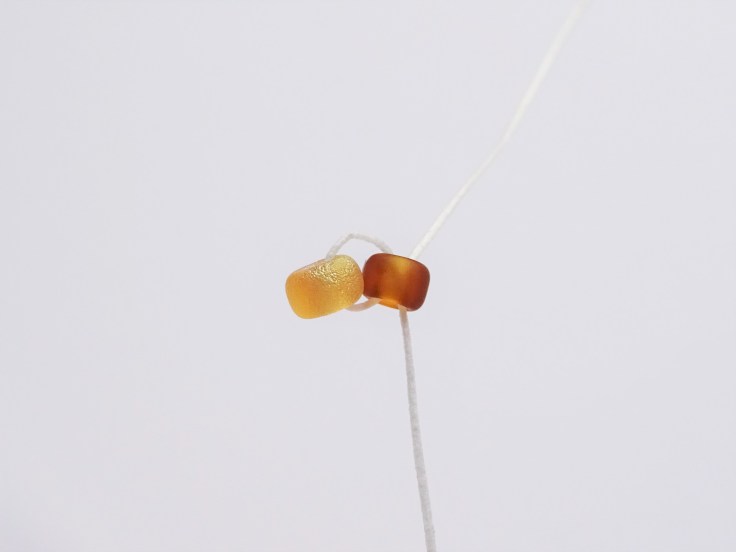
Next, pick up another dark brown bead and take the needle up into the orange bead and pull the thread tight. This will form the bottom point of the ice cream cone.

If you are looking at the pdf pattern then this is the moment to say that you will need to zig zag up the pattern to follow it. When ever a beading row is finished we step up to the next row, starting that row directly on top of the end of the lower row. Make sense? Follow the pattern in the cone to help you know which row you are on and which beads you should start with.
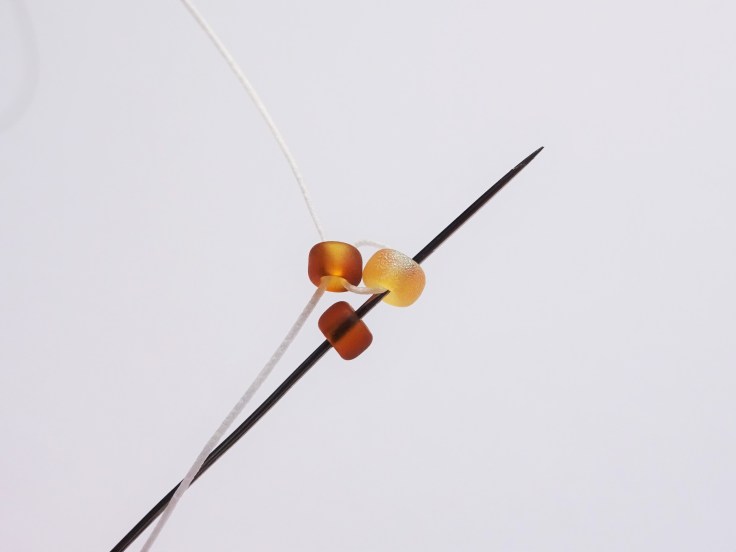
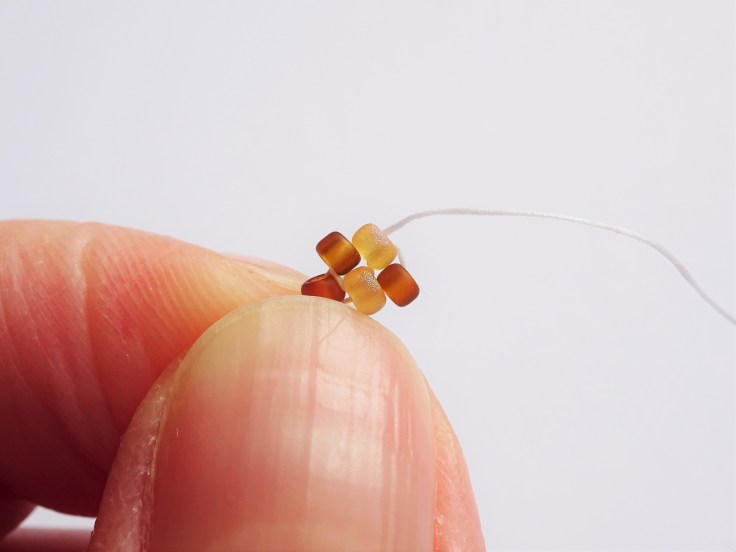
So, because you are exiting out of an orange bead, the beginning of the row above is a dark brown bead. The length of the row is also longer than the previous row so to make the row longer we need to pick up two beads to start the row off. In this case pick up one dark brown bead first and then an orange bead.
Take the needle under the thread bridging between the two lower beads as shown in picture 3a and pull through. Then, take the needle back up into the orange bead to finish the stitch off (picture 3b). Pull the thread tight so that the bead sit nicely as shown in picture 3c.
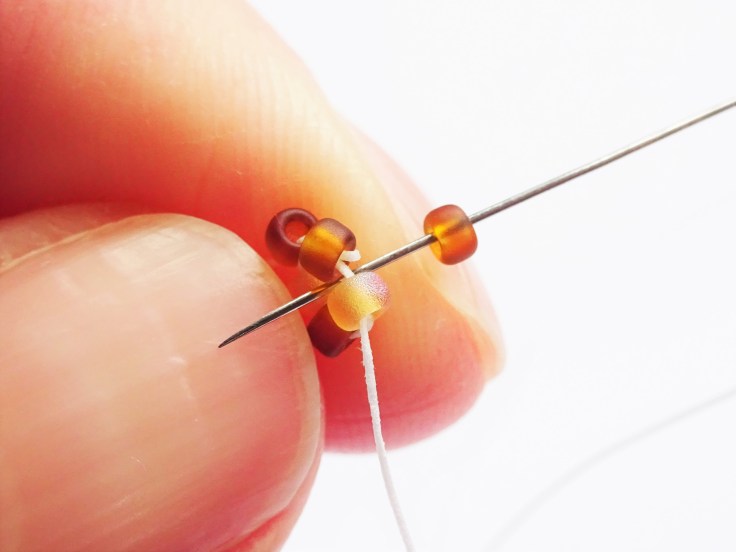
Pick up another dark brown bead and, because there is no bridging thread directly under where the bead will sit, take the needle under the thread that is going up into the orange bead (4a). Once you have pulled the thread through take the needle back up the same dark brown bead and pull tight to hold it in place.

Begin the next row by adding a dark brown and orange bead in the same way as we did in step 3a and 3b as this row in increasing in length again. Then, to continue the row, pick up one dark brown bead and pass the needle under the bridging thread directly underneath it (5b). Continue by taking the needle up into the same brown bead and pull tight (5c).
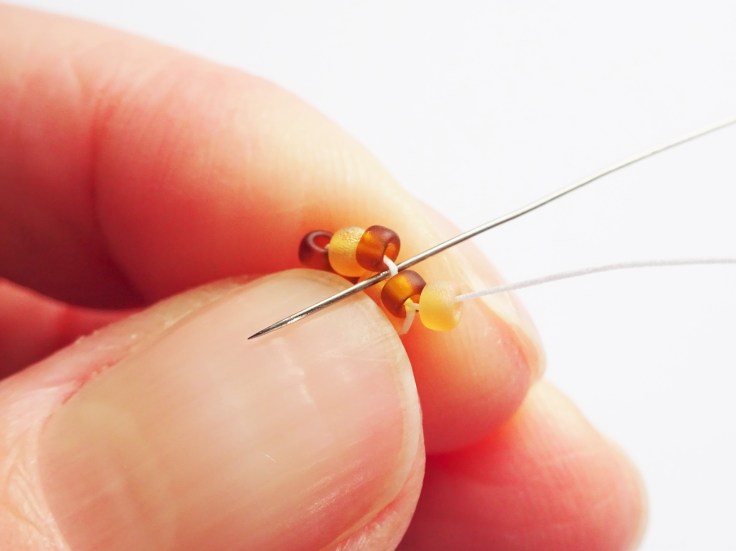
Finish this row off by adding one orange bead and taking the needle under the thread below the dark brown bead. Complete the stitch by taking the needle back up and into the same orange bead.
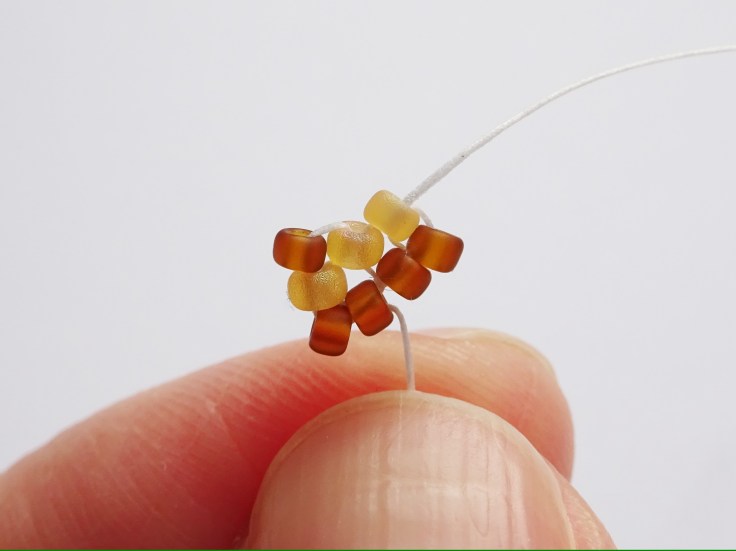
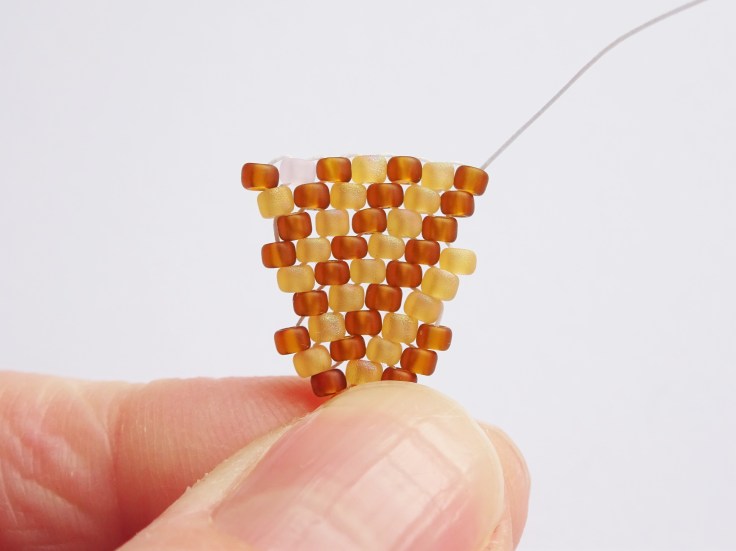
I’ve whizzed ahead and completed the whole row of beading here ( I am assuming you don’t have all day to watch me add every bead 😉 but begin by picking up two beads (one dark brown and then orange) and add all the other beads in the row exactly as we have done in steps 5 and 6.

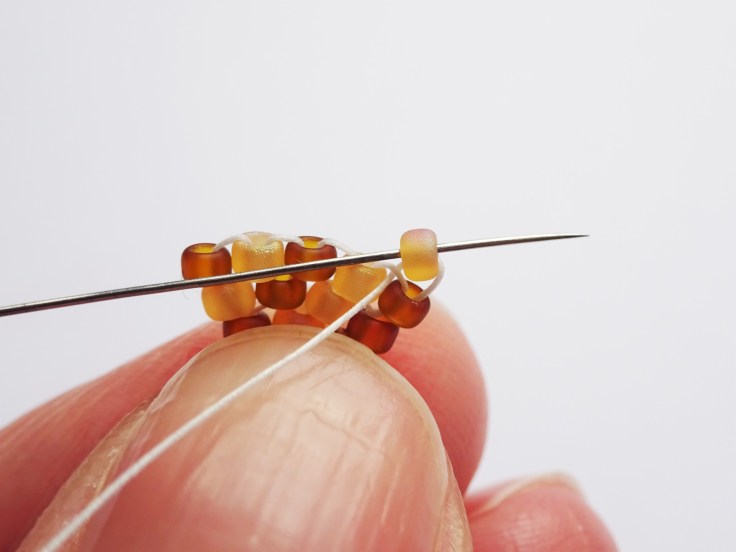
This new row sees is a tiny bit different at instead of increasing we are decreasing. The lower level of beading has 5 beads but this only has 4 so we only need to pick up one orange bead to begin the row. Add it in exactly the same way though as we have done in previous steps.
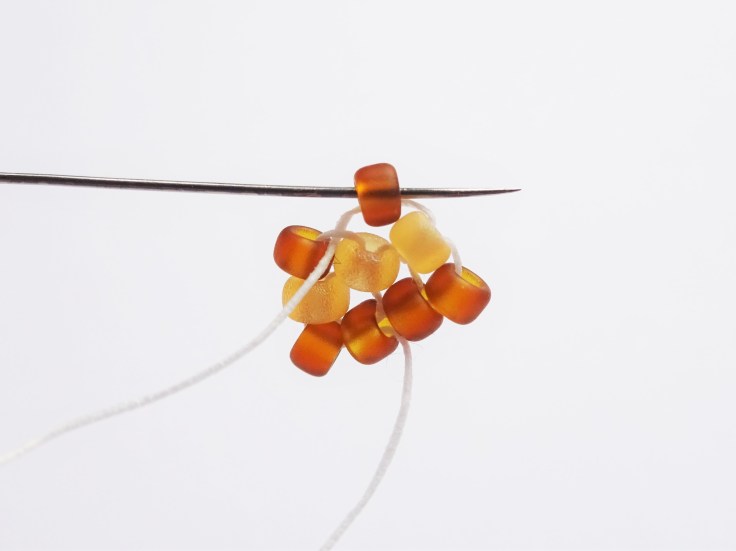
Continue along the row in this manner adding beads in alternating colours. The last bead in the row will use a bridging thread, just as all the others in the row have, as we are not increasing the overall length (8c).
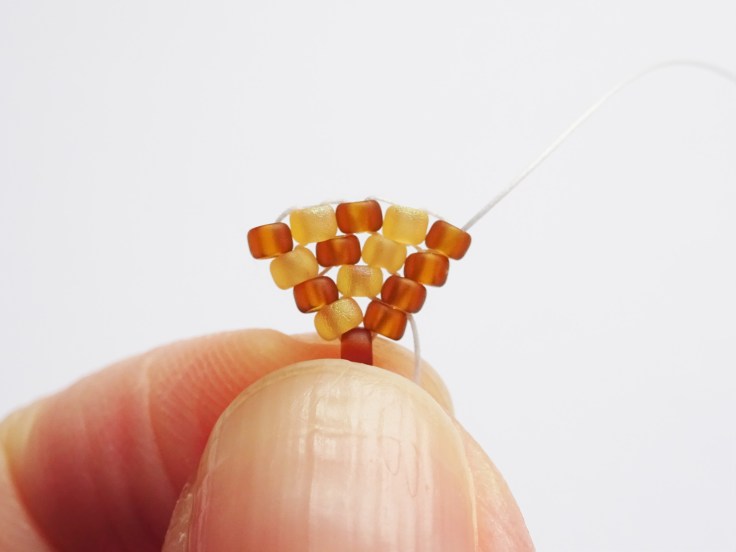
I have put a picture here showing the next two competed rows. Because each row increases pick up two beads to begin with and tag the bead on the end to the thread of the bead next to it.

Add two more rows of beading – the first row decreases again so pick up one bead to begin with and the row above it increases so pick up two beads to begin.


The next row of beading sees the introduction of a pink bead to begin our ice cream layer (11a). Add the next two rows of beading as shown in 11b and 11c.
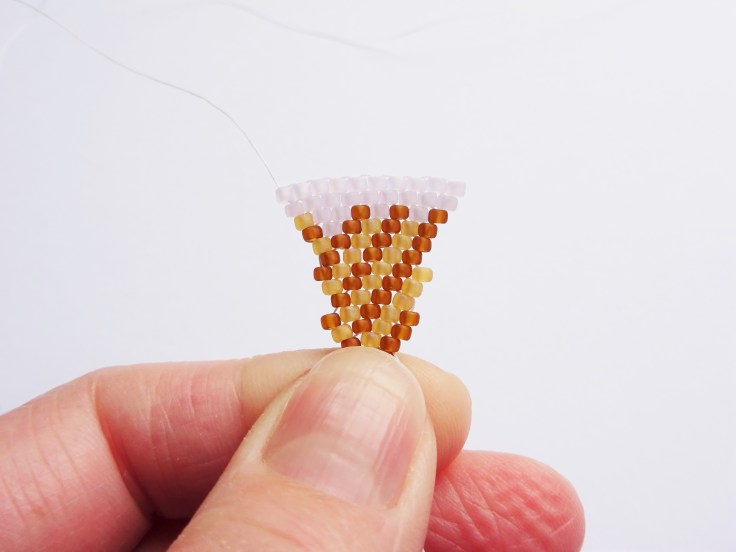
Add two more rows on pink beads only, increasing on each row.
The next row up decreases and the green is introduced.
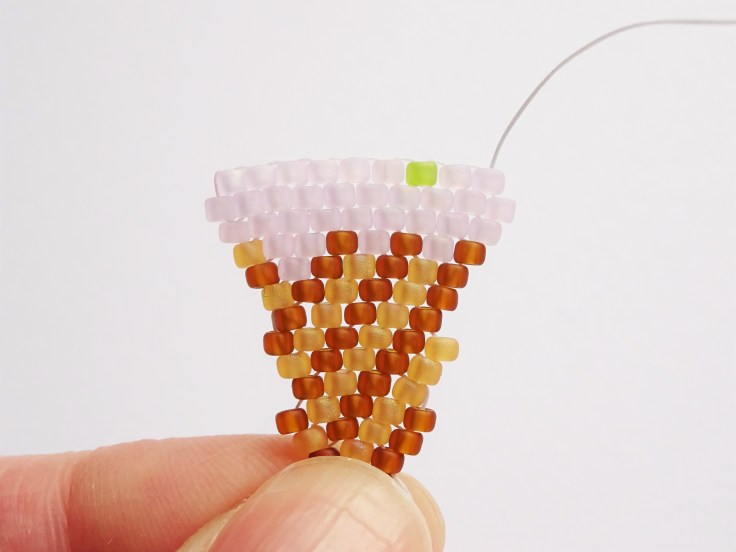
If you wanted to only do one ice cream scoop you could totally miss the green out and continue decreasing rows of pink beads until there are 5 pink bead across the top. I don’t believe in half measure though so I’ll continue with the second scoop…..
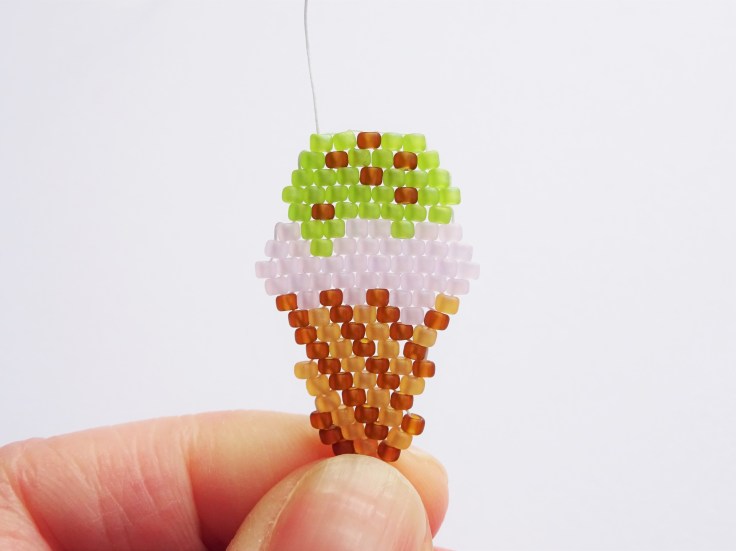
Picture 14a shows the next two rows where the green ice cream dribble comes into the pink and then a whole row of green with a cheeky choc chip.
Picture 14b shows the final 4 rows of beading. The green beads increase on the next row up but then decreases again until there are only 5 beads along the top row of beading.
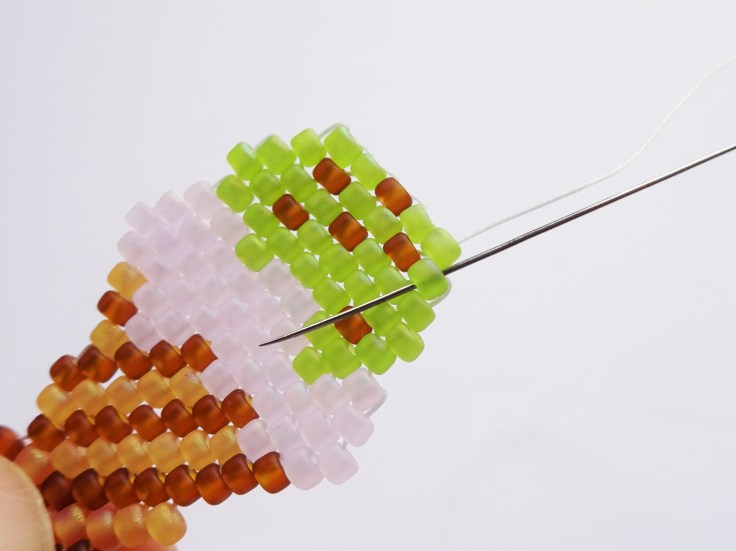

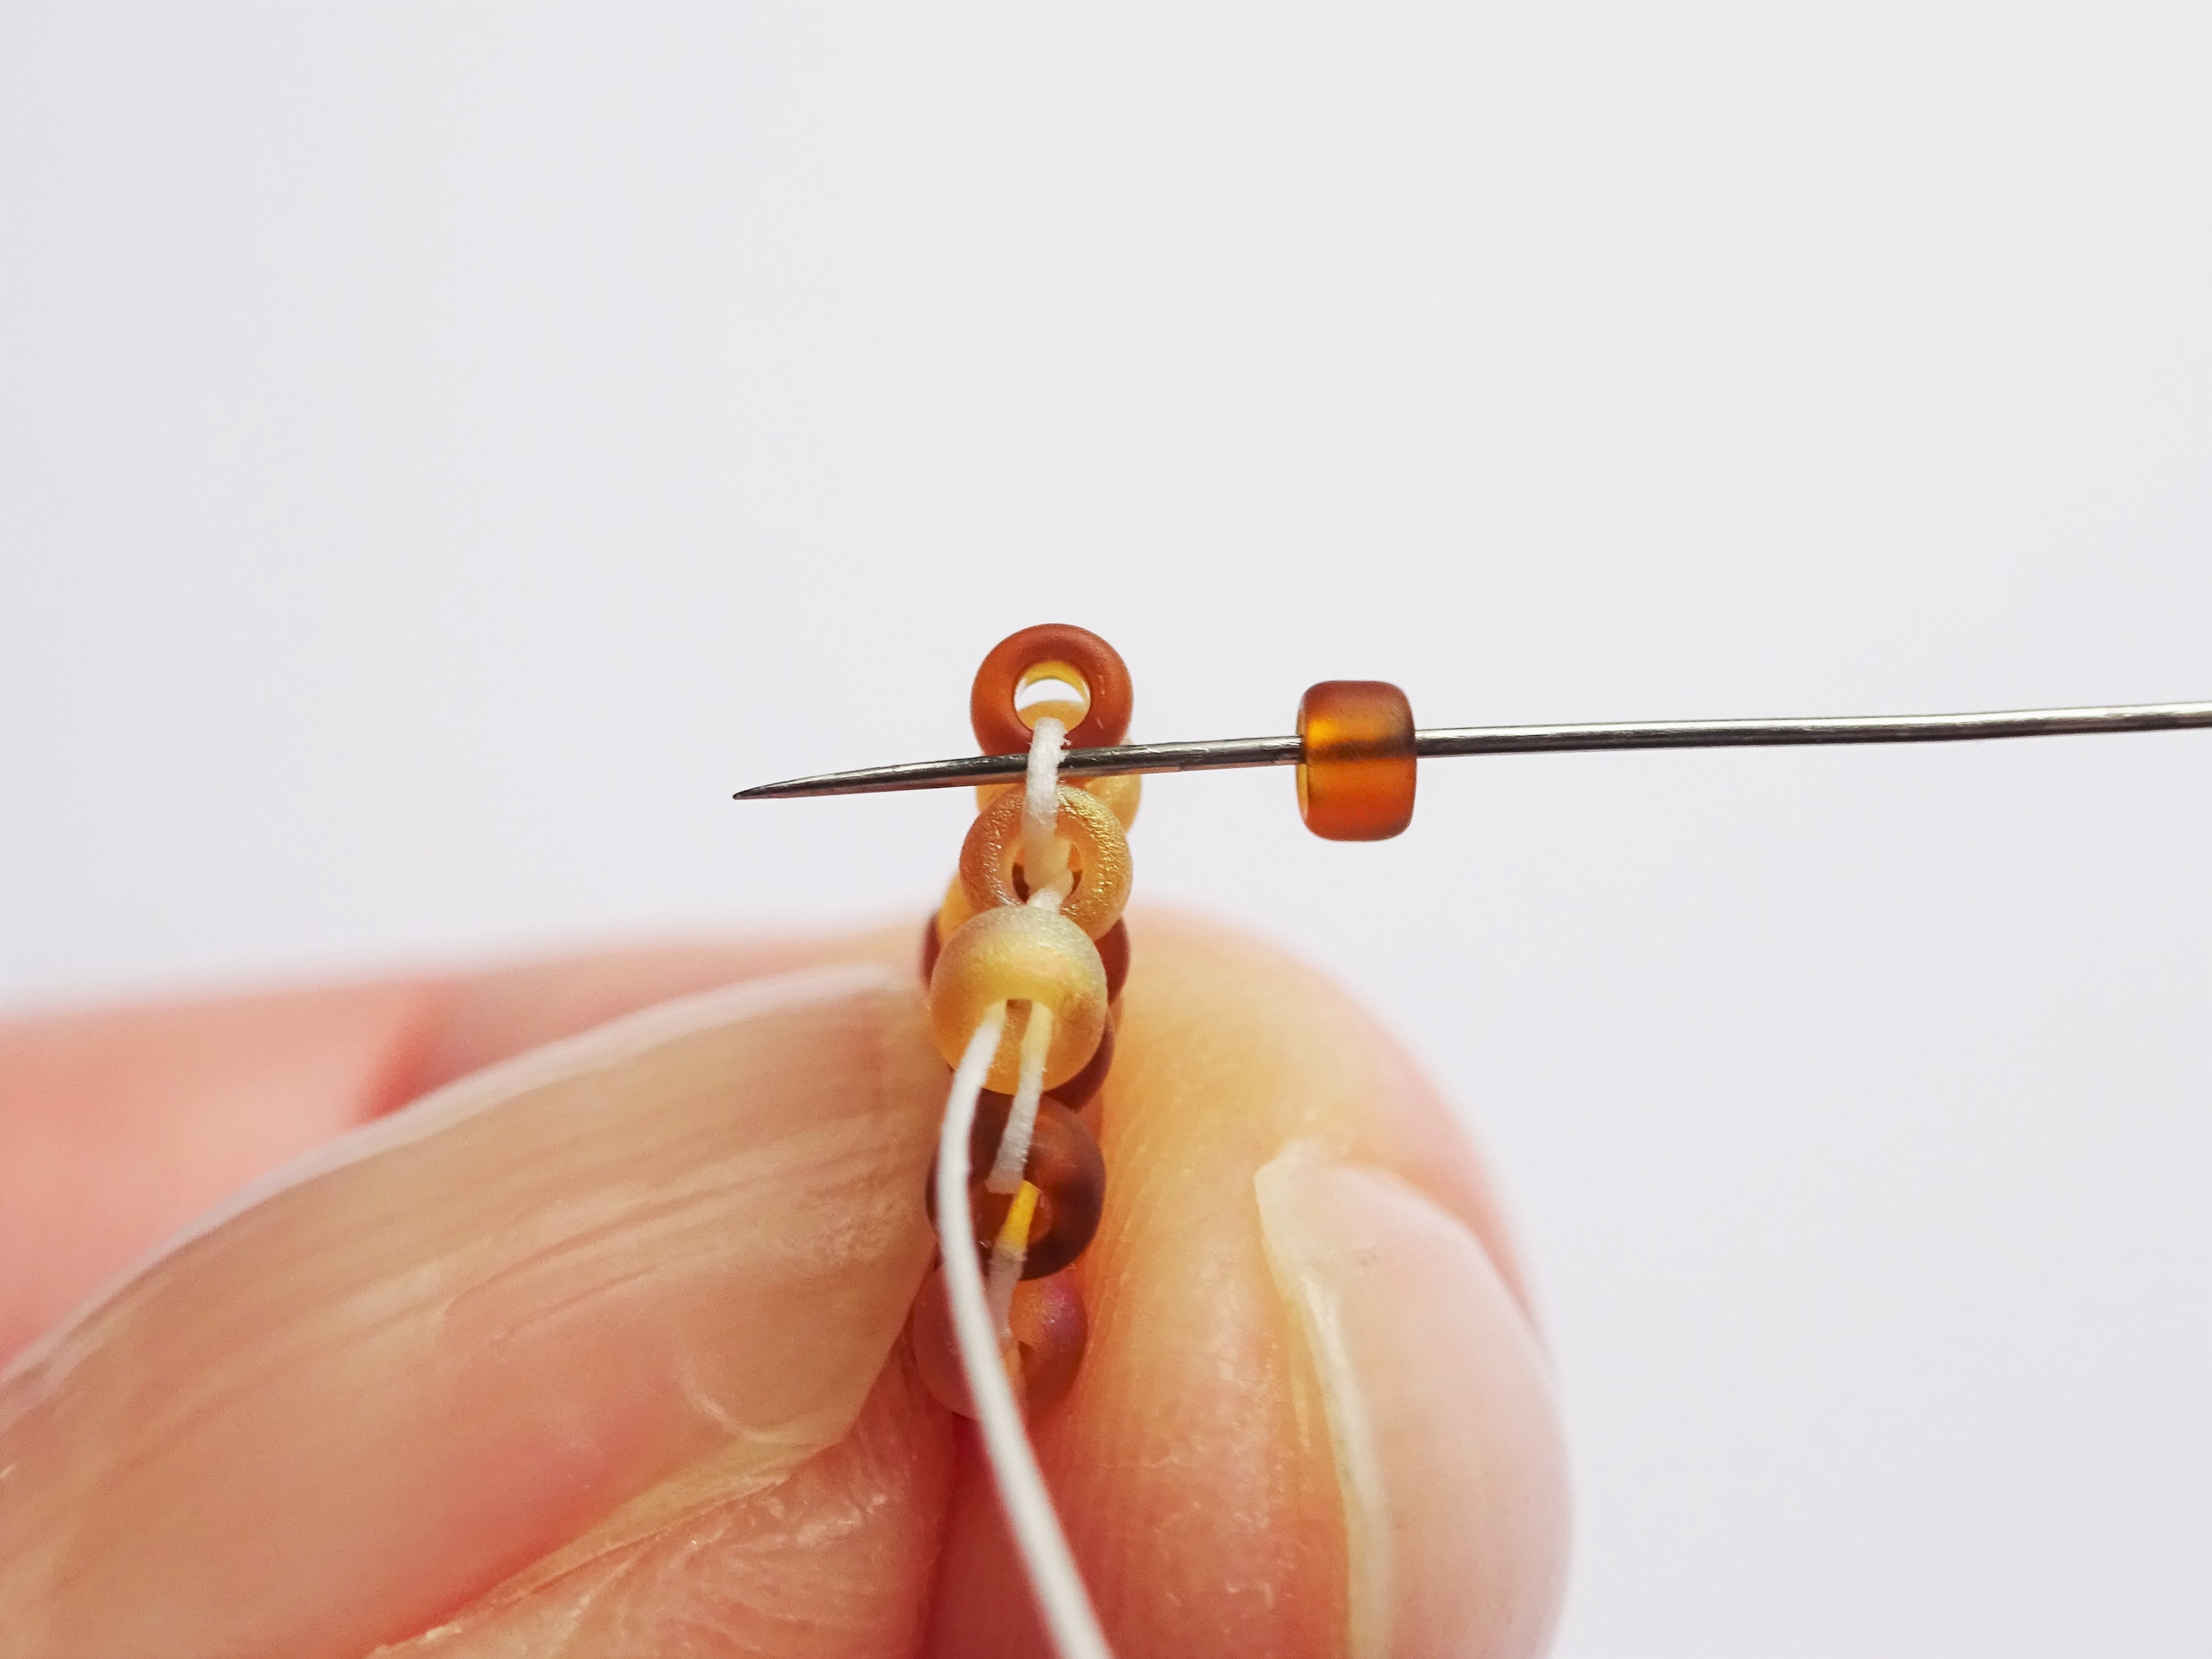
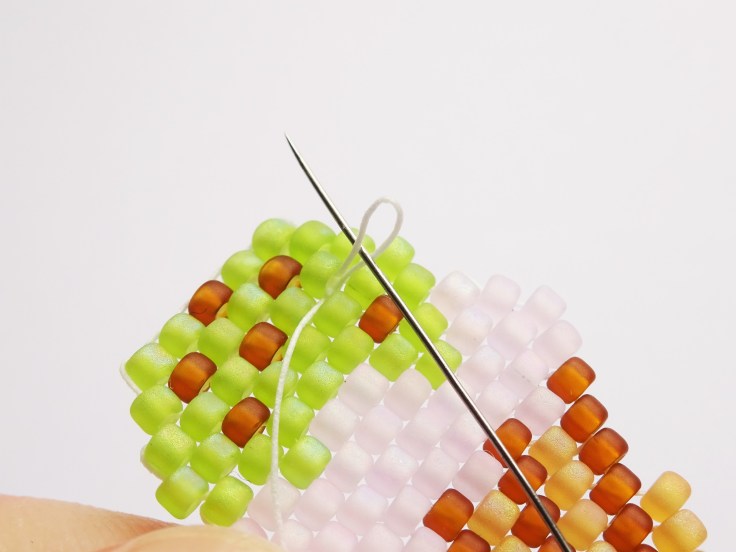
We have now reached the end of out ice cream scoop and need to add a beaded loop so that we can add jump rings or earring wires but we are exiting out of the top of the bead on the end of a row and we are going to add our loop starting from the next green bead in.
We are clearly facing the wrong direction so we are going to have to do a little manoeuvre to get the needle and thread where we need them. So, take the needle down into the green bead on the end of the lower row as in picture 15a. Don’t worry that you can see the thread as it is visible on row where the beading has decreased so it won’t be out of place.
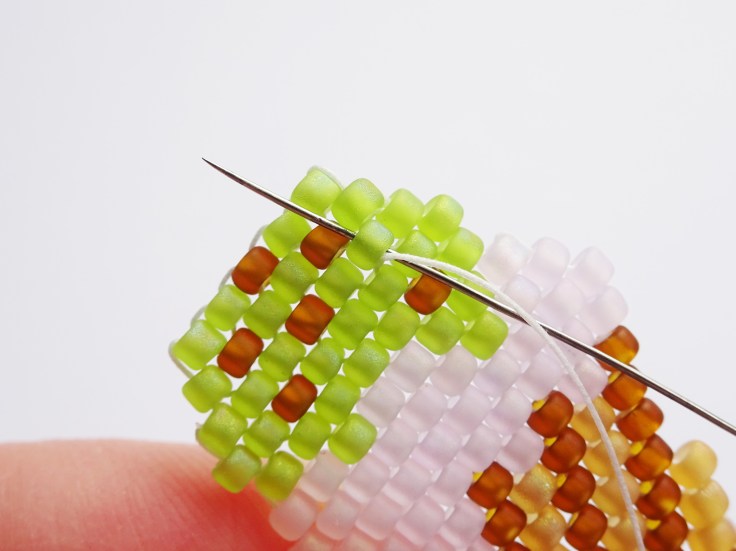
Continue down into the next row down again and into the green second in from the end (15b).
Picture 16a shows the needle being taken under a thread that is going up between the green beads. Pull the needle through until there in a small loop of thread. Take the needle thorough the loop and pull to form a knot around the thread (16b). This will secure the thread in place ready for the next step.
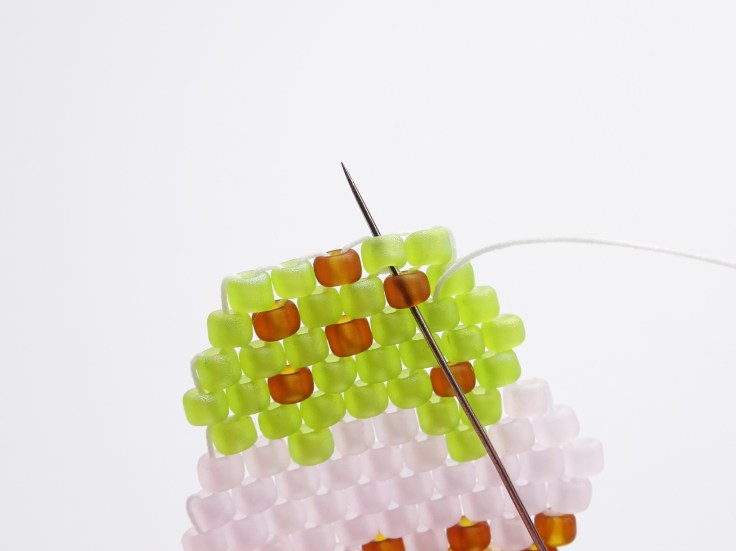
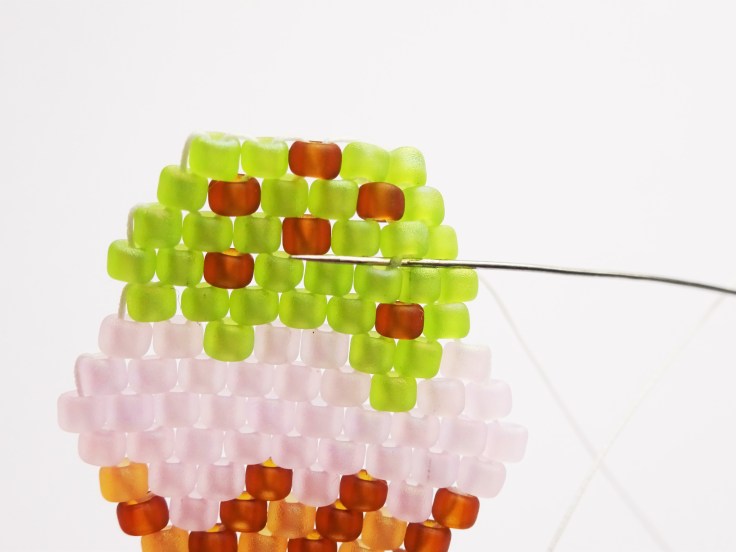
Take the needle back up the bead work as shown in steps 17a and 17b so the needle and thread exits out of the second green bead in at the top.

Pick up 5 green beads as shown in photo 18a. Then take the needle down into the next green bead along (second from the end of the row). Pull the thread tight to form a loop (18b).

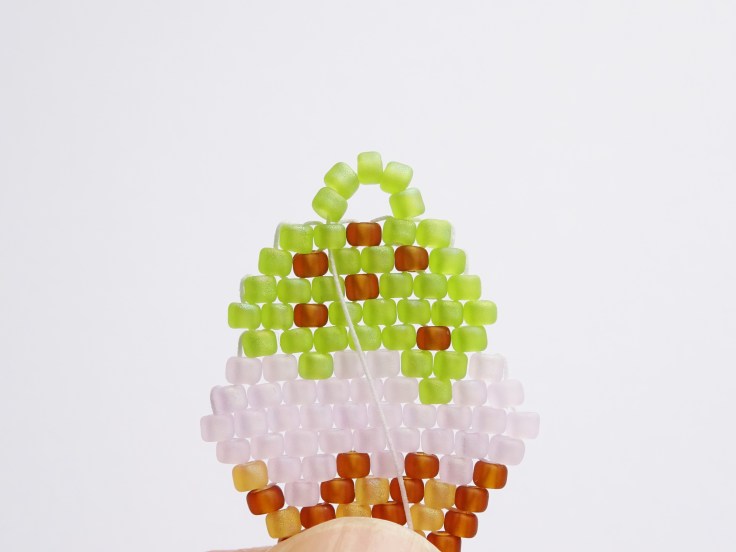
Weave in the remaining thread, knotting as you go just as we did in steps 16a and 16b and cut off any excess thread. Repeat this for the tail thread the we left at the very beginning and, et voila, your very own beaded ice cream. Considerably less tasty than the real thing but just as sweet.
I really hope that if you have made it this far that you have enjoyed this tutorial. I have a selection of brick stitch tutorials to look through ranging from hearts to pumpkins.
Here is the accompanying YouTube video.
Links below for products used are Affiliate links for Amazon (UK, United States and Canada). This just means that if you use my link to buy a product I earn a very small commission, at no extra expense to you (you pay the same regardless how you find the item). Every little extra helps me to offer free tutorials.
This link is for my all time favourite beading thread. I use it all the time and truly believe that the way to a great result with any beadweaving project begins with a really reliable thread.
Canada – Wildfire in Frost .006in
Before you go, what is your favourite ice cream flavour or is ice cream not your thing. I wonder what lovely earrings your favourite flavours would make.
Until next time, happy beading,
Hannah x


Leave a comment