


With Valentine’s Day on the horizon I thought it was time for a new heart bead weaving tutorial. Last year I wrote a tutorial showing how to make a brick stitch bead weaving heart (you can see the post here) and then showed how to use it to make an elasticated bracelet. I have written a few brick stitch tutorials since then so I decided that it is time for a new stitch to obsess over – Right Angle Weave.
Right angle weave (often shortened to RAW) is such an easy and versatile bead weaving stitch but I am yet to make a blog tutorial using it, until today that is. All you need are some 4mm beads ( I have used faceted beads here but this also works with more round beads), size 11 seed beads, a beading needle and beading thread.
I will show the basic stitch and how to use it to make the heart shape and then how to add even more detail to make a gorgeous heart pendant.
Let’s get beading…..
How To Make A Right Angle Weave Heart

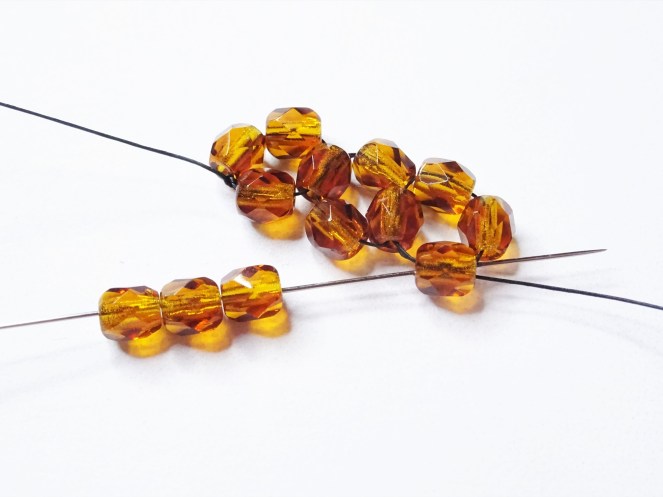
- Add a needle onto an arm span length of beading thread. Pick up 4 x 4mm beads and tie the thread in a knot to pull the beads together as shown. Leave a good tail thread to be weaved in a the end. Move the needle through the beads to move away from the knot.


2. Pick up 3 x 4mm beads and take the needle back through the bead you exited from but from the other side. Pull the thread tight to pull the beads to form another beaded loop as shown. Move the needle through two of the beads just added so that the needle and thread are exiting from the top of the bead work.
This is your first section of Right Angle Weave.

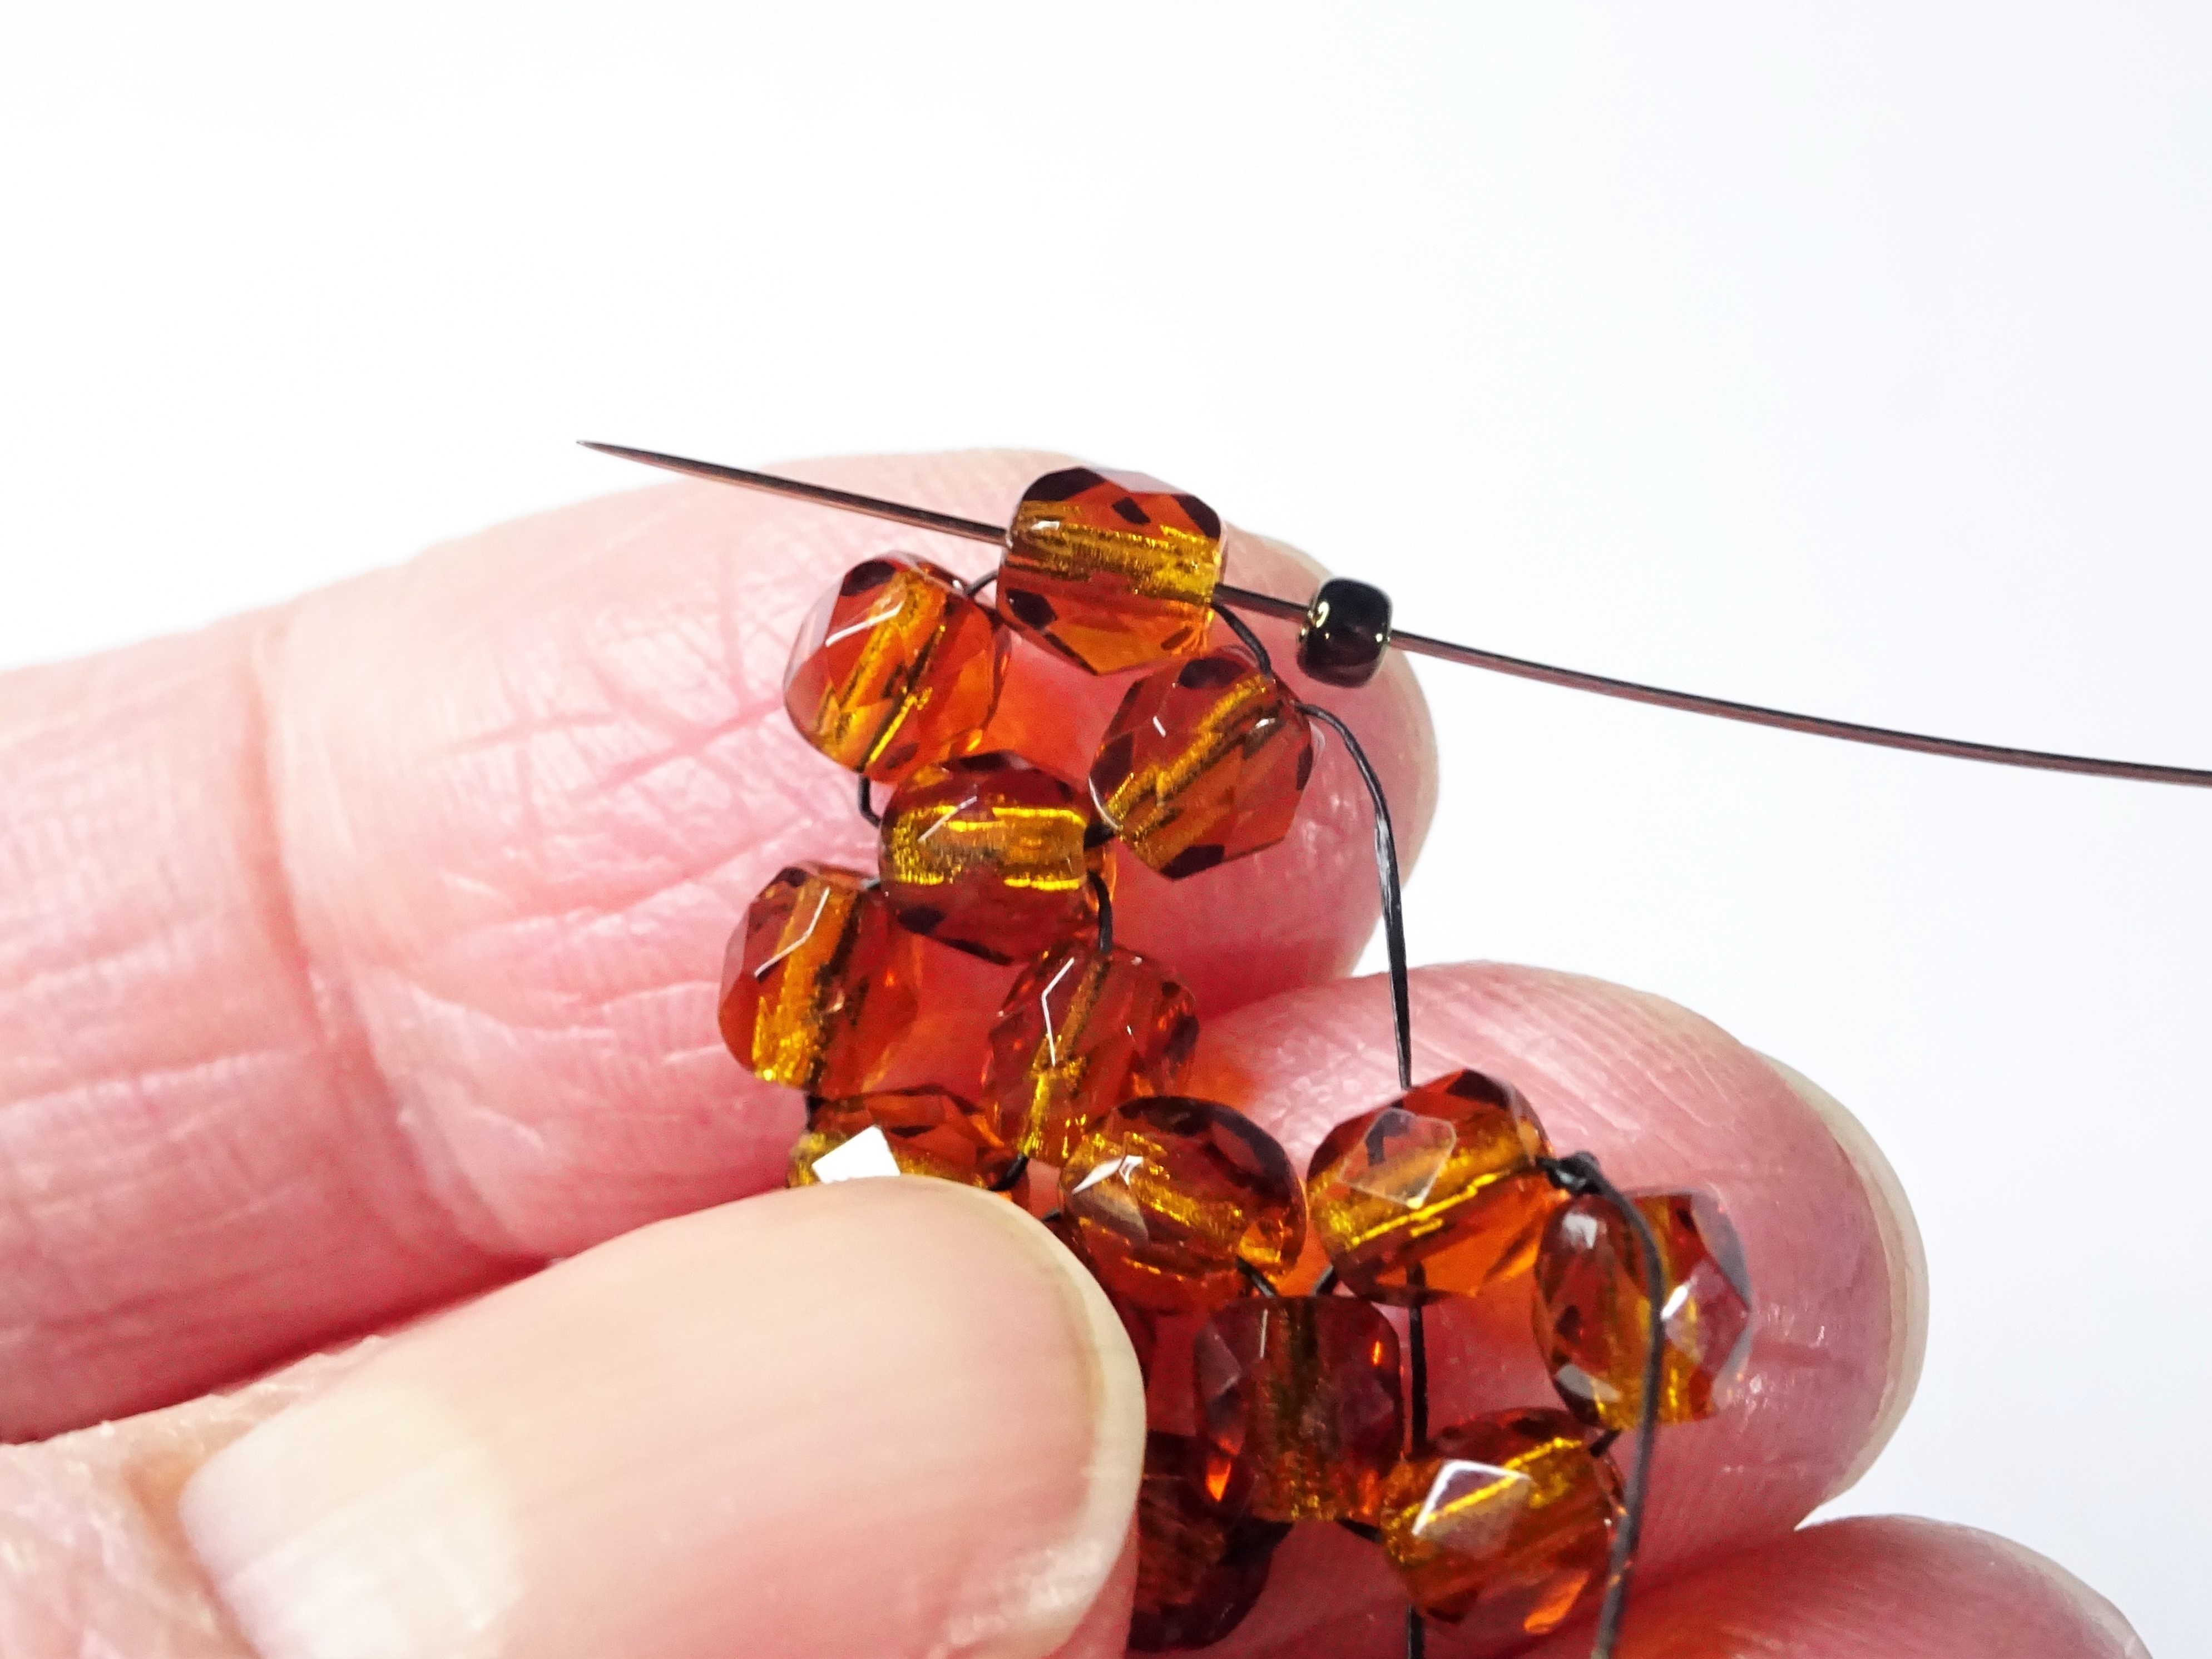
3. Pick up 3 more 4mm beads and take the needle through the same bead you exited from as in step 2. This time, because we need to change the angle of the bead work now to form the base ‘v’ shape of the heart, only move the needle through 1 bead so that the thread is exiting out of one of the side beads.

4. Pick up 3 x 4mm beads and take the needle through the bead you exited from to for a beaded loop. Pull the thread to tighten the bead work and move the needle through 2 beads so that the needle and thread are exiting out the top of the beadwork. (Sorry, the second picture here shows the beading flipped over).

5. Add 3 more 4mm beads in exactly the same manner as previous steps to finish the basic RAW heart shape.
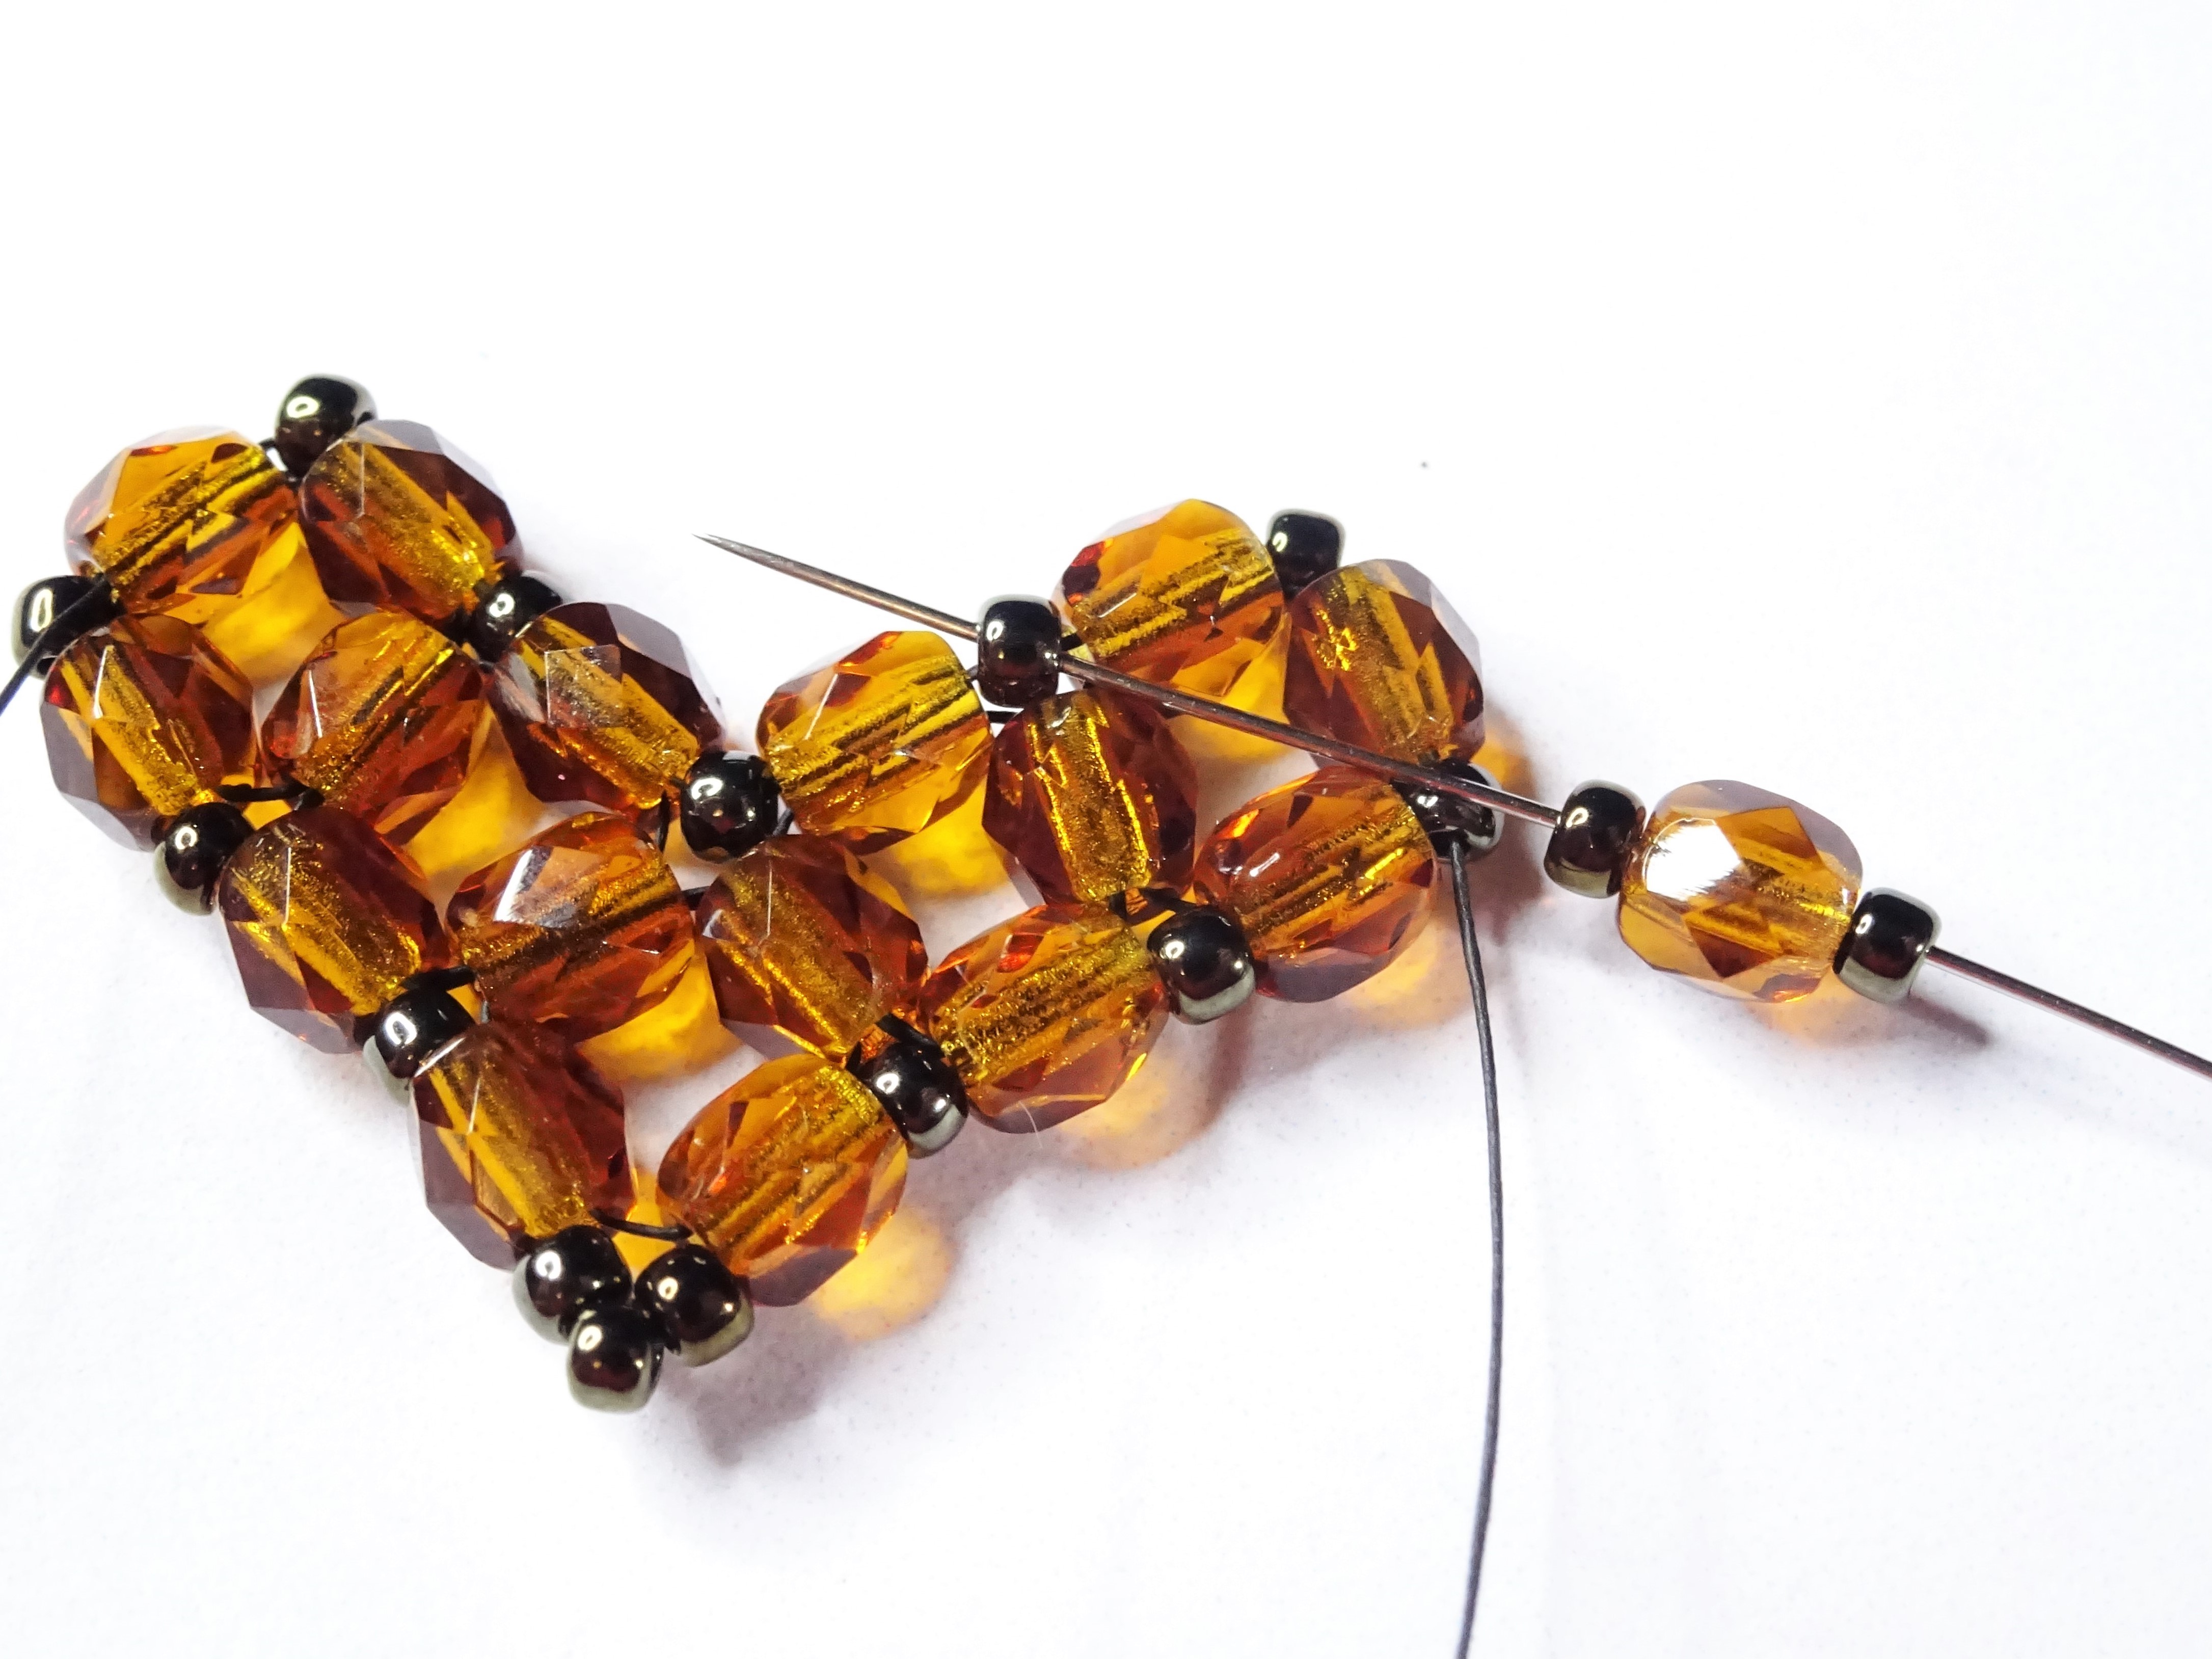
6. To add further detail and help tighten up the beadwork, move the needle into the next 4mm along so that the thread exits out of a side bead, pick up 1 x size 11 seed bead and take the needle into the next 4mm along on the heart.

7. Continue with step 6 all the way down the outer edge of the heart until you reach the base of the heart. To add a sharper ‘v’ shape, pick up 3 x size 11 and take the needle into the next 4mm along.

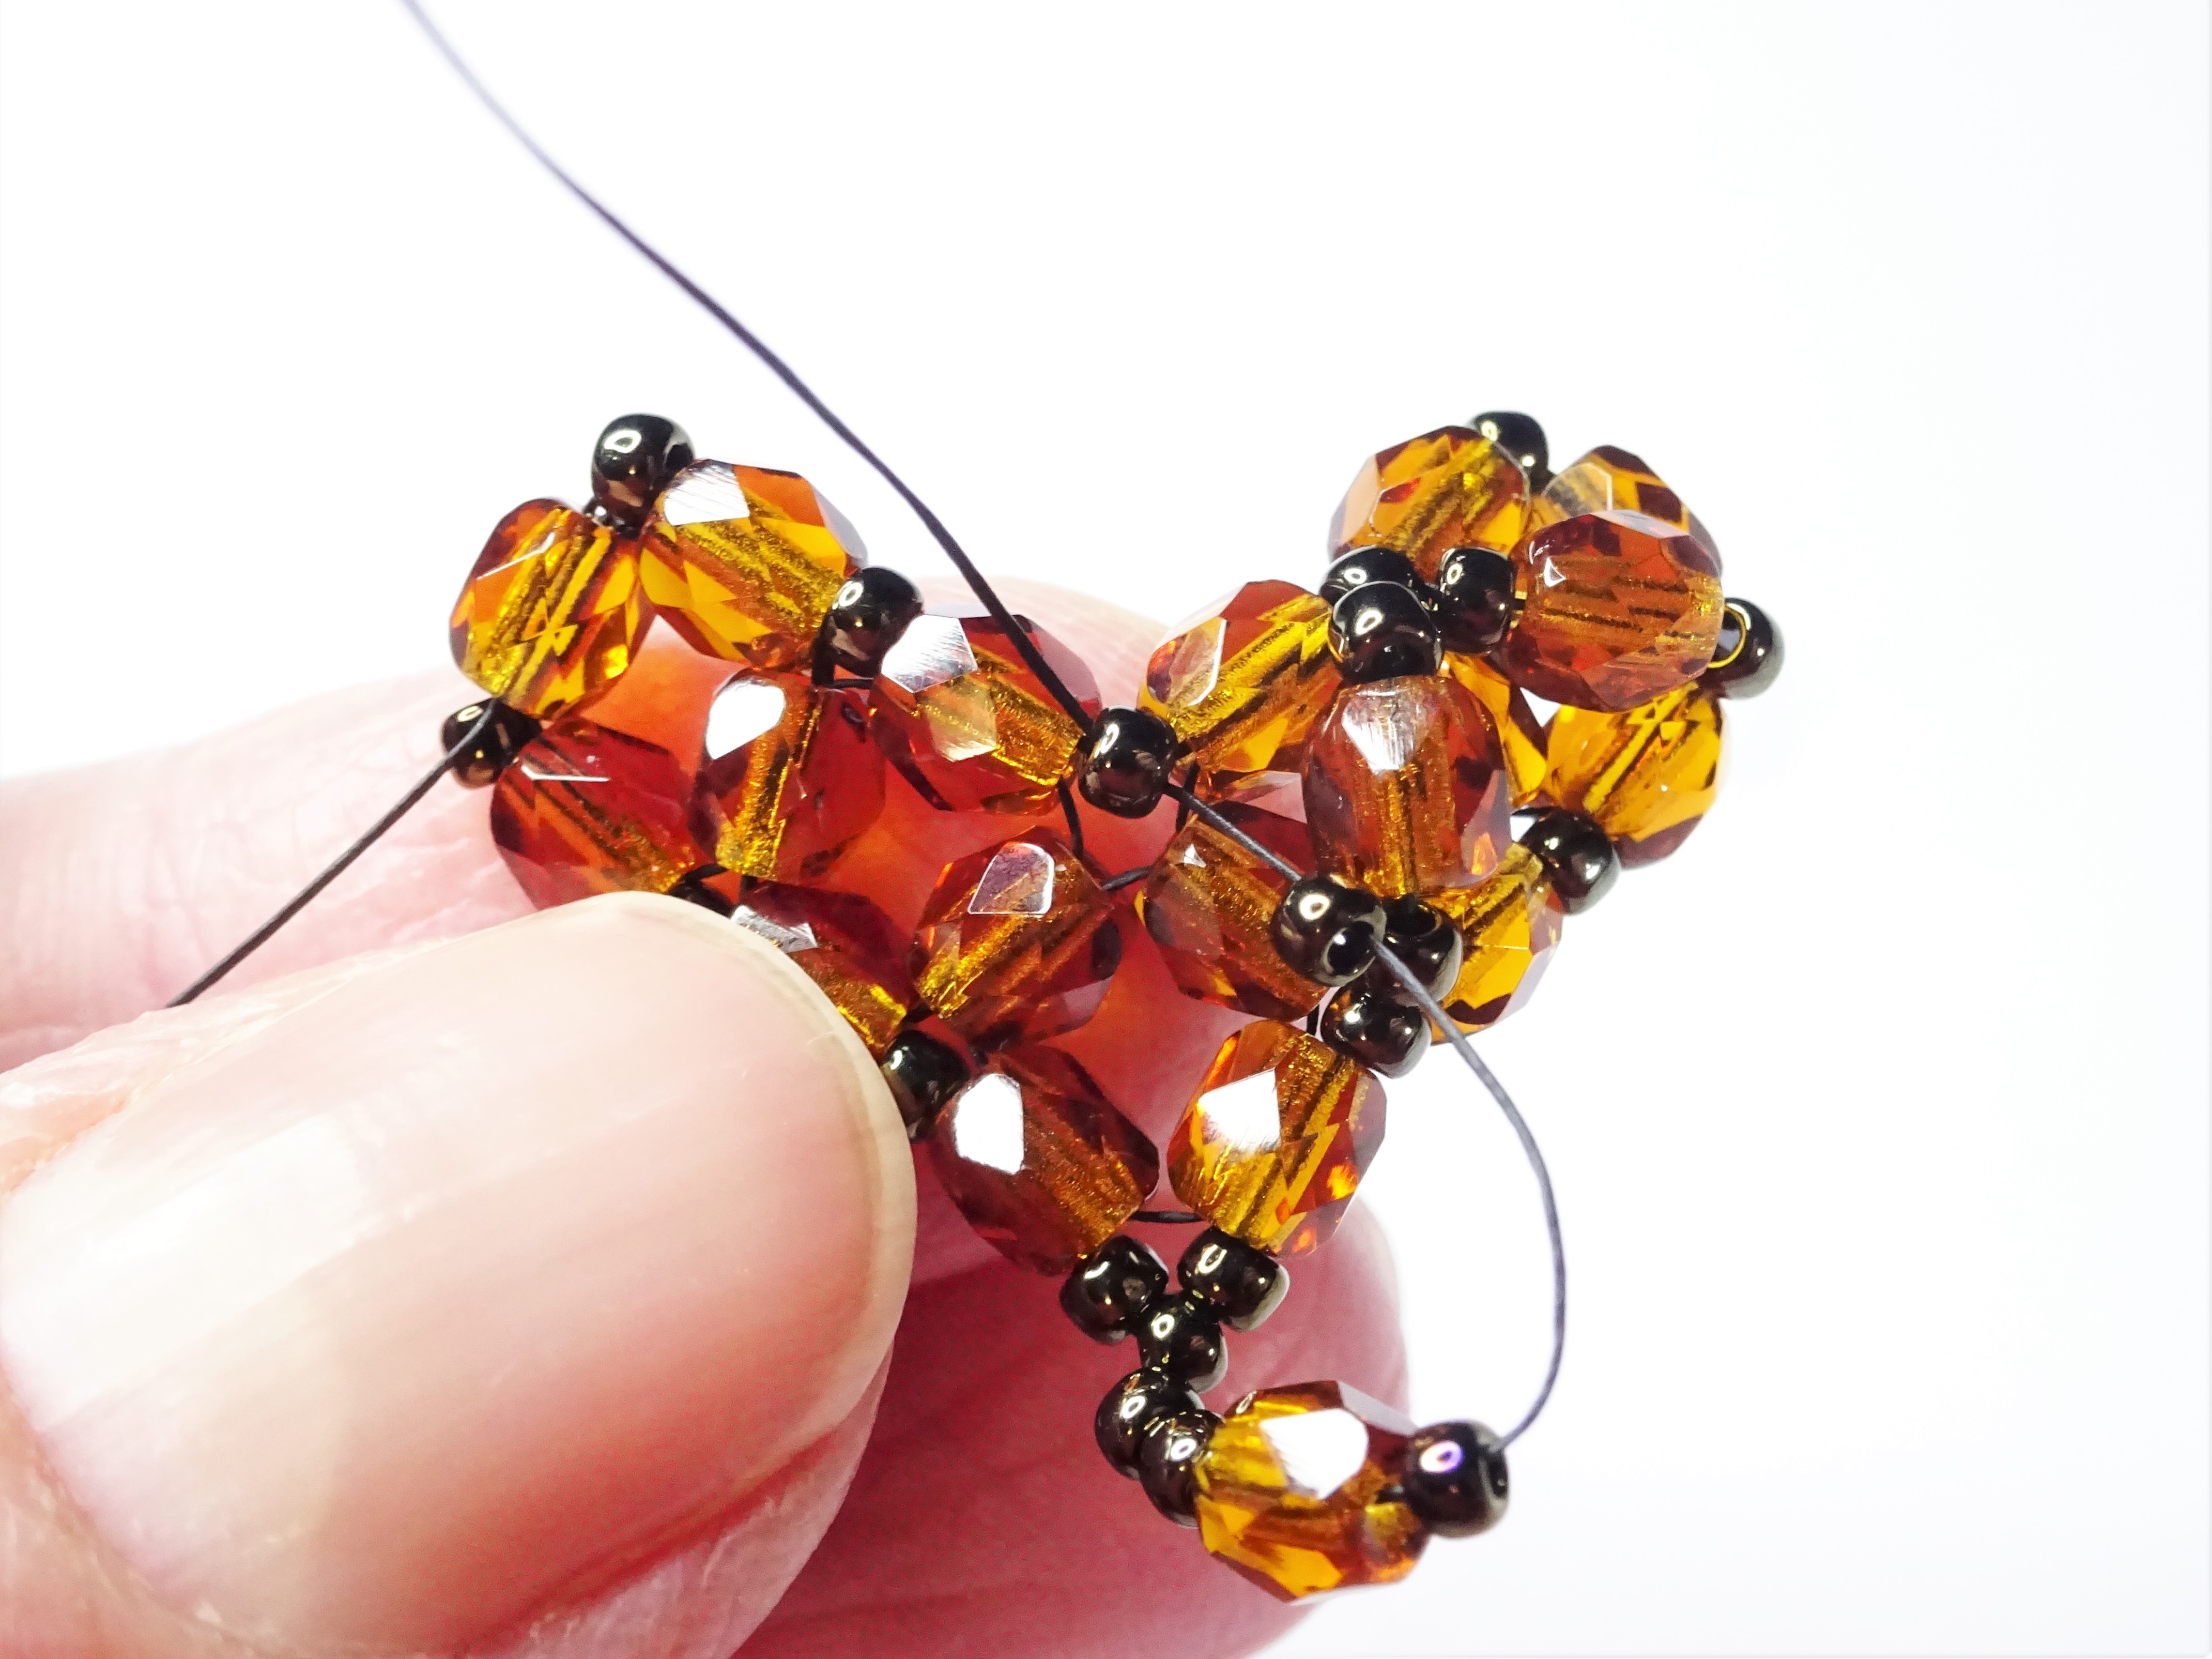
8. Continue adding size 11 beads all the way around the heart.
9.With the thread exiting out of the top right (your right!) size 11 seed bead pick up 1 x size 11, 1 x 4mm and 1 x size 11. Take the needle into the size 11 bead diagonally on the heart.

10. Pick up the same bead sequence as in step 9 and take the needle diagonally down into the opposite size 11.
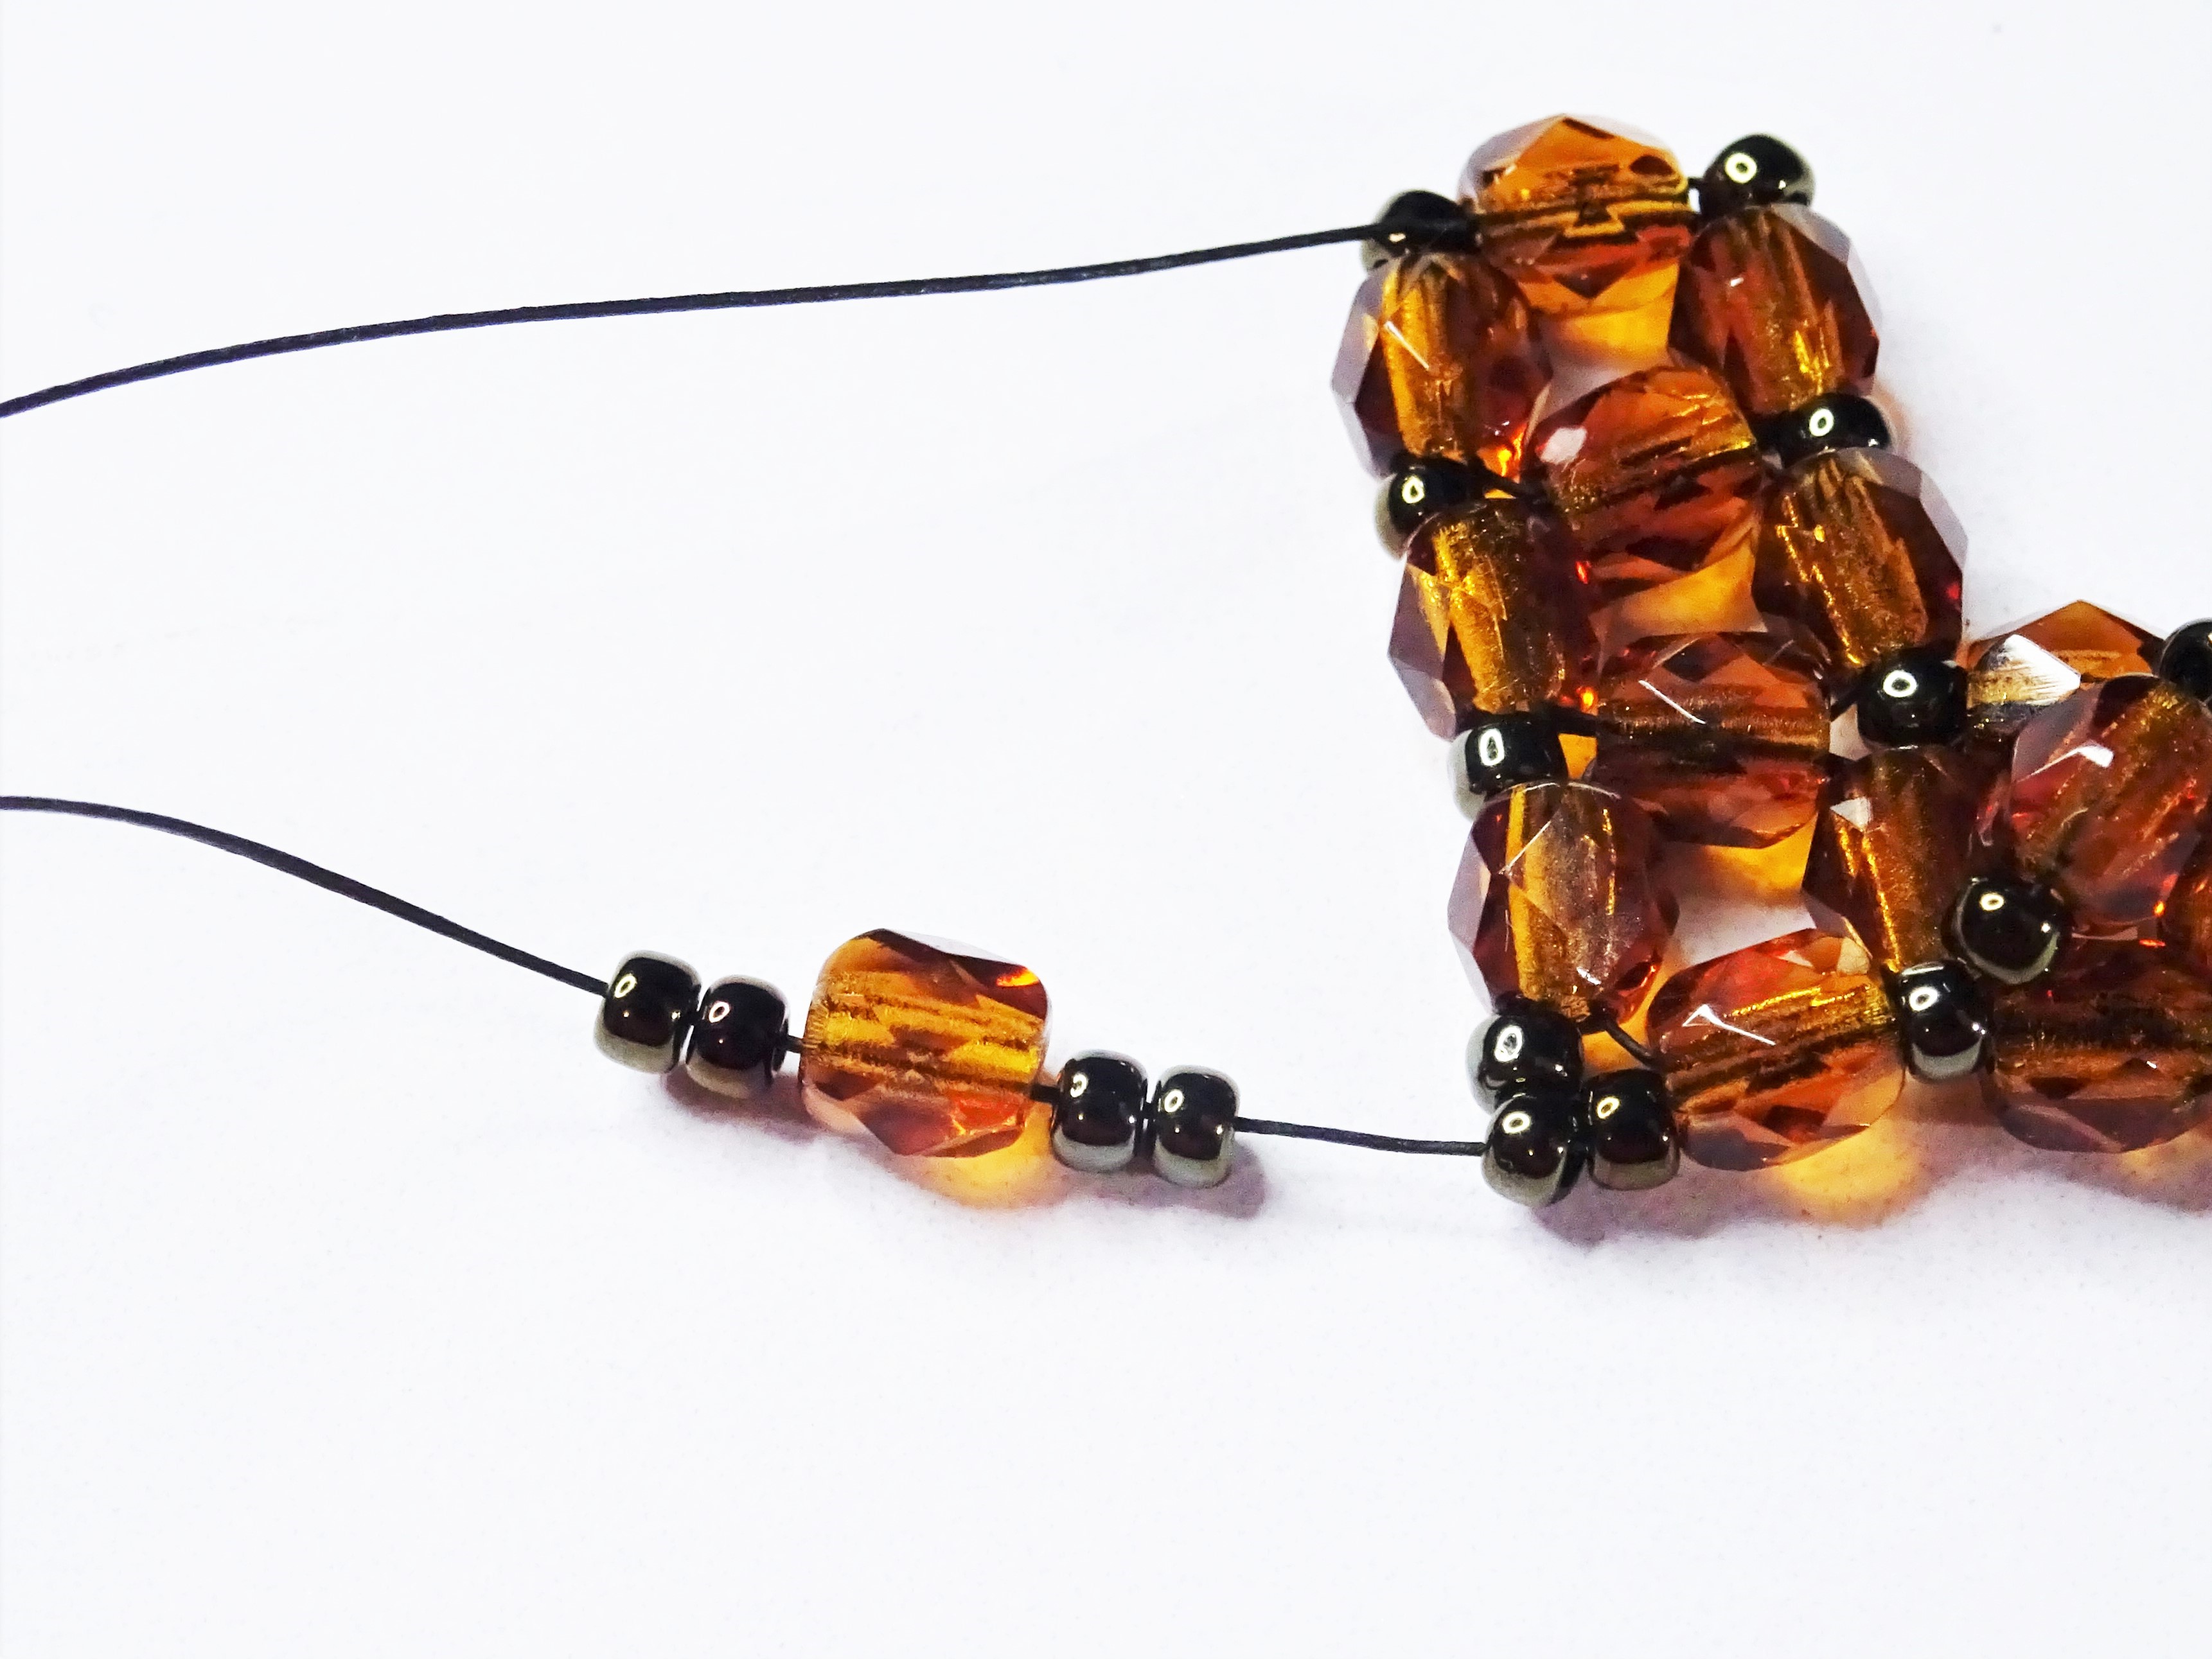
11. Move the needle through the beads so that it exits out the middle size 11 at the base of the heart. Pick up 2 x size 11, 1 x 4mm and 2 x size 11.
12. Take the needle up into the size 11 bead sitting at the top between the two sides of the heart. Pull to tighten the threads.

13. Pick up 1 x size 11 and take the needle back through the size 11 above the 4mm, the 4mm and the size 11 just below it. Pick up 1 more size 11 and take the needle back through the size 11 at the base of the ‘v’ shape.

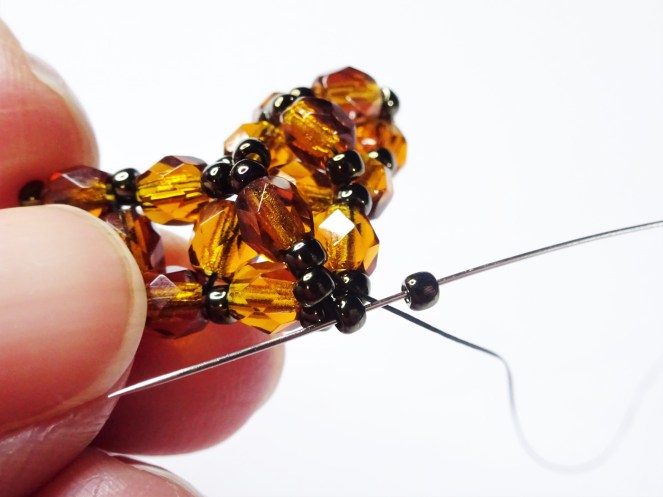
14. Move the needle so that it exits out of the next size 11 up on the outer edge of the heart and repeat steps 9, 10 and 11 on the other side in the reverse order..
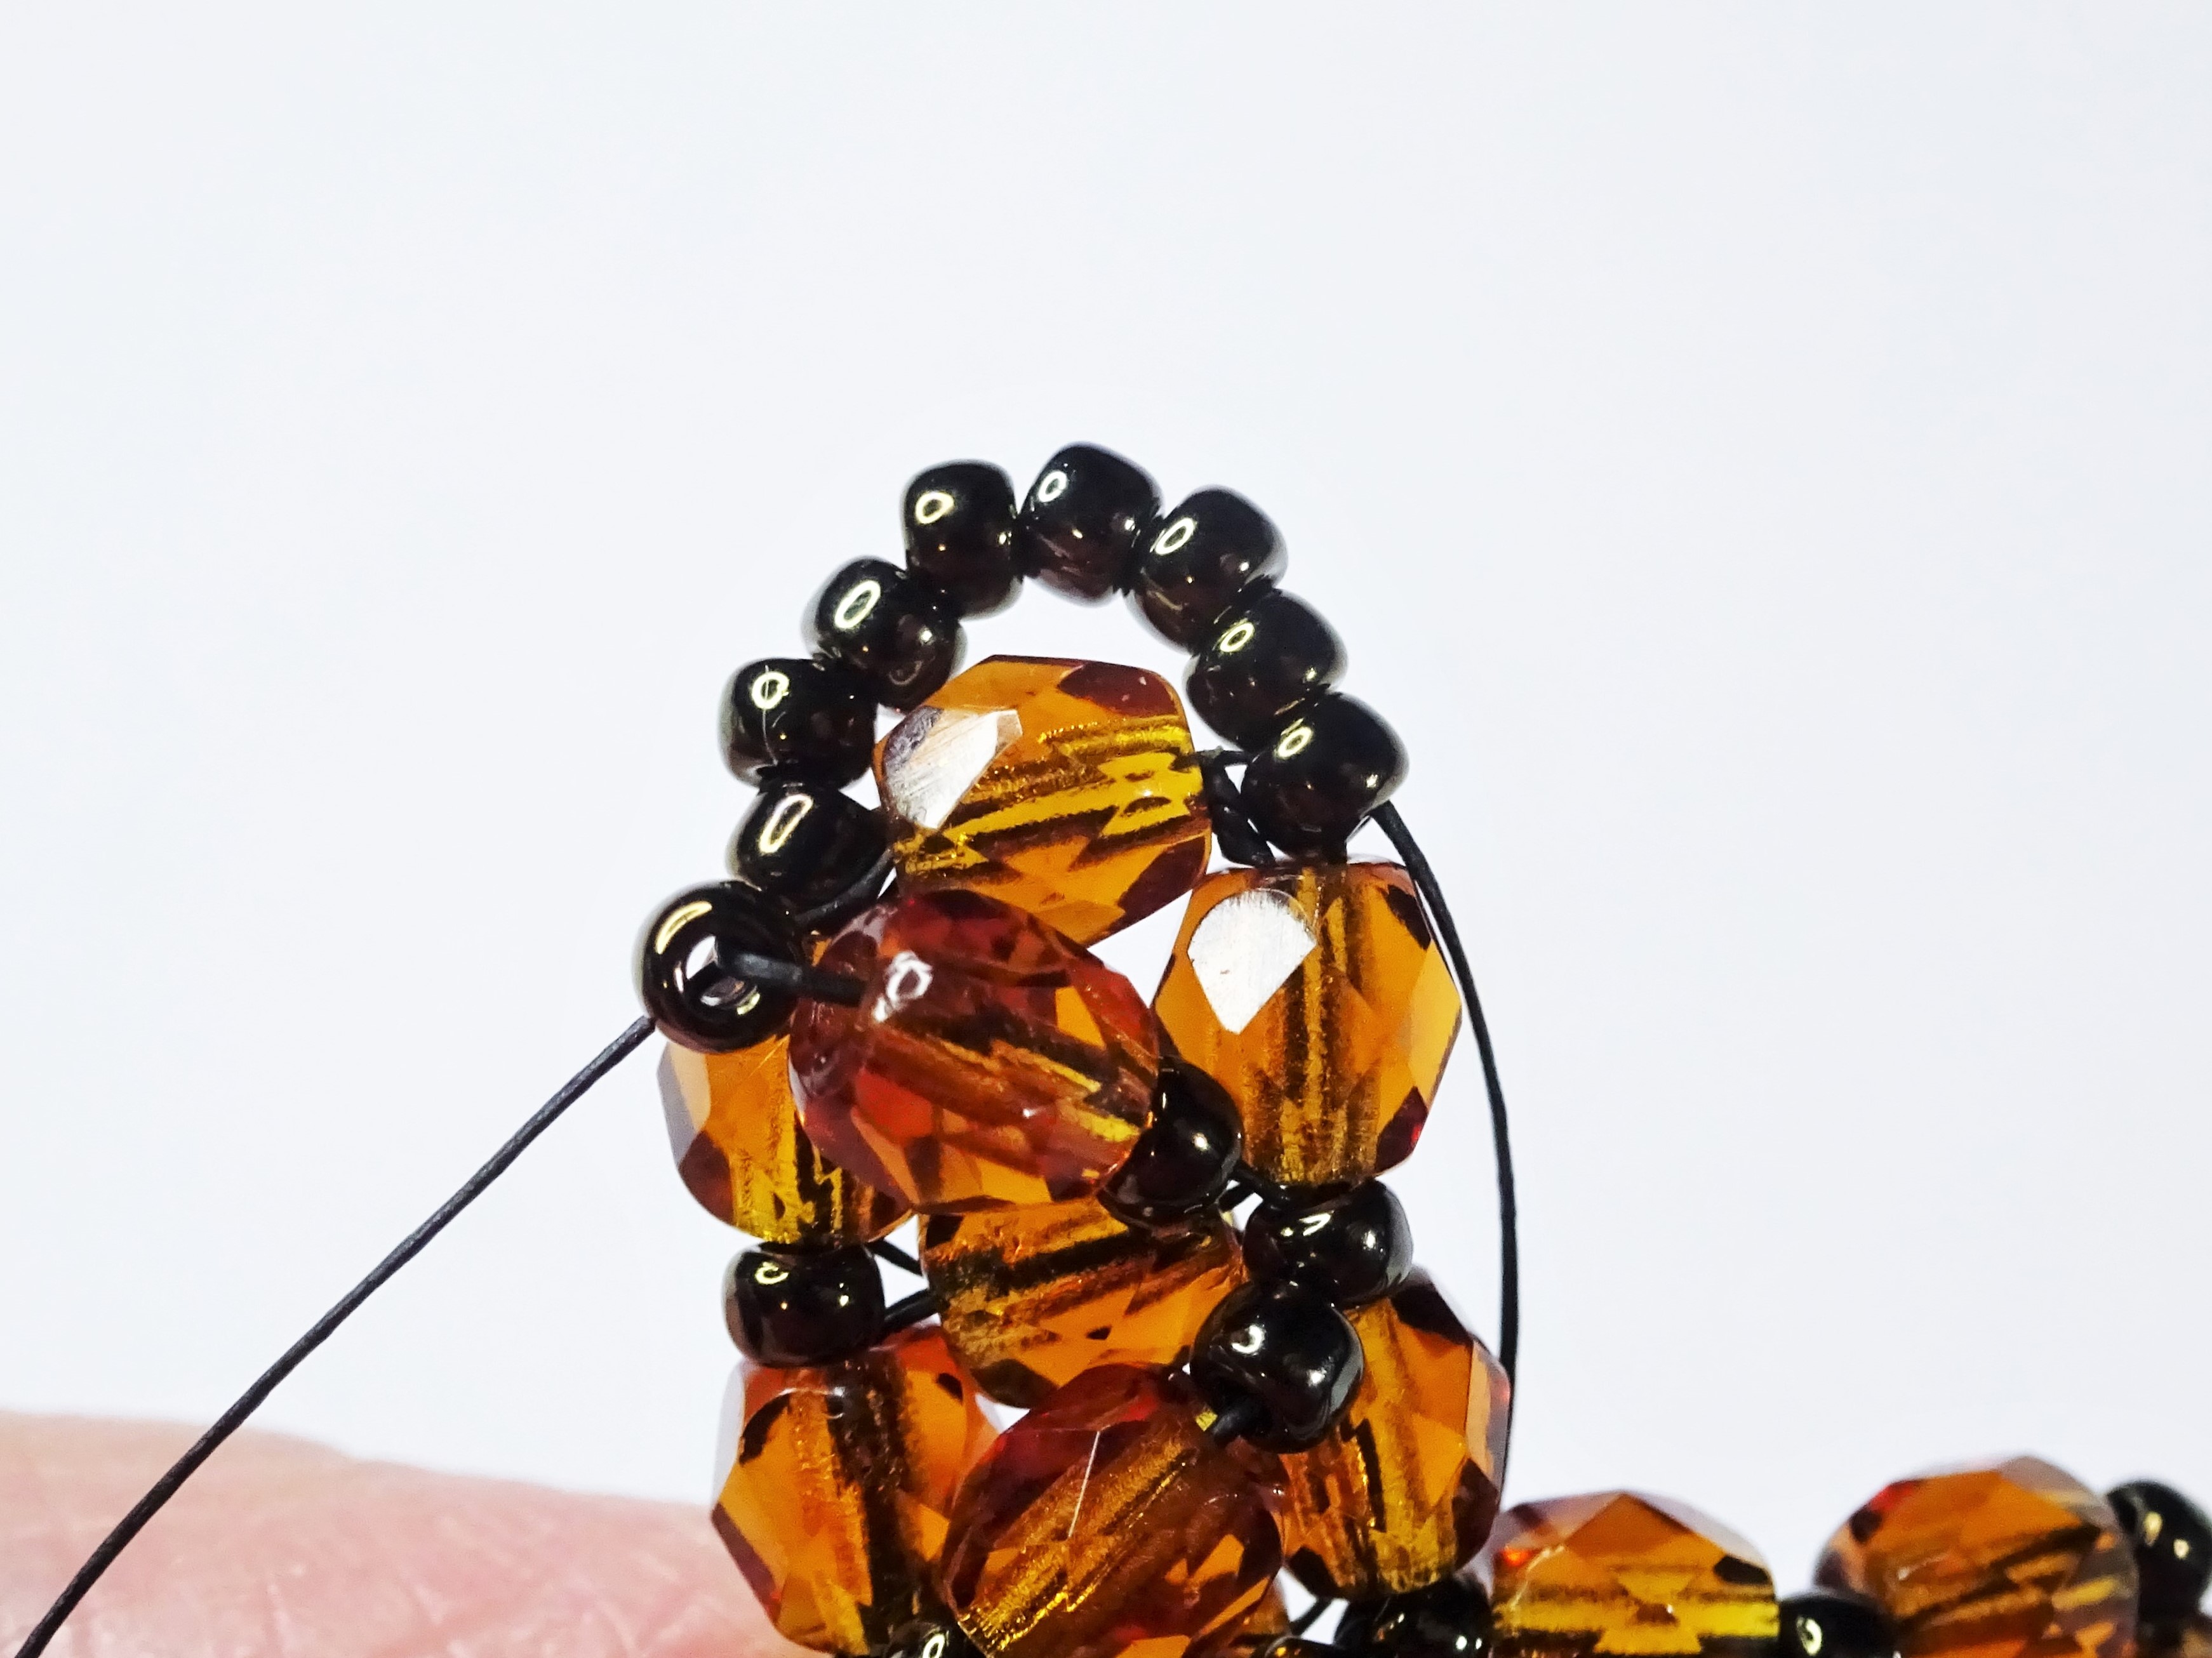
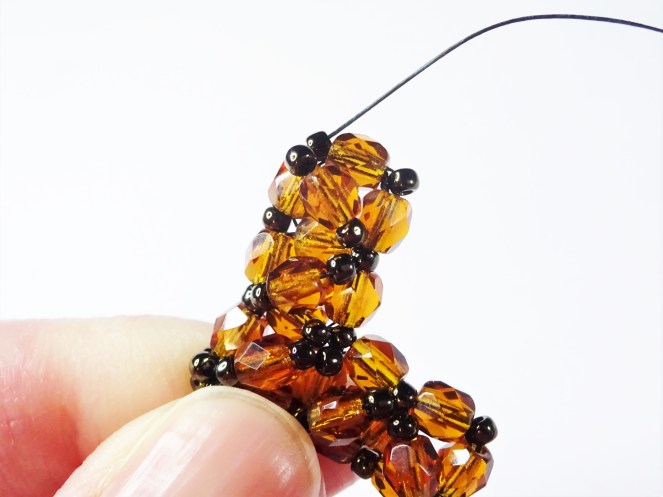
15. Exiting out of a size 11 at the top of the beadwork, pick up 6 x size 11 beads. Take the needle in to the next size 11 on the opposite side. This will for a loop at the top to attach your chain.

16. Move the needle through the beadwork to the other side an repeat step 15 to form a second loop. Weave in the remaining thread, knotting as you go. Cut of any remaining thread and repeat for the tail thread.
If you need to know how to knot the thread then check out the YouTube video below or this bead weaving post (there are details on knotting threads towards the end of the post).
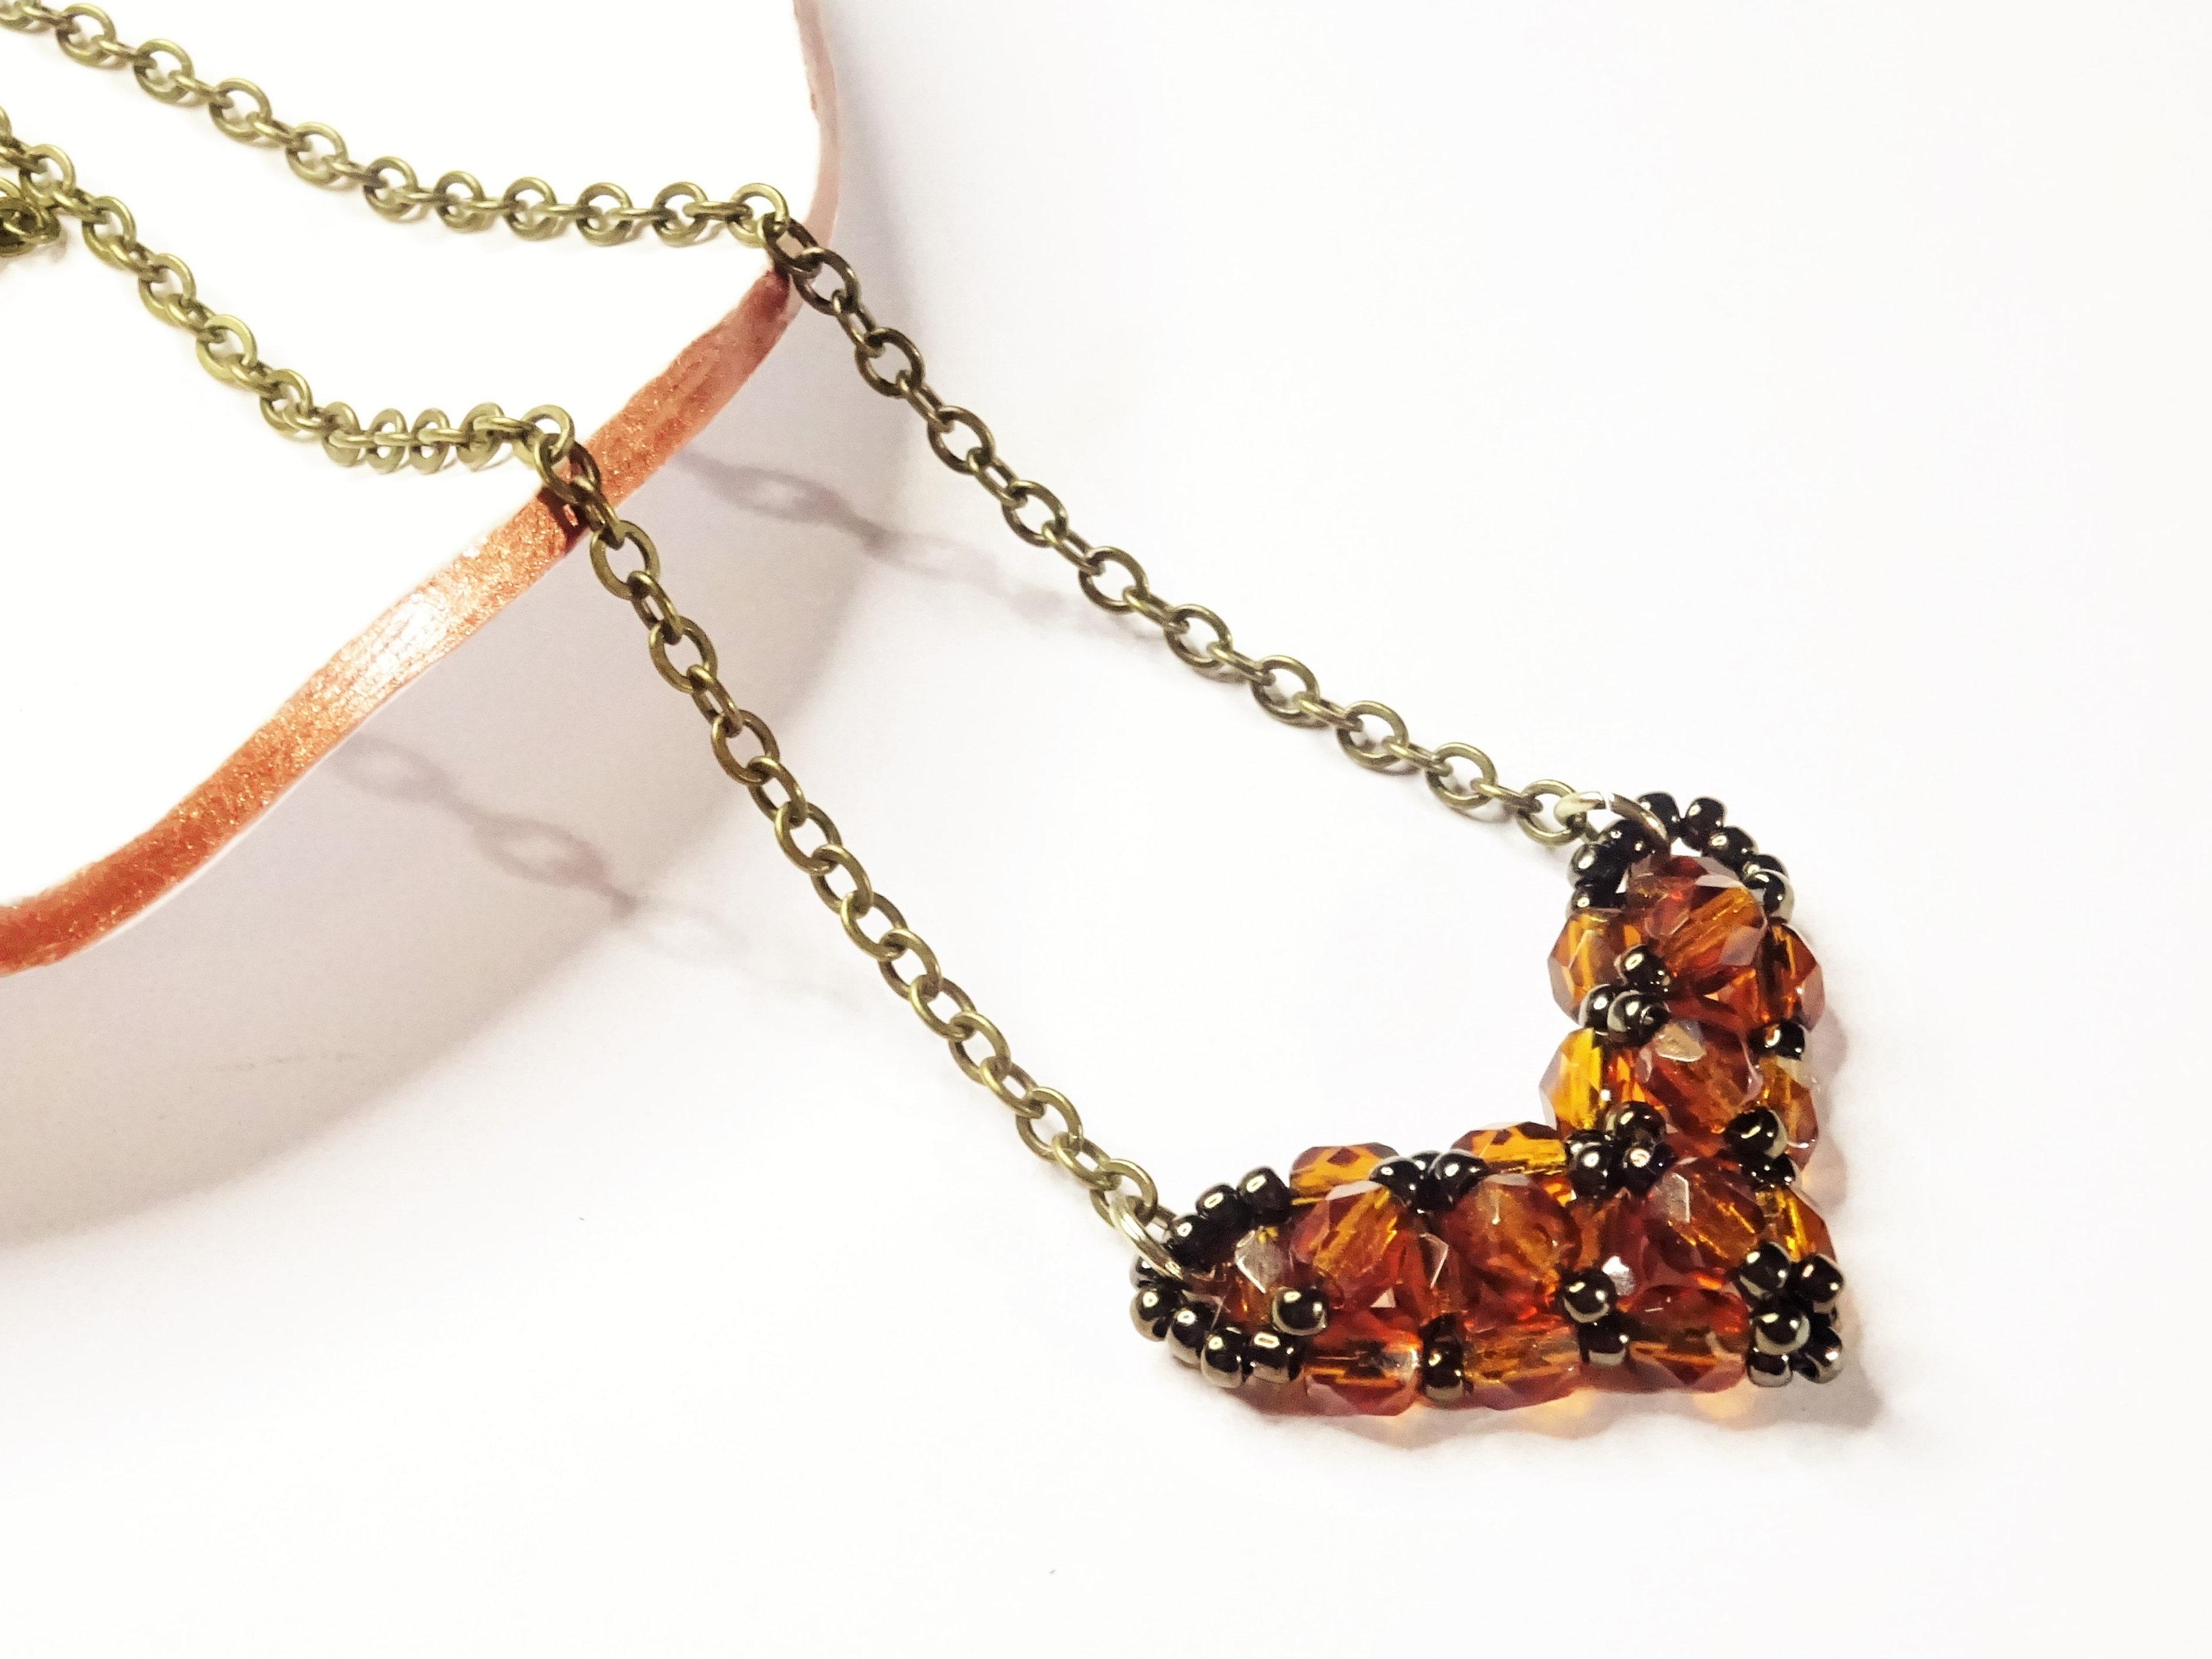
17. Attach your chain and your necklace is finished.
If you have enjoyed this tutorial then don’t forget to have a look at my other free tutorials before you go 🙂
As ever, if you make this or any of my project and share on social media then don’t forget to tag me as I would love to see them.
Hannah x


thank you very much
I do love this tutorial, not only I can understand it but it comes out decent… again thank you
Rena
Thank you so much Rena for your message. I’m so pleased you enjoyed the tutorial and that it was easy to follow. I hope you enjoy wearing your right angle weave heart necklace. Hannah x