
Please note this post contains Affiliate links. All links are clearly marked at the end of this post.

I realise that I am a little late to the party with a Valentine’s Day tutorial but I figured that hearts are good all year round so I’ll ignore my lateness and post it anyway. Home-schooling and preparing endless meals for my family seems to be my current occupation so this tutorial is short, sweet and really simple. It is perfect for beginners but will also give those more experienced with polymer clay an easy cane to use in multiple ways. I have used my clay extruder as this is the easiest way to produce evenly shaped pieces and speeds up the process but the shapes needed could easily be formed by hand.
I’ll just pop here a link for my tutorial showing how to use a polymer clay cane to make beads and pendants because that is the next logical step for when you have made your easy heart cane.
How To Use An Extruder To Make A Polymer Clay Heart

- Condition your clay well so that it is soft enough to use. The softer the clay is for the extruder the better. Use the teardrop shaped extruder disc and push through the colour that you are using for the heart.

2. Once you have a long section of this teardrop shape cut it from your extruder. Cut this length into two equal lengths and carefully match up the points of the teardrop all the way down the length – you may need to pinch these together to make them stick to each other. Ta-da, you have a heart!
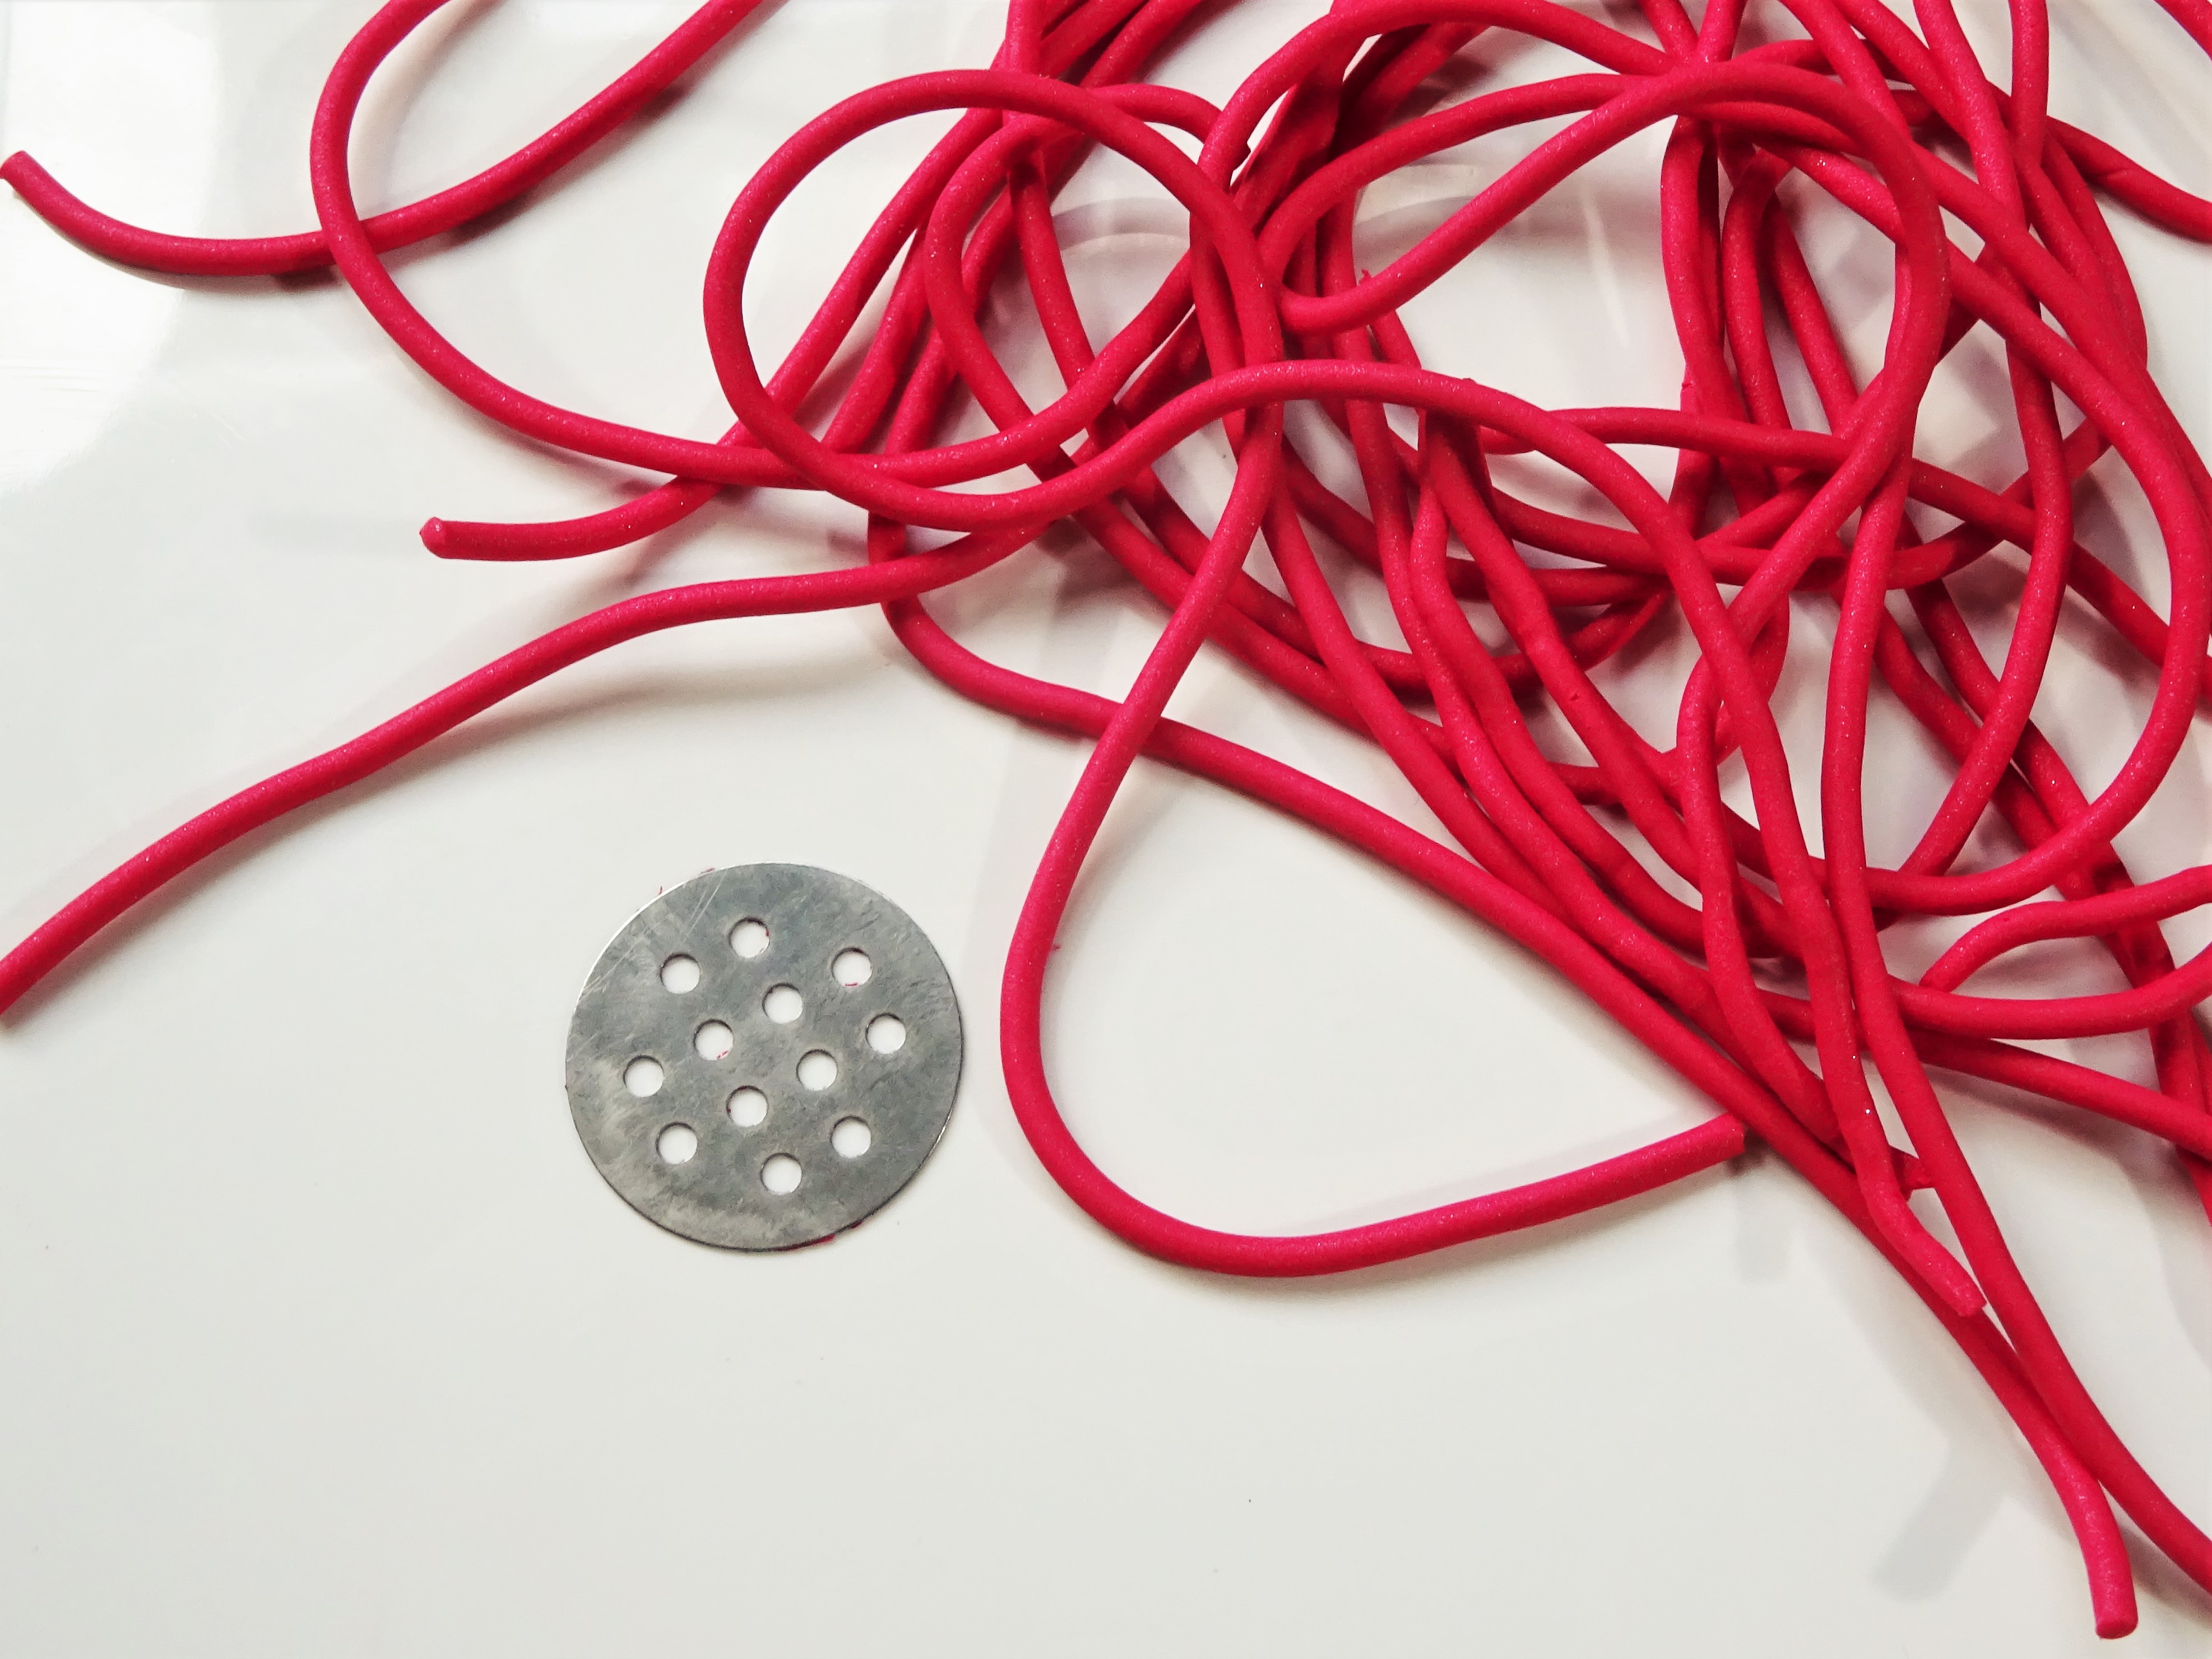
3. Condition the clay that is going to be used to surround your heart. Once soft enough, push it through your extruder using the disc with 12 circles on it. This will create long worms of clay.

4. Use the long snakes of clay made in step 4 to pack around the heart. To begin with, roll a piece a little thinner to sit in the ‘V’ at the top middle of the heart. Once this is pushed firmly into place use the snakes of clay to surround the heart by making one layer of clay around the entire heart shape and then using a little more clay around the sides that taper towards the bottom point and around the top of the heart shape.
The whole point of this is to try to make a shape that is as round as possible so that when it is reduced (made smaller by rolling etc) the heart retains it’s shape. If there was too little clay to support the shape then the heart will get distorted at the point where there is too little clay. The top curves of the heart are the widest point so they don’t need any extra support. If you need more clarification on this then I also cover it in detail in the YouTube video at the bottom of this post.

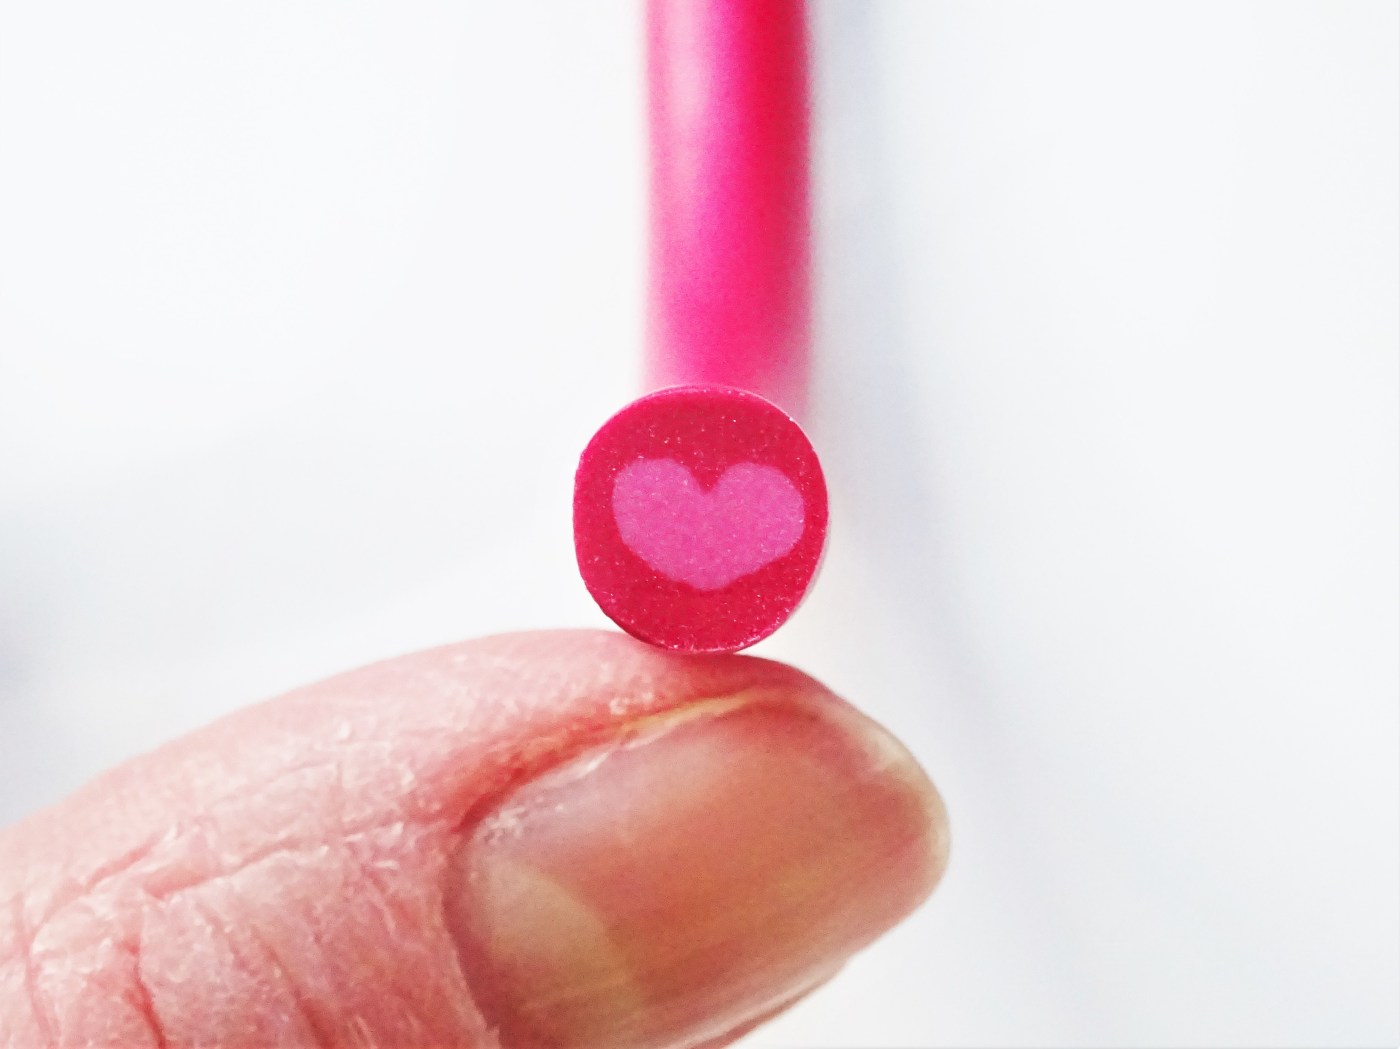
5. Reduce your cane down by squeezing and rolling until it is the desired size. Cut the end off it to reveal the heart within!

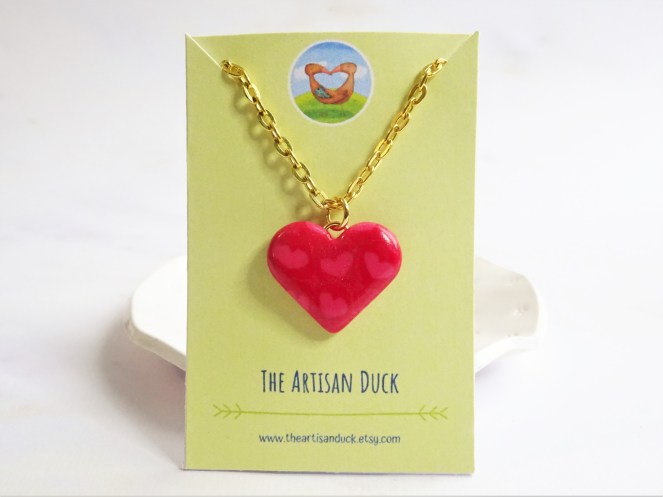
6. As shown in this tutorial, use your cane to make beads and pendant and pop into the oven according to the instruction on your packet of clay. Cover with two coats of gloss varnish to really make the colours pop, leave to dry and your jewellery is ready to wear.
If you are new to polymer clay then my post showing my top 5 essential tools may be of some use to you, as will my easy flower cane and my extruder flower cane tutorial.
Links below for products used are Affiliate links for Amazon. This just means that if you use my link to buy a product I earn a very small commission, at no extra expense to you (you pay the same regardless how you find the item). Every little extra helps me to offer free tutorials.
Affiliate Links are for the products I have used in this tutorial.
Amazon UK
Fimo in Metallic Ruby Red and Fimo Pale Pink (I mixed the pale pink with a little ruby red in the tutorial so darken the pale pink a little)
Sculpey Super Slicer Blades (I swear by these – you need a sharp blade to get crisp cuts of your cane)
Amazon US
Sculpey Super Slicer Blades (I swear by these – you need a sharp blade to get crisp cuts of your cane)
Easy Polymer Clay Extruder Heart Cane Video
If that little tutorial has got you interested in more then I have a range of tutorials showing various fun polymer clay techniques.
If you are on Instagram and you use one of my tutorials to make something then don’t forget to tag me – I would love to see what you have made.
Thanks for reading.
Hannah


Hannah I love this! Thanks so much for all your tutorials..I look forward to them.
Thank you so much Joyce for such a lovely comment – I really appreciate it. I always hope that my tutorials can help brighten someones day so your comment means a lot to me. I’m glad you enjoy them 😃