

Please note – this post contains affiliate links for products used.

This week I really felt the need for a little extra colour so I decided to go big and bold with this easy polymer clay slab tutorial. Having already decided that I wanted to make some flower statement earrings and having read that neon is a trend for this spring/summer I dashed over to my polymer clay storage to find the brightest clay colour in there. This lemon yellow clay really is a spectacular colour (perhaps not quite neon but it’s a great compromise). It is so cheery and will really liven up any outfit – I have am currently wearing a pair of the studs made with this slab and they make me smile every time I catch a glimpse of them in the mirror.
The little pattern reminds me of cake or ice cream sprinkles which, for me, makes this clay slab perfect! (One of these days I’ll try making some clay food)
This polymer clay slab is really easy and, as a result, perfect for beginners. Most can be done entirely by hand although I use tools to make my life quicker and easier. The main tools here being my clay extruder and cutting shapes. I have linked below to the ones I use as I couldn’t be without them now. If you are relatively new to polymer clay then check out my post showing my top 5 tools for polymer clay as it is a great place to start when buying for your new hobby.
There is a YouTube video at the bottom of the tutorial so you can always grab a cuppa, sit back and watch that instead.
Easy Polymer Clay Slab Tutorial

Begin by choosing three colours of clay making sure they have enough contrast for a really striking look. I am using Fimo Professional in Lemon Yellow, Turquoise and Magenta. Condition the clay well so it is soft enough to work with. Roll your slab base colour through on your clay machine on a number 2 or by hand to a thickness that you feel appropriate for the jewellery you wish to make. One at a time, pass the other two clay colours through your clay extruder using the disc with the smallest circles.
I am using this extruder disc as I will roll my little pieces of clay into my base colour and this will cause the clay to spread. By using this disc size the pieces will be the smallest that they can be.
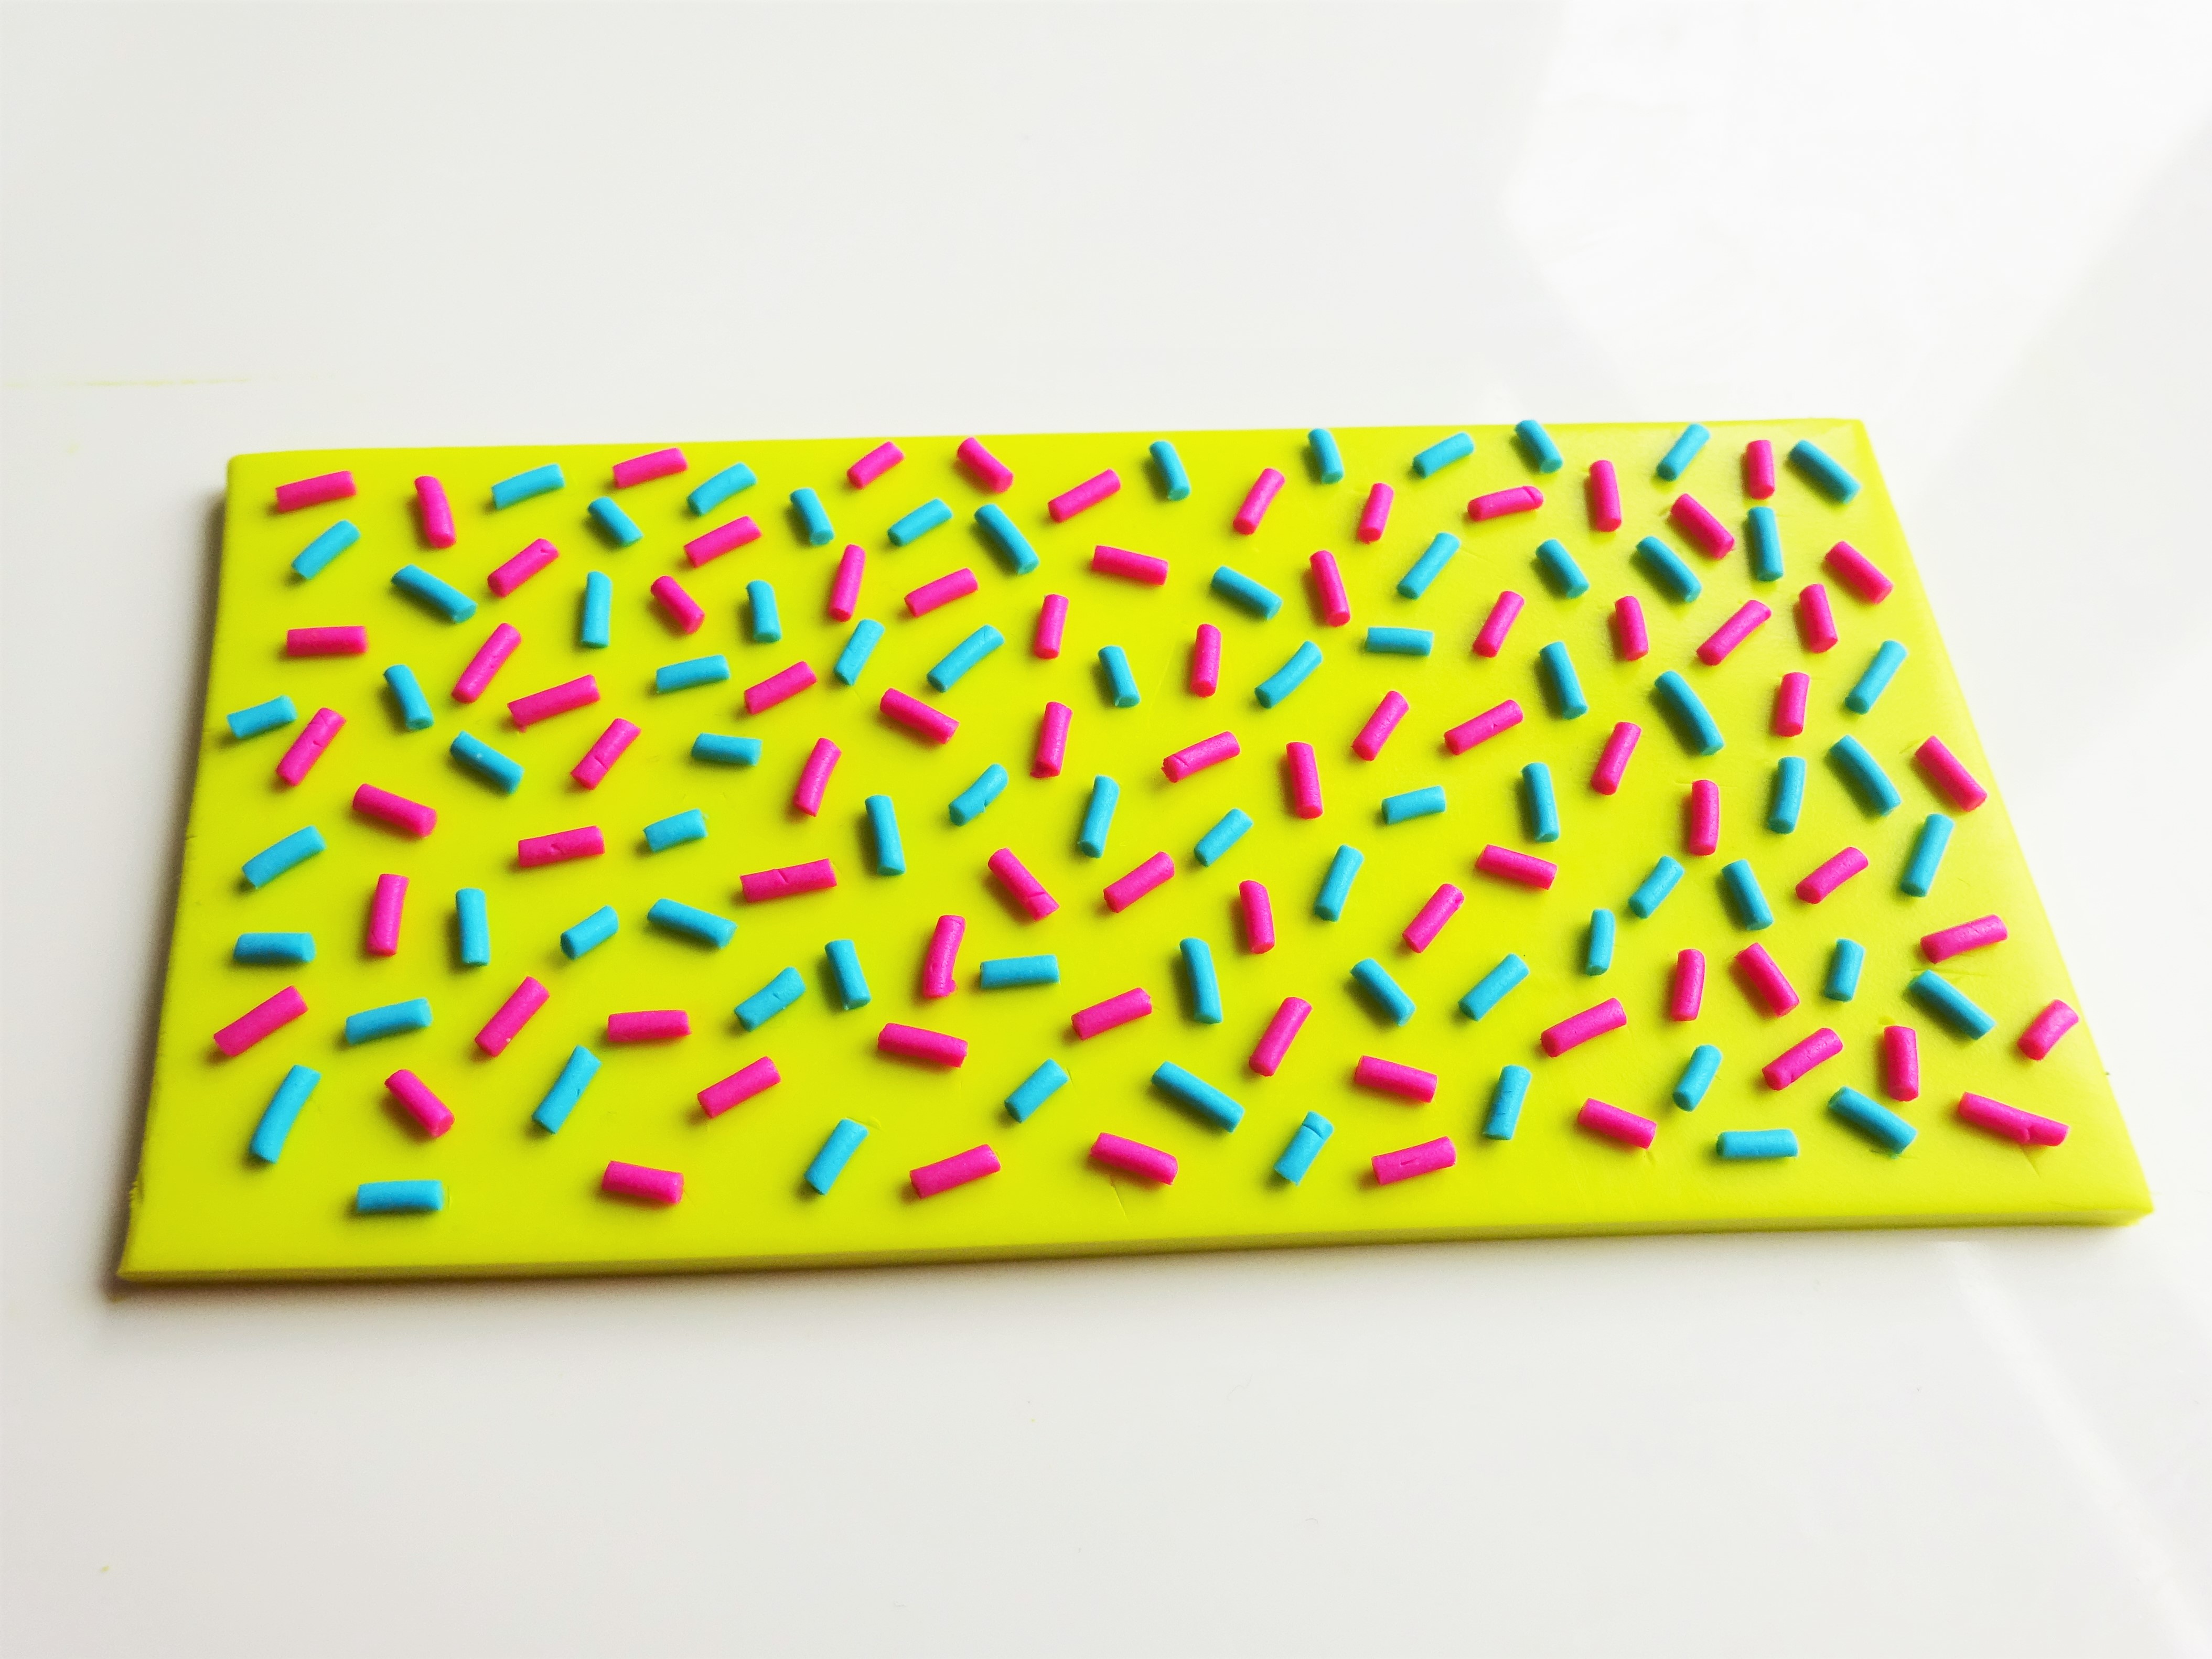
Cut little pieces from your clay snakes, roughly the same length, and position them randomly on your base clay. I like to make sure that they are not too spaced apart as I like my clay slab cuts to have as much pattern on them as possible.
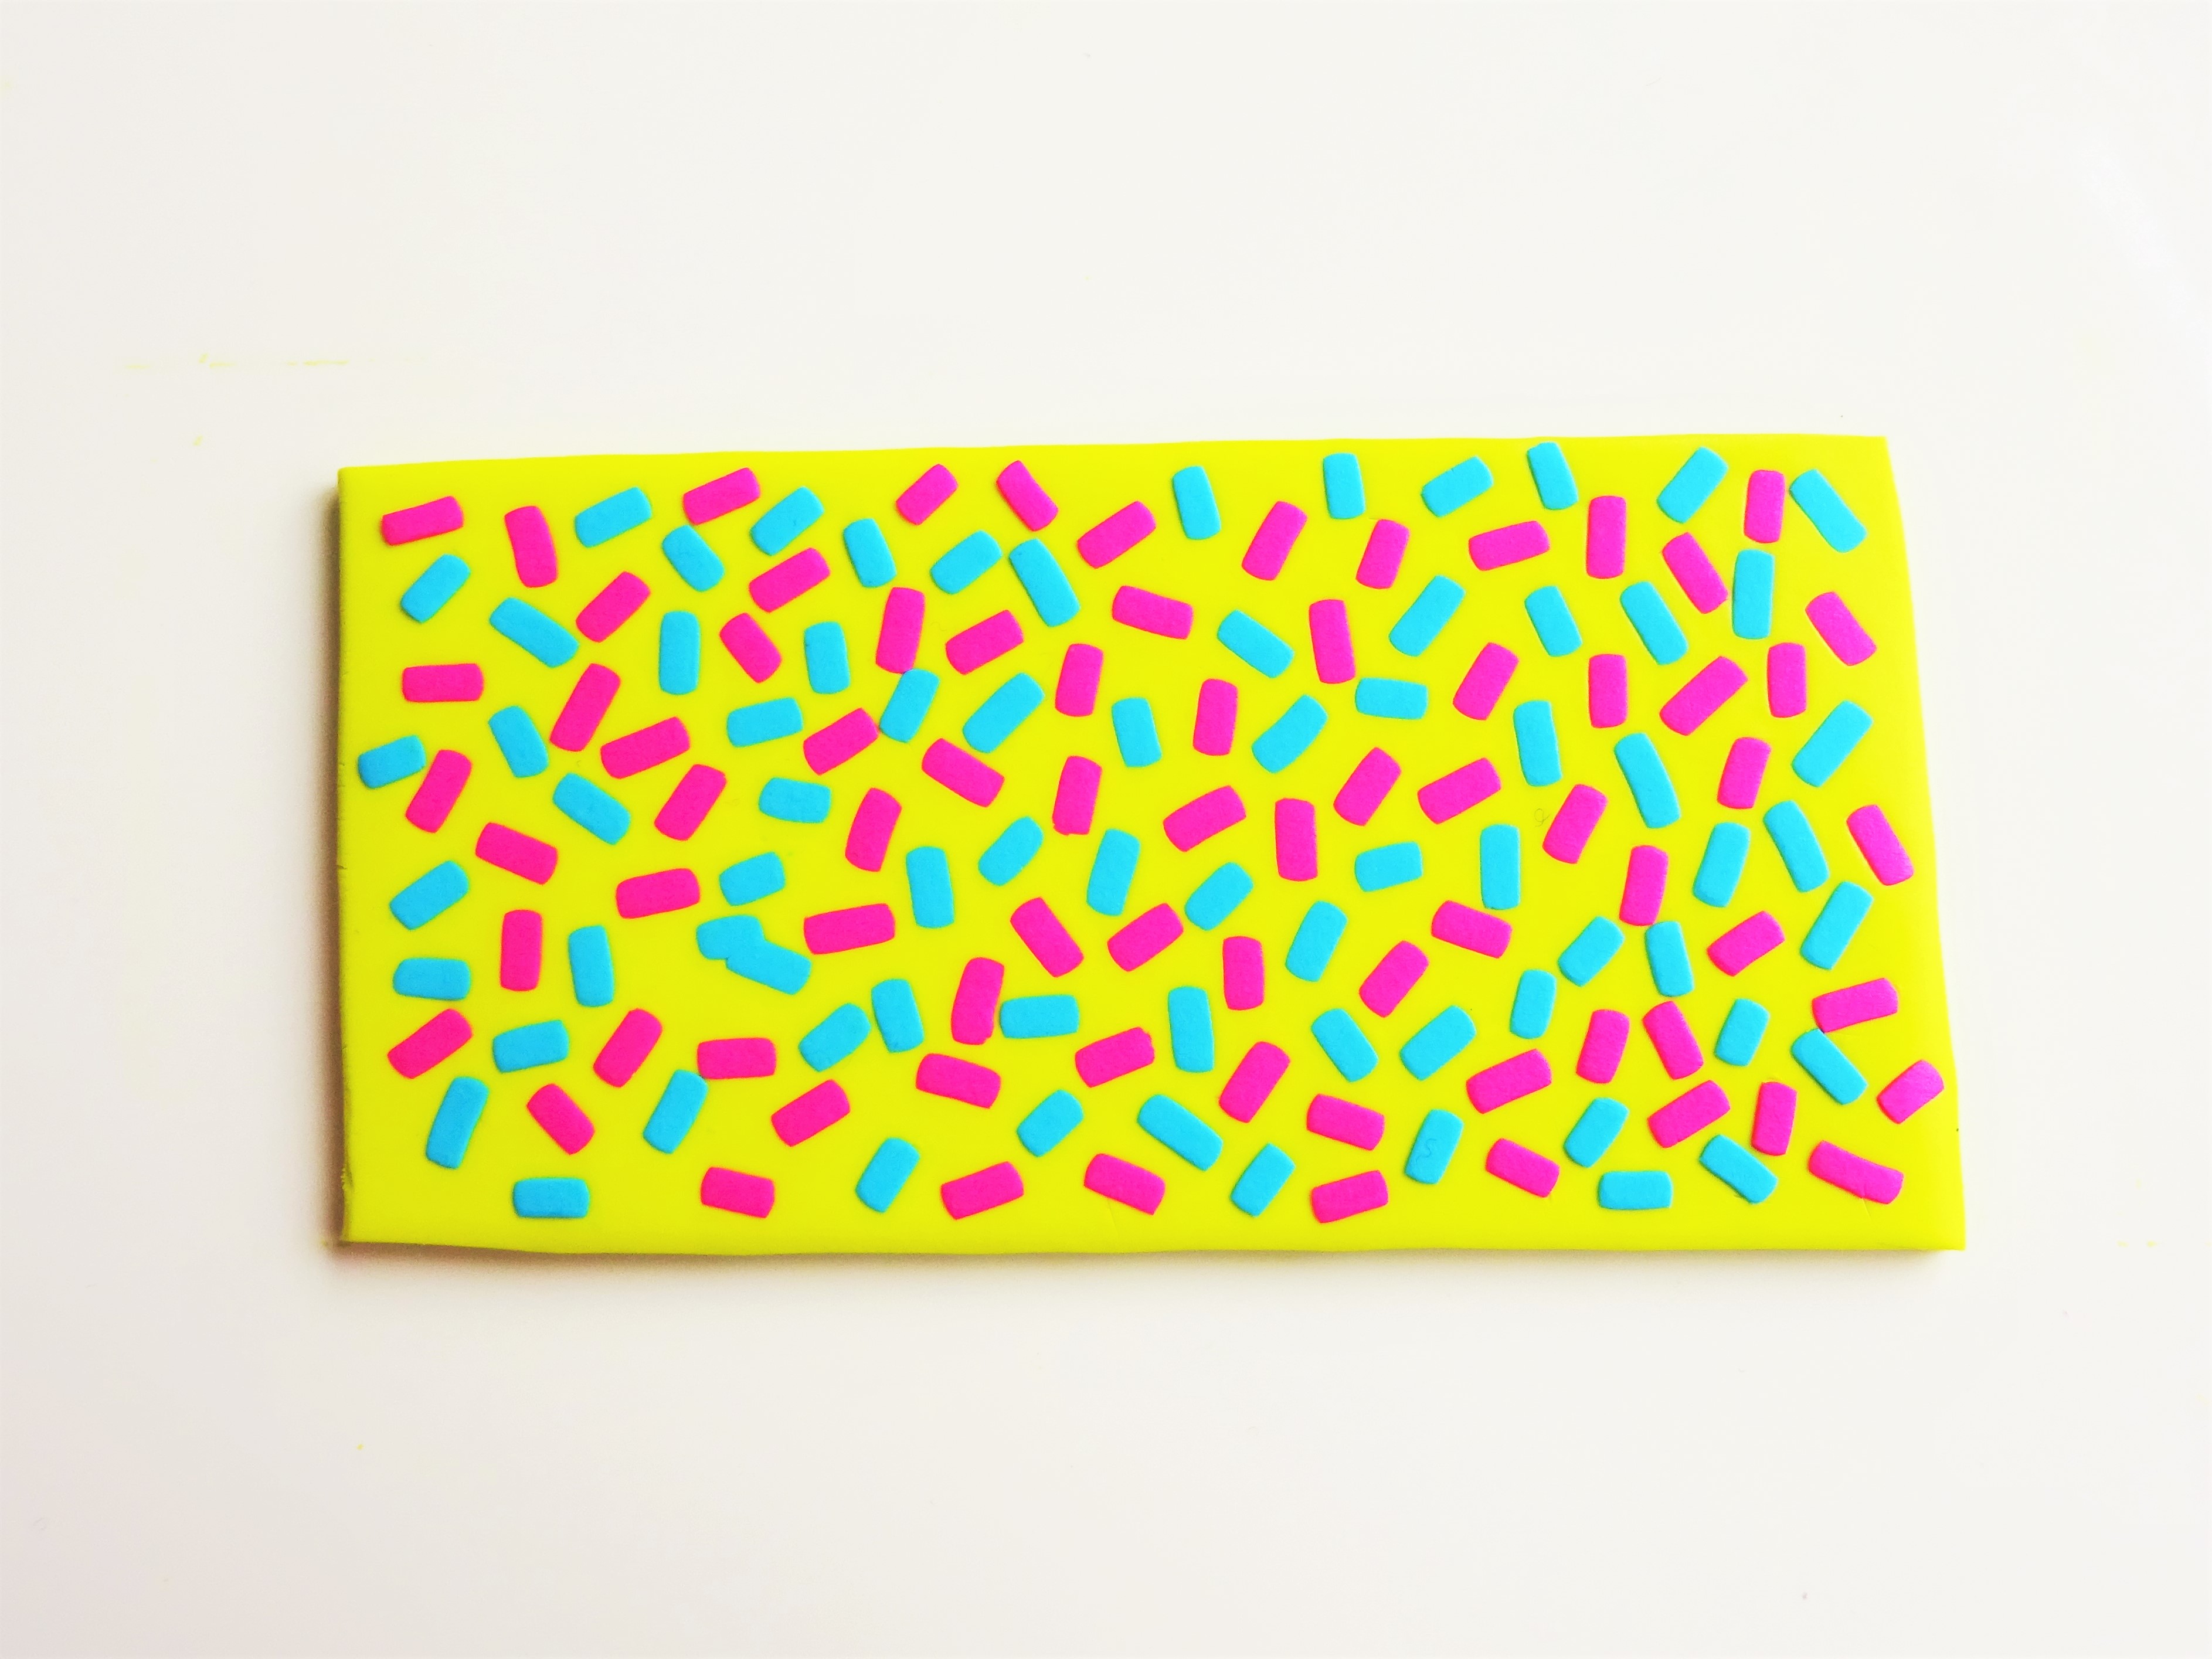
The next step here is to smooth out the surface of the clay as your sprinkles will be standing proud. To reduce the risk that your acrylic roller may pick up some of your sprinkles and reposition them on your clay (after putting in this much work so far it would be typical of me to mess it up with something like that), place a piece of paper on top and use your fingers to gently start pressing the clay down. Once the clay sprinkles are a little more attached to the base sheet of clay use your acrylic roller to smooth out the entire surface. It’s absolutely fine to roll over the paper and peel it off once it all feels flat.
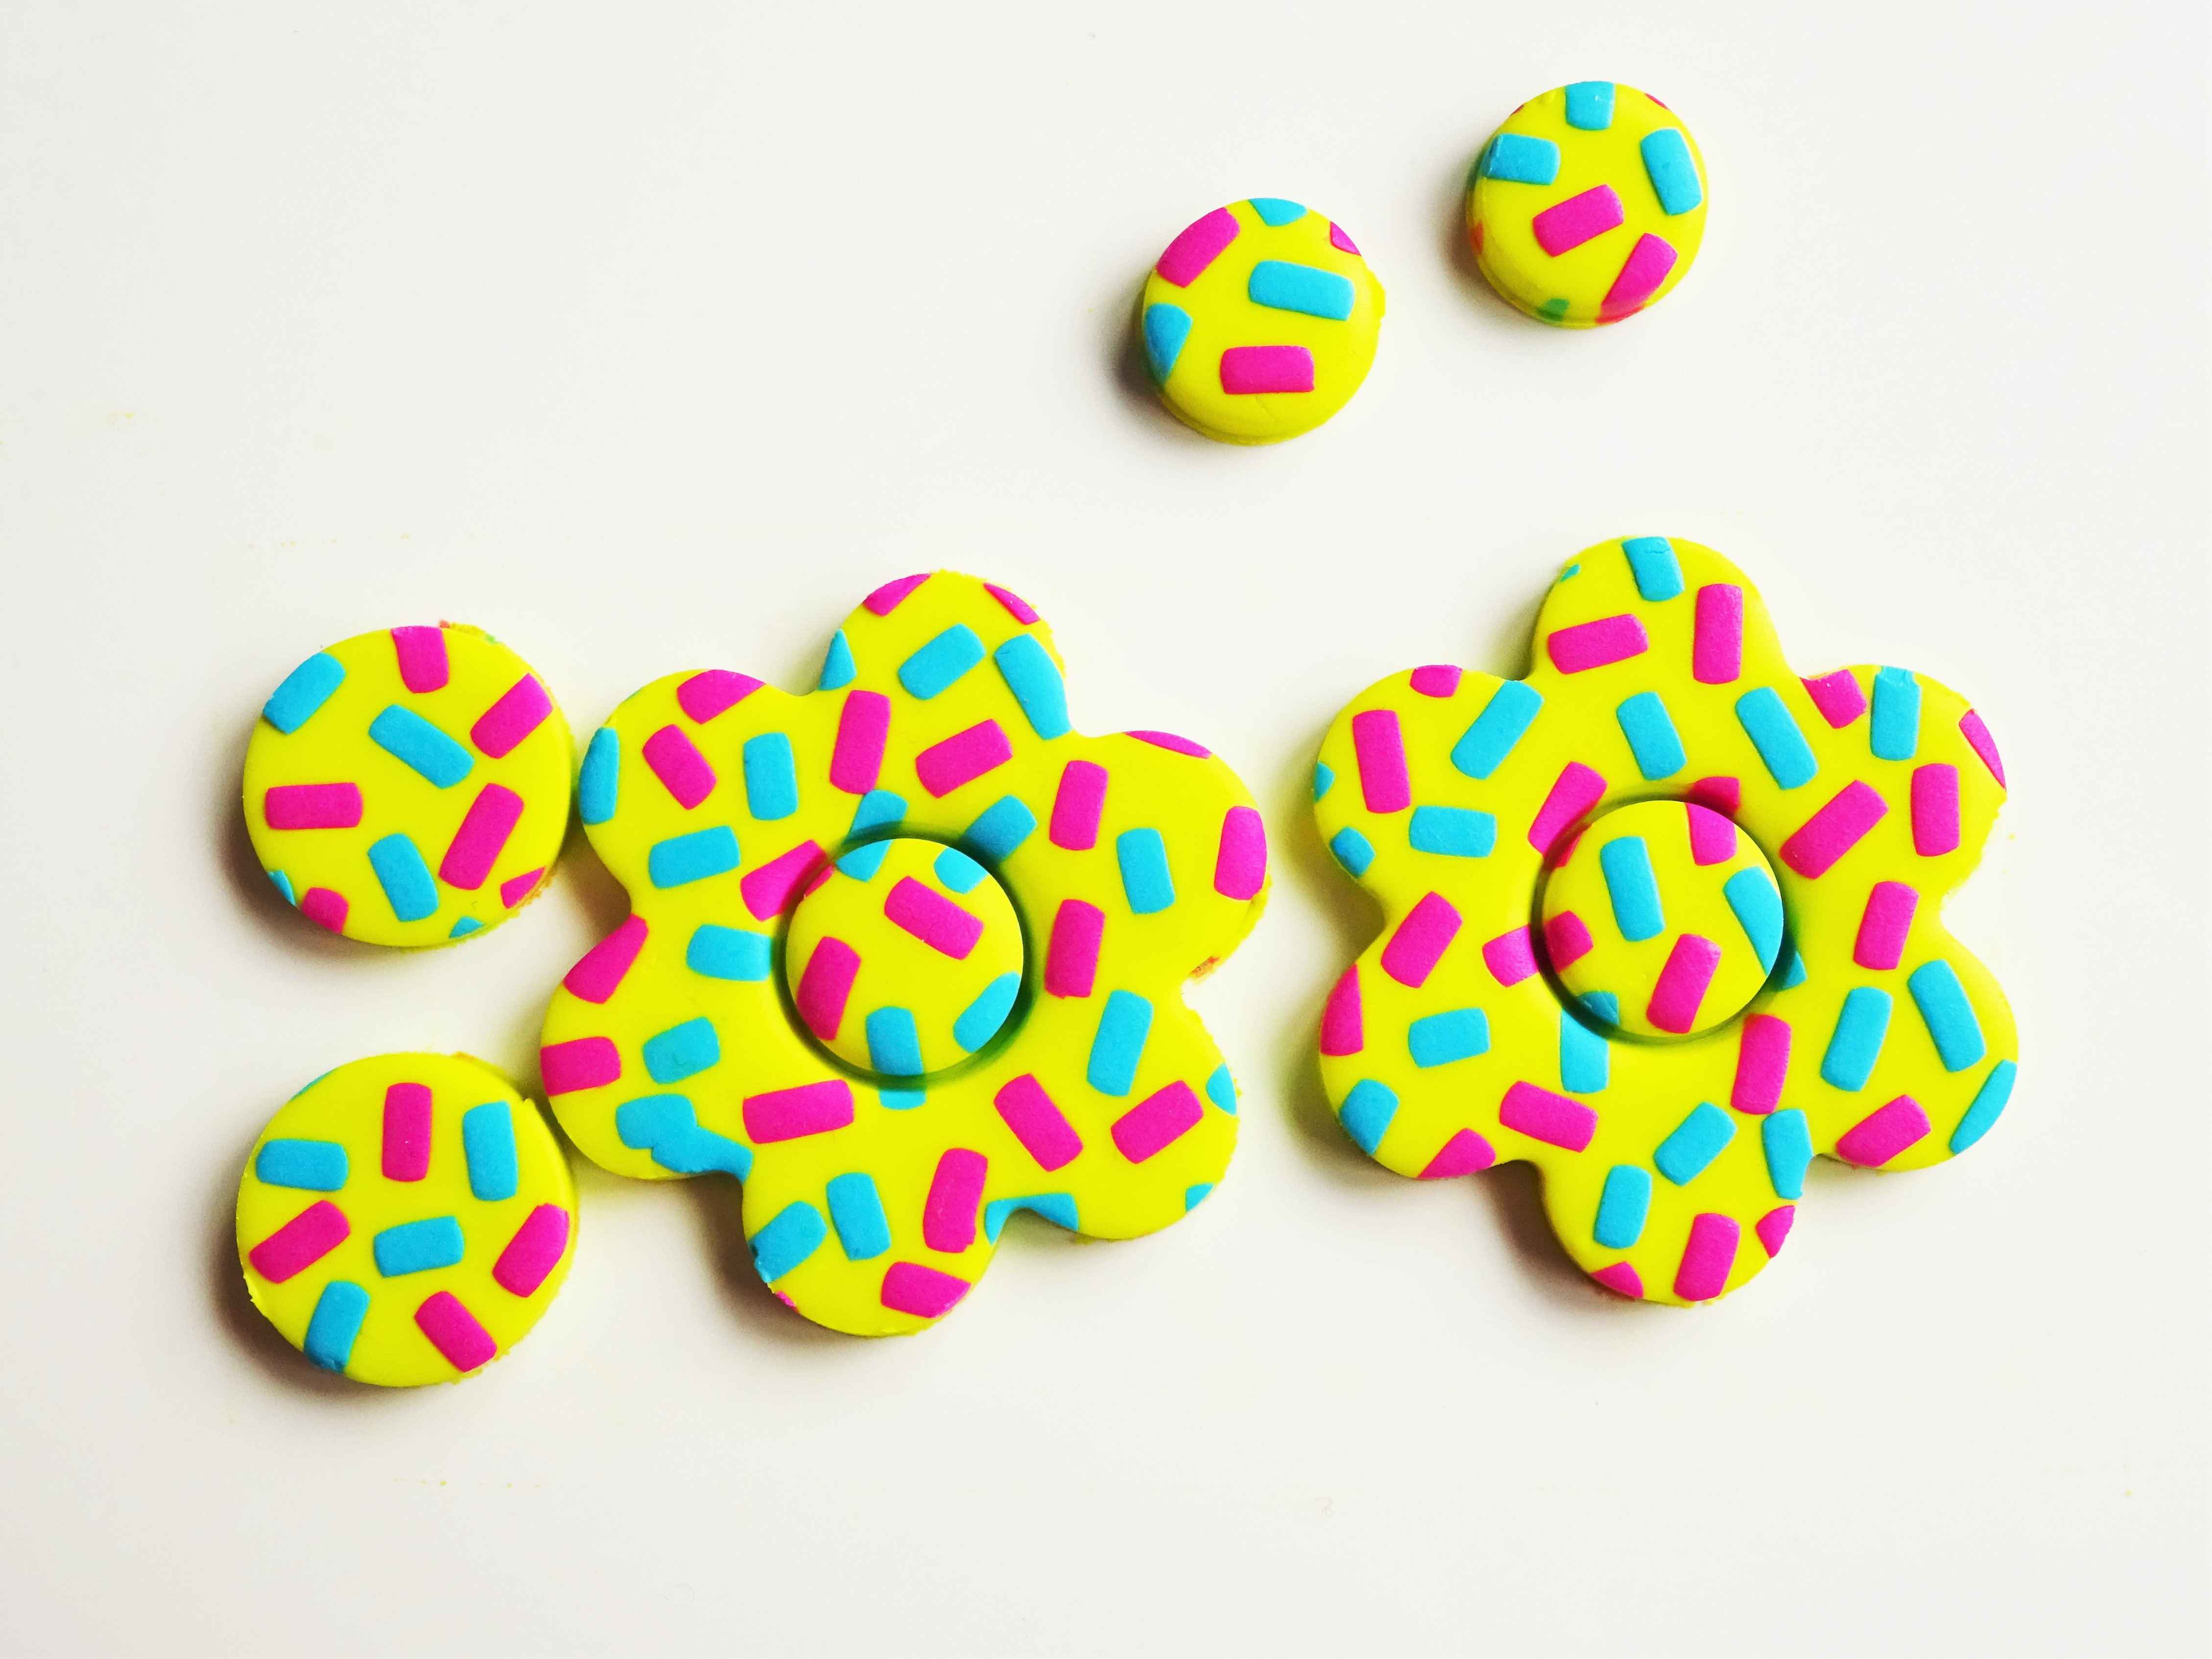
Use your chosen shapes to cut into your clay. Try to use every inch of it so no effort is wasted. If your shapes look a little ragged around the edges then you can smooth them out by running a finger around them. This will help refine the shape and make it look neater. Pop them into your oven following the instructions on your packet of clay.

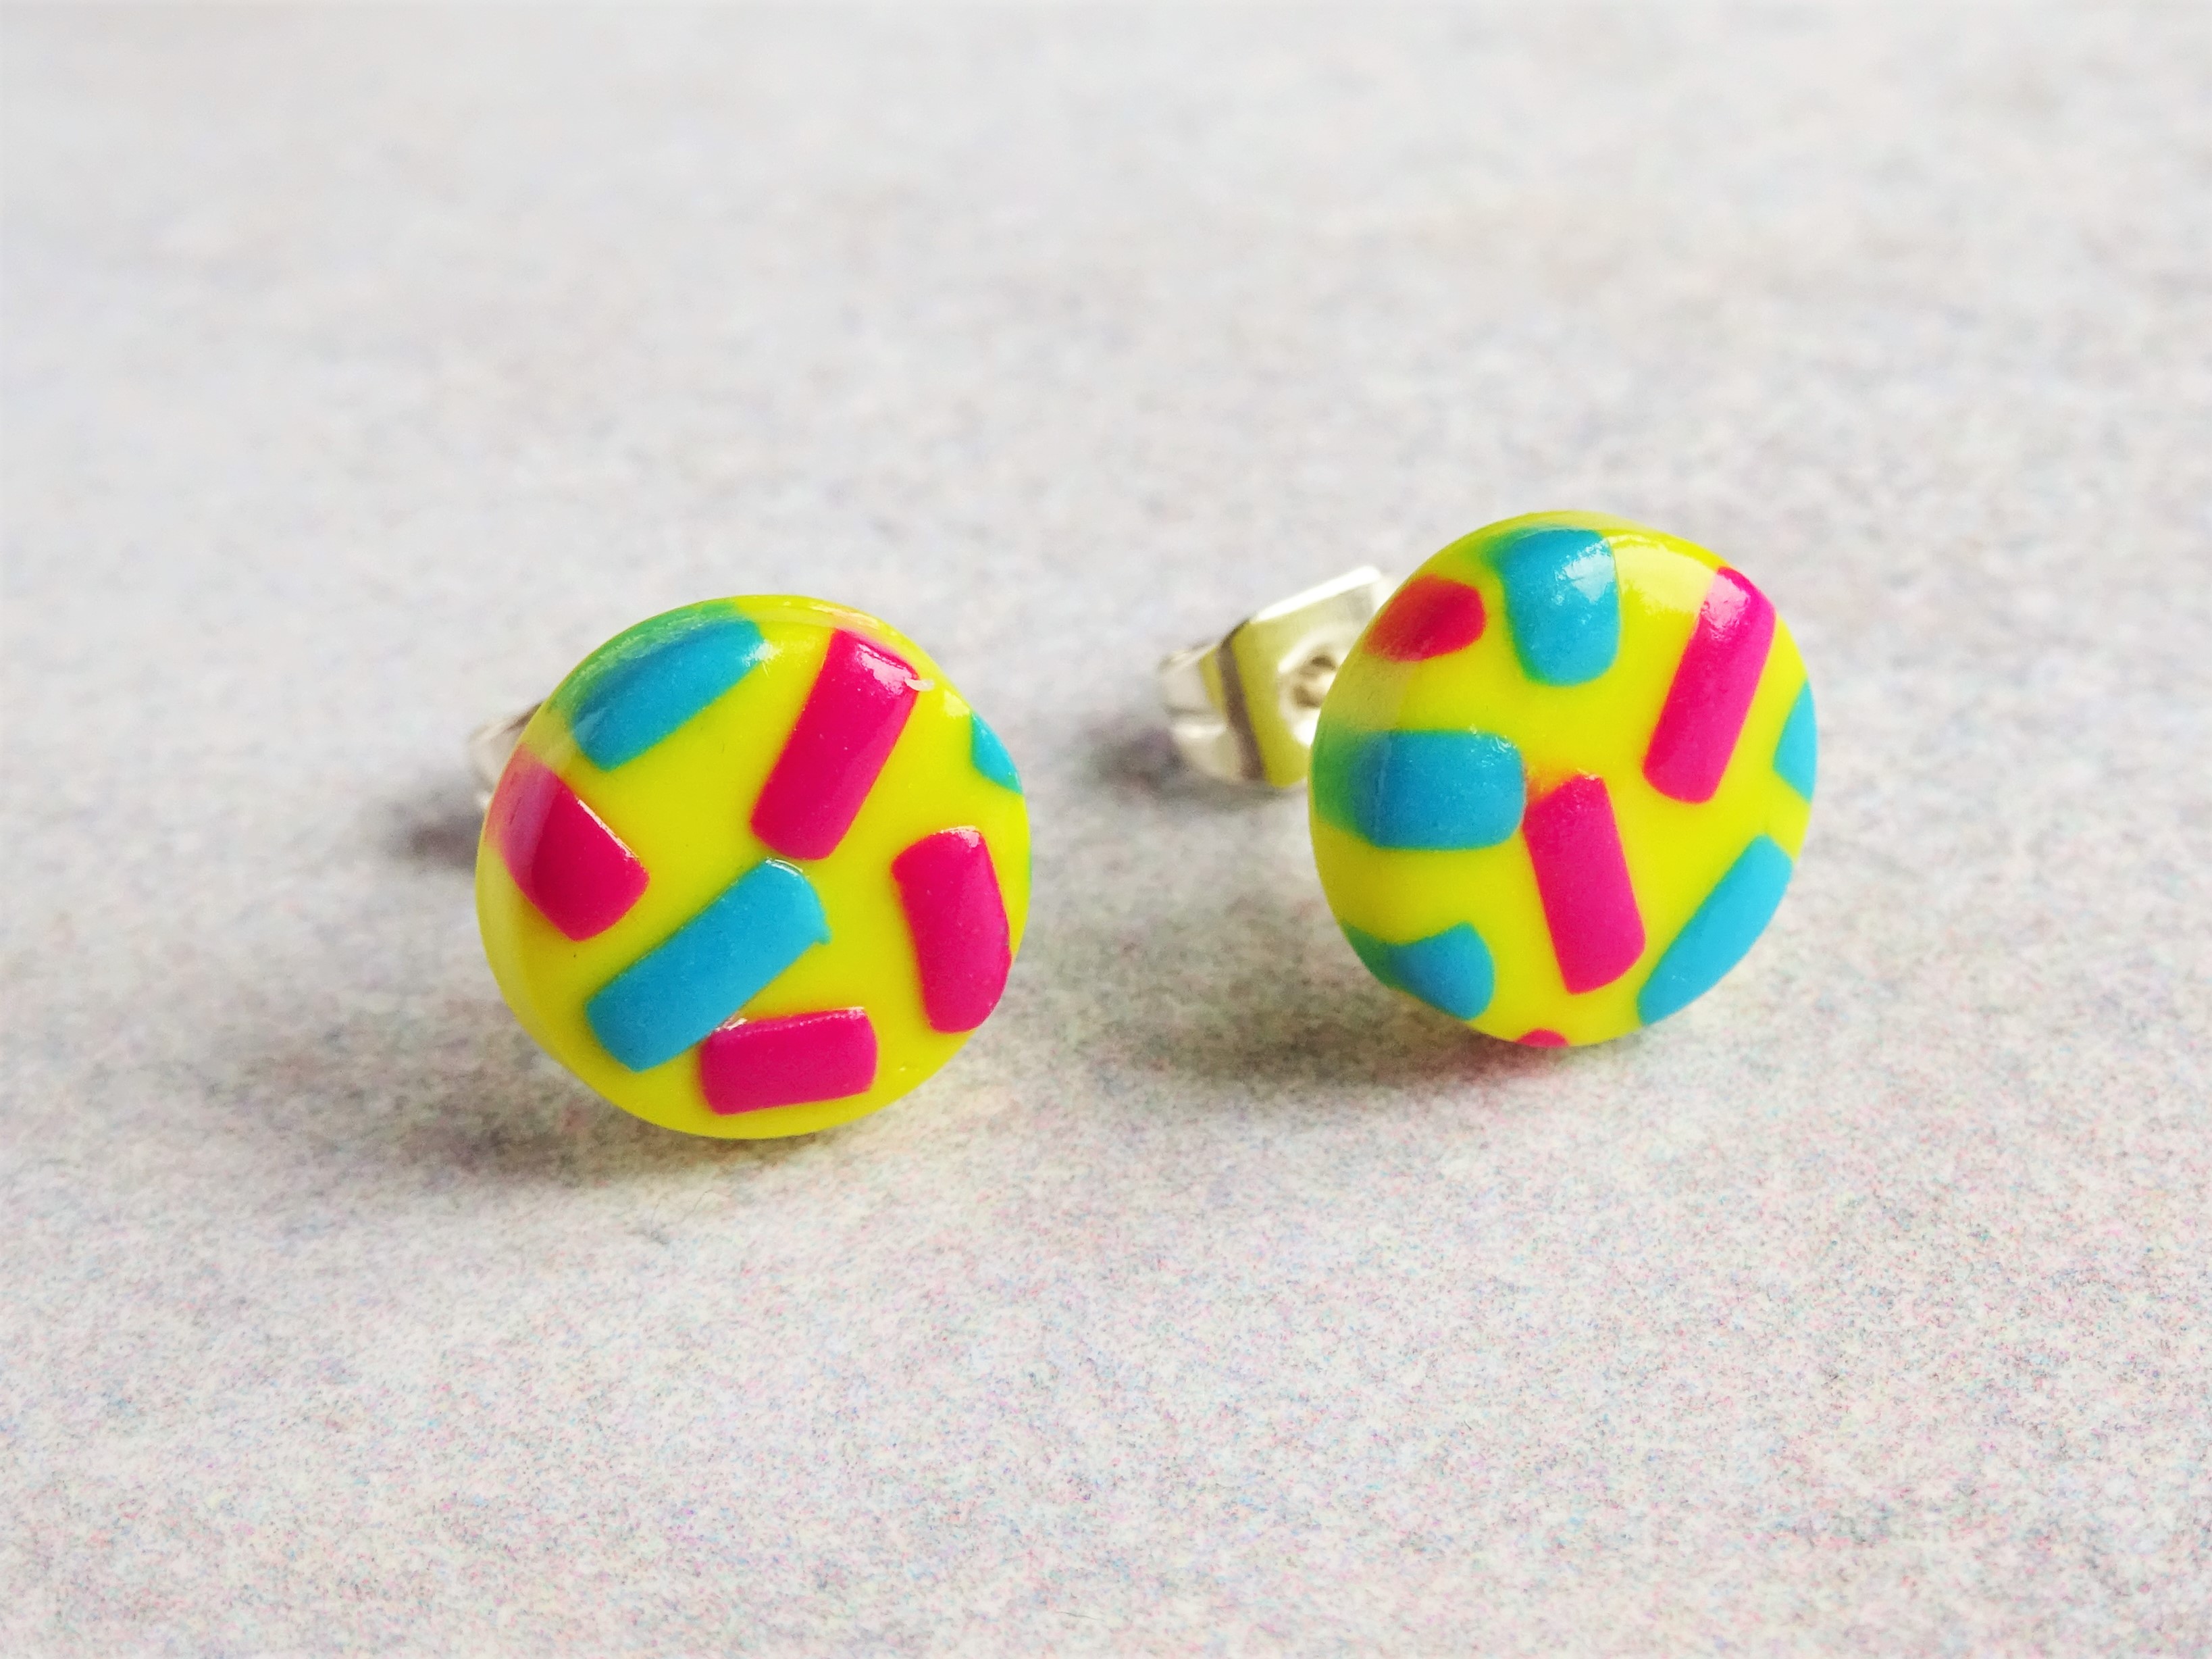
Once your pieces have cooled you can attach your earring backs and varnish. As you can see I have made some fantastic statement flower earrings and, as a complete opposite, some dainty studs.
Next weeks posts will show the two different methods I use to attach flat stud backs to my stud earrings so if you wish to see that then don’t forget to subscribe or sign up to my newsletter to keep in touch.
If this tutorial has got you in the mood for more polymer clay slabs then I have several more to read! They range from cute bees on blossom, strawberries and ghosts with a reindeer or two thrown in for good measure.
Links below for products used are Affiliate links for Amazon. This just means that if you use my link to buy a product I earn a very small commission, at no extra expense to you (you pay the same regardless how you find the item). Every little extra helps me to offer free tutorials.
Affiliate Links –
Fimo Professional in Lemon Yellow, Turquoise and True Magenta (Magenta is a link for UK)
Flower and larger circle shape cutters
Anyway, I hope the sun is shining where ever you are and if it’s not then you can always make your own sun shine jewellery to keep you going!
Until next time….
Hannah x


These are very beautiful 😍😍😍