

In accordance to my new year post I am staying focused on my Etsy shop and trying to keep ahead with seasons and events. I seem to gravitate more and more towards my polymer clay at the moment but I think that it’s because I can create whatever odd idea I have (within reason!) as opposed to trying to see what I can buy to make into the idea I have. Does that make any sense?!
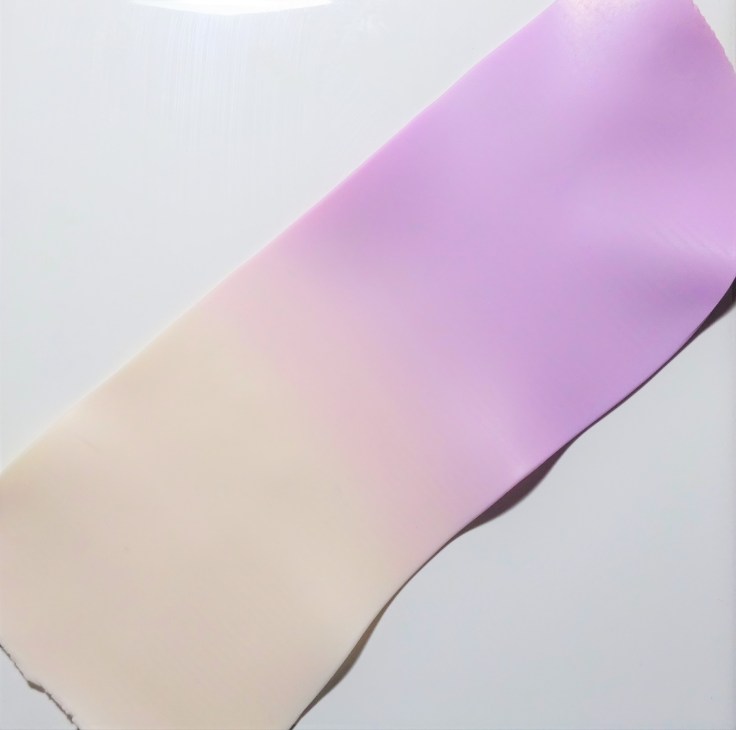
I had seen people mixing translucent clay with alcohol inks ( as in the Ranger ones I have used for card making ) and I wanted to see how it all worked. The thing about it though is that the colour shifts when it is being heated so I wasn’t quite sure how it would look. I wish now that I had gone a little bolder with the colours but I am pleased with the soft pastel look. Very spring like – I had to call it The Blossom Collection because it was the first thing that popped into my head when I pulled it out of my oven.
I even remembered to take some photos along the way so I can show you some of the steps as I thought it may be more interesting to see this rather than just the end result.
Bad photos again but it’s near on impossible to me to take a decent photo without setting up my light box and all that jazz.
I started off by softening translucent clay, separating it in 2 and adding alcohol inks in pink and purple (you will see in a minute that these become peach and pink). I make a skinner blend between the two colours so there is a gradual shift between them. I then made a jelly roll cane (sorry, more jargon) with this blend and white. I then made the flower shapes in the cane I had just made (possibly something for another day is anyone is interested) and this is what you get.
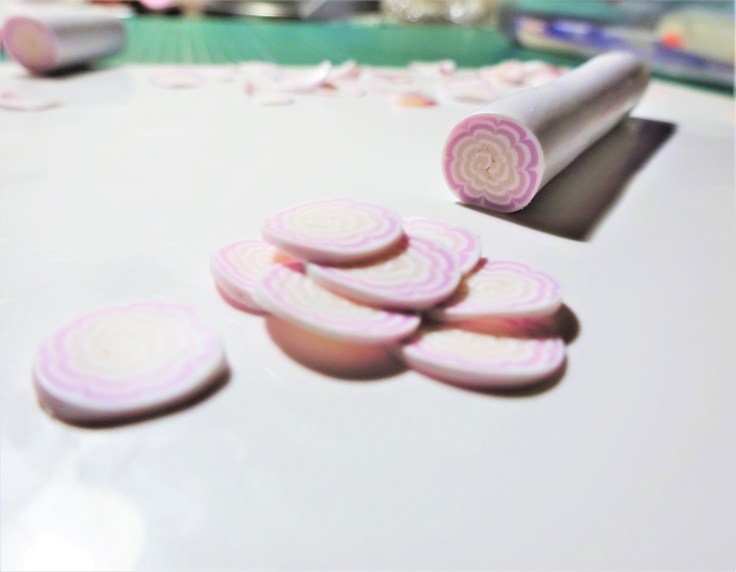
From here I cut slices off and layered on white clay.
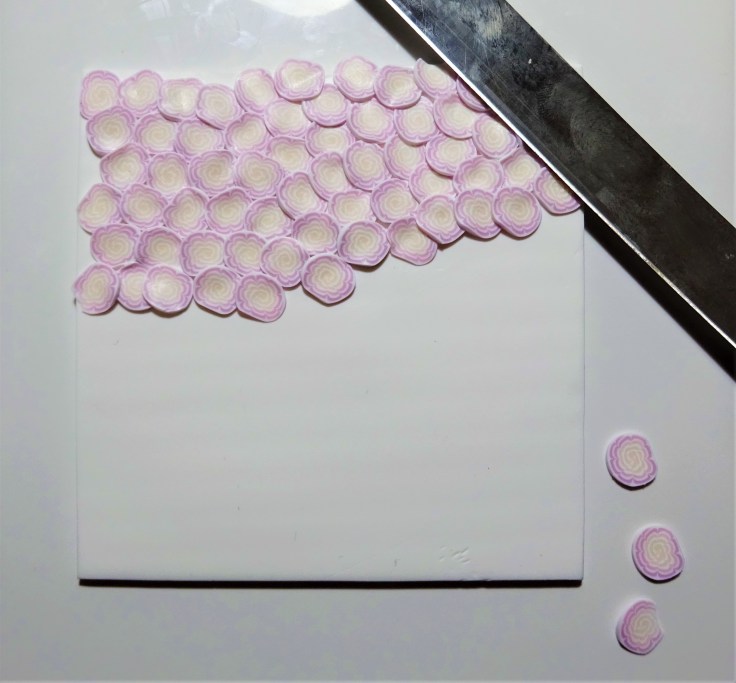
Smooth out the top layer to make it seamless and cut shapes out to use. I backed the jewellery onto shimmery purple clay because it seemed to fit. Once hardened, varnished and made into jewellery here are the results.
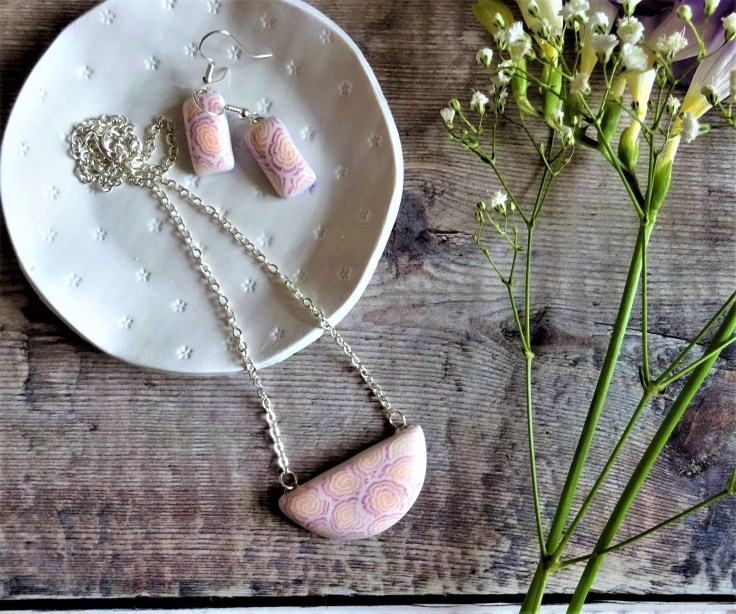
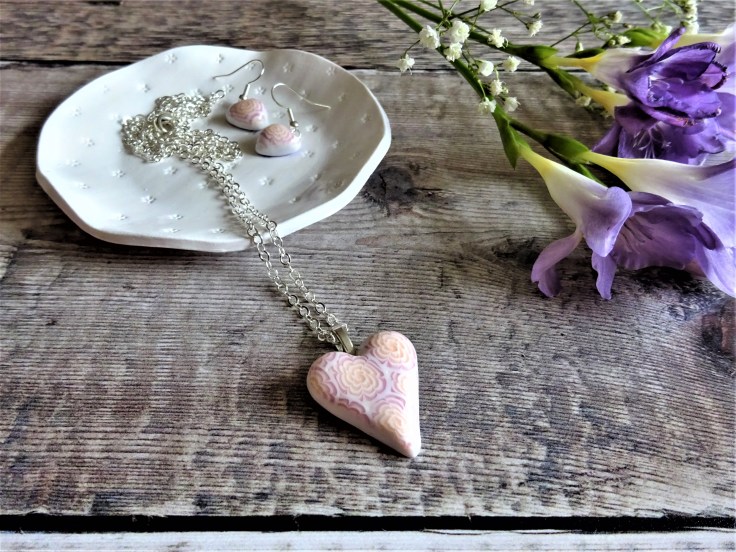

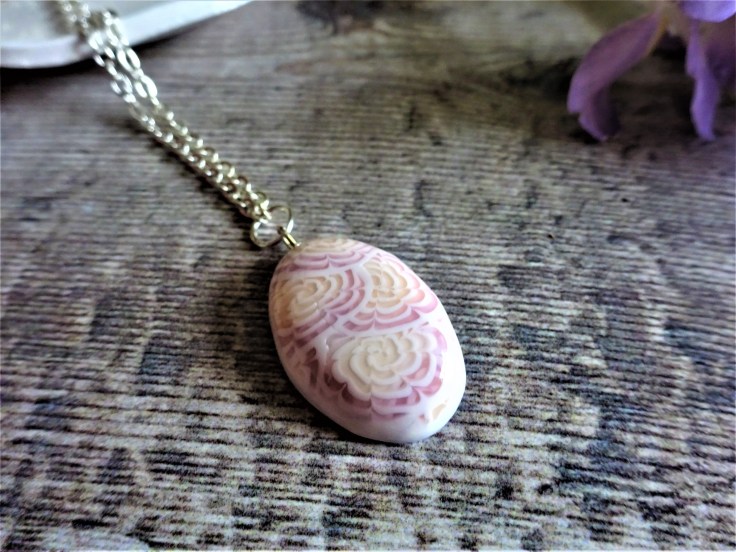
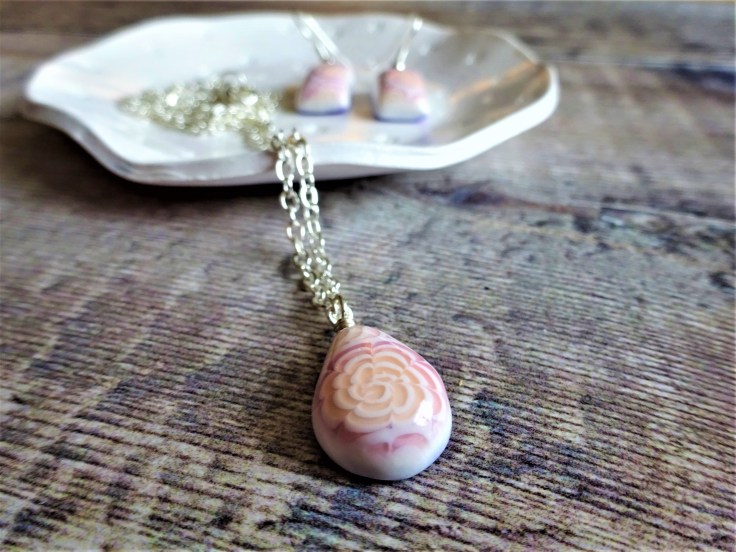

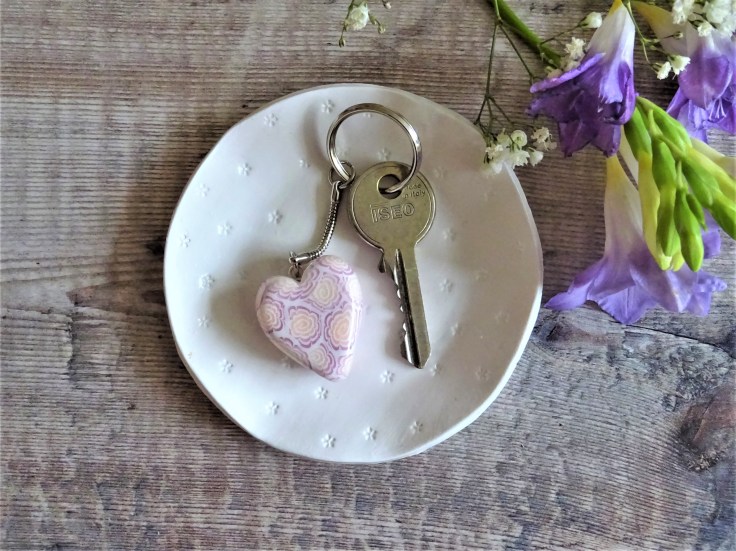
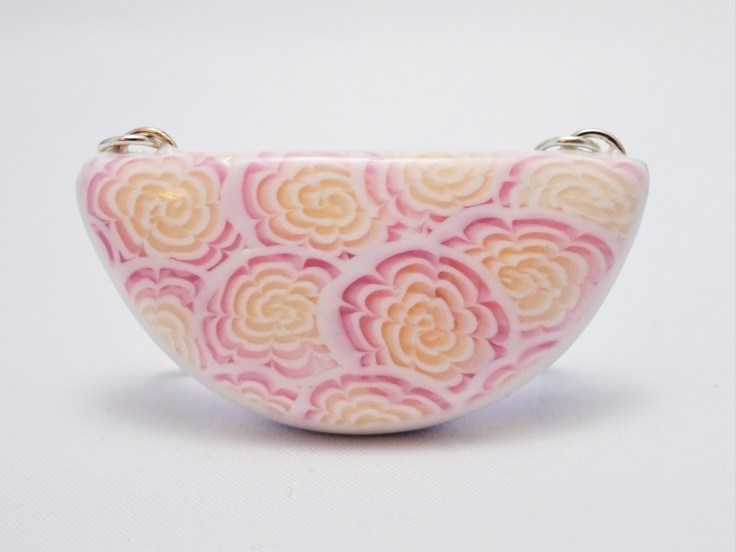
I love that you can see layers in the design and because the clay is translucent it has a glass like quality once they have been varnished.
Let me know if you like the process photos and what not. As you maybe able to see I am playing with photography and props to change things up a bit.
It’s nearly the weekend and my kids half term holiday. I hoping to keep up the blogging momentum as I have lots planned but If I disappear for a week you know why.
Happy crafting.
Hannah x


They are so pretty! I wish i could eat them LOL they look like sweets 😀
Ha ha, yes hard boiled sweets 😃
These are gorgeous!
Thank you 🙂
These are wonderful Hannah. Your ability to come up with creative ideas always amazes me 🙂
Thank you 🙂 My brain is full of stuff pretty much all the time (not all crafty though). Some times I manage to filter out the rubbish and find something worth working on 😀
You are too modest!
Ohh Hannah, these are just so, so beautiful!
As normal … I’ve tried to pick a favourite. I pretended that I was stood at your craft stall and only had enough money to buy just one thing, so I HAD to choose my most favourite …. (crumbs this was difficult as they’re truly all so lovely) … after much scrolling back and forth, I think I’m going to go for …. [drumroll] …… the fabulous bracelet!
But … I love them all.
I adore the soft colours and love the name you’ve chosen for this collection.
Well done you clever thing.
(It’s lovely to see you back with your clay, my fabulous blogging friend)
Sending much love ~ Cobs. xxx
Thank you Cobs. The bracelet was particularly fun as I got to try a bit of macramé again (did some years ago). I wanted to make a macramé ‘chain’ for some of the pendants but didn’t have enough pink cord left.
It was a nice change to work with the soft colours. I’m not tempted to do some swatches of my alcohol inks with translucent clay to see how the all react. I’m already planning on using this technique again. I can see so many uses for it.
Anyhoo, happy Saturday 🙂 Hxx
These are very cute. How do you get the flower effect? I hope you don’t mind but I’ve nominated you for a sunshine blogger award… Here’s the link https://juliascreativeyear.wordpress.com/2018/02/16/sunshine-blogger-award/
Thank you Julia 🙂 For the flower – once you have your jelly roll cane ( in this cane it was the translucent colours and white rolled up in a spiral ) you get something long, thin and relatively sturdy and press it into the clay length ways to make an indent. Go all around the length of clay doing this and it will push the outer layers of clay in to make the pattern. Roll it to smooth the outer surface and you are done.
Thank you so much for the blogger award – I am touched. I will have a look in a bit to see what I have to do 🙂
Happy Saturday Julia. Hxx
Oh cool. That makes sense… It was the fact that it was smooth on the outside that had me confused!
hmm.. I came her earlier today and typed a wordy comment .. . and it’s not showing up. It was definitely here because when I pressed ‘send’ it showed up in your comments, but now it’s gone.
This happened on another blog and the blog owner found it in ‘spam’. It might be there Hannah.
Then again … this might go there too and you won’t know anything about this.
ohh!!! {sigh} ~ Cobs. xxx
Hello Cobs, thanks. I did get your comment yesterday but when I came back to reply my internet had gone off. An automated Virgin person told us that they were working on it but we had no internet until about midnight – which I know because all of a sudden my mobile and tablet sprung to life with all the messages and emails that had been sitting with nowhere to go!
Thank you for your comment 🙂 I’m glad you like the jewellery. I was pleased with the results. Hxx
what a great effect! The translucent clay makes the design look textured. I was very interested to see the step by step photos!
Translucent ckay is just the best – I’m a little obsessed by it! Thank you for the feedback on the step by step photos. I was pleased that I remembered to do them. Hoping for more in the future 😃
Ooooh, lovely!
Thank you 😃